Easy Unicorn Crafts and Activities for Kids


A part of many mythological stories, fairy tales, and legends, unicorns are fictional or mystical creatures that are loved equally by adults and children! With Unicorn Day just around the corner, how about engaging your child in some fun and exciting unicorn art and craft activities! Well, if you nodded for a big fat yes, then we have some fun unicorn crafts for your kids that you can try at home!
Kid-friendly DIY Unicorn Craft & Activities
If your kid is an ardent unicorn fan, then involving him in some unicorn-themed activities will be a great way to learn something interesting! Here are some exciting crafts and activities for your children that will keep them entertained and amused at the same time.
1. Groovy Unicorn Notebook
Make simple and boring notebooks more alluring with one of the easiest unicorn paper crafts!
What You Will Need
- Glitter papers in three to four bright shades (silver, pink, purple, golden, etc)
- A spiral notebook
- Scissors
- Glue
- One sheet of black construction paper
Instructions
- Use scissors to cut two rectangles in the same size as the length and width of the notebook.
- Cut tiny heart shapes in any color, which will be used as decorations.
- Use silver sheet to cut out the horn.
- Use yet another color to cut out two tiny ears.
- Use construction paper to cut out two eyes.
- Begin by gluing the rectangular sheet to the front and back covers of the notebook.
- Paste the horn on top of the notebook in a way that 1/3 of it shoots out from the topmost part of the notebook.
- Paste ears on both the sides of the base the horn and place hearts to fill up the centre portion.
- Paste the eyes a few inches below the horn to complete decorating the notebook.
2. Funky Unicorn Pencil Holder
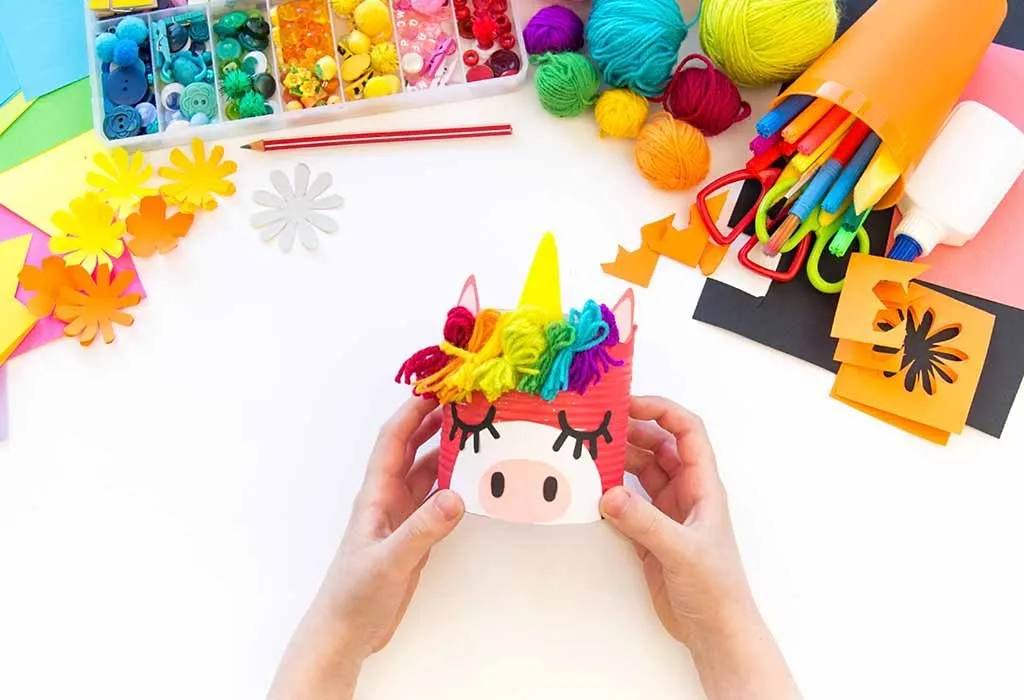
Amongst many fun unicorn crafts for kids, this pencil holder is fairly simple to make!
What You Will Need
- Pink craft paper
- Glitter foam sheets in silver, purple and pink colors
- Glue
- Black marker pen
- Scissors
- Old crayon box ( take a square or cylindrical ones, which are big enough to be used as pencil holders)
Instructions
- Measure the height and width of the crayon box, cut the pink craft paper half an inch more than the required size.
- Use glue to stick the paper to the box, fold the extra paper inwards and secure it with the glue.
- Cut out thin strips of ½ inch thickness using purple foam sheet and tiny flower shapes of half-inch circumference using the pink one.
- Using silver foam paper cut out a horn, which should be half the size of the box.
- Use the pink foam paper to cut out ears, which should be ¼th, the size of the horn.
- Paste the horn towards the rim of the box.
- Paste ears on both sides of the base of the horn.
- Paste tiny flowers between both the ears.
- Stick purple foam strips around the base.
- Use the marker pen to draw the eyes. Voila! The pencil holder is ready for use!
3. Unicorn Slime
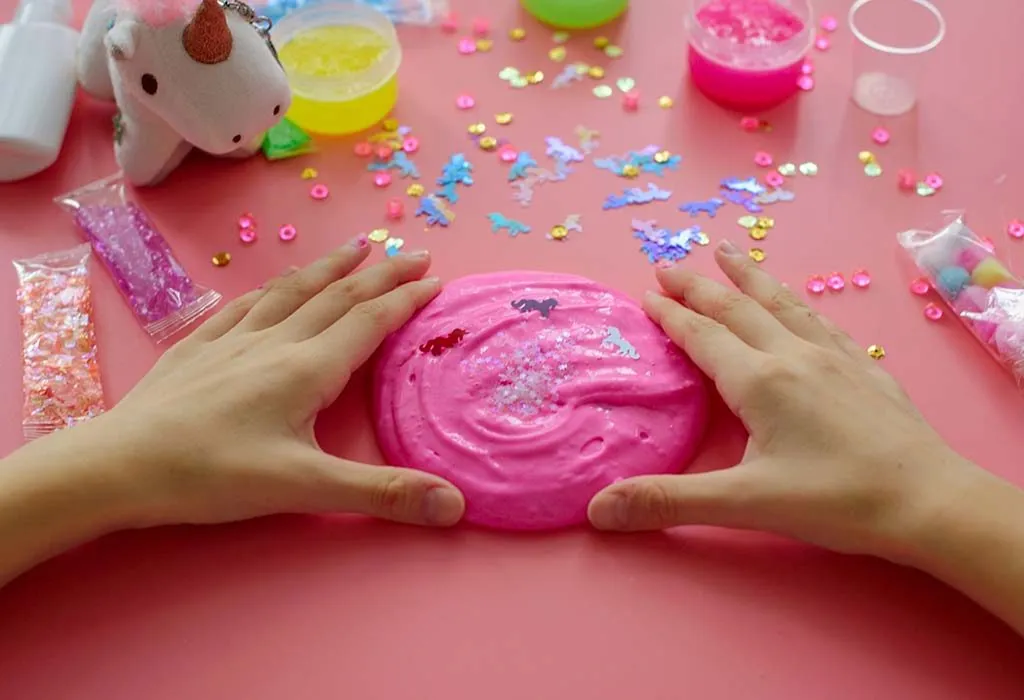
Imagine the delight on your kiddo’s face when there is glittery unicorn colored slime to play with! Well, here’s how you can help your kid make it at home!
What Will You Need
- Elmer’s Glitter glue in blue, pink and yellow (one bottle of 6 oz each)
- Baking soda, ½ teaspoon
- Glitter in gold, pink and blue colors (for enhanced shiny effect)
- Contact lens solution, 1 ½ tablespoon (you need the one with sodium borate and boric acid in the ingredients)
- Water, a few spoons (if required, to adjust the consistency)
Instructions
- Take a deep glass bowl; put the pink glue in it.
- Throw in the baking soda and give a thorough mix. If your kiddo prefers a more stretchy slime, you can add a few spoons of water at this juncture.
- Add pink glitter as you keep mixing the slime ingredients.
- Slowly add the lens solution to the mixture. Make sure you do not add too much as it may spoil the consistency.
- Take out the slime from the bowl and keep kneading until you achieve the desired consistency. If the slime seems sticky while kneading, you may use baby oil to avoid it from sticking to your hands.
- Make the blue and yellow slimes separately using the above process.
- Take all the three colors and let your kiddos play with this slimy unicorn slime!
4. Hand-painted Unicorn
This is one of the most enthralling unicorn crafts for preschoolers as this activity includes hand painting.
What Will You Need
- One thick white sheet
- Acrylic paints (pink, purple, etc)
- Black marker pen
- Bronze glitter pen
- Yarn in three to four shades
- Glue
Instructions
- Take the paint in a flat dish, enough to cover your kid’s palm nicely.
- Keep the paper on a table and gently press your kid’s handprint on the sheet. Let the handprint dry before working on it.
- Take the marker pen and color the base of the four fingerprints to form hooves of the unicorn. Draw an eye and smile on the thumb to make the face.
- Draw the horn using the bronze glitter pen on the upper edge of the thumbprint.
- Take multi-colored yarns, approximately 4 to 5 inches in length, tie a knot at one end and glue the knotted end to form the tail.
- Take multi-colored yarns and cut them into 2 to 4 inches length. Stick them in a bunch at the back of the horn to make the tresses of the unicorn.
5. Roly-poly Unicorn
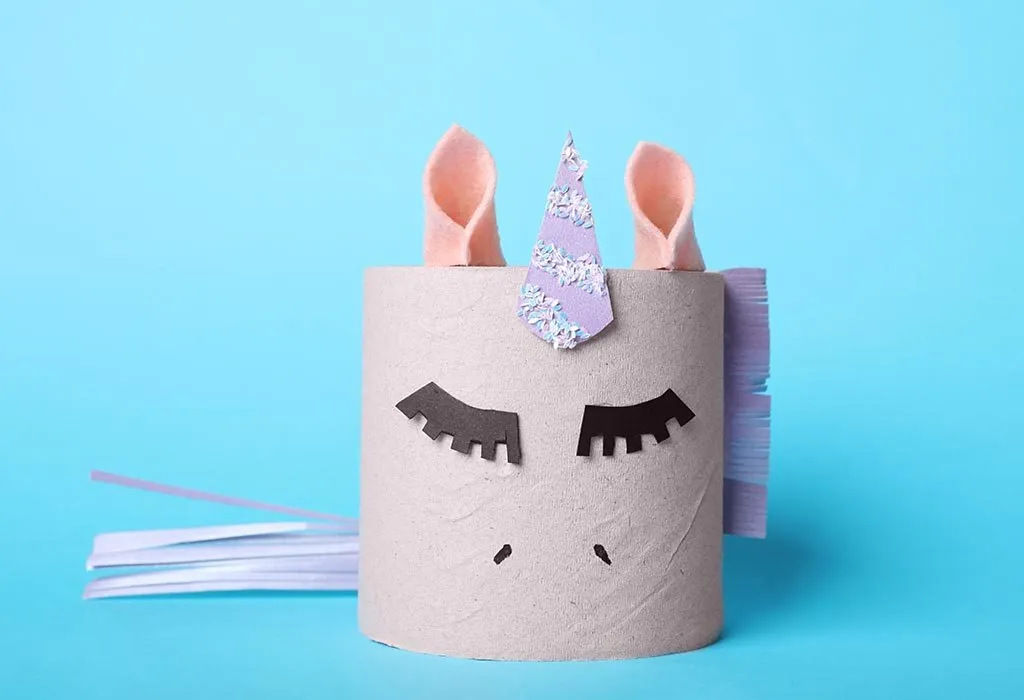
This is one of the most amazing unicorn party crafts décor ideas that can add more zing to your kid’s birthday bash. You can also place these adorably roly-poly unicorns in your kid’s room!
What Will You Require
- Empty toilet paper rolls
- Craft paper in different colors
- Gold glitter foam sheet
- Glue
- Scissors
- Black marker pen
- Multi-colored yarn
Instructions
- Take the craft paper and cut in a size that can cover the roll well.
- Now, take the paper and wrap it around the roll. Secure the ends with the glue and cut the extra paper from top and bottom.
- Take 7 to 8 strands of yarn, more than half the size of the roll. Knot the ends and stick the knotted end with the glue to make the tail.
- Take another yarn bunch, more than ¼th the size of the roll, and knot the ends. Secure the bunch by gluing the tied end inside the roll and use the yarn bunch to form the mane.
- Cut horn from the gold glitter paper and ears with contrasting colored craft paper. Glue the horn and ears on top of the yarn mane. Keep the ends neatly tucked inside the roll.
- Draw eyes with the marker pen. The roly-poly unicorn is ready!
6. Unicorn Finger Puppet
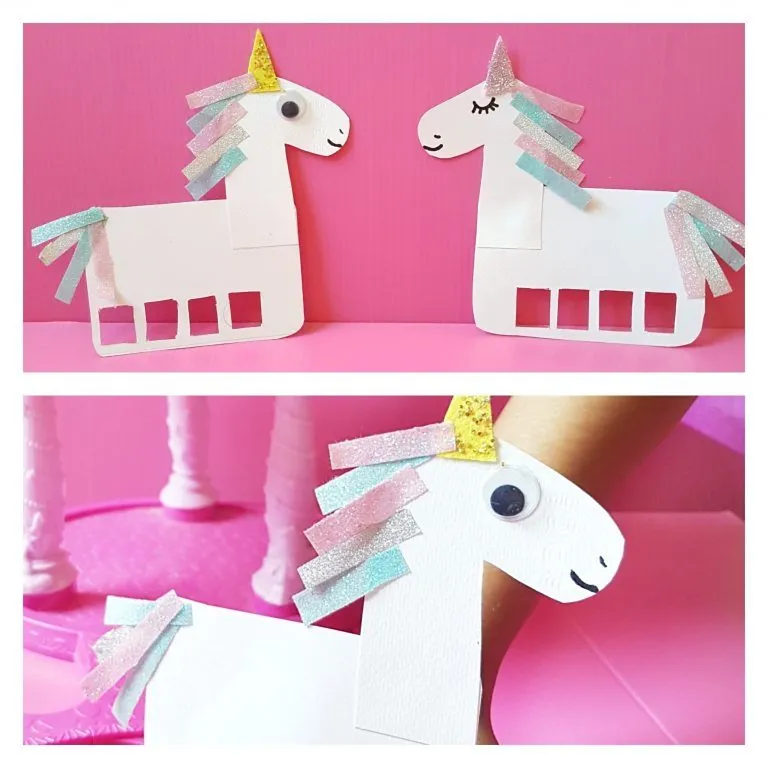
Source:Pinterest
These magical finger puppets are so much fun to play with!
What Will You Need
- White card stock
- Wobbly eyes
- Glittery ribbons in three to four colors (pink, mauve, etc.)
- Glue
- Scissors
- Golden glitter paper
- Paper knife
- Black marker pen
Instructions
- Take the card stock and cut it into a rectangle shape, a little bigger than your kiddo’s fist. Keep the ends a bit rounded.
- Cut the head and neck of the unicorn in a rounded seven shape from the card stock. Glue this to the body of the unicorn puppet.
- Cut four small rectangles towards the other end of the rectangle with the paper-knife. These rectangles will be used to hold the puppet.
- Cut a small triangle using the golden glitter paper and stick it on the head.
- Paste the wobbly eye, or you can draw the eye using the marker pen.
- Draw a smile using the black marker pen.
- Cut the glittery ribbons 3 to 4 inches in length and stick them to form the mane and tail of the unicorn.
7. Paper Plate Unicorn Mask
Have some magical fun and excitement with your kiddo with these stunning paper plate masks!
What Will You Need
- One paper plate
- Golden glitter paper
- One popsicle stick (pick up a larger one)
- Pink craft paper
- Small decorative paper flowers (available at any craft store)
- Glue
- Scissors
- Paper knife
Instructions
- Take the paper plate and cut out the inner circle of the plate, big enough for your kid to flash the face through it. Use the inner cutout to make ears.
- Use a pink craft sheet to cut out smaller ear shapes. Now, stick these on the bigger white ears.
- Use the golden glitter paper to cut out a big elongated triangle to make the horn.
- Take the large Popsicle stick and stick it on the backside of the one end of the plate.
- On the other side, stick unicorn horn in the centre and ears on the sides. (stick on the backside)
- Glue the decorative flowers in the centre. (stick on the front side)
- The mask is ready to cast magic on your little one!
8. Unicorn Rock
This adorably painted rock can be used as a paperweight too!
What You Will Need
- A flat oval rock or stone (pick one with a smooth surface)
- Acrylic paints (white, pink, purple and yellow)
- Black marker pen
Instructions
- You can trace a unicorn pattern on the stone, or if you are good at drawing, you can make one on your own.
- Color the base white.
- The horn can be colored yellow. Use pink and purple to color the hair and flowers.
- After the paint dries up, use the black marker pen to make the outlines, nose, eyes, and smile.
These unicorn activities and crafts are simple to try and will surely be a bit hit with your kids! They can enjoy doing them during their vacations.
Also Read:
Fun & Easy Homemade Hat Craft Ideas for Children
Plastic Bottle Craft Ideas for Children
DIY Mask Craft Ideas for Children
Was This Article Helpful?
Parenting is a huge responsibility, for you as a caregiver, but also for us as a parenting content platform. We understand that and take our responsibility of creating credible content seriously. FirstCry Parenting articles are written and published only after extensive research using factually sound references to deliver quality content that is accurate, validated by experts, and completely reliable. To understand how we go about creating content that is credible, read our editorial policy here.
- Author


.svg)


")


