

















.svg)
.svg)
.png)


Play & Activities
Suggested articles for you
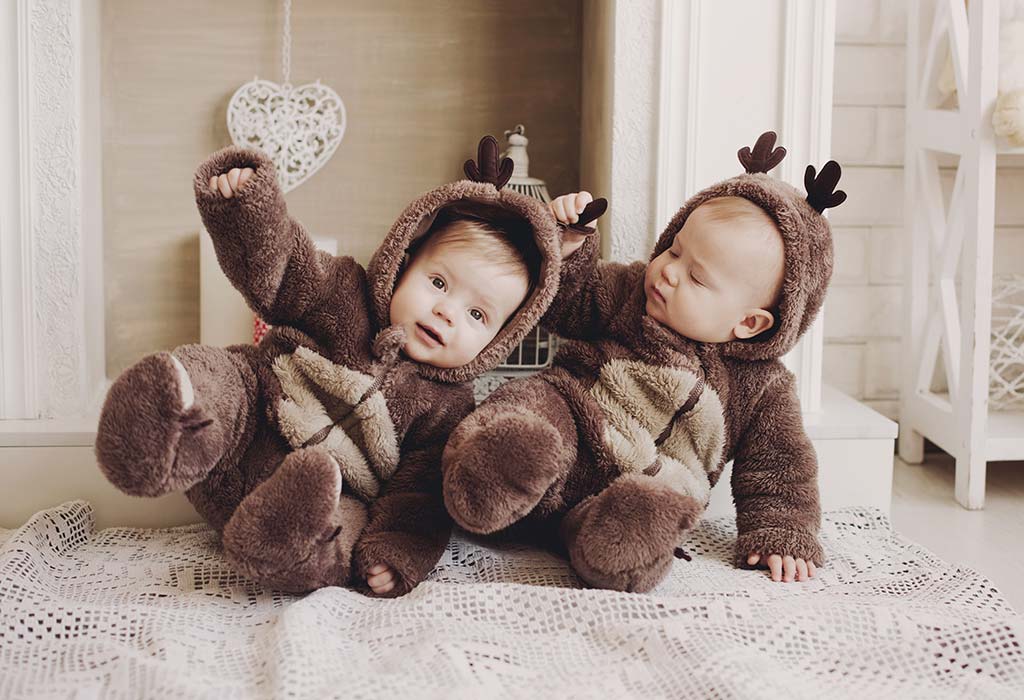
15 Halloween Costume Ideas for Twins
Halloween comes once a year, and this is the time when adults and children look forward to having fun and playing dress-up. For those with a particular love for Halloween drama, preparations start a long time in advance, with the entire costume needing to be put together with care. At the same time, some prefer last-minute dress-up with easy-to-find materials.
When you have twins to dress, things can get all the more fun and exciting when deciding the costumes. You can put them in themed or matching costumes that can be so much fun to put together. If you are looking for some great ideas or inspiration for twin costumes, you have come to the right place.
15 Best Twin Halloween Costumes to Dress up Your Twins
Whether you have twin boys, twin girls or a pair of fraternal twins with one boy and one girl, we have a lot in store for you. Check out some creative twin Halloween costume ideas given below.
1. Salt and Pepper
Your little ones may be just infants, but that doesn’t mean they can’t be included in the dress-up fun! Whether they are twin boys, girls, or one of each, you can go with a salt and pepper dress for each. This idea is one of the easiest infant twin Halloween costume ideas that you can put your kids in, especially if it’s a last-minute deal.
Image Credit : Pinterest
2. Hansel and Gretel
Hansel and Gretel are two famous siblings from the Grimm brothers tales and are every children’s beloved fairy tale characters. These boy-girl twin Halloween costumes are easy to make and will make your kids the centre of attention for creativity.
3. Mandrakes
Harry Potter fans will definitely appreciate this one. Just pick up two simple, lightweight flower pots that are big enough to hold a baby comfortably. You can keep it simple, add leaves to your babies’ hats, and put them in brown suits to get the perfect twin baby Halloween costumes. As parents, don’t forget your earmuffs, just in case the mandrakes decide to wail!
Image Credit : Pinterest
4. Clark Kent and Superman
Which young kid doesn’t like to be dressed up like a superhero? Well, Superman is the most popular of all, and you have the perfect opportunity to dress up your twin boys creatively. Dress one twin as Clark Kent and give him a nerdy appearance with spectacles, and dress the other one as Superman with a cape and slicked hair.
5. Phil and Lil
‘Rugrats’ was a popular show back in the 90s, so if you are a fan of that show, then you can dress up your little twins as Phil and Lil. This costume will go great if you have fraternal twins of both genders, as this is one of the most classic twin toddler Halloween costumes of all time.
Image Credit : Pinterest
6. Peter Pan and Wendy
The one night of the year when you are allowed to escape reality is the perfect time for a trip to Neverland. If you have fraternal twins of each gender, you may want to consider giving Peter Pan and Wendy a try. This is another simple costume idea since it involves green tights, a shirt and cap, and a pretty blue dress.
7. Anna and Elsa
Frozen has become every young girl’s favourite animation, and your twin girls may love dressing up as the two royal sisters, Anna and Elsa. These twin girl Halloween costumes ensure that your girls are dressing up like the princesses, which they are.
Image Credit : Pinterest
8. Tweedle Dee and Tweedle Dum
You can use Disney’s fantastic movie – Alice in Wonderland for inspiration and dress your twin boys as Tweedle Dee and Tweedle Dum. This costume is super easy to make. All you need are red pants, yellow shirts or sweaters, blue bow ties, and red caps. These twin boy Halloween costumes work best for the more mischievous boys, who love making people guess who is who.
9. Betty and Velma
Head back to the stone age with your twin girls to dress them up as beautiful cartoon characters – Betty and Velma. It is simple enough to put together a stone age dress, so you will need one blue cloth material and one white to stitch up two easy outfits. Add a pearl necklace and an orange wig for Velma, and a simple necklace for Betty. Voila! You have two perfect little stone age darlings.
Image Credit : Pinterest
10. Woody and Buzz
Who doesn’t love the perfect chemistry of two best friends? And none can be better than these two Disney Pixar characters of the popular Toy Story movie – Woody and Buzz Lightyear. If your twins are a fan of Toy Story, then these characters are just perfect. Getting together a cowboy outfit will not be very difficult, and a Buzz Lightyear costume can always be bought or put together quickly. These two characters are very much loved by kids and show the meaning of teamwork – something twins are good at.
11. Lilo and Stitch
Lilo and Stitch are a famous Disney’s duo, loved for their teamwork, friendship, and fun-loving nature. Their colourful costumes are sure to attract everybody’s attention at the party. Lilo’s dress reflects tropical vibes; therefore, you need a red blouse, artificial flowers for the garland around the neck, and large leaves for the skirt. You can buy Stitch’s costume at any costume shop. Its blue colour is eye-pleasing, and your kid will be fantastic in it.
12. Ketchup and Mustard
Can you ever forget ketchup and mustard while eating a burger or a sandwich? Definitely not. This Halloween, dress up your twins in this popular spice-duo and add some spice to the party. You can use red and yellow/mustard-coloured onesies for your twins. To the front of the onesie, you can paste a cut-out of Tomato ketchup and Mustard ketchup.
13. Thing 1 and Thing 2
Thing 1 and Thing 2 are mischievous characters known for their distinctive red and blue outfits.To complete the look, consider adding matching blue wigs or hair accessories that evoke the playful spirit of these beloved characters.
14. Peanut Butter and Jelly
Celebrate the classic duo of peanut butter and jelly with this whimsical costume idea. One twin can be the peanut butter, dressed in shades of brown. Consider a brown shirt or jumpsuit paired with matching pants. The other twin can be the jelly, adorned in various shades of purple. A purple outfit with complementary bottoms works perfectly.
15. Mario and Luigi
Mario and Luigi are iconic video game characters known for their distinct red and green outfits. Dress one twin as Mario, featuring a red cap with an “M”, blue overalls, and a red shirt. The other twin can be Luigi, sporting a green cap with an “L”, green overalls, and a green shirt. To add authenticity, consider applying temporary mustaches using costume makeup.
Whether you love to put together outfits or are content with throwing together something from the things that you have on hand, there are infinite creative options available to choose from for your little ones. No matter what you plan on dressing them, it will require a little time to put things together, but it can be a project that you and your kids work on together. While getting their costumes ready, don’t forget to have fun and pick something that makes everybody happy. So pick your costume and get started!
Also Read:
Cute Fancy Dress Theme Ideas for Kids
Scary Halloween Costume Ideas for Girls and Boys
Pretty and Scary Halloween Makeup Ideas for kids
Read more




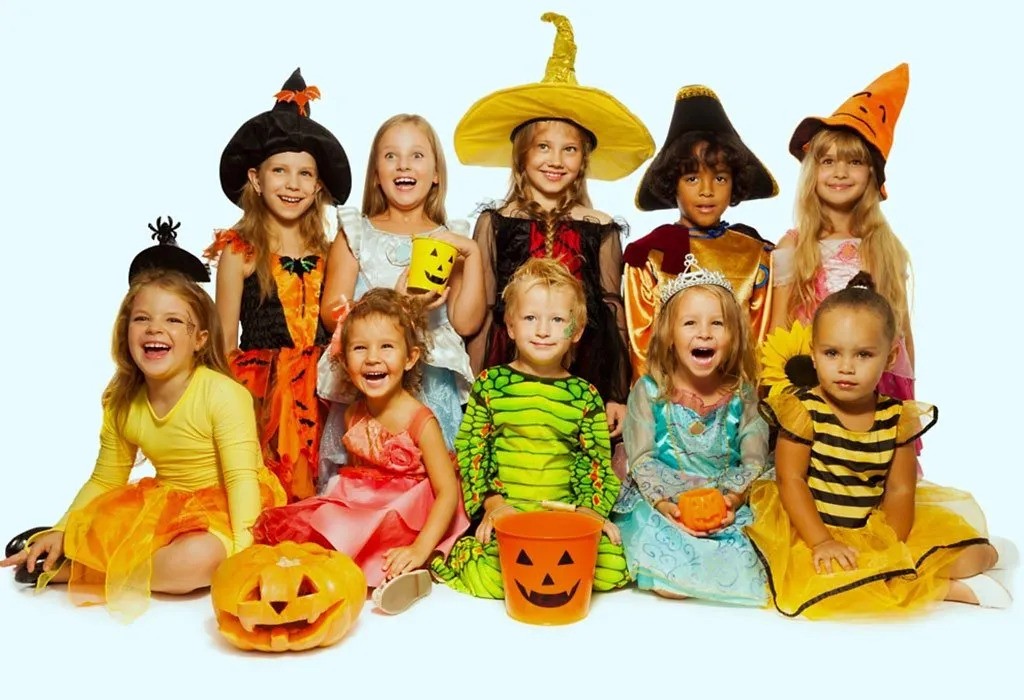
20+ Amazing Halloween Costume Ideas for Kids
When it comes to Halloween, no effort is too much. Homes are decorated to turn them into spooky manors, treats are stocked and the best of all costumes are diligently fussed over. Dressing as the scariest ghoul, banshee, or vampire is every child’s dream.
Halloween is a time for celebrating with the community and is an evening of pure fun and innocence. This holiday is something for which you and your child can work together to make it memorable.
What Is Halloween?
Halloween is celebrated across many countries. It is the shortened form of All Hallows’ Evening which is the eve of the All Hallows’ Day. This day marks the beginning of a three-day period dedicated to remembering the dead, including saints (hallows).
The tradition can be traced back to pagan times though, in recent years, it has taken a more festive and commercial spirit of activities that include trick-or-treating, apple bobbing, carving pumpkins, and of course Halloween costume parties.
Scary Halloween Costume Ideas for Girls and Boys
There are many options available for kids and adults alike when it comes to Halloween costumes. Halloween costume enthusiasts usually have two options. The first is buying a costume from a store or online. This allows for more extravagant costumes with minimal fuss, but can also prove to be generic.
The second option is to create the costume at home with whatever resources you already have. Your child’s costume will be unique and involving your child while designing her costume will give her a sense of pride and accomplishment.
Here, we bring some of the best Halloween costume ideas for children that you and your child can recreate to make a costume that is smashing.
1. Witch
One of the most classic costumes for Halloween, the witch costume has taken the fancy of many young girls especially in the wake of the hugely popular Harry Potter series. A witch costume is simple but its essence lies in the pointy hat. Many stores sell this costume, but you can also make this at home with papier mache. The hat is worn with a dress that has a cape. Stick to colours that are dark, usually black or purple. You can ask your child to help you embellish the cape or the hat or both. Think big and go for bedazzled rhinestones or sequence. Pair with a broom to get into the character.
2. Zombie
Now, this is a look your child is sure to enjoy. All you need is tattered clothes, face painting colours, and a zombie-like visage. You can involve your child in the actual face painting and decide which parts of her face, hands, or feet are decayed (not literally). Use a dark red lipstick to show lips as covered in blood. Don’t forget to master the zombie moan for the full effect!
3. Vampire
This mythical creature has seen a recent surge in popularity due to movies and TV shows that have vampires as their protagonist. There are many vampire costumes you can select from stores or you can also dress your child in a black dress will red highlights. Use powder or face paint to make your child’s face pale and add fangs. Get into the small details to work on your child’s face, like you can show fake blood, dripping from the fangs.
4. Mummy
With recent movies on this ancient Egyptian creature, the Mummy is a hugely popular Halloween character. This look can be achieved by kids easily. Use toilet paper or body bandage rolls to cover the entire body of your child. Use a kohl pencil to darken the rolls. Use a white cloth cut into strips for the head. You can go the extra mile to show organs peeking out from the gaps in the bandage.
5. Carl From Up
Any kid will look adorable when they dress up as the old man from ‘UP’. Use brown pants, white shirt, and a cardigan to get his look right. You can make a walker using pipes and tennis balls for the base. Get kid-size glasses and neatly comb down your child’s hair. Get a few helium balloons and tie them to the waistband for the full effect.
6. Princess
Almost all girls dream of being a princess and Halloween is the perfect excuse to dress up like one. Use a full-bodied flared frock, typically in pink, with embellishments and ruffles. Most stores sell tiaras but you and your child can make a unique crown at home using stock paper and lots of glitters. You can also change this princess look to an angel. Add wings to her dress at the back and make a wand with a star using thermocol.
Do not keep specific princesses like Cinderella or Sleeping Beauty in mind when creating this costume. Let your child come up with a character that she wants to be with the adornments and embellishments used to reflect the personality of this character. You could also create a backstory to keep your child more excited.
7. Katy Perry
If your daughter is a Katy Perry fan, dressing like her would be a dream come true for her. Her music is fun and catchy and she wears the most eclectic clothes. You can get a wig online or at stores with hair that is bright blue or bubble-gum pink. Take a white dress and stick some small shiny disco balls onto the dress with fabric glue. Add a prop mic for the complete look. If your child loves to sing, then encourage her to sing a few chorus lines of Katy Perry’s popular songs. This will encourage her to be more confident.
8. Harry Potter
Most kids would love to dress up as Harry Potter since he is this generation’s favourite wizard. Many stores sell the Gryffindor scarf which you can use as the focal point of the costume. You could also try your hand at knitting, especially if it is something you and your child do together. The rest of the outfit should resemble that of a prep school boy with trousers, white shirt and a sweater vest. Buy round glasses online and draw on a lightning-shaped scar on your child’s face using an eyeliner. Make a wand with a stick and teach your child a few spells from the Potter-verse. In fact, a few magic tricks can go a long way in making this costume a smashing hit.
9. Rockstar
A kid dressed as a rock star is going to look adorable no matter what. Use a dark pair of jeans and have your child sport a black leather jacket with a small guitar. If your child is already learning to play the guitar, then let her carry it with her to complete the look. You can try to portray actual rockstars, though coming up with a character along with your child will be more fun. The jacket can be bedazzled with rhinestones and sequins to add more pizzazz to the outfit.
10. Tinkerbell
This costume can be made easily if you are adept at sewing. Use green felt cloth to make the dress and use gauze and craft wire to make the wings. You can either stitch the wings onto the dress or make them removable if your child is small and will, of course, want to remove those cumbersome wings later. If your child has long hair, then pull it up to make a bun just like Tinkerbell does.
11. Rain Cloud
Making a rain cloud is a simple sewing project. This costume is cute and is perfect for toddlers. Make the cloud from simple white fabric and foam and strap onto the body with Velcro. Cut out blue raindrops from blue felt fabric and stitch onto a dark shade of pants to resemble raindrops falling from the cloud.This costume is comfortable as it is lightweight. Your toddler will not fuss with the costume and she is bound to look adorable in it.
12. Wonder Woman
A cute outfit to reflect the popularity of the DC character, this one will look great in photographs. It is a simple outfit in which you won’t have to work much on the sewing machine or shell out a lot of money. Use blue tulle material to make a tutu-like skirt for the bottom. Buy a kid-size red T-shirt with the wonder woman logo on it, or you could just paint it on any red t-shirt. Embellish the skirt with stars and stones for a glittery effect. Use a long piece of yellow yarn to make the lasso of truth and add silver bracelets to make the Bracelets of Submission.
13. Nerd
This look is easy enough to achieve. Make your child wear high-waist pants with a collared shirt or t-shirt. You can roll up the pants a few inches to show off white socks. Use suspenders to add more detail to the look. Get non-prescription classes to give the final touch to the nerd look. This look will be most effective if your child is otherwise outgoing and well-rounded. His friends are sure to find this look entertaining.
14. Minions
As one of the most beloved children’s characters in recent history, the minion outfit is sure to be a hit. Get your child to help you make this costume from cardboard. Cut out the template of a minion from the cardboard and draw the details of the minion on it. Your child can help you fill in the paint. Leave holes for the arm.
15. Rapunzel
This costume is easy to make and you can involve your child in its making as well. Use a simple dress for the body and buy yellow-coloured yarn for the hair. Use hot glue to stick the yarn together to create the head portion and then braid the rest of the yarn extra-long like Rapunzel’s. This look works best if you stick to simple ballerina shoes and a plain dress that will not grab any attention from the extra-long blond hair.
16. Red Riding Hood
This classic kids’ storybook character is a favourite among many. A red dress and a cloak is what you will need. You can make a gorgeous red cloak for your kid right at home to complete this ensemble. You can stitch this cloak using red velvet fabric or any other red fabric right at home. Make two rectangular pieces out of the fabric, one for the hood and one for the cape. Measure your kid before you cut these pieces. Fold the top ends of the hood fabric and stitch them together to resemble a hood. Now stitch the other end of the hood with the cape fabric to complete the cloak.
17. Dorothy (Wizard of Oz)
This lovely little girl from the Wizard of Oz stole many hearts along with her dog Toto. To dress your kid as Dorothy, you can get a simple white shirt and a plaid blue overalls dress. Some sparkly red shoes and a basket with a toy dog will complete the look.
18. Pirate
Who doesn’t love a pirate look? Pull some striped long-sleeved t-shirts, a black vest, tattered pants, and a pirate hat together for the perfect pirate costume. A black eye patch and a toy sword will work well to complete the costume.
19. Unicorn
Unicorns symbolize magic for most kids, and it is no doubt that your little one would love to dress like one. A unicorn costume is fairly simple if you don’t want to pick out a store-bought one. Simply dress your kid in white pants and a white sweatshirt and a headband with a unicorn horn attached to it. You should even glue a tail made of yarn to her pants for a complete look.
20. Knight
This is a creative idea that will need minimal effort. You’ll only need a grey sweatshirt, pants, your child’s bike helmet, and a shield and sword made of cardboard. You can cover the shield, sword and helmet with tin foil.
21. Mermaid
This mystical sea creature is a popular choice for many young girls. Start with a turquoise or blue-colored skirt or leggings with scale patterns. A matching top or tank top can work as the upper part of the costume. You can embellish the outfit with sequins and glitter to add some shimmer. For the hair, you can opt for a long wig, preferably in shades of blue or green. Consider adding a tiara or a headband with a starfish or shell decoration.
22. Astronaut
Let your child dream beyond the stars with this costume. Use a white jumpsuit or white pants and a white jacket as the base of your outfit. Print out or purchase NASA patches and other space-related badges to sew or glue onto the jumpsuit. A DIY helmet can be made from a clear plastic bucket with a few modifications. Don’t forget to add an American flag patch on the arm.
23. Butterfly
A butterfly costume is both colorful and beautiful. Use multi-colored leggings and a matching top. Wings can be made from lightweight fabric or felt, colored in bright, attractive patterns. Attach the wings to the back of the top using Velcro or ties. A matching antenna headband will complete the transformation from girl to butterfly.
24. Robot
Engage your child’s creative side with a DIY robot costume. Use cardboard boxes as the main body and smaller boxes or tin cans for the arms and legs. Spray paint everything in a metallic shade (like silver or gray) and attach various buttons, switches, and lights for added effect. Cut out holes for the arms, legs, and face. Finish off with metallic face paint and perhaps a voice modulator for robot-like speech.
There is no dearth of ideas that you can try for Halloween costumes for your kids. You can choose to make monsters or characters from movies, or even famous people. As long as your child is excited about the idea and wants to contribute to the making of the costume, you should be happy with the outcome. Keep the costumes so that you can modify them for next year’s outfit!
Also Read:
Kid-Friendly Halloween Party Games
Scary Halloween Makeup Ideas for Kids
Spooky Ideas To Enjoy Halloween with Your Kids
Read more
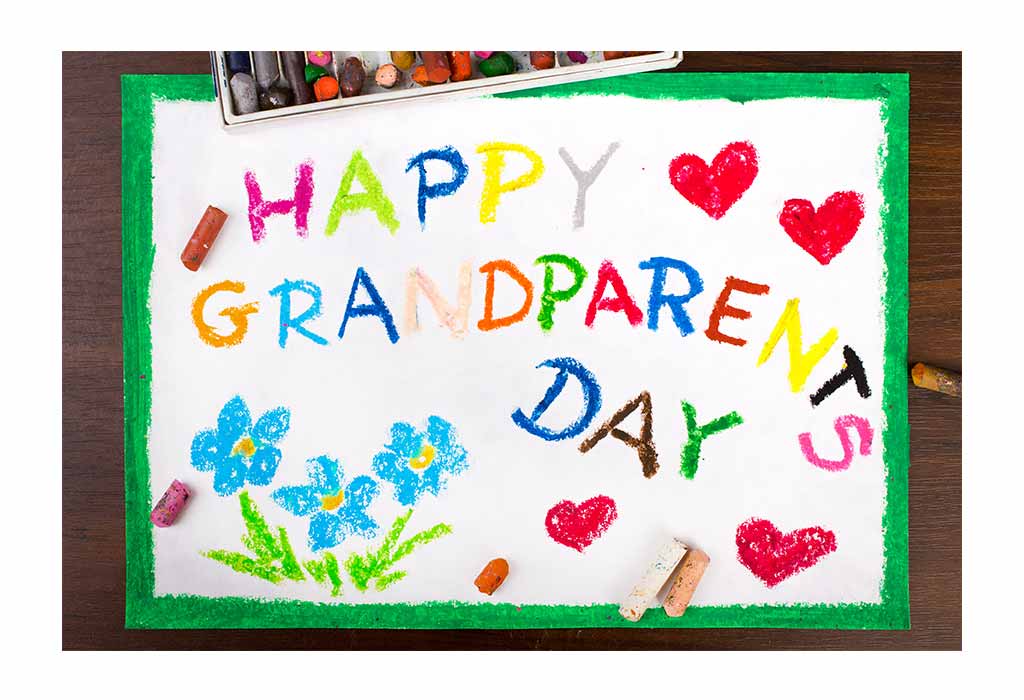
Grandparents Day Activities – 10 Ways Kids Can Make Them Feel Special
Grandparents don’t require a special day to be remembered – every day with their wisdom and warmth is worth celebrating! National Grandparents’ Day is celebrated in several countries across the world, India excluded – but there’s no reason why it shouldn’t become a regular occurrence here as well!
Grandparents’ Day is the day to make one’s grandma and grandpa feel extra special. The guidance, knowledge and strength children derive from their grandparents are unmatchable. Grandparents and grandchildren often enjoy spending time together, so why not make a day of it? The activities can be a day-long affair, or it can be a series of short and simple activities.
10 Fun Grandparents Day Activity and Games for Children
Love and appreciation can be shown to grandparents by doing fun activities and spending quality time together. Here are a few activity ideas to choose from in order to honour the elderly members of the family. It’s important to teach little children about their grandparents’ lives – that’s how they will understand them and appreciate them more.
1. My Grandparents and Me – A Project
This is a Grandparents Day activity for preschool. The kids should be motivated to read books like ‘Just Grandma and Me’ and ‘Just Grandpa and Me’.
Let the child will speak about his or her grandparents, and an adult will write it down accordingly.
Next, they will have to draw pictures of themselves in the company of their grandparents.
They should be taught how to draw stick figures.
Exclude the head and have the body, arms and legs.
When they complete making the headless stick figures, they should draw pictures with the grandparents holding their hands.
Photos of their faces should be cut out properly and stuck to the stick figures.
The preschoolers can then add flowers or trees in the background.
The completed picture can be presented to their grandparents.
2. Grow Your Own Family Tree
This is an activity that the kids and grandparents can do together.
The kids should be given a large sheet of paper with a tree drawn on it.
The tree should have many branches.
A circle should be drawn for a girl or a square for a boy.
The one doing the activity should write his/her name on it and stick it on the trunk of the tree.
The shapes of all the present family members –grandparents, mother, father, cousins, aunts and uncles are to be stuck on the branches.
Neighbours’ and pets’ names can also be included if desired. The names of ancestors can also be added.
This sheet can be put into a memory notebook.
Let your grandparents tell you the most interesting anecdote related to the members of the family, which can be noted in the memory book.
The parents can also recount what they remember specifically about their grandparents. Thus, this can be one of the best kindergarten Grandparents Day ideas.
3. National Grandparents Day Activity
On such an auspicious day, children should be spoken to about their grandparents. At home or in school, Grandparents Day events should be organised to honour them. Children can discuss:
What makes them special?
What do they call them?
Can they draw a picture of their grandparents?
Give them an idea to make cards for them and some extra cards too for older adults living in assisted-living facilities.
Can they make a small token gift for them?
Can they make a collage out of pictures of older adults cut out from newspapers or magazines?
4. My Special Grandparents
An interesting activity is to record an interview with the grandparents. A questionnaire for it can be prepared in advance, and then the interview can be recorded at a favourite place of their choice.
Is there something about my mom/dad that makes you really proud?
At what age did you get married?
Did you like going to school?
What were your favourite subjects?
What were your favourite games/activities?
What is your advice for me?
5. Cook Together and Gift a Keepsake
It can be really fun if grandchild and grandparent can cook a dessert, meal or snack together. The interesting activity can end with a delicious treat. Grandmothers love to cook what their little grandchildren love and enjoy. The recipe can be written and stuck on a plate to treasure as a keepsake. A warm thank you card can be given to them as a gift for their love and adoration.
6. Handprint Gift Activity With Grandparents
This is another activity that children can do with their grandparents.
You will require a stretched canvas, paintbrush, paint and stencils.
The child’s palm of the left hand is to be painted and pressed near the left corner of the stretched canvas.
Since this is one of the activities for grandparents and toddlers, the paint may be spread on a paper plate, and the child’s hand may be pressed onto it.
The adult’s hand, too, should be painted and pressed near the top left-hand side of the canvas.
When the handprints dry, a lovely and memorable message can be written wishing them health and happiness.
The grandparents would love to treasure such beautiful thoughts of their grandchildren.
7. Sing Along With Grandparents
This is a fun activity that is wonderful for those who enjoy music and singing.
There are special songs written only for grandparents.
Singing the songs is great fun, and it also is full of sentiments and touches their heart.
When kids express such sentimental thoughts in the form of a song, they are filled with tears of joy.
Even better would be to sing along with them rather than dedicate the song to them.
The musical notes work wonders and strengthen the feelings of love for each other, and that is how they can be made to feel special on Grandparents Day.
8. Make it Special With a Forget-Me-Not
A fun-filled activity for grandparents would be to gift a forget-me-not plant. This plant is the official flower of National Grandparents Day. It can be made even more special by painting the child’s hand with washable paint. The handprint made on the pot can make the gift more valuable for them.
9. Family Storytelling Circle
A storytelling session is a wonderful way for kids to connect with their grandparents while learning about family traditions and history.
Ask grandparents to share funny, inspiring, or childhood stories.
Kids can also share their favorite school memories or fun events.
Use a “story stick” or soft ball—whoever holds it gets to share.
End the activity by letting kids illustrate one of the stories on paper.
10. Grandparents Day Bingo
Make the day lively and fun with a simple game of Bingo designed around family and grandparents’ favorites.
Create bingo cards with items like “grandma’s favorite food,” “grandpa’s hobby,” “family recipe,” or “favorite song.”
Call out the clues, and kids can mark them on their cards.
The first to get five in a row shouts “Bingo!” and wins a small prize.
This game gets everyone talking about shared family memories.
Grandparents give their grandkids unconditional love and knowledge. The grandkids, in turn, give purpose to the grandparents’ lives and bring them love, youthfulness, and laughter. So this Grandparents’ Day, help your child celebrate this special bond with one of the activities we have listed!
Also Read:
DIY Father’s Day Card Ideas for Kids
Creative Family Tree ideas & Its Benefit for Kids
Know The Importance of Grandparents in Your Kid’s Life
Best Games To Play On Father’s Day That Kids & Dad Will Enjoy
Read more
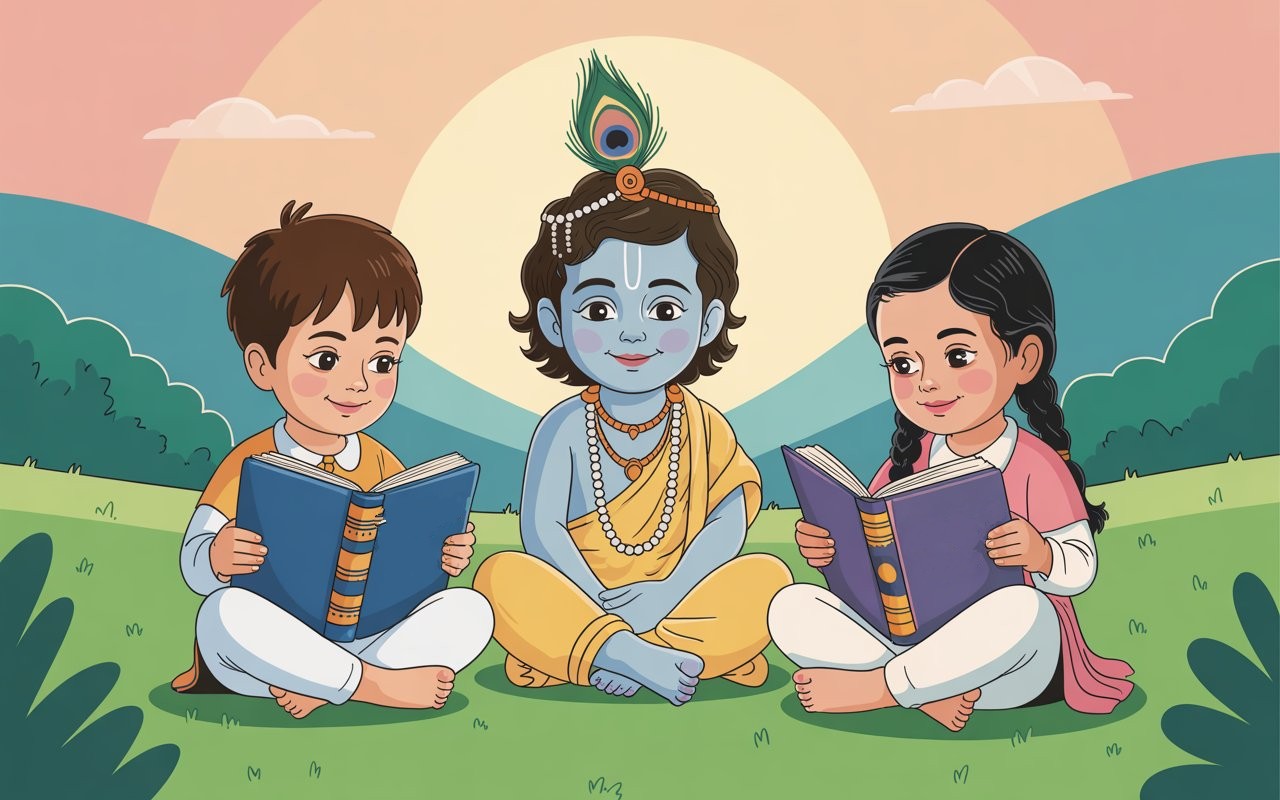
18 Childhood Stories of Lord Krishna for Kids
Storytelling helps parents bond with their kids and impart values in a fun and interesting way. There are many stories that parents can narrate to their children. The stories of Lord Krishna are narrated in every household, as children love him and adults adore him in all forms. Here we have mentioned some Lord Krishna stories for children that will help them learn important life lessons, and they’ll want to hear more. Your kids will surely love these stories from Lord Krishna’s childhood! Do let us know in the comments which story your little one liked the most and why!
Stories of Lord Krishna With Morals
Lord Vishnu is a Hindu god who appeared on Earth in nine avatars. Krishna is one of them. Till today, Krishna’s childhood escapades are fondly remembered. Here are short stories of Lord Krishna for kids.
1. The Divine Prophecy
Aeons ago, there lived a king named Ugrasena. He had two children – a son named Kamsa and a daughter named Devaki. Devaki was a good-natured person, but Kamsa had an evil mind. When he grew up, he dethroned his father and put him in jail.
Meanwhile, his sister Devaki married king Vasudeva. As Kamsa was escorting his sister to her in-laws’ place, a voice rang out from the skies – “The eighth son of your sister will grow up to kill you.” Kamsa wanted to put his sister to death to save his life. But Vasudeva begged Kamsa to spare his wife. He promised that he would hand over every child of theirs. Kamsa was pacified and put the couple behind bars.
Moral – You should never disrespect her parents.
2. Krishna’s Birth
Kamsa imprisoned Devaki and Vasudeva and ordered his soldiers to guard the cell. Every time Devaki gave birth to a child, Kamsa would visit the couple and take away their baby. Dashing it to the wall, he would kill it. When Devaki was pregnant for the seventh time, the foetus was miraculously transferred to Rohini’s womb in Vrindavan. Kamsa was told that it had been a stillbirth. Devaki and Vasudeva’s eighth child Krishna was born at the stroke of midnight. This special day is now celebrated as Janmashtami.
Moral – If you give your word, keep it.
3. Krishna’s Foster Home
As soon as Krishna was born, the guards manning Devaki and Vasudeva’s cell went into a deep slumber, and the locks fell open.
Placing baby Krishna in a wicker basket, Vasudeva left for Gokul. When he reached the Yamuna river, he saw that it was flooded due to the pouring rain. But he had to save Krishna’s life. So, without fearing for his own life, Vasudeva started walking across the river. With his every step, the waters receded, and Lord Vishnu’s serpent Adishesha protected baby Krishna from the rain.
When Krishna reached Nanda’s house, he saw that his wife Yashoda had given birth to a baby girl. Slowly, he picked the baby up and placed Krishna in her place. Then, he returned to the prison with the baby. Devaki and Vasudeva had hoped that Kamsa would spare the baby girl because the prophecy had mentioned Devaki’s eighth son. But Kamsa didn’t care. He snatched the baby from their hands and flung her against a wall. Miraculously, the baby transformed into Goddess Durga and informed Kamsa that Devaki’s eighth son was alive and would soon come for him.
Moral – Where there is a will, there is a way.
4. Krishna and Putana
Kamsa was desperate to kill Krishna, so he called for the fearful demoness Putana. He told her to assume the form of a beautiful, young woman and kill all the babies that had been born in the previous ten days. As this gave her an opportunity to instil fear in people’s hearts, Putana readily assented.
Putana entered Krishna’s village. When she heard everybody talking about Yashoda’s newborn, the demoness immediately knew that this was the child she had to eliminate. Distracting Yashoda, she made Krishna suckle on her poison-smeared nipples. The poison did nothing to him, but Putana died.
Moral – Never hurt a person or animal intentionally. You’ll end up paying for it.
5. Krishna’s Love for Butter
Krishna loved eating butter. As he grew older, Krishna started stealing butter from his own house and neighbours’. Yashoda hung up the butter so that Krishna wouldn’t be able to reach it. Slowly, other gopis also followed suit.
Krishna and his friends weren’t the ones to give up easily. They worked out a solution to this. The next time they raided a house for butter, Krishna made his friends form a human pyramid. He reached the top and broke the pot of butter. The friends relished it, much to the anger and disappointment of the gopis!
Moral – Focus on the solution and not on the problem.
6. Nalakuvara and Manigriva
Yashoda was so fed up of Krishna’s antics that, one day, she tied him to a mortar. To free himself, Krishna crawled to the two trees in his courtyard. Then, he proceeded to crawl through the passage between the trees. The mortar got stuck in the gap. Taking advantage of this, Krishna pulled the rope with all his strength. The trees came crashing down and two demigods Nalakuvara and Manigriva emerged. Krishna had freed them from their curse!
Moral – Believe in miracles; they do happen.
7. What’s Inside Krishna’s Mouth?
Once when Krishna and Balarama were playing, the avatar of Lord Vishnu stuffed a handful of mud into his mouth. When Krishna’s friends complained to his mother. Yashoda ran to him and asked him to open his mouth. Initially, he refused to. But when Yashoda gave him a stern look, Krishna obliged.
What Yashoda saw wasn’t mud but the entire universe. That’s when she realised that Krishna was the Lord in disguise!
Moral – Always listen to your parents.
8. Krishna and Kaliya
Every day, Krishna would take his cows to graze by the river. Suddenly, cows started dying after drinking from the river. With his divine power, Krishna realised that the ten-headed serpent Kaliya was poisoning the water with his venom.
He confronted Kaliya and asked him to stop, but the stubborn serpent refused. Krishna dived into the river and emerged dancing on Kaliya’s head. By then, all the villagers had gathered and were anxious for Krishna. Slowly, the Lord became heavier and heavier, until the serpent couldn’t bear his weight any longer. Kaliya’s wives begged Krishna to stop and they left the river, never to return.
Moral – Peace is better than war.
9. Krishna and Arishthasura
One day, a massive bull came to Vrindavan and started attacking the villagers. Nobody knew where it had come from. Everybody started running helter-skelter to save their lives. They went to Krishna for help.
When Krishna faced the bull, he realised that it was possessed by a demon called Arishthasura. Krishna managed to tackle the bull and pierce its horns! Finally, the demon left the bull’s body and bowed to the Lord. He said that he was a disciple of Lord Brihaspati and had been cursed to become a bull as he had disrespected his teacher.
Moral – Always respect your teacher.
10. Krishna and Keshi
After Krishna had defeated the demon Arishtasura, the celestial sage Narada informed Kamsa that Krishna was very much alive and would kill him. Fuming with rage, Kamsa summoned the demon Keshi and commanded him to kill the lad.
Keshi assumed the form of a fearful horse and started terrorising the inhabitants of Vrindavan. Krishna understood that the demon was challenging him to a fight. So, he confronted the horse. On seeing the young lad, the horse charged at him. Krishna, however, caught one of the horse’s legs and threw it a hundred yards away. When Keshi regained consciousness, he charged at Krishna with his mouth open. The Lord pushed his left arm into the horse’s mouth, making its teeth fall out. Then, inflating his arm, he killed it. That was the end of Keshi.
Moral – Face your fears.
11. Krishna and Lord Brahma
Once, Lord Brahma decided to test Krishna’s powers. So, he hid all the children and calves of Vrindavan in Brahma Loka. Krishna was unhappy with Brahma’s doing, and decided to teach him a lesson. So, he assumed the form of all his friends and calves and went to their homes. Nobody could even tell the difference.
When Brahma decided to check the situation in Vrindavan, he was shocked to see all the children and calves. Lord Bramha immediately realised his mistake and asked Krishna for forgiveness.
Moral – As you sow, so shall you reap.
12. Krishna and Govardhan
It was a ritual among the inhabitants of Vrindavan to worship Indra, the god of rain. Once, when preparations were in full swing, Krishna suggested that the villagers should rather worship the Govardhan hill. They assented and started worshipping the hill. This made Indra very angry, and he let his rain clouds loose over the village.
It poured cats and dogs for days on end, and everybody sought Krishna’s help. Unable to see his devotees in plight, the Lord lifted the Govardhan with his little finger. He asked the villagers to take shelter under the hill and stood in that position for seven nights. Indra realised his mistake and apologised to Krishna.
Moral – Always help someone in need, if you can.
13. Krishna and Aghasura
Once, Krishna and his friends set out on a picnic to the nearby forest. While they were enjoying, Aghasura, who was the brother of Putana, appeared at that spot. He had been sent by Kamsa to kill Krishna. The demon assumed the form of a python and made himself as long as a cave and as big as a mountain. Then, he lay in wait.
The cowherd boys, enticed by the beauty of the cave, entered it. Krishna knew that it was Aghasura and tried to warn his friends, but they were in no mood to listen. The demon had plans of closing his mouth once Krishna had entered his mouth. To save his friends, Krishna entered the cave and expanded himself. This suffocated the demon and lead to his death.
Moral – Good advice will stand you in good stead.
14. Krishna Kills Kamsa
Kamsa had been trying to kill Krishna but in vain. So, he hatched another plan. With his servant Akura, he sent a message inviting Krishna and Balarama to the wrestling match at Mathura.
Both of them agreed to attend the event. Once there, Kamsa pitted the brothers against two of his strongest wrestlers. Krishna and Balarama accepted the challenge, and easily defeated their opponents.
Kamsa lost his temper and ordered his soldiers to kill the boys. Hearing this, Krishna jumped into the stands, knocked Kamsa’s crown off his head and dragged him by the hair to the wrestling ring. Desperate to prove his might, the asura challenged Krishna to a wrestling bout. With one blow of Krishna’s hand, Kamsa fell dead. The Lord set his birth parents, Devaki and Vasudeva free, and placed Ugrasena back on the throne.
Moral – Truth and goodness always win at the end.
15. Krishna Miraculously Escapes
When Lord Krishna was a little infant, Yashoda ma had taken him to a village fair. After everyone was done with their lunch, Yashoda left Krishna to sleep underneath a bullock cart. After some time, Krishna woke up to the sound of music. He saw that all the villagers were dancing and so he too started dancing to the beats. Krishna then accidentally bumped against the bullock cart wheel which led to the cart crashing to the ground.
People rushed towards the cart expecting the little boy to be in a bad condition. Surprisingly, they found him still happily dancing to the tunes! Though this incident was one of the first that proved Krishna’s heavenly powers, it was believed that it was a miracle that the little boy was left untouched by the crash.
Moral – Miracles do happen.
16. Krishna and Varuna
Nanda, Krishna’s father, was fasting on one ekadasi. Before sunrise, Nanda went to take a dip in the holy river Yamuna. The servants of the demigod Varuna capture and present him in front of their lord, accusing Nanda of taking a bath in the river at a demonic time.
Krishna and Balrama searched for their father after his sudden disappearance. Then they heard sounds coming from the river and understood that the demigod Varuna had captured their father.
When Krishna visited Varuna, they engaged in a heartwarming conversation. Varuna realised the mistake committed by his servants, apologised to Krishna, and released Nanda immediately.
Moral – Do not take a one-sided decision.
17. Krishna and the Forest Fire
One day, Krishna and his friends went to the forest to play. They were so engaged in playing that they didn’t realise that the forest had caught fire. When they were surrounded by the fire from all sides, they asked Krishna for help. Krishna asked them to close their eyes, and he swallowed the entire forest fire within a few minutes, leaving everyone astonished.
Moral – Always be aware of your surroundings.
18. Shifting to Vrindavan
Village elders and Nanda decided to leave Gokul because Krishna had been attacked twice, once by rakshasi Putana and then by the asura Trinavarta. They decided to go to Vrindavan as they felt unsafe.
All Gokul villagers were getting cautious with repeated attacks and bad omens they had been experiencing for the last few years. Hence, they all, especially Upanand ji, suggested that the entire village leave Brij and move to Vrindavan, a very dense forest next to Govardhan mountain, which was a safer place. All the villagers agreed to the suggestion, and that is how the entire village shifted to Vrindavan.
Moral – Safety comes first and foremost.
FAQs
1. Why Is Krishna Blue?
Krishna drank the poisonous milk of the Putana, who was a demon, when he was a baby, so his skin became bluish.
2. Why Does Krishna Wear a Peacock Feather and Carry a Flute?
Krishna wears a peacock feather as it is a symbol of peace, prosperity and happiness. He carries a flute because Krishna is the God of divine love, and the flute, which is hollow, is the human heart where he plays his tune of love.
3. Why Do Children Love Krishna?
Little Krishna was a small child who was naughty, charming and a giver of love. When kids read or listen to the stories of Him, they do not connect to Him as a divine soul but feel more human and feel as if they know Him like an acquaintance.
4. What Krishna Loves to Eat?
Lord Krishna loves to eat makhan (butter).
5. At What Age Krishna Died?
On February 18, 3102 BC, Lord Krishna breathed his last on the banks of river Hiran. He lived for 125 years, seven months and six days.
Krishna story for kids is a good way to teach them about Krishna’s pastimes. Not only are they interesting, but they also instill morals and values in young minds.
Also Read:
Short Moral Stories for Kids
Story of Birth of Lord Krishna
Mythological Stories for Children
Short Stories of Ramayana for Children
Read more

20 Easy and Fun Christmas Crafts for Kids
Christmas crafts for kids are a wonderful way to ignite creativity and celebrate the festive season together. With a variety of easy Christmas crafts for kids available, little ones can enjoy hands-on activities that are both fun and developmentally enriching. From simple cut-and-paste projects to unique ornament-making, these Christmas art and crafts for kids spark imagination and provide memorable holiday experiences. Whether it’s decorating the Christmas tree, creating personalized gifts, or making festive decorations, these Christmas craft ideas for kids offer endless opportunities for joy and creative expression indoors during the holiday season. Perfect for all ages and skill levels, these crafts blend holiday cheer with educational play
Creative Christmas Crafts for Kids
Christmas ornament crafts for kids are simple and fun projects that help children create beautiful decorations.These easy crafts turn everyday materials into festive treasures perfect for decorating Christmas trees or gifting to loved ones.
1. Spoon Angel Ornament
This ornament craft is one of the popular choices among kids for Christmas crafts.
What You Will Need
Wooden craft spoons
5-inch lace paper or doily
Craft foam sheet – white
Yarn – any colour
Pointed black marker
Glitter stick – gold
Scissor
Glue
Ribbon
How to Make
Cut out a gown from the white foam sheet taking an approximate length according to the wooden spoon.
Take a few strands of yarn to make angel’s hair.
Fold the round lace paper or doily into half and glue it. Now cut it into two halves to make the angel’s wings.
Take two gold glitter sticks and bend them around in a circular shape, so that it looks similar to angel rings.
Using a fine point black marker, draw the eyes, mouth, and nose of the angel onto the backside of a wooden spoon.
Paste the yarn on the top of the spoon to give it a look of hair. Then, paste the angel wings and the white gown onto the spoon.
Using the hot glue gun, paste the angel’s halo over the top of the spoon.
Glue a short ribbon on the back of the angel ornament so hanging purposes.
Source: Pinterest
2. Reindeer Antler Headband
This reindeer antler headband is a perfect craft for your kids to create and later play with. Check out how.
What You Will Need
Printable of reindeer antler template
Red glitter paint
Cardstock -brown
sticky tape
Scissor
Glue
How to Make
Cut out the shapes given in the reindeer antler template. If you do not have any template, then you can create one on the cardstock and cut the shapes out.
Now, paste the colored templates onto brown cardstock. trim out the template shapes.
Glue the antlers and ears of the reindeer onto the front side of the headband.
For the red nose of the reindeer, paint the nose with red glitter paint.
Now, staple the edges of the reindeer headband piece to give it is a wearable loop.
Voila, the headband is ready to be worn by your kid.
Source: Pinterest
3. Paper Snowflakes
You’ve seen beautiful snowflakes and their unique patterns, right? Well. You can make some on your own at home! This may seem complex to make, but it is very simple!
What You Will Need
Some A4 size plain sheets
Scissors
How to Make Snowflakes
Fold the paper 4 times to make a square.
Cut a quarter of a circle from the square.
Now, make random cuts into the paper. You can make squares, triangles and much more.
Open up the folds to reveal a beautiful snowflake!
4. Orbeez Decoration
Do you want to create a beautiful Orbeez centre piece which reflects the beauty of Christmas and is fun to make? This is the perfect craft to do!
What You Will Need
Plain white orbeez
Christmas decorations (crystal balls and other tree hangings)
Water
A cylindrical glass-container
How to Make it
Soak the plain white Orbeez overnight and allow them to soak up the water.
Next day, take a glass cylindrical container and pour in some Orbeez balls; in intervals, add in some of the Christmas tree decorations.
Keep adding in Orbeez till you reach the top.
Once it is full, add in water till the top.
It will look as though the decorations are floating in the water!
5. The Centre of Attraction
Get your child to make a centrepiece for the dining table. This will give them a sense of achievement and pride.
What You Will Need
Two pieces of green chart paper about 1.5 inches X 11 inches in size (you can also use white chart paper and then paint it a green colour)
Small pompoms or coloured cotton balls
Glue
Scissors
How to Do
Draw a tree pattern on the chart paper either freehand or with the help of a printable.
Cut it out and make slots at the top and bottom of the tree to make it easy to slide together and hold up the tree.
Stick on the coloured cotton balls or pom-poms to look like Christmas tree ornaments. You can also use foam if you need to make a more stable tree. Another option is to glue the tree to a flat base like thick cardboard.
6. Recycled Holiday Crayons
If you have been wondering what to do with those bits and pieces of crayons that seem to be in every nook and cranny of the house, this idea is definitely for you.
What You Will Need
All those crayon pieces
Silicone baking moulds in Christmas shapes
A preheated oven around 350° Celsius
How to Do
Peel off any paper that is on the crayon pieces and put them into the mould till each is half full.
Then pop the moulds into the pre-heated oven and leave them there for about 6 to 8 minutes or till the crayons melt fully.
Leave them there till the moulds fully cool down, and this can take up to an hour. If you try to take out the moulds early, they might break off. These make for great gifts too.
7. Cute Napkin Holders
Festivals are a time for family get-togethers and dinners. This holiday craft for kids will keep your kids occupied and show their artistic talent. So, let your children feel a part of the festivities by getting them to make pretty napkin holders for the Christmas dinner table.
What You Will Need
Empty toothpaste boxes or similar
Craft paper or chart paper
Glue
Glitter or sequins
Scissors
Paints in the colours of your choice
Paintbrush
How to Do
Paint the outside of the empty toothpaste box in a single colour and let it dry.
Then cut sections of the box to about one and a half inches wide.
Trace out a pattern of your choice like stars or a bow on the craft paper and cut it out in colours matching the box cutouts.
Apply glitter on the pattern as well as the box cut-outs.
Then stick the pattern on the box sections to finish off your napkin holder.
Source: Pinterest
8. Personal Snow Globe
A snow globe makes for a great showpiece or gift and definitely tops the list of interesting Christmas craft activities for children.
What You Will Need
One glass jar (with a tight lid)
Your child’s favourite plastic figurine or a festive one if it’s a gift for someone else (choose a size that fits in the jar easily)
Waterproof glue
Distilled water or boiled and cooled tap water
Liquid glycerine
Glitter
How to Do
Stick the plastic figurine on the lid with waterproof glue and let it dry.
In the meantime, fill the jar with the water. Add a few drops of glycerine and glitter to the jar and stir gently.
Once the figurine is properly stuck to the lid, screw on the cap tightly and flip the bottle.
9. Felt Pom-Pom Ornaments
These soft and colorful felt pom-pom ornaments are easy for kids to make and decorate, offering a fun way to practice sewing or crafting skills while adding a cozy touch to the Christmas tree.
What You Will Need
Colorful felt sheets
Pom-poms in various sizes
Needle and thread or glue
Ribbon or twine for hanging
How to Do
Cut felt shapes like stars, trees, or circles.
Glue or sew pom-poms onto the felt shapes to decorate.
Attach a loop of ribbon or twine for hanging on the tree.
10. Paper Snowflake Ornaments
Simple yet beautiful, paper snowflake ornaments let kids create unique and delicate winter-themed decorations through folding and cutting, perfect for decorating windows or trees during the holiday season.
What You Will Need
White paper (copy or craft paper)
Scissors
Tape or stapler
How to Make it
Fold the paper into a square and make a series of folds to create the snowflake base.
Carefully cut shapes into the folded paper to form unique snowflake patterns.
Unfold the paper and attach a thread or ribbon for hanging on a Christmas tree or windows
Christmas Tree Crafts for Kids
Christmas tree crafts for kids are simple, hands-on projects that transform basic materials into festive holiday decorations.
1. Holiday Paper Plate Wreath
Crafting a festive wreath using paper plates is a delightful activity that allows kids to create a decorative piece for the holiday season.
What You Will Need
Paper plates (2-3)
Green paint or markers
Colored construction paper
Scissors
Glue or tape
Ribbon or string for hanging
How to Make it
Begin by painting or coloring the front of the paper plates green to resemble the base of the wreath. Let them dry completely.
Once dry, cut out the center of each paper plate to form a ring shape.
Cut out various shapes (such as holly leaves, berries, or other festive shapes) from the colored construction paper.
Arrange and glue these shapes onto the paper plate rings to decorate the wreath.
If desired, add a bow or other embellishments using extra construction paper.
Allow the wreath to dry thoroughly.
Attach a ribbon or string to the back of the wreath to hang it up for display.
2. Make Some Wreaths
Green and red wreaths are an integral part of Christmas decorations. An easy Christmas craft for kids, this can be done with natural greens or coloured paper.
What You Will Need
Red and green colour chart paper
Scissors
Pencil
A ruler
Stapler
Glue
How to Do
Fold the green chart paper in half along the length and cut in a straight line from the folded side to about one centimetre.
Make such slits all across the length of each sheet of chart paper. Then roll the sheet into a tunnel shape as you join one sheet of paper to the other and also staple it to keep it in place.
Then twist it into a wreath and decorate with bows and berry shapes made from the red chart paper.
3. Customised Christmas Stocking
One of the most popular Christmas themed activities for kids is to create a personalised stocking for Santa Claus to leave all the goodies in. Your kids can choose the colour as well as the embellishments they would like to put on it.
What You Will Need
Two equal pieces of felt
Stapler or craft glue
Colourful string or paper
Buttons, glitter, or stickers
Scissors
Pen
How to Do
Keep the two pieces of felt one over the other and draw a stocking shape with a pen.
Cut out the sock, and staple or glue the sides together, leaving the top open.
You can then glue on the colourful string or paper along the sides.
Make a small loop out of the leftover felt and fix it to the top corner so you can hang it up when done.
Finish up by embellishing with buttons, glitter, or stickers. You can also get your child to draw their initials on the stocking for a customised touch.
4. Recycled Gift Bags
There is no season better than Christmas to give gifts to all your loved ones and you can add to your list of good deeds by recycling old paper bags. Put those shopping bags from the mall to some good use.
What You Will Need
Paper shopping bags
Cellophane
Tissue paper
Colourful ribbons
How to Do
Neatly cut out the store name or logo on the shopping bags.
From the inside, tape cellophane over this hole that you’ve cut out.
Then line the bag with tissue paper and finish off with colourful ribbon bows. You can use it as a goodies bag or gift bag.
5. Bowled Over by the Tissue Box Snowman
Indoor bowling can be a fun activity to keep the kids entertained during the Christmas holidays when it’s cold and dark outside.
What You Will Need
4 empty tissue box containers
Some white paper or white paint
Pieces of black felt or chart paper
A piece of orange card paper
Glue
Some twigs
How to Do
Paint the tissue boxes white all over or cover them entirely with sheets of white paper.
Stack them and then make a triangular nose from the orange card paper. Stick this on the first tissue box to make it appear like a nose.
Then use the black felt or chart paper on the first box to make a hat and eyes for your snowman.
Use a ball to topple over the snowman and stack the boxes back again for endless play!
6. Snowman Buntings
It doesn’t matter if you don’t get a snowy Christmas. You can always put up some snowman buntings.
What You Will Need
White felt
Pieces of coloured felt
String
Hole puncher
Glue
Scissors
How to Do
Cut the white felt into squares of your preferred size.
Then stack them one over the other and draw the shape of a snowman before cutting out the outline.
Make felt hats for each snowman from the coloured felt and stick it on. Then punch a hole on the side of each and pass the string through
7. Popsicle Stick Christmas Tree
A simple and creative craft that lets kids build a miniature Christmas tree using common popsicle sticks, perfect for decorating their study desk or holiday shelf.
What You Will Need
Popsicle sticks
Green paint
Glue
Small colorful buttons or paper circles
Paper star for the top
How to Do
Glue three popsicle sticks in a triangle shape and let it dry.
Paint the triangle green and allow it to dry completely.
Decorate by gluing colorful buttons or paper circles on the tree.
Attach a paper star on top to complete the look.
8. Yarn-Wrapped Christmas Tree
This craft helps kids practice fine motor skills as they wrap colorful yarn around a tree shape to create a cozy and decorative Christmas ornament.
What You Will Need
Cardboard or sturdy paper cut into a Christmas tree shape
Green yarn
Pom-poms or small decorations
Glue
How to Do
Cut out a Christmas tree shape from cardboard.
Wrap green yarn around the tree shape, securing ends with glue.
Decorate by gluing pom-poms or other festive decorations on the tree.
9. Recycled Gift Box Christmas Tree
A creative way to repurpose small gift boxes into a miniature stacked Christmas tree, perfect for eco-friendly holiday decor.
What You Will Need
Small recycled gift boxes or cardboard boxes
Green wrapping paper or paint
Glue or double-sided tape
Small decorative items like beads, ribbons, or stickers
How to Do
Wrap the boxes with green wrapping paper or paint them green.
Stack the boxes from largest to smallest, securing with glue or tape.
Decorate the tree with beads, ribbons, or stickers to add festive charm
10. Candy Cane Paper Chain Tree
A festive and interactive craft where kids make a tree shape using paper chains that resemble candy canes, great for practicing fine motor skills.
What You Will Need
Red and white strips of paper
Glue or tape
Scissors
How to Do
Form loops with red and white paper strips and interlock them to create chains.
Assemble the chains into a triangular tree shape by tapering the length from bottom to top.
Optional: Add a paper star on top for finishing touch.
Craft projects completed during the Christmas holidays can be displayed in a prominent spot inside your home. This will show your child that his efforts are appreciated and make you proud of him. Thus, you would have not only made effective use of your child’s holidays but also cemented your relationship with him in a productive manner. These ideas will help you ensure that your child cherishes this festive season forever and that diy Christmas crafts for kids become more memorable.
Also Read:
Christmas Facts for Children
Christmas Stories for Children
Christmas Party Games Ideas for Kids
Steps to Draw Christmas Tree for Kids
Christmas Celebration Ideas with Kids
Read more
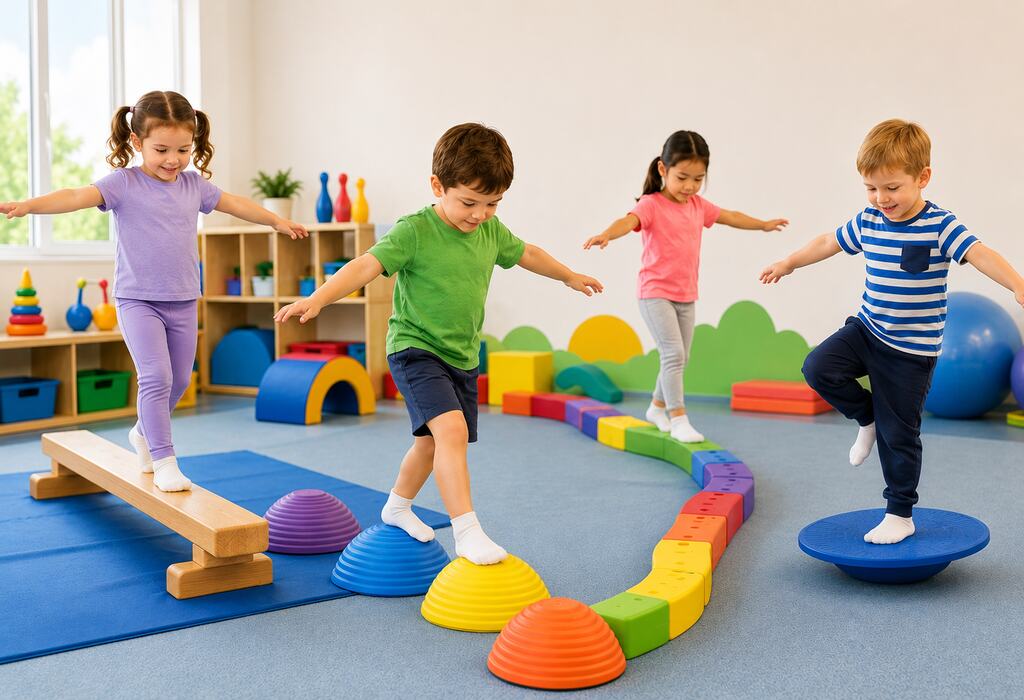
12 Balance Games & Activities for Kids
Have you ever noticed how much kids love walking along curbs, hopping on one foot, or pretending the floor is lava? That’s because balancing is naturally fun, and it’s also an important skill that helps children improve coordination, posture, confidence, and overall physical development. You don’t need fancy equipment or a large play area to help them practice. A few simple games and creative activities can turn balance practice into an exciting adventure filled with movement, laughter, and learning. Here are 12 fun balance games & activities for kids that will encourage them to stay active, improve their coordination, and have a great time along the way.
Benefits of Balance Activities for Kids
Balance is much more than standing on one foot. It’s a fundamental skill that children use every day, whether they’re walking up the stairs, riding a bike, getting dressed, playing on the playground, or simply moving around with confidence. Strong balance skills help kids improve coordination, posture, body control, and overall physical development, making everyday activities easier and safer (1).
Balance also supports other important developmental skills. As children practice balancing, they strengthen their core muscles, improve coordination between their eyes and body, develop better body awareness (knowing where their arms and legs are without looking), and build the gross motor skills needed for running, jumping, climbing, and sports. These abilities work together to help kids move confidently, stay active, and participate more comfortably in everyday play and physical activities (2).
Static vs. Dynamic Balance
Not all balance activities are the same. They generally fall into two categories: static balance and dynamic balance.
Static balance is the ability to stay steady while holding a position without moving, such as standing on one foot or balancing a book on your head.
Dynamic balance is the ability to maintain stability while your body is moving, like walking heel-to-toe along a line, hopping over obstacles, or riding a scooter.
Kids benefit from practicing both types of balance. Static balance helps build stability and body control, while dynamic balance improves coordination and confidence during everyday movements and active play. Including a mix of both in your child’s routine supports stronger motor skills and overall physical development.
Static
Holding a position
Standing on one foot
Dynamic
Moving while staying steady
Walking a balance beam
Combined
Shifting between still and moving
Freeze dance
12 Games and Activities to Try With Your Kids
Ready to get kids moving? These fun and easy balance activities turn skill-building into play, helping children improve coordination, stability, and confidence without feeling like they’re exercising. Pick a few favourites or try them all to keep playtime active and exciting.
1. Walk the Line
Source: Pinterest
What you need:
Painter’s tape
sidewalk chalk, or a length of string
Stick a straight line of tape on the floor and have your child walk along it heel-to-toe without stepping off. Once they master a straight line, switch to a zig-zag or figure-eight shape for an added challenge. This is one of the simplest balance activities for toddlers because it requires no equipment and can be set up in under a minute.
Skill focus: Dynamic balance, foot placement, concentration.
2. Freeze Dance
Source: PInterest
What you need:
Music (a phone or speaker works fine)
Play music and have kids dance freely. When the music stops, they must freeze in whatever position they’re in and hold it for a few seconds before the music starts again. This game blends movement with sudden stillness, which is exactly the combination that builds real-world balance control.
Skill focus: Static and dynamic balance, reaction time, listening skills.
3. Animal Walks
Source: Pinterest
What you need:
Just open floor space
Ask your child to move across the room imitating different animals: a crab walk, a bear crawl, a duck waddle, or a penguin shuffle. Each animal walk shifts weight differently, forcing the body to recalibrate its balance with every step. This is a favourite among balance activities for preschoolers because it doubles as imaginative play.
Skill focus: Core strength, bilateral coordination, proprioception.
4. Pillow Path
Source: Pinterest
What you need:
Couch cushions, pillows, or folded towels
Lay pillows across the floor in a winding path and have kids step from one to the next without touching the ground in between. The soft, uneven surface challenges the ankles and core far more than a flat floor does, which makes this a great low-cost alternative to a wobble cushion.
Skill focus: Static balance, core engagement, spatial awareness.
5. Stand on One Foot Challenge
Source: Pinterest
What you need:
Nothing, though a wall nearby adds safety for beginners
Have your child stand on one foot and count how long they can hold it before switching feet. Add a fun twist by having them close their eyes once they’re steady, which removes visual cues and forces the vestibular system to work harder. Keep a hand near a wall for younger kids who are just starting out.
Skill focus: Static balance, focus, vestibular processing.
6. Balance Beam Walk
Source: Pinterest
What you need:
A foam balance beam, a low curb, or a rolled-up yoga mat
Walking heel-to-toe across a raised surface is one of the most classic balancing games for kids, and for good reason. It combines height, narrow footing, and forward motion all at once. Start with a wide, low beam and narrow it as confidence builds. Always supervise closely near any elevated surface.
Skill focus: Dynamic balance, core strength, confidence building.
7. The Floor Is Lava
Source: Pinterest
What you need:
Furniture
cushions, or floor mats scattered around a room
In this game, the “floor” becomes off-limits, and kids must hop between furniture, cushions, or marked spots without touching the ground. It’s a fast-paced way to practice weight shifting and quick decision-making while having fun with siblings or classmates.
Skill focus: Dynamic balance, motor planning, problem-solving.
8. Bean Bag Balance
What you need:
A bean bag
small stuffed animal, or folded washcloth
Have your child place a bean bag on their head, shoulder, or the back of one hand, then walk across the room without letting it fall. For an extra challenge, ask them to walk on a taped line or step over small objects while balancing the bean bag.
Skill focus: Static and dynamic balance, posture, focus.
9. Yoga Poses for Kids
Source: Pinterest
What you need:
A yoga mat or open carpet space.
Simple poses like tree pose, airplane pose, and warrior pose ask kids to hold their bodies in specific positions, often on one leg. Yoga is one of the gentler balance activities for children who are less confident with fast-moving games, and it builds patience alongside physical control.
Skill focus: Static balance, body awareness, calm focus.
10. Obstacle Course Balance Trail
Source: Pinterest
What you need:
Household items like chairs, pillows, hula hoops, or a jump rope.
Set up a simple path that combines several balance challenges: step over a pillow, walk a taped line, hop through hula hoops, and finish by standing on one foot for five seconds. Kids love timing themselves or racing a sibling through the course.
Skill focus: Combined balance skills, sequencing, gross motor coordination.
11. Musical Statues on Uneven Ground
What you need:
A couch cushion, foam pad, or folded blanket.
This is a variation on freeze dance with a twist: play the game while standing on a soft or slightly unstable surface, like a couch cushion. The added instability makes each freeze moment a genuine balance test rather than just a stillness game.
Skill focus: Static balance, core strength, reaction time.
12. Bike or Scooter Riding
Source: Pinterest
What you need:
A balance bike, bicycle, or scooter sized for your child.
Riding a bike or scooter is one of the most functional ways to practice these skills because it applies balance directly to a real-world activity kids already want to do. Balance bikes without pedals are especially useful for younger children still building the coordination needed for a full bicycle.
Skill focus: Dynamic balance, steering coordination, confidence.
Balance Activities by Age
Age Group
Best-Fit Activities
Focus
Toddlers (1-3 years)
Pillow path, animal walks, walk the line
Foundational static balance
Preschoolers (3-5 years)
Freeze dance, yoga poses, bean bag balance
Static-to-dynamic transition
School-age (6-10 years)
Balance beam walk, obstacle course, bike riding
Advanced dynamic balance
Common Mistakes to Avoid During Balance Activities
Balance activities should challenge kids without making them feel overwhelmed or unsafe. Keep these common mistakes in mind to create a fun, safe, and rewarding experience.
Skipping the warm-up stage : Jumping straight into advanced activities like a narrow balance beam can frustrate a child who hasn’t built basic static balance yet. Start wide and low, then narrow the challenge gradually.
Over-relying on screens for balance games : Many balance-style video games ask kids to press buttons rather than move their bodies. True balance development requires actual physical movement, not simulated movement on a screen.
Forgetting to rotate feet or sides : Practicing a skill on only one foot or one direction builds uneven strength. Always repeat activities on both sides of the body.
Ignoring safety near elevated surfaces : Balance beams, curbs, and stairs are excellent tools, but they need close supervision, especially for toddlers and early preschoolers who are still gaining confidence.
When to Talk to a Professional
Occasional wobbling and falling is a normal part of childhood development. However, if a child seems significantly behind peers in balance, avoids physical play altogether, or shows ongoing clumsiness well past the toddler years, it may be worth mentioning to a paediatrician or paediatric occupational therapist. Balance difficulties can sometimes point to underlying vestibular or sensory processing differences that benefit from targeted support.
FAQs
1. At what age should kids start balance activities?
Most children begin developing basic balance skills between 18 months and 2 years, right around the time they start walking independently. Simple activities like standing on soft surfaces or walking short lines can start as early as this stage, with more advanced games introduced gradually through the preschool and school-age years.
2. How often should kids practice balance games?
Short sessions of 10 to 15 minutes, a few times a week, are enough to see steady improvement. Balance is a skill that responds well to frequent, low-pressure practice rather than long, infrequent sessions, so weaving activities into everyday play tends to work better than scheduled drills.
3. Do balance games help with anything besides physical coordination?
Yes. Balance activities also support focus, body awareness, and self-confidence. Because balance requires the brain and body to communicate quickly, regular practice can carry over into better concentration during seated tasks like schoolwork.
Start with the activities that match your child’s current stage, keep sessions playful rather than performance-driven, and let steady, low-key repetition do the rest. Over time, those wobbly first steps turn into the kind of confident, controlled movement that carries a child through every stage of childhood.
Also Read:
Learning Activities for Kids
Beach Games and Activities for Children
Indoor and Outdoor Physical Activities for Kid
Read more

Language Development Activities for Toddlers
Communication is a crucial aspect of cognitive development in children. Language development is essential for children to enable learning. If your child can speak and understand well, their learning and reading will also improve. If you find that your toddler has trouble with their language or hasn’t started to speak efficiently even after a certain age, you can engage them in a few fun activities that can help them develop their language skills. Toddler language development activities are easy to understand and exciting to do. We have mentioned these activities in this article that can help them develop language skills. Let’s read!
Video: 10 Language Development Activities for Toddlers
14 Activities for Language Development in Toddlers
The following communication and language activities for toddlers can help your child learn and model his language skills.
1. Play the Telephone Game
A toy telephone can be an active part of your little one’s playtime. Get a pair of toy telephones and pretend that you are dialling his number to call him. Encourage him to pick up the phone and answer. Teach him how to say ‘hello’ when he answers the phone. Doing this activity regularly can help your child develop good phone etiquette and improve his speaking skills.
2. Sing With Him
Singing lyrics of rhymes and songs can help your toddler improve his language while having fun. You may also introduce new words and teach him nouns and verbs using a song.
3. Play ‘Name the Thing’
Point to various objects in your house and ask your toddler to name them. You can help him with the names until he begins to say them on his own. This is an easy way to build and improve his vocabulary. This game can be played anywhere – your house, in the park, or even in the supermarket.
4. Speak in Complete Sentences
Ask your toddler simple questions and encourage him to speak in complete sentences. This will give him a good idea of how sentence construction works and help him construct strong, coherent sentences. Ask your child simple things like, “do you want an orange?” and teach him to respond in a full sentence. This practice will act as a strong foundation for the future, as he will be able to articulate his thoughts better.
5. Read Him Books
Reading to your toddler every night is a great way to introduce him to different words. Read him a simple book with pictures and ask him questions related to the story. You can also try pointing at images in the book and ask him to identify them. This can help improve his vocabulary and teach him to give accurate responses to the questions asked.
6. Join the Dots
Draw a dotted outline of the different letters of the alphabet. Now, ask your toddler to join these dots and identify the letter. This will enhance his motor skills and teach him to write better. You can also give him crayons or colour pencils to make the activity exciting for him.
7. Give Him Toys and Puppets
Give your toddler toys or puppets and encourage him to have conversations with them. Kids are creative and imaginative – once you show them the way, they will take over. You can also use puppets to have simple conversations with your child. Put on a puppet show to make playtime more enjoyable.
8. Match the Alphabet
Draw the letters of the alphabet on cardboard and hand it to your child. Next, give him pictures of objects and ask him to identify them. Then, ask him to match the picture with the starting letter of the object. This way, he will use phonetics to match the letters to the object, thus building his ability to spell correctly.
9. Set An Obstacle Course
If your toddler is over two years of age, you can create a simple obstacle course around the house. Give your child one instruction at a time so that he doesn’t get confused. Give him some time to complete the activity. You can also write out instructions on paper and place them around the house.
For example, if you want him to sit in a box, place a chit on the box that says, “sit inside the box.” You can then instruct him further and wait for him to follow through. Once he is in tune with the activity, you can try giving him more than just one instruction at a time and challenge him to complete it within a period of time.
Activities such as this one are best done when the child can understand simple instructions and can read. Such activities help build the expression power of the child.
10. Have Intelligent Conversations With Him
Even though your child may not be able to immediately respond to you, he will be listening keenly. Ask him for his opinions, thoughts, likes, and dislikes. Listen to him when he responds, and repeat what he said using coherent, grammatically correct sentences. This can help him express himself better and improve his articulation.
11. Stress on the Details
Whenever you are having a conversation with your child, encourage him to speak to you in vivid detail. Point out an object on the street (say, a car) and ask him what it is. When he says ‘car’, add more details to it (“It’s a car. A blue and black, long car.”). This will build your child’s vocabulary and develop his observation skills.
12. Make Animal Sounds
Children love animal sounds. So, take some animal pictures or figurines and show them to your child. Make the sound of that particular animal and make your child mimic it. This skill set is known as phonological awareness and is crucial for learning to read and write.
13. Role Play Game
Playing role-play games allow a child to explore their imagination without restrictions. As a child dress up for different roles, they also learn a few words about the character they are playing, which helps them in building their vocabulary, and, thus, enhances their language skills.
14. Tongue Twister
A fun and excellent way to teach toddlers correct pronunciation and enunciation of words. Tongue twisters help kids to train their tongues to pronounce words. Remember to start with simple ones and work your way up.
What Is Language Development Delay?
Language development delay refers to a child’s difficulty in understanding and/or using spoken language. These include:
Difficulty in responding to language
Difficulty in understanding words or sentences
Difficulty in saying first words or learning words
Difficult in putting words together to make sentences
Difficulty in building vocabulary.
What Is the Importance of Language Development for Toddlers?
Language is central to learning. Without language development, a child cannot make sense or communicate their understanding of a subject. They will need to develop language skills in order to communicate and to understand and make the most effective use of their study materials.
FAQs
1. What Are the Stages of First Language Development?
Here are the stages of language development
Stage 1: (0-6 months) Cooing or pre-talking stage
Stage 2: (6-8 months) Babbling
Stage 3: (9-18 months) Holophrastic stage
Stage 4: (18-24 months) Two-word stage
Stage 5: (24-30 months) Telegraphic stage
Stage 6: (30+ months) Later multiword stage
2. What Is Language Arts for Toddlers?
In language arts, children learn different forms of language, like symbols, sounds, gestures, and words. This involves a step-by-step approach that builds a strong foundation for children at an early age.
Your child will mimic you and learn from you, so it is important that you practice good grammar and speak as clearly as possible to help him pick up on words. Introduce new words to him on a regular basis and explain what they mean. Language development can help your toddler prepare for a successful future as he will be able to communicate better and express himself in a clear manner.
Language development is an essential part of your baby’s growth. Some children pick it instantly while some children take some time. With a little bit of patience, you can deal with any development issues. However, if you notice delayed speech and poor language skills after the age of three despite having performed these activities, consult your doctor to check for underlying causes like hearing impairment.
References/Resources:
1. Speech and Language Developmental Milestones; nidcd.nih.gov; https://www.nidcd.nih.gov/health/speech-and-language
2. Speech and Language Delay; familydoctor.org; https://familydoctor.org/condition/speech-and-language-delay/
3. Language Delays in Toddlers: Information for Parents; healthychildren.org; https://www.healthychildren.org/English/ages-stages/toddler/Pages/language-delay.aspx
4. 12 Ways to Support Language Development for Infants and Toddlers; naeyc.org; https://www.naeyc.org/our-work/families/support-language-development-infants-and-toddlers
5. Activities to Encourage Speech and Language Development; readingrockets.org; https://www.readingrockets.org/article/activities-encourage-speech-and-language-development
6. 5 Great Language Development Activities; napacenter.org; https://napacenter.org/activities-for-language-development/
7. Activities to Encourage Speech and Language Development; asha.org; https://www.asha.org/public/speech/development/activities-to-encourage-speech-and-language-development/
Also Read:
How Toddlers Learn New Words
Speech & Language Development in Bilingual Toddlers
Understanding Gender Differences in Speech Development in Toddlers
Read more
Learning Colours for Toddlers and Preschoolers – Teaching Tips and Best Activities
Children begin to notice colours at a very young age. Parents can, therefore, start teaching colours to toddlers & preschoolers by the time their little ones turn 18 months old. Babies as young as 18 months may not be able to communicate verbally but can easily point to different colours once they are introduced to them. Learning and identifying is considered a milestone in their cognitive development. Being able to distinguish colours with the help of creative activities and art helps build the cognitive pathways between visual cues and words (1). Therefore, helping children learn colours is essential at a very early age.
Why Teaching Colours to Toddlers Seems Complicated?
Your young one’s ability to recognise different colours begins to develop way before he is one year old. At the same time, he starts to notice differences in shapes, texture, and size and picks up the similarities. This is them using their visual discrimination skills and putting them in different conscious baskets to identify them separately (2). Knowing primary colours takes longer, and most children by the age of 30-36 months can name at least one colour (3).
Before you begin to teach colours to toddlers, it is crucial that you understand your child’s learning process. Especially with abstract concepts, such as colours, kids need to have accumulated a lot of information before they can understand colours. Before the concept of colour is understood, the learning might be as simple as ‘blue is blue’. Kids cannot differentiate between different shades, such as shades of blue – light blue and navy blue; neither do they have the verbal skills to explain the difference.
As kids begin learning what each colour is called, they also need to understand what each colour represents. For example, if you show your child a green apple and say the colour is green, he may associate the shape of an apple with the word green and may remember it as such. Therefore, you will also have to show him an apple that is not green, so it can act as a negative example to show the difference.
With more examples which show that green is not the shape, not the size, not the texture and not the name of an object, kids can grasp what green is. Therefore, every time you show your kid something green, but with a different quality to it, his understanding of the concept gets refined. Although it takes time, teaching colours can be easy as you can use everyday objects and different images to teach your child all about colours.
How to Teach Colours With Everyday Activities?
Teaching colours during everyday activities and routines is the best way to reinforce the concept of colours taught to kids in their preschools. Children are naturally attracted to brightly coloured objects, especially red; hence, most of their toys are strikingly colourful. Showing them an object, say, a ball, using the word “colour” along with the object’s name is a good way to teach them colours. Therefore, instead of saying, ‘This is red’, the better approach would be to say, ‘This is a ball, and its colour is red’ or ‘Please get the red ball.’ (4) The same can be done with different coloured balls.
It should also be noted that children’s receptive language develops earlier than expressive language. Kids could point at a colour long before they can say its name. Therefore, during playtime, you could ask your child to pick up all the pieces of a particular colour and put them together. It helps to stick to the primary colours – red, yellow, blue, black and white. You can add other colours later on.
Dedicating time to each colour separately is another good way to teach the concept. A “green week” or a “yellow week” works very well in helping children understand colours over time. You could wear identical-coloured clothes, paint in the same colour, or use toys with a specific colour every week. Children are experiential learners; therefore, they will learn better if they are taught to explore colours through all their senses, such as sight, smell, sound, taste, and touch.
12 Easy Ways to Teach Colours to Preschoolers
These ways to teach colours to preschoolers are fun and can help you teach your kid the concept of colours effectively. Let’s get started with exciting colour activities for toddlers and preschoolers!
1. Modelling Clay
Activities involving modelling clay is a great tool to teach colours in kindergarten. Modelling clay is highly engaging while being endlessly fun. Children can learn how to recognise colours and build different things out of the same colour. They can also mix colours to see what they get!
2. Colour Matching Games
Colour-matching games are great for teaching primary colours to preschoolers. You can make coloured cards out of any cardboard and place them on the floor or table, and get your kid to pick up matching colours. The same can be done with coloured blocks or balls with each day dedicated to a different colour.
3. Finger Painting
Finger painting is an immensely fun activity that teaches colours to 2- to 3-year-old kids. Children of that age are old enough to paint with colours, and you can start with one colour every day. The activity would be to let them have fun colouring while they tell you what colour it is.
4. I Spy Game
Play the “I Spy” game around the house and let the kids find objects of different colours. You can also play this game with an “I Spy” book that has different-coloured papers pasted on different pages, and the kids can look for them.
5. Colour Jigsaw Puzzle
Make a simple jigsaw puzzle out of cardboard strips of the same colour and let the kids pick up similar colours and put them all together.
6. Treasure Hunt
Hide a differently coloured object in a playing pit and let the kids dig out blocks of the same colour. Alternatively, you can use a bucket filled with sand to hide smaller coloured blocks.
7. Colour Fishing Game
Take cardboard sheets of different colours and cut out fish shapes. Glue a magnetic strip on each cutout. Then, take a stick and glue a string to it. On the other end of the string, carefully glue a magnet. Now, let your kid go fishing to catch all the fish in the colour of the day!
8. Colouring Books
Colouring in books is the simplest way to get kids to learn colours. Ask your child what coloured crayon he is using for each page when he’s having fun colouring.
9. Colour Days
Wear the same colour shirts on different days of the week. Monday could be yellow, Tuesday could be red, and Wednesday could be green. On those days, play with toys of the colour of the day.
10. Ribbon Dancing
Coloured streamers are available at party stores and are excellent for a ribbon dancing activity. Let the kids have fun dancing with their coloured streamer.
11. Pom Pom Colour Sorting
In this activity, kids will have to sort the coloured pom poms into categorised colour baskets. You can make the game interesting by adding the rule of picking the pom poms using either chopsticks, tongs, or safety pins.
12. Paper Tube Colour Stickers
Using just a paper tube and colour stickers, you can keep your child engaged. All you have to do is make big round dots of the size of the colour stickers. Ask your little one to match the colour on the tube by pasting the same-coloured stickers on it.
FAQs
1. Can babies and toddlers see all the colours right from infancy?
According to the American Optometric Association, it is generally believed that babies develop good colour vision by the time they are 5 months of age, even though their vision is as developed as an adult’s (5).
2. Which colours should be taught to children first?
There is no specific colour to start with, so you can teach your little one all of them from the beginning by starting with the basic ones.
3. What colours can I safely use for my little one?
You can use diluted food colours or edible paints to use in colouring activities for preschoolers and toddlers.
4. How can toddlers and preschoolers benefit from learning colours?
Learning colours aids toddlers in developing cognitive, mental, and creative skills (1). Recognizing and naming colours boosts their language abilities, allowing better self-expression. Understanding colours also enhances mathematical skills through logic, sorting, comparing, organizing, and matching (6). Engaging in colour activities can relax and de-stress toddlers with behavioural issues, improving their attention span and making them better learners (7).
These activities will help you teach your child different colours in a fun way. First, familiarise your kid with bright colours; kids have a natural affinity towards anything bright and shiny. Then, introduce him to other colours. Try to use everyday objects to reinforce the concept of colours, as it will help your kid learn colours, and various shapes and sizes. Apart from that, focus on improving other skills, too, by getting hands-on educational kits to promote overall intelligence in your child. The activities in these kits will help him work, hone other talents, and learn something new every day.
References/Resources:
1. Creative Art Helps Children Develop across Many Domains; National Cooperation Extension Resource; https://childcare.extension.org/creative-art-helps-children-develop-across-many-domains/; August 2019
2. Why is Visual Discrimination Important?; Primarily Learning; https://primarilylearning.org/lets-connect/; February 2020
3. When Do Kids Learn Colors?; New Kids-Center; https://www.newkidscenter.org/When-Do-Kids-Learn-Colors.html#google_vignette
4. Popular Activities to Teach Color Words; Primarily Learning; https://primarilylearning.org/learning-colors-name-sort-match/
5. Infant Vision: Birth to 24 Months of Age; American Optometric Association; https://www.aoa.org/healthy-eyes/eye-health-for-life/infant-vision?sso=y
6. Help Your Child Develop Early Math Skills; Zero To Three; https://www.zerotothree.org/resource/help-your-child-develop-early-math-skills
7. How Colors Can Benefit Children; Hunakai Studio; https://www.hunakaistudio.org/how-colors-can-benefit-children/; August 2017
Also Browse Coloring Pages:
Easy Colouring Pages for Kids
Animals Colouring Pages for Pre-schoolers
Vehicles & Transport Colouring Pages for Toddlers
Letters & Alphabets Colouring Pages for Children
Superheroes Colouring Pages for Kindergarten
Also Read:
Fun and Educative Colour Activities for Kids
Interactive Learning Activities for Toddlers
Language Development Activities for Toddlers
Number & Counting Games, Activities for Preschoolers
Read more

20 Best Kids YouTube Channels in 2026: Educational, Safe & Fun
This health content has been medically reviewed by qualified experts and follows the FirstCry Parenting editorial policy to ensure accuracy and reliability.
Out of the plethora of websites on cyberspace, YouTube has gained prominence like none other, among children and adults alike. Preceded only by Google, it ranks second on the list of most popular websites worldwide. However, while this popular website opens up a world of knowledge and newness to children, not everything they see can be deemed as informative or appropriate.
Hence, we have curated a list of the best YouTube channels for kids for pleasure and learning! From educational content to entertaining videos, these kids YouTube channels offer a safe and engaging experience for young viewers of all ages. Let us know if you already follow any of these top kids YouTube channels!
Do You Know What Your Kids Are Watching on YouTube?
More than ever, kids are getting hooked to the screen – and we’re not just talking TV. The exposure that children are getting to digital media is not confined to the living room any longer, but is available in portable modules like cell phones and iPads.
The American Academy of Pediatrics has stated that children are spending nearly 7 hours a day on passive screen time, which includes televisions, video games, and of course, YouTube (1). Another small study conducted by Common Sense and SurveyMonkey on 4201 parents, out of which 1024 parents had kids under the age of 18, showed that only 39% of them were “extremely aware” of what their kids were watching on YouTube, while 24% of them were “somewhat aware”.
Kids today are extremely tech-savvy, and take interest in exploring the various types of content that they see are accessible in one click. This calls for more vigilance on the parents’ part, to ensure that their tot is accessing only those options which are right for him.
Best YouTube Channels for Kids
International or Indian, YouTube has plenty of channels with kid-friendly YouTube videos on a variety of topics, be it nursery rhymes, children’s YouTube channels on science, children’s educational videos and so on. Here’s a list of the best educational YouTube channels for kids that can engage your little lot!
1. ChuChu TV Nursery Rhymes & Kids Songs
Focusing on nursery rhymes and educational songs, the videos on ChuChu TV have cute animated characters that can teach your kids all about colours, shapes, numbers and so on while sending through positive messages. Basing the main character called ‘ChuChu’ on his little daughter, the founder of ChuChu TV, Vinod Chandar launched this channel in 2013.
Subscribers: 98.1 M
Age Group: 2-6 years
2. FirstCry PlayBees
FirstCry PlayBees offers entertaining and educational content for preschoolers through playful animations, rhymes, stories, and activity-based learning videos. The channel encourages creativity, imagination, and early cognitive development, making learning enjoyable for toddlers and young children alike.
Subscribers: 2.83 K
Age Group: 2-6 years
https://www.youtube.com/@firstcryplaybees
3. CVS 3D Nursery Rhymes
One of the most popular channels for nursery rhyme videos for kids, it has plenty of songs that range across several Indian regional languages. Apart from songs, it also has a few videos of Panchatantra stories in Telugu and Hindi. This channel is definitely one of the best ways to teach your baby rhymes!
Subscribers: 38.4 M
Age Group: 2-5 years
4. Busy Beavers – Kids Learn ABCs 123s and More
At 3.17 million subscribers, Busy Beaver’s videos have catchy tunes and colourful illustrations to get kids interested in learning about the world around them, while increasing their knowledge of the English language.
Subscribers: 3.17 M
Age Group: 2-6 years
5. FirstCry Intelli Education
Designed to make early learning fun and interactive, the videos on FirstCry Intelli Education focus on developing essential skills in children through engaging educational content. From phonics and vocabulary to numbers, shapes, and storytelling, the channel helps young learners build a strong foundation while keeping them entertained with colourful visuals and easy-to-follow lessons.
Subscribers: 2.54 K
Age Group: 2-8 years
6. National Geographic Kids
Here’s a channel to boost your child’s curiousity and interest in science, nature, animals and so much more. Learn, laugh, and most importantly, explore – that’s what National Geographic aims for kids!
Subscribers: 1.9 M
Age Group: 6-12 years
7. Super Simple Songs
Super Simple Songs features a wide selection of nursery rhymes and children’s songs with simple lyrics and engaging animations. The channel’s content is designed to help young children develop language skills, rhythm, and musical appreciation through easy-to-sing-along songs.
Subscribers: 46.3 M
Age Group: 2-6 years
8. PBS Kids
PBS Kids is known for its educational programming that combines entertainment with important life lessons. The channel offers a variety of videos that promote creative thinking, problem-solving, and social-emotional development. Its content is crafted to support early childhood education while keeping children entertained through beloved characters and engaging stories.
Subscribers: 3.54 M
Age Group: 3-8 years
9. BabyBus – Kids Songs and Cartoons
BabyBus offers a diverse range of educational videos focused on preschool learning, including topics such as healthy habits, safety, and social skills. The channel’s colorful animations and interactive content make learning enjoyable for young children.
Subscribers: 43.7 M
Age Group: 2-6 years
10. Little Baby Bum – Nursery Rhymes & Kids Songs
Little Baby Bum provides a vast collection of nursery rhymes and children’s songs with delightful animations. The channel’s content is designed to entertain and educate young children, promoting early language development and musical enjoyment.
Subscribers: 41.7 M
Age Group: 1-5 years
11. KIDZ BOP
KIDZ BOP features popular songs performed by kids for kids, with family-friendly lyrics and energetic choreography. The channel’s music videos offer children a fun and safe way to enjoy current hits while engaging in dance and singing activities.
Subscribers: 5.4 M
Age Group: 5-12 years
12. Art for Kids Hub
Art for Kids Hub features weekly art lessons that inspire children to explore their artistic talents. Rob, the channel’s creator, provides easy-to-follow drawing tutorials and craft projects that cater to various skill levels. The channel encourages creativity and self-expression through a variety of art techniques and projects.
Subscribers: 10.3 M
Age Group: 5-12 years
13. Blippi – Educational Videos for Kids
This is a well-known YouTube channel name for kids. Blippi’s channel combines education and entertainment with lively adventures that teach young children about various topics, including numbers, colors, and everyday objects. Blippi’s energetic and playful approach makes learning enjoyable for preschoolers, with videos that often feature visits to interesting locations and hands-on activities.
Subscribers: 27.2 M
Age Group: 2-6 years
14. Peppa Pig – Official Channel
The official Peppa Pig channel offers episodes of the beloved animated series, featuring Peppa and her family as they navigate everyday life. The channel’s content is designed to entertain young children while providing gentle lessons about family, friendship, and problem-solving through relatable scenarios and charming storytelling.
Subscribers: 43.8 M
Age Group: 2-5 years
15. Mother Goose Club
Mother Goose Club features a rich collection of nursery rhymes and educational videos with engaging characters and colourful animations. The channel’s content is designed to support early literacy and language development through familiar rhymes and interactive songs that capture the attention of young learners.
Subscribers: 9.88 M
Age Group: 2-5 years
16. SciShow Kids
SciShow Kids offers engaging educational videos that answer fascinating scientific questions and explore a variety of topics in an age-appropriate manner. The channel’s content is designed to spark curiosity and make learning about science enjoyable and accessible for young children.
Subscribers: 1.63 M
Age Group: 5-10 years
17. The Wiggles – Kids Songs and Nursery Rhymes
The Wiggles channel features music, dance, and fun activities based on the popular children’s music group. The channel’s content includes interactive performances and educational songs that help preschoolers develop rhythm, coordination, and early learning skills through entertainment.
Subscribers: 10.5 M
Age Group: 2-6 years
18. Ryan’s World
Ryan’s World offers a variety of content, including toy reviews, science experiments, and fun challenges. Ryan’s engaging personality and playful approach make the channel a popular choice for young children who enjoy discovering new toys and participating in entertaining activities.
Subscribers: 40.3 M
Age Group: 3-8 years
19. TED-Ed
TED-Ed provides a range of animated educational videos on diverse topics, from history to science to literature. The channel’s content is designed to foster intellectual curiosity and critical thinking in older children through engaging visuals and thought-provoking content.
Subscribers: 22.6 M
Age Group: 10-15 years
20. Cosmic Kids Yoga
Cosmic Kids Yoga combines storytelling with yoga exercises to create a fun and interactive way for children to practice mindfulness and physical activity. The channel’s videos help kids build strength, flexibility, and focus through imaginative adventures and yoga routines.
Subscribers: 1.95 M
Age Group: 3-8 years
The Impact of YouTube on a Child’s Development
YouTube, no doubt, ranks high on the list of everyone’s favourite cyber destinations – and no wonder why! With videos across a whole range of topics under the sun, there is no dearth of information on this search engine. But kids as an audience are a tricky lot, especially because they tend to imbibe and incorporate the things they learn into their daily lives. And YouTube being a primary source of entertainment for most children today, there are benefits and side-effects that result from their exposure to this website.
Benefits of YouTube Videos for Kids
Watching YouTube videos provides the following benefits to kids, provided that the content is age-appropriate.
YouTube, being a global platform, offers kids a wide view of various cultures, languages, foods, clothing and so on.
Visual aids and communication are more effective in teaching children concepts, as opposed to restricting them to conventional textbooks, pen and paper.
Educational videos are presented in an entertaining manner, with illustrations and cartoons, which holds the attention span of kids more.
Videos focused on toddlers help them develop their vocabulary, be it in English or their regional language.
Watching videos can also help kids develop various interests and talents. When they see people showcasing their talents, they try to learn and experiment with the same.
Side-Effects of YouTube Videos for Kids
The following are the disadvantages posed to kids by watching YouTube videos.
It’s commonly noticed that with children getting increasingly engaged in watching videos, their tendency to indulge in good old outdoor play with other kids their age also reduces. This poses a challenge to their social skills.
Kids are not the best at judging what is ‘too much’, and therefore, they do not realise when they are getting addicted to something. An addiction can negatively affect their mental and emotional development. Quoting Dr Delaney Ruston of Stony Brook University Hospital, “it releases a hormone in the brain, dopamine, that is so rewarding, kids want this more and more. And therefore when they are not on these highly stimulating screens, they actually can get really agitated”, when kids get absorbed in a screen of some sort.
If parental control is not properly installed, you may find that your kid can come across inappropriate content that is violent graphic or mature in nature. There have also been instances where cartoon videos that seem innocent take nasty or gory plot twists – a harmful prank by several YouTube accounts. In fact, the Common Sense and SurveyMonkey online poll revealed that 62% of parents have known that their kids have come across inappropriate content online.
Parental Control for YouTube
Exercising caution over the content your child gets to watch is important for his own benefit. There are a few things that you, as parents and educators, can do to ensure that the child’s exposure to YouTube isn’t bordering on unhealthy addiction.
Regulate the Child’s Screen Time – Limiting screen time is crucial for both children and parents. Ensure that the device is being used in an area of the house where the content is visible to you. Say no to devices at mealtimes, and keep updating the WiFi password. This teaches kids to follow a routine and not go overboard with their favourite pastime, too!
Set Parental Control to YouTube Videos – Log in to your YouTube account, which is probably the same as your Google account. Click on the ‘Account’ option that can be seen in the upper-right corner of the YouTube homepage. Select ‘Restricted Mode’ and ensure that it is set to ‘On’. Prevent your child from turning it off by logging out of your account when you leave, as YouTube does not allow a change in this setting unless you’re signed in. Also, ensure that this feature is set to ‘On’ on every device your child uses.
Install the YouTube Kids App – Available for iOS and Android, the YouTube Kids app features content that is only for kids. You can set the preferences depending on what you would like your child to watch, set his age as a parameter, and use your Google/YouTube account for the same. The app requires an adult to sign up for it and can also restrict your child from searching for other content, if the settings are managed accordingly.
Create an Account for Sharing Access – You can also sign up and create an email ID that you and your child can share for watching YouTube. This way, you can keep track of what he’s watching by looking up the search and watching history.
Create Playlists – For very young ones, creating an extensive playlist of videos that you have watched and are okay with your kid watching restricts him to those choices alone.
Always, Always, Always, Log Out – While wasting even three extra seconds on the login process of your personal ID seems inconvenient, it’s the best way to ensure that your child doesn’t accidentally mess with the settings and stumbles into something he shouldn’t have seen.
Spend Time Watching Videos With Them – Dora the Explorer may test your patience rather than your observational skills, but watching your child’s favourite videos with him makes for a fun bonding session. You’ll be surprised to hear what your little one seems to be learning from these shows!
Keep Communication Open – Being the vast space that the internet is, your kids can run into inappropriate content, whether on or off YouTube. Ensure that your child is comfortable enough to talk about what he saw by keeping lines of communication open. Teach him to tell a trusted adult, use the ‘Back’ button, or turn off the screen if he does come across something he finds too mature for his liking.
What If Your Child Wants to Create His Own YouTube Channel?
WhatsApp, Snapchat, Instagram, Dubsmash, Musically – the list of apps that kids today use is ever-growing. A common feature across many of these platforms is the ability to create videos and customise them with filters and modes to make them more interesting. Children will also be coming across videos on YouTube made by kids their age, which can, in turn, have you suddenly deal with your own child expressing the desire to become a YouTube star!
So what do you do?
Technically, YouTube is for users over the age of 13, as kids are exempt from the data collection that Google (YouTube’s parent company) does for market research purposes. However, if done under controlled circumstances, your child can take to expressing his creativity and talent on this large global platform.
To begin with, use your own account or create an email ID that provides you with access, regardless of whether your child is under 13 or just over. This ensures that you’ll get alerts and notifications and keep track of what is getting uploaded. The child can still have full directorial control on the creative aspects of the video!
Don’t provide your child’s real name, and definitely, do not publicise any personal information. Also, ensure that the toggle is set to ‘On’ in Restricted Mode.
Monitor the contents of the video that the child wants to upload. Check for anything inappropriate he might say or do and if it is suitable for other kids to see as well.
Disable comments. One of the biggest curses of today’s social media culture is the presence of online trolls everywhere. Hiding behind a veil of anonymity gives them the power to indulge in cyberbullying, which can cause serious damage to your child’s mental state. Turn off the comment section and only have feedback provided by his well-wishers.
Set the privacy to private or unlisted, which means that you can control who gets to see your child’s view. Although, keep in mind that under the unlisted privacy setting, those with a link to the video are the only ones who can see it. But make sure that this link doesn’t fall into the wrong hands – or phone!
As the child grows older and wants to keep the channel running, you can discuss ideas for content and slowly open it up to the public.
FAQs
1. How can I find educational YouTube channels that also include interactive elements?
Look for good channels that incorporate quizzes, prompts for viewers to respond in the comments or interactive content within their videos. Channels that use these features can make learning more engaging and participatory for children.
2. What is the right age for children to watch YouTube?
Experts generally recommend avoiding screen time for children under 2 years, except for video calls. Children aged 2 years and above can gradually watch age-appropriate YouTube videos in moderation. Parents should always ensure the content is safe, educational, and suitable for their child’s age (2).
3. Can YouTube help children learn new skills?
Yes, YouTube can help children learn a variety of new skills, including drawing, dancing, singing, storytelling, science experiments, language development, and basic mathematics. Educational kids YouTube channels make learning interactive and engaging through visuals, songs, and hands-on activities.
YouTube is one of the best portals for kids to learn, explore, and understand the world around them. Although there are certain disadvantages to watching it continuously, restricting it altogether is not required. Keep an eye on your child’s surfing habits, ensure that their regular activities are not inhibited because of their indulgence in YouTube, and keep communication with your kids open so that they know they can approach you for any query!
Also Read:
Internet Safety Tips for kids
Good Kid-Friendly TV Channels
Best Animation Movies for Kids to Watch
Educational Movies that Kids Will Enjoy
Disney Channel Shows for Kids to Watch
Best Cartoons For Kids that They Will Love To Watch
Read more

40 Father's Day Card Ideas for Kids
Father’s Day is the time when dads are made to feel great about themselves, and children all over the world celebrate the fathers who brought them into the world. Rather than spending a lot of money on things Daddy may soon forget about, this homemade fathers day card ideas, have your child make him something special. There are lots of DIY projects suitable for kids of all ages. However, one gift that always makes it to the father’s office desk is a beautifully made card. This Father’s Day, get your child to make a stunning Father’s Day card with one of these card ideas.
Homemade Father’s Day Greeting Card Ideas for Children
If you are looking for some inspiration for cards you can make with the kids, here are some great handmade Father’s Day card ideas:
1. I Love Hangin’ Out With You
Here is how to go about making this Father’s Day card.
What You Will Need:
Brown Paint
Green squeeze paint
A4 size Light brown paper
A pair of googly eyes
Glue
Black felt pen
Heart stickers
A blank greeting card
Pencil
How to Make:
Help the kid paint his palms and four of his fingers brown. Do not paint the thumb.
Press the handprint onto the front side of the blank greeting card.
Now, on the brown paper, draw a circle for the head, two semi-circles for a pair of ears, a tail. Cut along the outlines.
Stick the head where the thumb would have been.
Stick the ears and the tail, and then paint the face and nose onto the monkey.
Stick the googly eyes.
With the green paint, have the kids make some tree branches below and around the monkey.
Use the heart stickers for fruits hanging on the tree.
Write “I Love Hangin’ Out with You” inside the card.
2. I Love You Berry Much
This Father’s Day card is one of the sweetest ways to surprise your father. Here is how you can go about it.
What You Will Need:
Blank greeting card
Black marker
Purple, red, and green paint
Small paintbrush
How to Make:
Mix the purple and red-coloured paint together. You need to aim for a rich raspberry tone.
Have the little ones dip their little fingers into the paint and start printing out the shape of a raspberry.
With a brush and green paint, make the leaves and stem of the fruit.
To give it a 3D effect, take some purple paint and lightly go around the individual prints.
Write “I Love You Berry Much, Daddy” inside the card.
3. My Best Teddy Bear
This time, gift your dear old man a cute little teddy bear Father’s Day card along with a big bear hug!
What You Will Need:
A blank greeting card
Black marker
Brown paint
A pair of googly eyes
Blue ribbon bow
Paintbrush, soft blending brush
How to Make:
Dip your little one’s foot in the brown paint and then make an imprint on the paper.
Using a paintbrush, blend the print out so that most of it has a brown colour. Don’t be rough, as you do not want to smudge the print.
The heel will be the head, so paint the ears on the heel.
Stick the googly eyes at the appropriate place and draw the nose and mouth.
Stick the ribbon where the neck should be.
Write “Happy Father’s Day to My Best Teddy Bear” inside the card.
4. Following in My Daddy’s Footsteps
Every child idolises his father. This handmade Father’s Day card is one way you can let him know how much you look up to him.
What You Will Need:
Orange and brown paint
Paintbrush
A blank greeting card
Dad’s shoe
How to Make:
Paint the bottom of dad’s shoe brown and make a shoe print on the blank card.
Paint the little one’s foot orange and make an imprint of it inside the shoe print.
On the side, write “Following…” and inside the card, write, “…in My Daddy’s Footsteps”.
5. I Heart Daddy
This is the simplest and the most cutest Father’s Day card to make on this special occasion.
What You Will Need:
A4 size white card paper
Scissors
Crayons
A blank greeting card
Pencil
Glue
How to Make:
With a pencil, draw a heart and letters “I”, “D”, “A”, and “D” on the white card paper. Cut along the outline.
Colour the cutouts with crayons.
On the front side of the greeting card, stick the cutouts to form “I heart DAD”.
Once the glue dries, let your little one go crazy colouring all over the greeting card.
Once done, she can gift it to her Daddy on Father’s Day.
6. Fishing You Happy Father’s Day
Father’s Day is all about enjoying every moment with your father. This handmade Father’s Day is another way you can wish your daddy dearest.
What You Will Need:
Colouring page with the shape of a large fish
Coloured crepe paper, cut into squares
Card paper/ A blank greeting card
A pair of googly eyes
Marker
Glue
How to Make:
Show your little one how to glue the crepe paper onto the fish.
Stick the googly eyes in place.
Cut out the fish from the paper and stick it onto the blank greeting card.
Write “Fishing You a Happy Father’s Day” inside the card.
7. You Love Pasta, and I Love You
This creative handmade Father’s Day card is a special treat for pasta lovers. Here’s how you can make one.
What You Will Need:
Cardstock paper
1 bowl butterfly pasta
Small paintbrush
Paint
Markers
Glue
How to Make:
Spread out the butterfly pasta on some old newspapers and let your kids paint them in their favourite colours.
Let the paint dry.
Take the card stock paper and fold it in half.
Stick the pasta bowties and write a lovely message, “You Love Pasta, and I Love You!”
8. When You Hold My Hand…
Father’s are the support system of every family. Express all that you feel for your dad in this beautiful handmade Father’s Day card.
What You Will Need:
Card paper
Coloured crepe paper, cut into small squares
Paint
Marker
How to Make:
Fold the card paper in half.
On top of the card paper, with a marker, write “When You Hold My Hand…”
Paint your little one’s palms and fingers one colour. Print the handprint inside the card.
Under the handprint, write “I Feel So Loved!”
Under this, draw a heart shape.
Put some glue inside the heart and let your little one fill it in with crepe paper.
9. It Takes a Big Heart to Hold Little Hands
Cherish your father’s selfless contribution with this cute little handmade Father’s Day card.
What You Will Need:
Two shades of paper – 1 each
Glue
Scissors
Print
Black marker
A blank greeting card
How to Make:
Trace your baby’s hand on the darker shade of paper and then cut it out.
On the lighter shade paper, cut out a big heart.
Stick the big heart into the hand cutout and write the message, “It Takes a Big Heart…”
Stick this palm cutout on the front side of the card.
Inside it, write, “…to Hold Little Hands! Happy Father’s Day, Papa!”.
10. You Are My Sunshine
This easy homemade Father’s Day card idea is for the sunshine in your family.
What You Will Need:
1 bowl spiral pasta
A blank greeting card
Yellow paint
Glue
Black marker
Paintbrush
How to Make:
Paint each of the spiral pasta yellow.
Draw a big yellow circle at the centre of the front side of the greeting card.
Make lines around the sun with some glue.
Stick the spiral pasta onto the glue.
Make a smiley face on the sun and write “Daddy, You are my Sunshine” on or above it.
Follow this with a heartfelt poem or a message inside the card.
11. You Make Me Feel So Fly
Most dads may look tough, but they have sensitive hearts. This homemade Father’s Day card idea is best suited for the dads who put your needs before theirs.
What You Will Need:
A4 size coloured card paper
A4 size coloured paper
Glue
Scissors
Pencil
Ruler
How to Make:
On the coloured paper, draw small hearts and cut them along the outline. These will be used as balloons.
Fold the card paper in half.
Get your little one to stick the balloons onto the paper.
Then have your toddler draw lines to connect them to a point on the bottom.
Underneath, write “You Make Me Feel So Fly”.
12. Hooked Onto Daddy
This Father’s Day card idea is a fascinating one to tell your father how much you love him!
What You Will Need:
Coloured Papers
Marker
Double-sided tape
Paints
Paintbrush
Blank greeting card
How to Make:
Dip your little one’s hand in paint and use the handprint to make the fish on blue-coloured paper.
Cut a hook and a heart from the two different sheets of coloured paper. Use a different colour for each of these cutouts.
Stick the paper onto the blank greeting card.
With the paint, your little one can add any other decorations and a message stating “Hooked onto Daddy”.
13. I Love You This Much
Sometimes, telling your father how much you love him is the best thing to do. With this handmade Father’s Day card, you can tell him that!
What You Will Need:
A4 size craft paper (folded in half)
Coloured paper – 2 sheets, glued horizontally to make one long sheet.
Scissors
Glue
Marker
Pencil
Decorative items – sequins, buttons, ribbons, etc.
How to Make:
Trace the shape of your child’s palm on the folded chart paper and then cut along the outline. Make one more palm-shaped cutout this way.
Fold the long sheet of paper, write “This Much!”
Then fold it into the shape of an accordion and glue each side to one of the hands.
On the outside of the first palm cutout, write “I Love You”.
Then, let your child decorate the rest of the card the way he wants to.
14. One in a Minion
If you’ve had the best time of your life watching minions with your daddy dearest, this Father’s Day card idea is the best way to tell him how much you adore him.
What You Will Need:
Yellow and blue paint
Two A4 size white sheets of paper
A6 size pink-coloured paper – 1
Black marker
Bottle with cap
Glue
Pencil
How to Make:
Have the children paint the bottle with some yellow paint. Let the paint dry.
Then use the blue paint to make the dungaree/overalls on the bottle. Let it dry.
Cut a small circle from a white paper and glue it to the bottle cap to make the goggled eye of the minion.
With a black marker, make a black inside the white circle to complete the eye.
Using the marker, make the hair on the top of the bottle cap.
Then, draw the straps of the goggle and the mouth underneath it.
Now, take another white paper and draw the feet/boots, and the hands, and cut along the outline.
Colour the hands in yellow paint and the boots in black paint on both sides. Let the paint dry.
Cut out a heart from the pink paper and write a sweet message, “You Are One in a Minion”.
Stick the pink heart on the overalls.
15. I Love Your Moustache
This handmade Father’s Day card is perfect for fathers who cannot get enough of their moustache.
What You Will Need:
A4 size coloured paper – red and black, 1 each
A4 size Card paper – 1
Pencil
Scissors
Glue
How to Make:
Fold the card paper in half.
Draw a heart on the large red paper and cut along the outline.
Draw a moustache on the black paper and cut along the outline.
Stick the red heart on the folded card paper.
Stick the moustache on the red heart right in the place a moustache would be on a face.
Write a sweet message underneath the moustache.
16. You Are My Life Vest
Celebrate your father’s life with this handmade Father’s Day card and express how grateful you are for being your greatest support system.
What You Will Need:
Papers – Orange, black, blue, and brown, all in A4 size
A4 size white card paper
Scissors
Glue
Marker
Pencil
How to Make:
Take the orange paper and cut slits for the arms.
Bring both the edges towards the middle and fold.
Make small straps for the life vest with the black paper.
Cut an oar out of the brown paper.
Cut out waves with the blue paper and stick it onto the white card paper.
Stick the oar and vest on top of the folded card paper, and inside, write a message “You Are My Life Vest”.
17. To the Best Dad on Earth
Here is how you can make this beautiful Father’s Day card for your daddy dearest.
What You Will Need:
White card paper – folded in half
Foam paper – in blue, green, black colours
Googly eyes
Scissors
Glue
How to Make:
Cut the blue foam paper into a circle to make the earth and stick it on the white card paper.
Cut the green foam into continent-like shapes and stick it onto the blue foam.
Cut a moustache out of the black paper.
Stick the eyes and moustache on the circle.
Inside the card, write “To the Best Dad on Earth”.
18. Yoda Best, Dad
This Father’s Day card is for all the Star Wars Dads!
What You Will Need:
Paint – Pale green and brown
White card paper – Folded in half
Black marker
Paintbrush
How to Make:
Paint your child’s fingers brown and palm light green and have them make an imprint on the front page of the folded white card paper.
With a marker, outline Yoda’s face and robe.
Fill in the face and ears with the light green colour.
Add lines on the forehead, ears, mouth and nose.
With some grey colour, add hair on the ears and head.
Finally, once the finishing touches are done on Yoda, add the message “Yoda Best, Dad” inside the card.
19. You’re Reel-y Awesome, Dad
This Father’s Day card is perfect for the awesome dad! Here’s how you can make one.
What You Will Need:
Gummy fish/worms
String
Glue
Marker
Toothpick
White card paper
How to Make:
Fold the card paper in half.
Stick the toothpick on one side of the paper and stick some of the string as if it is coming out of the toothpick to make the fishing rod.
Stick the gummy fish or worm at the end of the string as bait.
Inside the card, write the message “You Are Reel-y Awesome, Dad”.
20. You’re the Ketchup to My Fries
Here is how to go about making this homemade Father’s Day card.
What You Will Need:
Yellow craft paper for fries
Colour Fry Box image printed out on paper
Glue
Scissors
Black felt pen
How to Make:
Cut out the PDF fry box into the right shape and stick it together.
Cut the yellow paper into smaller rectangular bits for fries.
On the outside of the fry packet, write “You’re the Ketchup to My Fries”.
On the fries, write down on each fry a thing that your little one thinks makes Daddy great.
21. You Make My World Go Round and Round
What’s a world without some excitement? Here’s how you can tell the dad how he makes the world go round for your child.
What You Will Need:
A4 size white paper
A4 size card paper
Scissors
Ruler
Pencils
Crayons
Black marker
Glue
Cardboard
How to Make:
Draw a circle on the white paper and divide it into eight equal parts like a pizza.
Colour each slice a different colour.
Write down different things that your kid can do with Daddy like “Watch TV together”, “Backrub”, etc.
Cut out the circle and then glue it onto the card paper.
Make a small arrow out of the cardboard and make a hole at the centre of the spinning wheel.
Stick the arrow on the top right corner of the card, overlapping a bit on the circle.
Inside the card, write a sweet Father’s Day message.
22. Daddy, You’re Grrreat
For a grrreat dad, you need a grrrreat Father’s Day card. This is how you can make one.
What You Will Need:
Paint – black, red, white and skin colour
Googly eyes
Black sharpie
Card paper
How to Make:
Paint four of your child’s fingers black. Leave the thumb clean.
Paint the palm with the skin colour.
Paint above that with a line of red.
Press the hand onto the paper.
With the black paper, cut out a pirate hat.
Make a skull and crossbones out of white paint.
Stick the googly eyes and make an eye patch with the marker.
Draw a smiley face and write, “Daddy, you are grrreat!”.
23. You’re Tee-rific, Dad
Here is how to make this interesting Father’s Day card.
What You Will Need:
Green card paper
Golf tee
White paint
Scissors
Black marker
How to Make:
Fold the green card paper in half, and on the first half, make two slits and stick a golf tee inside it.
Dip the little one’s fingers in paint and create a golf shape above the tee for the golf ball.
Write “You Are Tee-rific, Dad!” inside the card.
24. You Protect Me Like a Lion
The lion of the house needs a little pampering. Tell him how much the kids love him with this Father’s Day card idea.
What You Will Need:
Coloured sheets of paper – yellow and white
Paint
Black marker
Fork
Glue
How to Make:
With a pencil, make a circle on the yellow paper and slowly add the rest of the face.
Cut out the eyes using white paper and draw the pupils with the black marker.
Stick the eyes in place.
For the mane, your young one can dip a fork in the paint and begin to imprint the mane around the head.
Write “You Protect Me Like a Lion” on the card.
25. You’re Out of This World
This card is a sweet way to tell the father how awesome he is! Read on to know how you can make this Father’s Day card.
What You Will Need:
A4 size card paper – White and green, 1 each
Glue stick
Pencil
Scissors
Marker
How to Make:
Take the green card paper and fold it in half.
Cut it into the shape of an alien head.
Cut the white paper into two oblong circles for the eyes. You may use a pencil to trace the eyes beforehand.
Draw pupils in the eyes and stick the cutouts on the card.
Out of the white paper, cut a small oval and write “You Are Out of This World, Dad”.
Stick that inside the card.
26. We’re the Champions, Dad
This Father’s Day card idea is perfect for the champion fathers!
What You Will Need:
White foam ball
Scissors
Card paper – Light green and blue, 1 each
Tape
Marker
How to Make:
Fold the blue card paper in half.
Cut the foam ball in half.
Trace the kid’s hands on the green paper, and cut it along the outline.
Stick these on the blue paper as grass.
Stick the ball on top.
Decorate the football with the marker and write, “We’re the Champions, Dad!”.
27. Guess Whooo Loves You Very Much?
Add an element of fun into your Father’s Day card with this interesting idea.
What You Will Need:
Coloured paper – White, black, green, blue, yellow
Scissors
Glue
Marker
Pins
Picture of father and child
Pencil
Blank greeting card
How to Make:
Draw an outline of an owl on the blue paper, and cut along the outline.
Draw and cut two round circles out of the white paper.
Draw and cut two small black circles for pupils.
Draw and cut two half circles out of the green paper.
On the yellow paper, draw a small triangle for a beak and two semi-circles for the wings. Cut along the outline.
Stick everything on the blank greeting card at the appropriate place except for the wings.
The wings should be added on with the pins inserted in the place where the shoulder joints would be.
Bend the back of the pins so they stay in place.
Put a small piece of tape on the pins on the backside so they do not prick.
The wings will move back and forth over the stomach of the owl.
Stick the picture of the Daddy and child on the stomach so that it is covered by the wings when they are down
On the wings, write, “Guess Whooo Loves You Very Much?”
28. Daddy No. 1
Every dad deserved to know he is number one for his kids. Here’s how you can make this handmade Father’s Day card.
What You Will Need:
Card paper – red, blue and white
Scissors
Glue
Gold glitter
Pencil
How to Make:
Draw a circle and three triangles on the blue-coloured paper, and cut along the outline.
Glue the triangles behind the blue circle with the corners sticking out to form even ridges along the edge of the circle.
Cut out two long rectangular pieces of red and blue paper and stick them underneath the circle. These are supposed to be the ribbons.
Write “Daddy No. 1” in glue and cover with glitter.
Dust off and then stick it on a white card paper.
Cut out stars from the coloured papers and stick them on.
29. Daddy Cool
This Father’s Day card is apt for the coolest dad and the dad who likes the coolest ice cream. Here’s how you can make one.
What You Will Need:
Bright green and pink card paper – 1 each
Glue
Scissors
White card paper
Googly eyes
Marker
Ice cream stick
Pencil
How to Make:
On the green paper, draw the shape of a stick ice cream with a bite taken out of it.
Cut it along the outline.
Glue the ice cream stick on the lower backside of the ice cream cutout.
Make sure it is slanted, and then glue the whole thing to the white card paper.
Stick the googly eyes onto the ice cream.
Cut out pink circles from the pink paper (for the cheeks) and stick them on the ice cream cutout.
With a marker, draw a mouth.
Write “Happy Father’s Day, Daddy Cool!”.
30. I Ruff You
This cute Father’s Day card idea will surely remind the father of the times when he spent hours teaching your little one how a dog barks.
What You Will Need:
Scissors
Glue
Googly eyes
Marker
Pencil
Brown foam
How to Make:
Draw a dog silhouette on the brown foam.
Cut it out.
Stick the googly eyes.
Draw the mouth and nose with the marker.
Stick this onto the white card paper and write “I Ruff You Dad”.
31. Father’s Day Vest Card
This card is a great idea for fathers who love wearing vests.
What You Will Need:
Coloured paper
A blank card
Pencil
Glue
Button
Ribbon
Crayons
Marker pen
Scissors
How to Make:
Using the blank card as a template, trace a rectangle on the brown-coloured paper. Then, arrange the paper such that the length of the rectangle is horizontal. Draw two triangles starting from either side of the rectangle.
Take the card and let your child colour it with crayons.
Then, using more crayons and a marker pen, write a sweet message for his father.
Then, keep the card on top of the brown paper and bring both the triangles over it such that the card is wrapped inside it.
Use some glue to stick the triangles at the point they meet. Then, glue a button on it.
Take some white-coloured paper and cut a two-inch long, and an inch thick strip. Colour it in the colour of the card. Bring the ends of this strip together at the centre and push them down so that it resembles the collar for a shirt. Stick the ends and glue the collar at the top centre of the card as shown in the image.
Then make a bowtie from the ribbon and stick it slightly below the collar (refer to the image given).
You may then decorate the brown paper to make an attractive vest.
32. Father’s Day Picture Card
This is a sweet and simple way to wish your father this Father’s Day.
What You Will Need:
A blank card
Crayons
Marker pen
Glue
A picture of you and your father
How to Make:
Take the blank card and draw a cloud-like figure large enough to have some empty space in the centre. In this space, write, “Happy Father’s Day!”
On the outside of this outline, freestyle some more clouds and draw some stars.
Colour these in your favourite colours.
Then, paste a picture of you and your father, or the entire family in the centre.
Inside the card, write a sweet message or a wish for your dad.
33. M&M Bow Card
This is indeed the sweetest Father’s Day card you can make for your dad!
What You Will Need:
Cardstock paper
Ribbon
Glue
M&Ms
How to Make:
Tie a ribbon in a knot around the middle of the M&Ms bag.
Make sure that each side is evenly filled.
Glue or attach it to the bottom of the card.
Write “Happy Father’s Day! love, your little peanut” above it.
34. Following the Footsteps Card
We declare it the cutest Father’s Day card! This card makes a wonderful keepsake, and daddy will LOVE it!
What You Will Need:
Orange and brown paint
Father’s shoe
Plain card
Baby’s shoe
How to Make:
Take dad’s shoe and paint the bottom of the shoe brown.
Stamp it on the piece of card.
Now paint your baby’s shoe bottom with orange paint and stamp it inside the middle of the dad’s shoe print.
Write “Following in my daddy’s shoes” and add a little heart after it.
35. Tools Father’s Day Cars
This one is a simple card made with some colourful paper tool cutouts. Here’s what you need.
What You Will Need:
A4 size coloured construction paper – 1 nos.
Coloured sheets of paper
Sketch pens
Glue
Pencil
Scissors
How to Make:
Fold the A4 sheet in half.
Now, take the colourful sheets and draw shapes of the tools you often see your dad using when mending things at home, such as a screwdriver, a hammer, scoop, nails, screws, etc.
Carefully cut each shape and stick them randomly on the top of the card.
Now, with a sketch pen, write down a beautiful Father’s Day wish inside the card.
36. Tie and Pocket Father’s Day Card
What You Will Need:
A4 size coloured construction paper – 1 nos.
Coloured sheets of paper – 2 nos.
Sketch pens
Glue
Pencil
Scissors
How to Make:
Fold the A4 sheet from the centre and keep it aside.
Then, take the coloured sheets of paper and draw a tie shape on one sheet, and a pocket shape on the other. You may refer to images online to get the shape right.
Then, using a scissor, cut the shapes.
Stick the tie cutout to the right, on the top of the folded A4 sheet.
Apply glue only along the edges of the pocket cut out, and stick it on the card, to the left of the tie.
Cut another little square or triangle from the remaining paper. Write ‘To, Dad’ on it, and slip it inside the pocket. You can fold the paper if it’s a bigger size.
Using a sketch pen, write your thoughts and feelings inside the card.
37. Father’s Day Trophy Card
What You Will Need:
A4 size coloured construction paper
Sketch pens
Pencil
Scissors
How to Make:
Fold the A4 sheet in half to make your card.
Then, use a pencil and draw the shape of a trophy on the card, such that the left handle of the trophy is the folded part.
Now, cut along the outline leaving the left side handle as it is.
This way, you get a trophy-shaped card that opens from the right and is attached on the left.
Now, use the sketch pens and write a beautiful Father’s Day message inside the card.
On the top of the card, write ‘No. 1 Dad’” and colour it in your favourite colours.
38. Palm Print Father’s Day Card
This is the easiest Father’s Day Idea and is, therefore, perfect for toddlers. Of course, mothers and older siblings need to help them, but it is fairly simple to make.
What You Will Need:
A4 size coloured construction paper – 1
A6 size black construction paper – 1
Sketch pens
Glue
Pencil
Scissors
How to Make:
Take the A4 sheet and trace the palm with a pencil.
Now, cut it along the outline.
Take the white A6 size paper and draw a moustache on it.
Cut it along the outline and colour it black.
Now, take the palm cutout and draw some hair and a pair of eyes.
Then, stick the moustache with some glue.
On the backside of the card, write a beautiful Happy Father’s Day message for your dad.
39. Handprint Tie Card
This card is both fun and personal — with a handprint tie to show your love!
What You Will Need:
Colored paper
Paint (any color)
Scissors
Glue
Markers
How to Make:
Fold a piece of paper in half to form a card.
Paint your hand and press it on another sheet to make a handprint.
Cut out the handprint in the shape of a tie.
Glue the “tie” onto the front of the card.
Write “You’re the best, Dad — hands down!” inside.
40. Nuts About You Card
A clever and fun card that’s perfect for the handy dad who loves tools!
What You Will Need:
Grey or white cardstock
Real or paper nuts/bolts/screws
Glue
Marker
How to Make:
Fold the cardstock to make your card base.
Glue a few real (or drawn) nuts and bolts on the front.
Above the tools, write “I’m nuts about you, Dad!”
Decorate with hearts or mini tool drawings for extra charm.
It’s always nice to get new things from the stores, but those gifts often lose their charm. These DIY Father’s Day cards are so much more special to daddy because he will be able to see the love and effort you have put into making him something special. So, whether it is for preschool kids, toddlers, or older kids, these Father’s Day card ideas are sure to work their magic!
Also Read:
Father’s Day Memes
Father’s Day Poems for Kids
Father’s Day Quotes and Wishes
Father’s Day Games & Activities
Gifts for Dad on this Father’s Day
Read more
Sound Words and Substitute Pronunciation in Toddlers
It’s definitely a moment of joy when your little one starts communicating with you through speech. However, substitute pronunciation in toddlers can often leave the adults confused. Understanding what the baby wants to convey can take some time. So, how should you go about it?
The cooing sounds your baby makes are music to your ears and you eagerly wait for the day when your little one would start speaking. But when this happens, you might find that the baby’s words just don’t make any sense. Well, most toddlers start speaking in a language that seems alien to their parents. However, with time and some practice this can improve. Simplify the babble by learning how.
Hard Words for Kids to Say
Do you know why your munchkin’s words don’t make any sense to you? It’s just because babies generally prefer to leave out certain words and consonants that they find difficult to pronounce. Sometimes they might substitute some similar sounding consonant in the word for easier pronunciation. This is one of the main reasons for toddlers mixing up words while speaking.
Reason Behind Toddler Speech Difficulty
Speaking comes easily to you. But this isn’t as easy for your little one. Your child’s discovery of speech is relatively new and he might take some time to get acquainted to using his mouth, tongue and throat to speak properly. Second, the tongue movement for difficult to pronounce words doesn’t come easily to little ones. Words where two consonants blend together to form a word, like flower, slow, fly, spray etc. might pose a challenge for your child. However, this is nothing to worry about. With time, your darling will learn the right way to pronounce these words too.
Pronunciation of Words With Sounds by Toddlers- What you Should Know
Most toddlers start speaking a word or two by the time they turn one. You can see an improvement in their speaking skills as they grow older. Generally, toddlers can converse quite effectively by the time they turn four. In case, your little one doesn’t show any improvement in his speaking skills, you might want to consult a doctor. This delay can be easily rectified with speech therapy sessions.
What You Can Do To Improve Speaking Skills in Your Little One
1. Filling in the missing sound
Whenever you notice that your child has missed out on a consonant while pronouncing a word, make sure that you repeat the word to let your toddler know the right way to say it. Remember that your child might not correct himself the very first time. This is an exercise that you need to follow till your child learns the right pronunciation of words.
2. Patience is the key
You might sometimes find it annoying that your little one commits the same mistake in spite of repeated correction. However, it’s important that you keep your cool. Let your toddler take his own time to learn the difficult to pronounce words. Losing your cool might scare the little one and your child might try to avoid speaking that word.
3. Enhancing speech skills with practice
Practice makes a man perfect and this holds true for your toddler too. The best way to enhance the language skills of your baby is to encourage him to speak. `Ask him to repeat the words that he finds hard to speak. You can also read some story books to your child to help him understand the right way to speak different words. Make sure you pay special attention to the words that your child finds difficult to pronounce.
4. Learn your baby’s language
In order to enhance your child’s language skills, it’s important that you understand the little one’s language. Remember that most kids substitute ‘R’ with ‘W’, ‘P’ with ‘B’ or ‘H’, ‘TH’ with ‘F’ and ‘SC’ with ‘K’. Of course, your child might have his own version of the language. So, find out what he means so that you can communicate with him effectively.
Proper communication with your little one is the best way to enhance his speaking skills. So, keep talking to your child and encourage him to speak more.
Read more
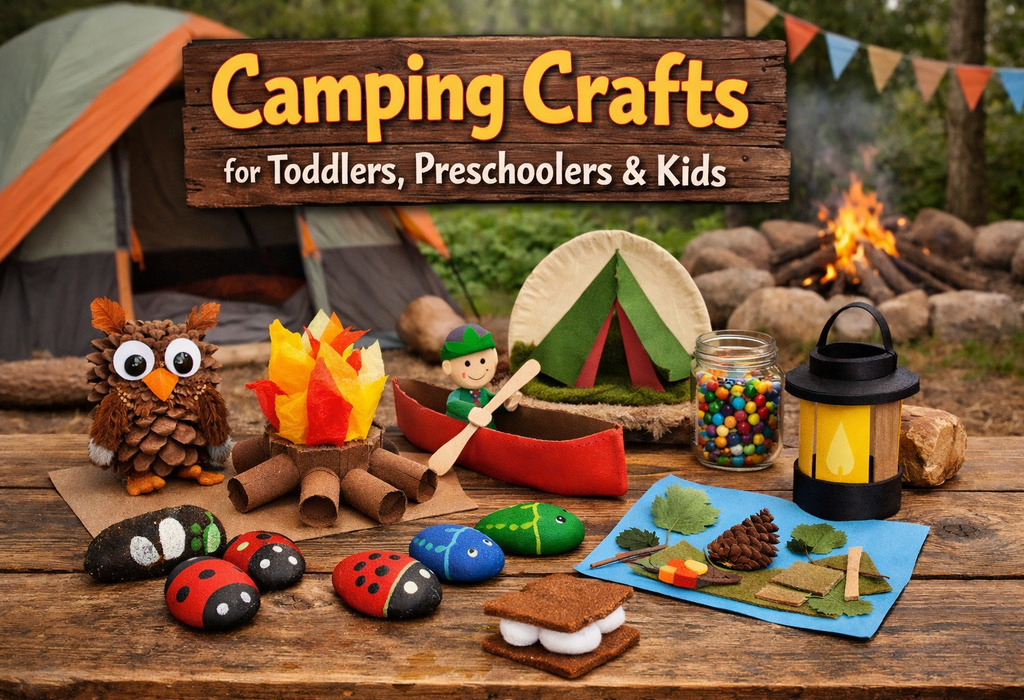
20+ Camping Crafts for Toddlers, Preschoolers & Kids
There is something magical about camping, whether in the woods or in your backyard. For young children, it is like entering a whole new world. And if you have ever tried keeping a toddler busy outdoors for more than two or three minutes at a time, you will understand the value of these activities. This is where camping crafts for toddlers & preschoolers enter the picture. They are fun, easy to set up, and messy enough to keep things interesting without causing chaos.
When children get older, their interests expand as well. Older children want to know things about nature, make things, and create stories about camping. This is when you can get really creative and make creative and engaging camping crafts for kids that will stimulate their minds and teach them something.
The following sections will highlight fun, easy, and meaningful camping-themed crafts that work well at home, in the classroom, or on an actual camping adventure.
What Are the Benefits of Camping Crafts for Kids?
Spending time on simple hands-on activities can do more than just keep children busy. Camping-themed crafts give kids a chance to slow down and enjoy the moment while using their imagination. Whether at home or outdoors, these activities create a sense of calm and excitement at the same time. Even a simple camping craft for kindergarten can be meaningful for a child.
Develops creativity as kids turn simple items into exciting and original creations.
Improves fine motor skills through cutting, pasting, and manipulating small objects.
Teaches patience as kids learn to follow instructions and finish what they started.
Helps kids express their emotions through the freedom to create anything they want.
Introduces bonding moments between kids and their parents or teachers who join in the activity.
Helps kids connect with nature through observing and replicating natural elements.
Camping Crafts for Toddlers
Toddlers learn best when they can touch, feel, and play with what they create. Camping-themed activities are simple and imaginative. These camping arts and crafts for toddlers keep little ones engaged without needing too many materials. Many of these ideas can also be adapted as camping craft ideas for preschoolers when children grow a little older.
1. Paper Plate Campfire
Image Credit: Pinterest
What You Will Need
Paper plate.
Red, orange, and yellow tissue paper.
Glue.
Brown paper strips.
Instructions
Give your child a paper plate as the base for the campfire.
Ask them to tear the tissue paper into small pieces.
Help them glue the pieces onto the plate to form flames.
Stick brown paper strips at the bottom to look like logs.
2. Handprint Campfire
What You Will Need
Washable paint in red, orange, and yellow.
White paper.
Paintbrush.
Wet wipes.
Instructions
Paint your child’s hand using warm colored paints.
Press their hand onto paper to create flame shapes.
Repeat with different colors to layer the flames.
Clean their hands gently once they are done.
3. Paper Tent Craft
Image Credit: Pinterest
What You Will Need
Colored paper.
Glue.
Crayons.
Child-safe scissors.
Instructions
Fold a piece of colored paper into a triangle shape.
Help your child glue it onto another sheet as the background.
Let them draw trees, grass, or stars around the tent.
Encourage them to add details like a door or a sleeping bag.
4. Campfire Stick Craft
What You Will Need
Ice cream sticks.
Red, orange, and yellow paper.
Glue.
Instructions
Arrange the sticks in a criss-cross pattern to form logs.
Glue the sticks together to keep them in place.
Cut small flame shapes from colored paper.
Stick the flames on top of the logs to complete the campfire.
5. Paper Lantern Craft
Image Credit: Pinterest
What You Will Need
Colored paper.
Glue or tape.
Child-safe scissors.
Instructions
Fold the paper in half and make small cuts along the folded edge.
Open the paper and roll it into a cylinder shape.
Secure the edges with glue or tape.
Help your child gently press the middle to create a lantern shape.
6. Nature Collage
What You Will Need
Leaves small twigs and grass.
Paper.
Glue.
Instructions
Take your child outside to collect natural items.
Ask them to place the items on paper in any pattern they like.
Help them glue each piece carefully onto the paper.
Talk about the different textures and shapes as they work.
Camping Crafts for Preschoolers
Preschoolers are at that lovely stage where their imagination really starts to shine. They enjoy creating things that look like the world around them. These camping art activities for preschoolers give them a chance to explore colors, shapes and storytelling. Many of these ideas also work well as kids’ camping crafts that can be enjoyed in small groups or at home.
1. Paper Roll Binoculars
Image Credit: Pinterest
What You Will Need
Two toilet paper rolls.
Glue.
String.
Crayons or paint.
Instructions
Place two rolls side by side and glue them together.
Let your child decorate them using crayons or paint.
Attach a string on both sides to make a strap.
Encourage them to pretend they are spotting animals.
2. Camping Scene Collage
What You Will Need
Colored paper.
Glue.
Child-safe scissors.
Instructions
Cut shapes for tents, trees, and sun from colored paper.
Help your child arrange the shapes on a base sheet.
Glue each piece carefully in place.
Talk about the scene they have created.
3. Stick Tent Craft
Image Credit: Pinterest
What You Will Need
Small twigs or sticks.
Glue.
Paper.
Instructions
Help your child arrange sticks into a triangle shape.
Glue the sticks onto paper to form a tent.
Let them draw details around the tent.
Allow time for the glue to dry completely.
4. Paper Campfire Craft
What You Will Need
Brown paper strips.
Red, orange, and yellow paper.
Glue.
Instructions
Arrange brown strips to look like logs.
Glue them onto paper in a criss-cross pattern.
Cut flame shapes from colored paper.
Stick the flames above the logs.
5. Painted Rock Animals
Image Credit: Pinterest
What You Will Need
Smooth rocks.
Paint.
Paintbrush.
Instructions
Let your child pick a rock they like.
Paint simple animal faces on the rock.
Allow the paint to dry fully.
Use the rocks for pretend camping play.
6. Night Sky Painting
What You Will Need
Black paper.
White and yellow paint.
Cotton buds.
Instructions
Give your child black paper as the sky.
Dip cotton buds into paint.
Dab small dots to create stars.
Add a moon using yellow paint.
7. Paper Plate Moon
Image Credit: Pinterest
What You Will Need
Paper plate.
White paint.
Sponge.
Instructions
Paint the plate white using a sponge.
Dab lightly to create a textured look.
Let it dry completely.
Talk about the moon and the night sky.
8. Camping Story Stones
What You Will Need
Small stones.
Paint or markers.
Instructions
Draw simple camping items on each stone.
Let your child color or paint them.
Allow them to dry before use.
Use the stones to create short stories.
9. Leaf Printing Craft
Image Credit: Pinterest
What You Will Need
Leaves.
Paint.
Paper.
Instructions
Apply paint on one side of a leaf.
Press it gently onto paper.
Lift the leaf to see the print.
Repeat with different leaves and colors.
10. Paper Flashlight Craft
What You Will Need
Paper.
Yellow paper circle.
Glue.
Instructions
Roll the paper into a tube shape.
Glue it to hold the shape.
Attach a yellow circle at one end.
Pretend it is a flashlight for camping.
11. Camp Badge Craft
Image Credit: Pinterest
What You Will Need
Card paper.
Crayons.
Safety pin or tape.
Instructions
Cut a circle from card paper.
Let your child draw camping symbols on it.
Color the badge as they like.
Attach it to their shirt with help.
12. Nature Bracelet
What You Will Need
Tape.
Leaves and small flowers.
Instructions
Wrap tape around your child’s wrist with the sticky side out.
Let them pick small natural items.
Stick the items onto the tape.
Admire their nature bracelet together.
Camping Crafts for Kids
As the kids get a bit older, they enjoy making things that are more realistic and useful. They like making things that they can use for playtime or even for a camping trip. The camping-themed crafts for kids are fun and help them become independent. Many of these ideas are great for crafts to do while camping.
1. DIY Camp Lantern
Image Credit: Pinterest
What You Will Need
Empty jar.
Colored paper.
Glue.
Small LED light.
Instructions
Wrap colored paper around the jar, leaving small gaps for light.
Secure the paper using glue carefully.
Place a small LED light inside the jar.
Turn off the lights and watch it glow.
2. Nature Frame Craft
What You Will Need
Cardboard.
Leaves and twigs.
Glue.
Instructions
Cut a square frame shape from cardboard.
Arrange leaves and twigs along the edges.
Glue each piece firmly onto the frame.
Let it dry and display it proudly.
3. Camping Journal
Image Credit: Pinterest
What You Will Need
Blank notebook.
Crayons or markers.
Stickers.
Instructions
Give your child a notebook as their journal.
Ask them to decorate the cover with drawings.
Encourage them to write or draw daily camping moments.
Let them share their favorite page with you.
4. Stick Picture Art
What You Will Need
Small sticks.
Glue.
Paper.
Instructions
Collect sticks from outdoors together.
Arrange them into shapes like tents or trees.
Glue the sticks onto the paper carefully.
Add drawings around the shapes if they like.
5. Paper Plate Compass
What You Will Need
Paper plate.
Marker.
Paper arrow.
Pin.
Instructions
Draw directions on the paper plate clearly.
Cut out a small arrow from paper.
Attach the arrow using a pin at the center.
Spin the arrow and talk about directions.
6. Campfire Story Cards
Image Credit: Pinterest
What You Will Need
Small cards.
Markers.
Instructions
Write or draw simple prompts on each card.
Mix the cards in a small pile.
Pick one card at a time.
Create a story based on the card.
7. Painted Camping Mug
What You Will Need
Plain mug.
Acrylic paint.
Paintbrush.
Instructions
Let your child choose a design for the mug.
Paint simple camping elements like trees or tents.
Allow the paint to dry completely.
Use the mug for pretend or real camping.
8. DIY Tent Model
Image Credit: Pinterest
What You Will Need
Cardboard.
Glue.
Fabric scraps.
Instructions
Cut cardboard pieces to form a tent shape.
Glue the pieces together carefully.
Cover parts with fabric scraps.
Let your child decorate the tent as they like.
9. Nature Crown
What You Will Need
Paper strip.
Leaves and flowers.
Glue.
Instructions
Measure a paper strip to fit your child’s head.
Glue leaves and flowers along the strip.
Join the ends to form a crown.
Let them wear it during play.
10. Camping Map Drawing
Image Credit: Pinterest
What You Will Need
Paper.
Markers.
Instructions
Ask your child to draw a simple map.
Include tents, trees, and paths in the drawing.
Label different areas clearly.
Pretend to follow the map together.
11. Recycled Tin Can Lantern
What You Will Need
Empty tin can.
Paint.
Hammer and nail with adult help.
Instructions
Clean the tin can properly before use.
Paint the outside in any design they like.
With adult help, make small holes in patterns.
Place a light inside to see the design glow.
FAQs
1. What age is best for camping crafts?
Camping crafts can be enjoyed by toddlers, preschoolers, and older kids with simple adjustments based on their age and skills.
2. Do I need special materials for camping crafts?
Most camping crafts use basic items like paper, glue, and natural materials, which are easy to find at home or outdoors.
3. Can these crafts be done during a real camping trip?
Yes, many of these crafts are simple and portable, and perfect for a quiet, creative time while camping.
Camping crafts simply combine creativity, play, and bonding. Whether your child is a toddler playing with textures or an older child purposefully creating something, these activities offer little moments of magic. They don’t have to be wonderful to be effective. What matters is how wonderful your child feels creating something by themselves. These little creative experiences add up to wonderful memories over time, which both you and your child will cherish.
Also Read :
Science Trivia for Kids (Questions and Answers)
Fish Jokes for Kids That Will Make Them Giggle
March Crafts for Kids to Celebrate Springtime
Read more
25+ Rainbow Crafts for Kids That Spark Creativity
If you have ever watched a child light up at the sight of bright colours, you already know the magic a rainbow can bring. Craft time becomes even more exciting when those colours come together in playful, hands-on activities. From simple paper projects to sensory-rich creations, these ideas work beautifully as rainbow crafts for toddlers & preschoolers and for slightly older children. The beauty of rainbow crafts for kids is that they combine creativity, colour recognition, and fine motor development in one joyful experience. The best part is that most of these crafts use everyday materials, so you can jump right in without much preparation.
Rainbow Crafts for Toddler & Preschoolers
Craft time with little ones is not about perfection, it is about joy, discovery and messy hands. Young children learn best when they can touch, feel and explore colours in a relaxed way. These simple ideas are designed to support early learning while keeping things fun and stress-free. Each activity works well as a rainbow craft preschool parents can try at home, and also as a rainbow craft for kindergarten classrooms.
1. Paper Plate Rainbow
Source: Pinterest
What You Will Need
Paper plate
Paint or crayons
Cotton balls
Glue
Instructions
Cut a paper plate into a semicircle so it forms the base of your rainbow.
Let your child paint or colour each section in rainbow shades while you gently guide if needed.
Stick cotton balls on both ends to create soft clouds.
Allow the craft to dry fully before hanging it up for display.
2. Handprint Rainbow
What You Will Need
Washable paint
White paper
Wet wipes or a cloth
Instructions
Apply paint to your child’s palm using one colour at a time and help them press it onto paper.
Repeat the process with different colours, placing each print in a curved line.
Keep building the arc slowly so it forms a rainbow shape.
Clean hands after each print to keep colours bright and separate.
3. Rainbow Paper Strips
Source: Pinterest
What You Will Need
Coloured paper
Scissors
Glue
Instructions
Cut coloured paper into long strips and keep them ready in rainbow order.
Show your child how to arrange the strips from red to violet in a gentle curve.
Glue one end together and carefully spread them out to form a rainbow.
Press lightly and let it set so the shape holds well
4. Cotton Ball Rainbow
What You Will Need
Cotton balls
Liquid colours or paint
Paper
Glue
Instructions
Dip cotton balls into different colours and let children enjoy the soft texture as they explore.
Allow the cotton balls to dry slightly so they do not drip excess colour.
Help your child glue them onto paper in a curved rainbow pattern.
Add extra cotton at the ends to create fluffy clouds for a finished look.
5. Rainbow Collage
Source: Pinterest
What You Will Need
Old magazines
Coloured scraps
Glue
Paper
Instructions
Tear paper or magazine pieces into small bits and sort them by colour together.
Draw a simple rainbow outline so your child has a guide to follow.
Apply glue section by section and stick the pieces carefully in order.
Keep filling until the rainbow looks full and colourful.
6. Finger Paint Rainbow
Source: Pinterest
What You Will Need
Finger paints
Thick paper
Apron or old clothes
Instructions
Pour small amounts of paint onto a plate and let your child dip their fingers freely.
Show them how to draw curved lines using their fingers to form a rainbow.
Encourage them to explore mixing and spreading colours gently.
Let the painting dry while appreciating their creative effort.
7. Rainbow Sponge Painting
Source: Pinterest
What You Will Need
Sponges
Paint
Paper
Instructions
Cut sponges into easy-to-hold pieces and dip each into a different colour.
Demonstrate how to dab the sponge on paper instead of dragging it.
Help your child place colours in the right order to form a rainbow.
Continue dabbing until the shape looks bright and complete.
8. Rainbow Bead Threading
Source: Pinterest
What You Will Need
Large beads
String or yarn
Instructions
Sit with your child and show them the order of the rainbow colours before starting.
Let them pick beads one by one and gently guide their threading.
Encourage focus and patience as they continue the pattern.
Tie the ends securely once the string is full and admire the result.
9. Rainbow Pasta Craft
Source: Pinterest
What You Will Need
Dry pasta
Food colouring
Zip-lock bags
Paper
Glue
Instructions
Place pasta into bags with a few drops of colour and shake until evenly coated.
Spread the pasta out and allow it to dry completely before use.
Draw a rainbow shape on paper to guide your child.
Let them glue the colourful pasta pieces along the lines to create texture.
10. Rainbow Stick Craft
Source: Pinterest
What You Will Need
Ice cream sticks
Paint or markers
Glue
Instructions
Give your child sticks and let them paint each one in a different rainbow colour.
Allow the sticks to dry fully before arranging them.
Help them place the sticks in a curved rainbow shape.
Glue the sticks together carefully so the structure stays in place.
11. Rainbow Dot Sticker Art
Source: Pinterest
What You Will Need
Coloured dot stickers
White paper
Instructions
Draw a simple rainbow outline on paper to give your child a clear guide.
Provide coloured dot stickers and explain the colour order gently.
Let them stick each dot along the arcs one by one.
Continue until the rainbow is filled with bright, colourful dots.
12. Rainbow Yarn Craft
Source: Pinterest
What You Will Need
Coloured yarn
Paper
Glue
Instructions
Cut yarn into small pieces and keep them sorted by colour for easy use.
Draw a rainbow outline so your child can follow along confidently.
Apply glue on one section at a time to avoid a mess.
Stick yarn pieces neatly along each arc to complete the rainbow.
13. Rainbow Crayon Resist Art
Source: Pinterest
What You Will Need
White crayon
Watercolours
Paper
Instructions
Draw a rainbow shape using a white crayon, which may not be clearly visible at first.
Let your child paint over the entire paper using watercolours.
Watch their excitement as the hidden rainbow slowly appears.
Leave the artwork to dry completely before showing it off.
14. Rainbow Nature Craft
Source: Pinterest
What You Will Need
Leaves, flowers, and small natural items
Paper
Glue
Instructions
Take your child outside to collect colourful natural items during a short walk.
Sort the items together by colour to make it easier to arrange.
Draw a rainbow shape on paper as a guide.
Glue each item carefully to create a natural textured rainbow.
15. Rainbow Cupcake Liner Craft
What You Will Need
Coloured cupcake liners
Scissors
Glue
Paper
Instructions
Flatten cupcake liners gently and cut them in half.
Show your child how to arrange them in rainbow order on paper.
Apply glue and stick each piece carefully in place.
Press lightly and allow the craft to set before displaying it.
Rainbow Crafts for Kids
As children grow, they begin to enjoy crafts that give them more freedom to create and experiment. These ideas are designed to feel fun yet slightly more engaging, so kids can build confidence while learning. You can use these rainbow craft activities at home or in class. Each kid’s rainbow craft brings colour, imagination and a sense of pride.
1. Rainbow Paper Chain
Source: Pinterest
What You Will Need
Coloured paper
Scissors
Glue or tape
Instructions
Cut coloured paper into equal strips and arrange them in rainbow order before starting.
Help your child form the first strip into a loop and secure it with glue or tape.
Thread the next strip through the loop and repeat the process carefully.
Continue until a long rainbow chain is formed and hang it as decoration.
2. Rainbow Watercolour Painting
Source: Pinterest
What You Will Need
Watercolours
Paintbrush
Thick paper
Water cup
Instructions
Lightly sketch a rainbow shape so your child has a simple guide to follow.
Let them dip the brush into watercolours and begin painting each arc slowly.
Encourage gentle strokes so colours stay neat and do not mix too much.
Leave the painting flat to dry and admire the finished rainbow art craft.
3. Rainbow Clay Art
Source: Pinterest
What You Will Need
Coloured clay or playdough
Flat surface
Instructions
Give small portions of different coloured clay to your child and let them roll each into long pieces.
Show how to bend each piece into a curved rainbow shape.
Place each colour side by side to complete the pattern.
Press gently so the pieces stay together and display their rainbow creation.
4. Rainbow Bookmark
Source: Pinterest
What You Will Need
Card paper
Markers or crayons
Ribbon
Hole punch
Instructions
Cut card paper into a long rectangular bookmark shape that is easy to hold.
Let your child decorate it using rainbow colours and simple patterns.
Punch a hole at the top and add a ribbon for a neat finish.
Encourage them to use it in their favourite books proudly.
5. Rainbow Salt Art
What You Will Need
Glue
Salt
Liquid colours
Paper
Instructions
Draw a rainbow outline using glue so it forms raised lines on the paper.
Sprinkle salt over the glue and gently shake off the extra.
Drop liquid colours onto the salt and watch the colours spread slowly.
Let the artwork dry fully before touching the textured surface.
6. Rainbow CD Craft
What You Will Need
Old CD
Paint
String
Instructions
Give an old CD and let your child paint rainbow colours across its surface.
Allow the paint to dry fully so it does not smudge.
Attach a string through the hole in the centre.
Hang it near a window where it can catch light beautifully.
7. Rainbow Bracelet
Source: Pinterest
What You Will Need
Elastic string
Coloured beads
Instructions
Cut a piece of elastic string that fits comfortably around your child’s wrist.
Ask them to pick beads and follow the rainbow colour sequence.
Help them thread each bead slowly with focus and patience.
Tie the ends securely so the bracelet stays strong during use.
8. Rainbow Paper Fan
Source: Pinterest
What You Will Need
Coloured paper
Glue
Popsicle stick
Instructions
Stack coloured papers in rainbow order and fold them carefully like a fan.
Secure one end with glue, so it holds the shape.
Attach a popsicle stick at the base for easy holding.
Open the fan gently and enjoy the colourful design.
9. Rainbow Mosaic Art
Source: Pinterest
What You Will Need
Coloured paper
Glue
Pencil
Paper base
Instructions
Draw a rainbow outline and divide it into small sections for easy filling.
Cut or tear coloured paper into tiny pieces.
Let your child stick each piece carefully inside the sections.
Continue until the full rainbow is filled with a mosaic effect.
10. Rainbow Balloon Painting
What You Will Need
Balloons
Paint
Paper
Instructions
Inflate small balloons and dip them lightly into paint.
Show your child how to stamp the balloon onto paper gently.
Repeat using different colours to form a rainbow pattern.
Allow the painting to dry before displaying it.
11. Rainbow Window Art
What You Will Need
Transparent sheet or plastic
Glass colours
Outline marker
Instructions
Draw a rainbow outline on the transparent sheet using a marker.
Let your child fill each section with glass colours slowly.
Encourage careful colouring to keep colours within the lines.
Once dry, place it on a window to see the light shine through.
12. Rainbow Button Craft
Source: Pinterest
What You Will Need
Coloured buttons
Glue
Paper
Instructions
Draw a rainbow shape on paper as a simple guide.
Sort buttons by colour before starting the activity.
Apply glue and stick buttons along each arc carefully.
Press gently so they stay in place and let the craft dry.
13. Rainbow Scratch Art
Source: Pinterest
What You Will Need
Crayons
Black paint
Paper
Toothpick
Instructions
Colour the paper fully using bright crayons in different rainbow shades.
Paint over it with a thin layer of black paint and let it dry.
Use a toothpick to scratch designs and reveal colours underneath.
Enjoy the surprise effect as the rainbow appears through each line.
Rainbow crafts bring a special kind of joy that goes beyond just colours on paper. They create moments where children feel proud of what they make while learning in a natural way. With so many rainbow-themed crafts to try, you can always find something that matches your child’s mood and age. These simple kids rainbow craft turn everyday time into meaningful memories filled with creativity and connection.
Also Read:
Best Riddles for Kids to Boost Their Thinking Skills
Best Bible Stories for Kids – Teach Faith With Fun
Tongue Twisters for Kids (Easy & Hard)
Read more
20+ Best Brain Development Toys for Babies and Toddlers
Witnessing your baby discover something new for the first time is a magical feeling. Something as simple as a rattle, a soft block, or a colourful puzzle can make them curious and confident and lay the foundation for future learning. This is why selecting the right baby brain development toys is very critical. These early experiences influence how their child will think, reason, and interact with their world.
If you have ever seen a toddler stack blocks with intense focus or laugh while figuring out how a toy works, you already understand how powerful play can be. The right toys for brain development 1-2 years are not just about entertainment. They support memory, motor skills, language growth, and emotional development in ways that feel natural and fun.
This topic goes beyond just picking toys from a shelf. It is about understanding what truly helps your child grow and making choices that support their development in simple, meaningful ways.
Different Types of Brain Development Toys and Their Advantages
Every child learns at their own pace and in their own way, and toys are one of the ways in which this learning takes place. Some toys encourage physical activity, while others encourage mental or imaginative activity. Bear in mind that the toy’s ability to promote your child’s natural curiosity is more important than its aesthetics.
1. Sensory Toys
Sensory toys engage a baby’s senses through touch, sound, and sight. Think of soft fabrics, textured balls, or crinkly toys that babies love to explore. These toys help build early brain connections and improve awareness of the world around them.
2. Stacking and Building Toys
Stacking rings, cups, or blocks are simple, but they teach important skills. Children learn balance, size, coordination and patience. They learn as they watch a tower fall and try to build it again.
3. Shape Sorters and Puzzles
These toys gently challenge children to think and solve problems. Matching shapes or fitting pieces together improves memory and reasoning skills. Over time, you can see children become more confident in figuring things out on their own.
4. Musical Toys
Musical toys playfully introduce rhythm, sound, and patterns. A simple drum or xylophone can keep a child engaged for a long time. They also support listening skills and early creativity.
5. Pretend Play Toys
Pretend play toys like kitchen sets, dolls, or toy tools help children express themselves. They copy what they see around them and begin to understand emotions and social roles. This builds strong communication skills.
6. Push and Pull Toys
These toys encourage movement, especially for toddlers learning to walk. As children push or pull, they develop balance and coordination. It also gives them a sense of independence as they explore their surroundings.
7. Interactive Books
Books with textures, flaps, or sounds make reading more engaging for young children. They help build language skills and improve focus in a gentle way. Sitting together with a child and exploring a book often becomes a bonding experience as well.
Brain Development Toys for Babies
In the early months, babies learn by touch, sound, and observation of everything around them. Even the smallest interaction with their toys can make them curious, creating new connections in the brain. The right toys should be simple and appropriate for what your child is learning at the time. Simple and thoughtful mind development toys can create meaningful moments with your child.
1. Soft Sensory Cloth Toys
These toys come with different textures and gentle sounds that babies love to explore. They are safe, easy to hold, and perfect for tiny hands learning to grasp.
2. Baby Rattles
Rattles are often a baby’s first favourite toy. The sound and movement help babies understand cause and effect while improving hand coordination.
3. Teething Toys
Teethers are for soothing gums and helping babies learn to grip and explore. They come in different shapes to keep babies engaged.
4. High Contrast Flash Cards
Black and white cards help babies focus better, especially in the early months. They support visual development in a simple but effective way.
5. Activity Play Gym
A play gym encourages babies to reach, kick, and move. Hanging toys and mirrors makes it more engaging and supports physical development.
6. Crinkle Books
These soft books make a gentle crinkling sound when touched. Babies enjoy the sound and texture while slowly getting introduced to books.
7. Musical Soft Toys
Toys that play soft music or lullabies can calm babies while also stimulating their hearing. They often become comforting companions.
8. Baby Mirrors
Unbreakable mirrors help babies discover their own reflection. It may seem simple, but it builds awareness and curiosity.
9. Stacking Rings for Infants
Large soft stacking rings are easy for babies to handle. They help develop coordination even before babies fully understand stacking.
10. Tummy Time Toys
Toys designed for tummy time encourage babies to lift their heads and look around. This strengthens muscles and supports early movement skills.
Toys for Brain Development for Toddlers
Toddlers are naturally curious and want to explore everything around them. Children learn best by moving, touching, and solving problems at this age. The right toys for brain development for 1-2 years can make them confident while learning how things work. What’s surprising is that children learn so much through small play experiences.
1. Stacking Rings
Stacking rings helps toddlers understand size order and balance. They also build hand control and patience as children try again and again.
2. Shape Sorter Toys
These toys encourage toddlers to match shapes with the right spaces. It gently builds problem-solving skills and helps them think more clearly.
3. Building Blocks
Blocks give toddlers the freedom to create and explore. They learn balance, coordination, and even early planning while stacking and knocking them down.
4. Push and Pull Toys
These toys support walking and movement. Toddlers feel a sense of independence as they move around with something they can control.
5. Musical Instruments
Simple instruments like drums or xylophones introduce rhythm and sound. They joyfully help toddlers express themselves.
6. Peg Boards
Placing pegs into holes improves fine motor skills and focus. It may look simple, but it requires attention and coordination.
7. Nesting Cups
Nesting cups teach size comparison and sequencing. Toddlers enjoy stacking and fitting them together in different ways.
8. Interactive Board Books
Books with flaps, textures or sounds keep toddlers engaged. They slowly build language skills and improve their attention span.
9. Pretend Play Sets
Toy kitchens, dolls, or toy sets allow toddlers to copy everyday actions. This helps them understand emotions and social roles.
10. Puzzles
Simple puzzles help toddlers recognise shapes and patterns. Completing even a small puzzle gives them a sense of achievement.
11. Ride On Toys
Ride-on toys improve balance and coordination. They also give toddlers a fun way to stay active.
12. Sorting Games
Sorting colours or objects helps toddlers notice differences and similarities. It builds early thinking and memory skills.
13. Ball Drop Toys
Dropping balls and watching them roll teaches cause and effect. Toddlers love repeating this action and learning from it.
14. Lacing Toys
Lacing beads or shapes helps improve hand control and focus. It also prepares them for skills they will need later, like writing.
15. Activity Cubes
Activity cubes combine different small games in one toy. They keep toddlers engaged while supporting multiple areas of development.
Tips for Choosing Brain Development Toys
Choosing the right toy for your child can sometimes feel confusing with so many options around. As parents, you want something that is fun but also truly helpful for growth. The best toys for cognitive development are often simple, thoughtful, and suited to your child’s stage. It is less about having more toys and more about choosing the ones that really support learning through play.
Choose toys that match your child’s age and ability, so they feel confident and not frustrated.
Look for toys that can be used in different ways, as they keep children engaged for longer.
Prefer toys that encourage hands-on play instead of passive watching.
Focus on safety and quality since babies and toddlers explore everything closely.
Pick toys that allow interaction so you can play and bond together.
Avoid toys that are too noisy or distracting, as they can reduce focus.
Notice what your child enjoys and choose toys that build on their natural interests.
FAQs
1. How many toys does a baby or toddler really need?
Children do not need many toys to learn well. A few meaningful toys that they can use in different ways are often enough.
2. Are expensive toys better for brain development?
Not always. Simple, well-designed toys often support learning better than expensive ones, as they allow more creativity and exploration.
Choosing the right kind of toys for your baby or toddler is about understanding their learning and development process. Simple toys promote curiosity and learning through play. Learning through play is an important aspect of development, and the best part is that as your child grows, the learning opportunities through play continue to evolve. The most important thing in the entire process is to provide your child with the opportunity to learn and play on his or her own. Being present during playtime makes the learning process an emotional one, and in the end, it’s the learning experience that you create around the toys.
Also Read:
Horse Jokes for Kids That Will Make Everyone Laugh
Science Trivia for Kids (Questions and Answers)
Fish Jokes for Kids That Will Make Them Giggle
Read more
130 Jokes for Toddlers & Preschoolers That’ll Make Them Giggle!
There’s something truly magical about the sound of a child’s laughter — that pure, belly-deep giggle that seems to light up a whole room. For parents, caregivers, and teachers, finding ways to spark those little moments of joy can turn an ordinary day into a memory worth keeping. And one of the simplest, most heartwarming ways to do that? Jokes.
The best jokes for toddlers & preschoolers are the ones that don’t just make them laugh, but help them learn language, timing, and imagination along the way.
Funny & Clean Jokes for Toddlers and Preschoolers
Little kids love jokes that are easy to understand and full of playful fun. The joy in their faces when they “get it” is worth every silly punchline. These funny and clean jokes for toddlers and preschoolers are simple, safe, and guaranteed to bring out the giggles during family time, car rides, or snack breaks.
Jokes About Animals
Kids have a natural fascination with animals — from the way they move and sound to the funny things they do. Sharing preschool jokes about animals is a simple way to make children laugh while also helping them learn about different creatures in a fun, gentle way. Whether it’s a roaring lion, a clumsy penguin, or a curious cow, these jokes will have your little one smiling from ear to ear.
1. Why did the cow cross the road?
To get to the udder side!
2. What do you call a sleeping bull?
A bulldozer!
3. Why don’t ducks tell jokes when they fly?
Because they’d quack up midair!
4. What do you get when you cross a sheep and a kangaroo?
A woolly jumper!
5. Why did the cat sit on the computer?
To keep an eye on the mouse!
6. What’s a frog’s favourite game?
Leapfrog, of course!
7. Why did the fish blush?
Because it saw the ocean’s bottom!
8. What do you call an alligator in a vest?
An investigator!
9. Why are elephants never allowed to use computers?
Because they’re afraid of the mouse!
10. What do you call a pig that knows karate?
A pork chop!
11. Why did the horse go behind the tree?
Because he wanted to change his jockeys!
12. What did the duck say when it bought lipstick?
Put it on my bill!
13. Why did the bee get married?
Because he found his honey!
14. What do you call a bear with no teeth?
A gummy bear!
15. Why did the crab never share his toys?
Because he was a little shellfish!
16. What did the sheep say to the barber?
Baa, humbug! Just kidding—she wanted a shear cut!
17. What do you get when you cross a dog and a phone?
A golden receiver!
18. Why did the owl invite friends to his house?
Because he didn’t want to be owl alone!
19. What do you call a fly with no wings?
A walk!
20. Why did the turtle cross the playground?
To get to the shell slide!
Food Jokes for Preschoolers & Toddlers
Food is one thing kids can always relate to — whether it’s a crunchy apple, a cheesy slice of pizza, or their favourite bowl of noodles. Sharing food jokes with preschoolers and toddlers makes mealtime more fun and helps them see everyday things in a playful way. These light and clean jokes are perfect to tell while packing lunch or waiting for snacks.
1. What did one plate say to the other plate?
Lunch is on me!
2. Why did the banana go to school?
To learn how to split!
3. What kind of key opens a banana?
A monkey!
4. Why did the tomato blush?
Because it saw the salad dressing!
5. What do you call cheese that tells jokes?
Cheddar than the rest!
5. What did the baby corn say to the mama corn?
Where’s popcorn?
7. Why don’t eggs tell jokes?
They might crack up!
8. What kind of nut sneezes a lot?
A cashew!
9. What did the hamburger name its baby?
Patty!
10. Why did the orange stop halfway up the hill?
It ran out of juice!
11. What does a pizza say when it introduces itself?
Slice to meet you!
12. Why did the cookie go to the hospital?
Because it felt crummy!
13. What’s a pretzel’s favourite dance?
The twist!
14. What do you get when you drop a pumpkin?
Squash!
15. Why did the grape stop in the middle of the road?
It ran out of juice!
16. What did the apple say to the peanut butter?
You’re my butter half!
17. Why did the cereal get so quiet?
It lost its crunch!
18. What do you call a fake noodle?
An impasta!
19. What did the bread do on vacation?
It loafed around!
20. Why don’t melons get married?
Because they cantaloupe!
Jokes About School
School jokes are a fun way to make kids look forward to learning and help them relax after a busy day. These lighthearted giggles remind children that school isn’t just about reading and writing — it’s also about sharing smiles with friends and teachers. Here are some funny and simple school jokes that toddlers and preschoolers will love to repeat at story time or during lunch breaks.
1. Why did the maths book look sad?
Because it had too many problems!
2. What did the pencil say to the paper?
You’ve got a good point!
3. Why did the student eat his homework?
Because the teacher said it was a piece of cake!
4. What did one crayon say to the other crayon?
You make life colourful!
5. Why was the music teacher so good at her job?
Because she had perfect pitch!
6. Why did the kid bring a ladder to school?
Because he wanted to go to high school!
7. What did the paper say to the pencil?
Write on!
8. Why did the computer go to school?
To improve its byte size!
9. What’s a maths teacher’s favourite place?
Times Square!
10. Why did the clock get sent to the principal’s office?
It was always tocking back!
11. Why did the eraser feel sorry for the pencil?
Because it always made mistakes!
12. What do you call a teacher who loves to tell jokes?
A pun-damental educator!
13. Why did the ruler stop talking?
It didn’t want to be measured by others!
14. What did the notebook say to the backpack?
You carry me through everything!
15. Why was the student’s report card wet?
Because it was below “C” level!
16. Why did the teacher wear sunglasses to class?
Because her students were so bright!
17. What did the glue say to the teacher?
I’m stuck on you!
18. Why did the kid sit next to the clock in class?
Because he wanted to be on time!
19. Why was the music lesson so noisy?
Because everyone played by ear!
20. Why did the pencil get in trouble?
It couldn’t stop drawing attention!
Silly Jokes for Preschoolers and Toddlers
Kids love silly jokes because they don’t have to make perfect sense to be funny. The joy is in the surprise, the giggles, and the shared fun that comes with each goofy punchline. These light and silly jokes for pre-k are full of playful humour that’s perfect for family time, classroom fun, or even a quick laugh before bedtime.
1. Why did the cookie go to the doctor?
Because it felt crummy!
2. What do you call a dinosaur with no eyes?
Do-you-think-he-saurus!
3. Why did the kid bring a pillow to the party?
He wanted to have a nap dance!
4. What did one wall say to the other wall?
I’ll meet you at the corner!
5. Why did the skeleton stay home from school?
He had no body to go with!
6. What did the zero say to the eight?
Nice belt!
7. Why was six afraid of seven?
Because seven eight nine!
8. What did the big flower say to the little flower?
Hey bud!
9. Why did the golfer bring two pairs of pants?
In case he got a hole in one!
10. What do you call a sleeping dinosaur?
A dino-snore!
11. Why did the bicycle fall over?
Because it was two-tiered!
12. What did the ocean say to the shore?
Nothing, it just waved!
13. Why was the broom late?
It swept in!
14. What did one hat say to the other?
You stay here, I’ll go on ahead!
15. Why did the picture go to jail?
Because it was framed!
16. What did the clock do when it was hungry?
It went back four seconds!
17. Why did the kid throw his clock out the window?
He wanted to see time fly!
18. What did one snowman say to the other?
Do you smell carrots?
19. Why did the banana wear sunscreen?
Because it peels easily!
20. What did the left eye say to the right eye?
Between us, something smells!
Spooky Jokes for Toddlers & Preschoolers
Spooky jokes are a fun way to make Halloween or storytime less scary and more giggly. Little ones love the idea of friendly ghosts, funny monsters, and not-so-spooky skeletons who just want to have fun. These easy jokes are silly, harmless, and perfect for getting those tiny giggles going — even if a ghost or two joins in for a laugh.
1. Why did the skeleton not go to the party?
He had no body to go with!
2 . What do you call a ghost’s favourite dessert?
I scream!
3. Why did the vampire brush his teeth?
Because he had bat breath!
4. What kind of music do mummies love?
Wrap music!
5. What do you call a witch at the beach?
A sand-witch!
6. Why don’t ghosts lie?
Because you can see right through them!
7. What is a monster’s favourite game?
Hide and shriek!
8. Why did the zombie skip school?
He felt rotten!
9. What does a ghost wear when it rains?
A boo-tie coat!
10. What kind of key opens a haunted house?
A spoo-key!
11. Why did the skeleton go to the barbecue?
To get another spare rib!
12. What’s a ghost’s favourite ride at the amusement park?
The roller-ghoster!
13. Why did the mummy stay home from work?
He was all wrapped up!
14. What do baby ghosts wear?
Boo-ties!
15. What did one bat say to another bat?
Let’s hang out!
16. Why don’t mummies take vacations?
They’re afraid to unwind!
17. What’s a skeleton’s favourite snack?
Spare ribs!
18. Why did the ghost go into the elevator?
To lift his spirits!
19. What kind of pants do ghosts wear?
Boo-jeans!
20. Why did the monster eat the light bulb?
He wanted a light snack!
Jokes About People and Nature
Kids see the world in such a curious and joyful way — from the people they meet to the trees, rain, and sunshine around them. Sharing gentle jokes about people and nature helps them connect humour with everyday life. These funny jokes for toddlers celebrate the simple, silly side of the world they’re growing up in.
1. Why did the gardener plant a light bulb?
He wanted to grow a power plant!
2. What did the tree wear to the pool party?
Swimming trunks!
3. Why did the man run around his bed?
Because he wanted to catch up on sleep!
4. What did one volcano say to the other?
I lava you!
5. Why did the scarecrow win an award?
Because he was outstanding in his field!
6. What did the snowman say to the other snowman?
Do you smell carrots?
7. Why did the sun go to school?
To get brighter!
8. What did the rain say to the flower?
Keep growing, you’re blooming great!
9. Why did the kid bring soap to the park?
To clean up the slide!
10. What do you call a tree that fits in your hand?
A palm tree!
11. Why did the man put his money in the blender?
He wanted to make some liquid assets!
12. What did one cloud say to the other?
Let’s go for a little drizzle!
13. Why did the farmer ride his horse to town?
Because the tractor was too tired!
14. What did the leaf say to the wind?
I’m falling for you!
15. Why did the boy throw butter out the window?
He wanted to see a butterfly!
16. What did the mountain say to the earthquake?
You rock!
17. Why did the gardener bring a ladder?
To reach new heights!
18. What did one raindrop say to the other?
Two’s company, three’s a cloud!
19. Why did the kid take a ladder to the apple tree?
To get to the core of the problem!
20. What did the bird say after a long flight?
I’m talon-tired!
Knock Knock Jokes for Preschoolers & Toddlers
Knock-knock jokes never get old for little ones. They love the rhythm, the repetition, and that fun moment right before the punchline lands. These silly knock-knock jokes are short, playful, and easy for preschoolers and toddlers to remember — perfect for family laughter or classroom giggles.
1. Knock, knock.
Who’s there?
Boo.
Boo who?
Don’t cry, it’s just a joke!
2. Knock, knock.
Who’s there?
Lettuce.
Lettuce who?
Lettuce in, it’s cold out here!
3. Knock, knock.
Who’s there?
Cows go.
Cows go who?
No, silly! Cows go moo!
4. Knock, knock.
Who’s there?
Tank.
Tank who?
You’re welcome!
5. Knock, knock.
Who’s there?
Ice cream.
Ice cream who?
Ice cream every time I see a ghost!
6. Knock, knock.
Who’s there?
Olive.
Olive who?
Olive, you and I miss you!
7. Knock, knock.
Who’s there?
Atch.
Atch who?
Bless you!
8. Knock, knock.
Who’s there?
Snow.
Snow who?
Snow use hiding, I know you’re there!
9. Knock, knock.
Who’s there?
Harry.
Harry who?
Harry up and open the door!
10. Knock, knock.
Who’s there?
Dishes.
Dishes who?
Dishes the police, open up!
Importance of Jokes for Toddlers and Preschoolers
Laughter is one of the most natural ways children learn and connect. For toddlers and preschoolers, jokes are more than just moments of fun — they help build language, imagination, and emotional understanding.
1. Helps With Language Development: Simple jokes introduce new words, sounds, and sentence patterns in a playful way. Kids begin to understand rhythm, timing, and word meanings without feeling like they’re being taught.
2. Builds Social Confidence: When children share a joke and make others laugh, it gives them a sense of pride. It helps them learn how to communicate, take turns in conversations, and feel more confident around people.
3. Encourages Creativity and Imagination: Funny stories and silly punchlines inspire kids to think differently. They start to create their own funny ideas, helping their minds grow more flexible and imaginative.
Laughter truly is one of the best gifts you can share with a child. So keep sharing those little laughs — they’re small moments that create lasting joy and memories for years to come.
Also Read:
Hilarious Christmas Jokes for Kids
Funny Knock Knock Jokes for Children
Funniest Thanksgiving Jokes for Kids
Car Jokes and Puns for Children
Read more
25+ Best Fun & Development Boosting Activities for 18 Months Old
At 18 months old, your little one is blossoming with curiosity and energy, eager to learn and explore the world around them. This stage plays a vital role in their cognitive, social, and motor skill development. As a parent or caregiver, finding the right balance of fun and learning in educational activities is the key for supporting their growth. From sensory play to outdoor adventures, the activities for 18-month-old toddlers not only keep them entertained but also encourage their young minds to develop in meaningful ways. In this post, we’ll present you with a range of engaging activities that are perfectly suited for your 18-month-old toddlers, offering both enjoyment and developmental benefits. Let’s explore the world through your toddler’s eyes and discover how simple, everyday play can make a big difference in their early learning journey.
What Development Should You Expect in Your 18-Month-Old Baby?
At 18 months, your baby is making significant strides in their development, both physically and mentally. This period is marked by newly found independence, enhanced motor skills, and a growing curiosity about the surroundings.
1. Motor Skills and Coordination
By 18 months, your toddler is likely walking more confidently and may even start running, climbing, and exploring their environment with greater ease. Their fine motor skills are also improving, allowing them to grasp small objects, stack blocks, and use utensils with more precision.
2. Language Development
Language skills are rapidly expanding at this age. Your child might be saying a few simple words and beginning to understand and follow basic instructions. They may also start to identify familiar objects and people by name, demonstrating an increasing understanding of the world around them.
3. Social and Emotional Growth
Your toddler is starting to express a wider range of emotions, from joy and excitement to frustration and determination. They are also beginning to engage in parallel play, where they play alongside other children, and may show signs of empathy, like comforting a friend in distress.
4. Cognitive Development
At this age, your child’s cognitive abilities are growing as they start to solve simple problems and engage in pretend play. They are becoming more aware of cause and effect, and their curiosity leads them to explore and experiment with their surroundings.
Development Activities for 18-Month-Old
Engaging your 18-month-old in developmental activities helps with their overall growth. These activities not only provide entertainment but also outstandingly contribute to the physical, mental, and social development of 18-month-old babies. Below are some fun and effective activities that you can easily set up at home.
1. Sensory Play With Rice
Things You Will Need:
Uncooked rice
A large container
Small toys, spoons, and cups
How to Do It:
Pour the rice into the large container.
Bury small toys in the rice for your child to find.
Give your toddler spoons and cups to scoop and pour the rice.
Development:
This activity enhances your toddler’s fine motor skills and hand-eye coordination while also stimulating their senses. It also encourages problem-solving as they search for hidden toys.
2. Water Play
Things You Will Need:
A shallow basin or bathtub
Cups, spoons, and small waterproof toys
How to Do It:
Fill the basin or bathtub with a small amount of water.
Let your toddler play with cups, spoons, and toys in the water.
Encourage them to scoop, pour, and splash.
Development:
Water play promotes sensory exploration and helps develop fine motor skills. It also introduces early concepts of volume and cause-and-effect relationships.
3. Building With Blocks
Things You Will Need:
A set of large, soft blocks
How to Do It:
Show your toddler how to stack blocks to make simple towers.
Encourage them to build their own structures.
Knock the blocks down together and rebuild.
Development:
Building with blocks supports spatial awareness, problem-solving, and fine motor development. It also enhances creativity and introduces basic concepts of balance and gravity.
4. Simple Puzzles
Things You Will Need:
Age-appropriate wooden or foam puzzles
How to Do It:
Select a puzzle with large, easy-to-hold pieces.
Demonstrate how to place the pieces in the correct spots.
Let your toddler try on their own, offering guidance as needed.
Development:
Puzzles are excellent for developing cognitive skills, including problem-solving and hand-eye coordination. They also help with understanding shapes and spatial relationships.
5. Music and Dance
Things You Will Need:
A music player or instruments (tambourine, maracas, etc.)
How to Do It:
Play your toddler’s favourite songs or rhythmic tunes.
Encourage them to dance, clap, and move to the music.
Offer simple instruments for them to play along.
Development:
Music and dance activities play a vital role in enhancing physical development, coordination, and rhythm. They also cultivate self-expression and promote social interaction, particularly when shared with others.
6. Storytime
Things You Will Need:
Picture books with simple, colourful illustrations
How to Do It:
Choose a short storybook with engaging pictures.
Read aloud to your toddler, pointing to and naming objects in the pictures.
Encourage them to turn the pages and interact with the story.
Development:
Storytime enhances language skills, listening abilities, and imagination. It also strengthens the bond between you and your child, fostering emotional and social development.
7. Outdoor Exploration
Things You Will Need:
A safe outdoor space (garden, park)
Comfortable clothing and shoes
How to Do It:
Take your toddler outside to explore the natural environment.
Let them walk, run, and explore different textures (grass, sand, leaves).
Point out and name different objects like flowers, birds, and trees.
Development:
Outdoor play is crucial for physical development, offering opportunities for gross motor skills to flourish. It also stimulates curiosity and environmental awareness, fostering cognitive growth.
8. Drawing With Crayons
Things You Will Need:
Non-toxic crayons
Large sheets of paper or a drawing board
How to Do It:
Give your toddler crayons and a large piece of paper.
Encourage them to make marks and scribbles freely.
Talk to them about the colours they are using and the shapes they create.
Development:
Drawing helps improve fine motor skills, hand-eye coordination, and creativity. It also introduces basic concepts of colour and shapes, contributing to cognitive development.
9. Stacking Cups
Things You Will Need:
A set of stacking cups or similar objects
How to Do It:
Show your toddler how to stack the cups in size order.
Encourage them to try stacking the cups themselves.
Experiment with different stacking arrangements.
Development:
This activity develops fine motor skills, hand-eye coordination, and problem-solving abilities. It also enhances spatial awareness and understanding of size relationships.
10. Pretend Play With Dolls or Stuffed Animals
Things You Will Need:
Dolls, stuffed animals, or toy figurines
Simple props (blankets, toy food, etc.)
How to Do It:
Set up a small play area with dolls or stuffed animals.
Encourage your toddler to feed, dress, or tuck in their toys.
Join in by pretending to play along, enhancing the story.
Development:
Pretend play is vital for social and emotional development. It allows toddlers to explore different roles, practice empathy, and understand the world around them. It also fosters creativity and language skills.
11. Simple Obstacle Course
Things You Will Need:
Cushions, soft furniture, and other safe objects
How to Do It:
Arrange cushions and soft objects to create a simple obstacle course.
Encourage your toddler to crawl, climb, and walk through the course.
Guide them as they navigate each obstacle, offering praise and encouragement.
Development:
An obstacle course is excellent for developing gross motor skills, balance, and coordination. It also builds confidence as your toddler learns to overcome physical challenges.
Educational and Learning Activities to Do with an 18-Month-Old
At 18 months, your toddler is at a prime age for absorbing new information and developing critical skills. Incorporating educational and learning activities into their daily routine can significantly boost their cognitive and language development. Below are some engaging and effective educational & learning activities for 18-month-old babies that you can easily try at home.
1. Matching Games
Things You Will Need:
Picture cards or objects in pairs
A flat surface
How to Do It:
Lay out the picture cards or objects in front of your toddler.
Show them how to match similar cards or objects together.
Encourage them to find and match the pairs themselves.
Skill Development:
This activity enhances cognitive skills, particularly memory and recognition. It also helps with problem-solving and visual discrimination.
2. Shape Sorter Play
Things You Will Need:
A shape sorter toy
How to Do It:
Show your toddler how to fit the different shapes into their corresponding holes.
Encourage them to try each shape themselves.
Praise them when they successfully match a shape.
Skill Development:
Shape sorter play improves fine motor skills, hand-eye coordination, and understanding of shapes and spatial relationships. It also fosters problem-solving abilities.
3. Counting Objects
Things You Will Need:
Small toys or everyday objects (blocks, spoons, etc.)
How to Do It:
Gather a few small objects and line them up in front of your toddler.
Count the objects aloud while pointing to each one.
Encourage your toddler to repeat the counting with you.
Skill Development:
Counting objects introduces basic math skills, including number recognition and one-to-one correspondence. It also enhances language development as they learn to associate numbers with words.
4. Colour Sorting
Things You Will Need:
Coloured objects (balls, blocks, or pom-poms)
Containers or bowls
How to Do It:
Provide your toddler with a variety of coloured objects.
Show them how to sort the objects by colour into different containers.
Let them try sorting the objects themselves, offering guidance as needed.
Skill Development:
Colour sorting helps with colour recognition, fine motor skills, and cognitive development. It also encourages organisation and categorisation skills.
5. Alphabet Singing
Things You Will Need:
Alphabet chart or flashcards
A music player (optional)
How to Do It:
Sing the alphabet song with your toddler, pointing to the letters on the chart or flashcards as you go.
Encourage your toddler to sing along and point to the letters.
Repeat the song regularly to reinforce letter recognition.
Skill Development:
This activity boosts language skills, particularly letter recognition and early literacy. It also helps with memory and auditory learning.
6. Interactive Storytelling
Things You Will Need:
A storybook with interactive elements (flaps, textures, etc.)
How to Do It:
Choose a storybook with interactive features that your toddler can touch and explore.
Read the story aloud, encouraging your toddler to interact with the book by lifting flaps or touching textures.
Ask simple questions about the story to engage their comprehension.
Skill Development:
Interactive storytelling enhances language development, listening skills, and cognitive abilities. It also promotes early literacy and a love for reading.
7. Stacking Rings
Things You Will Need:
A set of stacking rings
How to Do It:
Show your toddler how to place the rings on the stacking pole in order of size.
Encourage them to stack the rings themselves.
Mix up the rings and let them try again, offering guidance if needed.
Skill Development:
Stacking rings improve fine motor skills, hand-eye coordination, and problem-solving. It also helps with understanding size and order.
8. Singing Nursery Rhymes
Things You Will Need:
A list of favourite nursery rhymes
A music player (optional)
How to Do It:
Sing or play popular nursery rhymes that your toddler enjoys.
Encourage them to join in with the singing, clapping, or actions that go along with the rhymes.
Repeat regularly to help with memorisation and language skills.
Skill Development:
Singing nursery rhymes boosts language development, memory, and auditory skills. It also fosters social interaction and rhythm awareness.
9. Animal Sounds Recognition
Things You Will Need:
Animal toys or flashcards
A music player with animal sounds (optional)
How to Do It:
Show your toddler different animal toys or flashcards and name each animal.
Play the corresponding animal sound and encourage them to imitate it.
Repeat with different animals and sounds.
Skill Development:
Recognising and mimicking animal sounds enhances auditory discrimination, language skills, and cognitive development. It also introduces the concept of different animals and their characteristics.
18-Month-Old Sensory Activities
Sensory activities are an excellent way to engage your 18-month-old in exploring their environment through touch, sight, sound, and smell. These activities help stimulate their senses, promoting cognitive growth and enhancing their understanding of the world. Below are some enjoyable and effective sensory activities for 18-month-old babies.
1. Sensory Bin Exploration
Things You Will Need:
A large plastic bin or container
Various fillers (rice, pasta, sand, or dried beans)
Small toys or objects to hide in the filler
How to Do It:
Fill the bin with your chosen filler material.
Bury small toys or objects in the filler for your toddler to find.
Let your child explore the bin with their hands, encouraging them to dig and discover the hidden items.
Skill Development:
This activity enhances fine motor skills, tactile exploration, and cognitive development. It also helps with problem-solving as your child searches for hidden objects.
2. Finger Painting
Things You Will Need:
Non-toxic, washable finger paints
Large sheets of paper or a smooth surface
An old shirt or apron to protect clothing
How to Do It:
Lay out the paper or set up a smooth surface for painting.
Pour small amounts of finger paint onto the paper or surface.
Encourage your toddler to use their fingers to paint, mix colours, and create patterns.
Skill Development:
Finger painting promotes creativity, fine motor skills, and hand-eye coordination. It also provides a sensory-rich experience through touch and colour mixing.
3. Bubble Play
Things You Will Need:
Bubble solution
A bubble wand or blower
How to Do It:
Blow bubbles using the bubble wand or blower.
Encourage your toddler to chase, pop, and catch the bubbles.
Talk to them about the bubbles’ size, movement, and how they float in the air.
Skill Development:
Bubble play stimulates visual tracking, hand-eye coordination, and gross motor skills. It also provides a fun way to explore cause and effect as your child pops the bubbles.
4. Nature Walk and Touch
Things You Will Need:
A safe outdoor space (garden, park)
A small basket or bag to collect items
How to Do It:
Take your toddler for a walk in a garden or park.
Encourage them to touch and explore different natural textures, such as leaves, grass, and bark.
Collect interesting items like leaves or stones for further exploration at home.
Skill Development:
This activity promotes sensory exploration through touch and sight. It also encourages curiosity about nature, enhancing cognitive and language development as you discuss what they find.
5. Sound Exploration
Things You Will Need:
Household objects that make different sounds (pots, spoons, bells, etc.)
A safe space for playing with the objects
How to Do It:
Gather a variety of objects that produce different sounds.
Let your toddler explore the objects by hitting, shaking, or tapping them.
Talk about the different sounds they make and compare loud and soft noises.
Skill Development:
Sound exploration helps with auditory discrimination, fine motor skills, and cognitive development. It also introduces your toddler to the concept of cause and effect through sound production.
6. Scented Playdough
Things You Will Need:
Homemade or store-bought playdough
Food-safe scents or essential oils (lemon, lavender, etc.)
How to Do It:
Mix a few drops of food-safe scent or essential oil into the playdough.
Give the scented playdough to your toddler and encourage them to knead, roll, and shape it.
Talk to them about the different scents they are experiencing.
Skill Development:
Scented playdough engages the sense of smell, along with enhancing fine motor skills and creativity. It also introduces your child to new scents, expanding their sensory experiences.
Things to Keep in Mind While Playing With an 18-Month-Old
When engaging in playtime with your 18-month-old, it’s important to create a safe and nurturing environment that fosters their growth and learning. Understanding their developmental needs and limitations will help you make the most out of your play sessions. Here are some key things to do with 18-month-olds to ensure a positive and enriching experience.
1. Prioritise Safety
Ensure that the play area is free from sharp objects, small parts, or anything that could pose a choking hazard. Always supervise your toddler during playtime, especially during arts & crafts activities for 18-month-old children that involve small or messy materials.
2. Encourage Exploration
Allow your toddler to explore different textures, sounds, and objects at their own pace. This hands-on exploration is crucial for their sensory and cognitive development. Avoid pushing them towards activities they are not yet ready for, and instead, focus on what captures their interest.
3. Keep Activities Short and Simple
Toddlers have short attention spans, so it’s important to keep activities brief and engaging. Break down arts & crafts activities for 18-month-olds into simple, manageable steps, allowing them to enjoy the process without feeling overwhelmed.
4. Be Patient and Supportive
Your 18-month-old is still learning and may not always grasp instructions immediately. Be patient, offer gentle guidance, and celebrate their achievements, no matter how small. This positive reinforcement encourages confidence and a love for learning.
5. Rotate Toys and Activities
To keep your toddler engaged, rotate the toys and activities regularly. Introducing new things to do with 18-month-olds keeps their curiosity alive and prevents boredom. Include a mix of physical, sensory, and creative activities to support well-rounded development.
Infographic
FAQs
1. What are some indoor activities at home to keep an 18-month-old entertained?
Indoor activities such as sensory bins, building with blocks, and interactive storytelling are excellent ways to keep an 18-month-old engaged and entertained at home.
2. What are some outdoor activities for 18-month-olds?
Outdoor activities for 18-month-olds include nature walks, bubble play, and exploring the playground, which are all fun games that also promote physical development.
3. How can I find things to keep an 18-month-old entertained during playtime?
Creative art projects, simple puzzles, and fun games are some things to keep an 18-month-old entertained and help them learn through play.
Incorporating a variety of activities into your 18-month-old’s daily routine can greatly enhance their development and keep them joyfully engaged. Activities like sensory exploration and educational games play a crucial role in cultivating their physical, mental, and social growth. Remember to prioritise your child’s safety and adapt activities to suit your child’s individual pace and interests. Whether at home or outdoors, the key is to make playtime both fun and enriching. By doing so, you’re laying a strong foundation for their future learning and development.
Also Read:
Improving Stacking Skills in 18-Months-Old
How to Play with a 18-month-Old- Tips
Memory Games to Play with Your Toddler
Read more
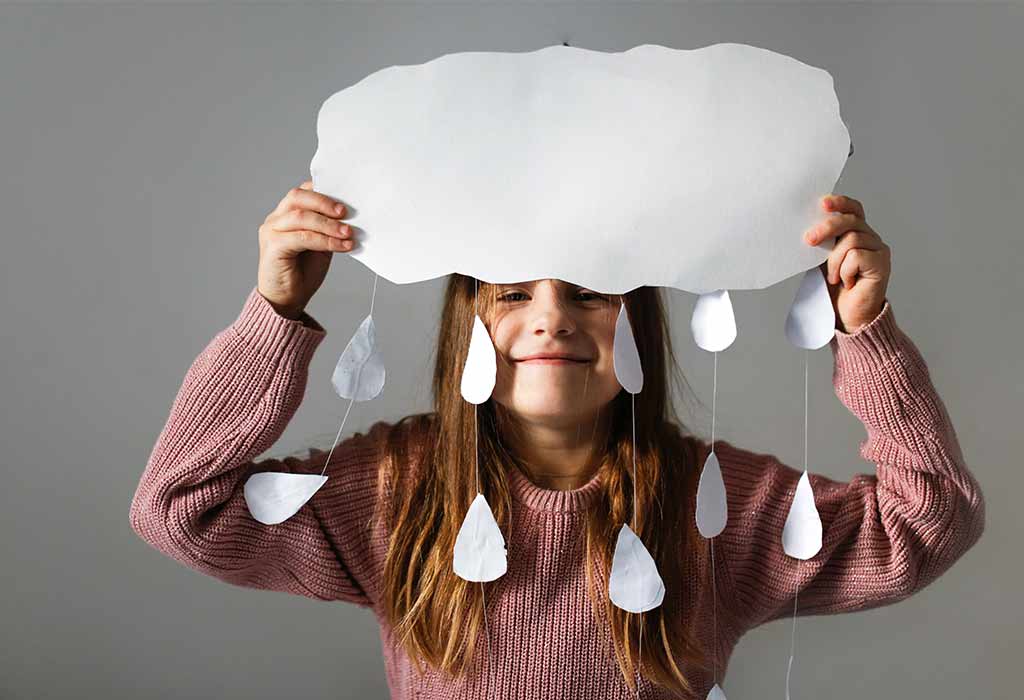
30 Creative Weather Crafts for Toddlers, Preschoolers, and Kids
‘Why does the sun disappear at night?’ ‘What happened to the moon in the morning?’ ‘How does God create the rain?’ This is what a daily episode of children looks like who are trying to find answers to their curiosity. Teaching little ones about the weather can be super enjoyable if you start with fun and educational crafts. Parents looking to keep their toddlers entertained on a rainy day or a day off can introduce weather concepts to preschoolers by incorporating weather crafts into their activities. Since kids are pretty much always curious about the sun, moon, and land, weather crafts for preschoolers and toddlers can be beneficial in teaching them something new and educational as well as keeping them engaged. Rest assured, we have compiled the best and age-appropriate weather crafts for kids that are entertaining and educational at the same time. Let’s start with weather crafts for toddlers that’ll introduce them to sunshine, rain, snow, and more crafty topics.
10 Weather Crafts for Toddlers
Toddlers love getting hands-on with things they like to explore, and weather-themed crafts are a fantastic way to dig deeper into their curiosity about the world. These weather arts and crafts for toddlers are fun, simple, and educational, and they help develop fine motor skills, creativity, and a beginner understanding of weather concepts in children.
1. Paper Plate Sunshine
Things You’ll Need:
Paper plate
Yellow paint
Yellow and orange construction paper
Glue stick
Scissors
Black marker
Method:
Paint the paper plate with a yellow colour and let it dry.
Cut triangles from the construction paper to create sun rays.
Glue the triangles around the edge of the paper plate.
Use the black marker to draw a happy face in the centre of the sun.
2. Cotton Ball Cloud
Things You’ll Need:
Blue construction paper
Cotton balls
Glue stick
Scissors
White paper
Method:
Cut out a cloud shape from the white paper.
Glue the cloud shape onto the blue construction paper.
Spread glue over the cloud shape and cover it with cotton balls.
3. Rainbow Handprints
Things You’ll Need:
Red, orange, yellow, green, blue, and purple paint
White construction paper
Paintbrush
Wet wipes (for cleaning hands)
Method:
Paint your toddler’s hand with red paint and press it onto the top of the paper.
Repeat with orange, yellow, green, blue, and purple paint, making a rainbow of handprints.
Let the paint dry before displaying.
4. Raindrop Mobile
Things You’ll Need:
Blue construction paper
White string or yarn
Scissors
Glue stick
Paper plate
Method:
Cut raindrop shapes from the blue construction paper.
Attach the raindrops to lengths of string.
Cut a paper plate in half and decorate it like a cloud.
Attach the strings to the paper plate cloud and hang it up.
5. Tornado in a Bottle
Things You’ll Need:
Clear plastic bottle with a lid
Water
Glitter
Dish soap
Method:
Fill the bottle with water. Don’t fill it to the brim; leave some space at the top.
Add a few drops of dish soap and a pinch of glitter.
Close the lid tightly and swirl the bottle to create a tornado effect.
6. Snowflake Painting
Things You’ll Need:
White paper
Blue paint
Paintbrush
White crayon
Method:
Use the white crayon to draw snowflakes on the white paper.
Paint over the paper with blue paint.
Watch as the crayon-resistant snowflakes appear through the paint.
7. Wind Sock
Things You’ll Need:
Toilet paper roll
Colourful streamers
Paint or markers
Glue stick
String
Method:
Paint or decorate the toilet paper roll.
Glue streamers around one end of the roll.
Attach a string to the other end for hanging.
8. Weather Wheel
Things You’ll Need:
Paper plate
Split pin
Construction paper
Markers
Scissors
Method:
Divide the paper plate into four sections and draw different weather symbols (sun, cloud, rain, snow) in each section.
Cut an arrow from the construction paper and attach it to the centre of the plate with a split pin.
Spin the arrow to indicate the weather.
9. Lightning Bolt Craft
Things You’ll Need:
Yellow construction paper
Black construction paper
Scissors
Glue stick
Method:
Cut a lightning bolt shape from the yellow construction paper.
Glue the lightning bolt onto the black construction paper to create a striking contrast.
Display the lightning bolt as a fun weather decoration.
10. Weather Sensory Bottle
Things You’ll Need:
Clear plastic bottle with a lid
Baby oil
Blue food colouring
Glitter
Water
Method:
Fill the bottle halfway with water. Now, add a few drops of blue food colouring.
Add glitter to the water.
Now, fill the rest of the bottle with any baby oil of your choice and seal the lid tightly.
Shake the bottle to see the weather’s sensory effects.
10 Weather Crafts for Preschoolers
Preschoolers are at a wonderful age where their curiosity about everything happening around them is boundless, including how the sun and the moon work. So, introducing them to weather art for preschoolers can be a fantastic way to combine fun and learning. Try out these weather-themed crafts that will inspire creativity and teach them about different weather conditions.
1. Rainy Day Collage
Things You’ll Need:
Blue construction paper
Grey and white cotton balls
Glue stick
Scissors
Silver glitter
Method:
Cut out cloud shapes from the grey construction paper.
Glue the clouds onto the blue construction paper.
Stretch out the cotton balls to make them flat and glue them onto the clouds.
Add drops of glue below the clouds and sprinkle silver glitter to create the effect of rain.
2. Sun Catcher Rainbow
Things You’ll Need:
Transparent contact paper
Tissue paper in rainbow colours
Scissors
String
Method:
Cut the contact paper into a large circle or any desired shape.
Cut the tissue paper into small squares.
Peel the backing off the contact paper and stick the tissue paper squares onto it to create a rainbow pattern.
Hang the sun catcher with string in a sunny window.
3. Windmill Craft
Things You’ll Need:
Coloured paper
Scissors
Glue stick
Straw or wooden stick
Pin
Method:
Cut the coloured paper into a square.
Cut diagonally from each corner towards the centre. Don’t go all the way to the very centre; stop a few centimetres from the middle.
Fold alternating corners into the centre and glue them down.
Attach the windmill to the straw or stick with a pin.
4. Snow Globe
Things You’ll Need:
Clear plastic cup
White glitter
Blue construction paper
Glue stick
Scissors
Clear tape
Method:
Cut a circle from the blue construction paper to fit the opening of the plastic cup.
Glue white glitter to the paper to represent snow.
Tape the paper to the opening of the cup, glitter side in.
Shake the cup to see the “snow” fall.
5. Thunderstorm in a Jar
Things You’ll Need:
Glass jar with lid
Water
Shaving cream
Blue food colouring
Dropper
Method:
Fill the jar three-quarters full with water.
Top it up with a layer of shaving cream.
Use a dropper to add drops of blue food colouring onto the shaving cream.
Watch as the “rain” falls through the shaving cream into the water.
6. Weather Chart
Things You’ll Need:
Large poster board
Markers
Construction paper
Glue stick
Velcro dots
Method:
Draw a grid on the poster board with the days of the week.
Create weather symbols (sun, cloud, rain, snow) from construction paper.
Attach Velcro dots to the back of the symbols and on the chart.
Let children change the symbols daily according to the weather.
7. Puffy Paint Clouds
Things You’ll Need:
Shaving cream
White glue
Blue construction paper
Paintbrush
Method:
Mix equal amounts of shaving cream and white glue to make puffy paint.
Use the paintbrush to create cloud shapes on the blue construction paper.
Let the clouds dry to become puffy and soft.
8. Tornado Twirlers
Things You’ll Need:
Black construction paper
White crayon
Scissors
String
Method:
Draw a spiral on the black construction paper with the white crayon.
Cut along the spiral line.
Attach a piece of string to the centre of the spiral.
Hang the tornado twirler and watch it spin.
9. Weather Wheel
Things You’ll Need:
Paper plate
Markers
Split pin
Construction paper
Method:
Divide the paper plate into four sections and draw different weather symbols (sun, cloud, rain, snow) in each section.
Cut an arrow from the construction paper and attach it to the centre of the plate with a split pin.
Spin the arrow to indicate the weather.
10. Cloud Viewer
Things You’ll Need:
Paper towel roll
Blue paint
Cotton balls
Glue stick
Scissors
Method:
Paint the paper towel roll blue and let it dry.
Glue cotton balls around one end of the roll to represent clouds.
Look through the other end to view the sky and imagine different weather scenarios.
10 Weather Crafts for Kids
Weather phenomena is such a vast topic that keep learning about it even in your adulthood. Temperature, precipitation, rain, electricity, thunder, storm,…oh my my… there’s so much to learn. Instead of asking them to rote, let’s engage them in projects that combine creativity with education, basically hands-on learning. These engaging weather crafts for kids are perfect for school projects and rainy day activities at home.
1. Weather Diorama
Things You’ll Need:
Shoebox
Construction paper
Markers
Scissors
Glue stick
Cotton balls
Miniature plastic figures, like humans, trees, and animals
Method:
Cover the inner side of the shoe box with blue construction paper to make it look like the sky.
Create weather elements like clouds, sun, and raindrops from construction paper.
Glue cotton balls for clouds and place them inside the box.
Add plastic figures to represent people or animals experiencing the weather.
2. Weather Forecast Board
Things You’ll Need:
Large poster board
Markers
Construction paper
Velcro dots
Scissors
Method:
Divide the poster board into sections for different weather conditions (sunny, rainy, cloudy, snowy).
Create weather symbols from construction paper.
Attach Velcro dots to the back of the symbols and on the board.
Allow kids to change the forecast daily based on the actual weather.
3. DIY Barometer
Things You’ll Need:
Glass jar
Balloon
Rubber band
Drinking straw
Glue
Index card
Tape
Method:
Cut the balloon and stretch it over the top of the jar, securing it with a rubber band.
Glue a drinking straw to the centre of the balloon top.
Place an index card vertically next to the jar and tape it in place.
Mark the card to track the straw’s movements, indicating pressure changes.
4. Rain Stick
Things You’ll Need:
Cardboard tube
Aluminium foil
Rice or beans
Construction paper
Glue stick
Markers
Method:
Cover one end of the cardboard tube with construction paper and secure it with glue.
Twist aluminium foil into a spiral and place it inside the tube.
Fill the tube with rice or beans.
Cover the other end of the tube with construction paper and glue.
Decorate the tube with markers and shake to hear the sound of rain.
5. Sun Clock
Things You’ll Need:
Paper plate
Markers
Construction paper
Glue stick
Scissors
Split pin
Method:
Draw a clock face on the paper plate.
Create clock hands from construction paper and attach them to the centre of the plate with a split pin.
Decorate the plate with sun rays using markers.
Use the sun clock to teach kids about time and daylight.
6. Weather Vane
Things You’ll Need:
Straw
Paper
Glue stick
Scissors
Pencil with eraser
Pin
Method:
Cut an arrow and tail from the paper and glue them to opposite ends of the straw.
Push a pin through the centre of the straw and into the pencil eraser.
Place the pencil in an upright position.
Use the weather vane to determine wind direction.
7. Cloud in a Jar
Things You’ll Need:
Glass jar
Warm water
Ice
Hairspray
Method:
Fill the jar with warm water.
Spray a small amount of hairspray into the jar.
Quickly place the lid with ice on top of the jar.
Watch as a cloud forms inside the jar.
8. Snowflake Window Clings
Things You’ll Need:
White school glue
Glitter
Wax paper
Method:
Draw snowflake designs on wax paper using white school glue.
Sprinkle glitter over the wet glue.
Let the snowflakes dry completely.
Peel them off the wax paper and place them on the windows.
9. Temperature Chart
Things You’ll Need:
Poster board
Markers
Construction paper
Glue stick
Method:
Create a large thermometer shape on the poster board.
Use markers to indicate temperature ranges.
Cut a strip of red construction paper to represent mercury and glue it to the chart.
Adjust the “mercury” strip daily to reflect the temperature.
10. Weather Journal
Things You’ll Need:
Notebook
Markers
Stickers
Ruler
Method:
Divide the notebook into sections for each day.
Have kids draw and write about the weather they observe daily.
Use markers and stickers to decorate the journal.
Review the journal regularly to discuss weather patterns and changes.
FAQs
1. What are some easy weather craft ideas for preschoolers?
Some easy weather craft ideas for preschoolers include making paper plate suns, cotton ball clouds, and rainbow handprints. These projects are simple, engaging, and perfect for young children.
2. How can weather crafts benefit preschoolers?
Weather crafts for kindergarten and preschoolers help develop fine motor skills, enhance creativity, and teach basic weather concepts through hands-on activities.
3. What materials are commonly used in weather crafts for preschoolers?
Paper plates, construction paper, child-safe glue sticks or glue guns, cotton balls, markers, scissors, glitter, etc., are some commonly used materials in weather crafts for preschoolers. Apart from scissors, these items are safe and easy to handle for several weather projects for preschoolers.
4. How can I incorporate weather crafts into a preschool curriculum?
You can introduce several weather crafts into a preschooler’s curriculum by aligning them with weather lessons. For instance, at home, you can create a weather wheel to track daily weather, make DIY wind chimes, or make a rain stick to observe the sound of rain. These activities make learning about the weather interactive and super fun.
Weather crafts offer a wonderful opportunity for toddlers, preschoolers, and big kids to learn about different weather phenomena in a fun and engaging way. These hands-on projects build creativity, enhance fine motor and observational skills, and, most of all, do all this in a non-boring way. Plus, the crafts designed for children require only simple materials and easy-to-follow steps, so creating a sunny day collage or a rain stick is quite easy and fun. We hope these weather craft ideas for preschoolers and kindergarteners turn your little one’s day into a learning adventure and be an excuse for socialising with other kids and turning new pages, one at a time.
Also Read:
Amazing paper craft activities for kids
Waste Material Craft Ideas for Kids
Plastic Bottles Craft Ideas for Kids
Read more
10 Best Farm Activities For Preschoolers and Toddlers
Farm-themed activities provide a fantastic opportunity for preschoolers and toddlers to learn about animals, nature, and the agricultural world. Engaging in farm activities helps children develop important skills such as sensory exploration, fine motor skills, and social interaction. In this article, we will explore 25 fun and educational farm activities specifically designed for preschoolers and toddlers. These activities will inspire young minds, spark their curiosity, and create lasting memories.
Benefits of Farm Activities for Children
Engaging children in farm activities offers a multitude of benefits that contribute to their overall development. Here are five key benefits of farm activities for children:
1. Hands-on Learning
Farm activities provide children with hands-on learning experiences, allowing them to explore the natural world and gain a deeper understanding of how food is grown, animals are cared for, and the importance of sustainability. By actively participating in activities like planting seeds, caring for animals, and observing the growth process, children develop a stronger connection to nature and a greater appreciation for the environment.
2. Sensory Stimulation
Farm activities often involve sensory play, which engages children’s senses and promotes sensory development. Activities such as sensory bins filled with hay, corn, or water provide opportunities for children to explore different textures, smells, and sounds. Sensory stimulation not only enhances cognitive development but also improves fine motor skills, hand-eye coordination, and sensory processing abilities.
3. Cognitive Development
Farm activities stimulate children’s cognitive development by fostering curiosity, problem-solving skills, and critical thinking. For example, sorting vegetables or matching animal sounds to pictures encourages logical reasoning and classification skills. Farm activities also offer opportunities for language development as children learn new vocabulary related to animals, farming, and nature.
4. Social and Emotional Development
Participating in farm activities promotes social interaction and cooperation among children. Whether it’s working together to plant seeds, taking turns during a game, or engaging in role-play with farm animal puppets, children learn valuable social skills such as communication, sharing, empathy, and teamwork. Farm activities also provide opportunities for emotional expression, as children connect with animals, nature, and their own creativity, fostering a sense of joy, wonder, and self-confidence.
Health and Well-being: Farm activities encourage a healthy and active lifestyle. Children engage in physical activities like running, hopping, and playing games that enhance gross motor skills and overall physical fitness. Additionally, farm activities often involve exposure to fresh fruits, vegetables, and healthy eating concepts, promoting a positive attitude towards nutritious foods and healthy habits.
25 Fun Farm Activities For Preschoolers & Toddlers
Some fun preschool farm activities are –
1. Planting Seeds – Learning About Growth and Responsibility
What You Will Need:
Small pots or containers
Potting soil
Vegetable or flower seeds
Watering can or spray bottle
Instructions:
Help the children fill the pots with potting soil.
Let each child choose a seed and plant it in their pot.
Instruct them to water their pots regularly and place them in a sunny spot.
Encourage them to observe and document the growth of their plants.
2. Farm Animal Sensory Bin – Exploring Textures and Animal Sounds
What You Will Need:
Large plastic bin or tray
Shredded paper or hay
Plastic farm animal figurines
Farm animal sound clips or recordings
Instructions:
Fill the bin or tray with shredded paper or hay.
Add the plastic farm animal figurines.
Play farm animal sound clips or recordings and encourage children to match the sounds to the appropriate animals.
Let them explore the textures and create imaginary farm scenes.
3. Paper Plate Farm Animals – Encouraging Creativity and Fine Motor Skills
What You Will Need:
Paper plates
Construction paper
Scissors
Glue
Markers or crayons
Instructions:
Assist children in cutting out ears, snouts, tails, and other features from construction paper.
Have them glue the paper cutouts onto the paper plates to create different farm animals.
Encourage them to use markers or crayons to add details and colors to their creations.
Display the finished paper plate farm animals for everyone to admire.
4. Vegetable Sorting – Learning About Different Types of Vegetables
What You Will Need:
Assorted plastic or felt vegetables (carrots, tomatoes, broccoli, etc.)
Baskets or containers labeled with vegetable names
Tongs or small scoops for sorting
Instructions:
Place the baskets or containers in a row.
Mix the plastic or felt vegetables in a pile.
Encourage children to use tongs or scoops to sort the vegetables into the correct containers based on their types.
Discuss the different vegetables, their colors, shapes, and textures as they sort.
5. Farm Animal Yoga – Promoting Physical Activity and Imagination
What You Will Need:
Farm animal yoga cards or printouts (available online)
Open space for movement
Instructions:
Introduce different farm animal yoga poses, such as cow, chicken, horse, and pig.
Show the children the yoga cards or printouts and demonstrate each pose.
Encourage them to imitate the animal movements and hold the poses for a few seconds.
Incorporate animal sounds and storytelling to enhance the experience.
6. Sensory Farm Animal Wash – Exploring Water Play and Animal Care
What You Will Need:
Plastic farm animal figurines
Large container or basin filled with water
Brushes, sponges, or scrubbers
Instructions:
Place the farm animal figurines in the container filled with water.
Provide brushes, sponges, or scrubbers for the children to wash the animals.
Encourage them to scrub the animals gently and talk about the importance of cleanliness and caring for animals.
Allow them to create imaginative stories while engaging in sensory water play.
7. Fruit and Vegetable Tasting – Encouraging Healthy Eating and Food Exploration
What You Will Need:
Assorted fruits and vegetables (apples, grapes, carrots, cucumbers, etc.)
Child-friendly knives for cutting (with adult supervision)
Plates or trays for serving
Instructions:
Wash and cut the fruits and vegetables into bite-sized pieces.
Arrange them on plates or trays.
Encourage children to try different fruits and vegetables, discussing their flavors, colors, and textures.
Discuss the importance of eating a variety of healthy foods for their growth and well-being.
8. Farm Animal Sounds Match-Up – Developing Listening and Memory Skills
What You Will Need:
Farm animal sound clips or recordings
Pictures or flashcards of corresponding farm animals
Instructions:
Play the farm animal sound clips or recordings for the children to listen to.
Lay out the pictures or flashcards of farm animals in front of them.
Encourage them to match the sounds they hear to the correct animal pictures.
Discuss the characteristics and sounds of each animal.
9. Farm-themed Sensory Bottles – Stimulating Senses and Exploration
What You Will Need:
Empty plastic bottles with caps
Dry ingredients for different sensory experiences (rice, lentils, sand, cotton balls, etc.)
Small plastic farm animal figurines
Glue (optional)
Instructions:
Fill each plastic bottle with a different sensory material, leaving some space at the top.
Add a few plastic farm animal figurines to each bottle.
Secure the caps tightly, or glue them shut for extra safety.
Let the children shake and explore the sensory bottles, observing the different sounds and textures.
10. Hay Bale Maze – Promoting Gross Motor Skills and Problem-Solving
What You Will Need:
Bales of hay
Rope or twine (optional)
Cones or markers (optional)
Instructions:
Set up a simple maze using hay bales, arranging them in a pattern.
Use rope or twine to mark the paths if desired.
Guide the children through the maze, encouraging them to navigate the twists and turns.
Add cones or markers for extra challenges and create different routes.
Important Safety Rules To Follow For Farm Activities With Preschoolers & Toddlers
Engaging in farm activities for preschoolers and toddlers can be a delightful and educational experience. However, it is essential to prioritize safety to ensure the well-being of the children. Especially when it comes to outdoor farm activities for preschoolers, safety is a priority. Here are some important safety rules to follow when conducting farm activities for 2-year-olds, and farm activities for kindergarteners:
Adult Supervision: Always have adult supervision present during farm activities. Adults should actively monitor the children, providing guidance and assistance when needed.
Age-Appropriate Activities: Select activities that are suitable for the age and developmental level of the children. Ensure that the activities do not pose any physical or cognitive risks.
Farm Environment Safety: Before engaging in farm activities, assess the farm environment for any potential hazards. Remove or secure items that could cause injury, such as sharp tools, poisonous plants, or unstable structures.
Animal Interaction: If the farm activities involve interaction with animals, establish guidelines for safe animal handling. Teach children to approach animals gently and calmly, avoiding sudden movements or loud noises. Reinforce the importance of respecting the animals’ space and not engaging in behaviors that could harm them.
Hygiene Practices: Emphasize the importance of good hygiene practices on the farm. Encourage children to wash their hands thoroughly with soap and water before and after engaging in farm activities, especially if they have come into contact with animals or soil.
Protective Clothing: Ensure that children are appropriately dressed for farm activities. Encourage them to wear closed-toe shoes, long pants, and long-sleeved shirts to protect against potential scrapes, scratches, or exposure to allergens.
Sun Protection: When conducting farm activities outdoors, apply sunscreen to protect children’s skin from harmful UV rays. Provide hats and sunglasses for added sun protection.
Water Safety: If water activities are part of the farm experience, such as sensory bins or water play, ensure adequate supervision and maintain shallow water levels appropriate for the children’s age and swimming abilities. Never leave children unattended near water sources.
First Aid Preparedness: Have a first aid kit readily available during farm activities. Be prepared to address minor injuries such as cuts, scrapes, or insect bites. In the event of a more serious injury, seek medical attention promptly.
Allergy Awareness: Take note of any known allergies among the children participating in the farm activities. Be cautious about exposure to potential allergens, such as certain plants or animal products.
Communication with Parents: Communicate with parents or guardians about the farm activities, including any potential risks or safety precautions. Obtain necessary permissions and inform parents about the safety measures in place.
By adhering to these safety rules, you can create a safe and enjoyable farm experience for preschoolers and toddlers, allowing them to learn, explore, and develop a deeper connection with nature and farm life.
Engaging in farm-themed activities provides preschoolers and toddlers with exciting opportunities to learn, explore, and have fun. These 25 farm activities encompass a range of experiences, including sensory play, art, movement, and imaginative play. Through these activities, children develop essential skills while gaining a deeper understanding of farm animals, nature, and the agricultural world.
Also Read:
Activities for 3 Year Old Children
Fun Things to Do With a Toddler
Interesting Colour Activities for Preschoolers
Read more
Toys for Children with Autism to Help Them Learn
Generally, symptoms of autism spectrum disorder start to appear as early as two years. So, it is imperative that parents recognise the issue at the earliest and help the child with autism get treated to reduce the symptoms and lead a better life. There is an array of toys for children with autism that can help with their development. Since every child or person with autism is different, they need a different set of toys that match their ability, development and skills for better performance. To help sustain themselves in the social environment, special toys are grouped under different categories, which, therefore, can be chosen according to the age, development stage, and impact of autism a child possesses.
This article is your guide for choosing a perfect toy gift wrapped for your little one with special needs.
What Toys Are Good for Autistic Children?
Children with autism may have different impairments with social skills, language skills, motor skills and repetitive behaviour patterns. For example, children high in energy can be gifted play toys which require more physical activity. Children with visual ailments can be given liquid timers for better observation. Educational toys help children with autism therapeutically and also build a platform for reaching their academic goals. There is also a wide range of sensory toys that a child with autism can pick to get them engaged in a way they prefer.
1. Sensory Toys
Sensory toys are designed to keep the child engrossed in an activity which makes them enjoy their most preferred senses. They come in different sizes and shapes. Children undergoing therapies for treating Sensory Processing Disorder (SPD) are often impacted by stress due to time-consuming treatments. In such scenarios, these sensory toys come handy as they act as a safe object that helps the child to keep their stress levels low. Occupational therapists usually advise children with SPD to use sensory toys to complete their therapies.
How They Help ?
Children with SPD become very sensitive and stressed when new taste, sound, touch, feel, or sight is introduced to them. However, to calm children during such situations, the right sensory toy that a child likes is used to keep the child’s composure. Once the child comfortably interprets a sense better, slowly other sensory toys can be introduced. These are the best toys for autistic toddlers since the idea behind using sensory toys is to naturally decline a child’s fear and difficulties. Proper use of sensory toys for children with autism may help them improve their communication skills due to low-stress levels.
Which Toys You Can Pick?
Fidget blocks
Real-life toys like kitchen items and dolls to promote cognitive skills
Memory games to develop the ability to match
Chew toys that are made with non-toxic silicone
Sensory rings for introducing textures
2. Visual Toys
You can find different sets of toys that are designed to have a cause-and-effect pattern. These toys create visual interest in children with ASD and help them blossom in a fun way. Different sound patterns and colourful flashing lights in these toys make the child fall in love with them.
How They Help ?
Visual toys flash a light, create a sound, move, spin or light up, keeping a child with autism interested visually. Toys under this category immensely develop hand and eye coordination as the child progresses with these pretty lot.
Which Toys You Can Pick ?
Interactive toys for children with visual impairments
Sound puzzles
Fidget spinners to learn rotation
Light up blocks
Marble run
Liquid timers
Mechanical sets
Colourful ooze tubes
Rainstick
3. Physical Activity Toys
A proper physical activity toy for a child has to be chosen with respect to age and level of development. Physical activity toys can be chosen to develop fine motor and gross motor skills to strengthen the child’s bones and muscles. You can observe the way your child uses their hands in joining, building, stacking or matching the toys using these toys.
How They Help ?
Indulging your child in physical activity toys can be beneficial for developing motor skills in the early stages. Hence autism therapy toys are used by doctors for treating children with ASD (Autism Spectrum Disorder). It is also imperative to choose these toys that match the child’s ability, just to ensure that the difficulty level of the toy is fine for your child. Toys of these sorts help a child to use both hands while playing, and the child figures out ways to manipulate the toy pieces.
Which Toys You Can Pick ?
Building blocks for problem-solving skills and motor skills
Lacing beads for understanding sequencing
Pattern cards for developing motor skills
Stacking toys
Sorting toys
Colouring with rock crayons and finger crayons
Drawing and painting
4. Educational Toys
Educational toys have pictorial representations and creativity that emphasise the cognitive skills of a child with ASD. Such toys develop an interest in a child and often work as a base for improving verbal communication and identifying letters and words. However, there are also toys for preschoolers with autism that have fun pictures that a child can repeatedly choose, helping them familiarise themselves with the pictures.
How They Help ?
Educational toys widely contribute to developing knowledge and memory for autistic children in a simple and enjoyable way. These toys work better in improving the receptive and expressive vocabulary of the child. You can choose books that are repetitive in nature that help the child learn vocabulary unknowingly in a fun way.
Which Toys You Can Pick ?
Repetitive books
Big stickers and small stickers
Sticker books
Fixing letters and alphabets in the right space designed for it
Board of basic skills like buttoning shirts, lacing shoes, etc.
Flashcards
5. Other Best Toys for Autism
Manipulative toys like card games and categorising games work wonders for developing mathematical skills and learning patterns for autistic children.
Puzzles will be a great pick for improving the problem-solving abilities of an autistic child.
Exercise balls and trampolines promote vestibular input for children with autism.
Water beads and sensory bags help in gaining focus and attention in children.
Toys like a crash mat, bean bags, stuffed animals, etc., provide proprioceptive inputs for a child with autism and help in strengthening bones and muscles.
Egg shakers, rainmakers and music mats provide input for developing audio senses in children.
How to Choose Toys for Autistic Kids?
Observe your child’s interests and choose a toy that matches their interests better.
Choosing highly challenging toys can worsen the condition of the child.
Opt for toys under a category one at a time based on your child’s ability, like choosing a sensory development toy first and then going for educational toys.
Observe your child’s reaction when they hold a particular toy.
Choose toys that are educational and help in developing their social interaction.
Select toys that are apt for their development stage rather than their age precisely.
Selecting toys that encourage shared play will help them socialise better.
While it may be overwhelming when you enter a toy shop due to the vast collection, you need to gauge your child’s requirements before picking a proper toy for an autistic child. Understand the child’s needs and pick the appropriate ones to make the most of them. Else you might find the toys stored in the closet, unused. Right toys can help your child with ASD develop better in every aspect of life.
References/Resources:
1. The 10 Best Sensory Toys & Gifts for Children with Autism; Carmen B. Pingree Autism Center of Learning; https://carmenbpingree.com/blog/best-sensory-toys-for-children-with-autism/
2. Piller. A, et al.; Sensory strategies to calm and engage children with autism spectrum disorder; The ASHA Leader; https://leader.pubs.asha.org/doi/10.1044/leader.FTR2.24042019.56; April 2019
3. What is a sensory toy and how do they help?; Autism Speaks; https://www.autismspeaks.org/blog/what-sensory-toy-and-how-do-they-help; May 2020
4. Dsouza. AJ, Baretto. M, Raman. V; Uncommon Sense: Interactive Sensory toys that encourage Social Interaction among children with Autism; https://homepage.divms.uiowa.edu/~hourcade/idc2012-specialneeds/dsouza.pdf
Also Read:
Animal Games and Activities for Kids
How to Teach Mindfulness to Children
Games Kids Can Play With Their Hands
Importance of Constructive Play in Early Childhood
Read more
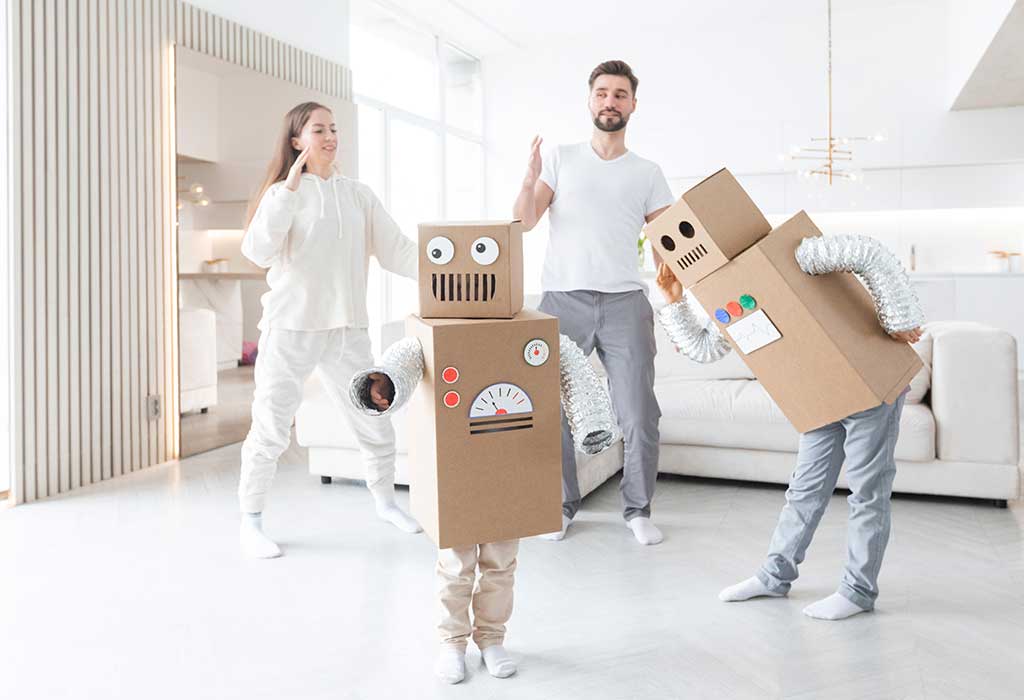
9 Best DIY Robot Costumes for Kids
You can easily create a DIY robot costume toddler without stitching or sewing. If you are looking for creative ideas to give your kid the best robot costume, then you are at the right place. It is very easy to bring the unique materials together and make them valuable and interesting. For example, you can make robotic arms and legs using dryer vents. With simple materials, you can also make a passable WALL-E robot costume child DIY, making it a memorable Halloween for your child.
If you want your kid to shine in the crowd of a kid’s costume competition or Halloween party, then you must give some effort and provide them with the best costume of all time. Keep reading for some easy but brilliant ideas for a robot costume for your kids this Halloween.
Unique Robot Costume Ideas for Children
Parents try to make extraordinary dresses for their children on occasions, like Halloween or any fashion competition. This results in magic, and everyone appreciates your kid. The Halloween party DIY robot Halloween costume for your kid and yourself can be creative, fun, and influential on social media platforms. Family Halloween is the best time to show your imagination, skill, and creativity.
However, many people find it very difficult to design toddler robot costumes, but actually, it is very easy, as you must have the most materials already in your home. You can skillfully cut and make it of any size. We are here with different creative ideas to help you design the best robot costumes for your kid.
1. Baby Robot Costume
Once you make this costume and make your kid wear it, then you must see their eyes twinkling with happiness and curiosity. This outfit can easily be built with leftover materials. It is a super easy robotic costume to make.
Materials Needed
Full-length grey pajamas or leggings
A top or high neck of full sleeves
A cardboard box in which your kid’s upper body can fit comfortably
Lids of plastic bottles
A large silver tape and silver pipe cleaner
Split pin paper clip and box cutter
Silver or grey hair glitters
A hot adhesive to paste these things
Silver or grey boots (optional)
Instructions
Let your little kid wear the grey or silver legging and full-sleeved top to give the robotic effect.
Start with the box, and then use silver duct tape to tape up the whole box.
Cut the box from the bottom and tape all the edges to ensure that the box is held tightly to the kid.
Now to make the robot’s limbs, cut out the head part according to your kid’s head size, and make armholes with the box cutter.
Once your child perfectly fits the box, go ahead with the decorating ideas.
Cover the top and bottom of the box with multiple layers of duct tape, and then use the colorful bottle lids to make a dial pad and make it look cooler; you can add a dial screen.
Now that you have decorated the box, it’s time to put it on your kid. Highlight your child’s hair with the silver hair glitters, and make them wear silver or grey boots.
2. Optimus Prime G1 Costume
Do you want your kid to look different from all others on Halloween and any fashion competition? If yes, design it for your kid from the household things like cereal boxes, paint, and glue. Moreover, this costume costs only 50 dollars.
Materials Needed
Grey and red duct tape
Cardboard boxes
Spray paint
Foamboard
Deadly helmet
Instructions
Take the cardboard box of different sizes, and cut them according to your shoulder and limbs.
Wrap them with duct tape, and then color them red using spray paint.
Use foam boards to create designs on costumes.
Give your kid a helmet to wear on the costume.
3. Astronaut Robot Costume
It is better to create a handy costume for your kid, this astronaut robotic costume is one of them. To make this DIY cardboard robot costume look cute and even better, you have to start with just a few things.
Materials Needed
Colored felt
Pillowcase
Silver foil paper and duct tape
Colored tape
Scissors
Glue
Plastic caps
Instructions
To make an Astronaut Robot Costume for your kid, you need to follow the below-given instructions.
Half-fold the pillowcase, then cut the neck opening using scissors from the front to give the astronaut effect.
Make armholes and remove the binding of the pillowcase from the bottom.
Cut the designs from felts and place them on the pillowcase using glue.
Insert the arms of foil paper and cover it with silver duct tapes.
Add colored duct tape for decoration.
Make the eye of the robot by cutting down the foil or boxes.
Add the plastic caps to each side of the robot head to make ears.
4. Caterpillar Robot Costume
This costume is not difficult to design. Furthermore, parents can make it with kids. Your kid will love this costume, and if you ask them to help you with it, they will feel more attached to it. Moreover, your kids will become more creative and closer to you by doing these activities.
Materials Needed
Cardboard boxes
Duct tape
Knife
Glue
Spray paint, any blue or silver color paint
Dryer vent
Instructions
Get the box that fits your child perfectly. For example, the big diaper box or any big amazon box will work.
Once you get the box, cut down the neck opening from the top for your child’s head.
If it perfectly fits your child, continue by making the box hard. And to do so, add the pieces of cardboard to it.
Cover the box using duct tape and then spray paint on all the edges and sides.
Do the multiple coating so that every side is covered, and then dry the box thoroughly.
Get all the robotic items, like plastic lids, colorful tubes, electric circuits, etc.
Cut and paste all those items using scissors and glue.
Place the dryer vent, cover it with foil and make your child’s arms.
Paint it with spray.
Get your kid the same color legging and top.
If you have rain boots at home, make sure your kid wears them.
5. Light-up Robot Costume
You can make a traditional cardboard robot with multiple lights and buttons to give more visual effect to your costume. Let’s see how you can build one such costume.
Materials Needed
Cardboard
Scissor
Glue
Plastic bottle caps of different colors
Duct tape
Box of two different sizes, one for the head and one for the body
Dryer vents
Chart paper
Battery
LED lights
Color or paints
Instructions
Cut the box for the head in square shape using scissors or a blade, and ensure that your kid’s head perfectly fits in it.
Add cardboard pieces to make the box hard and wrap it with silver foil or chart paper.
Make the eyes using different color chart paper, and put the bottle cap on it.
Make the mouth, nose, and ear using the foils, and then paint them accordingly.
Get the rectangular box, and measure it according to your kid’s length.
Cover it with foil or chart paper, and decorate it with caps and buttons.
Design separate spaces for control system and battery powers.
Put the LED lights inside the caps to glow and give a more robotic effect to your costume.
Paint the outlines and edges to highlight the parts.
Make limbs using the dryer vents.
Paint those dryer vents using spray paint.
Give your kid the rusty color shoes and gloves.
6. WALL-E Robot Costume
WALL-E and eve robot costumes are some of the favorite Halloween dresses for kids. It is a piece of art creatively made from recyclable items of home or leftover school crafts. To design this costume, you must know what things are required to make it.
Materials Needed
CDs
Cardboard
Boxes
Chart paper
Black inner and lowers
LED lights
Scissor
Glue
Dryer vents
Instructions
Let your child wear a sweatshirt and full-length leggings.
Get the rectangular box and cut it using scissors according to the child’s body size.
Cover it with the chart paper, and add the cardboard inside the boxes to reinforce it.
Put CDs as the eyes, or add two CDs together to make a full face shape.
Place the two LED lights inside the disk to make the glowing eyes of the robot.
Make designs on chart paper pieces and paste them on the body parts using hot glue to make it look like a robot’s operating system.
Put chart papers on the hands and legs, or you can use the dryer vents to create the limbs, as done in previous ones.
7. Retro Arcade Robot Costume
Source: Pinterest
Take a trip down memory lane with a Retro Arcade Robot Costume. This costume is inspired by classic arcade games and is sure to be a hit.
Materials Needed
Cardboard boxes
Retro arcade stickers or printouts
Silver and black spray paint
LED lights
Hot glue gun
Flexible dryer hose
Instructions
Cut a cardboard box to fit your child’s torso, making openings for the head, arms, and legs.
Paint the box with silver and black spray paint. Allow it to dry completely.
Glue retro arcade stickers or printouts of dials onto the box. Add LED lights for a glowing effect.
Cut pieces of flexible dryer hose and glue them to the arm and leg openings.
Have your child wear black clothing. Put on the box, ensuring that all elements are securely attached.
8. Tin Can Robot Costume
Source: Pinterest
Create a rustic and charming Tin Can Robot Costume using everyday materials. This costume has a recycled and industrial look.
Materials Needed
Large tin can
Steel funnel
Aluminum foil
Silver face paint
Foam axe
Gray or silver clothing (leggings and long-sleeve shirt)
Instructions
Have your child wear gray or silver leggings and a long-sleeve shirt
Cut the top and bottom of the large can to fit your child’s torso.
Place the aluminium foil on the hands and legs.
Place the inverted steel funnel on the child’s head as a hat.
Paint your child’s face with the face paint. Make sure the paint is kid-friendly.
You can give your little one the foam axe.
9. Heart Robot Costume
Source: Pinterest
Create a whimsical and adorable robot costume inspired by hearts. This costume combines the charm of robotics with the sweetness of hearts, perfect for a playful and cute look.
Materials Needed
2 white cardboard boxes (1 large and 1 small)
2 rectangular pink boxes
2 small white bowls
Heart-shaped sticker
Pink tutu
4 flexible dryer pipes
Scissors
White stick
Red ball
Glue
Instructions
Place the dryer pipes on your child’s arms and legs.
Place the large white square box on your child’s torso.
Using the scissors, cut out a square shape in the smaller white box. This will represent the opening for the face. Place this over your child’s head.
Using the two white bowls, create ears by sticking them on the sides of the smaller box with glue.
Use the glue to stick the antenna on top with the white stick. Add the red ball on top.
You can tie the tutu below the big box.
Add the pink boxes as the shoes.
Place the heart sticker on the left side of the big white box.
FAQs
1. How can I make a robot costume that is safe for my child?
Ensuring proper fit and comfort is essential. Make sure the cardboard box fits your child’s torso comfortably, providing enough room for movement. The openings for arms and legs should be large enough to avoid chafing and allow easy movement. The head opening should be big enough to fit comfortably but not too loose. Use non-toxic paints and adhesives to ensure safety. Smooth or cover any sharp edges on the cardboard or other materials to prevent cuts and scrapes. Ensure the costume has enough ventilation, especially around the head area, and make sure your child has clear visibility. You can add mesh or netting to the eye openings if needed.
2. How can I safely add lights to a robot costume?
Using battery-operated LED lights is the safest option as they are cool to the touch and energy-efficient. Ensure the battery pack is securely fastened inside the kids robot costume and easily accessible. Attach the lights securely using hot glue or strong tape and avoid placing lights near the face to prevent glare. Keep wires short and close to the costume to avoid tangling and use duct tape to secure any loose wires.
3. How do I ensure the costume is comfortable for extended wear?
Using lightweight materials is crucial. Opt for lightweight cardboard to prevent the costume from being too heavy and avoid adding too many layers of decoration that could weigh the costume down. Adding soft padding around the edges where the costume meets the skin can prevent discomfort. Use a comfortable inner lining, such as soft fabric, to prevent itching and irritation.
DIY robot costumes will not only make your child happy but will also save you a lot of money that you would have spent on buying a robot costume from a store. It also allows you to create a customized dress for your kid for all occasions, whether Halloween or any fashion competition.
Also Read:
DIY Hocus Pocus Costumes Ideas
Easy DIY Halloween Costume Ideas for Children
Unique Fancy Dress Costume Ideas for Kids
Best Book Character Dress Up Ideas for Children
Dress Up Play for Kids: Importance & Benefits
Read more
Sort By
 Latest
 Most Popular
 Trending
Please select atleast one Filter