

















.svg)
.svg)
.png)


Toddler


Suggested articles for you

Tongue Movement in a 14 Months Old
If your toddler refuses to eat or is a picky eater, one of the many causes for his picky behaviour could be a lack of tongue lateralization. Now as a parent, you may never have considered that tongue lateralization or rather the lack of it could be a problem for your child, but it can make your child a picky eater. Nevertheless, it can be easily rectified with a few exercises. Find out how!
What is Tongue Lateralization in Toddlers?
Tongue lateralization refers to the sideways movement of the tongue inside the mouth. When we eat something, the bite we take is first grabbed by the tongue and then moved to the side to be ground by the teeth. After the chewing is complete, the tongue brings back the food to the center of the mouth and then pushes it down the throat so that it can be swallowed. All this can take place only when there is proper tongue lateralization.
Children can find it hard to graduate from pureed food to textured food. Lack of oral motor development is one of the main reasons why toddlers can be fussy about their food. They reject a particular food item not because they don’t like it, but because their tongue isn’t lateralized enough to manoeuvre it around their little mouth. You can help your child control his tongue movements with some very easy and fun activities.
Activities to Develop Tongue Movements in Toddlers
1. Let’s Mimic!
Your toddler will love this activity! When you help your toddler brush his teeth, make him look in the mirror and make some funny faces that involve using tongue movements. Then ask your toddler to mimic these actions and make the same faces at you. This is a great exercise to develop tongue movement in toddlers.
2. Mealtime Activity
While feeding your toddler, take two pieces of soft food and place them on either side of his mouth. This way, your child will have to use his tongue to get the food, chew it, and then push it down the throat. Practising this daily will enhance your toddler’s tongue lateralization.
3. Sticky Food Time
Play a game with your toddler using some sticky foods like chocolate spread or peanut butter. Dab this on your little one’s lips and ask him to lick it off. Change the place where you dab the sticky food so that your toddler uses his tongue in several directions. Of course, you might have to demonstrate this to him first, but he will have fun!
4. Finger Foods
Place finger foods like carrot, cucumber sticks, or chips on the molar of your toddler. This will prompt him to use his tongue to chew the food and then swallow it.
You can also use a gum massager to push your toddler’s tongue sideways. His reflexes will encourage him to push your finger with his tongue. This is a good exercise to enhance tongue movement in toddlers!
Read more





10+ Best Parenting Books of All Time
Being a parent to a child is one of the most wonderful feelings. However, besides the joy and love, parenting involves unique challenges that keep changing as children grow up. Here is a list of 10 best parenting books that can help you navigate through your journey of being a parent.
Top Rated Books on Parenting That Every Parent Should Read
While children are getting smarter with each generation, parents need to up their parenting game too, to be able to handle them! These books will help you on your way to becoming a great parent for your child!
1. How to Talk So Kids Will Listen & Listen So Kids Will Talk by Adele Faber and Elaine Mazlish (1979)
This best-selling book is written by renowned experts Adele Faber and Elaine Mazlish who specialise in effective communication between parents and their children. This well-loved classic offers enduring insights on ways to deal with problems faced by parents while raising their children. Recommended by parents all over the world, this book offers practical, sensible, and hands-on solutions to children’s frustration and anger.
2. Calm Parents, Happy Siblings: How to Stop the Fighting and Raise Friends for Life by Dr. Laura Markham (2015)
A clinical psychologist and a mother of two, Dr. Laura Markham is an acclaimed author on parenting. She believes that a strong emotional bond between parent and child is key to raising a healthy and happy child. Raising siblings, as any parent would agree, is an extremely challenging task. In this book, the author emphasises on teaching children conflict resolution skills and creating a deep and meaningful bond with each child to cultivate a good family life.
3. Heart to Heart Parenting: Nurturing Your Child’s Emotional Intelligence From Conception to School Age by Robin Grille (2008)
This book stresses the importance of emotional bonding between parent and child. Heart to Heart Parenting is about celebrating the blissful journey of raising your children and trusting your instinctive parenting acumen. A psychologist and psychotherapist, Robin Grille offers insightful and practical ways to help develop your child’s emotional and social well-being.
4. Simplicity Parenting: Using the Extraordinary Power of Less to Raise Calmer, Happier, and More Secure Kids by Kim John Payne, Lisa M. Ross (2009)
Children today are overwhelmed with many choices and with very little time, leading to behavioural problems like social anxiety and stunted emotional growth. The book offers ideas and ways for salvaging the freedom and care-free environment that every child deserves to grow up in. An insightful read, this is a timeless book that has become a favourite among parents.
5. The Mommy Shorts Guide to Remarkably Average Parenting by Ilana Wiles (2016)
One of the funniest and most entertaining parenting books for moms, The Mommy Shorts Guide tells the story of an “average” mom from a refreshing perspective. Ilana Wiles’ humorous book on remarkably average parenting is a must-read for every mom struggling to be the perfect mother to her children. Although the book contains lots of practical advice, it does not offer a solid list of dos and don’ts about raising children. This book is more of a tribute to every mother and celebrates the less glamorous side of parenting.
6. Raising Your Spirited Child: A Guide for Parents Whose Child Is More Intense, Sensitive, Perceptive, Persistent, and Energetic by Mary Sheedy Kurcinka (1991)
Mary Sheedy Kurcinka is an internationally renowned author and educator on parent and child relationship. Translated into ten languages, this best-selling book includes real-life stories told from a refreshing and engaging perspective. The book draws on relevant and current research to offer effective parenting tips for handling tantrums and instilling discipline. It also helps build a positive, promising, and healthy environment for your children to grow up.
7. Unconditional Parenting: Moving From Rewards and Punishments to Love and Reason by Alfie Kohn (2006)
In this pioneering book, educator Alfie Kohn argues that traditional parenting methods often send out the wrong message. Children are loved only when they earn our approval, which may affect their mental and emotional wellbeing. An alternate parenting approach Kohn suggests involves shifting from the traditional approach to working with children by offering unconditional love and support.
8. First-time Parents by Miriam Stoppard (2009)
When you think of good parenting books, this is one that immediately comes to mind. In this book, Dr. Miriam Stoppard, a childcare specialist, offers first-time parents a practical guide to parenting. One of the best parenting books for new parents, this book addresses a wide range of topics. The book also talks about the role of the father, including emotional issues of adapting to becoming a new parent.
9. Parentology: Everything You Wanted to Know About the Science of Raising Children But Were Too Exhausted to Ask by Dalton Conley (2014)
In this witty and extremely entertaining book, Dalton Conley, a university professor, offers his unconventional but appealing approach to raising children. The book reveals pioneering research to help groom smart and self-assured children. The book, however, does not present a list of dos and don’ts or instructions for other parents. Instead, it is about his parenting experience.
10. Parenting With Love and Logic: Teaching Children Responsibility by Foster Cline and Jim Fay (1990)
Jim Fay, an educational consultant, and Dr. Foster Cline, a child and adult psychiatrist, stress the importance of “practice” while raising responsible children. This parenting book offers practical tips and tricks and shows you how to raise self-confident, motivated children without resorting to shaming and manipulation.
Enjoy a good read while you pick up trick and tips which will help iron out the rough road of parenting, with this selection of parenting books.
Also Read: Positive Parenting Tips
Read more
What Degree of Organizing and Sorting is Normal for Kids?
Your little ones birth has already brought a lot of happiness and it is surely bringing more every day. Right from the birth your baby starts understanding the world outside and perceives things accordingly. Your baby’s birth chart is also line up with some milestones. These are nothing but developmental pit stops that would help you track your baby’s development. There are defined milestones that your baby should have crossed to mark a positive development.
However, at times while you are monitoring all activities of your baby and tracking the milestones, there could be something that you might notice which may be a little unusual or too good for your child at that age. Experts say anything unusual should be discussed with your doctor immediately. One such behavior often observed is organizing and sorting things. Your kid might show signs of organizing and sorting things out of their way. This can often turn into an obsession and you might freak out.
So, is organizing and sorting normal for your kids?
The answer to the one above is tricky, as this behavior is not something unusual. In essence, you should feel proud that your little one knows to keep things organized. It will also give an idea of your kid being so learned about the environment that he wants things handy and sorted out. So, what are the benefits of organizing and sorting activities?
1. Cognitive skills
The above activity will increase your kid’s cognitive health by enhancing the hand eye coordination. Sorting out activity will also encourage your kid to observe and assess the similarities between the two separate set of stuff present. This activity will also help your kid organize things in such a manner that your little one can access the same with an ease.
2. Team Work
Often, you may find that your child is instructing others on the way to carry out sorting & organizing. At the end, they all will find that their effort was worth. The stacked and organized toys will give them access to all of them at once and they will feel very happy.
3. Physical Activity
In the pursuit of organizing and sorting, your kid will have a lot of physical activity. This in turn will give a lot of exercise and your kid will be all the more happy doing it. The direct impact will be on muscles and ligaments that will grow stronger.
So, why are you now worried of organizing and stacking? Is it necessary?
Well, there is no reason to worry about this. In essence, this is all the more normal and you should be happy that your kid is so well brought up. It is perfectly normal that your kid loves to be organized and sorted. In fact, this is the systematic approach for better life. Do not panic and learn some new ways of sorting from your kid.
Read more
Oh Crap Potty Training Method: How It Works, Pros, Cons, and Tips
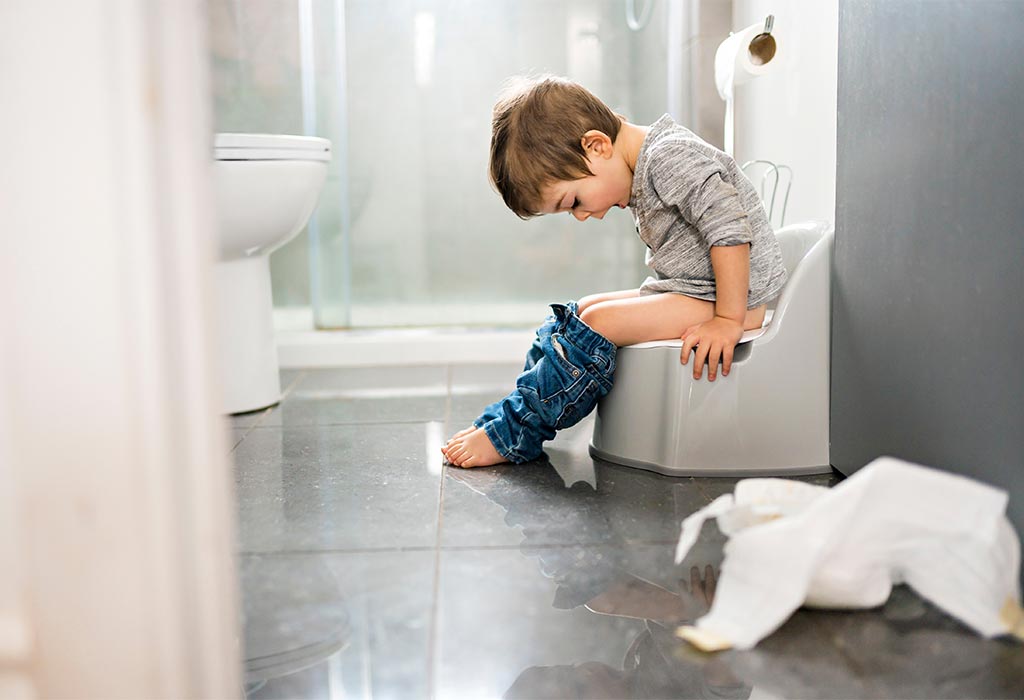
The potty training journey is often as much of a rite of passage for parents as it is for children. One of the many methods that have gained popularity in recent years is the “Oh Crap” method. It’s a technique many parents swear by, but, as with any approach, it has its supporters and sceptics. So, let’s dive deep into this method, understand its nuances, and help you decide if it’s the right approach for your little one.
What Is the “Oh Crap” Potty Training Method, and Does It Work?
The “Oh Crap” potty method is a popular approach developed by Jamie Glowacki, a social worker and potty training expert. Her book, “Oh Crap! Potty Training: Everything Modern Parents Need to Know to Do It Once and Do It Right” provides a comprehensive guide on this method.
The method recommends that parents should look for signs of readiness instead of setting a strict age. These include showing interest in the toilet, hiding poop, or telling a caregiver they’ve soiled their diaper. The method suggests completely removing diapers (except during nighttime and naptime) once you decide to start. This can make accidents more noticeable and create a natural incentive for the child to use the potty.
Does It Work?
Many parents have found success with the “Oh Crap” method, praising its straightforwardness and emphasis on natural consequences. These parents often appreciate the structured approach and the clarity it provides. Like any method, it only works for some children or families. Some parents find going ultimately diaper-free too stressful, while others feel their child needs more time to be ready for the suggested age range.
At What Age Should You Start “Oh Crap” Potty Training for Kids?
Transitioning from diapers to the potty is a significant milestone in a child’s developmental journey. For parents who opt for the “Oh Crap” approach, understanding the optimal age to embark on this transition can make the process smoother for both the child and caregivers.
Jamie Glowacki, the brain behind this method, emphasises a ‘golden window’ for potty training, typically between 20 and 30 months old (1). This age range is believed to be when children are most receptive to the process, showing a mix of independence, curiosity, and cognitive awareness that facilitates the transition. However, it’s essential to remember that every child is unique, and parents should be attuned to their child’s specific readiness cues rather than strictly adhering to a particular age.
Oh Crap Method Potty Training Blocks
The potty training journey can sometimes feel like navigating a maze without a map. Thankfully, the “Oh Crap” potty training approach simplifies this by breaking down the process into distinct stages, or “blocks”. These blocks sequentially guide parents and children through the oh crap potty training steps, ensuring that each aspect of training is covered comprehensively.
Block One: Commando at Home
Oh Crap potty training method block 1 stage focuses on the child being at home without any bottoms. The idea is to let them recognise the sensation of having to go without the barrier of a diaper. During this phase, parents should be vigilant, observing for cues that the child needs to pee or poop.
Block Two: Introducing Clothes Without Underwear
This block introduces a clothing challenge once the child demonstrates mastery in recognising their need to go. However, underwear is still avoided as it can mimic the tight feel of a diaper, which might confuse the child.
Block Three: Mastering Self-Initiation
Here, the emphasis is on the child’s ability to initiate the process independently. While parents can remind or ask occasionally, the primary goal is for the child to recognise and act on their need to use the potty without prompting.
Block Four: Overcoming Outings and Challenges
Stepping out of the house can introduce new challenges, such as unfamiliar toilets or distractions. This block helps the child and parent navigate such situations, ensuring the child feels confident using the potty outside the home environment.
Block Five: Introducing Underwear
Underwear will be introduced only after the child has become comfortable and consistent with the previous steps. The transition should be slow, and the child should understand the difference between underwear and diapers.
Block Six: Nighttime Training
The final block addresses the challenge of nighttime potty training. It’s essential to remember that nighttime control often takes longer than daytime control, as it’s influenced by the child’s physical development and deep sleep patterns.
Pros of Oh Crap Potty Training
Introducing the benefits of the Oh Crap Potty Training Method, which has gained popularity for its straightforward approach and successful outcomes. Below are the seven key advantages of this method:
Gentle Transition: Oh Crap Potty Training promotes a gradual and gentle transition from diapers to using the potty. This can reduce stress and anxiety for both the child and the parents, making the process smoother.
Effective Timing: This method encourages potty training at an earlier age (around 20–30 months), taking advantage of the child’s natural curiosity and receptiveness to learning new skills.
Empowerment: Oh Crap Potty Training empowers the child by involving them in the process and allowing them to take ownership of their bodily functions. This can boost their confidence and sense of accomplishment.
Communication: The method emphasises open communication between the parent and child, fostering a deeper understanding of the child’s cues and needs during the potty training journey.
Cost Savings: By transitioning away from diapers sooner, parents can save on the ongoing costs of diapers, contributing to potential long-term financial savings.
Environmental Impact: Reduced diaper usage associated with Oh Crap Potty Training can have a positive impact on the environment by decreasing the amount of disposable diapers in landfills.
Family Independence: Successful potty training promotes greater independence for both the child and the family, eliminating the need for constant diaper changes and enhancing overall convenience.
Cons of Oh Crap Potty Training
While the Oh Crap Potty Training method has its merits, it’s essential to consider potential drawbacks as well. Exploring both sides of the approach can help parents make an informed decision. Here are five notable concerns associated with this method:
Intensive Commitment: Implementing the Oh Crap Potty Training method requires a high level of commitment and vigilance from parents or caregivers, which can be challenging for those with busy schedules or multiple children to attend to.
Early Start: Starting potty training at a younger age may not align with every child’s developmental readiness. Some children might need more time to be mentally and physically prepared for this process, leading to frustration and setbacks.
Accidents and Stress: The method’s no-pants approach and emphasis on learning from accidents might cause stress and embarrassment for the child, potentially affecting their confidence and attitude towards potty training.
Individual Variability: Every child is different, and what works well for one child may not work for another. The one-size-fits-all approach of Oh Crap Potty Training might not accommodate the unique needs and personalities of all children.
Parental Pressure: The intense focus on timely potty training might inadvertently pressure the child and the parents. This pressure can lead to frustration and negative associations with the potty training process.
How Long Will It Take to Potty Train Your Child With the Oh Crap Method?
The duration of potty training using the Oh Crap method can vary significantly from child to child. Factors such as the child’s age, temperament, readiness, and consistency of implementation all play a role in determining how long the process will take (4). On average, some parents have reported successful potty training within a few days to a few weeks, while others might take longer.
It’s important to note that the Oh Crap method focuses on a quick initial phase, during which the child learns to recognise bodily cues and use the potty. However, achieving complete independence and consistency might take more time. Some children might experience setbacks or resistance along the way, which can extend the overall time frame.
What Are Some of the Biggest Mistakes Parents Make With Oh Crap Potty Training Methods?
When implementing the Oh Crap Potty method, there are several common mistakes that parents should be aware of to ensure a smoother potty training experience. Here are five notable mistakes to avoid:
1. Rushing the Process
One significant mistake is rushing through the process without giving the child enough time to adapt. Pushing a child to advance too quickly through the stages can lead to frustration and resistance.
2. Lack of Consistency
Applying the method’s principles inconsistently can confuse the child. Skipping steps or maintaining a consistent routine might help their progress and understanding.
3. Ignoring Cues
Recognising and responding to the child’s cues and signals is essential for their development. Ignoring signs that the child needs to use the potty might lead to accidents and setbacks.
4. Overreacting to Accidents
Reacting negatively or with frustration to accidents can create a stressful environment for the child. Overreacting might make them anxious about using the potty and impact their confidence.
5. Neglecting Communication
Effective communication between parent and child is crucial. Not explaining the process, not involving the child in decision-making, or not addressing their concerns can hinder their cooperation.
How Different Is “Oh Crap” Training Method From “3-Day Potty Training”?
Both the “Oh Crap” potty training method and the “3-Day Potty Training” approach aim to expedite the potty training process, but they have differences in their strategies and philosophies. Here’s a comparison of the two methods:
“Oh Crap” Potty Training Method:
Approach: The “Oh Crap” method, introduced by Jamie Glowacki, emphasises gradual learning and understanding of bodily cues. It involves observing the child’s behaviour and signals to initiate the potty training process.
Timeline: The method does not strictly adhere to a specific time frame. Rather than a fixed three-day period, it focuses on the child’s readiness and progress.
Nudity Phase: The method includes letting the child go without pants or diapers to help them connect bodily sensations with the potty need.
Communication: “Oh Crap” emphasises open communication between parent and child, allowing the child to take ownership of the process.
“3-Day Potty Training” Method:
Approach: Lora Jensen popularised the “3-Day Potty Training” method, which involves an intensive three-day period during which parents focus solely on potty training with little to no distractions.
Timeline: The central idea is to achieve potty training success within three days, with the understanding that accidents may still occur afterwards.
Intensive Phase: During the three days, parents closely monitor the child’s cues and prompt them to use the potty frequently.
Rewards System: Positive reinforcement and rewards play a significant role in this method, with parents offering praise and small treats when the child successfully uses the potty.
Some Common Problems Parents Experience While Oh Crap Potty Training
While the Oh Crap Potty Training method offers a practical approach to potty training, parents may encounter particular challenges along the way. Understanding these common problems can help parents better navigate the process and address potential setbacks. Here are three prevalent issues parents might face:
1. Accidents and Setbacks
During the no-pants phase of Oh Crap Potty Training, accidents are to be expected. However, some parents might find that their child continues to have frequent accidents even after the initial stages. These accidents can be frustrating and might lead to doubts about the method’s effectiveness.
2. Resistance and Fear
Some children might resist or fear using the potty, especially if they’ve experienced accidents or discomfort. This resistance can manifest as tantrums, refusal to sit on the toilet, or increased anxiety around bathroom-related activities.
3. Nighttime Training Challenges
Oh, Crap Potty Training mainly focuses on daytime training. Transitioning to nighttime dryness might pose challenges, as children might not have developed the physical ability to hold urine throughout the night.
How to Deal With Oh Crap Potty Training Regression?
Dealing with potty training regression while using the Oh Crap method requires a thoughtful and patient approach. Regression can occur due to various reasons, such as changes in routine, stress, or developmental shifts. To address regression effectively:
1. Identify Triggers: Reflect on recent changes or events that might have triggered the regression. Identifying the cause can help you address the underlying issue.
2. Maintain Calm: Stay calm and supportive when accidents happen. Reacting negatively can increase your child’s stress and hinder their progress.
3. Revisit the Basics: Briefly revisit the initial potty training steps. Remind your child about cues, potty use, and staying consistent.
4. Positive Reinforcement: Offer praise and rewards when your child successfully uses the potty. Positive reinforcement encourages them to regain confidence.
5. Consistent Routine: Stick to the potty training routine you established. Consistency provides stability and reassurance for your child.
6. Address Anxiety: If your child is anxious, address their concerns. Use gentle communication, potty-related books, or a comfort item to alleviate anxiety.
7. Patience is Key: Regression is temporary and a normal part of the process. Maintain patience and avoid expressing frustration.
8. Seek Guidance: Consult resources related to the Oh Crap method for additional guidance. Books, online forums, or even professional advice can offer valuable insights.
How is the Oh Crap Potty Training Method Applied During Nighttime and Nap Periods?
The Oh Crap Potty Training method primarily focuses on daytime training, and transitioning to nighttime dryness may require a different approach. During nighttime and nap periods:
1. Nighttime Diapers: Initially, continue using diapers or training pants during sleep. Most children achieve nighttime dryness later in the potty training as their bodies develop the ability to hold urine overnight.
2. Limit Fluids: Limit your child’s fluid intake in the evening to reduce the likelihood of nighttime accidents. Encourage them to use the potty before bed.
3. Consistency: Continue fostering a consistent routine. Encourage your child to use the potty before sleep and immediately upon waking up.
4. Transitioning: As your child shows more consistent dryness during naps or wakes up dry in the morning, consider transitioning to training pants or underwear during sleep.
5. Patience: Nighttime dryness might take longer than daytime dryness. Be patient and avoid stressing your child or yourself over occasional accidents.
How to Use the “Oh Crap” Training Method for Twins?
Applying the Oh Crap Potty Training Method to twins requires careful planning and coordination. While it can be challenging to potty train two children simultaneously, the method can still be effective:
1. Individual Focus: Initially, focus on training each twin individually. Follow the Oh Crap Potty Training method for one child at a time to provide dedicated attention.
2. Staggered Timing: Stagger the training periods for each twin by a few weeks. This can help avoid overwhelming both parents and children.
3. Consistency: Keep routines consistent between both children. Maintain open communication and consistent potty breaks for each twin.
4. Support System: Enlist the help of family members or caregivers to assist with one child while you focus on the other. This can provide a balance of attention and support.
What to Avoid While Training Your Twins?
Potty training twins presents a unique set of challenges and opportunities. To navigate this journey successfully, it’s essential to be aware of potential pitfalls and things to avoid. Here are two key points to consider:
Introducing Competition: Avoid creating a competitive atmosphere between your twins. Comparing their progress or achievements can lead to rivalry and negatively impact their learning motivation.
Ignoring Individual Needs: Twins may have different potty training readiness levels and personalities. Avoid assuming that both twins will progress at the same pace. Tailor your approach to each child’s unique needs and abilities.
Signs of Potty Training Readiness in Your Toddler
Recognising the signs of potty training readiness is crucial when considering the application of the Oh Crap toilet training method. Before embarking on this journey, ensuring your toddler is physically and emotionally prepared is essential. Here are five key indicators that your child might be ready for potty training:
Interest in Using the Toilet: Your toddler might show curiosity about the toilet, ask questions, or express a desire to imitate older family members.
Physical Signs: Look for signs such as staying dry for extended periods, indicating improved bladder control, or discomfort when the diaper is wet (3).
Communication Skills: If your toddler can communicate basic needs, express discomfort, or understand simple instructions, they are more likely to grasp the concepts of using the potty.
Awareness of Bodily Functions: Your child may start indicating when they are about to pee or poop, whether through words, gestures, or changes in behaviour (2).
A desire for Independence: If your toddler expresses a desire to do things on their own or shows an interest in dressing and undressing themselves, it might indicate readiness for potty training.
Tips for Preparing Your Child for Potty Training
Preparing your child for potty training using the Oh Crap method involves setting the stage for a smooth and positive transition. Taking specific steps before you begin can increase the likelihood of success. Here are five essential tips to help you prepare your child for potty training:
Introduce the Concept: Begin by casually introducing your child to the idea of using the potty. Read potty-related books, watch videos, or talk about the toilet in a positive and fun way.
Choose the Right Equipment: Invest in a child-sized potty chair or a seat reducer for the regular toilet. Allow your child to become familiar with the equipment before starting the training process.
Set a Routine: Establish a consistent routine for potty breaks. Encourage your child to sit on the potty regularly, such as upon waking up, after meals, and before bedtime.
Use Positive Language: When discussing potty training, use positive and encouraging language. Avoid any negative connotations or pressure that might cause anxiety.
FAQs
1. Do boys take longer for Oh Crap potty training?
The duration of potty training can vary among individual children, regardless of their gender. While it’s commonly believed that boys might take longer to potty train than girls, a strict rule doesn’t apply to all children. Factors such as developmental readiness, temperament, and consistency of the potty training approach play a more significant role in determining the timeline for success. Some boys might catch on quickly using the Oh Crap method, while others might take a bit longer to grasp the concepts thoroughly.
2. How can you know if the Oh Crap method isn’t working?
If you’re using the Oh Crap potty training method and find that your child is not making the expected progress, there are a few signs that might indicate the approach isn’t working as intended:
Consistent Accidents: If your child is having frequent accidents even after the initial stages of potty training, it could be a sign that they are struggling to understand the connection between bodily cues and using the potty.
Resistance or Fear: If your child shows increased resistance or fear of using the potty, it might indicate that they are uncomfortable with the training approach.
Lack of Progress: If you see significant progress over an extended period and your child seems to adapt to the method, it could be a sign that it’s not the right fit for them.
Potty training using the Oh Crap method can be an effective and practical approach for many parents and toddlers. You can embark on a successful potty training journey by understanding the method’s principles, recognising signs of readiness, and being prepared for potential challenges. Remember that every child is unique, and their progress will unfold at their own pace. Whether you choose the Oh Crap method or another approach, patience, consistency, and a supportive environment are critical factors in achieving positive outcomes in the potty training process.
References/Resources:
1. Mockensturm. L; Oh Crap Potty Training: A Guide for Parents; WonderBaby.org; https://www.wonderbaby.org/articles/oh-crap-potty-training
2. Potty Training; C.S. Mott Children’s Hospital; https://www.mottchildren.org/posts/your-child/potty-training
3. Potty Training Children with Special Needs; American Academy of Pediatrics; https://www.healthychildren.org/English/ages-stages/toddler/toilet-training/pages/Toilet-Training-Children-with-Special-Needs.aspx
4. Oster. E; The Best Potty Training Advice; ParentData; https://parentdata.org/potty-training-best-advice/; July 2023
Also Read:
14 Innovative Ideas to Potty Train Kids Quickly
Potty Training Games for Children
Potty Training Essentials for Toddlers
Read more

Tell Us Your Child's Favourite Toy, We'll Tell You His Personality!
When your baby comes home, your household becomes a treasury for toys! There’s the monkey with the orange ribbon, the toy piano that makes funny sounds, and the pull-along train your child loves chugging around the house with. It’s funny what our children fall in love with…But wait, is it really? What if we tell you that the connection between your kid and a certain toy is not a coincidence but a deep look into his future personality? It’s time to give those toys a long, hard look!
Child development experts have revealed that toys not only shape our physical and mental development, they also determine our personality. What we like and feel drawn towards is an early but definite indication of our personality – and yes, this holds true for your little child!
So, what is your kiddo’s most loved toy? Get ready to unravel what it means…
Tricycles and Bicycles
Granted, most average kids enjoy riding around on their cycles, but there are some who simply cannot stay apart! These kids are usually also attracted to motorcycles and cars that allow kids to steer them.
What it means: Your child is an energetic, restless little human! He loves getting a lot of space to move around in – and this holds true inside the house. He is naturally curious, enjoys having fun, and is likely to be free-spirited.
As moms, all of us want to instill curiuosity in our kids. These cycles can help you do that.
Musical Toys
Pianos, guitars or simple movers-and-shakers, your kiddo is a music lover! He not only enjoys playing with rattle jars and music-making-toys but also shakes a leg every now and then.
What it means: Kids who love musical toys usually grow up to be creative and liberal in their thinking. Even from an early age, music breaks boundaries and builds a sense of rhythm in our mind – something that lets us make the whole world our oyster! While such kids will not necessarily grow up to be musicians, they will definitely develop a love for symmetry, melody and beauty.
Find some musical toys here and build your kid’s love for melody.
Building Blocks
Every set of building blocks that you get home is transformed into houses, roads and gardens! Your child loves messing around with blocks even if he can’t hold them very well at this age, and spends hour after hour with them.
What it means: Your child has a creative soul – and yes, this holds true even if all they seem to enjoy doing with blocks is push them around! He likes to think things from a fresh perspective and also has immense patience and stability. Here’s an interesting forecast for you: research has proven that such kids are likely to take up design-led jobs in the future. Now that’s smart!
Board Games
Monopoly, Life or Scrabble? Some kids just lap up board games and will pester you no end to get everyone together and have a go. When you’re travelling or out for a picnic, you know what to turn to.
What it means: Congrats Mom, you have quite a family person at home! Kids who like board games have better social skills than their peers and find less trouble making new friends. They also appreciate sharing, empathy and a sense of consideration for others.
Soft Toys & Dolls
Teddy bears, dolls and doll-houses, monkeys and rabbits – they are your child’s best friends! Whether through pretend play or by being a good friend to these toy-friends, your child loves his little menagerie!
What it means: This one is really sweet – your child is excellent at empathy, affection and care! While most kids go through a lovey phase wherein they obsess about a certain soft toy, sometimes this lasts longer. Being attached to soft toys isn’t something you need to discourage; older children understand the difference between fantasy and reality. A love for soft toys and dolls hints at an emotional personality and a creative bent of mind. These kids have a world within this world!
Puzzles
Jigsaw puzzles, animal puzzles, logic questions and brain-teasers – your child gulps them all down with elan! There’s never a boring day for him as long as he has a set of puzzles to solve at home.
What it means: This one may seem obvious but the connection has been validated by studies repeatedly – puzzle-loving kids are brainy, patient, hard-working and involved. It takes a lot to distract them from what they love doing. Guess what experts think your child is likely to opt for as career? A Maths related role such as an accountant or a banker! Talk about a proud Mommy!
Take a look at some engaging puzzles here – they’re what your kid needs to be brainy!
Our children spend a lot of time with their toys. As moms, it is our responsibility to give them age-appropriate toys, free from gender stereotyping. Ensure that what they are playing with is safe and useful for their overall development. Eventually, patterns will start showing up in your child’s inclination towards certain toys – and that is when the fun begins!
Read more

Rett Syndrome in Children – Causes, Symptoms, and Treatment
Rett syndrome is an uncommon, serious genetic disease that mostly occurs in girls. It is a neurological disorder and is commonly diagnosed within the first 2 years of the birth of a child. To know more about this disease in detail, read this article.
What is Rett Syndrome?
Rett syndrome is a brain disorder that is caused by genetic mutation. It affects girls and is mostly fatal in boys as the chromosome combination in boys is different from girls. After around 6 months of age, babies who have ‘Rett syndrome’ have a problem with communication, muscle coordination, and movement. The symptoms of Rett syndrome become most noticeable between 12 to 18 months of age.
What Causes Rett Syndrome
Rett syndrome is caused by an X-chromosomal mutation. This mutation causes an impairment of protein production which is crucial for the development of the brain. As a result, the brain does not grow, and the head appears smaller. Although it is a genetic disorder, Rett syndrome inheritance is very rare. The gene mutation happens spontaneously in 95% of babies who then develop the Rett syndrome.
Rett Syndrome – Signs and Symptoms
Following are the signs and symptoms of Rett syndrome in children:
1. Growth Retardation
Babies afflicted by Rett syndrome grow slowly. Their brain development slows down after birth. Microcephaly, which means small-size head than normal is a prominent indication that the child may have Rett syndrome. As the child grows older, delayed growth in other body parts is also observed.
2. Loss of Coordination and Movement
Babies with Rett syndrome lose the ability to use their hands, crawl, and walk. Their muscles become rigid and weak, and the movements become abnormal.
3. Irregular Hand Movements
Rett syndrome causes affected babies to develop repetitive, abnormal hand movements which do not serve any purpose. These movements could include tapping, squeezing, wringing, and squeezing.
4. Abnormal Eye Movements
Babies who have Rett syndrome have abnormal eye movements, such as rapid blinking, intense staring, closing a single eye at a time or crossed eyes.
5. Irritability and Anxiety
Rett syndrome makes the babies very agitated and moody. They may also have episodes of prolonged screaming and crying for no reason that may last for hours.
6. Seizures
Babies who have Rett syndrome may also experience seizures at some point in their lives. Around 80% of children having Rett syndrome suffer from seizures.
7. Scoliosis
It is an abnormal curvature of the spine. It affects Rett syndrome children between the ages of 8 and 11 years of age and gets worse as they age. It often requires correction by a surgical procedure.
8. Irregular Heartbeat and Cognitive Disability
Rett syndrome babies have irregular heartbeats, which can also cause sudden death. Children affected by Rett syndrome may also suffer from cognitive impairment.
What Are the Different Stages of Rett Syndrome?
The four different stages of Rett syndrome are explained below:
1. Early Onset
This is the initial stage which begins when the babies are between 6 and 18 months of age. The initial signs are easily overlooked. Babies at this stage stop making eye contact and they also lose interest in playing with toys. They may also exhibit delays in crawling or sitting.
2. Rapid Destructive Stage
This stage starts between one and five years of age and can last for several weeks or months. The onset can be either rapid or gradual. A child loses the ability to speak and use her hands. Other symptoms of this stage include abnormal hand movements (such as wringing and tapping), irregular breathing, unsteady gait, slow head growth, and autism-like symptoms such as the inability to communicate and interact socially.
3. Plateau
This stage is also called the pseudo-stationary stage as there may be some improvement in behaviour. There is also increased alertness and improved communication skills in this stage. Many affected girls may remain in this stage for most of their lifespan. This stage begins between the ages of 2 and 9 years, and it can last for many years. Motor control issues, lack of movement coordination, and seizures are common at this stage.
4. Late Motor Deterioration
This stage begins around 9 to 10 years of age and can last for decades. Common symptoms of this stage include a reduction in mobility, scoliosis, weak and rigid muscles, and abnormal posturing of limbs. Spasticity, a condition where the muscles contract continuously, is also common in this stage.
How Is It Diagnosed
Rett syndrome is diagnosed by observing the abnormalities and delays in development. Decreased head growth is a prominent indication of Rett syndrome. To diagnose Rett syndrome, 4 criteria have to be met – Motor skill loss, verbal communication loss, abnormal gait, and repeating hand movements like squeezing and wringing. Other tests for diagnosis include DNA analysis, imaging tests like MRI or CT scans, blood and urine tests, Hearing and vision tests, and Brain activity tests like EEGs.
Make sure to rule out conditions with similar symptoms such as hearing or vision problems, cerebral palsy, metabolic disorders, autism, and brain disorders resulting from trauma and infection.
Complications That Arise from Rett Syndrome
The following are the complications that arise due to Rett syndrome:
Unusual sleep patterns and insomnia.
Requiring lifelong assistance with activities in daily life.
Anxiety and moodiness which hamper social interactions.
Muscle and joint issues which hinder movement and coordination.
Diminished lifespan due to heart problems and health complications.
Treatment Methods for Rett Syndrome in Children
Unfortunately, there is no cure available for Rett syndrome. However, there are some treatment methods that you can try for Rett syndrome in children:
1. Medication
Seizures, problems of the gastrointestinal tract, breathing issues, and muscle rigidity can be controlled with medication prescribed by doctors.
2. Physical Therapy
Using braces and casts will help children who have scoliosis and joint problems. Physical therapy can also help improve movement and balance. Assistive devices like walkers and gait trainers can also help with the movement.
3. Speech Therapy
Speech therapy and learning non-verbal communication can improve the quality of life in children affected by Rett syndrome.
4. Managing Symptoms
Managing symptoms of this disease, like constipation, low weight gain, and lack of nutrition can help. Nutritional supplements and laxatives can also be taken.
5. Sleep Aids
The patient can be given mild sedatives to help him sleep if he is affected by irregular sleep patterns.
6. Counselling
Counselling can help both the patient and his caregivers. It can be physically and emotionally challenging to care for a child having Rett syndrome. Talking to a therapist or counsellor can help with this.
7. Surgical Intervention
In case of severe scoliosis, the patient may need correction via surgery.
What Is the Life Expectancy of a Child Suffering from Rett Syndrome?
The prognosis for boys afflicted by Rett syndrome can be grim as they do not survive beyond infancy. Most Rett syndrome boys die in the womb. However, girls with ‘Rett syndrome’ can live up to 40 years or more despite the symptoms, if provided with proper care, therapy, and medical assistance.
Can It Be Prevented?
There is no way to prevent Rett syndrome as this is a disease caused by the X-chromosome suddenly mutating. However, it is prudent to go for genetic counselling before trying to pregnant, if you have close relatives afflicted by Rett syndrome as it can be inherited from the mother in very rare cases.
The Outlook for Rett Syndrome
Despite the severity of the symptoms, most girls having Rett syndrome are able to live to middle age and beyond. Since this is a rare neurological condition, not much is known about its long-term outlook. Although there are some who were able to live for 40 or 50 years. But nothing can be said for sure.
While there is no cure for Rett syndrome in children, all you can do is make sure that you do your best to let your child have a fulfilling life.
Also Read: Nephrotic Syndrome in Children
Read more
Independent Activities Toddlers Can Do Well
Getting your child to play independently not just sharpens the child’s mind but also leaves you with some spare time. Once you’re aware of the activities you can introduce, there’re many things a 14-month-old baby can do herself much to your surprise.
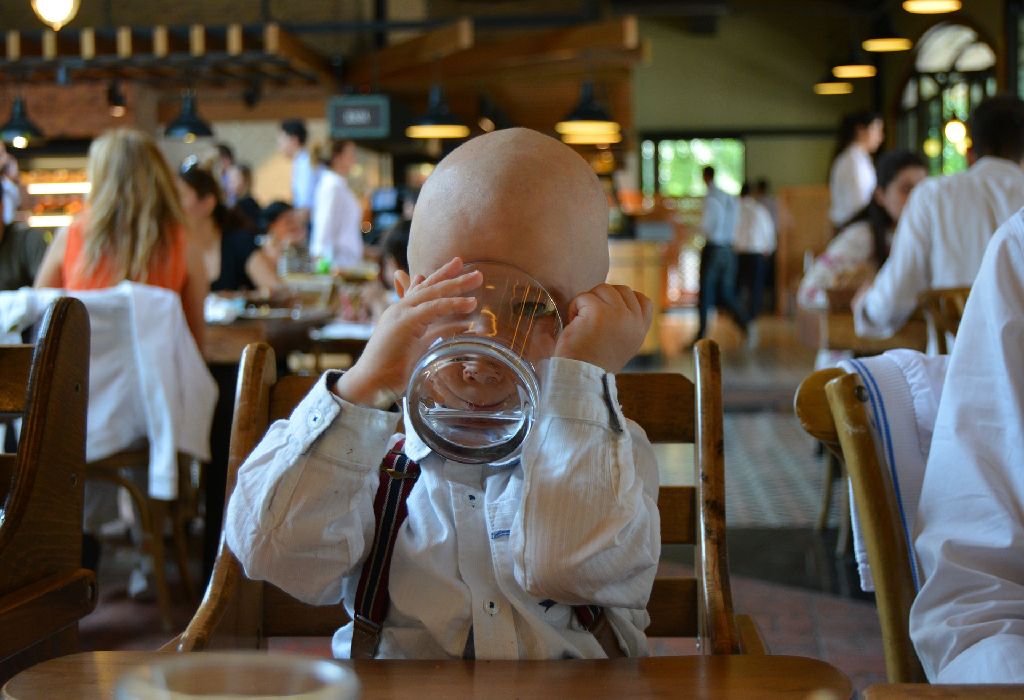
Toddlers love to explore and do things on their own and they often insist on it. And why not? Independent play is the best way to learn things. Be it eating food with their own hands or drinking milk from a glass, the benefits of letting your child do things on his own are immeasurable.
Activities Toddlers Can Do Well Independently
1. Eating is fun
By 14 months of age, most toddlers start grabbing the spoon. Help them to eat on their own by providing them with kid size utensils and bite-sized food that are thicker in texture and easy to eat. Though your child will put the food in the mouth intermittently, help them and encourage this. This will give your child an opportunity to learn how to self-feed. Besides, this activity helps in developing motor skills and gives you time to enjoy your meal too.
2. Water games
Children love water and they are enthralled by it. But it’s always good to take the game outside or to the sink. Give them a small mug and bucket of water less than half-filled, to water the plants. Else, give then different sized containers and a cup and encourage them to practice pouring water from one container to the other. Don’t expect an efficient job, although.
3. Engaging with toy basket
At this age, emptying things filled with anything is a toddler’s favourite pastime as they are trying to perfect some finer movements. But teach them to refill the basket with toys. Ask for their help when you’re gathering toys and teach them to put those inside the toy basket. You’ll be surprised to see what excellent helpers they are. Soon they’ll be emptying and filling their toy baskets without any aid.
4. Drinking from the cup
14 months is the best time to encourage your toddler to drink by himself using a cup. This will also help her to leave the habit of drinking from the bottle. Bottling for too long can lead to a delay in speech too. Supply them with good quality plastic mugs and pour a little amount of liquid to start with. Pretty soon you’ll see them drinking independently.
A toddler of 14 months has a brain full of inquisitiveness. Support him to learn and explore. Yes, of course, the little one can’t do things perfectly but with a little patience you’ll be surprised to see what she can achieve and it can be fun for you as well. Hope these tips will help you understand the needs of your toddler in a better way.
Read more

How to Deal With Gas in Toddlers?
Young children can encounter gas issues much like adults. While it’s true that most instances of gas problems in toddlers aren’t typically a serious concern, significant pain and discomfort can be alarming. If your toddler appears to be suffering excessively or showing signs of severe distress due to gas, it is crucial to seek professional medical advice promptly. This article aims to provide comprehensive information about the nature of gas problems in toddlers, identify potential triggers, and explore effective methods for managing and alleviating these discomforts. Understanding these aspects can be useful in helping toddlers with gas.
Is It Normal for a Child to Have Intestinal Gas?
Yes, it is very normal for a child to have intestinal gas and, in most cases, it is not a matter of great concern. It is incredibly natural for your toddler to pass out gas, rather it is unavoidable. However, in cases where the gas does not pass with ease, and the child feels uncomfortable, it may lead to digestive problems. There can be many reasons that may cause a gas problem in young children and toddlers.
Causes of Gas Pain in Toddlers
What causes gas in toddlers? Here are some of the reasons that may cause a gas problem in toddlers:
Change In Diet: Sometimes, including new food items in your child’s diet may cause excessive gas formation in their tummies. This is quite a common digestion problem in children. Hence, parents should enforce a staple diet.
Antibiotic Medicines: Abdominal gas and cramping may be caused if your child is on some antibiotic medication.
Lactose Intolerance: In case your child is lactose intolerant, it means that milk or any milk product can cause the excess formation of gas or stomach discomfort in your child.
Improper Chewing: Many young children and toddlers do not chew their food properly. This leads to more gas production.
Swallowing More Air While Eating: Sometimes, toddlers may swallow more air while drinking and eating. This may lead to the formation of gas in their bellies.
Not Drinking Adequate Amounts Of Water: Drinking enough water keeps the digestion process in place and wards off any digestion-related problem at bay, but if your child is not drinking enough water, it may lead to digestive problems and formation of gas.
Certain Food Items: Certain food items such as beans, peas and vegetables like broccoli and kale may cause gas. It is important to keep the consumption of such food items to moderate levels.
Food With High Fat or Fibre Content: Sometimes, food items that are rich in fat or have high fibre content, such as cereals and french fries, may induce gastrointestinal distress in your baby.
Consuming Large Amounts of Fruit Juices: Refrain from giving more than one glass of fruit juice a day to your child. Some children cannot digest the fructose and sucrose that is present in the juice, and it may cause gas trouble in your child.
Consuming Carbonated or Aerated Drinks: Such drinks have high levels of phosphoric acid, which may cause problems of indigestion and gas in young children.
Signs and Symptoms of Gas Problems in Toddlers
If you find it difficult to establish that your child has a gas problem, the following signs and symptoms may help you know it:
If your child looks uncomfortable.
If you notice your child clenching his fists.
If you see your child burping more than usual.
If you find your child squirming.
If you feel your child is cranky and crying even after being fed.
If your child pulls up his legs towards his tummy.
If your child is facing difficulty passing stool.
If your child is grunting and writhing.
If you notice any of the symptoms mentioned above, you should seek advice from your doctor.
How to Prevent Gas Problems in Toddlers?
You may adopt the following measures to prevent a gas problem in your child:
Introduce new foods gradually to your toddler’s diet, as some can cause more gas than others. Avoid foods known to cause gas, like beans, cabbage, and broccoli.
Keeping your toddler hydrated can help reduce gas. Encourage them to drink water regularly.
Encourage your toddler to engage in age-appropriate exercises and playtime activities to keep their digestive system moving smoothly.
Consult your pediatrician about incorporating probiotics into your toddler’s diet.
Home Remedies for Gas in Toddlers
You may try the following home remedies to ease gas problems in toddlers:
Check the Fluid Intake: An adequate amount of water and other fluids prevent constipation and reduce the chances of gas problems.
Establish Good Eating Habits: Make sure your toddler chews on food nicely before swallowing.
Include More Fibrous Foods: Adding more fibrous foods will help keep your toddler’s digestive system in place, which means fewer gastric problems.
Massaging Your Child’s Belly: It is an efficient way of releasing gas from your baby’s belly. Work in clockwise motions for smooth passage of gas.
Refrain From Giving Acidic Food: Food items such as cauliflower, cabbage, peas and onions are the common culprits for causing gas. Do not feed such food items if your child experiences gas problems often.
Apply Warm Compressions: You may apply warm compression to provide relief to your baby. This not only helps expel the gas but also relaxes your baby.
Fennel: You may give fennel to your baby as it is beneficial in relieving digestive problems. If your child can chew, you may provide roasted fennel seeds or else boil some fennel seeds in water and give it to your child 2 to 3 times a day.
Though the home remedies mentioned earlier are useful in treating gas problems in toddlers, if you notice your child in pain or discomfort even after trying these measures, you should seek immediate medical help for gas relief for toddlers.
FAQs
1. Can clothing contribute to gas problems?
Yes, tight-fitting clothing can put pressure on a toddler’s stomach, potentially worsening gas discomfort. Ensure that your toddler’s clothing is loose and comfortable to avoid additional pressure on their abdomen, which could exacerbate gas problems.
2. Does the sleeping position affect gas in toddlers?
The way your toddler sleeps can impact how gas is distributed and expelled. If your toddler has gas pains at night, try laying them on their left side, as this position may help facilitate digestion and reduce gas buildup.
3. Can teething cause gas problems?
Teething can lead to increased saliva production and changes in eating habits, which might result in swallowing more air or altering digestion, contributing to gas. Keep an eye on your toddler’s teething patterns, and use teething toys or other soothing methods to minimize this potential cause of gas discomfort.
Gas problems are incredibly typical in young children, and there is nothing to worry about. However, some cases of gas problems in toddlers may be due to a serious condition. It is a good idea to get in touch with your doctor to discuss your concerns regarding the same. Timely medical intervention can ward off any severe complication that may arise.
References/Resources:
1. Controlling Intestinal Gas; International Foundation for Gastrointestinal Disorders; https://iffgd.org/gi-disorders/symptoms-causes/intestinal-gas
2. Foods Likely to Cause Gas; International Foundation for Gastrointestinal Disorders; https://iffgd.org/gi-disorders/symptoms-causes/intestinal-gas/foods-that-may-cause-gas/
3. Gas in the Digestive Tract; Children’s Hospital of Orange County; https://www.choc.org/programs-services/gastroenterology/gas-digestive-tract/
4. Intestinal Gas; Canadian Society of Intestinal Research; https://badgut.org/information-centre/a-z-digestive-topics/intestinal-gas/
5. Can I reduce belching, bloating and intestinal gas at home?; Mayo Clinic; https://newsnetwork.mayoclinic.org/discussion/home-remedies-tips-for-reducing-belching-intestinal-gas-and-bloating/
6. Antacids; NHS; https://www.nhs.uk/conditions/antacids/
7. Treatment for GER & GERD in Children; National Institute of Diabetes and Digestive and Kidney Diseases; https://www.niddk.nih.gov/health-information/digestive-diseases/acid-reflux-ger-gerd-children/treatment
Also Read:
Chronic Conditions in Toddlers
Common Genital Problems in Toddlers
Loose Motions (Diarrhoea) in Toddlers
Understanding & Treating Sore Throat in Babies and Toddlers
Read more

Dealing with Anxieties and Fears in your Toddler
As much as you would like your child to be a brave little kid, it is common for children to air some fears and anxieties in every day life. This article gives you information about the different fears and anxieties of your little one, and the ways in which you can handle them.
As your little one starts growing, she might develop many little fears. There could be the fear of sudden loud noises, darkness, lurking monsters, or even the fear of spiders! Some of these fears if not dealt with at the right time, might fester into anxieties making her a highly strung and nervous child.
Dealing with fears requires you to first get into your toddler’s shoes and understand her. Here’s a list of some common childhood fears and anxieties and ways of dealing with them
Fear of The Dark
Fear of the dark is the most predominant one in a majority of kids. Speaking of your little one, her imagination is just beginning to blossom. While this is a good sign, it also means she is unable to distinguish between the real and the imaginary world, often mixing up the two. In her little mind, dark rooms and dark corners are filled with monsters, waiting to pounce upon her. These are some ways in which you can put her fears to rest
Talk and reassure her: Tell your child that there is no such thing as monsters. Never throw open the cupboards to reassure your child. This might give her the mistaken impression that you also believe in monsters.
If your child is afraid of robbers and thieves, show her the security measures you have installed in your home. This will immediately put her mind to rest.
Put a night lamp in your child’s room or better still put a lamp near her bedside. This would help her to feel in control as she knows what to do when she is afraid.
Put up stuffed toys on her bed.
Establish a relaxing bed time routine which will help in de-stressing her.
Ensure that the fear does not have any other underlying cause and anxieties such as the fear of dying.
Neither belittle her fears nor publicize them.
Separation Anxiety
Separation anxiety may start at a time you are trying to teach your child to sleep on her own, or when you leave her in a day care centre. The best way of dealing with this anxiety is preparing your child for it. You can do this by telling your little one that you would be right there, in the adjacent room, and would immediately come over if she calls out for you. If you are opting for a day care, you can make things easy for her by making her look forward to it. You can do this by telling her how much she’s going to enjoy being there because there would be so many little girls and boys to play with. With time, her anxieties will gradually disappear.
Other Fears and Anxieties of Your Child
Other than the fear of darkness which plays a major role during the growing up years, there are other fears and anxieties which may inevitably creep up. These may include
The fear of looming objects
The fear of loud noises
The fear of strangers
Similar to the fear of darkness, the above fears may stem from the fear of the unknown. The easiest way to deal with them is to reassure your little one. For instance, when the pressure cooker whistles, you can say, “Hey that’s just the pressure cooker making the soup for the baby!” or “Look who’s here! Its Uncle Joe. Let us shake hands with him!” Over time, your little one’s fears will slowly disappear and he will start looking at these things with curiosity and joy.
Quell your little one’s fears with lots of reassurance, rationality and hugs. Tell her that darkness is not scary and monsters do not exist anywhere – neither in the dark nor in the light. Remember that if these fears are not dealt with at the right time, they might develop into full-fledged phobias.
Read more
Fluoride Toothpaste – Is It Safe for Babies, Toddlers and Kids to Use?
Concerns have been raised as to whether the use of fluoride toothpaste is safe for kids and infants. The American Dental Association does recommend its use for kids. However, children can be more prone to complications associated with excess fluoride intake than adults. This is because their developing teeth are more vulnerable to the damage caused by excess fluoride. So, it is important that any kind of fluoride-based products, like fluoride toothpaste, is used in the safest ways recommended for children.
What Is Fluoride?
Fluoride is a natural mineral found in the earth’s crust. It is found naturally in our water, soil, and air. It is used in toothpaste and water supplies because it has the following benefits:
Prevents tooth decay and cavities.
Fortifies weak tooth enamel and reduces the loss of minerals from it.
Helps in repairing tooth damage caused by acid.
Reduces oral bacteria/plaque.
Fluoride toothpaste has a greater amount of fluoride than fluoridated water and therefore, should not be swallowed. But why does a high amount of fluoride cause harm? Just like any other vitamin or mineral supplement, anything is high quantities can cause more harm than good.
Is It Safe for Babies and Toddlers to Use Fluoride Toothpaste?
There have been debates about whether fluoride is safe for babies. Yes, it is. However, it has been recommended that you use a fluoride toothpaste that has a seal of acceptance from relevant medical authorities in your country.
Fluoride is also often recommended for kids as supplements. However, fluoride for toddlers is usually not recommended unless they live in areas where there is a lack of fluoride in drinking water, including bottled water.
So, what measures should be taken for infants using a toothpaste with fluoride? For babies and toddlers, the amount should be just about the size of a grain of rice.
Excess fluoride is not good before 8 years of age. This is when human teeth develop. Excess fluoride at this time can lead to a condition called enamel fluorosis. This condition is marked by discoloured and patchy teeth. These symptoms are not very noticeable at times and usually, the condition is mild. You should take your child to a dentist if you notice these symptoms.
The reason for the ingestion of excess fluoride is mostly the accidental swallowing of fluoride toothpaste, mouthwashes, rinses or any other fluoride-based dental care product. Excess intake of fluoride supplements, when it is not required by the body, can also cause this condition.
If there is excess ingestion of fluoride, poisoning can also occur. This is not a serious or life-threatening condition but it is very common. It occurs usually half an hour after ingestion. The condition can last for nearly 24 hours. The symptoms of fluoride poisoning include:
Nausea
Diarrhoea
Vomiting
Abdominal pain
Increased salivation
Increased thirst
Can Young Children (Ages 3 Years and Above) Use Fluoride Toothpaste?
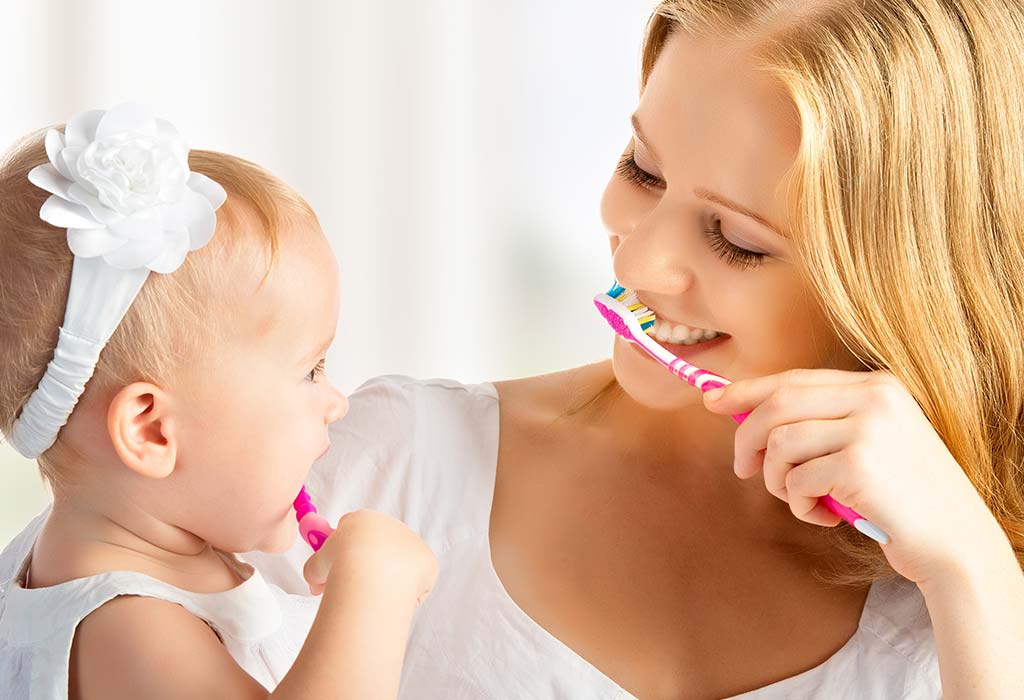
Yes, kids of ages 3 years and above can use fluoride toothpaste. Ensure that the amount used is not more than the size of a pea. Toddlers swallowing toothpaste is a common practice, which should be discouraged. Be around when your kids are brushing by themselves. Advise them to spit out the toothpaste and not to swallow it. Keep products out of the reach of kids so that they don’t playfully take in large amounts of them.
Are There Any Alternatives to Fluoride Toothpaste for Children?
There are products that help with dental and oral care other than fluoride-based ones. The below ingredients can be used in/as alternatives to fluoride toothpaste for children. They are:
1. Neem
A toothpaste with neem extract can be beneficial for the teeth. Neem is considered very effective in dental care especially in reducing plaque and as a remedy for gingivitis.
2. Coconut Oil
It can be used as a toothpaste easily when mixed with baking soda. It has antibacterial properties and reduces the growth of some bacteria that cause tooth decay. It can also help reduce plaque.
3. Sea Salt
Mix some sea salt in water or dip a wet toothbrush into some sea salt and brush your teeth as you normally would. It has several antibacterial properties and is high in nutrients that are good for your teeth.
4. Baking Soda
A very common household ingredient, you can mix together baking soda and water to form toothpaste. It can also be used in powder form for dental care.
5. Ozonated Olive Oil
Olive oil is a good moisturizer and when infused with ozone it can be used as an effective product for dental care. It is considered a viable alternative to fluoride-based dental care products.
6. Oregano Oil
Oregano oil can reduce toothaches, abscesses, and mouth sores. It is best used when diluted with olive oil because of its high potency.
7. Myrrh
Myrrh reduces bad breath and is great for gum health. It also prevents periodontal disease.
The oral and dental hygiene of kids is a primary concern for most parents. If you prefer to stick to traditional fluoride toothpaste keep the tips we have provided in mind. You can also prefer to opt for an alternative toothpaste for a few days of the week and use the fluoride one on the other days. This can create a healthy balance.
Also Read:
Effective Tips for Dealing with Broken Teeth in Kids
Bruxism in Children
Using Braces for Kid’s Teeth
Read more
24 Months (2 Year) Old Baby Food – Ideas, Chart, and Recipes
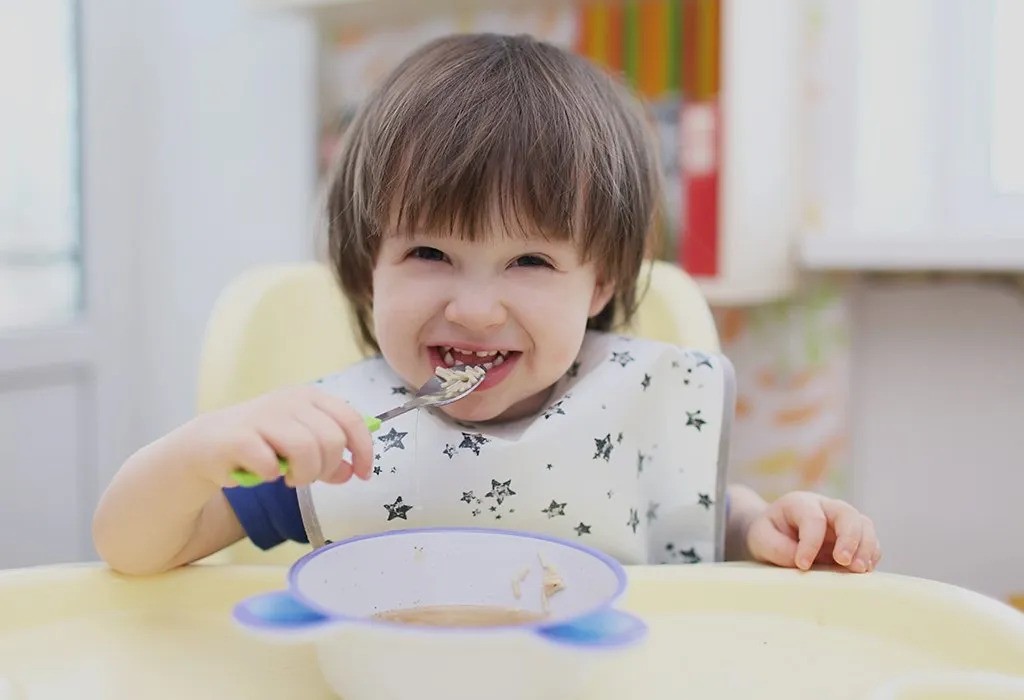
Your child has turned two and now he can eat almost every food item that is on your plate. While this might seem like a blessing, it also means that your child will be even pickier than before and refuse to eat certain items just because he won’t like the taste. So, you will have to be more careful about his food choices. But there is no need to worry about your child’s food habits, as we have some amazing ideas and recipes that you can try for your two-year-old. These 2-year-old baby food ideas and recipes are simple and easy to make and especially free of chemicals and preservatives.
Nutrient Requirements of a 24-month-old Child
At 2 years, your child’s appetite will increase; hence, you will see him gorging on whatever comes his way. While he eats anything and everything, it is your responsibility as a parent to see if his nutrient requirements are being fulfilled or not. The following are the nutrient requirements of a 24-month-old child:
1. Calories
Between the ages of 1 and 4 years, a child’s calorie requirement does not increase as much as expected. Most children need only about 1000-1400 kcal daily (1).
2. Proteins
The growth of a child’s body and muscles heavily depends on his protein intake. But that does not mean his diet should consist only of protein-rich foods. A child gets enough proteins from the usual food products.
3. Carbohydrates
Carbs form the core of each meal a child has at this age. A child needs around 130-150 grams of carbohydrates for a kid to keep functioning properly throughout the day.
4. Dietary Fibre
Since most meals include processed foods, it is important to maintain an inclusion of whole food items as well. Fruits or grains can incorporate fibre into your child’s diet and keep his digestive system healthy.
5. Sodium
Most parents fret about their children getting a lot of sodium from salt. However, maintaining a daily gram of sodium intake is utterly important for children at this age.
6. Iron
Along with sodium, iron is another element that plays a vital role in producing haemoglobin and keeping the circulatory system of a child’s body at an optimal level (2). WhThe importance of milk cannot be stressed enough. Milk is necessary for bone development and overall growth, so make sure your child drinks a glass of milk daily (2). You can give him cow’s milk, soy milk, or almond milk, too. However, it is recommended to focus on whole milk at this stage to ensure proper dietary fat and calcium requirements for optimal bone and brain growth (2).
8. Water
The presence of water might seem surprising in the list of nutritive elements, but you would be surprised to know that only a few children meet the daily requirement of drinking 1.3 litres of water every day. Hence, you must check if your baby drinks water enough or not to ensure they stay hydrated so issues like constipation stay miles away (5).
How Much Food Does a 24-month-old Toddler Need?
Although your child is growing, this does not mean you feed him every hour. At his current age, he requires no more than 1.5 kcal on a daily basis, including three healthy meals with one or two healthy snacks. This can be easily achieved with a diet that includes a good combination of grains, fruits, vegetables, and other food items. American Academy of Pediatrics suggests not fixating on amounts but on the experience of having the child eat their meals. Plus, you should also introduce finger foods at this point where toddler make use of their hands, finger foods particularly, to hold and pick foods (6).
Best Foods for a Twenty-four-month-old Baby
Completing 24 months puts your child at an important stage in his life. Going ahead, it is important for him to gain a good amount of weight and develop an energy reserve to power him through life. A few specific foods can help him make that happen. Here are some nutritious baby food ideas for 2-year-olds (7) (8).
1. Eggs
Giving your little one a whole egg, either as an omelette or boiled is a great way to increase weight and make him a filling meal. Children can eat both the yolk and the whites without any issues.
2. Khichdi
Since it can get difficult to make kids have a complete meal by themselves, khichdi is a great option that can be made within no time and is full of nutrients, thanks to the presence of both rice and various lentils. Eating khichdi helps in healthy weight gain and stimulates the metabolism as well.
3. Potatoes
This vegetable can go with nearly any kind of meal preparation. Yes, you must be bored of eating it; it is extremely vital for your kid. Your kid’s diet should include potatoes. Starchy vegetables are quite essential at this age.
4. Curd
A child needs strength right from an early age. The cream of milk or curd is a great source of fat and even provides energy to the body, which can be synthesized by the body in the best form and prove beneficial for the child.
5. Milkshakes
Your child may whine when it comes to drinking his daily glass of milk. Combining the same with fruit can help turn it into a delicious milkshake, which provides added nutrition and would be loved by your little one.
6. Ghee
Adding a spoonful of ghee when serving veggies to your child should become a practice at this age. While vegetables should be prepared in ghee itself, you could opt for using olive oil instead to keep your own health intact.
7. Nuts
Breakfast is a great time to include a variety of nuts in your child’s diet. Let it be mixed with cereal, or let him have a few after he wakes up in the morning. Everything from almonds to cashews and raisins is good if given in moderation.
8. Flaxseeds
A healthy combination of proteins, fats, and fibre is essential for a growing baby. To meet these nutrient requirements, you can include flaxseed in his diet. Flaxseeds are immensely popular among those, but pumpkin and melon seeds can do the trick as well.
9. Peanut Butter
Yes, this is a healthy food item for your child. Although it is best to keep peanut butter and jelly sandwiches for special occasions, you can use the butter in various preparations since it is a great source of fats and energy.
10. Jaggery
Most households use refined sugar to bring out the sweetness in their preparations. Replacing it with jaggery is not only a healthy alternative for everyone, but the child also receives its health benefits.
24 Month Old Baby Food Chart/Meal Plan
Figuring out what to give your 24-month toddler can take up an entire day. Make use of a simple meal plan to get a foothold, and plan your own chart accordingly. The following meal plan is great for children who are 2.
Diet for a 24-month-old – Week 1, Day 1
Breakfast
Seviyan coconut upma + milk
Mid-morning
Banana/apple/any locally available fruit
Lunch
Mini roti + dal + any sabzi of choice + a few slices of carrot/cucumber/tomatoes + 1 spoon of coriander /mint chutney
Evening
Fruit smoothie
Dinner
Methi (fenugreek)thepla + dal(lentil) soup
Diet for a 24-month-old – Week 1, Day 2
Breakfast
Multigrain chilla + almond milkshake
Mid-morning
Any locally available fruit
Lunch
Mini roti + dal + any sabzi of choice + a few slices of carrot/cucumber/tomatoes + 1 spoon of coriander /mint chutney
Evening
Almond-anjeer (fig)milkshake
Dinner
Paneer (cottage cheese)pulav + raita
Diet for a 24-month-old – Week 1, Day 3
Breakfast
Parathas with milk + raisins + honey
Mid-morning
Cut fruits
Lunch
Mini roti + dal + any sabzi of choice + a few slices of carrot/cucumber/tomatoes + 1 spoon of coriander /mint chutney
Evening
Paneer(cottage cheese)- khakhara chaat
Dinner
Bajra(pearl millet)- besan(gram flour)- lauki(bottle gourd) muthia + tomato carrot mint dip
Diet for a 24-month-old – Week 1, Day 4
Breakfast
Phirni
Mid-morning
Cut fruits
Lunch
Mini roti + dal + any sabzi of choice + a few slices of carrot/cucumber/tomatoes + 1 spoon of coriander /mint chutney
Evening
Peanut chikki + ½ cup of any locally available fruit
Dinner
Paneer pulav + raita
Diet for a 24-month-old – Week 1, Day 5
Breakfast
Oats-almond kheer
Mid-morning
Cut fruits
Lunch
Mini roti + dal + any sabzi of choice + a few slices of carrot/cucumber/tomatoes + 1 spoon of coriander /mint chutney
Evening
Banana/apple milkshake
Dinner
Ragi(finger millet) dosa with sambar and chutney
Diet for a 24-month-old – Week 1, Day 6
Breakfast
Poha (flattened rice) with tomatoes and capsicum + chocolate milkshake
Mid-morning
Cut fruits
Lunch
Mini roti + dal + any sabzi of choice + a few slices of carrot/cucumber/tomatoes + 1 spoon of coriander /mint chutney
Evening
Dalia (broken wheat)
Dinner
Paneer (cottage cheese) – aloo (potato) – palak (spinach) paratha + curd
Diet for a 24-month-old – Week 1, Day 7
Breakfast
Banana pancake
Mid-morning
Cut fruits
Lunch
Mini roti + dal + any sabzi of choice + a few slices of carrot/cucumber/tomatoes + 1 spoon of coriander /mint chutney
Evening
Paneer (cottage cheese) with honey and almonds
Dinner
Bajra(pearl millet) roti + brinjal bharta + dal(lentil) soup
Diet for a 24-month-old – Week 2, Day 1
Breakfast
Dalia( broken wheat) upma with grated carrot and milk
Mid-morning
Plain khakhra mixed with curd
Lunch
Mini roti + dal + any sabzi of choice + a few slices of carrot/cucumber/tomatoes + 1 spoon of coriander /mint chutney
Evening
Plain khakhra mixed with curd
Dinner
Palak(spinach)-moong dal(split yellow gram) muthia
Diet for a 24-month-old – Week 2, Day 2
Breakfast
Banana pancake and chocolate milk
Mid-morning
Mashed potato with grated paneer(cottage cheese)
Lunch
Mini roti + dal + any sabzi of choice + a few slices of carrot/cucumber/tomatoes + 1 spoon of coriander /mint chutney
Evening
Mashed potato with grated paneer(cottage cheese)
Dinner
Dal(lentil) khichdi with lotus stem soup
Diet for a 24-month-old – Week 2, Day 3
Breakfast
Scrambled egg with toast and fruit milkshake
Mid-morning
2-3 homemade cookies + milk
Lunch
Mini roti + dal + any sabzi of choice + a few slices of carrot/cucumber/tomatoes + 1 spoon of coriander /mint chutney
Evening
2-3 homemade cookies + milk
Dinner
Paneer (cottage cheese)paratha with drumstick leaves and drumstick soup
Diet for a 24-month-old – Week 2, Day 4
Breakfast
Moong dal(split yellow gram)-spinach dhokla with green chutney
Mid-morning
Masala makhana(puffed lotus seeds) + banana milkshake
Lunch
Mini roti + dal + any sabzi of choice + a few slices of carrot/cucumber/tomatoes + 1 spoon of coriander /mint chutney
Evening
Masala makhana(puffed lotus seeds) + banana milkshake
Dinner
Vegetable soup/ chicken broth with vegetable paratha and curd/lassi
Diet for a 24-month-old – Week 2, Day 5
Breakfast
Sattu(gram flour mix) with milk, almonds and dates (sieved)
Mid-morning
Rajgira(amaranth) chikki dipped in milk
Lunch
Mini roti + dal + any sabzi of choice + a few slices of carrot/cucumber/tomatoes + 1 spoon of coriander /mint chutney
Evening
French fries with tomato chutney
Dinner
Ragi (finger millet)tomato soup with rajma(kidney bean) chawal
Diet for a 24-month-old – Week 2, Day 6
Breakfast
Idli with chutney or sambar
Mid-morning
Banana/apple milkshake
Lunch
Mini roti + dal + any sabzi of choice + a few slices of carrot/cucumber/tomatoes + 1 spoon of coriander /mint chutney
Evening
Crushed til(sesame) ladoo with banana milkshake
Dinner
Roti + dal + a subzi of choice + a few slices of cucumber+ hand pounded rice
Diet for a 24-month-old – Week 2, Day 7
Breakfast
Puttu with chana(chickpea) curry
Mid-morning
Cut fruits
Lunch
Mini roti + dal + any sabzi of choice + a few slices of carrot/cucumber/tomatoes + 1 spoon of coriander /mint chutney
Evening
Wheat laddoo and milk
Dinner
Dal dhokli with sliced carrots
Diet for a 24-month-old – Week 3, Day 1
Breakfast
Grated cucumber-oats pancake
Mid-morning
Cut fruits
Lunch
Mini roti + dal + any sabzi of choice + a few slices of carrot/cucumber/tomatoes + 1 spoon of coriander /mint chutney
Evening
Grilled sweet potato slices
Dinner
Chole puri + lassi
Diet for a 24-month-old – Week 3, Day 2
Breakfast
Vegetable upma made with buttermilk
Mid-morning
Paneer(cottage cheese)-apple mash
Lunch
Mini roti + dal + any sabzi of choice + a few slices of carrot/cucumber/tomatoes + 1 spoon of coriander /mint chutney
Evening
Oats-apple smoothie
Dinner
Makki(corn) ki roti + sarson ka saag
Diet for a 24-month-old – Week 3, Day 3
Breakfast
Omelette with bread or paneer(cottage cheese) sandwich
Mid-morning
Bread slices with butter/home made fruit jam
Lunch
Mini roti + dal + any sabzi of choice + a few slices of carrot/cucumber/tomatoes + 1 spoon of coriander /mint chutney
Evening
Paneer(cottage cheese)-dates ladoo
Dinner
Mix vegetable-paneer(cottage cheese) paratha with tomato soup
Diet for a 24-month-old – Week 3, Day 4
Breakfast
Rajgira(amaranth)-wheat sheera with mashed raisins
Mid-morning
Banana/apple/any locally available fruit
Lunch
Mini roti + dal + any sabzi of choice + a few slices of carrot/cucumber/tomatoes + 1 spoon of coriander /mint chutney
Evening
Baked potato wedges topped with cheese
Dinner
Paneer(cottage cheese) cutlets or grilled fish with coriander tomato soup
Diet for a 24-month-old – Week 3, Day 5
Breakfast
Puri sabzi with milk
Mid-morning
Multigrain ladoo
Lunch
Mini roti + dal + any sabzi of choice + a few slices of carrot/cucumber/tomatoes + 1 spoon of coriander /mint chutney
Evening
Plain dahi with banana/apple/ locally available fruit
Dinner
Baked beans with toast
Diet for a 24-month-old – Week 3, Day 6
Breakfast
Seviyan kheer
Mid-morning
Banana/apple/any locally available fruit
Lunch
Mini roti + dal + any sabzi of choice + a few slices of carrot/cucumber/tomatoes + 1 spoon of coriander /mint chutney
Evening
Banana/apple milkshake
Dinner
Bisi bele bath with curd
Diet for a 24-month-old – Week 3, Day 7
Breakfast
Vegetable upma made with buttermilk
Mid-morning
Fruit custard
Lunch
Mini roti + dal + any sabzi of choice + a few slices of carrot/cucumber/tomatoes + 1 spoon of coriander /mint chutney
Evening
Roasted peanuts + yoghurt
Dinner
Roti + sabzi + dal
Diet for a 24-month-old – Week 4, Day 1
Breakfast
Rajgira(amaranth) milkshake with chopped anjeer(fig)
Mid-morning
Dates- skim milk powder ladoo
Lunch
Mini roti + dal + any sabzi of choice + a few slices of carrot/cucumber/tomatoes + 1 spoon of coriander /mint chutney
Evening
Plain khakhara mixed with curd
Dinner
Lauki(bottle gourd)-methi(fenugreek) muthia with buttermilk
Diet for a 24-month-old – Week 4, Day 2
Breakfast
Boiled egg yolk/ homemade paneer(cottage cheese)
Mid-morning
Palak(spinach)- grapes -apple smoothie
Lunch
Mini roti + dal + any sabzi of choice + a few slices of carrot/cucumber/tomatoes + 1 spoon of coriander /mint chutney
Evening
Mashed potato with grated paneer
Dinner
Shahi paneer(cottage cheese) with paratha and tomato-mushroom soup
Diet for a 24-month-old – Week 4, Day 3
Breakfast
Besan(gram flour)-jowar(sorghum)-coriander chilla with curd
Mid-morning
Besan(gram flour)mixed with sattu(barley) + khajur(dates)ladoo + milk
Lunch
Mini roti + dal + any sabzi of choice + a few slices of carrot/cucumber/tomatoes + 1 spoon of coriander /mint chutney
Evening
2-3 homemade cookies + milk
Dinner
Paneer(cottage cheese) cutlets or grilled fish with baked bean soup and grated carrot raita
Diet for a 24-month-old – Week 4, Day 4
Breakfast
Fruit smoothie
Mid-morning
Poha(flattened rice)soaked in dahi(curd) with mashed banana
Lunch
Mini roti + dal + any sabzi of choice + a few slices of carrot/cucumber/tomatoes + 1 spoon of coriander /mint chutney
Evening
Masala makhana(puffed lotus seeds) + banana milkshake
Dinner
Bajra(pearl millet) roti + brinjal bharta + dal + vegetable raita
Diet for a 24-month-old – Week 4, Day 5
Breakfast
Scambled egg
Mid-morning
Oats-apple smoothie
Lunch
Mini roti + dal + any sabzi of choice + a few slices of carrot/cucumber/tomatoes + 1 spoon of coriander /mint chutney
Evening
Rajgira (amaranth)chikki dipped in milk
Dinner
Macaroni and cheese with tomato soup
Diet for a 24-month-old – Week 4, Day 6
Breakfast
Seviyan upma + kesar(saffron) elaichi (cardamom)milk
Mid-morning
Peanut ladoo
Lunch
Fried rice with sweet corn soup
Evening
Poha (flattened rice) soaked in dahi(curd) with mashed banana
Dinner
Mini roti + dal + any sabzi of choice + a few slices of carrot/cucumber/tomatoes + 1 spoon of coriander /mint chut
Diet for a 24-month-old – Week 4, Day 7
Breakfast
Ragii satva (Finger millet malt) with almond powder
Mid-morning
Mashed potato with cheese
Lunch
Mini roti + dal + any sabzi of choice + a few slices of carrot/cucumber/tomatoes + 1 spoon of coriander /mint chutney
Evening
Dahi(curd)vada (homemade)
Dinner
Dhansak with rice
Food Recipes for a 24-months-old Baby
In order to make sure your little kid eats his meals properly, here are a few recipes you can make to ensure that he gets the right nutrients. Trust us; these 2 years old baby food recipes are super delicious and quick to prepare.
1. Spinach and Beetroot Cutlets
These make for a great breakfast item on weekdays and even on weekends.
Ingredients
Spinach puree, 2 tablespoon
Beetroot puree, 2 tablespoon
Whole wheat flour, 0.5 cup
Jaggery, 0.5 cup
Butter, 2 tablespoon
How To Prepare
Begin by preheating the oven at a temperature of 200 degrees.
Mix together jaggery and butter in a bowl along with spinach puree.
In another bowl, mix beetroot puree with jaggery and butter.
Add the flour to both the bowls with some water, and make the dough.
You can even mix spinach and beetroot puree and make their cutlets.
Make cookie shapes from the dough and line them on a greased baking tray.
Place them in the oven and let them bake for about 8-10 minutes.
Serve warm with curd or chutney.
2. Ragi Cake
Satiate your little one’s sweet cravings with this healthy and delicious ragi cake.
Ingredients
Olive oil, 0.5 cup
Vanilla essence, 1 teaspoon
Salt
Milk, 1 cup
Yoghurt, 1 cup
Baking soda, 1 teaspoon
Brown sugar, 1 cup
Cocoa powder, 2 teaspoons
Whole wheat flour, 1 cup
Ragi flour, 0.5 cup
How To Prepare
Preheat the oven to 180 degrees.
Take wheat flour in a big bowl and add ragi flour, brown sugar, baking soda, salt, cocoa powder to it. Mix it thoroughly.
Add yoghurt, oil, milk, and vanilla essence to it and mix well again.
Pour this mixture in a baking tray and place it in the oven for about half an hour. Serve it with some nice chocolate syrup.
3. Egg Dosa
When a simple uttapam does not fill your child’s tummy, give it a twist. Make egg dosa, and he will finish it in no time.
Ingredients
Salt
Pepper
An egg
Dosa batter
How To Prepare
Heat the pan and sprinkle a little oil on it.
Pour dosa batter in the centre and spread it around. Now crack an egg exactly over it.
Let each side be cooked properly and add salt and pepper for additional taste.
4. Sweet Potato Puffs
Potato puffs are one of the top tasty and healthy baby food recipes for 2-year-old babies. This food item is a great evening snack and can even be a major side dish for a light dinner.
Ingredients
Flour, 0.5 cup
Cereal, 1 cup
Applesauce, 1 tablespoon
Water, 2 tablespoons
Vegetable oil, 2 tablespoons
Sweet potato, mashed, 4 cups
How To Prepare
Preheat the oven at a temperature of 350 degrees.
Mix together oil, potato mash, and applesauce in a bowl. Add water gently till the mixture blends fully.
Follow it up with cereal and flour as needed.
Use the dough to make small ball-like portions. Poke a small hole in the middle to let the trapped air out, allowing it to puff up.
Apply oil on a baking tray and arrange the puffs on it. Bake them for about 15 minutes and serve.
5. Fried Bananas
For little kids who turn their face away at the sight of a banana, this fried delicacy would be hard to resist.
Ingredients
Oil
Cardamom powder, 1 teaspoon
Bananas, 2
How To Prepare
Slice the bananas after peeling them.
Add some ghee to a pan and fry the pieces. Sprinkle cardamom powder over those, and enjoy.
Feeding Tips
A few handy tips for feeding your child can go a long way in making the entire meal experience a memorable one.
Do not reward or punish your child when it comes to his eating habits. He will learn in time what is healthy and what is not, so don’t force him to eat anything.
Do not feed spicy food items early in life.
Refrain from giving anything that is extremely hot or cold.
Make it a habit to sit together at the dining table and enjoy a meal.
When giving him snacks, choose nutritious options.
Keep meals frequent and small in quantity.
Let children take small portions of the food.
Avoid rushing through the meals.
Maintain a combination of vegetables, fruits, and milk.
When introducing any food, check if it provides him energy or not. Do not give foods containing empty calories.
FAQs
1. How often should I feed my 2-year-old child?
2-year-old babies should be fed every two to three hours. Now that children are able to walk and play, they are able to burn more calories while playing and feeding them at frequent intervals keeps hunger at bay.
2. Can I feed my 2 years old baby at night if they ask?
Yes, toddlers at this age tend to be explorative and hyper active in checking out their surroundings and new sensory information. So, if your little one wakes up at night or in the early moring, you can consider giving them a bedtime snack.
3. Should I worry if my two-year-old baby child is not feeding as usual?
Your little one is developing their taste buds for different foods, flavours, and textures, which may or may not make them like or averse to a particular food. If they do not like a particular food or texture, they will avoid eating it further. So, it could be that they may not be feeling well, have teething issues, or are just constipated. As long as your little one is healthy after taking a break from the scheduled appetite, it can be considered normal. However, if they lose body weight drastically and are more lethargic than usual, along with poor appetite, you should contact a doctor then.
4. Can I feed my 2-year-old packaged juice and flavoured milk?
No, the American Academy of Pediatrics suggests refraining from packaged 100% fruit juices, as many packaged juices do not contain fruit fibre and have preservatives and sweetener additives. Similarly, flavoured milk contains plenty of added sugar and preservatives to last them longer on shelves; therefore, you should avoid such and continue with plain milk. You must avoid feeding caffeinated drinks like soda, sports drinks, and fruit drinks (5).
Introducing healthy and nutritious foods at the right age can help your child pick good habits in the future, too. Most kids warm up to the foods once they see the entire family enjoying it together and work towards developing a habit of doing the same. So, make sure that you eat with your family every day.
Disclaimer :
Each child is different and so use these meal plans as a trusted guide as per your discretion. You can modify the meals according to your child’s preferences / requirements.
Never force-feed a child.
While preparing formula, please follow the instructions on the box and use the measuring spoon provided with it.
While introducing solid food to a baby, initially, one needs to prepare watery gruels/soups. As a child gets older, the caretaker/ mother has to increase the thickness of the liquids slowly according to the child’s capacity to swallow. Foods that are too thick can cause stomach upset/ unnecessary load; while excessively watery food might cause the child to remain hungry.
Some kids may eat less on some days and that is absolutely alright. However, if a child eats less for more than 3-4 consecutive days, please visit a doctor to guide further.
A child may eat less during the teething phase or if he/she may not be feeling well. You could increase breast milk /formula feeds on those days. Re-introduce the foods once the child is back to normal.
Don’t stop feeding if the child is suffering from diarrhoea.
You can alter the taste of the food by adding some natural flavours like cinnamon, jeera powder, lemon juice, curry leaves etc. if the child doesn’t accept the food initially.
If your child suffers from an allergy to nuts, gluten or eggs, please consult your doctor before feeding him/her any foods that may contain them.
References/Resources:
1. Faizan. U, Rouster. A. S; Nutrition and Hydration Requirements In Children and Adults; StatPearls Publishing; https://www.ncbi.nlm.nih.gov/books/NBK562207/#:~:text=For%20a%20child%20between%202,as%20well%20as%20to%20grow.
2. Nutrition Guide for Toddlers; Nemours KidsHealth; https://kidshealth.org/en/parents/toddler-food.html
3. 12.5 – Nutrition in the Toddler Years; PennState; https://psu.pb.unizin.org/nutr100/chapter/12-4-infancy-and-nutrition/
4. Iron and iron deficiency; BetterHealth; https://www.betterhealth.vic.gov.au/health/conditionsandtreatments/iron
5. Muth. N. D; Recommended Drinks for Children Age 5 & Younger; American Academy of Pediatrics; https://www.healthychildren.org/English/healthy-living/nutrition/Pages/recommended-drinks-for-young-children-ages-0-5.aspx
6. Sample Menu for a Two-Year-Old; American Academy of Pediatrics; https://www.healthychildren.org/English/ages-stages/toddler/nutrition/Pages/Sample-One-Day-Menu-for-a-Two-Year-Old.aspx
7. Feeding & Nutrition Tips: Your 2-Year-Old; American Academy of Pediatrics; https://www.healthychildren.org/English/ages-stages/toddler/nutrition/Pages/feeding-and-nutrition-your-two-year-old.aspx
8. Ages 2-8 Feeding Recommendations; Healthy Eating Research; https://healthyeatingresearch.org/tips-for-families/ages-2-8-feeding-recommendations/
Also Read:
20 Month Old Baby Food
Food Ideas for 21 Month Old Baby
22 Month Old Food Ideas and Chart
Food and Recipe Ideas for 23 Month Old
Read more

Foods for Babies and Toddlers With Diarrhoea
The bodily functions in children develop as they grow. Babies and toddlers have a sensitive digestive system, and therefore, they have more chances of suffering from diarrhoea. They may not want to eat or drink anything during this time, but, as a parent, you need to keep your kid hydrated for their good health. There are certain foods to give toddlers with diarrhoea to ensure they recover soon and stay hydrated during this difficult time. You may wonder what foods these are. This article covers the foods you should and shouldn’t feed your child when he has loose motions. Let’s get started then.
Video
Foods You Should Give When Your Infant/Toddler Has Diarrhoea
The diet for a child with diarrhoea usually includes food items that are not only easy to digest but sometimes, also help resolve the problem.
1. Breast Milk (0 Months+)
If your breastfeeding baby soils his diapers often, just stick to breast milk. Breast milk will keep him hydrated and also tackle his bowels.
2. Buttermilk (7 Months+)
Probiotics are very effective in battling diarrhoea. Give foods like curd, buttermilk or lassi yoghurt to your little one.
3. Rice Gruel (6 Months+)
Rice water can help your baby maintain the fluid levels in his body. It also helps to decrease the frequency of stools.
4. Ginger
Many mothers and people from the earlier generations swear by the power of ginger in reducing the symptoms of diarrhoea. Usually, this is meant for kids that are slightly older and not young babies. Giving them ginger mixed with some rock salt and jaggery works on providing some relief from diarrhoea and indigestion. You may also try a decocotion or pramathya of carom seeds (ajwain), nagara or ginger (zingiber officinale), pippali (Piper longum), harad (Terminalia chebula), Vacha (Acorus calamus), which is very effective for treating diarrhoea.
5. Nutmeg
Also known as jaiphal in various parts of the country, this is yet another age-old remedy used in various Ayurvedic preparations till date. It is usually prepared by rubbing a small portion of the spice on a stone grinder to get some powder. This powder is then mixed with some water and given to babies. This remedy is an effective one to provide relief or treat diarrhoea in children over 6 months and under 10 years of age.
6. Lemon Water ( 8 Months+)
There seems to be no ailment that lemon can’t cure. Lemon replenishes the body with the lost fluids. Mix lemon juice with warm water and add some salt to make tasty and healthy lemon water.
7. Cumin Powder
This is a great remedy for improving digestion and stimulating hunger in babies older than 6 months. It can also provide relief from mild gastric pain and indigestion, but may not help control diarrhoea. Roast some cumin powder and fennel seeds in a pan. Boil the roasted spices in some water and let it cool. Feed the water to your child 2 to 3 times a day in small portions depending on your his age.
8. Vegetable Soup (8 Months+)
Babies’ bodies can easily absorb the nutrients from a clear veggie soup. Avoid using spices like pepper and gassy veggies like cauliflower, cabbage, sprouts and spinach during loose motions. You may add a pinch of roasted hing, and jeera powder to improve digestion.
9. Chicken Soup (9 Months+)
If you wish to try a non-veg soup, clear chicken soup is a great option. It digests easily and is nutritious for children with diarrhoea.
10. Tender Coconut Water (8 Months+)
Dehydration can take a toll on your little one. Coconut water has a lot of natural salts and minerals, along with natural glucose. And the best part is that coconut water works for breastfeeding babies, too!
11. Sabudana (7 Months+)
Khichdi or porridge made from sabudana is quite beneficial for kids during a bout of diarrhoea. Soak the sabudana, cook it, and strain the water. You can add salt or hing for flavour.
12. Baby Bananas (6 Months+)
Bananas help to harden your baby’s stools, thus relieving diarrhoea. Steam and cut the banana into small pieces before offering.
13. Boiled Potatoes (8 Months+)
Food items that have starch can provide nutrition to your baby. Mashed potatoes flavoured with cumin seeds reduce gas as well as work on diarrhoea.
14. Pomegranate
If your kid has teeth and can chew well, you can feed him pomegranate seeds. Else, it is best to extract pomegranate juice and dilute it with enough water. Giving it to your baby once a day can work towards reducing diarrhoea in babies between 6 months and 5 years of age.
15. Idli (8 Months+)
Yes! Idlis are healthy and easily digestible, as the batter is fermented, but it’s role in controlling diarrhoea is debatable. Crush the idlis properly into small pieces before giving them to the child. Don’t feed chutney along with it.
16. Moong Dal Soup (6 Months+)
Cook a handful of moong dal with a pinch of turmeric powder in water. Then, drain the water and give it to your baby. It can help with stomach pain and diarrhoea.
17. White Bread (1 Year+)
This is yet another preferred food item during diarrhoea. White bread is made of refined flour that acts as a binding agent, and does’t have the fibre that encourages elimination. This bread can be eaten toasted or untoasted. Avoid using spreads, butter, jam, etc. as it will only aggravate the situation.
18. Bilva/Bel/Wood Apple Syrup
A homemade syrup of bilva (bel/wood apple/Aegle Marmelos) can help control diarrhoea in babies older than 6 months of age. This remedy is useful for adults as well! The syrup can be made by soaking dried wood apples in water overnight, and boiling it in the same water the next day till the water reduces to half the quantity. Then, strain the syrup and let it cool. You may feed the syrup with a spoon to your little one, or dilute it in water to make a sherbet without any sugar.
Another way of making the syrup is to cut wood apples, take out the pulp, and soak it in twice the amount of water, i.e. the pulp to water ratio should be 1:2. When the pulp has soaked enough, mash it properly and sieve it. You can add a pinch of roasted cumin and hing to it. There is no need to mix sugar as its already a little sweet, but if your child has sugar in his diet and you think he could need some, add a small amount to sweeten the syrup.
19. ORS
Diarrhoea tends to dehydrate the system as your baby looses important water and minerals every time he must visit the loo. To replenish these lost electrolytes, and ensure your child stays hydrated, ORS or electrolyte powder is a great option. You can easily make this at home too by dissolving six teaspoons of water and 1/2 teaspoon of salt in a litre of water. Make sure your child does not gulp this down, but sips it through the day, as too much at a time can be harmful to the body.
20. Applesauce
If your little one is refusing to eat during this time, applesauce is a great option. It tastes sweet and is easy to consume, making it the perfect option for toddlers with diarrhoea. You can even mix a little applesauce into soup or water to enhance the taste if your little one is extra fussy during this time.
Foods You Should Avoid
The foods you shouldn’t give your baby/toddler when he has diarrhoea are:
Dairy products except curd and buttermilk, and yoghurt
Fruit juices
Fizzy drinks
Fruits that start with P (peaches, pears, prunes, plums)
High fibre foods
Dry fruits and nuts
Sweets
Raw veggies
Gas-inducing veggies (broccoli, chickpeas, etc.)
FAQs
1. Should I Continue to Breastfeed My Baby If She Has Diarrhoea?
Diarrhoea can cause dehydration, so it is important to breastfeed your baby as normal if she is unwell. If your baby is refusing to feed, try giving her a small quantities of breastmilk through the day instead of a few major feeds.
2. How Long Does Diarrhoea Last In A Baby?
Diarrhoea should ideally last for 1-2 days in babies. However, if it has been longer than that, contact a paediatrician immediately as your baby might have a more serious problem.
Diarrhoea can make you quite anxious about your baby. Giving the right foods to prevent diarrhoea in babies is the first step to recovery. If your baby’s health doesn’t improve, contact your paediatrician immediately.
References/Resources:
1. Kaneshiro. N; When your child has diarrhea; MedlinePlus; https://medlineplus.gov/ency/patientinstructions/000693.htm; December 2021
2. Dietary Management of Toddler Diarrhoea; NHS Foundation Trust; https://www.swft.nhs.uk/application/files/2414/7626/8750/Dietary_Management_of_Toddler_Diarrhoea.pdf; August 2016
3. Dietary advice for toddler diarrhoea – Parent / carer information; Cambridge University Hospitals; https://www.cuh.nhs.uk/patient-information/dietary-advice-for-toddler-diarrhoea-parent-carer-information/; December 2022
4. Hyman. P, Milla. P, Benninga. M, et al.; Childhood functional gastrointestinal disorders: neonate/toddler; PubMed; https://pubmed.ncbi.nlm.nih.gov/16678565/; April 2006
5. Hoekstra. J; Toddler diarrhoea: more a nutritional disorder than a disease; PubMed Central; https://www.ncbi.nlm.nih.gov/pmc/articles/PMC1717620/; July 1998
Also Read:
Giving Enema for Babies and Kids
Cough Remedies for Kids at Night
Remedies for Stomach Pain in Toddlers
Read more

Febrile Seizures
A paediatric febrile seizure is one of the most common childhood disorders related to convulsions. Febrile (meaning feverish) seizures are convulsions that can happen during a fever and are generally seen in children aged between 3 months and 6 years of age. A febrile seizure is most commonly observed in babies who are 12–18 months old. While these seizures can be quite traumatic for you and the child, they usually don’t require treatment or cause other health problems.
Video: Febrile Seizures
What Is a Febrile Seizure?
A febrile seizure is a convulsion that may get triggered by a high fever, often from an infection. A febrile seizure fever can be alarming for a parent to witness.
Febrile seizures represent the response of a child’s brain to rising body temperature, usually on the very first day of a fever. Fortunately, in most cases, the seizure has no lasting effect. It does not create difficulties in learning or cause any underlying disorder. However, as a matter of caution, a doctor should be consulted immediately if a child has an episode of febrile seizure.
As a parent, you can help your child by keeping him/her safe during a seizure and by comforting them afterwards. Febrile seizure fever does not cause any cognitive problems, epilepsy, or brain damage in a child. In fact, children having febrile seizures have excellent prognosis for normal neuron functions.
How Common Are Febrile Seizures in Children?
Children who have a family history of febrile seizures are more likely to suffer from one. If your child has had a febrile seizure and is below 15 months of age, then there is a high likelihood of them experiencing another seizure in future. In 33% of the cases, children who have had one seizure will have another one, generally within the first 1–2 years of their life. Thankfully, most children stop having febrile seizures by the age of 5 years and above.
Causes of Febrile Seizures in Children
Wondering what causes febrile seizures in infants? This disturbing incident usually happens with fevers where the temperature is higher than 102 degrees Fahrenheit. The seizures tend to occur during the first 24 hours of a fever, but not necessarily when a child’s fever is spiking upwards.
There aren’t any specific causes of febrile seizures in infants. Certain viruses cause fever leading to seizure. Some children’s developing brains can also react to high fevers by triggering a seizure.
It is rather rare for a febrile seizure to be caused by a bacterial infection and related fever. Viral infections such as various types of the flu that are often accompanied by high fever are mostly linked to febrile seizure.
There is a misplaced apprehension that certain vaccinations, such as the vaccine for diphtheria, tetanus and/or measles–mumps-rubella, increase the chances of febrile seizures. In truth, it is a low-grade fever that causes the seizure, not the vaccination as interpreted in general.
Signs and Symptoms of Febrile Seizure
The symptoms of a febrile seizure can range from mild to severe and from staring to shaking or tightening of the muscles.
A child having a febrile seizure is likely to:
Have a fever higher than 100.4 F (38.0 C)
Lose consciousness
Roll their eyes and drool
Have darker skin
The seizure may last only a few seconds or even up to15
A child with a febrile seizure may feel tired and sleepy after the seizure subsides. Their arms and legs may jerk and the seizure may last only for a few seconds or up to 15 seconds.
Recurring Febrile Seizures
The first recurrence after an initial febrile seizure usually occurs within a year. Factors that increase the risk of having a recurring febrile seizure include:
Young age
Most febrile seizures are common in children between 6 months and 5 years of age. The likelihood of a recurrence decreases as the child grows up.
Family history
Some febrile seizures can be genetic in nature.
Persistent fever
A relatively shorter duration of low fever can also trigger febrile seizures.
Illness
As per medical reports, thirty per cent of children can have recurrent febrile seizures during subsequent illnesses.
Febrile Seizure Complications
The most common complication of a febrile seizure is the risk of recurrence. It can occur if:
The first seizure resulted from a low fever.
The period between the start of the fever and the seizure was short (a few hours).
The child was very young at the time of the first febrile seizure (younger than 12 months).
It is important to note any possible complications of febrile seizures as they could also be associated with a higher risk of recurrence.
The three characteristics of febrile seizures where you must be careful are:
1. when the seizure is focal, i.e., involves more than one part of the body.
2. when the child suffers from multiple seizures, i.e., the seizure recurs within 24 hours.
3. when the seizures are prolonged, i.e., last longer than 15 minutes.
Diagnosis of Febrile Seizure
The diagnosis involves a thorough physical examination, including a neurological exam or laboratory tests, if needed. The doctor will also track the history of symptoms.
Blood/urine tests and lumbar punctures are done to rule out other possible causes for the seizure and to detect viruses or bacteria or high levels of white blood cells, which may indicate infection. Dehydration (e.g., caused by vomiting and/or diarrhoea) and meningitis-related fever can also cause seizures.
Complex febrile seizures may require extensive diagnostic testing. Inconclusive lab tests, inconclusive physical examination, and any unusual suspicion of a neurological condition may make the doctor ask further questions. An electroencephalogram (EEG) is one such additional non-invasive test and is normally performed after a febrile seizure.
Further testing may not be needed in the following cases:
If the child shows normal mental development
The results of the neurological examinations are normal
The seizure is general, not focal
The seizure does not last longer than 15 minutes
The seizure does not recur within 24 hours
Febrile Seizure Treatment
Most febrile seizures stop on their own within a couple of minutes. If your child’s seizures extend beyond a few minutes or repeat frequently, then it is advisable to call for emergency medical attention.
If the seizure is because of a persistent infection or if it is hard to determine the source of the infection, then your child may need hospitalisation for further observation.
How to Manage Febrile Seizure
Parents need to take certain precautions to handle the situation while the child is having a febrile seizure.
The child should be rolled on to their side to prevent choking.
Never insert anything into their mouth.
The movement of the convulsions or twitching should not be restricted.
Any sharp items and objects should be removed as they may harm them during the seizure.
Do not put your child in the water in an attempt to cool off the fever.
The understanding and reassurance of the family play a vital role in managing febrile seizure. A first seizure episode can be a terrifying experience for most parents. It is important to understand that there will be no subsequent risk of intellectual delay in the child.
The next step is to follow instructions for the treatment of a complex febrile seizure (if there is any) to rule out serious underlying infections such as meningitis or encephalitis. This will be done by lumbar puncture, clinical assessment, or through laboratory tests like EEG or neuroimaging. Your doctor will perform proper diagnosis and recommend the necessary treatment in case a serious illness is detected.
How to Prevent Your Child From Getting Febrile Seizure
Most febrile seizures occur in the first few hours of fever, during the initial rise in body temperature. In such a case, the child can be given paracetamol or acetaminophen for comfort. However, it must be remembered that these won’t stop a seizure.
Rarely, prescription anticonvulsant medications may be used to try to prevent febrile seizures. However, since these medications can have side-effects, they should be avoided unless necessary.
The paediatrician may prescribe specific drugs to treat a child having recurring febrile seizures or seizures of long duration.
When to Seek Medical Help
Febrile seizures often occur within the first 24 hours of fever and can be the first symptoms of the child’s illness. Take your child to the doctor for an evaluation right after a febrile seizure.
Febrile seizures are classified as simple or complex:
Simple febrile seizures
This is a more common type of seizure that lasts from a few seconds to 15 minutes. Simple febrile seizures do not repeat within a 24-hour period and generally have no impact on any specific part of the body.
Complex febrile seizures
This type of seizure lasts more than 15 minutes and recurs within 24 hours. The child may become unconscious and the seizure typically impacts one side of the body.
If your child shows any symptoms of a complex febrile seizure, or seems to be sluggish and has trouble breathing, please consult the doctor without delay.
Despite the typically benign nature of febrile seizures, this condition should not be overlooked. The guidelines given here aim to help improve the understanding in dealing with febrile seizures and to ensure the overall health and wellness of the child.
Read more
How to Draw a Lion – A Step-by-Step Guide for Kids
Does your little one enjoy arts and crafts? With a little nudge in the right direction, he could turn into the next little Picasso! Drawing and colouring reach a level of excellence when practised often, if not daily. If you’re looking to hone your little one’s artistic talent, drawing a day is a step in the right direction. Since kids are easily captivated by animals and birds and are often taught animals, colours, and birds early on, a drawing on such topics can be a great idea; for instance, a lion drawing for kids. You can start with an easy lion drawing for your kiddo and take their skills to the next level with other animals. This article is a simple guide on lion drawing for kids step by step.
This step-by-step guide is a great way to get your child to learn a new drawing. This one is simple and turns out great! Ready to see how simple it is to draw a lion?
What You Will Need
1 pencil
1 eraser
An A4 size plain paper/ plain white sheet
Colours
Lion Drawing for Kids – 13 Easy & Simple Steps
Let’s quickly learn how to make a cute lion drawing, shall we? All you need is a pencil, an eraser, an A4-size white sheet, and colours.
Step 1: Draw a lion face.
Draw a circle with a diameter of 5 cm or more on a plain sheet. To draw a lion face, make a small circle inside this circle. The space between the two circles should be about 1 cm. The outer circle should be sketched lightly so that it can be erased later.
Step 2: Draw the mane of the lion.
Draw frill-like semi-circles on the circumference of the bigger circle to draw the mane of the lion. Then erase the outer circle.
Step 3: Draw an egg shape.
Draw an oval or egg-like structure starting from 1 cm below the centre of the circle as shown in the illustration.
Step 4: Draw two small circles on the left and right sides of the oval shape.
Draw two small circles along the base of the oval shape. The two circles should be drawn on the left and right side of the oval shape respectively such that they intersect with the oval shape as shown in the image.
Step 5: Draw two arcs inside the oval shape.
Draw two arcs inside the oval shape on the left and right sides respectively, as shown in the image.
Step 6: Erase the top-half of the oval shape.
Erase the above half of the oval shape.
Step 7: You will get a U-shape.
You will get a U-shape, which will form the base or the body of the lion.
Step 8: Draw the lion’s feet.
To make the lion’s legs and feet, draw a ‘J’ on the left, as shown in the image and an ‘L’ on the right. Draw two arcs on both feet as illustrated.
Step 9: Draw the tail of the lion.
Now to make the tail of the lion, draw two parallel lines going upwards on the right. Draw a leaf-like shape on the end of the lines.
Step 10: Draw the facial features.
To make lion’s eyes, start with drawing two small circles inside the smaller circle drawn in step 1.
Draw an oval shape inside the above two circles respectively and colour them black.
To make the white part of the eyes, draw a little circle on the top left inside each oval shape.
To draw a nose, draw a wide ‘V’ under the eyes of the lion. Draw an arc to connect the ends of the ‘V’ shape.
Step 11: Draw the tongue of the lion.
Draw a small line from the centre of the lion’s nose and draw a half-circle curved upwards (towards the nose). Draw a small semi-circle underneath to make the tongue of the lion. Next, draw two whiskers on each side as shown in the image.
Step 12: Colour the nose and tongue of the lion.
Colour the tongue and the nose of the lion black.
Step 13: Colour the body of the lion.
Colour the body of the lion mustard yellow and his mane and tail brown.
In 13 simple steps, your kids will have learned how to draw a lion.
FAQs
1. What are the advantages of lion drawing for children?
Lion drawing, first of all, teaches children about what a lion looks like. This drawing is a great way to introduce children to animals one by one and teach them the trivia. Instead of rote learning, kids will enjoy learning about animals like lions in a fun and creative way.
2. What colours can children use to fill in a lion drawing?
Yellow, brown, and orange can be used to colour a lion. For children beginning their colouring journey, they can use pencil colours or oil pastels as they glide smoothly. Remember to use child-safe colours only.
3. What else can we draw on a lion drawing?
You can make trees, rocks, vines, sand dunes, mountains, and other animals to give the drawing a vibrant look.
With some practice (and patience), your kiddo will learn how to draw a lion and other animal figures. And once he gets the hang of it, he can teach his friends, too!
Also Read:
How to Draw a Frog for Kids
How to Draw an Owl for Children
How to Draw An Apple for Kids
How to Draw Butterfly for Children
Read more
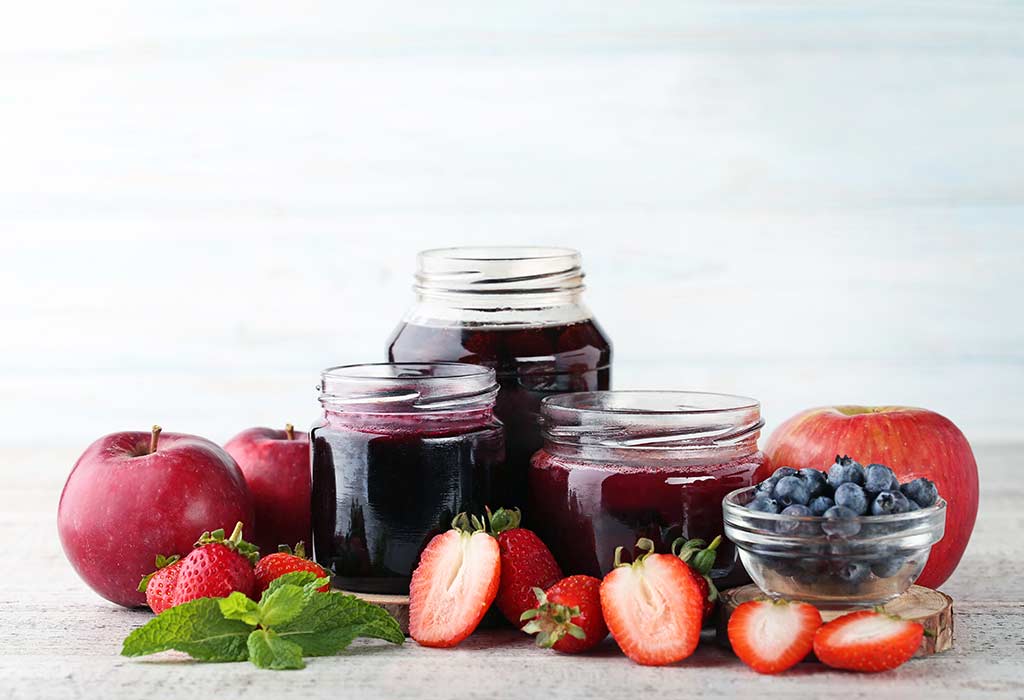
Homemade Fruit Jam Recipe
While some kids enjoy savoury dishes, others enjoy the sweet treats. If your kid has a sweet tooth and relishes everything sweet, we have an interesting recipe that your munchkin will love for sure. We have an easy Homemade fruit jam recipe that you can make with seasonal fruits. This recipe offers the goodness of several fruits in just one single spread. Browse through this post and learn this jam recipe that your kiddos will simply love!
Cooking Time
Type
Time (hh:mm:ss)
Preparation Time
00:10:00
Cook Time
00:20:00
Total Time
00:30:00
Cooking Method
Gas Stove
Type of Meal
Vegetarian
Suitable For
Toddlers over 24 months of age
Meal Schedule
Breakfast, Mid Morning Snack or Evening Snack
Recipe Type
Spreads
Ingredients
Here’s what all you need to make Homemade fruit jam for toddlers:
Ingredient
Quantity and Volume
Banana (medium-sized)
1
Apple (medium-sized)
1
Guava
1
Papaya (chopped)
1/2 cup
Prunes
3 to 4
Strawberries
8 to 10
Red grapes
8 to 10
Jaggery
3/4 cup
Lemon juice
2 tsp
Orange juice
1/2 cup
Instructions
Want to know how to make the make homemade fruit jam? Follow these simple step by step directions given below:
Wash all the fruits nicely under running water. Drain excess water by keeping them on the strainer for some time.
Chop all the fruits into small pieces, discard the seeds and peels.
Take the chopped fruits in batches and churn them into a fine paste in a blender.
Place the fruit paste in a heavy-bottomed pan and turn on the heat.
Add jaggery, orange juice, and lemon juice and keep cooking the fruits on low flame for few more minutes. Keep stirring it constantly or else the jam may stick to the base.
Once the fruit paste reaches a thick consistency or no longer remains watery, turn off the heat and let it cool.
Store the jam in a sterilised glass jar.
Serve homemade fruit jam with bread, cracker, parantha or other such meal options!
Recipe Tips
Keep in mind these following tips while making homemade fruit jam baby food recipe:
You can use brown sugar or white sugar in place of jaggery.
Do not skip lemon juice as it is added to increase the shelf life of the jam.
You can adjust the sweetness of the jam by increasing or decreasing the use of jaggery as it depends on the sweetness of the fruits.
You can add more bright coloured fruits such as red grapes and strawberries to render deep red colour to the jam.
Keep the jam under refrigeration and use it within a few weeks.
Nutrition Information (Per 100 Grams):
Nutrient
Value
Energy
300 Cal
Carbohydrates
75 g
Protein
5 g
Calcium
20 g
Vitamin C
10 mg
Sodium
30 mg
Potassium
75 g
This table shows approximate nutritional values present in 100 grams of homemade jam. The actual nutritional content may slightly vary.
Health Benefits
Here are some health benefits of eating jam:
All fruits contain pectin, which is a natural substance that gets modified on being heated. The presence of pectin is great for hampering the growth of cancer cells.
Being a good source of natural sugar and other sweeteners, jams are great for providing that added dose of energy to your munchkin.
Jams provide a concentrated dose of nutritional benefits when it is made from ripened fruits.
Mixed fruit jams are not only loaded with nutrients, but they also help in optimizing the body’s metabolism.
Buying Guide
Now that you know how to make Homemade fruit jam, here are some tips on buying the ingredients for the same:
Buy seasonal fruits to make jam. Frozen or fruits from cold storage contain very fewer nutrients in them.
Always buy organic fruits for your baby to protect your baby from any chemical exposure.
Ripe fruits are ideal for jam as they render natural sweetness to the jam, and this means less need of adding extra sugar or other kinds of sweeteners.
Buy organic jaggery to make jam. You can also replace jaggery with brown sugar. Check the expiry date of the product before buying it.
Homemade jam is a sweet treat for your munchkin, and this can be made in different flavours as per your kid’s choice. So, get hold of some yummy fruits and make this mouth-watering jam for your little one and make regular toasts, crackers and pooris more interesting and tastier!
Read more
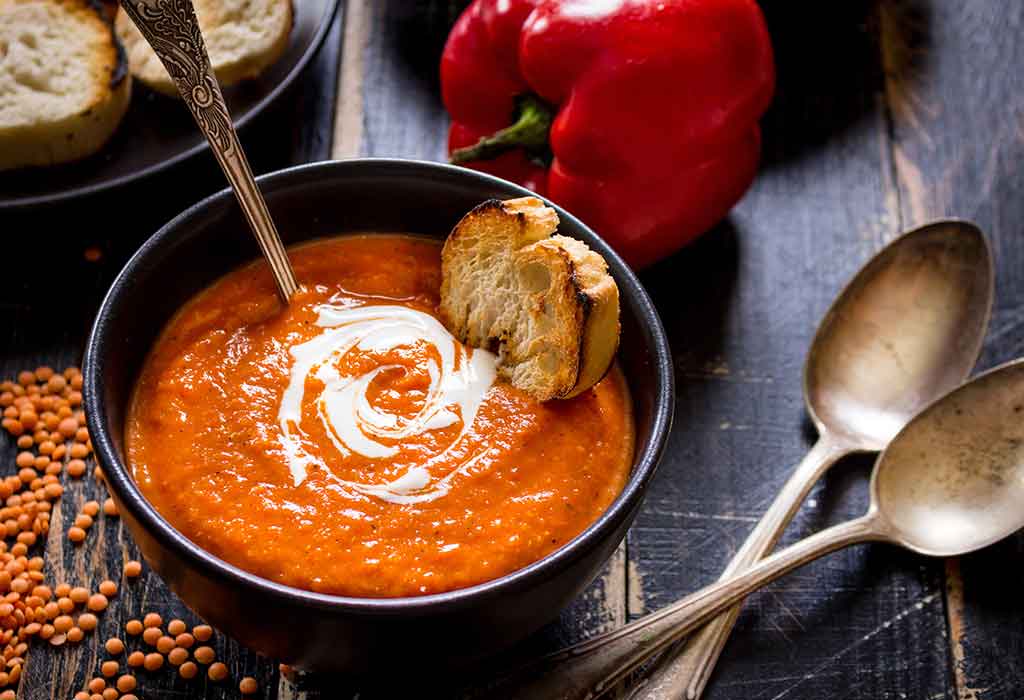
Tomato Pumpkin Rice Soup Recipe
Need a comforting winter recipe to treat your family? A bowl of hearty tomato and pumpkin rice soup may be just the right answer. This wholesome dish can be served as a tasty appetiser or after-school snack. This continental style recipe is ideally served with bread, grilled pizzas, and sandwiches or even eaten by itself. Combining the goodness of vegetables, rice and aromatic herbs, the goodness of its ingredients makes your baby’s daily diet more nutrient-rich and delicious. Find out the easiest way to make tomato pumpkin rice soup and it is sure to become your child’s favourite dish.
Video: Tomato Pumpkin Rice Soup Recipe for Babies and Toddlers
Cooking Time
Type
Time (hh:mm:ss)
Preparation Time
00:10:00
Cook Time
00:35:00
Total Time
00:45:00
Cooking Method:
Stove
Type of Meal:
Vegetarian
Suitable For:
Weaning babies older than 9 months of age
Meal Schedule:
Lunch, evening Snack or dinner
Recipe Type:
Appetiser
Ingredients
Type
Quantity
Tomatoes
3
Pumpkin
1
Crushed Garlic Clove
2
Water
1 Litre
Salt
As Per Taste
Lemon Juice
2 Tbsp.
Pepper
½ tsp
Olive Oil/Butter
2 Tbsp.
Basmati Rice
2 Cups
Ginger
2 Piece
Instructions
The appropriate step by step directions for making tomato pumpkin rice soup is your perfect guide for developing your culinary skills.
Blanch the tomatoes. Remove their skin and cut them into half.
Peel off the skin of pumpkin and cut it into cubes.
Heat a tablespoon of olive oil in a large pan. Add in the garlic cloves and pumpkin cubes.
Sprinkle some salt and roast the pumpkin till it turns tender. Cover the pan to fasten the roasting process.
Add the roasted tomatoes to the soft pumpkin and sauté for another 2 minutes.
Pour in the water or vegetable broth and let the mixture simmer for 10 minutes.
Once the mixture cools down, transfer it into a blender.
Make a smooth puree and stir in cooked rice and simmer it for a minute.
Sprinkle some herbs, lemon juice and basil leaves to season from the top.
Recipe Tips
Use chilli flakes, cayenne or chilli oil for older children to this simple tomato pumpkin rice recipe, to make it moderately hot.
Add finely chopped leek to the broth for a mild, onion-like crunchy taste.
You can mash and break the pumpkin with a wooden ladle instead of using a blender.
This homemade tomato pumpkin rice soup baby food recipe can be made tastier by adding coriander leaves to it.
Continuous reheating reduces the nutrition value of the soup.
Use olive oil instead of butter or chopped onion instead of garlic cloves.
Herbs like oregano, thyme, parsley can be used to garnish this soup.
Nutrition Information (Per 1 Serving)
Type
Value
Carbohydrates
76.8gram
Calories
427.7 Kcal
Protein
14.3gram
Sodium
2454.9 mg
Fiber
3gram
Fat
16.1 gram
Potassium
3091.2mg
Calcium
28.9%
Vitamin C
319.5%
Vitamin A
856.5%
Dietary Fibre
11.1gram
Sugar
12 gram
Health Benefits
Tomato pumpkin rice soup is filled with the goodness of vegetables and carbohydrates that are extremely beneficial for your baby. Let us focus on the nutritive value of this satisfying meal:
Rice is an excellent source of carbohydrates and vitamins for babies, apart from being easily digestible.
Highly loaded with antioxidants like beta-carotene and Vitamin A, pumpkins are not only sweet but contain well-balanced mineral composition that contributes to the overall development of your little munchkin.
Low in fat and calories, pumpkins have a high fibre content that supports digestion and eases bowel movements. Its potassium content improves the functioning of muscles while Vitamin C helps to boost the immunity of your child.
If your child develops certain allergic reactions after graduating to these solid foods, consult your paediatrician for advice.
Tomatoes are a very essential part of a baby’s diet. They contain antioxidants and Vitamin K that are important to build strong bones.
Buying Guide
Shopping for the best quality ingredients for your tomato pumpkin soup recipe can be challenging unless you have clear information about the products. This buying guide will assist you to make precisely exercise your choices.
Ensure that the tomatoes that you’re buying are red and orange. They shouldn’t have any cracks or soft spots on them.
Spices need to have a strong aroma and a rich colour.
It is always better to choose vegetables from an organic source keeping their nutrients intact.
Basmati rice is flavoured rice. You can choose short-grain rice that cooks faster, but brown rice is more filling and has more health benefits for a child.
Combine the goodness of autumn harvest of pumpkin with ripe tomatoes and rice to make this homemade tomato pumpkin rice soup for babies. It is a better alternative to readily available soup packets containing harmful preservatives.
Read more

Teaching Toddlers to Count Numbers: 1 to 10
Prepare your child for preschool by learning how to teach numbers to toddlers while making it fun at the same time. You can make a game out of learning numbers and use physical representations too. Find out how to use everyday things and experiences as teaching tools.
Children pick up things very quickly because they’re naturally curious. Whether it’s language skills, eating or developing motor skills, with the right encouragement, they absorb information rapidly. If you’re trying to teach anything new to your toddler then repetition is the key. It’s a good idea to help him learn some essential maths skills such as counting from 1 to 10 too as he gets ready to join play school.
Games for Teaching Numbers to Toddlers
1. Use Music
Kids learn things faster if they associate them with something enjoyable. Music is one of the best ways to teach numbers to toddlers, because it’s easy to memorise songs. Sing nursery rhymes related to numbers such as ‘1-2, buckle my shoe’, ‘5 little monkeys jumping on the bed’, and ’This old man’. Hold up your fingers for the number of characters in the rhyme. It’ll give your child an understanding of the concept of less and more.
2. Use Colours
Most children love colouring, so use it to your tot’s advantage. Draw the outlines of numbers on a large drawing pad, and let him colour them as he wishes to after he identifies the numbers. To connect each number to a certain figure, write a number and ask him to draw the corresponding number of things. For example, if you’re teaching him the number 4, ask him to draw 4 circles or 4 flowers.
3. Use Physical Representations
When planning counting lesson plans for toddlers, it’s important to keep in mind that apart from just learning the names of numbers, your toddler should also understand the idea of quantities, and numbers increasing and decreasing. Physically connect objects to each number. You can take candy for representation. With each number, show your child the corresponding amount of candies.
4. Play Games
Games are an excellent teaching tool. One of the activities for counting 1 to 10 for 2-year-olds is hopscotch. Children love jumping and hopping, and hopscotch gives them an outlet for their energy. Aside from helping them learn how to count, it also develops gross motor skills. Hide and seek is another good game to teach your child counting because the ‘den’ needs to count till at least 10. You can also ask your toddler to spot numbers on hoardings and price tags.
When Do Toddlers Learn to Count?
You can start introducing numbers as early as the age of 12 months by way of songs and nursery rhymes. Gradually, you can move to other counting activities and games. Create an environment that encourages creativity and exploration if you want his interest to be maintained.
Counting is the ability to recite numbers in order. There are learning opportunities everywhere around you, which you can take advantage of. It’s important to teach numbers to your toddler early on so that he has a quicker grasp of mathematics when he enters school.
Read more
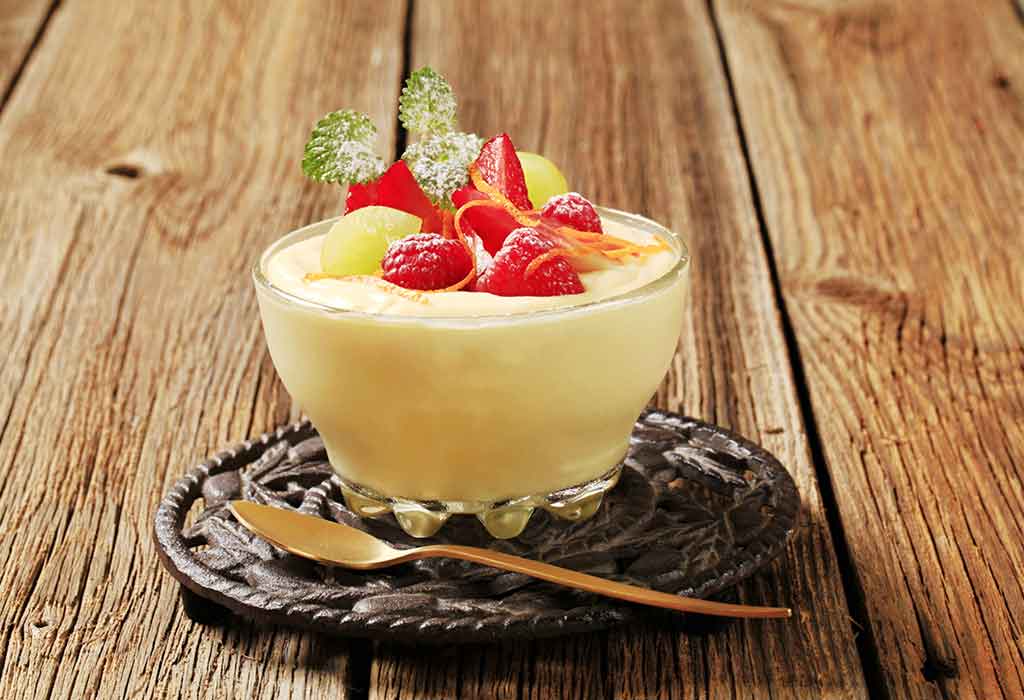
Fruit Custard Recipe
A timeless dessert recipe, this mouth-watering and simple Fruit Custard recipe is the perfect way to serve some exotic and nutritious fruits to your toddler. It is one of those desserts that can be whipped up in seconds and is equally filling too. So go ahead and serve this basket of fruits with a creamy twist for your baby to enjoy.
Cooking Time
Type
Time (hh:mm:ss)
Preparation Time
00:20:00
Cook Time
00:15:00
Total Time
00:35:00
Total Servings
3-4
Cooking Method
Gas stove or induction
Type of Meal:
vegetarians and non-vegetarians
Suitable for
Any toddler above 12 months of age
Meal Schedule
Dessert or Snack
Recipe Type
Main Meal
Ingredients
Ingredients
Quantity & Volume
Milk
4 ½ cups
Vanilla Custard Powder
3 tablespoon
Sugar
5 tablespoon
Apples peeled and finely chopped
1 cup
Grapes finely chopped
1 cup
Oranges chopped
¾ cup
Bananas chopped
½ cup
Chickoo
½ cup
Instructions
Making fruit custard needs a little bit of patience as you need to peel, de-seed and chop the fruits. But the fruits of your labour will not go to waste. Learn how to make Fruit Custard by following this simple step-by-step procedure:
Combine the custard powder, milk, sugar in a deep bottomed pan. Stir well and cook on a slow flame for about 10 to 12 minutes while stirring continuously.
Once the mixture starts to thicken slightly turn off the gas. Let the mixture cool completely.
Once cooled, add the fruits and mix gently.
Refrigerate it for some time if you want to serve it chilled.
Recipe Tips
Make sure you rinse and wash the fruits before chopping them.
Make sure you remove the seeds from the apple when you peel and chop them.
Always slit the grapes lengthwise first and then chop them into tiny pieces.
Make sure you take the seeds out of the oranges before chopping them.
You can add the fruits of your choice. When berries are available, add them for an exotic touch. Try to add seasonal fruits. During summer you can use mangoes, and during winters you can add pomegranate and guavas. If you are adding pomegranates, you may need to de-seed them as the tiny seeds could irritate and choke your baby.
Try to make the custard with a thin consistency so that your baby can slurp it easily.
Nutritional Facts Per Servings
Nutrient
Value
Calories
237 Kcal
Protein
5.5 gm
Carbohydrates
30.6 gm
Fibre
2.7 gm
Fat
7.7 gm
Cholesterol
18 mg
Sodium
31.3 mg
Health Benefits
No mother will ever challenge the health benefits of Fruit Custard for babies. Below are the ones for the fruits included in this recipe. If you add more, you feed more.
Apples are an excellent source of antioxidants and help to keep the free radicals at bay. They re also a good source of fibre and Vitamin C.
Chickoo is good for digestion and also helps in the development of bones. TIt is also rich in Vitamin A and Vitamin C and provides energy.
Oranges are rich in Vitamin C and help in boosting immunity. They also contain soluble fibre making it a good source for digestion.
Grapes are superfoods to protect from respiratory infections and a potential laxative. They are also a good source of antioxidants.
Bananas are great for digestion and are rich in Vitamin C, Vitamin B2 and Vitamin B6.
Buying Guide
Now that you have learned the homemade Fruit Custard baby food recipe, you need to familiarise yourself with some buying tips when sourcing the ingredients.
Buy organic fruits as they do not contain chemicals or pesticides. Harvested with 100% natural ingredients, they are entirely safe for your baby.
If you are using grapes and oranges, make sure they are not sour. If sour grapes and oranges are used, it will spoil the taste of the fruit salad.
You can buy custard powder of any reputed brand from the shelves of supermarkets. Make sure you check the expiry date before using the product.
Fruit Custard can be made with the fruits that are readily available in your fruit basket. You do not have to add too many vegetables. You could add just two of them and mix it with the custard and serve it to your baby. A good idea would be to alternate the vegetables daily so that your baby is introduced to new tastes and will not be bored too soon.
Read more
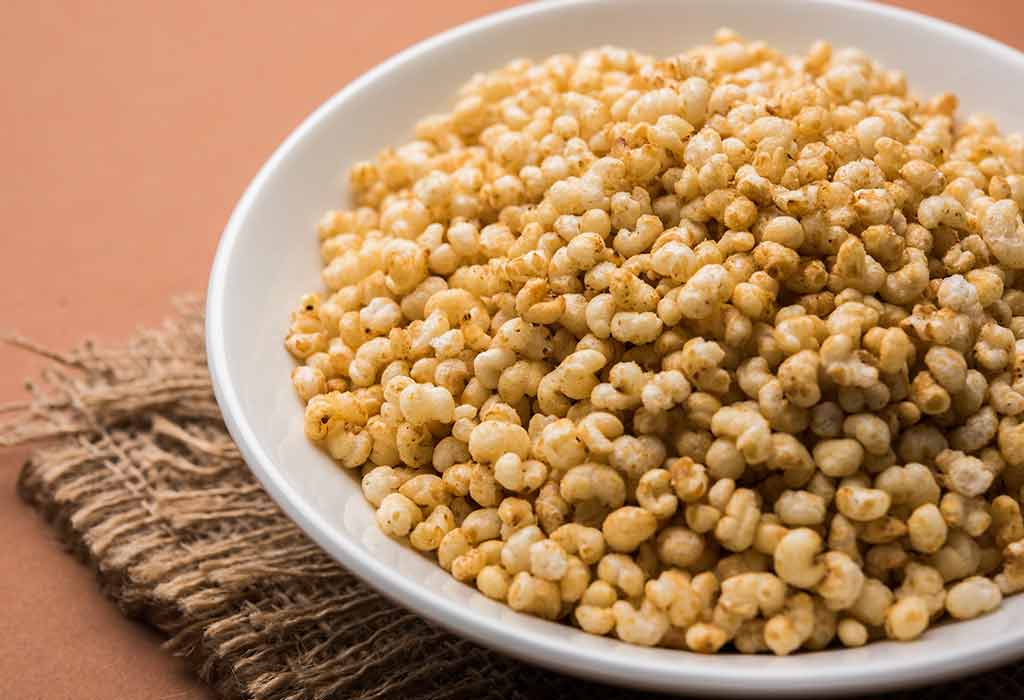
Jowar Puff Chivda Recipe
This Jowar Puff Chivda recipe promises a bowl full of crunchy and tangy fun. Made with some jowar puffs, roasted chana dal and seasoned with mild spice powders, it is an excellent crispy treat that can be enjoyed by kids and adults alike. Chivda is a popular tea time snack in India, and it can be introduced to babies after the age of twelve. Although adults like it spicy, this variation is a perfectly spiced snack that babies will love.
Cooking Time
Type
Time (hh:mm:ss)
Preparation Time
00:05:00
Cook Time
00:10:00
Total Time
00:15:00
Cooking Method: Gas
Type of Meal: Vegetarian or vegan
Suitable For: Toddlers older than 18 months of age
Meal Schedule: Snack, In-between meals
Recipe Type: Snack, Treats
Ingredients
Type
Quantity
Jowar Puffs
5 cups
Oil
2 tbsp
Mustard seeds
1 tsp
Curry leaves
6
Asafoetida
¼ tsp
Roasted chana dal
2 tbsp
Turmeric powder
½ tsp
Chilli Powder (optional)
½ tsp
Salt
To taste
Instructions
This easy jowar puff chivda baby food recipe is an excellent starter for your child who has just completed their first birthday. A milestone in itself, children over one year need to be offered different foods to tickle their taste buds. Follow this step-by-step guide to make this yummy snack.
First, make the jowar puffs with the seeds. Pop them in a pan. Close the lid and let each grain pop. Remove and keep the popped corns aside.
Boil some oil in a pot or a deep non-stick pan. Add the mustard seeds, curry leaves and asafoetida and saute on a medium flame. Wait until the mustard seeds pop.
Add the roasted chana dal and cook on a medium flame for about 1 minute.
Now add the turmeric powder, chilli powder and salt. Mix well and cook on a low flame for about 10-20 seconds.
Add the roasted jowar puffs to this mixture and mix well. Cook on a low flame for about 1-2 minutes and keep stirring occasionally.
Cool this completely and store in an airtight container.
Recipe Tips
You can eliminate the chilli powder if you do not want it to be too spicy.
Make sure the jowar seeds puff and check before you add them to the sautéed mixture.
Chop the curry leaves finely so that your child will not have difficulty in biting them.
Nutrition Information (Per 100 Grams)
Type
Value
Energy
66 kCal
Protein
1 g
Carbohydrates
1.8 g
Fibre
0.4 g
Fat
6.1 g
Cholesterol
0 mg
Vitamin A
102.8 mcg
Vitamin B1
0 mg
Vitamin B2
0 mg
Vitamin B3
0.3 mg
Vitamin C
2.6 mg
Folic Acid
0 mg
Calcium
5.9 mg
Iron
0.1 mg
Magnesium
0 mg
Phosphorus
0 mg
Sodium
9.7 mg
Potassium
48.2 mg
Zinc
0 mg
Health Benefits
You have learnt how to make jowar puff chivda for your kids, but you would want to learn the health benefits. Read on to find out.
Jowar puffs are great for improving immunity in infants.
Jowar puffs are full of carbohydrates and help to keep the tummy full for longer.
Jowar puffs are also good for the bones as it contains high levels of magnesium. It is also rich in protein.
Jowar contains a high concentration of fibre which helps in digestion.
Jowar also contains iron and can be combined with any source of Vitamin C to aid in absorption.
Jowar contains Vitamin B and helps the body to build new tissues and cells.
Jowar also contains traces of copper, zinc, and high levels of antioxidants.
With its high levels of iron and copper, it aids in healthy blood circulation in the body.
Buying Guide
This homemade jowar puff chivda recipe is an excellent snack for your kid with a popcorn-like feel in the mouth.
Buy jowar seeds in sealed form.
Check the expiry date on the packaging before using the jowar seeds.
Buy good quality chana dal and preferably in sealed form.
Buy fresh curry leaves from the market. Make sure to check that there are no holes in the leaves. If there are discard them immediately as worms may infest them.
This jowar puff for babies is a perfect balance. As your baby grows, they will need more meals and in small portions. It may not always be possible to make something fresh from the kitchen all the time. Snacks like these will come to your rescue. These snacks can be made in a jiffy and stored. It can come in handy when your baby feels hungry between meals.
Read more
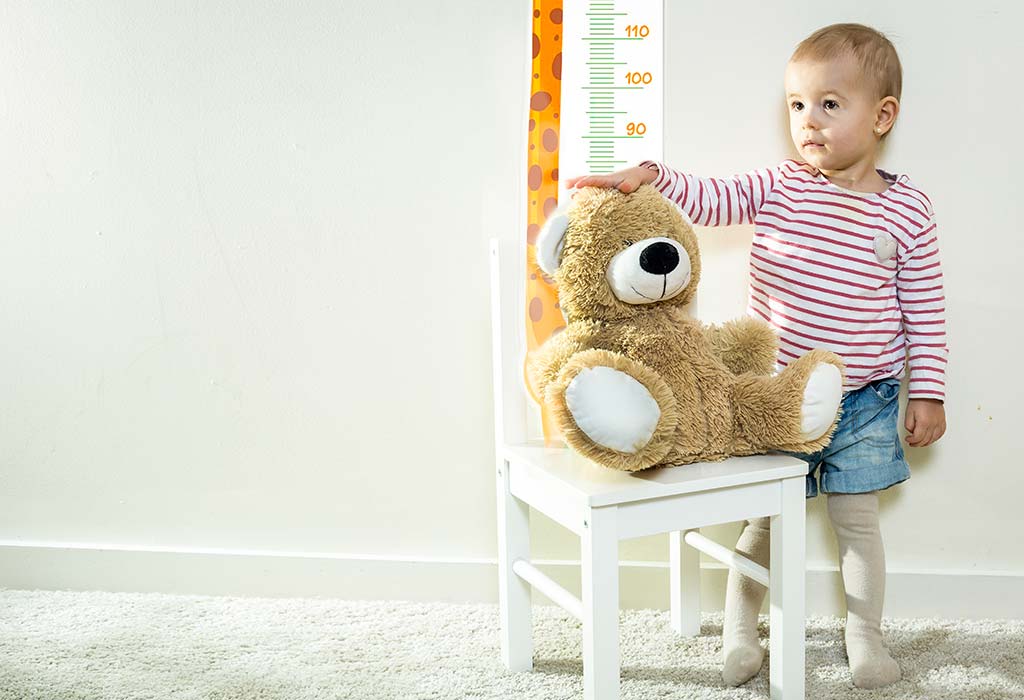
Weight and Height of Toddlers – From 12 to 24 Months
A baby brings immense joy in a family. When you have a baby, you take care of his every little need and prioritise his happiness over everything else. We know you take care of your little one in the best way possible, but to ensure that your toddler grows up properly and meets his milestones in time, you should keep note of his height and weight. Genetic factors, environment, nationality, ethnicity, age, race, gender are some factors that decide the height and weight of a child, but not completely. However, you can take note of these factors and monitor your child’s height and weight to identify any health problems. This would help you in ensuring optimum nutrition for your child.
Video : The Ideal Height & Weight Chart for Toddlers (From 12 to 24 Months)
What Is a Toddler Growth Chart and How Does It Work?
Toddler growth charts are the best tools to track a child’s growth and development. They indicate the growth in weight, height and head circumferences which is an indicator of healthy development of the brain. These growth charts show the average height, weight, and head circumferences that should be achieved per month and help the paediatrician assess if the child’s growth is on track.
Height and Weight Chart for Toddlers
Below are the two charts to give you information regarding the average height and weight of toddlers (from 12 months to 24 months). This chart would give you a quick peek into the well-being of your child.
Average Height and Weight of a Toddler Girl
The following height and weight chart gives information about the average height and weight a toddler girl should have at different months.
Age (Months)
Weight
Height
12
20.4 lb (9.2 kg)
29.2” (74.1 cm)
13
21.0 lb (9.5 kg)
29.6” (75.1 cm)
14
21.5 lb (9.7 kg)
30.1” (76.4 cm)
15
22.0 lb (9.9 kg)
30.6” (77.7 cm)
16
22.5 lb (10.2 kg)
30.9” (78.4 cm)
17
23.0 lb (10.4 kg)
31.4” (79.7 cm)
18
23.4 lb (10.6 kg)
31.8” (80.7 cm)
19
23.9 lb (10.8 kg)
32.2” (81.7 cm)
20
24.4 lb (11.0 kg)
32.6” (82.8 cm)
21
24.9 lb (11.3 kg)
32.9” (83.5 cm)
22
25.4 lb (11.5 kg)
33.4” (84.8 cm)
23
25.9 lb (11.7 kg)
33.5” (85.1 cm)
24
26.2 lb (11.8 kg)
34.1” (86.5 cm)
Source: https://www.disabled-world.com/calculators-charts/height-weight-teens.php
Average Height and Weight of a Toddler Boy
The following height and weight chart gives information about the average height and weight a toddler boy should have at different months.
Age (Months)
Weight
Height
12
21.3 lb (9.6 kg)
29.8” (75.7 cm)
13
21.8 lb (9.9 kg)
30.3” (76.9 cm)
14
22.3 lb (10.1 kg)
30.7” (77.9 cm)
15
22.7 lb (10.3 kg)
31.2” (79.2 cm)
16
23.2 lb (10.5 kg)
31.6” (80.2 cm)
17
23.7 lb (10.7 kg)
32.0” (81.2 cm)
18
24.1 lb (10.7 kg)
32.4” (82.2 cm)
19
24.6 lb (10.9 kg)
32.8” (83.3 cm)
20
25.0 lb (11.2 kg)
33.1” (84.0 cm)
21
25.5 lb (11.5 kg)
33.5” (85.0 cm)
22
25.9 lb (11.7 kg)
33.9” (86.1 cm)
23
26.3 lb (11.9 kg)
34.2” (86.8 cm)
24
26.8 lb (12.1 kg)
34.6” (87.8 cm)
Source: https://www.disabled-world.com/calculators-charts/height-weight-teens.php
How Fast Do Toddlers Grow?
While they continue to get stronger and able to do many things, the rate of growth in toddlers reduces during this year. They grow at a slow, but steady rate. Toddlers generally gain an average of 5 pounds during this periods and grow about 4-5 inches.
How to Help Your Child Maintain a Healthy Weight and Height
To ensure that your child is growing properly and is gaining weight, you can always use the height and weight calculator. This would give you an idea of the average weight and height of a toddler. Keep a tab of the weight of toddler in kgs or lbs and the average height of toddler in cms or inch for later considerations. Record your child’s height and weight every month so that your paediatrician gets an idea of your child’s growth pattern. He will be able to find out your child’s body mass index (BMI). This would assist him in deciding what is best for your toddler. Here are some ways you can maintain a healthy weight and height of your child:
Breastfeed your child at least until he turns a year old.
Once he turns six months old, you can start giving him healthy foods like fruits and vegetables in pureed form.
Indulge your child in physical activities. Play with him; exercise with him, or take him for a stroll in a park.
Allow your toddler to eat until he’s full but don’t force him to eat.
Limit screen time for your toddler.
When Should You Be Worried About Your Child’s Weight?
You shouldn’t worry about where your toddler begins on the growth chart. It will be a matter of concern if your child suddenly gains or reduces weight. For example, if they are on the 85th percentile for a few years and suddenly drop to the 65th percentile. Or if they are on the 30th percentile and suddenly reach the 50th percentile. So, in short, if they gain or lose a significant amount of weight, then it’s time to get them checked at the paediatrician’s.
Reasons Why Your Toddler May Be Bigger or Smaller Than His/Her Peers
There are a couple of reasons your toddler may be bigger or smaller than their peers, which are as follows:
1. Genetics
Your toddler may inherit their height from you and your partner or maybe from someone in the previous generation.
2. Thyroid Issues
The thyroid releases chemicals which are responsible for bone growth. Hyperthroidism causes the body to produce this chemicals in lower levels which affect growth.
3. Growth Hormone Issues
Some children may have either too much or too less of the growth hormone, which results in the child either putting on too much weight or too less weight.
4. Systemic Illnesses
When a child is ill, it affects their ability to grow, as the body focusses on fighting the illness. The child may even reduce to eat during an illness.
You want the best for your toddler, don’t you? So, keep track of his height and weight. If his growth and development take place in the right manner, he will stay healthy and happy. And by tracking his height and weight, you will also be able to ensure that he gets the right amount of nutrition!
Also Read:
When Toddlers Learn to Lean Over Without Falling
How to Help Distracted Toddlers?
Importance of Talking to Your Toddler
Read more
Tools And Trackers


.svg)


Sort By
 Latest
 Most Popular
 Trending
Please select atleast one Filter