

















.svg)
.svg)
.png)


Baby


Suggested articles for you
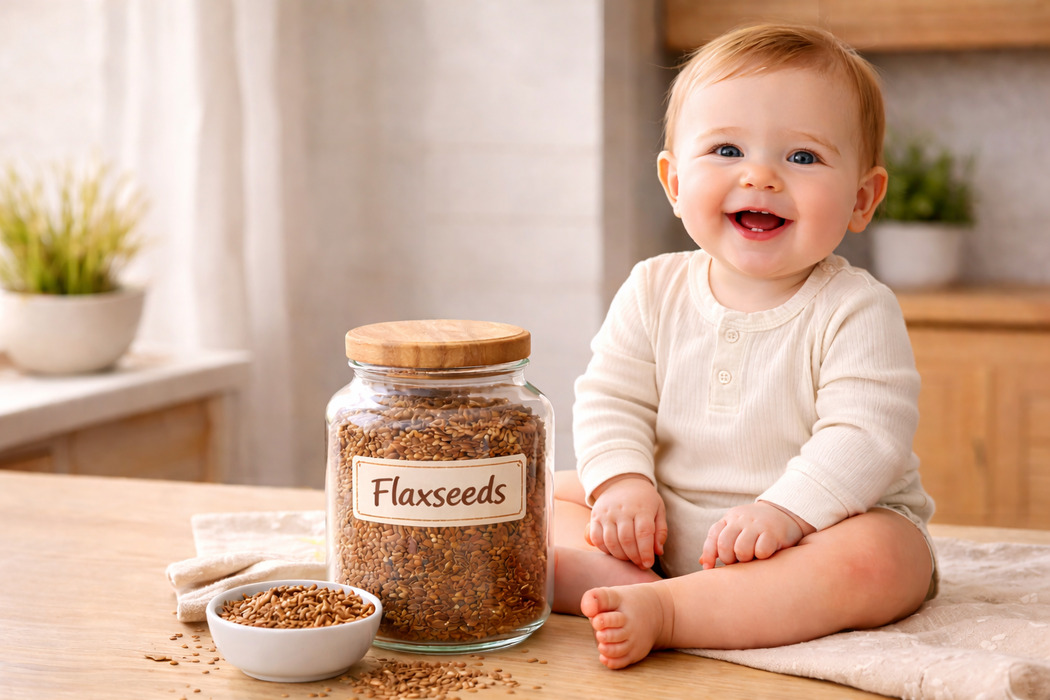
Flaxseeds for Babies and Kids: Benefits, Safety and Recipes
Did you know that the introduction of flaxseeds for babies and kids is highly beneficial for their growth and development? Flaxseeds are a known ‘superfoods’ that contain good amounts of essential vitamins, minerals, and nutrients like Vitamin B complex, Vitamin C, folate, omega-3 fatty acids, choline, calcium, and iron. Yes, children in their formative years need lots of nutrition to grow and develop properly. This nutrition comes in the form of a large variety of fruits, vegetables, grains, nuts, seeds, and even supplements (choose natural and organic foods whenever you can!).
The inclusion of flaxseeds in a child’s diet is beneficial for him, but it is a decision that should be taken after consideration of its nutrient content, pros, and cons. There are a number of food items that your kid needs to be consuming on a regular basis, but eating habits may not necessarily be correct at this stage, leading them to fall short of some particular nutritious elements that might be vital to them. Flaxseeds may actually help them keep all of it balanced in an appropriate manner.
What Are Flaxseeds?
Flaxseeds are obtained from the flax plant, which flowers perennially throughout the year. Usually present in the Western regions of the world, the seeds can be found in most supermarkets. The flax plants have been cultivated, and the seeds have been used for ages in many civilisations, too.
Nutritional Value of Flaxseeds
As mentioned, flaxseeds are a superfood. The nutritional benefit it provides is ground-breaking! In 100 grams of flaxseeds, the following nutrients can be obtained:
Description
Quantity
Water
6.96 g
Energy
534 kilocalories
Sugar
1.6 g
Fibre
27.5 g
Carbohydrates
29 g
Lipids
42.2 g
Protein
18.3 g
Iron
5.75 mg
Calcium
256 mg
Copper
1.3 mg
Zinc
4.4 mg
Sodium
31 mg
Phosphorous
815 mg
Magnesium
393 mg
Vitamin K
4.5 mcg
Folate
90 mcg
Vitamin B6
0.5 mg
Pantothenic acid
1 mg
Niacin
3 mg
Riboflavin
0.2 mg
Thiamine
1.6 mg
Vitamin C
0.5 mg
Selenium
25 mcg
Manganese
2.5 mg
Source: USDA (1)
When to Introduce Flaxseeds to Babies
There is no clinical evidence of flaxseeds in the diet or from supplements triggering toxicity. However, it can be harmful if consumed in large quantities. So, small quantities of flaxseeds rarely trigger any allergies in babies, making them a safe food to be given to infants. The ideal age is usually the time when babies are introduced to solids, making them a great fit for when your little one is about 9 months old or so.
Possible Benefits of Flaxseed for Older Babies and Kids
Aside from the nutrition that they provide, there are tons of properties that can benefit your child, both directly and indirectly, in numerous ways (2).
1. Anti-Cancerous Properties
One of the constituents of flaxseeds is lignans. These are known to protect the body from numerous cancer risks that could cause problems either presently or later in life.
2. High Fibre Content
Our gut loves fibre, and flaxseeds are rich in dietary fibre, both soluble and insoluble. The soluble fibre in flaxseeds helps retain water and increase the bulk, keeping you full for a longer time. Flaxseeds are also great for keeping constipation at bay (3). Coarsely ground flaxseeds work more efficiently than finely ground flaxseeds.
3. Protects From Respiratory Disorders
Many studies have reported that flaxseeds can substantially reduce the risks of various problems associated with the respiratory system, such as inflammation. By hampering that, flaxseeds reduce the chances of asthma, migraine and other disorders.
4. Brain and Eyesight Development
Babies and kids have plenty of development to go through, especially in terms of brain growth and the improvement of eyesight. Omega-3 fatty acids play a vital role in this regard, as they stimulate the development of the brain. Flaxseeds contain alpha-linolenic acid, which allows the body to build the omega-3 acids, thus supporting overall growth (4).
5. Streamlines Digestion
The amount of fibre in flaxseeds is what makes it a favourite amongst health fanatics (5)! Flaxseeds work on bowel movements and regularise the normal functioning of the digestive system in a jiffy.
6. Source of Protein
Proteins play a huge role in a child’s development, providing them with the energy they require for metabolic activities and aiding the development of muscles as well as the internal growth of organs. Flaxseeds provide all of this within a nice, small package!
7. Good Source of Iron
Not too much, flaxseeds contain a decent amount of iron that helps produce haemoglobin. About 5.6 to 5.7 mg of iron per 100 grams can be obtained from flaxseeds. While not as dense as other superfoods, a tablespoon of ground flaxseeds can give about 1.1 to 1.2 mg of iron, making it a good addition to diets.
However, whether babies and young children can consume flaxseeds in their ground form or in another form should be determined only by qualified paediatricians. Parents must consult their child’s paediatrician to get approval and safe ways to include flaxseeds in their child’s diet.
Besides, flaxseed in different forms helps reduce cardiovascular diseases, cancer, diabetes, osteoporosis, arthritis, atherosclerosis, and several autoimmune and neurological disorders. It also supports the immune system and treats and prevents heart disease (6).
Possible Side Effects of Flaxseeds in Children
The multiple advantages of flaxseeds might get you eager to start using them in your child’s food preparations right away. However, this superfood does not come without some potential side effects.
Certain cases have been observed where flaxseeds have increased the susceptibility to injuries and bleeding.
The chances of allergies are slim, but the itching, rashes, and wheezing sensations might occur if your child consumes flaxseeds. Stop serving him the food immediately, and consult your paediatrician.
Most children face problems of gas and flatulence after eating flaxseeds.
The constituents of flaxseeds can, at times, lead to diarrhoea if they are eaten in large quantities, owing to their mildly laxative effect.
There is a possibility that flaxseeds could interact with ongoing medicines or supplements, thereby reducing the intended effect of both.
Are Flaxseeds a Choking Hazard for Babies?
Yes, flaxseeds can pose a choking risk for babies when given whole or dried, particularly to infants under 1 who are still developing and learning to swallow and chew different foods. Whole flaxseeds tend to be very slippery, small, and hard to chew, making it difficult for young babies to chew and swallow them nicely. When properly soaked, ground, or cooked into soft foods, flaxseeds can be safely incorporated into children’s diets.
Paediatricians recommended introducing flaxseeds only after babies are 6 months old. In such cases, flaxseeds can be ground into a smooth, age-appropriate texture to be added to porridges or purees. This will ensure easy assimilation of flaxseeds and reduce the risk of choking in babies, while allowing them to retain nutrients and healthy fats.
As with any other food, including flaxseeds, parents should be alert while introducing any new foods and serve them in small amounts to avoid the choking hazard and always keep the child under close supervision.
How to Store Flaxseeds
Flaxseeds can decay quite easily if they aren’t stored in the right manner. Storing them in the refrigerator is the best method. If the seeds are whole, they can last for up to 2 years when stored properly.
Precautions to Take When Using Flaxseeds for Babies
While flaxseed is rich in several goodies, there are some precautions that should be taken when babies and young children are considered.
Strictly avoid giving whole flaxseeds to your baby. Whole flaxseeds may either pass through the gut as they are without providing any nutritional benefit or pose a choking hazard (7). Instead, provide ground flaxseeds mixed into the food like a puree or a mash.
Always use freshly ground flaxseed powder when using it for your baby. If the powder smells rancid or has mould growth, throw it away.
Start small. Instead of adding two to three tablespoons of flaxseed powder to their meal in the beginning only, start by adding one-fourth or half a teaspoon of ground flaxseeds and check for their reaction. Let them understand the change in the taste and texture of the food when you add flaxseeds to their food.
To learn whether your baby is allergic to flaxseeds or not, do a patch test by adding a small amount to their food and wait for any unusual symptoms. If your little one does not show any weird or unusual reaction to the flaxseed-mixed food, you can continue adding it to their meal.
If your baby shows intolerance or any kind of sensitivity, it’s better to discontinue feeding and try again later. If they again happen to have the same reaction, talk to your doctor. Check for allergy signs like itching, swelling, hives, nausea, and vomiting and consult a doctor.
Since flaxseed is high in fibre, make your little one drink a good amount of water to stay hydrated and avoid gas or bloating.
There is a possibility of flaxseed reacting with medications. Thus, if your child is on any medication, avoid including flaxseed in their meal. Flaxseed is also said to be avoided if an individual has inflammation or gastrointestinal strictures (8).
Can You Use Flaxseed Oil as a Substitute for Other Cooking Oils?
Flaxseed oil is another product of the flax plant. However, it would be unwise to use it to prepare food. Flax oil is not intended for cooking; any exposure to heat will cause it to burn and spoil.
However, that being said, flaxseed oil is actually quite safe and beneficial when used in other methods, such as dressings for salads, additions to dips and sauces, and even as a tablespoon or two in smoothies and shakes! They can also be taken as supplements and are especially important if you aren’t taking fish oil supplements (for omega-3 fatty acids).
How to Include Flaxseed in a Child’s Diet
Flaxseeds can go with numerous other food items. Making them a part of your child’s diet is possible in different ways, depending on their age.
A Baby’s Diet
To be able to bring the most benefit, flaxseeds need to break down completely within the body and be absorbed by the digestive system. Thus, don’t bake them into muffins, bakes, or bread, as that can prevent absorption of all the constituents in an appropriate manner.
When giving your baby some porridge or yoghurt, mix a few seeds with it.
If your baby is at his teething stage, you can include flaxseeds in the recipes you use to make edible teething biscuits.
As he comes closer to being a year old, and if he is being introduced to meat, ground flaxseeds with meatballs and chicken nuggets can be a good pairing.
Garnishing purees with a few flaxseeds can be digested really well.
Once he starts having cereals, mixing flaxseeds with oatmeal can be a tasty meal.
A Child’s Diet (older than 1 year)
As cooperative as your baby might have been in the early years, he might not like flaxseeds as he starts growing up, due to the fussy toddler stage. Don’t worry, though – you can still find great ways to include them without him finding out!
If your child is a fan of soups and vegetable stews, mixing the flaxseeds with other garnishing items can work as a great camouflage and make for a nutritious addition, too!
While making ketchup and other dips at home, combine ground flaxseeds with other mild spices to make these sauces healthier without affecting their taste.
When making a tasty smoothie for your child, add in flaxseeds, and he will hardly notice them among the flavours of the fruits!
Easy Flaxseed Recipes for Babies and Kids
Flaxseeds can be safely introduced to babies’ and young children’s diets when coupled with awareness. Check out these baby-safe flaxseed recipes to introduce flaxseeds into your little one’s diet.
1. Flaxseed Apple Porridge
Image Credit : AI Generated Image
Ingredients:
Finely ground flaxseed powder – ½ teaspoon
Apple (peeled and chopped) – 1 small
Water – 1 cup
Rice cereal or broken rice – 1 tablespoon
Method:
Cook the chopped apple in water until soft and mushy.
Add rice cereal or broken rice and cook until fully done.
Mash or blend the mixture to a smooth consistency.
Stir in the flaxseed powder once the porridge cools slightly.
Note: Always add flaxseeds to the food after cooking only to avoid bitterness and ensure better digestion.
2. Soft Flaxseed Banana Mash
This recipe is suitable for babies who have already tried banana and shows no signs of food sensitivity.
Image Credit : AI Generated Image
Ingredients:
Ripe banana – ½
Finely ground flaxseed powder – ¼ teaspoon
Method
Mash the banana thoroughly using a spoon or fork.
Sprinkle the flaxseed powder evenly over the mash.
Mix well until no lumps remain.
3. Flaxseed Vegetable Khichdi
Image Credit : AI Generated Image
Ingredients:
Rice – 1 tablespoon
Moong dal – 1 tablespoon
Mixed vegetables (carrot, pumpkin, or bottle gourd) – 2 tablespoons
Finely ground flaxseed powder – ½ teaspoon
Water
Method:
Pressure cook rice, dal, and vegetables with water until very soft.
Mash the cooked mixture well or blend lightly for younger babies.
Allow it to cool slightly, then mix in the flaxseed powder. Ensure the texture is soft and lump-free to suit your child’s age.
4. Flaxseed Oatmeal for Toddlers
Recommended for toddlers above 1 year who are comfortable with thicker textures.
Image Credit : AI Generated Image
Ingredients:
Rolled oats – 1 tablespoon
Water or breast milk/formula – 1 cup
Finely ground flaxseed powder – ½ teaspoon
Method:
Cook oats in water or milk until soft and creamy.
Let the oatmeal cool to a warm temperature.
Stir in the flaxseed powder thoroughly.
5. Flaxseed Yogurt Mix
Image Credit : AI Generated Image
Ingredients:
Plain homemade curd (yoghurt) – 2 tablespoons
Finely ground flaxseed powder – ¼ teaspoon
Method:
Whisk the yoghurt until smooth.
Add flaxseed powder and mix well.
Serve fresh. Offer this only after dairy has been safely introduced and tolerated.
FAQs
1. How do flaxseeds compare to other Omega-3 fatty acid sources for children?
The three primary omega-3 fatty acids include alpha-linolenic acid (ALA), eicosapentaenoic acid (EPA), and docosahexaenoic acid (DHA), with ALA being classified as an essential fatty acid since the body cannot synthesise it. A single tablespoon of whole flaxseeds provides approximately 2.35g of ALA. An ounce of chia seeds and walnuts offers 5.06g and 5.27g of ALA, respectively. Three ounces of fish, for instance, salmon, typically contain about 1.2g of DHA and 0.5g of EPA.
2. Can flaxseeds relieve a baby’s teething pain?
There are no scientific reports on flaxseeds relieving teething pain in babies.
3. Can flaxseeds help babies with eczema?
A 2017 study conducted on experimental animals indicated that fermented flaxseed oil positively impacted atopic dermatitis (eczema) and helped reduce symptoms, including epithelial damage, redness, swelling, and itching. However, there are currently no large-scale human studies confirming these findings (9). Thus, it is wise to consult your child’s paediatrician for any health issues like eczema or skin dryness.
Flaxseeds are supremely nutritious and are consumed by people all over the globe. Right from using flaxseed oil for constipation to including them as a supplement for enhanced health, your children can benefit from flaxseeds when administered in the appropriate amounts. Be assured that they will warm up to their presence in the diet after a few instances!
Also Read:
Makhana for Babies
Ajwain and Ajwain Water for Babies
Consuming Tofu for Babies
Eating Butternut Squash for Infants
Read more




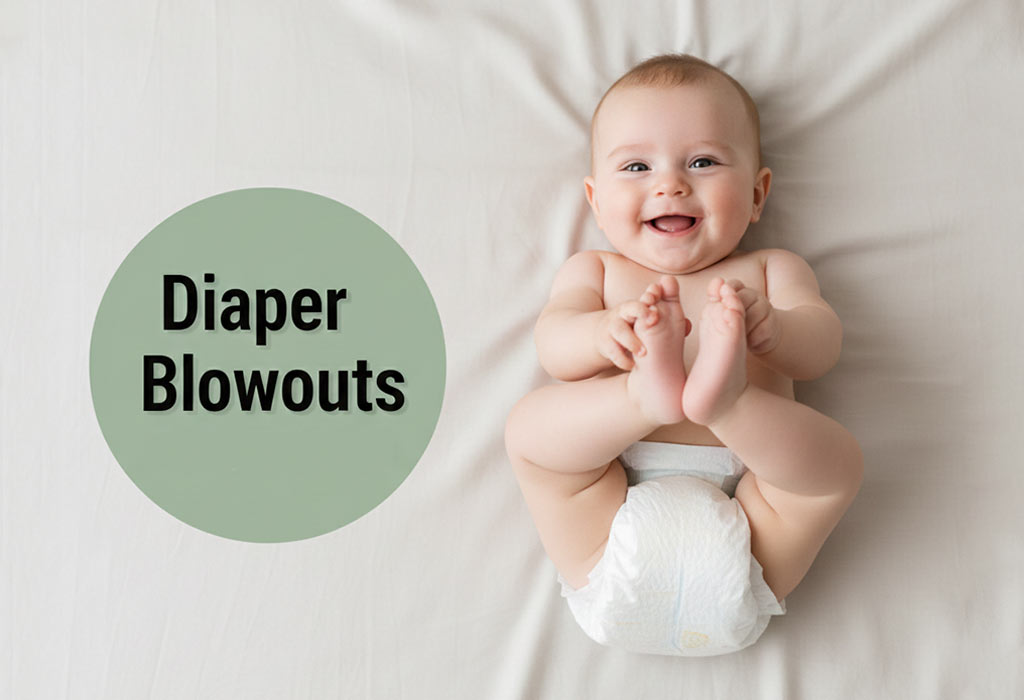
Diaper Blowouts – Why It Happens and How to Prevent It
If you’ve ever opened your baby’s diaper and thought, “How did it get all the way up there?” welcome to the messy world of diaper blowouts. Almost every parent faces this surprise at some point, whether at home, in the car seat, or five minutes before leaving the house. It’s the kind of surprise that turns a normal day into an instant outfit change for everyone involved.
But blowouts aren’t just something you have to accept as part of the job. While they can feel unpredictable (and a little dramatic), there are real reasons why they happen. And yes, there are ways to prevent them. Keep reading to learn what causes diaper blowouts and how you can prevent them before they start.
What Is a Diaper Blowout?
A diaper blowout is when your baby’s poop escapes the diaper and spreads beyond where it is supposed to stay. Instead of being neatly contained, it leaks out through the back, sides, or leg openings, often reaching clothes, blankets, or even you. They are messy, inconvenient, and very common, especially in young babies.
What Causes Diaper Blowouts?
If you are tired of asking yourself why do diaper blowouts happen, you are in the right place. The answer is simpler than it seems, and there are ways to stay ahead of the mess. Let us start by looking at what actually causes diaper blowouts.
1. The Diaper Is the Wrong Size
A diaper that is too small fills up quickly and cannot handle pressure, while a diaper that is too big leaves gaps. Either way, poop finds a way out.
2. Loose Leg or Waist Fit
Even the right size can fail if it is not fastened correctly. Gaps around the legs or a loose waistband give poop an easy escape route.
3. Baby’s Position and Movement
Blowouts often happen when babies are sitting, lying flat, or being held in a curled position. Pressure from these positions pushes waste upward and out of the diaper, especially during feeds or naps.
4. Runny or Newborn Poop
Newborn and breastfed babies often have softer, runnier stools (1). This type of poop spreads quickly and can leak past a diaper before you realise what is happening.
5. Waiting Too Long Between Changes
A diaper that is already full has less room to contain anything new. When poop is added to a heavy diaper, overflow becomes much more likely.
How to Prevent Diaper Blowouts?
While you cannot prevent every mess, the right habits can reduce how often they occur. Here are a few ways to stop diaper blowouts.
1. Choose the Right Diaper Size
A diaper that fits well can handle movement and pressure without leaking. If the diaper feels too tight or leaves gaps, it is likely time to size up or try a different fit.
2. Check the Fit Every Time
Before closing the diaper, make sure the waistband sits snugly, and the leg cuffs are pulled out (2). These small adjustments help keep everything contained where it belongs.
3. Change Diapers More Often
A full diaper has less room to do its job. Frequent changes reduce pressure and lower the chance of overflow, especially during feeds or long naps (3).
4. Dress Your Baby for Easy Movement
Tight clothing can push waste upward and out of the diaper. Looser outfits give the diaper space to work properly and reduce pressure during movement.
How to Handle Newborn Diaper Blowouts?
Now that we’ve covered the causes and how to prevent diaper blowouts, let’s focus on what to do when one actually happens. Because no matter how prepared you are, some messes still sneak through. Here’s a simple step-by-step way to manage it (1) (2) (4):
Prepare Your Supplies
Have these ready:
Clean diapers
Baby wipes or a soft washcloth
Extra clothes and a towel
Diaper cream (if needed)
Step-by-Step Cleanup
Place your baby on a changing table or flat surface where you can clean up without spreading the mess further.
Pull clothes down instead of over your baby’s head whenever possible. This helps avoid smearing poop onto their face or hair.
Newborn skin is sensitive, so clean thoroughly without rubbing. Use soft wipes and take your time to avoid irritation.
Always wipe from front to back to reduce the risk of infection, especially for baby girls (3).
After cleaning, look for redness or rashes. Blowouts often sit against the skin longer than usual and may need extra care.
A thin layer of diaper cream can protect your baby’s skin from moisture and irritation after a messy change (3).
Make sure the diaper isn’t too small or too loose. Pull out the leg ruffles so they sit outside the thighs. Consider sizing up if blowouts happen often.
FAQs
1. How often should I change my baby’s diaper to prevent blowouts?
Frequent diaper changes help prevent overflow. It’s a good idea to check and change your baby every 2-3 hours, and always soon after a bowel movement.
2. Why do blowouts happen more at night?
Blowouts happen more often at night because babies usually go longer without a diaper change. As the diaper becomes heavy with urine, it has less room to absorb a bowel movement. Lying flat for hours also allows poop to spread more easily.
3. Is it normal for babies to have diaper blowouts every day?
Most of the time, this happens because the diaper is the wrong size, doesn’t fit well, or your baby has loose poops (which is common in newborns). If your baby seems uncomfortable or has very runny poop, it’s best to talk to your paediatrician.
Diaper blowouts might not be the most glamorous part of parenting, but they’re definitely one of those “you’re officially a parent now” moments. And somehow, even the messiest situations turn into stories we laugh about later. Do you have a funny diaper blowout to share? Tell us in the comments below; we’d love to hear it!
Also Read:
Baby Diaper Leaks
Diaper Size Chart By Weight
Using Diapers Safely for Newborns and Babies
How Many Diapers Does a Baby Needs Per Day?
Read more

18 Week Old Baby – Development, Milestones & Care
Your baby is officially 18 weeks old, and you might have witnessed quite a few developments in him in the past months. While it may seem that he has turned 18 weeks so soon, you know well that’s not true! You have had sleepless nights and done everything possible to care for him and help him meet his milestones. By now, your little one must have discovered his feet and toes, and he will start rolling over any day now if he hasn’t already. By this stage, most babies ramp up their development even more and get a good idea of how to handle themselves. Learn everything you need to know about your 18-week-old baby’s development.
Your 18-Week-Old Baby’s Development
Your baby will continue to gain weight, but his weight gain will reduce slightly compared to the previous months. From now on, his emotional and mental development will start. That being said, many changes will still happen in the physical behaviour and motor coordination portions of his body. Having started rolling over already or being pretty much on the verge of doing that, your baby will now fall in love with the concept of movement and want to carry it out. Your baby may constantly wriggle if you hold him or wrap him, and at times, might bump his head on the floor or fall off the couch, and so on. If your baby has started rolling over, you need to take extra precautions to prevent the worst from happening.
[Also Read: 4 Months Old Baby Development]
Weight of 18 Week old Baby
The typical crown-heel length of a baby at 18 weeks, measuring from the head’s top to the heels, is about 8 1/3 inches (21.2 centimetres). The baby weighs nearly 8 ounces (222 grams) this week.
Your 18-Week-Old Baby’s Milestones
By this week, your baby will find everything interesting and intriguing. He will even be intrigued by his body parts and discover his hands and legs. He will observe his fingers and toes, see how they move, and attempt to put them in his mouth. He will soon gather how to use them the best. This could mean he can put his legs on the crib bars and push himself to move around in that space. Don’t be surprised to see your baby in a weird position moments after you leave him there on his own.
Although wrapping your baby when he sleeps will help him prevent from doing any harm to himself, many recommend leaving your baby as is. This will allow him to move his limbs a lot more than before, which will then help him learn to walk.
By this time, your little one’s teeth will start preparing themselves by taking their positions under the gums and erupt slowly. If your baby has early teething tendencies, there is a high probability that the front teeth of the bottom gum might already be starting to show themselves near the surface, just about to cut it.
Your baby will now learn about his individuality and understand that his sounds will differ from yours. He will see your face in the mirror alongside his own and will learn things from you.
Slowly, he will start interacting with the familiar faces around him – he will also start trusting them. This also means that strangers might make him wary, and he may cry looking for you among strange faces. But the more time your baby spends with them, the more he will trust them.
His perception of space, depth, and coordination will greatly improve by this time. Fewer failures will meet his judgement in going for objects and grabbing them. Looking at multiple objects and following those with his eyes will start becoming a normal task for him.
His communication skills will develop a lot (as per his age, though) more as he will try to imitate the sounds you make and establish contact with you. This can escalate further as you repeat the sounds he makes but in a louder voice or a different tone. It acts as validation and encourages him to communicate more often. Using different objects to make sounds will also help in the same way.
[Also Read: 4 Months Old Baby Milestones]
Feeding
Most mothers tend to start making their way to return to work or at least take some time off to catch up with work-related activities from home. This might necessitate feeding your baby via a bottle, especially if he has been feeding off your breast all this while. Many babies accept the bottle quickly since the increased flow and convenience work in their favour. Other babies might want breastmilk and may not accept the bottle readily.
One way to work this out is to keep a bottle by your side while breastfeeding your baby. You can introduce the bottle gradually. If you introduce it slowly and repeatedly, it will make your baby believe that the bottle is an extension of you and start drinking from it as well. Gradually, you can let your baby lie by your side and feed him using a bottle or ask somebody else to help you. Some babies reject a bottle but accept milk through a cup or so. If any other person is going to be taking care of the feeds in your absence, do make sure they have a proper understanding of how much feeding is necessary and an approximate schedule that your baby is used to.
If possible, pump the breastmilk and store it so that it can be given via bottle, and resort to giving the formula only if this isn’t a possibility. Your parents or relatives of the earlier generation might take care of your baby and find it appropriate to introduce solid foods since that was the norm in their times. It is important to make it clear to abstain from giving any solids. Your baby might show interest in wanting to taste something on seeing others have their food, but don’t start with solids yet. Your little one is still too young to be given solids.
[Also Read: 4 Months Old Baby Food]
Sleeping
For an 18-week-old baby, sleep remains the most important aspect of his growth. Any distractions may disrupt his sleep and make him cranky. If others are taking care of him, do let them know of any techniques or any music that is beneficial in making him fall asleep quickly. Holding him for a while, cuddling him, or taking a small stroll in the pram and other such activities can make him fall asleep. There isn’t a particular need to wrap your baby up when he sleeps at this age. But you must ensure that there are no hard toys or objects on your baby’s bed while he sleeps or he might hold them in his sleep and get hurt.
[Also Read: 4 Months Old Baby Sleep]
Tips to Take Care of Your 18-week-old Baby
Here are some tips you should follow while caring for your 18-week-old baby.
You can introduce bottle feeding to him, but the transition should happen slowly and gradually; plus it should be comfortable for your little one.
Your little one will soon start rolling, so keep toys with sharp edges away from him. When your little one is asleep, ensure no hard toys are near him.
Try hanging playful objects above your baby to keep him occupied when he wakes up.
[Also Read: 4 Months Old Baby Care]
Tests and Vaccinations
The vaccines for PCV, diphtheria, Pertussis, Tetanus, Polio, Hepatitis B and Rotavirus are usually already administered until the baby has completed 4 months. If the vaccines have been given before, no vaccination is necessary now. If not, your doctor will assist you in developing the right schedule for them.
Games and Activities to Keep Your Baby Engaged
Your baby’s power to remember and recall will develop significantly in these weeks, and it is necessary to keep that progress going. As sounds are important, so is silence. By talking to him constantly, you can introduce the concept of being quiet by whispering or talking softly (or not talking for a while and just observing him). These little acts and games will help him recognize sounds better. The act of saying “shhh” and then talking gently to your child can be quite an experience for him. At the same time, you can make it fun for him by talking to your baby via a baby monitor. This can also be done by recording your voice on the phone and playing back the audio from another corner of the room. Just the presence of your voice will bring about a smile and recognition on his face.
[Also Read: 4 Months Old Baby Games and Activities]
When to Consult a Doctor
Babies are curious; by now, you must have figured that out! Your little one will be curious, too; he will be curious about himself and notice different things about him. But if your baby doesn’t seem interested or doesn’t register his presence, it is strange and should be checked with the doctor.
This could also be in the case of new toys and games. And if your baby doesn’t show any interest in interacting with others and seems lethargic, it could be because of some health-related issues. So you must take him to a paediatrician immediately.
FAQs
1. How Far Can an 18-week Old See?
Your infant’s vision at this stage is developed to the point where they can perceive objects at a distance of approximately 8 to 12 inches. While their gaze might occasionally shift aimlessly and even cross paths, your baby is beginning to coordinate their eyes, allowing them to align their gaze and follow a moving object reliably.
2. Do Babies Have Growth Spurt at Week 18?
Rapid growth episodes are a natural component of a child’s developmental process. They will occur intermittently from infancy through physical maturity, typically between 16 to 20 for girls and 17 to 20 for boys.
Your baby’s mental and emotional development will be rapid at this stage and give him a personality in the future. You will also see other developments in him! Your baby’s progress can bring relief; you should feel proud of him. But if you feel your baby is not developing as his age, consult a doctor and get him checked!
References/Resources:
1. Misirliyan. S. S; Boehning. A. P, Shah. M; Development Milestones; NIH; https://www.ncbi.nlm.nih.gov/books/NBK557518/; March 2023
2. Weight-for-age; WHO; https://www.who.int/tools/child-growth-standards/standards/weight-for-age
3. Data Table for Boys Length-for-age and Weight-for-age Charts; CDC; https://www.cdc.gov/growthcharts/who/boys_length_weight.htm
4. Baby’s physical development; Pathways.org;
https://pathways.org/wp-content/uploads/2020/03/AssureBrochure_English_LEGAL_2020.pdf
5. Feeding Tips For Your Baby with CHD; Heart Attack and Stroke Symptoms; https://www.heart.org/en/health-topics/congenital-heart-defects/care-and-treatment-for-congenital-heart-defects/feeding-tips-for-your-baby-with-chd
Also Read:
16 Week Old Baby’s Development
Development of 17 Week Baby
Development Milestones of 19 Week Old Baby
Read more
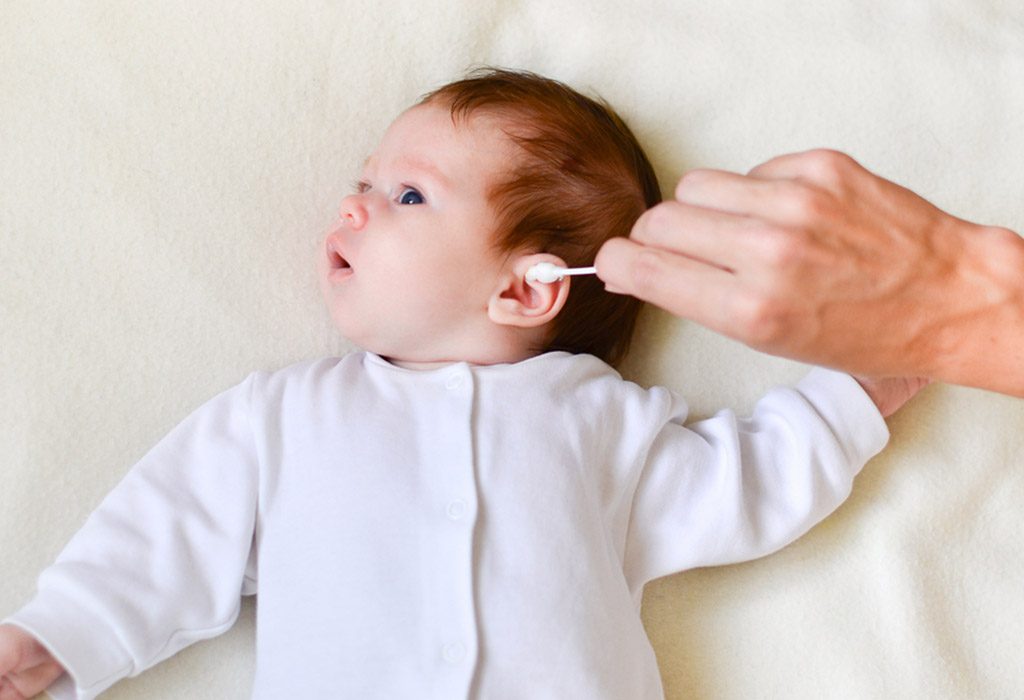
How Do You Clean Infant Ears?
As a new parent, you will have a lot of responsibilities towards your child – cleaning his ears being one of them. Yes, it may come as a surprise, but you will pay attention to the little things (like cleaning his ears or trimming his fingernails), which may become one of the reasons for his health issues. When it comes to cleaning your baby’s ears, safety comes first. There will be earwax build-up in your infant’s ears, and it is common. There are a lot of ways in which you can clean your baby’s ears, but the key is to find a method that works best for you and your child.
What Is Earwax?
Earwax, which is also known as cerumen, is a sticky, gooey material produced inside the ear. It consists of dead skin cells and is secreted by the glands situated in the lining of the ear. As irritating as earwax might be, it is actually a sign of the normalcy of your baby’s physiology. Furthermore, the secretion of earwax is the body’s natural method of preventing water or external infection from entering inside.
How Much Ear Wax Is Normal for a Baby?
While earwax may be secreted generously from a baby’s ears, excessive ear wax in babies is generally uncommon. The amount of wax secreted from each ear may not always be the same – one ear may have more earwax than the other. The earwax secreted or produced is considered healthy earwax when the paediatrician is able to see the baby’s eardrums clearly through the wax. If the ear canal is totally blocked by the hardened earwax or there’s a yellowish flaky wax causing discomfort to your baby, then that may be a problem.
Why Is It Important to Clean Baby’s Ear?
Cleaning a baby’s ears is important to maintain ear hygiene, prevent infections, and ensure overall health. Here’s why:
1. Preventing Wax Buildup
Earwax is a natural substance that helps protect the ear canal from dust, debris, and bacteria. However, if too much wax accumulates, it can harden and block the ear canal, leading to discomfort, itching, and even temporary hearing loss. Regular cleaning of newborns’ ears helps prevent excessive wax buildup, ensuring that the ear canal remains clear and functional.
2. Reducing the Risk of Infections
Babies are more susceptible to ear infections due to their developing immune systems and the shape of their ear canals. Dirt, bacteria, or moisture trapped in the ear can create an environment where infections like otitis media (middle ear infection) can thrive. By keeping the ears clean, you minimize the risk of infections that can cause pain, fever, and fussiness in your baby.
3. Maintaining General Ear Hygiene
Ears can collect dust, dirt, and other small particles, especially as babies start to crawl or explore their surroundings. Regular cleaning helps remove these foreign particles, keeping the ear canal clean and reducing the chances of irritation or infection. Good ear hygiene is an essential part of overall cleanliness and health for your baby.
4. Supporting Healthy Hearing
Clear hearing is crucial for a baby’s development, especially as they begin to recognize and respond to sounds and voices around them. If earwax or debris blocks the ear canal, it can interfere with their ability to hear properly. By keeping the ears clean, you help ensure that your baby can hear clearly, which supports their speech and language development.
5. Preventing Odor
Accumulated earwax, trapped moisture, or an ear infection can sometimes produce an unpleasant odor. This can be uncomfortable for the baby and concerning for parents. Regular cleaning of wax from baby’s ear helps prevent the buildup of substances that might lead to odor, keeping your baby’s ears fresh and free from any bad smells.
My Baby’s Ear Is Hurting – Is It Because of Earwax or Ear Infection?
When babies experience discomfort in their ears, they tend to start rubbing and pulling their ears and even poking their fingers inside their ears to scratch the ears and to get some relief from the irritation. This is a general reaction to the uncomfortable nature of earwax. However, a build-up of earwax does not result in any fever or sleeping problems, since earwax is a normal secretion.
Large amounts of earwax can be easily spotted by simply looking into the ear. Sometimes, there might be a little brownish coloured fluid discharge from the ear present inside too. If your baby is in pain, or the earwax looks different than usual, then there is a chance that the pain is from an ear infection. The obvious sign of an infection is high fever or milky white coloured pus draining out from the baby’s ears. This could also mean a perforated eardrum, which can cause intense pain and discomfort due to the earwax discharge. Among other things, if your baby becomes irritable and starts crying when he lies down and also suffers from diarrhoea, these are tell-tale signs of an ear infection and you should show your baby to a paediatrician as soon as possible.
Reasons for Earwax Build-Up in an Infant’s Ears
Earwax building up is one of the natural processes of the human body, similar to that of hair growth. An infant’s ears generate wax all the time as a protective mechanism for the eardrum. Once generated, the earwax is gradually pushed out of the ear via the ear canal. This is done by extremely tiny, hair-like structures inside the ear canal called cilia.
Since the skin growth inside the ear is also outward, the earwax gets pushed out of the ear canal. Generally gooey and slightly fluid in nature, earwax is known to get denser if your baby isn’t consuming enough fluids. Similarly, when the natural tendency to push wax outside is countered by attempting to clean it with cotton swabs, the action generally results in pushing the earwax deeper within the ear canal. This starts creating an earwax buildup, resulting in a blockage of the ear canal.
How to Clean Your Child’s Ears
There are enough and more ways to clean a baby’s ears. Here is how to safely clean baby ears – try out the one which works best for your child!
1. Using a Washcloth
The best way to remove earwax is by using a soft washcloth dipped in warm water. First, dip the washcloth in warm water and squeeze it out to get rid of excess water. Then, use it to wipe around the outer area of the baby’s ear to clean any earwax that’s trickled outside gradually. Most of the wax will fall out on its own. The remaining can be wiped off. Do not push the washcloth inside the ear canal. Take your baby to your paediatrician and let him take a look at his ears. Your paediatrician might scrape out the wax inside the ear using a tiny tool.
2. Using Baby Ear Drops
If the build-up is deep, you might need to use ear drops. Before administering ear drops, ensure that you use the ones which your baby’s paediatrician recommends. Calm down your baby and keep him engaged in some activity; otherwise, choose a time of the day when your baby is usually silent and rested. Hold the bottle of ear drops in your palms to slightly warm it up. Lay your baby on your lap, with the blocked ear facing towards you. Use an eyedropper and fill it up with the solution in the bottle.
Place the dropper close to the baby’s ear and drop the solution gradually until the baby’s ear canal is full. Wait a few minutes for the solution to settle inside the ear. Your baby may feel a weird sensation, so keep him calm. The ear drops will soften the wax in the canal and then flow out of the ear. Next, dip a washcloth in warm water, squeeze out excess water, and clean up any excess drops and wax that flow out of the ear. Do not try to put the washcloth inside the baby’s ears. This treatment must be repeated for at least three to five days, as your doctor recommends.
Safety Tips to Follow When Cleaning Your Baby’s Ears
You can try the methods mentioned above to clean your baby’s ears. It is, however, important to remember what not to do and what not to use when cleaning a baby’s ears. The cardinal rule of cleaning an infant’s ears asks parents to refrain from using cotton buds. As convenient as they might seem, cotton swabs are known to push the earwax further into the ear canal. This worsens the problems and results in earwax build-up, leading to canal blockage. The same goes for using fingers, too. Sticking anything inside the ear canal can result in wax build-up or can cause harm to the eardrum and may even rupture it. If the earwax problem starts getting worse, it is better to use baby earwax drops after consulting with your baby’s paediatrician.
Precautions to Take While Cleaning Your Baby’s Ears
As simple as it may sound, cleaning baby ears is not an easy task and the slightest mistake can cause your baby intense pain. Here are some dos and don’ts you should follow while cleaning your baby’s ears.
Dos
Make sure your baby is calm and engaged.
Use a clean washcloth.
Consult a doctor if the wax build-up is excessive.
Don’ts
Don’t use any pointed objects inside the ears.
Avoid inserting cotton swabs or earbuds.
Don’t use cold water to drain out the excess earwax.
Don’t spray water or any liquid inside the ear with force.
Do not clean your ears too often or too hard.
When to Visit a Doctor
Take your baby to a paediatrician when there is an excessive build-up of earwax in your baby’s ears, and you are unable to remove the wax with the remedies mentioned above. Also, if there are symptoms of infection, such as drainage of milky fluid, ear pain, fever, or even hearing loss after the removal of wax, check with your baby’s doctor as soon as possible.
FAQs
1. Should I clean my baby’s ears if they have a cold?
When a baby has a cold, the Eustachian tubes, which connect the middle ear to the back of the throat, can become blocked or swollen, leading to fluid buildup in the ear. It’s important to be gentle when cleaning the outer ear during cold and avoid inserting anything into the ear canal. If your baby is in pain or fluid is draining from the ear, consult a pediatrician.
2. Is it normal for a baby’s earwax to change color?
Yes, the color of a baby’s earwax can vary from yellow to brown or even slightly orange. These color changes are typically normal and reflect the earwax’s function in trapping dirt and bacteria. However, if the wax is greenish or has a foul odor, it might indicate an infection, and you should consult a doctor.
3. How often should I clean my baby’s ears?
You don’t need to clean your baby’s ears every day. Typically, cleaning the outer part of the ear during bath time is sufficient. The ear canal is self-cleaning, and over-cleaning can lead to irritation or removal of too much protective earwax.
4. Can water get trapped in my baby’s ears during bath time?
Yes, water can sometimes get trapped in a baby’s ears during bath time. To prevent this, gently tilt your baby’s head to the side after a bath to let the water drain out. If water remains trapped, it can create a moist environment conducive to infections, so it’s important to dry the outer ear carefully.
Baby earwax is not harmful unless it collects in abnormal quantities or gets infected. Choosing safe and careful measures to clean your baby’s ears will prove to be beneficial. However, if they don’t work and you notice anything out of the ordinary with regards to your baby’s health, check with your baby’s paediatrician.
References/Resources:
1. Cleaning your baby’s ears, eyes and nose; Pregnancy, Birth & Baby; https://www.pregnancybirthbaby.org.au/cleaning-your-babys-ears-eyes-and-nose
2. Ameen. Z, Chounthirath. T, Smith. G, Jatana. K; Pediatric Cotton-Tip Applicator-Related Ear Injury Treated in United States Emergency Departments, 1990-2010; The Journal of Pediatrics; https://www.jpeds.com/article/S0022-3476(17)30461-4/fulltext; May 2017
3. Dealing With Earwax (Cerumen); Nemours Kids Health; https://kidshealth.org/en/parents/earwax.html
4. Earwax Buildup; Seattle Children’s Hospital; https://www.seattlechildrens.org/conditions/a-z/earwax-buildup/
5. How to Give Ear Drops to a Child; American Academy of Pediatrics; https://www.healthychildren.org/English/safety-prevention/at-home/medication-safety/Pages/How-to-Give-Ear-Drops.aspx
6. McCarter. D, Courtney. A, Pollart. S; Cerumen Impaction; American Family Physician; https://www.aafp.org/pubs/afp/issues/2007/0515/p1523.html; May 2007
7. Earwax Buildup; American Academy of Pediatrics; https://www.healthychildren.org/English/tips-tools/symptom-checker/Pages/symptomviewer.aspx?symptom=Earwax+Buildup
Also Read:
How to Clean Baby’s Tongue?
How to Brush Babys Teeth?
How to Clean your Baby’s Genitals?
How to Wash a Baby’s Face Properly?
Read more
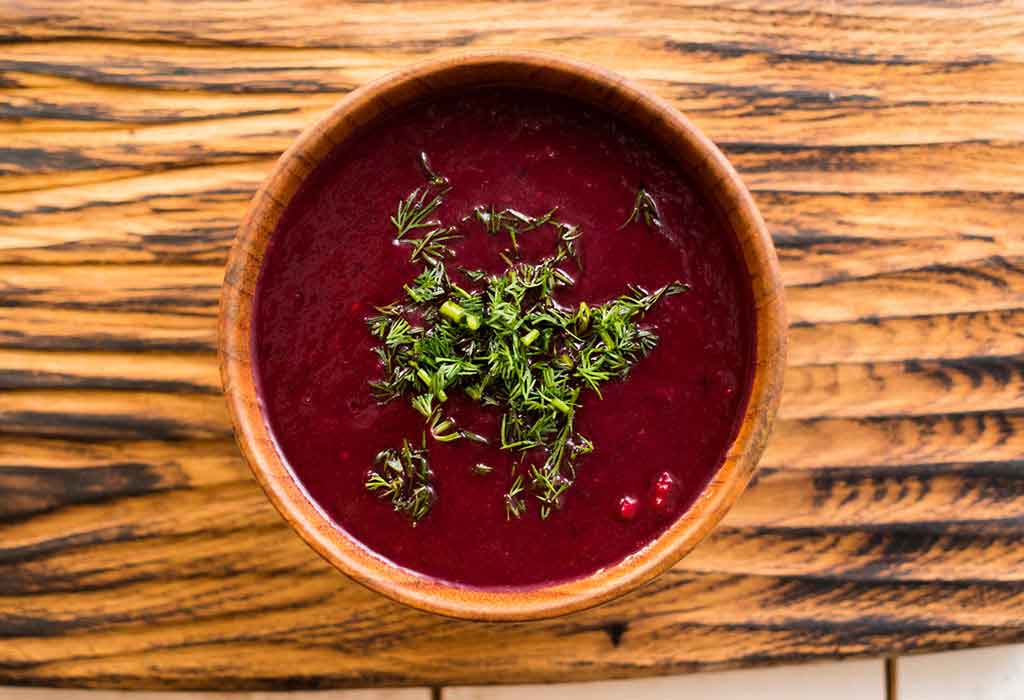
Carrot-Beetroot Coriander Soup Recipe
Easy to make and healthy homemade Carrot Beetroot Coriander soup will surely get a thumbs up from your baby for its flavour. It serves as a full meal for growing babies as is loaded with nutrients and is filling too. It is ideal for babies above 6 months who are being weaned and proves to be a great way to introduce them to solid food. Both carrot and beetroot are bright-coloured vegetables that are rich in essential nutrients.
Cooking Time
Type
Time (hh:mm:ss)
Preparation Time
00:10:00
Cooking Time
00:15:00
Total Time
00:25:00
Cooking Method
Gas
Type of Meal
Vegetarian, Vegan
Suitable For
Babies from 8 months onwards
Meal Schedule
Breakfast, Mid-Morning Snack, Lunch, or Evening Snack.
Recipe Type
Soup
Ingredients
Ingredient
Quantity
Carrot (peeled and chopped)
1/2 cup
Beetroot (peeled and chopped)
¼ cup
Coriander (Cilantro) leaves
a few sprigs
Butter
1 teaspoon
Garlic cloves (finely chopped)
2-3
Cumin seeds
¼ teaspoon
Black pepper powder (optional)
¼ teaspoon
Water
As needed
Salt (optional)
As needed
Instructions
Read on to know the step-by-step instructions guide to making this super healthy and delicious soup that helps in the development of babies and is easy on the stomach too.
Wash the carrot & beetroot thoroughly in running water.
Peel the skin off from the carrots & beetroots using a peeler and chop finely into small cubes.
Transfer the chopped vegetables to a pressure cooker, add a cup of water. Cook for 2-3 whistles.
Wait for the pressure to be released and check the softness of the vegetables.
Transfer the cooked vegetables to a blender. Make a smooth paste. Add more water if required.
Heat a pan and add the butter. Let it melt and add the cumin seeds and chopped garlic. Saute for two minutes.
Then add the vegetable paste to it and let it boil.
Strain the soup using a strainer if making it for babies between the age of 6 to 12 months.
Season with salt and pepper powder, garnish the soup with finely chopped coriander leaves.
Recipe Tips
This super easy Carrot Beetroot Coriander soup recipe is good for babies, toddlers, and kids and can be given in small quantities either by itself or with some steamed rice. Here are some tips that will help you while making this tasty soup for your little one.
All vegetables need to be washed properly.
Adding black pepper and salt is optional and depends on your baby’s preference.
You can also grind a few coriander leaves along with the carrots and beets to add more flavour.
Use only RO or purified water in making food for babies or toddlers.
Make sure your hands, vegetables, and utensils are clean when you are preparing anything for your baby.
If you are feeding this soup to babies in the age group of 6 to 12 months then the straining of this soup is essential. For toddlers above one year, you can serve the soup as is, straining is not required.
Nutrition Information (Per 100 g)
Type
Value
Energy
22 Kcal
Carbohydrates
4.6 g
Vitamin A
529.2 mcg
Protein
0.6 g
Fat
0.1 g
Dietary fibre
1.9 g
Health Benefits
This Carrot Beetroot Coriander Soup recipe for babies/toddlers is easy and quick to make and is delicious too. It is packed with all the essential nutrients required in a complete meal for a baby. There are numerous health benefits that this recipe possesses and few of them include:
Carrots are rich sources of beta-carotene which helps in the absorption of Vitamin A and develops your baby’s vision.
This easy Carrot Beetroot Coriander soup recipe helps in improving the immune system of growing babies and toddlers.
Beetroots are packed with iron and enhances brain development.
All the vegetables used in this soup are super healthy and are rich in vitamins A, B complex, C, E, and K, and help in the overall growth and development of babies and toddlers.
This soup is rich in fibre and is easy to digest.
Buying Guide
Always purchase fresh vegetables and check for firmness and blemish-free bright skin.
If possible, go for organic products as they are best for your baby. These products are not only free of harmful chemicals, pesticides, and insecticides but are tastier, healthier, and safe for your little one.
Now you know how to make this tasty and easy Carrot Beetroot Coriander soup. So don’t wait, make this for your munchkin and let her/him savour this soup.
Read more
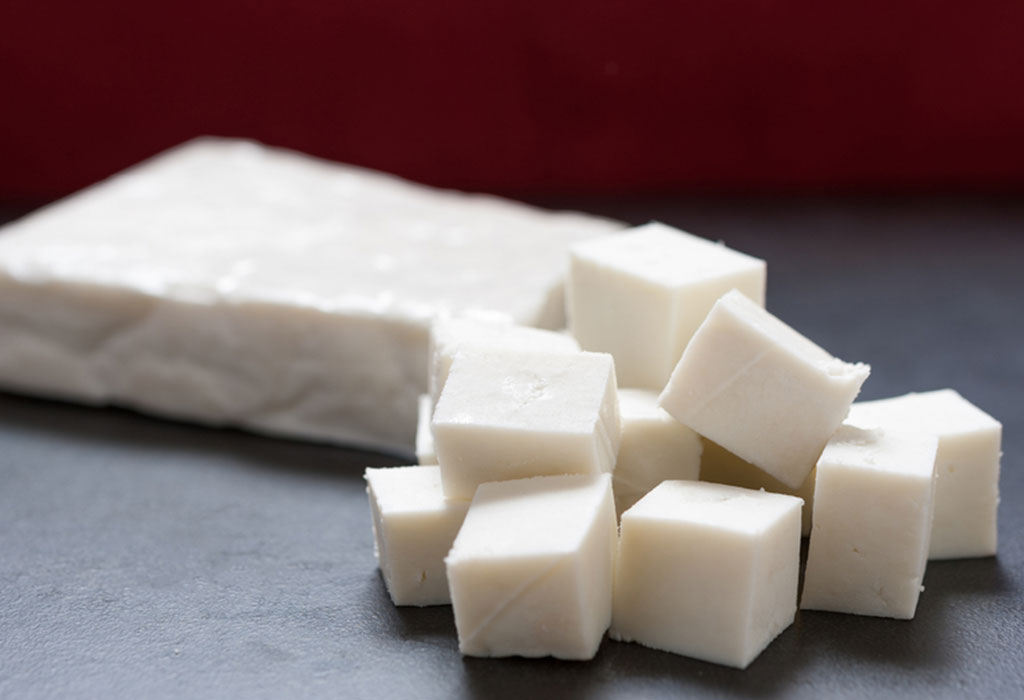
Introducing Paneer to Babies – Benefits and Recipes
Now that your baby is above six months old, you must be looking to introduce new and tasty foods into his diet. Your baby must be already eating mashed dal and rice and fruit purees, but if paneer is a part of your weekly diet, you must be planning to make your little one try it too. It is rather delicious, no? Well, while paneer is indeed tasty and healthy, you need to find out when you should introduce it in your baby’s diet because of the two main reasons: paneer is a dairy product and well, your baby is still young and you can’t say for sure how his body and digestive system will respond to this dairy product! Let’s read on to know all about paneer for babies.
When to Add Paneer to Your Baby’s Diet?
Many doctors and experts advise against including milk and dairy products in a baby’s diet until he is at least a year old or older. Until then, the only milk a baby should have is breast milk or formula milk.
If your baby is close to 8 or 9 months old, you can introduce a small bite of paneer and gauge his reaction to it. A few months later, you can start increasing the quantity of paneer to around two cubes, four times a week.
Nutritional Value of Paneer
A 100gm block of paneer generally contains:
72 calories
20gms protein
93.5 water
4mg cholesterol
3.4g carbohydrates
131mg fibre
3.3g sugar
1.4g fat
21mcg vitamin B1
181mcg vitamin B2
143mcg vitamin B3
71mcg vitamin B6
0.7mcg vitamin B12
19.2mcg vitamin A
0.9mg vitamin C
13mcg vitamin E
0.7mcg vitamin K
20mg choline
420 mg Calcium
Benefits of Including Paneer in an Infant’s Diet
Including fresh, healthy, and tasty paneer in your baby’s diet can offer him various health benefits. Let’s look at some of them below.
1. Helps in Bone Development
Adding paneer in your baby’s diet can help strengthen the bones of the baby as paneer is a good source of calcium.
2. Strengthens the Immune System
Paneer contains a lot of vitamins in varying quantities which help strengthen a baby’s immune system.
3. Helps in the Formation of Bone Cartilages
Vitamin B plays a vital role in the formation of bone cartilages. Since it is present in paneer in a pretty good quantity, it supports the formation function within the baby’s body.
4. Helps in Baby’s Overall Growth
Paneer contains protein and fat in good quantities. This helps give all the crucial nourishment a baby requires in the years of growth and development. The nutrients present in paneer affect the various bodily processes and body functions that help the child grow properly.
5. Promotes Healthy Hair and Skin
Since paneer contains a lot of vitamin B, fatty acids (Omega 3 and Omega 6), as well as antioxidants, these in a combination keep the skin soft and the hair healthy, maintaining their texture and beauty.
6. Enhances Digestive Health
The probiotics present in paneer contribute to a healthy gut flora, aiding in digestion and preventing common digestive issues such as constipation or diarrhea in infants.
7. Provides Energy for Physical Activity
Paneer is a rich source of protein and healthy fats, providing infants with sustained energy levels necessary for their daily activities and growth requirements.
How Much Paneer Can Be Given to a Baby?
Initially, it is best to give only a couple of small cubes to your baby once he turns 8-9 months of age. If your little one likes it and his body seems to respond well to it, you can gradually increase the quantity of paneer to normal.
How to Make Paneer at Home?
You can make paneer right at home if you don’t want to buy the packaged paneer available in the market.
Ingredients
1 litre of full cream milk
A half-cup of curd or two small spoons of lemon juice
Method
Take a bowl and pour fresh milk into it.
Place the bowl on low heat and let it sit there for a few minutes.
When the milk comes to a rolling boil, add the curd or lemon juice to it, and stir continuously.
Soon, the milk will start curdling.
At this point, turn off the heat and strain the liquid and keep the paneer in a muslin cloth.
Tie this cloth and hang it above a sink. The excess water inside will begin to drain.
Once the water is fully drained, remove the paneer from it. Let it set on a large plate. You can also add salt if you desire. After about 30 minutes, you can either use it for consumption or refrigerate it.
This paneer can be given to the baby as well. To be used the next day, it is best to keep it refrigerated.
Quick and Easy Paneer Recipes for Babies
Here are some simple paneer recipes for your little one. You can introduce these recipes in your baby’s diet once he turns 8-9 months of age.
1. Spinach and Paneer Rice
Ingredients
Chopped spinach – 1/2 cup
Cooked rice – 1/2 cup
Chopped paneer – 10 gms
Ghee – 1/2 teaspoon
How to Cook
Take a pan and add a small amount of ghee to it. Follow it up with cooked rice and stir. Let it cook for a minute.
Add paneer pieces, spinach leaves, some water, and let it all cook for 3-5 minutes.
Turn off the flame and serve.
Source: Pinterest
2. Blueberry Delight
Ingredients
Chopped blueberries – 4-5
Mashed banana – 1/2
Paneer – 10 gms
Vanilla – 1 drop
A pinch of cinnamon powder
How to Cook
Put all the mixtures together in the blender.
Blend it all together to a consistency that is good enough for your baby.
Pour it in a bowl and serve it to your baby.
3. Apple Paneer
Ingredients
Diced apple -1/2
Ground flax- 1/4 tsp
Paneer – 10-20 gms
Cinnamon powder
How to Cook
Take a pan and add the apple pieces to it with some water.
Heat it for a few minutes without letting the apple pieces break.
Crumble the paneer in a bowl. Then add the apple pieces on it. Sprinkle some cinnamon powder.
Finish it with a few ground flax and the dish is ready to serve.
Source: Pinterest
4. Fruit Paneer
Ingredients
Chopped ripe banana -1/2
Small blocks of paneer – 10-20 gms
Ripe papaya -1/2 cup
How to Cook
Mix all the ingredients together in a bowl and serve it to your baby.
Source: Pinterest
5. Paneer Rice Puree
Ingredients
Steamed fresh peas – 2-3 tsp
Small pieces of paneer – 10-20 gms
Cooked rice – 1/2 cup
A pinch of black pepper
A pinch of onion powder
How to Cook
Take the peas and steam them. Keep them aside for ten to fifteen minutes.
Later, add the peas, some onion powder, cooked rice, and pepper in a blender and blend it together to make a puree.
Add paneer to the puree and mix it with a spoon or a fork.
Source: Pinterest
6. Peach, Pear, Paneer
Ingredients
Paneer – 10 gms
Peaches – 2
Pear – 1/2
How to Cook
Take a bowl and mix all the ingredients well. Then serve to your baby.
Source: Pinterest
7. Cauliflower and Paneer
Ingredients
Cauliflower florets – 4-5
Paneer – 10 gms
How to Cook
Take small florets of cauliflower and steam them for ten to fifteen minutes.
Once soft, allow them to cool.
Take a shallow dish, place the steamed cauliflower florets in it and crumbled paneer. Sprinkle some pepper and serve it to your baby.
Source: Pinterest
8. Paneer Veggie Mash
Ingredients
Mixed vegetables (carrots, peas, beans) – 1/2 cup
Paneer – 20 gms
Olive oil – 1 teaspoon
Cumin seeds – 1/4 teaspoon
Turmeric powder – a pinch
Water or vegetable broth – as needed
How to Cook
Steam or boil the mixed vegetables until soft.
Heat olive oil in a pan and add cumin seeds. Let them splutter.
Add turmeric powder and sauté for a few seconds.
Add the steamed vegetables and crumbled paneer to the pan. Mix well.
Add water or vegetable broth to adjust the consistency as desired.
Mash the mixture using a potato masher or fork to achieve a semi-smooth texture.
Cook for a few more minutes until everything is heated through.
Allow it to cool before serving to your baby.
9. Paneer and Oats Porridge
Ingredients
Rolled oats – 2 tablespoons
Paneer – 20 gms
Water or milk – 1/2 cup
Dates (optional for sweetness) – 1 or 2, chopped
Cinnamon powder (optional) – a pinch
How to Cook
In a small saucepan, bring water or milk to a gentle boil.
Add rolled oats to the boiling liquid and reduce the heat to low.
Cook the oats for about 5-7 minutes or until they are soft and creamy, stirring occasionally.
Crumble the paneer and add it to the oats, stirring until well combined.
If using dates for sweetness, add them to the porridge and mix well.
Sprinkle a pinch of cinnamon powder if desired for flavor.
Cook for another 1-2 minutes until the paneer is heated through.
Remove from heat and let it cool down slightly before serving to your baby.
How to Prepare Paneer for Baby-led Weaning?
Paneer, a versatile dairy product, can be introduced to babies during the weaning process. It’s a good source of protein and calcium, essential for their growth and development. However, when preparing paneer for baby-led weaning, it’s important to ensure it’s soft and easy for the baby to chew and swallow. Here’s how you can prepare paneer for babies in different age ranges:
For 6 to 9 Months
At this stage, babies are typically transitioning to solid foods. To introduce paneer, steam or boil it until it’s soft and can be easily mashed with a fork. You can also crumble it finely and mix it with other soft foods like mashed fruits or vegetables to make it easier for your baby to handle.
For 9 to 12 Months
As your baby’s chewing skills improve, you can offer paneer in slightly larger pieces or cubes. Ensure that the paneer is still soft and cooked thoroughly to avoid any choking hazards. You can serve it as a finger food alongside other soft foods or incorporate it into recipes like vegetable stir-fries or mashed with lentils.
For 12 to 24 Months
By this age, most toddlers have developed the ability to chew and handle a variety of textures. You can continue to offer paneer in small cubes or thin slices, cooked until soft. Encourage self-feeding by providing paneer alongside other foods, allowing your toddler to explore different flavors and textures. Additionally, you can include paneer in meals like sandwiches, wraps, or pasta dishes for added nutrition and variety.
FAQs
1. When can I introduce paneer to my baby’s diet?
Paneer can typically be introduced to your baby’s diet around 6 to 8 months of age, once they have started eating solid foods and have shown no signs of dairy allergies. However, it’s always best to consult with your pediatrician before introducing any new food to your baby’s diet.
2. Are there any benefits of including paneer in my baby’s diet?
Yes, paneer is a good source of protein, calcium, and other essential nutrients necessary for your baby’s growth and development. It can help in strengthening bones, supporting immune function, and providing energy for physical activity.
3. Can paneer cause allergies in babies?
While rare, some babies may be allergic to dairy products like paneer. Signs of a dairy allergy include rash, vomiting, diarrhea, or difficulty breathing. If you suspect your baby is allergic to paneer or any other dairy product, consult with your pediatrician for guidance.
There are enough and more paneer dishes that are super healthy for babies and tasty too. By taking account of your baby’s age and introducing paneer slowly in his diet, you can rest assured that your baby will grow up into a healthy child and love paneer-based dishes, just like you do.
References/Resources:
1. Paneer; Food Data Central; U.S. Department of Agriculture; https://fdc.nal.usda.gov/fdc-app.html#/food-details/392808/nutrients
2. Feeding Your Baby and Toddler (Birth to Age Two); C.S. Mott Children’s Hospital; https://www.mottchildren.org/posts/your-child/feeding-your-baby-toddler
3. Starting Solid Foods; American Academy of Pediatrics; https://www.healthychildren.org/English/ages-stages/baby/feeding-nutrition/Pages/Starting-Solid-Foods.aspx
4. When, What, and How to Introduce Solid Foods; Centers for Disease Control and Prevention; https://www.cdc.gov/nutrition/infantandtoddlernutrition/foods-and-drinks/when-to-introduce-solid-foods.html
5. 7 Reasons Why Cottage Cheese Is Good for You; Cleveland Clinic; https://health.clevelandclinic.org/cottage-cheese-benefits
6. Stokes. T, Hector. A, Morton. R, McGlory. C, Phillips. S; Recent Perspectives Regarding the Role of Dietary Protein for the Promotion of Muscle Hypertrophy with Resistance Exercise Training (Nutrients); National Library of Medicine; https://www.ncbi.nlm.nih.gov/pmc/articles/PMC5852756/; February 2018
Also Read:
Finger Food for Infant
Dairy Products for Babies
Benefits of Sooji for Babies
Read more

January Babies: Personality & Traits
January, the first month of the year (as per the Julian calendar), is about new beginnings, new resolutions, new promises, and, well, all things new! If you’re about to start your new year by welcoming a baby in the very first month of the year, then we are sure you are on this page for a reason. If you have taken the time out to read this, we know that your baby is either a January-born child or is due in January; or maybe you have a niece or nephew who is a January kid. So, without further delay, find out some fun facts about January babies!
14 Fun Facts About January-born Babies
There’s something special about people born in January because people aspire to be like them. Are you excited to find out why that is? Read on about these January-born characteristics, as it’s about to get much more exciting. Since Jan-born babies are characteristically fun, read all these January-born traits in good humour – you don’t always need to go by science or logic; sometimes it’s just about having FUN!
1. They Are the Funniest!
If your baby is a January baby, then rest assured, you’ll never get bored. People born in January have a natural sense of humour and are incredibly witty. You never know, your little one could grow up to be a funny and cheerful person, always entertaining others. Sarcasm and ingenuity come naturally to people born in January, so you are in for a hilarious ride!
2. They Are Pretty Cool
Your Jan-born baby is less likely to be irritable than babies born in other months. If you think that the cold winter month of January has something to do with this behaviour of your kid, then you are not entirely wrong. The cold weather makes January-borns pretty cool and chilled (pun intended!) when it comes to dealing with life! It’s a trait worth aspiring for, as life becomes easy when you stress less and take each day as it comes!
3. They Are Creative
Babies born in January are likely to be more creative and imaginative. Their problem-solving skills are also excellent. If you see your little one solving a puzzle on his own or creating something unique, don’t be surprised; creativity comes naturally to January born kids. Are you already feeling proud & content thinking about your child’s potential spatial and logical intelligence? It’s okay, you don’t have to be modest about it, because you’ll have every reason to be proud of your baby in the future!
4. They Are Likely to Be Doctors or Debt Collectors
When you come to know that you are pregnant, you already start thinking about the potential careers for your child (yes, you don’t voice it out in public, but in your mind, you have it all sorted out), don’t you? If you are expecting a baby in January, and are secretly wishing to see him grow up to be a footballer or badminton player, then you may have to rethink your kid’s (potential) career slightly. People born in January are more likely to become doctors or debt collectors! So if your little one plays doctor-doctor with you now, you never know, he might become a real doctor in the future – after all, the odds are in his favour!
5. They Are Bold and Independent
Has your baby already started showing signs of independence? Ah! He must be a January kid then. People born in January are bold and brave. They like to take all the burdens of a task on themselves, thinking they can manage everything on their own. Yes, they believe they can singularly handle any job, but the reason for this might be their inability to trust anyone. January-born kids also think that their way of getting things done is better than anyone else’s, and for this, they may get cold stares, of course! So, let your baby be bold & independent as he grows up, but if you ever observe that his behaviour is getting out of control, have a word with him (you know what we mean!).
6. They Are Destined for Fame
Are you happy on reading this? You should be, because your January baby can walk down (or up, rather!) the path to fame in the future. People born in January are either Capricorns or Aquarians, but it is the latter ones that are likely to get famous. Well, the month of January is undoubtedly a bearer of good fortune – doctors, debt collectors, and fame – your kid’s future is secure!
7. They Love to Lead
January-borns have an opinion on everything. If a person tries to change their way of thinking, chances are that the person may get influenced by them, because January-borns will be adamant about their decisions and beliefs. These people are born to lead; it’s their innate quality, and you can’t just underestimate them. So, if you have a January baby, you’ve got a leader in your family.
8. They Are Immune to Stupidity
These people know how to subtly provide criticism (without hurting any feelings) and how to respond to stupid questions. If they are ever asked a silly question, their only response may be SILENCE. Yes, they don’t tolerate nonsense, and their witty grin conveys the message. Although you might appreciate this trait of your baby as he grows up, you’ll have to be a little careful while introducing him to your relatives – you wouldn’t want him offending them, right?
9. They Are Secretive
Don’t stress if your January baby grows up to be a secretive person because January-borns can be that way. People born in January are logical and realistic, and they like keeping things to themselves. They also gel with people well, but trust none; so spilling their secrets to anyone – not going to happen!
10. They Are Natural Organizers
January-borns often possess a knack for organization and structure. From an early age, you might notice your little one arranging toys in a particular order or having a clear preference for routines. This tendency can lead them to be efficient planners and excellent at managing tasks, making life more orderly and smooth. Just think of how tidy their room might be compared to other kids!
11. They Are Loyal Friends
People born in January are known for their loyalty and dedication to their friends. They value their relationships deeply and will go to great lengths to support and protect their loved ones. Your January baby will likely grow up to be a trustworthy and dependable friend, cherished by those around them. You’ll have every reason to feel proud of your little one’s steadfast and reliable nature.
12. They Are Ambitious
January-born individuals are often highly ambitious and driven. They set high goals for themselves and work diligently to achieve them. This determination and focus can lead to significant accomplishments in their personal and professional lives, ensuring they reach their full potential. So, if your January baby grows up aiming for the stars, don’t be surprised – it’s in their nature!
13. They Have a Strong Sense of Justice
January babies tend to have a strong sense of right and wrong. They are often drawn to causes that promote fairness and equality. As they grow, you may find them standing up for others and advocating for justice, making them a force for positive change in the world. You can be proud knowing your child has a deep-rooted moral compass and a heart of gold.
14. They Are Reflective Thinkers
Reflective and introspective, January-borns often spend time contemplating their thoughts and actions. This self-awareness allows them to learn from their experiences and continuously improve themselves. Encourage your January baby’s reflective nature, as it can lead to personal growth and wisdom. Just imagine the thoughtful conversations you’ll have with your little philosopher in the making!
Famous People Born in January Month
January is a month that has seen the birth of many remarkable individuals who have made significant contributions to various fields. From iconic musicians to influential leaders, here are some famous people born in January.
Elvis Presley – Iconic American singer and actor
Martin Luther King Jr. – American civil rights leader
Oprah Winfrey – American talk show host, television producer, actress, author, and philanthropist
David Bowie – British singer, songwriter, and actor
Michelle Obama – Former First Lady of the United States, lawyer, and author
Muhammad Ali – American professional boxer
Stephen Hawking – Renowned British theoretical physicist
Kate Middleton – Duchess of Cambridge
Eddie Redmayne – Academy Award-winning British actor
Ellen DeGeneres – American comedian, television host, actress, writer, and producer
FAQs
1. Are January-born babies more likely to be left-handed?
It’s believed that babies born in the winter months, including January, are slightly more likely to be left-handed compared to those born in other months. The exact reason for this correlation is still a topic of research, but it adds an interesting twist to the uniqueness of January-born individuals.
2. Do January babies have any particular birthstones?
Yes, January babies have garnet as their birthstone. Garnet is known for its rich red color and is believed to symbolize protection, strength, and healing. It’s a beautiful and meaningful stone that adds a touch of elegance to those born in this month.
3. Is there a specific zodiac sign for January-born babies?
January-born babies can be either Capricorns or Aquarians, depending on their birth date. Those born between January 1 and January 19 fall under Capricorn, known for their ambition and practicality. Babies born from January 20 onwards are Aquarians, known for their creativity and independence.
4. Do January babies have any health advantages?
Research has shown that babies born in January may have certain health advantages, such as a lower risk of developing respiratory infections. The colder weather conditions they are born into may contribute to a more robust immune system, offering them a slight edge in overall health resilience.
So, these are some of the unique traits of January-born babies. We are sure reading about these wonderful qualities of January people will make you feel content and happy (if your baby is a January baby or is due in January, of course!). Although these traits are a plus to help a child grow up to be a good, confident, and successful person in life, they aren’t substitutes to hard work. Take pride in your child if he displays these qualities, but don’t let your praise reach his ears at all times. If you want to see your little one grow into a humble and successful person, teach him to work hard and stay kind – the inborn traits are just going to fuel his success further!
Also Read:
Characteristics of December Babies
Facts About February-born Babies
Personality Traits of March-born Babies
Qualities of April-born Babies
Read more
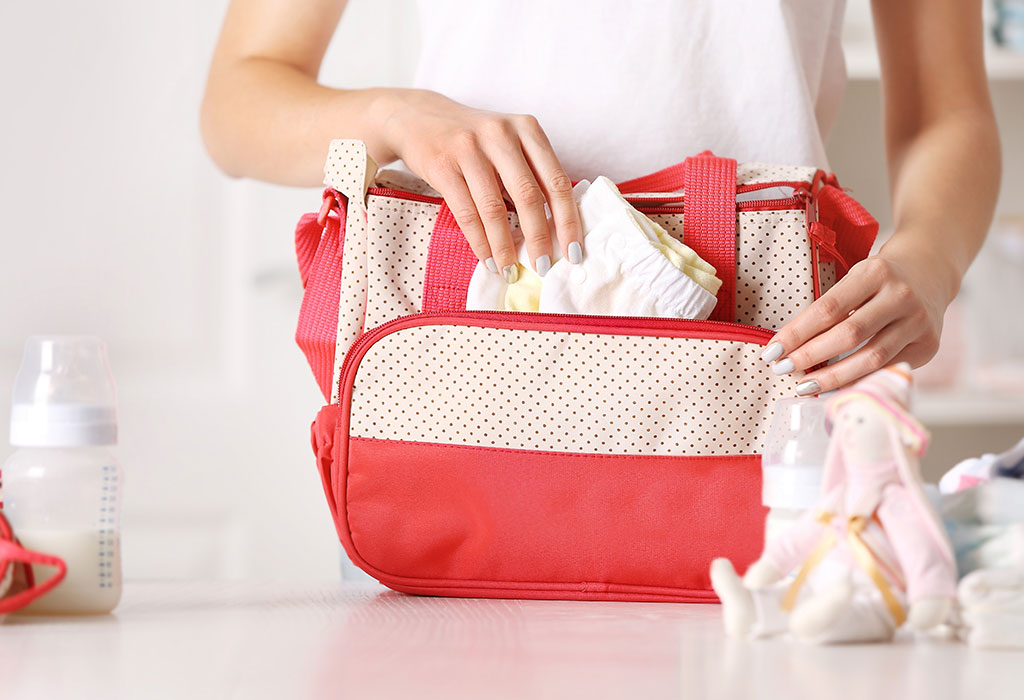
15 Essential Items to Pack in Your Diaper Bag
Diaper bags, the most essential requirement after your baby is born. Why is it the most essential? Well, simply because all babies do initially is poop, pee, sleep and eat! And where there’s poop and pee, there have to be items handy to clean it up for the sake of your baby.
Firstly, you need to select the ideal diaper bag for your specific needs. Your large tote bag no longer needs to double up as a diaper bag because there are so many options available to pick from. You can choose from style, size, material, print, functionality and a mix of these to suit your diaper bag needs.
Once you get the diaper bag sorted out, you need to have essentials required for your baby. So, what really goes into a diaper bag that will make you prepared for anything?
Let’s have a look at the essentials most moms keep handy.
1. Baby Wipes
A pack of baby wipes can be used for EVERYTHING. From cleaning pee and poop to wiping any stain, baby wipes are ESSENTIAL so toss them into your diaper bag. Make sure you buy fragrance free and alcohol-free wipes.
SHOP BABY WIPES
2. Diapers
What’s a diaper bag without diapers, right? Make sure you carry enough diapers because babies are unpredictable and it’s better to have more than fall short.
SHOP DIAPERS
3. Changing Pad
Most modern diaper bags double up as changing pads on-the-go. You can even buy these separately. They are perfect while travelling because no one wants to keep their babies down on an un-sanitized surface, right?
SHOP CHANGING PAD
4. Feeding Bottles
Sometimes it isn’t possible to breastfeed your baby while travelling. Make sure you pump and keep spare feeds for your little one.
SHOP FEEDING BOTTLES
5. Snacks
If your child is slightly older, carry pureed food in containers, a big and a spoon.
SHOP SNACKS
6. Blanket
A blanket can be used as a nursing cover, a protector for your baby, a changing pad or even a burp cloth if needed. This item, you cannot do without!
SHOP BLANKETS
7. Sippy Cup
Your child will get thirsty, especially if travel is long. Carry juice and water.
SHOP SIPPY CUPS
8. Change of Clothes
Drool, spit-up, poop, spills, babies almost never stay clean. This is why it’s important to carry 2-3 sets of clothes along in your diaper bag.
SHOP BABY CLOTHES
9. Pacifier
Babies might not find travel comfortable and possible will get cranky. A pacifier can calm your baby and keep you stress-free too. Make sure the pacifier is sterlised and contained separately to avoid infections.
SHOP PACIFIERS
10. Diaper Rash Cream
This item is not essential but you never know when a rash could crop up, making your baby uncomfortable. Don’t forget to pack in a gentle diaper rash cream in case your baby’s sensitive skin reacts to external conditions while travelling.
SHOP DIAPER RASH CREAM
11. First-aid Supplies
Band-aids, anti-septic gentle baby creams etc. are good to have handy while travelling.
SHOP FIRST AID KITS
12. A Sling / Carrier
It can get exhausting to handle your baby through the journey. Especially while travelling alone, a sling or carrier can ease the tension off your muscles greatly.
SHOP SLINGS AND CARRIERS
13. Tissue
Wipes are already mentioned but a few additional dry tissues could be required for nappy changing time too where you cannot fully air out your baby’s bottoms, you could wipe it dry instead.
SHOP TISSUE PAPERS
14. Medication
Carry any medication your doctor may have prescribed for the trip both for baby and you. You do not want to forget this one!
15. Emergency Numbers
A diary of emergency contacts of your paediatrician, family members or friends is essential in case your gadgets fail or batteries die.
Additional Tips for Travelling with Baby
Pick a bag with multiple compartments so that it is easier to find what you are looking for in a hurry.
Use zip-lock bags for items that may leak on the way.
Do not forget your own essentials like keys, phonebook, deodorant, and any other item you cannot live without
Travelling with a baby even if it is an hour long journey is not easy and it is best to always be prepared. Don’t worry, with this checklist, you are well-equipped for any surprises along the way!
Read more

100 Best Occupational Names for Boys and Girls
Occupational surnames that describe people of a particular profession have been used as first names for generations. However, names related to jobs have been stylish enough to slip into the forename territory over the past years and are destined to score further in the popularity charts. The naming pattern in the English language began with single names as people lived together in small communities. After the Norman Conquest in 1066, the English system of surnames first started being used with the rise of the country’s population in 12th-century England.
People derived many of them from the trades and crafts practiced by their bearers, such as tools, products, or positions in society. Occupational surnames covered all the common occupations of the medieval era, ranging from agricultural, manufacturing, and retail to trade that transcended European cultural and linguistic boundaries. Peoples’ surnames described their job to distinguish one from the other. These “occupational names” that were sometimes initially a family surname are used as first names in modern times. Although they are primarily suitable for boys, a few occupational last names can be used for girls or unisex. Several well-known names are usually directly taken from family surnames and are enjoying popularity beyond their familial connection. Many of these surname-first names have a punchy rhythm and down-to-earth heritage that have an added appeal beyond their job titles.
Whether you’re interested in tracing back your family lineage or choosing a unique name that gives a subtle hint about your family profession name, here is a comprehensive compilation of classic and trendy names belonging to both genders. Read on to find out the best occupational baby names while choosing a perfect name for your newborn baby.
50 Famous Occupational Baby Boy Names With Meanings
In case you’re looking for a suitable first name with modern variation from an English surname, this guide can certainly cater to your style and preference:
1. Abbott
The Hebrew name of Old English origin means “father” or ‘priest’ and was applied as the word for ‘the head of an abbey.’ It could also be an occupational name for ‘someone employed in the house or land of an abbot.’
2. Booker
Derived from Old English ‘bocere’ and Middle English ‘boker,’ this surname of English origin refers to ‘someone who bound, wrote, or sold books.’
3. Barber
This surname of English origin means ‘Hair Cutter for Men.’ It comes from Anglo-Norman French barber, Old French barrier, and Late Latin barbarius, a derivative of barba ‘beard.’
4. Carpenter
Derived from Norman French carpentier and originated from late Latin carpentarius ‘cartwright,’ Carpenter refers to ‘worker in wood.’
5. Cohen
Derived from Hebrew Kohen, this occupational name means ‘priest.’ It may also be a Jewish surname of biblical origin.
6. Cooper
Derived from Middle English Couper, this name of Old English origin means “barrel maker.”
7. Cash
Derived from the Middle French Caisse, or Old Italian cassa, Cash refers to ‘maker of chests’ or ‘box maker.’
8. Deacon
Derived from the Greek word diakonos or Late Latin diaconus, Deacon means ‘messenger,’ or ‘servant.’
9. Dexter
Derived from Old English “deag,” meaning dye or color, Dexter is an ultra-cool name meaning ‘one who dyes.’
10. Dean
Derived from the Old English word ‘denu,’ this name of Anglo-Saxon origin means ‘church official.’
11. Draper
Derived from Old French drapier, this English and Irish occupation is a merchant in woolen cloth or goods.
12. Duke
A name of English and Norman origin, Duke, means “leader” in Latin. Duke is also a short form of Marmaduke.
13. Earl
This popular name of English origin means “warrior,” “prince,” or “nobleman.” This name was initially a cognate to the Germanic title of Jarl, meaning ‘a warrior-king”.
14. Einstein
This name of German origin means ‘stone worker.’ It has been made famous by the scientist Albert Einstein.
15. Foster
This name of English or Irish origin means “Forest Worker” or ‘one who looks after the forest.’
16. Fisher
Fisher comes from the Old English fiscare, and it means “fisherman” in German and Yiddish.
17. Fletcher
This Middle English name means ‘maker of arrows” or ‘seller of arrows.”
18. Flax
This English and Jewish name means ‘one who grows, weaves or sells flax.’ Flax is a single, slender stalk with blue flowers. The fiber of the bark is used for making thread and cloth.
19. Gardner
Derived from the Saxon words gar, meaning “a weapon,” and Dyn meaning “sound or alarm,” this name of Middle-English origin means “one who bears arms” or “keeper of the garden.”
20. Gage
This name of English origin means ‘Measurer’ or ‘moneylender.’ This word comes from Middle English, Old French gage ‘pledge,’ ‘surety’ against which lenders lent money.
21. Goldsmith
A compound of Old English,’ Goldsmith is a name for a ‘worker in gold.’ It was initially given to a ‘jeweler.’
22. Harith
This Arabic name means “he who digs the earth.” It is a Quranic name for ‘farmer.’
23. Inman
This name comes from Old English inn meaning ‘abode’ and refers to the ‘keeper of a lodging house where alcoholic beverages were served”.
24. Jari
Derived from Old Norse, this name means ‘helmed warrior”.
25. Jack
Jack is a trendy name that originated in medieval England and means ‘God is gracious”. It means “healthy, strong, and full of vital energy” in its Celtic origin.
26. Jagger
This Middle English name refers to ‘One who carries about a small load; a peddler.”
27. Knight
This name of English origin means ‘A nobleman who served his lord as a mounted soldier in armor” or “someone who has been honored by the monarch of England for his achievements.”
28. Kellogg
Derived from the Medieval English Kellen, this surname is a nickname for ‘a pork butcher.’
29. Kyler
This name of Dutch origin means ‘maker of arrows” or ‘bowman.’
30. Kaiser
This name of German and Bulgarian origin means ‘emperor.’ It refers to Caesar’s Latin imperial title.
31. Lander
This Middle English occupational name means “laundryman” or “landowner.”
32. Luther
Derived from the Greek name Eleutherius, this name of Germanic origin means ‘army people’ or ‘lute player.’
33. Marshall
Derived from French, Marshall means ‘one who looks after horses.’ This occupational name comes from mare (horse) and skalkoz (servant).
34. Mason
Derived from Old French “Masson,” this English surname means ‘brick layer’ or ‘stone worker.’
35. Nadir
This German and Arabic name refers to ‘a tailor.’
36. Nayder
A derivative of Middle English nayle, this name means ‘maker of nails.’
37. Ovidio
This Latin name is common in Italian and Spanish-speaking countries and means ‘shepherd’.
38. Pepin
Derived from French, this name means ‘gardener’ or ‘grower of fruit trees.’
39. Rex
This Latin surname means ‘king.’
40. Sailor
This name of German origin means ‘Boat Man.’ It is derived from the ancient word ‘seil,’ meaning a rope primarily used in shipping.
41. Smith
Derived from Old English Smitan, meaning ‘to smite,’ refers to ‘blacksmith’ or ‘metal worker.’
42. Spencer
Derived from the Old French despensier, this English surname means “house steward, dispenser of provisions.”
43. Thatcher
This English name means ‘roof maker’. It was popularized by the former prime minister of England, Margaret Thatcher.
44. Tucker
This English name means ‘softener of cloth.’
45. Usher
This English, Scottish, and Irish name refers to ‘door-keeper’ or ‘janitor.’
46. Valiant
This tradesman’s name of English origin means ‘brave.’
47. Webster
This name of Scottish origin comes from the Anglo-Saxon word ‘webba,’ meaning ‘weaver.’
48. Wheeler
This name of English origin means ‘wheel maker.’ This name is of Anglo-Saxon descent and has spread chiefly in Celtic countries of Ireland, Scotland, and Wales.
49. Ward
This name of Old English origin and Old Gaelic origin means ‘guard,’ ‘watchman.’
50. Waterman
This English and Dutch name means ‘ferryman’ or ‘boat operator.’
50 Adorable Occupational Baby Girl Names With Meanings
Parents who are looking for a job-related name, this baby name list can surely inspire you to find the perfect moniker for your baby girl.
1. Amma
This African and Ghanaian origin name means “mother, or born on a Saturday.”
2. Abigail
This Hebrew name is given to ladies maids in literature.
3. Archer
This name of English origin means ‘Bowman’ or ‘One Who Excels at Archery.’
4. Bailey
Derived from the Old English term “bailiff,” this masculine name means “agent of the law,” “debt collector,” or ‘someone who lived by the outer walls of the castle.’
5. Baxter
This Anglo-Saxon and Scottish name means ‘female baker.’
6. Carbry
This name of Irish origin means “charioteer.”
7. Carey
Carey comes from Gaelic ‘caraich,’ which means ‘to move’ or ‘to stir,’ indicating ‘a cook.’
8. Chandler
This name of French origin means ‘candle maker’ or ‘seller.’
9. Clarke
This surname of English and Irish origin comes from the Latin clericus, which means ‘scribe.’
10. Carillo
This name of Spanish origin means ‘cart or wagon maker.’
11. Cross
This name of English origin means ‘lives near a crossing” or occupational for “someone who carried a cross in church.”
12. Dajana
This Arabic and South Slavic name means ‘nurse.’
13. Dancer
This name of English origin refers to ‘someone who dances”.
14. Devina
This Scottish variant of David, Devina, means ‘poet.’
15. Devon
This English name means ‘poet.’
16. Evan
This name of Irish, Hebrew, and Celtic origin means ‘a young warrior.’
17. Fabio
This Latin name means ‘grower of beans.’
18. Fae
This name of Old French origin comes from ‘fagus’ or classical Irish words ‘O fathaigh’ and “O Fiaich’ and means ‘fairy.’
19. Georgia
This Greek name means ‘farmer.’
20. Greer
This name of Latin and Scottish origin means ‘vigilant guardian.’
21. Harper
This English surname comes from Gaelic and means “son of the harper” or a ‘harp player.”
22. Hunter
This Scottish or English surname means ‘one who hunts animals”.
23. Kai
Derived from Welsh, Scandinavian, and Greek roots, it means “keeper of the keys, earth’.
24. Kennedy
This unisex name of Gaelic origin means “armored head, helmeted leader.”
25. Lany
This Christian name of English origin means ‘attendant.’
26. Legacy
This name of English origin means ‘something left to someone in the will’ or ‘inheritance”.
27. Molina
Molina is a Spanish surname and Latin for ‘mill.’ It is derived from the word, mola meaning ‘millstone.’ The surname originated from the early Middle Ages, referring to a person who operates a mill or a millstone.
28. Owen
This name of Welsh, Scottish and Celtic origin means ‘young warrior.’
29. Palmer
This name of English and Scottish origin means ‘a pilgrim to the Holy land’.
30. Parker(u)
This English name means ‘park-keeper.’
31. Piper
This name of English, Dutch, and North German origin means ‘pipe or flute player.’
32. Paige
This name of Latin origin comes from Byzantine “Págius” and means ‘young helper’. It is also derived from the Greek “Paidion” meaning ‘child.’
33. Rain
This name of Latin and English origin means ‘wise ruler’ or ‘counselor.’
34. Rory
This name of Gaelic, Celtic, and Irish origin means ‘chief.’
35. Reagan
This name of Scottish, Irish, and Celtic origin means ‘little ruler.’
36. Riya
This name of Indian origin means ‘singer.’
37. Ryan
Derived from the Gaelic words righ and an, it together means “little king” in Irish.
38. Shannon
Derived from Gaelic “O’Sionain, this gender-neutral name of Irish origin means ‘straw worker’.
39. Sabian
This gender-neutral name of Arabic origin means ‘baptist’ or ‘dyer.’
40. Sawyer
This English surname means ‘woodcutter.’ Sauyer, Sawyar, Sawyor, Sawyr, Sawyrr, Soiyer are variant forms.
41. Sumner
This English surname is “an official responsible for ensuring the appearance of witnesses in court.”
42. Saylor
Derived from the Old Norman French word “sailleor,” this name denotes a “leaper” or “dancer.”
43. Skylar
A variant of Schuyler and Skyler, this name means “scholar” in Dutch who imported it to America in the 17th century.
44. Schneider
This name of German and Jewish origin means ‘tailor” or ‘cutter.’
45. Theresa
Derived from the Greek verb therízÅ, Theresa means “to harvest” or ‘huntress.’
46. Taylor
Derived from the Old French tailleur, this name means ‘tailor.’
47. Tanner
This Anglo-Saxon name comes from Old English “tannere,” which came to be used as a surname in the 12th century. It means ‘leather worker’ or ‘maker of hide.’
48. Tyler
Derived from the Old French tieuleor and the Middle English Tyler and Tyler, this name of English origin means ‘maker of bricks or tiles.’
49. Teegan
Teegan is a Cornish name meaning ‘special thing,’ and in Gaelic, it means ‘little poet.’
50. Xerxes
This Greek name means “ruler over heroes.” It is a Greek form of the Persian name Khshayarsha.
Labor Day is an annual event that pays tribute to the contributions and achievements of laborers and the American working class towards building its strength and prosperity. However, long before that, the importance of work was enshrined in the practice of last names or English occupational surnames that are the genesis of most fashionable names of today. This tradition allows parents to choose from a vast pool of first and last names for their newborns that can become a significant part of their personalities. So choose from these unique occupational names for your child and pay tribute to the glorious tradition.
Read more
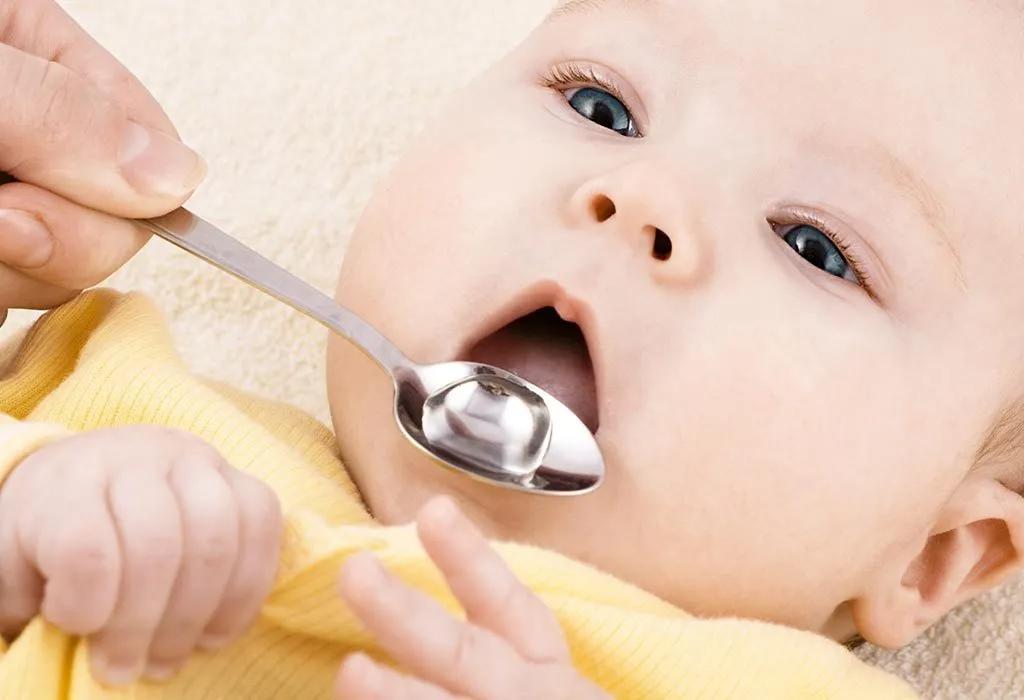
Easy Homemade Gripe Water Recipe for Babies
A baby crying due to stomach problems is not a new occurrence. All babies suffer from stomach issues at some time. What’s important is how parents tackle it. As first-time parents, you will have no idea what to do.
Do you recall your mother and grandmother talking about the umpteen benefits of gripe water, and how it calms a baby? Gripe water is usually recommended for babies with stomach problems; however, it should not be given to a baby under the age of 6 months, and babies should exclusively be breastfed till they’re 6 months old. Although gripe water is readily available in various medical stores, the constituents used in it may not always be suitable for your child. Hence, you must opt for homemade gripe water, which is safe for a baby.
Benefits of the Ingredients Used in Homemade Gripe Water
The preparation of gripe water makes use of very specific ingredients. These have been chosen for an essential reason since each ingredient adds a vital benefit to the gripe water. When these benefits combine, the cumulative effect is what relieves the gas-related issues, and other digestive problems that a baby might be suffering from.
1. Cloves
Cloves play an essential role in various natural remedies and are highly recommended for respiratory issues too.
How Does It Help?
Cloves consist of numerous properties that directly impact the digestive system. They help in reducing any kind of bloating caused by digestive activities, as well as in calming the inner body with its pain-relieving properties.
2. Natural Sweetener
A baby will have gripe water only if it tastes good, hence adding a natural sweetener to it is important.
How Does It Help?
Instead of going for natural sugar, coconut sugar is recommended as a sweetener as it is easier for the baby to digest it. Any artificial sweeteners or even honey is to be avoided.
3. Cinnamon
A pinch of cinnamon powder mixed with water is usually given to people with a stomach ache. Cinnamon is an important ingredient of gripe water for the immense benefits it offers to the baby.
How Does It Help?
Cinnamon has been known to work wonders in reducing gas and treating indigestion problems. Therefore, it is included in gripe water.
4. Chamomile
The benefits of chamomile tea include controlling pain and calming the mind. So, adding chamomile to gripe water will help the baby in case of any pain.
How Does It Help?
Chamomile flowers used in the preparation of gripe water will ensure that any inflammation inside the baby gets a soothing effect, and allows the little one to relax and sleep well.
5. Fennel Seeds
The benefits of fennel seeds are quite exhaustive, and their effect on the body, right from improving the health to relieving various stomach issues have been well-known for quite some time. This is why including them in gripe water would prove beneficial for the baby.
How Does It Help?
Fennel seeds have laxative properties, and they also contain an essential element that prevents the formation of gas, making them a useful addition in the gripe water preparation.
6. Ginger
Ginger is an essential ingredient used in numerous natural remedies, and the effects of ginger can be listed extensively in matters of keeping the digestive system intact.
How Does It Help?
Any chances of a baby suffering from diarrhoea, colic infection, indigestion, or any other stomach problems are nipped in the bud with the gripe water that contains ginger in it.
How to Make Gripe Water for Infants at Home?
You only require a few specific ingredients to make gripe water at home for your baby. However, gripe water provides its beneficial effects for only a week or so. Hence, any remaining water should be frozen to keep its effectiveness intact. Here’s a homemade gripe water recipe for infants.
Required Ingredients
The ingredients needed to prepare gripe water at home are as follows:
Ground clove
Ground cinnamon
Coconut sugar or strictly natural sweeteners
Dried and crushed cardamom
Dried and crushed fennel seeds
Dried chamomile flowers
Fresh ginger, sliced
Purified water
How to Prepare Gripe Water
Preparing gripe water using the ingredients mentioned above is not a complex process. The steps are as follows:
Take the purified water in a large pan or a kettle. Let it boil.
In a cloth tea bag, add the cardamom, fennel, chamomile, and ginger.
Once the water boils, turn off the heat and place the bag in the pan. Let the bag sit in it for around 30 minutes.
Remove the bag from the water after 30 minutes, and add the coconut sugar or any other natural sweetener, ground clove, and cinnamon. Mix it well and give it to your baby once it cools down. Store the rest in the fridge in an airtight glass bottle.
Notes
This mixture is most effective within a week of preparation, so it’s advisable to freeze a portion of it. Ensure you shake thoroughly before each use. Here are the recommended dosages (do not exceed 6 doses in a 24-hour period):
0-3 months: 1/2 tsp. (2.5 ml)
3-6 months: 1 tsp. (5 ml)
6-12 months: 2 tsp. (10 ml)
FAQs
1. Can I use different herbs or ingredients in my homemade gripe water?
Yes, you can experiment with different herbs or ingredients in your homemade gripe water. Some parents choose to add fennel seeds, chamomile flowers, or ginger for their soothing properties.
2. How should I store homemade gripe water, and how long does it last?
Homemade gripe water should be stored in the refrigerator to maintain its freshness and potency. It is typically effective for up to one week. To extend its shelf life, you can freeze portions of the mixture in ice cube trays and thaw as needed. Always shake well before use to ensure the ingredients are properly mixed.
Homemade gripe water for newborns is always better than the ones that are commercially available, as you are sure of the way it has been prepared and there is no trace of adulteration in it. This quick recipe will solve all the stomach problems that your baby is experiencing in a couple of days.
References/Resources:
1. Medarov. B; Milk-Alkali Syndrome (Mayo Clinic Proceedings); National Library of Medicine; https://www.ncbi.nlm.nih.gov/pmc/articles/PMC2664604/; March 2009
2. Will gripe water help my baby’s colic? Is it safe?; Sutter Health; https://www.sutterhealth.org/health/south-asian/childrens/myths
3. Kopač. M; Evaluation and Treatment of Alkalosis in Children (Journal of Pediatric Intensive Care); National Library of Medicine; https://www.ncbi.nlm.nih.gov/pmc/articles/PMC6517058/; June 2019
4. Sugars and dental caries; World Health Organization; https://www.who.int/news-room/fact-sheets/detail/sugars-and-dental-caries
5. Why Gripe Water Isn’t the Best Answer for Your Fussy, Gassy or Colicky Baby; Cleveland Clinic; https://health.clevelandclinic.org/gripe-water-for-babies
6. Sas. D, Enrione. M, Schwartz. R; Pseudomonas aeruginosa septic shock secondary to “Gripe Water” ingestion; The Pediatric Infectious Disease Journal; https://journals.lww.com/pidj/fulltext/2004/02000/pseudomonas_aeruginosa_septic_shock_secondary_to.19.aspx; February 2004
7. Alexandrovich. I, Rakovitskaya. O, Kolmo. E, et al.; The effect of fennel (Foeniculum Vulgare) seed oil emulsion in infantile colic: a randomized, placebo-controlled study (Alternative Therapies In Health And Medicine); National Library of Medicine; https://pubmed.ncbi.nlm.nih.gov/12868253/
Also Read:
Rice Water for Infants
Bottled Water for Babies
Can Babies Drink Alkaline Water?
Dal Water (Dal Ka Pani) for Babies
Ajwain and Ajwain Water for Infants
Read more
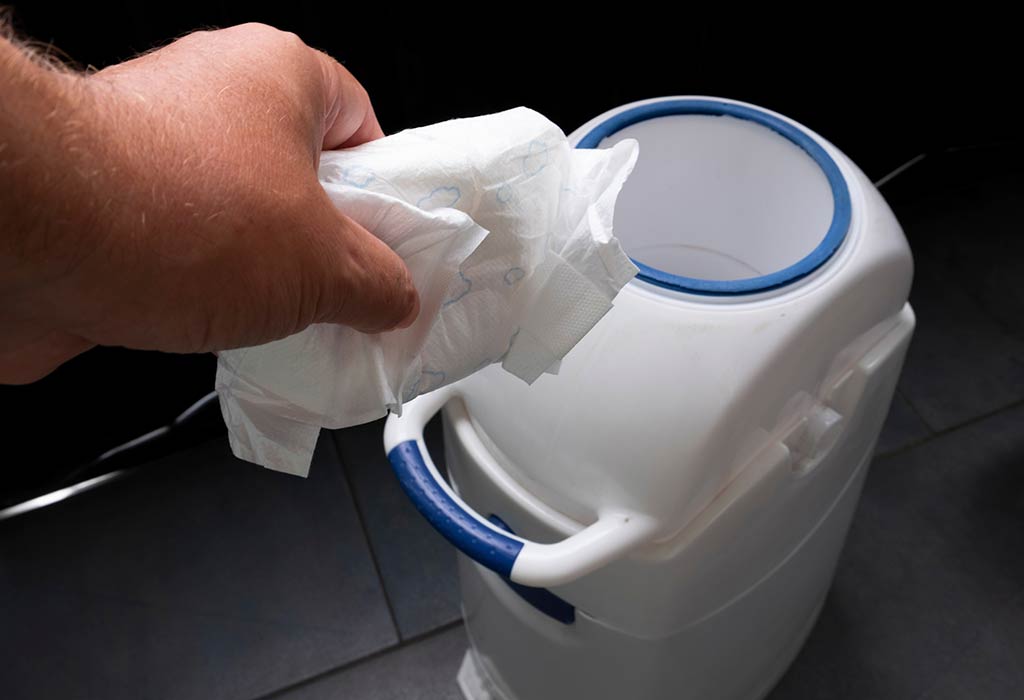
Diaper Pail – How It Works and Tips to Pick One
A diaper pail is one of the most used items for every parent. A diaper pail comes in handy when you pile up stacks of diapers and still keep the odor away from the room or your baby’s lovely nursery setup. Here we bring you some good insight on the necessity of having a diaper pail, how to choose the right one, the advantages of having a diaper pail, and other points to keep in mind. Having the right diaper pail will indeed improve the quality of your life. Read on to know more.
What Is a Diaper Pail and Why Is It Necessary?
A diaper pail is a garbage or trash can designed specifically to store dirty and used diapers. It is a smart investment for parents that can be used for years, from day one when a baby arrives home until they grow into a toddler. With your baby growing, the need to use and change diapers will also increase. You will continue to see diapers piling up and the use of your diaper pail also increasing than ever before.
A diaper pail may not be an absolute necessity. While a regular trashcan can be used, in all probability, you will end up breathing from your mouth instead of your nose. Using a regular trashcan or a garbage bag may make the beautiful setup nursery of your little munchkin smelly and stinking within a short period.
People mostly want to prevent the spread of stench from dirty diapers and want a uniquely designed diaper disposal system. It will neutralize the odor and allow you to store a huge number of diapers, which will prevent you from frequently running to the outside trash to dump throughout the 24 hours cycle. This indeed saves time for new parents.
How Do You Choose a Diaper Pail?
Different models of diaper pails have different benefits. While all diaper pails try to overcome the stench issue, below are a few features that you might want to consider to choose the right diaper pail for your baby’s nursery.
1. Convenient to Use
This one’s important to consider. When changing a diaper, you will need to have one hand on your baby. Look for a diaper pail with a foot pedal that makes you go hand-free and easy to use. Additionally, having a child locking system on the diaper pail can be advantageous to keep curious kids away from opening and closing them continuously.
2. Odor Blocker
One of the primary reasons to buy a diaper pail is to keep the odor at bay. Hence, look for a diaper pail that has an odor control system. It’s a good idea to pick diaper pails made of non-porous steel that have odor-blocking capacity better than the plastic ones, which would allow the smell to leak. Alternately the ones that come with scented bags to ward off the smell.
3. Correct Size
Ensure to pick a diaper pail that is of the right size. Two factors to consider while choosing the size would be, first being the space where the pail would be kept. It should easily accommodate the space identified. The second factor will be the number of used diapers that the pail would hold in it. That would control the frequency of emptying the can throughout the day or week.
4. Diaper Pail Liners
While you can always choose a typical kitchen trash bag, some diaper pails require special refill bags, like a scented or a deodorizing one. However, you can buy a diaper pail and liners separately too. Ensure to determine the cost for the refills when you surf to choose between different bags.
5. Ties on Bags
Bags would usually have a tie-off in the end. You would use your bags or buy refills with a tie-off available.
There are different options and choices of diaper pails available – you can choose from the hands-free diaper pail to the economical and even eco-friendly ones. You can also buy a diaper pail for cloth diapers to keep them separate.
How Do Diaper Pails Work?
A diaper pail’s primary objective is to store dirty diapers made of cloth or disposable ones. Diaper pails block the unavoidable and unpleasant stench of the used and dirty diapers for several days at a stretch. It effectively seals the odor that’s old and unpleasant. It also reduces the frequency at which you need to take the diaper garbage out and dump it in the trash outside your house on the garbage day.
Any classic diaper pail will have a clamp system and bags to seal off each diaper stuffed into the trash. As every individual diaper is contained, that sudden rush of smelly air will not pop out when the trash is opened or when the bags are changed. Some diaper pails come with a squeegee that will help you to push the other diapers inside and make space to put in more used diapers.
Advantages of a Diaper Pail
Diaper pails are easy to use. They are made of non-porous steel, which helps contain the odor much more effectively than plastic ones. Diaper pails come with a locking system; hence it comes in handy to keep curious toddlers away from all the mess they can create. Imagine you have twins or, for that matter, a pet; the diaper pails remain locked and closed. Despite prying on the lock, they will not be able to unlock it.
Hands-free foot pedal diapers are available that come in very handy at the time of change. You will not need to keep touching the lid with your hands to open them. These cans are durable and can be used as regular trash cans once the diaper days are over. These are simple and easy-to-use cans. You can load and empty them easily.
Steps to Clean a Diaper Pail
Cleaning a diaper pail is a smelly task. However, it is important to clean a diaper pail thoroughly as the diaper pails can be prone to sheltering mold and mildew that can be health risking. It could compromise the baby’s and even the parents’ health if not kept in check. At times the interior of the pail can retain the foul smell for long, even after the diapers have been long trashed. Below are the steps that you need to follow carefully to clean a diaper pail.
Step 1: Wear a rubber glove on each hand.
Step 2: Next steps are to remove and get rid of the dirty diapers from your diaper pail.
Step 3: The bag cartridge needs to be removed from the top of the diaper pail.
Step 4: Take the diaper pail outside in the backyard or put it in the bathtub for cleaning.
Step 5: You can use a garden hose or showerhead to properly rinse off the inside and the outside of the diaper pail.
Step 6: Squirt any dish soap or castile soap in the interior and exterior of the diaper pail.
Step 7: If you get any bad odor, you can neutralize it by sprinkling baking soda inside and outside the diaper pail.
Step 8: Allow five to ten minutes for the soap and the baking soda to set and penetrate properly
Step 9: Now, take a sponge or an old rag to scrub the diaper pail thoroughly. It’s a good idea to keep a separate sponge just for cleaning the diaper pail.
Step 10: Now, you can rinse out the diaper pail thoroughly with water to clean the soap.
Step 11: To avoid mold and mildew from breeding inside the diaper pail, spray a concoction made of tree tea oil, vinegar, and borax. Now in circular motions, rub it in using another rag.
Step 12: Re-spray some borax solution inside the diaper pail.
Step 13: Allow the interiors of the pail air to dry for as long as probable. You can also dry it off properly with a cloth or a towel. Of course, the outside of the pail needs to be dried too.
Step 14: It is important not to leave any moisture once it has been cleaned and rinsed.
Steps to Clean Cloth Diaper Pail
The basic steps to clean cloth diaper genie are similar to how you clean a disposable diaper pail. Below listed are the cloth diaper pail ideas for cleaning.
Step 1: The first step is to wash the pail liner and the cloth diapers as you normally wash them.
Step 2: Now, use the showerhead, garden hose, or a diaper sprayer to spray the interiors and exteriors of the diaper pail.
Step 3: It is a good idea to have some water left in the bottom of the pail. This will help to effectively clean the soiled part of the diaper and soak up the smell too.
Step 4: Now, squirt any dish soap or a castile soap in the interior and exterior of the diaper pail.
Step 5: To neutralize any bad odor, you can try sprinkling some baking soda inside and outside of the diaper pail.
Step 6: Allow five to ten minutes for the soap and the baking soda to set and penetrate properly
Step 7: Take a sponge or an old rag to scrub the diaper pail thoroughly. It’s a good idea to keep a separate sponge just for cleaning the diaper pail.
Step 8: Now, rinse the diaper pail thoroughly with water to clean the soap.
Step 9: To avoid any mold and mildew from breeding inside the diaper pail, do spray a concoction made of tree tea oil, vinegar, and borax. Now in circular motions, rub it in using another rag.
Step 10: Re-spray some borax solution inside the diaper pail.
Step 11: Allow the interiors of the pail air to dry for as long as probable. You can also dry it off properly with a cloth or a towel. Of course, the outside of the pail needs to be dried too.
Diaper Pail Safety Tips
There are no major risks related to diaper pails. However, being cautious about all small little things is important in ensuring hygiene and safety. Read below the tips:
Keep an Extra Diaper Pail: If you have multiple levels in your house, it is a good idea to keep a diaper pail on every level of the house for quick and easy accessibility. This, of course, will create some extra work in the long run; however, you would need to deal with far less serious odors.
Go for Scented Trash Bags: It is a common practice to line the pails with trash bags. You will easily find scented trash bags manufactured by different companies in the market. They are available in different sizes. You will need to pick the right size that fits your diaper pail. You will rid yourself of that ‘in your face odor experience’ when the can is opened. Also, it helps to keep smelling fresh in between different chores of cleaning.
Use Deodorized Bars: These are like quick fixes, even if it is temporary. You will need to replace these bars every week to cut down on the smelly odor in the air the moment you open the container of your Diaper pail. You can try those DIY ideas to make your bars.
Using Rubber Gloves: This one’s the most important purchase you need to make to clean your diaper pails. Don’t forget to wear rubber gloves when dealing with your diaper pail. It’s an additional precaution you must take because, at times, you will be unpleasantly surprised just in case the liner gets torn and begins to leak.
Keep Disposable Gloves Handy: Wearing disposable gloves makes it easier for you to unload the contents into the toilet or even when you’re using a hose to rinse stuff out.
Keep a Dedicated Sponge: Sponges used for cleaning can get mixed up with other sponges or cloths. Use a designated sponge to clean your diaper pail and keep changing them at the end of each month. Try to keep it inside an airtight bag to avoid other things in the cleaning closet.
Make Use of Essential Oils: There are essential oils available in the market that can help to mask smells and keep surroundings fresh. Try tangerine, lavender, grapefruit, and citrus oils with nice aromas and are safe to use around the kids.
The early months and years in the life of an infant or a toddler and even for the new mom, it is all about diapers. Depending on your budget and, more importantly, looking at the convenience of not having to run around the house with hands full of diapers, it’s a good idea to have a diaper pail. With all the information stated above, you can take an informed decision about a diaper pail.
Also Read:
Usage of Diapers for Infant
Common Myths about Diapering
Side Effects of using Diapers for Infants
Read more
Scrambled Egg Recipe
Scrambled eggs for babies is one of the easiest and best foods for baby-led weaning. For a child who is weaning, this egg recipe for babies and toddlers can be a great finger food. It could also serve as a snack for older kids. Eggs have a high protein content, so this is an ideal choice for kids. They are soft and easy to chew, so even a small baby can easily feed themself. You could also add veggies to this recipe to make it tastier, and colourful, and more nutritious. We have used yoghurt and cheese in this recipe, but if you are trying a dairy-free diet for your little one, you can easily omit them. These scrambled eggs taste good with rotis and parathas, so you could make it for the entire family as well. A recipe power-packed with nutrition, this can be the best breakfast you can offer to your child every day.
How to Make Scrambled Eggs?
This scrambled egg recipe for toddlers and young children is easy to make, filling, and, most importantly, super nutritious.
Cooking Time
Type
Time (hh:mm:ss)
Preparation Time
00:05:00
Cook Time
00:05:00
Total Time
00:10:00
Cooking Method
Gas stove
Type of Meal
Eggetarian
Suitable For
Any baby above 12 months of age
Meal Schedule
Breakfast, Dinner
Recipe Type
Main dish/ Side dish
Ingredients
Ingredients
Quantity and Volume
Egg
1 large
Pepper powder
1 pinch
Spinach
2 tbsp cut into small parts
Yoghurt
1 tbsp
Cheddar cheese
1 tbsp grated
Olive oil
1 tsp
Salt
1 pinch (optional)
Instructions
Below is the step by step procedure to make these delicious and healthy scrambled eggs. You can adjust the proportions and timings based on the number of eggs you use and how many servings you need to make.
In a mixing bowl, take the egg, curd, and pepper powder and beat it vigorously.
Add the spinach and cheese, and give it a stir.
Heat olive oil in a pan and pour in the egg mix, stirring continuously.
Keep stirring with a wooden spoon or spatula till the eggs do not appear raw or liquid-like for 4-5 minutes.
Serve them with wholemeal toast.
Recipe Tips
This is an easy scrambled egg recipe for a baby, which can be served as a main dish for infants and as a side dish for toddlers.
Egg is a common allergen. Before feeding your child any dish made with eggs, make sure to check for allergies by feeding them eggs in a small quantity and observing for any unusual symptoms (1).
You may add grated carrots to this recipe.
Do not forget to stir frequently. It also tends to stick to the bottom of the pan, so keep an eye on that.
You could add tomatoes to this. To do so, first, blanch them with boiling water in a pan and then drop the tomato in it for a minute. Then, let it cool, peel off the skin and chop the flesh. Cook it first before adding the eggs.
Use only egg yolks for babies less than 1 year old.
Do not add salt to the recipe if you are preparing it for babies under 1 year of age, as their teeny-weeny kidneys aren’t fully developed yet (2).
Make sure you check for any kind of allergy from the eggs. You may try changing the type of egg if you notice any kind of allergy. It is, however, best to consult your paediatrician in such cases.
Nutrition Information (per 100 grams)
Here is the nutritional value of whole-cooked scrambled eggs. The portion size is 100 grams.
Nutrient
Value
Energy
149 kcal
Protein
9.99 g
Carbohydrates
1.61 g
Fibre
0 g
Fat
11 g
Cholesterol
277 mg
Sodium
145 g
Vitamin D
72 IU
Calcium
66 mg
Iron
1.31 mg
Potassium
132 mg
Magnesium
11 mg
Vitamin A
161 µg
Folate
36 µg
Vit B12
0.76 B12
Selenium
23.5 µg
Source: USDA (3)
Health Benefits
This homemade scrambled eggs baby food recipe is a must-try if you are weaning your child. A wholesome food, it is also quite yummy, and most kids are going to love it.
Packed with vitamins, calcium and zinc, eggs are one of the healthiest foods on the planet and a portion of essential food for the good development of a growing child.
It raises good cholesterol.
It has choline, a very important nutrient that supports the building of cell membranes (4).
Buying Guide
Buy free-range eggs as they are the most nutritious ones. You must also check their sell-by dates to make sure they are not too old.
Buy organic vegetables to steer clear of toxins.
FAQ
1. Can I make scrambled eggs in the microwave?
For those lazy mornings, microwave is the most efficient tool to make great scrambled eggs. Quickly whisk the eggs in a bowl or a mug that can fit inside the microwave. Now, microwave the eggs for around 1.5 minutes. Take it out, your quickest and best scrambled eggs recipe is ready!
This recipe on how to make scrambled eggs can be done in less than 10 minutes and is a powerhouse of nutrients.
References/Resources:
1. Egg allergy; Mayo Clinic; https://www.mayoclinic.org/diseases-conditions/egg-allergy/symptoms-causes/syc-20372115
2. Foods to avoid giving babies and young children; NHS; https://www.nhs.uk/conditions/baby/weaning-and-feeding/foods-to-avoid-giving-babies-and-young-children/
3. Egg, whole, cooked, scrambled; USDA; https://fdc.nal.usda.gov/fdc-app.html#/food-details/172187/nutrients
4. Iannotti. L. L, et al.; Eggs early in complementary feeding increase choline pathway biomarkers and DHA: a randomized controlled trial in Ecuador. Am J Clin Nutr.; PubMed; https://pubmed.ncbi.nlm.nih.gov/29092879/; December 2017
Also Read:
Thalipeeth Recipe
Stewed Apple Recipe
Chicken Broth Recipe
Rice and Carrot Porridge Recipe
Read more

Is It Safe to Try Intermittent Fasting While Breastfeeding
Many mothers will vow about how breastfeeding will help to shed weight without any exercise routine or diet regimes. However, not all mothers can lose weight from breastfeeding. In fact, some may even gain or retain weight until their baby starts weaning. Frustrating but true. Many mothers research different ways to lose weight without any harm to them or their baby while breastfeeding. Intermittent fasting is one of them. Read on to find out more about intermittent fasting while nursing and whether it is safe for you and your baby. The effects it will have on weight loss, health and, most importantly, the impact of intermittent fasting and breast milk is something every mother should be aware of.
What Is Intermittent Fasting?
Intermittent fasting is basically different ways or patterns of consuming food within a specific window of time. There are several ways to approach fasting. Some eat during the day while fasting at night. There are different kinds of intermittent fasting. A few are:
5:2– You eat a regular diet for five days a week and for two days, you restrict to 500-600 calories.
8:16/10:16– You eat for 8-10 hours a day and fast for the rest 14-16 hours.
Alternate Day Fasting– You eat every alternate day.
Eat-Stop-Eat– You go 24 hours without food for once or twice in a week.
Warrior Diet– You eat massively at night and eat less during the day.
There are various reasons suggested for intermittent fasting:
Cells resist disease when they are not under the stress of not eating.
Fasting reduces inflammation in the body, reduces blood sugar levels, cholesterol and blood pressure levels.
Intermittent fasting helps to reduce weight.
The main reason behind weight loss by intermittent fasting is that when the body does not get food, it dips into the fat reserves for energy. Fasting for some period of time reduces calorie consumption and leads to weight loss.
Is Intermittent Fasting Safe While Breastfeeding?
Traditionally, a woman breastfeeding must take in an additional 330-600 calories of food to supplement milk production. The kind of food consumed must also be rich in protein, iron and calcium to provide enough nourishment to the baby. Eating right and enough will ensure that the baby gets the necessary needs. A lot of the daily fluid that is needed by the body comes from the food consumed. Fasting could reduce fluid intake and lessen the supply.
There are no proven studies to reveal the impact of intermittent fasting while breastfeeding and weight loss. Is it really safe to undertake different types of intermittent fasting and breastfeeding to undergo weight loss?
The safety of alternate day, eat-stop-eat; warrior diet; 5-2; 14-10/8-16 fasting on breastfeeding depends on many personal factors and it’s important to speak with your doctor about the below topics that can impact your breastfeeding journey.
For the Mom
The safety of fasting and breastfeeding depends on many personal factors for a mother. It is therefore important to speak to your doctor or lactation consultant. The main factors to be considered are:
Child’s age ( infants tend to rely on breast milk entirely for nutrition).
If a mother is relying entirely on breastfeeding or has started the baby on solid foods.
Any underlying health issues.
The type of fasting a mother wishes to choose.
If there are any issues with lactation.
If a mother is lactating well, she could indulge in intermittent fasting if she is not dropping her calories too low. What is more important is to eat food rich in calories and essential nutrients.
There are a few things that have been connected with intermittent fasting and breastfeeding after some research.
1. Factors affect female hormones
Fasting can affect estrogen levels, luteinising hormones and follicle-stimulating hormone that can decrease fertility. If a mother is breastfeeding she may not be ovulating anyway. There may be some changes to your menstrual cycle. It is important to take precaution if it has an effect on your hormones, especially when the body does not have enough intake of food
2. Breastfeeding causes the fasting stage to reach faster
When women breastfeed, nutrients are used not just to power metabolism but to produce breastmilk as well. So a woman reaches the fasting stage sooner. When breastfeeding, a mother could be feeling hungry more often. Depriving your body of food could result in a metabolic state called Ketoacidosis. Symptoms of Ketoacidosis start with bellyache, nausea and vomiting. It can also cause confusion and affect breathing.
3. Fasting could decrease milk supply depending on some factors
Milk supply could be decreased if fasting for over 24 hours. It can also decrease if the intake of calories in a day is lesser than 1800 kCal.
4. Fasting can affect milk composition
If you are not careful about the kind of food you have it may affect the quality of breast milk. The decrease in micronutrients can be controlled by ensuring the right kind of food during the “eating” window.
In a nutshell, the main takeaways for a mother when practising intermittent fasting are:
Short term fasting may not affect milk production and the main nutrient levels.
Short term fasting could have some effect on the micronutrients in breastmilk.
To reduce the effect on micronutrients it is important to have calorie-rich and nutrient-dense food during the “eating” window.
Long term fasting, especially over 20-24 hours, could affect milk production.
Long term fasting can be dangerous and have other medical implications.
For the Baby
The impact of intermittent fasting on baby can be gauged by certain observations of your baby when you are fasting and feeding him. As mentioned earlier, short term fasting does not affect macronutrients in breastmilk but affects the micronutrients significantly. A few indicators of the effects of fasting on the baby are:
A lethargic or sleepy baby.
Change in the normal feeding session. Your baby may be either taking too much or too little at a time.
There is a change in your baby’s bowel movement.
The baby is dehydrated. This can be seen if the diapers are dry or dark or reddish-brown urine is noticed in her diaper.
Loss of weight or lack of weight gain.
How Intermittently Fast in a Right Way if the Mom Chooses to Do It
Intermittent fasting while breastfeeding results have not been entirely proven and the effects vary from one to another. There are a few tips one can follow.
1. Start slowly
It is important to start off on the fasting routine slowly. Fasting could interrupt milk supply so it is important to start off with a small fasting window and increase it gradually. It would help to keep a track of your fasting records and any changes you notice to your body and the baby.
2. Understand and listen to your body
Listen and understand the signs that your body is sending you. Keenly study the times when your body is experiencing hunger pangs and pay attention to any emotional triggers ( irritation, stress and mood swings). Understand the kind of food that your body likes and try to supplement it with healthy food that will uplift your mood, keep you satiated and also provide the necessary nutrients.
3. Drink lots of water
Fasting could lead to dehydration and it is important to have lots of fluids. It also helps to keep the skin clear and healthy.
4. Exercise with care and caution
Exercise regularly but do not go overboard with it. As your body is getting used to the new eating pattern, gradually increase the intensity and the timing for exercise.
5. Time your exercise routine
Exercise before you break the fast and make the most out of the metabolic benefits.
6. Eat right
Eat food rich in lean proteins, healthy fats and nutritious vegetables. Including these in each meal and snack will help in providing nutrition and reducing weight.
7. Plan your meals and experiment with the schedule
Stick to a timetable and plan your meals. Include the right nutrient-rich food on a daily basis so that you are not depriving your body of any essential vitamins and nutrients.
8. Finish your meals at dinner
Try not to eat after dinner as your body will use up fats during the day. Eating after dinner could send one on a binge eating spree.
9. Take food supplements
Food supplements that control blood sugar levels, reduce food cravings and control appetite are available and you can take them after consulting your doctor. This could aid in the benefits of fasting.
10. Have a protein and fibre rich diet
Protein and fibre rich diet helps to curb over-eating. There are several combinations that one can try- chicken or fish with baked vegetables, smoothies packed with greens, almond butter and fruits.
The need to remain fit and healthy is constant and essential. Intermittent fasting while breastfeeding can be helpful for moms if they ensure to follow the right things that will not affect their health or the baby. However, be sure to consult a doctor if you are planning to try intermittent fasting while breastfeeding, so you are your baby remain safe and healthy.
Also Read:
Foods to Avoid While Breastfeeding Your Baby
Important Benefits of Intermittent Fasting to Lose Weight
How to do Side Lying Breastfeeding
Read more
Is Eating Pineapple During Breastfeeding Safe?
Most women are aware that eating fruits during pregnancy and while breastfeeding their baby is quite important, as fruits are extremely nutritious and babies also get the taste of a variety of nutritive elements that support their growth. Including pineapple in a pregnant woman’s diet is recommended, especially in the last stage of pregnancy, as it is known to induce labour. However, when it comes to consuming this fruit while nursing, it cannot be surely stated that it is safe for a baby. Since what you eat and drink is ultimately used to form the milk in your body, it indirectly will be consumed by the baby. Therefore, being informed about the safety of eating pineapple during breastfeeding is of utmost importance.
Video
Can a Breastfeeding Mom Eat Pineapple?
Yes, eating pineapple while breastfeeding is possible. A mother who is breastfeeding can make pineapples a part of her diet, but only after she has been breastfeeding her baby for about 5-6 months. There are various studies that strongly indicate that a higher presence of citric fruits in the diet of a woman can be harmful to the baby’s body. This also tends to include pineapple, since it has a pretty strong flavour and an acidic content, which could be quite strong for the baby.
Nutritional Value of Pineapples
Pineapples are a pretty important fruit for breastfeeding moms since they are immensely rich in numerous vitamins and a few elements that are very specifically found only in themselves. A simple cup full of pineapple chunks contains a nutritional distribution as follows.
Element
Percentage of daily value required
Pantothenic acid
7%
Folate
7%
Fibre
8%
Vitamin B1
11%
Vitamin B6
11%
Copper
20%
Manganese
67%
Vitamin C
105%
Benefits of Eating Pineapple for Nursing Moms
While the evidence of pineapple juice increasing breast milk in a lactating woman might not be conclusively proved, there are many other benefits of consuming this fruit for a mother and her baby.
The presence of various substances in pineapple that contain antiemetic and diuretic properties is quite useful for new mothers.
Regular consumption of pineapples is also known to bring about a substantial reduction in inflammation and pain experienced in joints and various muscles of the body.
If a mother has an infection of any sort and is not healing, the recovery period can be accelerated by eating pineapples as they contain disease-fighting antioxidants.
The content of fibre and numerous elements helps in stimulating the digestive process and treating various disorders of the stomach, as well as constipation, consequently reducing haemorrhoids.
Since consuming pineapples helps in controlling hypertension by diluting the volume of blood as well as removing any blood clots, the health of the cardiological system is improved and the heart remains in an optimal condition.
Any bouts of extreme headache, dizziness or sleeplessness are highly reduced when including pineapples in your diet.
When and How to Introduce Pineapple to a Breastfeeding Mom’s Diet?
Eating pineapple while you’re breastfeeding is completely safe. This is because acidic foods like citrus fruits, pineapple, and tomato do not affect breast milk, as these foods do not change the pH balance of maternal plasma. In case, you’re worried about including pineapple in your diet while you’re breastfeeding you should discuss your concerns with a gynaecologist or a nutritionist.
Is Canned Pineapple Safe for Nursing Mothers?
While canned pineapples seem juicier and better looking than actual fresh pineapples, they should be strongly avoided by nursing mothers. Not only does the canning process rob the fruit of its important nutritive elements, but the long storage also increases the amount of sugar and calories already present and other chemicals, which could be harmful.
How to Choose Fresh Pineapples?
When going to the supermarket to purchase pineapples, there are certain aspects of the fruit that need to be examined before buying. This ensures you pick only the best and fresh ones every time.
Hold a pineapple close to your ear and tap on it. The sound should be dull or almost absent.
The crust of fresh pineapple is generally elastic and a bit soft. The tail is also green and separates easily from the fruit.
A ripe pineapple has a peel that has a consistent shade of yellow-brown colour all over, without any blemishes or spots.
How to Prepare, Eat, and Store a Pineapple Safely?
To avoid consuming any bacteria or germs that can harm the baby while breastfeeding, it is essential that you clean, prepare, and store a pineapple in a safe and hygienic manner. Here are some tips to keep in mind when consuming pineapple.
Wash your hands and rinse the pineapple thoroughly under running water. This helps in getting rid of any microbes and germs on the surface.
Cut the skin of the pineapple cleanly and cut it into your desired shape and size.
Store the pineapple chunks in an airtight container and refrigerate.
Consume the pineapple within 2 days of refrigeration.
Avoid buying cut pineapple from vendors, as you cannot be assured of the hygiene practices kept in mind while cleaning and cutting it.
FAQs
1. Does Eating Pineapple While Breastfeeding Make My Baby Gassy?
Eating acidic fruits like pineapple, citrus fruits, and tomatoes can sometimes lead to gas in mothers. Importantly, it’s worth noting that this gas typically doesn’t transfer to the baby through breast milk, so it’s less likely to affect the infant.
2. Can Consuming Pineapple While Breastfeeding Make My Baby Sick?
No conclusive evidence exists to indicate that eating pineapple while breastfeeding would adversely affect the health of a nursing infant. In fact, incorporating pineapple into your daily diet can offer potential advantages for both you and your breastfeeding baby. Nevertheless, if you have uncertainties, you may consider introducing pineapples into your diet and monitoring your baby’s response over a few days. If your baby exhibits any adverse reactions, it’s advisable to consult your healthcare provider and eliminate pineapple from your dietary choices.
The connection between pineapple juice and breastfeeding might not make sense early on since every fruit seems to bring only benefits to the one who eats it. By knowing the right time to eat it and the right way to consume it, a nursing mother can derive benefits from it while ensuring the well-being of her child.
References/Resources:
1. Food Data Central: Pineapple; U.S. Department of Agriculture; https://fdc.nal.usda.gov/fdc-app.html#/food-details/169124/nutrients
2. Pavan. R, Jain. S, Shraddha; Kumar. A; Properties and Therapeutic Application of Bromelain: A Review; PubMed Central; https://www.ncbi.nlm.nih.gov/pmc/articles/PMC3529416/; December 2012
3. Gordon. B; Nursing Your Baby — What You Eat and Drink Matters; Academy of Nutrition and Dietetics; https://www.eatright.org/health/pregnancy/breastfeeding-and-formula/nursing-your-baby-what-you-eat-and-drink-matters; April 2022
4. Eglash. A; Breastfeeding While Taking High Dose Vitamins; Institute for the Advancement of Breastfeeding & lactation Education; https://lacted.org/questions/0147-high-dose-vitamins-breastfeeding/; June 2019
5. Cervo. M, Llido. L, Barrios. E, Panlasigui. L; Effects of Canned Pineapple Consumption on Nutritional Status, Immunomodulation, and Physical Health of Selected School Children; PubMed Central; https://www.ncbi.nlm.nih.gov/pmc/articles/PMC4258310/; November 2014
6. Jeong. G, Park. S, Lee. Y, Ko. S, Shin. S; Maternal food restrictions during breastfeeding; PubMed Central; https://www.ncbi.nlm.nih.gov/pmc/articles/PMC5383635/; March 2017
7. Nutrition and You… Pineapples; Ohio State University; https://fcs.osu.edu/sites/fcs/files/imce/PDFs/SNAP_Ed_newsletter_pineapples.pdf
8. Pregnancy and breastfeeding; NZ Nutrition Foundation; https://nutritionfoundation.org.nz/healthy-eating/pregnancy-and-breastfeeding/
Also Read:
Eating Banana during Breastfeeding
Consuming Jackfruit in Breastfeeding
Why You Should Eat Papaya when Breastfeeding
Read more
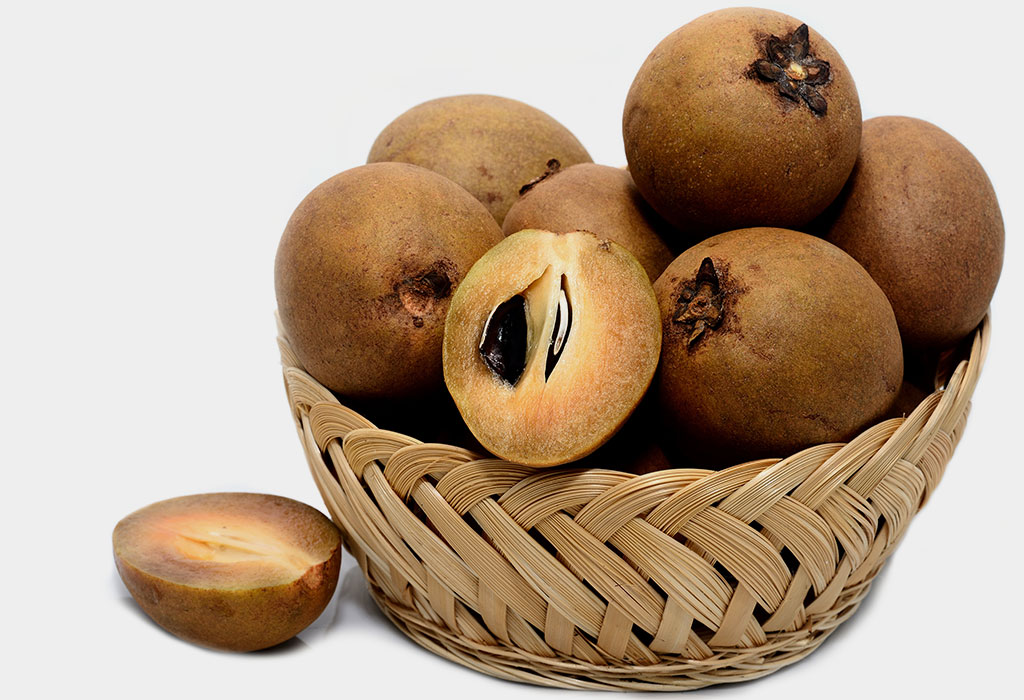
Chikoo (Sapota) for Babies – Health Benefits and Recipes
Chikoo, a delicious pulpy fruit, is widely popular and enjoyed by everyone. It is also known as sapodilla or sapota, but the name “chikoo” is more popular in the Indian subcontinent. The fruit is yellow or brown in colour, soft, sweet, and has a grainy texture. It consists of simple sugars such as fructose and sucrose, and considerable amounts of immunity-boosting nutrients. Chikoo, therefore, is also known as a super fruit.
Although the fruit has been popular since time immemorial, one question bothers many parents, and that is whether their children can eat it, especially if they are infants. If this question has been on your mind, you will find this article pretty useful. Here, we have put together information about the fruit, when it can be fed to a baby, along with its health benefits and side effects. Read on to know more.
Is Chikoo Good for Infants?
Yes, chikoo is safe for infants. It has many health benefits, such as strengthening the immune system and easing bowel movement. You can include this fruit in your baby’s diet along with other solid foods once he is ready to be weaned on to solids.
When Can You Introduce Chikoo to Your Baby’s Diet?
You can introduce chikoo in your baby’s’ diet once he turns 6-months-old. This fruit is usually recommended for its rich nutritional value, which we shall talk about in the next section, its taste and texture. Start with a soft chikoo mash and slowly proceed to a pulpy mash before your little one is ready to relish the fruit as is.
Nutritional Value of Chikoo
Chikoo is a highly nutritional fruit. Here is the nutritional value per 100 grams of fruit.
Nutrition Constituent
Nutritional Value
Energy
73 Kcal
Fat
1.26 g
Carbohydrates
13.9 g
Dietary Fibre
9.6 g
Protein
0.92 g
Cholesterol
0 mg
Vitamins
Niacin
0.200 mg
Riboflavin
0.03 mg
Thiamin
0.01 mg
Vitamin A
13.45 MCG
Vitamin C
20.96 mg
Vitamin B6
0.12
Folate
10.83 µg
Electrolytes
Sodium
4.61 mg
Potassium
280 mg
Minerals
Calcium
17.87 mg
Magnesium
16.19 mg
Copper
0.07 mg
Zinc
0.18 mg
Selenium
0.39 µg
Phosphorous
22.26 mg
Iron
0.49 mg
Source: The values in the chart above are based on a study conducted by the IFCT, Indian Council of Medical Research.
Health Benefits of Chikoo Fruit for Babies
Babies love anything that tastes sweet. Chikoo is one of them, but along with its rich taste, there are some amazing sapota benefits for babies that make it a good choice of food for them. Read on to find out how chikoo is beneficial for babies:
1. Improved Digestion
Chikoo is highly recommended for babies as it has a rich in fibre content. Eating the fruit helps improve digestion and relieve constipation. Pureed chikoo can be an excellent home remedy for your baby if he is suffering from constipation.
2. Improved Physical and Mental Growth
Chikoo is a rich source of Vitamin A and C. Vitamin C boosts immunity, Vitamin A improves eyesight, while Vitamin B6 helps in the development of the baby’s brain and controls the haemoglobin levels. It even helps in the production of RBCs. Including chikoo in the baby’s diet while he is transitioning to solid foods will ensure he gets the nourishment he requires for his physical and mental growth.
3. Cures Cold and Cough
Chikoo contains expectorant properties which, from a medicinal point of view, makes it a useful fruit to feed your baby if he is suffering from cough and cold. It can provide relief from congestion in the chest too.
4. Provides Energy
Chikoo is a good source of minerals like potassium, iron, calcium, and copper. It is also a great source of folate and niacin. The combination of all these minerals and vitamins help provide enough energy and strength required by your baby.
5. Helps the Body Fight Free Radicals
Chikoo is a good source of antioxidants, which are necessary for infants as they help prevent cell damage. The free radicals that are produced during metabolism are counteracted effectively with the help of antioxidants.
6. Stronger Bones
Chikoo is rich in calcium, potassium, and iron. Calcium helps in building stronger bones, while iron and potassium provide babies with energy required during development and growth.
7. Strengthens the Immune System
Chikoo is rich in Vitamin C, which helps in maintaining stronger immunity and enhancing the iron absorption process in the body. Feeding your baby chikoo regularly will help in building a strong immune system.
Now that you know that chikoo can be included in your baby’s diet if he is over 6 months old, you must also be aware of the precautions you need to take before you feed the fruit to your little one. Read on to know more.
Precautions to Take While Feeding Chikoo to Infants
Although chikoo is found to be beneficial for infants, certain precautions should be taken while feeding them this delicious and nutritious fruit.
Serve peeled chikoo to your infants and ensure you remove all the seeds.
If your baby doesn’t have teeth yet, it is better to puree the fruit and then feed it to him. This will also ensure better digestion.
Only feed ripe chikoo to your little one as it will be easy for him to swallow and digest. Eating raw chikoo could also lead to irritation in the throat, choking or breathing problems.
Do not feed rotten chikoo to your baby. If the fruit looks smashed or has a foul odour, it is rotten. Choose only the fruits that have a firm outer surface and smell fragrant. The fragrance denotes the fruit is ripe.
It is recommended that you store the fruit in a cool and dry place.
Ensure you feed chikoo to your baby in limited quantities, as excessive consumption could lead to digestive problems.
Although healthy, chikoo has some side effects, which can be prevented with a little care. Let’s take a look at them too.
Side Effects of Chikoo in Infants
Chikoo is rich in nutrients, but it can also cause side effects in certain cases. Here are some of them:
Overeating the fruit can also lead to indigestion, diarrhoea, and abdominal pain.
Eating raw chikoo can lead to throat irritation.
When not removed properly, chikoo seeds may lead to choking in infants.
When it comes to babies, you’d find yourself thinking and wondering about how to feed them different foods. If you have the same concerns about feeding chikoo to your little one, here are some recipes that can make your life simple.
Easy to Make Chikoo Recipes for Babies
The recipes given below are not only delicious but also very healthy for your baby.
1. Chikoo Milkshake for Babies
This delicious protein drink is highly recommended for babies older than a year who have been introduced to cow’s milk. This recipe is also a great addition to your toddler’s diet. You may choose to add or skip some ingredient if your baby is too young to have them or is allergic to them.
Ingredients
Milk – 1 ½ cup
Chikoo Fruit – 2, fresh and ripe
Sugar – 1 tablespoon
Soaked Dry Fruit – 3 to 4 tablespoons, finely chopped cashew (optional, can be excluded if your baby is allergic to nuts)
Ice cubes – 2 cubes (optional)
How to Prepare
Mix all the ingredients, except the ice, and blend them till it forms a smooth paste.
Pour in a glass and add the ice cubes.
Feed it fresh.
2. Chikoo Puree for Infants
Chikoo puree is extremely easy to prepare and highly recommended if your baby’s teeth have not developed yet.
Ingredients
1 Chikoo
How to Prepare
Cut the chikoo into two equal parts.
Take out the seeds.
Mash the fruit in a bowl with the help of a fork. You can also blend it in a blender to make a smooth paste.
3. Chikoo Porridge for Babies
Chikoo enhances the taste of regular porridge for babies and is highly nutritious.
Ingredients
1 Chikoo
50 grams porridge powder
Water – 1 cup
How to Prepare
Cut the chikoo in half and scoop out the pulp.
Mash the pulp using a fork.
Pour water in a pan and bring to a boil.
Add the porridge powder to it and cook.
Add the mashed chikoo to the porridge and mix well.
Simmer for 2 minutes. The porridge should be cooked thoroughly.
Cool and feed to your baby.
4. Chikoo Halwa for Toddlers
This halwa is easy to prepare, and sure to become a favourite for your toddler.
Ingredients
1 Chikoo
Ghee – 1 tablespoon
Milk – 1/4 cup
Sugar – 1.5 tablespoons
Soaked Dry Fruit – 3 to 4 tablespoons, finely chopped cashew (optional, can be excluded if your baby is allergic to nuts)
How to Prepare
Wash the chikoo, and remove the skin and seeds. Mash well.
Heat ghee in a pan, and add cashews. Fry until golden, and keep aside.
Add the mashed chikoo to the pan and cook for a minute.
Pour milk to the pan and mix well. Cook on medium flame, stirring occasionally until it becomes thick.
Add sugar and cook further for a few minutes.
Pour the remaining ghee and cook until everything comes together and ghee oozes out on the sides.
Garnish with the fried cashews and serve warm.
How to Prepare Chikoo for Baby-Led Weaning?
Weaning is a bitter-sweet moment in every mother’s life. However, watching your little one grow up and explore different textures and flavours makes it worth the while. Chikoo is a great option, as it has a mild and sweet flavour that goes with different ingredients. Here is how you can use chikoo for baby-led weaning.
1. For 6 to 9 Months
When it comes to babies between 6-9 months, the best way to start off is with chikoo puree. All you need to do is cut and blend chikoo to make a puree, and feed it to your baby.
2. For 9 to 12 Months
You can easily feed your child chikoo porridge at this age, as porridge would already have been introduced in his meal plan. Simply add mashed chikoo to porridge, and your simple chikoo porridge is ready to be devoured.
3. For 12-24 Months
A great option for this age group is chikoo milkshake, as your baby would be acquainted with the taste of cow’s milk by now. All you need to do is blend mashed chikoo, sugar, milk, and dry fruits in a blender, and your chikoo milkshake is ready.
4. For 24 Months and Up
Chikoo halwa is a great option for this age group, as they will love the sweet taste and soft consistency. This is also a great way to experiment with flavours like cashews and coconut, as it is versatile. Make sure you check for any allergies before feeding to your child.
FAQs
1. Can Chikoo Cause Choking Issue in Babies?
Chikoo has a rough skin on the exterior, and seeds on the interior. If these are not removed properly, it could become a choking hazard. Hence, ensure that you remove the skin and seeds, and mash the chikoo well before feeding it to your baby, to avoid any choking hazards.
2. Can Babies Be Allergic to Chikoo?
Chikoo isn’t found to pose any allergic reactions to babies, so it is safe to feed it to your child. However, just to be sure, follow all the precautions and check for an allergy before you start feeding chikoo regularly to your baby.
Chikoo is one of the tastiest and most nutritious fruits that you can feed your baby. Now that you know almost everything about it, you can either cut slices of the fruit, puree it, or prepare a milkshake to suit your baby’s requirement. This magical fruit can be fed without hesitation as long as you ensure it is ripe and edible.
References/Resources:
1. Singh. P, Rathore. M , Prakash. H; Studies on Nutritional, Pharmacological and Health Importance of “Chikoo” (Manilkara Zapota L.); International Journal of Science and Research (IJSR); https://www.ijsr.net/archive/v10i3/SR21319173103.pdf; March 2021
2. Bangar. S, Sharma. N, Kaur. H, et al.; A review of Sapodilla (Manilkara zapota) in human nutrition, health, and industrial applications; ScienceDirect; https://www.sciencedirect.com/science/article/abs/pii/S0924224422001844; September 2022
3. What to feed your baby; NHS; https://www.nhs.uk/start4life/weaning/what-to-feed-your-baby/around-6-months/
4. Baby-Led Weaning: What You Need to Know; Cleveland Clinic; https://health.clevelandclinic.org/baby-led-weaning/; October 2021
5. Healthy Eating for 6 to 24 month old children (1) Getting Started; The Government of the Hong Kong Special Administrative Region; https://www.fhs.gov.hk/english/health_info/child/14727.html; March 2023
Also Read:
Green Beans for Babies
Are Bananas Good for Infants
Introducing Grapes to Babies
Read more

Inherited Traits – Passing Traits From Parents to Children
When you see a trait that your child exhibits that is similar to something you possess, know that this isn’t just some random coincidence. Traits are inherited and passed from parent to child through their genes. Some are passed from the mother and some from the father. Others depend on what traits are most prominent in both parents, if they are dominant traits and if they run in the family. In this article, we will cover everything you need to know about the passing of traits from parents to offspring, what are inherited traits and more!
What Are Inherited Traits?
Let’s understand inherited traitis meaning in an easy way. In a baby, there are certain traits belonging to both parents that the baby will adopt. The baby might have the father’s nose or the mother’s mouth. The genes of both parents influence what traits and characteristics the baby will have, and these are called inherited traits.
Role of Genes in Inherited Traits
Children inherit genes from both their mother and father. What we see in the end is the dominant set of genes or dominant genes. Boys have one X and one Y chromosome, while girls have two X chromosomes. The X chromosome contains more genes than the Y chromosome, and hence girls will have double the opportunity to exhibit dominant genetic traits inherited from their parents than boys. For example, a boy may inherit a blood disorder called haemophilia, while his sister will still carry the gene even if she does not have the disorder herself.
What Is the Difference Between Inherited Traits and Acquired Traits?
Let’s see the difference between inherited traits vs acquired traits with examples of inherited traits and the other one to understand them both better (1).
Inherited Traits
Acquired Traits
Inherited traits are the features that a person inherits from their biological parents.
Acquired traits are the features or behaviours that a person acquires over their life.
These are passed down through generations through DNA and genetic material.
These traits are not passed down from generation to generation, and each individual develops their own traits.
These traits are dependent on the laws of inheritance.
These traits are dependent on the individual’s environment.
There are many physiological and behavioural elements that can be determined through inherited traits.
It is difficult to pinpoint any characteristics of an individual unless one knows their environment.
Examples: Hair, Skin, Height
Examples: Likes, Dislikes, Cooking Skills
What Traits Are Inherited From Mother Only?
So what traits are inherited from the mother and what from the father? Let’s look at a few genetic traits inherited from the mother below:
1. Left-handedness
Being left-handed is pretty rare, so the genes responsible for this trait are also quite complicated. If the baby’s father is left-handed, there is a slight chance the baby might be too, but if his mother is left-handed, then the possibility increases exponentially. This is one of the fine instances of inherited traits from mothers. If both parents are left-handed, the baby will be too. Also, if all the people on the mother’s family tree are left-handed, the baby will inherit this trait. There can be other personality traits inherited from the mother.
2. Blood sugar
Diabetes is something that is quite easily inherited from parent to child (2). If the mother carrying a baby was suffering from diabetes pre-pregnancy, her baby could have it too. If the woman can keep her diabetes well under control and blood sugar levels stable during and before pregnancy, she can still deliver a healthy baby. If she has Type 1 diabetes, there is a chance the baby can have low blood sugar soon after birth and for the first few days.
3. Sleeping Style
According to a 2023 study published in the Journal of Child Psychology and Psychiatry, it was found that children with a genetic predisposition towards insomnia experience more sleep issues similar to insomnia, while those with a genetic tendency for extended sleep show longer sleep durations but also tend to be more awake at night during their teenage years (3). The mother’s genetics seem to play a huge role in the baby inheriting sleep traits like tossing or turning, and insomnia. But this can also be because most mothers sync their nap time with their babies during the first few months post-delivery.
4. Lyme Disease
Lyme disease is a rare inflammatory disease caused by ticks. It is serious but not life-threatening. If a woman is pregnant and has Lyme disease, she can pass it onto her unborn baby. For a baby, Lyme disease is quite fatal so take measures to avoid contracting it before pregnancy to keep your baby safe.
5. Drug Addiction
Addiction can play a huge role in genetics and DNA sequencing. A 2021 study published in Translational Psychiatry compared siblings and observed the links between maternal alcohol consumption during pregnancy and emotional difficulties in their children (4).
For example, if the mother takes heroin during her pregnancy, it will pass to the baby through her bloodstream. Due to this, the baby will be addicted to heroin when he is born and will have trouble with withdrawal symptoms. Taking heroin while pregnant also increases the chances of premature birth or stillbirth.
6. HIV/AIDS
Mothers who have HIV can pass it on to their unborn babies. If she doesn’t pass it to her child during pregnancy, the child can still contract it via breastfeeding or exchange of body fluids.
7. Mutations
Mutations usually occur when DNA splices itself and comes back together in a slightly different form. Mutations are influenced by the parents’ genes; if the mother has a mutation, it might be passed on to the child or might manifest the same way.
8. Hashimoto’s Disease
This disease happens when the body’s immune system attacks the thyroid. Hashimoto’s disease is often passed down from the mother or someone in her family tree. If a mother has some thyroid issues or Hashimoto’s, the children need to be checked as well.
9. Hair Type and Colour
Dominant and recessive genes play a huge role in determining hair colour and type. There is more chance that the baby will inherit the mother’s dominant gene for hair colour and texture.
10. Huntington’s Disease
This is a very serious disorder which causes a slow breakdown of the nervous system. It gets transferred from mother to child, and there is no real cure. The only prevention is to make sure never to take in any toxins during pregnancy.
11. Mitochondrial Diseases
Mitochondrial DNA is inherited from the mother, and hence any diseases related to the mitochondria are also inherited from the mother (5). These diseases can be caused by any mutation or defect in the mitochondrial DNA. These usually appear at birth and can affect almost every organ of the body, including the liver, heart, and brain.
12. Eye Conditions
Recent studies suggest that a person’s eyesight and eye structure are inherited from their mother, and so, any eye conditions that the mother has can be passed on to the offspring too.
What Traits Are Inherited From the Father Only?
Below is a list of traits inherited from father to child:
1. Eye Colour
Dominant and recessive genes play a role in determining the eye colour of the child. Dark-coloured eyes are dominant and light coloured eyes are recessive. The baby can have the father’s eyes if they are the dominant colour between both parents (1).
2. Height
If the father is tall, there is a greater chance for the child to also be tall. If the mother is short, the child may grow to be the same height as her. It just depends on the genetics of both parents.
3. Dimples
Dimples can be a trait that babies inherit from their fathers, as it is a dominant trait. It is categorised as a facial deformity, but it looks adorable on anyone and everyone.
4. Fingerprints
No two humans’ fingerprints are the same, and even children will not share fingerprints with either parent. Even identical twins with the same DNA have different fingerprints (6). But among the genetic traits inherited from the father, the genetic component of fingerprints is most definitely included. Fingerprint patterns between the father and child may not be identical, but extremely similar.
5. Lips
When it comes to lip structure and the size of the baby, the father’s genes come into play. Full lips are a dominant trait which the baby can be born with if his father has the same.
6. Sneezing
This has a name, the ‘Achoo’ syndrome – sneezing when someone looks directly into bright light. If the father has this syndrome, then the baby will also exhibit it as it is a dominant genetic trait.
7. Tooth structure
Among the physical traits inherited from father, tooth structure is hereditary. There is a gene which determines the gap which comes between teeth. If the father has a gap tooth, it is very likely that the baby will have one as well.
8. Mental disorders
Both parents can pass on mental health issues to their children, but studies show that if the father is older and has a mental disorder like schizophrenia, autism spectrum disorder, or ADHD, it can be passed on to the child as well (7).
9. Heart problems
Babies can inherit a gene from their fathers that can increase the risk of coronary heart disease. This is due to the unique genetic makeup of a father who has that gene.
10. Infertility
Studies show that men who have low sperm count and have undergone in-vitro fertilisation can pass their infertility trait to their sons. Recent research has stated that infertility is among the genetic traits inherited from the father.
11. Biological Sex
This is probably the most important thing you will inherit from your father. Fathers have XY chromosomes, which eventually decide the child’s sex. A sex chromosome pairing of XX leads to a female offspring, while a XY pairing of the sex chromosomes leads to a male offspring.
12. Storage of Fat
Genetics play an important role in how our body looks and functions internally. However, researchers have suggested that the father’s adipose tissue has a bigger role in passing on excess fat to the offspring.
FAQs
1. How are traits passed from parents to children?
Traits are passed through different genes working together, located on chromosomes (8). A child receives a full set of 23 chromosomes from each parent. The National Human Genome Research Institute (NHGRI) explains that genes carry instructions for physical and biological traits.
2. Do babies inherit more from the mother or the father?
Genetically, children inherit equal DNA from both parents. However, some traits (like mitochondrial DNA) come only from the mother (9).
3. Can personality traits be inherited?
Research shows genetics influence temperament and behaviour, but environment also plays a major role. According to the National Institute of Mental Health (NIMH), behaviour is shaped by both genes and life experiences.
4. What role do dominant and recessive genes play?
Dominant genes express traits even if only one copy is present, while recessive traits require two copies. We can understand bt this example: The brown eye allele (B) is dominant over the blue eye allele (b). Therefore, if you possess one brown eye allele and one blue eye allele (Bb), your eye colour will be brown. This is also true if you have two brown eye alleles (BB). Conversely, if you inherit two recessive alleles (bb), your eye colour will be blue (10).
Parents might worry about their children inheriting the same genetic disorders as them. Educating yourself about your family history health is a good step before deciding to have children. Using this information, you can check for any red flags or see what options are available to discuss with your doctor.
Also Read:
Role of Parents in Child Development
Characteristics and Traits of Gifted Kids
Impact of Nature and Nurture on Child Development
Read more
Amazing Nursery Organization Ideas and Tips
Even the most organized parents and caregivers may get overwhelmed by baby clutter. (It is conceivable that it multiplies rapidly.) And that’s completely understandable – you’re so busy being the center of your child’s world that things are going to get a bit out of hand at times! Whether you’re dealing with a poop-losion and looking for diaper wipes in the middle of the night, it’s all too easy to become overwhelmed, especially when sleep deprivation is combined with an inability to locate what you’re looking for.
Video : 10 Best Tips on How to Organise Your Baby’s Nursery
Having said that, although life with a newborn may undoubtedly be chaotic, there are methods to maintain order by looking through newborn closet ideas and nursery dresser organization ideas. Utilize these space-saving techniques such as bookshelf ideas for nurseries to create a more orderly nursery quickly.
Best Ideas for Organizing Nursery Closet
Have you recently had a baby? We don’t need to emphasize how crowded and unorganized the nursery becomes with baby things, clothing, and other necessities. What you need to assist you with that new parenting job are these oh-so-clever ideas for small nursery and DIY nursery storage ideas that make the baby room seem more lovely than ever while also keeping everything easily accessible.
1. Organize your diapering materials
Your changing-table routine will be more efficient, which will make life easier for both you and your child. Make the most of your time by having everything you may need on hand. Keep diapers, wipes, and creams in a basket or caddy, along with a cloth diaper or rag in case there are any unexpected accidents to clean up.
SOURCE: PINTEREST
2. Makeover the clothes in your child’s closet
The temptation to hang onto every bib and little onesie you’re given is strong, but you’ll likely end up with much more than you need. If your child’s wardrobe is bursting at the seams with clothing, put any excess away for your next child or give them to a women’s refuge. It’s important to remember that you shouldn’t require more than a week’s supply of anything.
3. Decorate the nursery differently each season
While all of those handmade blankets and framed pictures are definitely worth preserving, you don’t have to put them all on display at the same time – after all, who wants to spend all of their free time cleaning and organizing? With this, you can turn the closet into a nursery. Partition your seasonal décor into four piles, then rotate among them as the seasons and holidays change.
SOURCE: PINTEREST
4. Look for a crib that has storage space built-in
Even though babies are small, their possessions vary from bite-sized to gigantic — and there is more than enough of them. To save space, look for a crib with additional storage (like one with shelves or drawers) where you can store extra crib sheets or bulk purchases, such as backup diapers.
SOURCE: PINTEREST
5. You can adorn open shelves with baskets
Wide shelves are ideal for storing baby toys and books – provided you have the time and energy to arrange everything perfectly. Line shelves with canvas bins and fill them with anything you choose for uncomplicated storage. A bonus is that when children are a little older, it is simple to keep this arrangement tidy.
6. Stock and back stock should be kept in different locations
It may seem a brilliant idea to keep your whole supply of a particular item or commodity in one place, but this is a mistake. Few helpful nursery drawer organization ideas include certain goods, particularly disposable items, like diapers and toiletries, that you must have quick access to but do not need to have your whole supply within reach at all times.
SOURCE: PINTEREST
7. Build the baby’s closet from top to bottom
If the clothing in your newborn’s closet used to be for adults, redesign it to accommodate a pint-sized collection. You may increase the amount of room in your closet by installing second clothes rod a few feet below the existing one. Increase the amount of overhead space available by installing additional shelves, which are ideal for storing items you will keep for a long time.
SOURCE: PINTEREST
8. Rearrange things according to who has access
If you decorated your baby’s nursery when you were pregnant, you’ve undoubtedly realized that some of your pre-baby choices aren’t serving you as well as they might. If this is the case, read on. Perhaps the backup diapers are kept too far away from the changing table, or the sound machine is kept on a low shelf where the baby can now easily reach. If you want to save time in the long term, consider scheduling an afternoon for a fast rearrangement based on what you often use.
SOURCE: PINTEREST
9. Make use of the resources you currently have
The most effective organizational tools are often things that you already have. That over-the-door shoe organizer you never use? It’s time to throw it out. Instead of socks, loveys, and ribbons, use such organizers to store them. Don’t want to spend the money on a glider? The old chair in the basement may be just what you’re looking for. Once you start searching for items that can serve two purposes, you’ll see that they’re all over the place.
SOURCE: PINTEREST
10. Maximize the available space
Save space in the baby’s room by working smarter, not harder. For instance, can you store your child’s dresser inside the closet to provide more floor room for playing and reading? Could you position a floor light behind the glider instead of in the center of the room? Being inventive with the arrangement may make a significant impact.
SOURCE: PINTEREST
If you follow these Organization and Relocation principles, you may create the structured nursery of your dreams. Now that all of your baby items are organized, you don’t have to hunt for anything or go out of your way to get anything. We hope that this article helps you go through your transition phase.
Also Read:
Baby Nursery Rhymes with Lyrics
Amazing Woodland Themed Nursery Ideas
Gender-Neutral Nursery Ideas for Your Child’s Room
Read more

When and How to Stop Co-sleeping With Your Child?
It is strongly recommended by the American Academy of Pediatrics (AAP) that no one, even newborns under the age of four months, should sleep in the same bed as their parents. Keep reading to know at what age to stop co-sleeping with your child.
What Is Co-sleeping?
Co-sleeping is described as sleeping near one another, sometimes on the same bed, and more often in the same room.
Why Parents Co-sleep With Their Babies or Toddlers?
For new parents, co-sleeping is the practice of sleeping in the same room as the baby. The risk of a sudden unexpected death, such as Sudden Infant Death Syndrome (SIDS), and fatal sleeping accidents, is increased when two people sleep together. Parenting is a very personal decision, and many parents choose to sleep in the same bed with their babies for various reasons.
Reasons Why You Might Want to Stop Co-sleeping
Taking a step back and assessing the reasons to wean off co-sleeping with your child can assist you in determining whether to discontinue. While the reasons for quitting co-sleeping vary in every household, there are some common ones. Read and learn the reasons behind stopping co-sleeping.
Hazardous activity: Co-sleeping might be dangerous, depending on your approach. Co-sleeping should be avoided if you or your spouse routinely use sedatives.
Physically, it may be harmful: As your child gets older, babysitting becomes more challenging. You may get aches and pains in the morning due to an overly heated bedroom and bed.
Perhaps you will remain awake: Depending on how your child sleeps, you and your spouse may not get enough sleep, resulting in experiencing constant fatigue.
Sheets get damp: While some children have more difficulty than others, all kids urinate in their beds as they grow up. It may be rather infuriating to sleep with a bed wetter.
Daytime proximity: Apart from nocturnal naps, your child may need your proximity during daytime naps. This is more difficult if you are not at home throughout the day or if your child is in preschool. If this pattern develops, stop co-sleeping.
Sleep schedules may be erratic: Your child’s bedtime may vary after 8 p.m., and you and your spouse may elect to stay up longer. Therefore, if you can no longer co-sleep, you may need to discontinue.
When to Stop Co-sleeping?
When does co-sleeping with your children end? As you may imagine, almost every family has a unique answer to this question. It is a trial and error to determine the most comfortable time for you and your kid to stop co-sleeping.
The following are some reminders to help you choose the optimal moment to cease co-sleeping with your child. Continue reading if you’re debating whether or not to put an end to this behavior in your household.
Take into account your and your spouse’s emotions. Perhaps you’d want to sit down with your spouse and discuss your existing sleeping arrangements.
Take into account your child’s emotions. Infants cannot express their feelings about co-sleeping; however, their body language while sleeping and waking reflects their opinions.
Keep an eye out for signals that your youngster is unhappy or too reliant on you or your spouse for aid and guidance.
It’s something you should discuss with your eldest kid. Children old enough to communicate with you may express their preference for co-sleeping with their parents.
Your youngster may dislike it on the first night, so give it a few more attempts.
How Can You Stop Co-sleeping?
To maximize your infant’s or toddler’s chances of relaxing and sleeping well in their bed at night, ensure that step by step guide to stop co-sleeping is set up appropriately.
1. Babies Under 6 Months
Follow the steps to stop co-sleeping with a newborn:
To begin with, if you’ve been sleeping in the same bed as your infant, make sure they have their place in your bedroom (a bassinet, cot, or crib).
Take 10-15 minutes to rock or feed your baby to sleep; then keep them in your arms until they drift off to sleep.
Rock or massage your child softly as they go off to sleep. It is better to do the same whenever they wake up at night.
Your baby may be experiencing the four-month regression between 3 and 6 months.
Their naps and night-time sleep will improve, thanks to self-settling activities. To help your baby relax between sleep cycles, pay attention to the beginnings of naps and bedtimes.
2. Babies Between 6 and 12 Months
Follow the recommendations below when you want to stop co-sleeping with your kids:
You may begin teaching your baby to nap and sleep independently in their bed in your room.
Begin each nap by teaching your kid how to settle independently.
Separate your baby from you and your spouse during night times as soon as possible. You are more than welcome to spend the night helping her through this.
Leave the room and teach your child to calm on their own.
3. 1-year Old Babies
If an older child has been used to being nursed or rocked to sleep, the methods discussed below may help them transition to sleeping on their own.
It is possible to console them with your presence, touch, and voice even if they cannot be fed or rocked to sleep.
While they’re sleeping or napping, put a chair next to their bed and utilize voice and touch to help them unwind.
Lift them and hug them till they calm down; then put them back to bed and do it all over again if necessary.
A progressive reduction in the amount of time you spend touching and singing them to sleep in their bed can help them learn how to settle independently.
Your child may be moved into their room after they are capable of self-settling for naps and bedtimes without your supervision.
4. Toddlers
Follow the steps to stop co-sleeping with toddlers:
Allow them to pick out some new sheets or a soft toy and provide them with a nightlight to help them get some shut-eye.
New sleep associations may establish during the 2-year regression, leading to separation anxiety or nap refusal individuals.
From sleeping near their bed to gradually moving away and eventually leaving the room may be necessary if they suffer from separation anxiety.
Your child may wake up more often because of their newfound independence.
Introduce your child to their separate and room bed gradually.
Is There Any Quick Approach to Stop Co-sleeping?
While there is no right or wrong method to wean off your kid’s co-sleeping habit, your doctor can surely advise you on the most effective techniques to deal with your child’s concerns.
It’s worth examining the following suggestions:
To begin with, keep your toddler’s crib or bed in your room rather than in a separate room. After she’s become accustomed to sleeping on her own, bring the crib back into her room. This will allow them to focus on one change at a time rather than a slew of changes.
Invite your friends over for a night. A sleeping area on the floor, maybe with a cot or sleeping bag, should be set up to help her feel safe. This will gradually get your child accustomed to sleeping alone.
Using the chair approach is an alternative option. Position yourself in a chair near your child’s crib or bed while they settle down for the first time at home. The chair should be moved farther away from her each night until she’s on her own.
Getting some shut-eye is a good start. Your child doesn’t sleep well at night because you don’t want to stay up with them until they do. An alternative strategy would be to let your child take naps in their room at first and gradually transition them to sleeping in their bed at night.
Tips to Stop Co-sleeping
Consider the following co-sleeping transition tips:
Inform your child about your goals: Read to your kid books about fast sleeping newborns and mention how pleased and invigorated parents feel after a good night’s sleep in their cot. The day is filled with fun and activity, while the night is filled with slumber. And praise them whenever possible.
Make a choice: The ideal technique will depend on your family’s and child’s requirements. The closeness of a parent to a baby’s crib may bring comfort to some infants.
Apply ‘cold turkey’ strategy: The ‘cold turkey strategy works wonderfully for some individuals. Your doctor or a child development specialist can assist you in determining the best plan for your child.
Consistency: The most critical aspect is consistency. Determine what is most beneficial for you and your family. Maintain your composure and toughness while your youngster shouts at you.
Plan this ‘major project’ well-ahead: The parents must agree on managing late-night awakenings. When the infant awakens about 4 a.m., you will need help. Bear in mind that this is merely the beginning of your infant’s path to independence and self-reliance.
This article should assist you in determining whether or not to discontinue co-sleeping with your infant. It is critical to ensure your baby’s safety in any co-sleeping setting, regardless of age. Though older children are less likely to be harmed, you should adhere to safety guidelines and regulations. Limitations may be surpassed if one family member no longer desires to co-sleep. That is why everyone’s sleeping arrangements must be agreed upon.
FAQs
1. How Long Will It Take to Stop Co-sleeping?
Co-sleeping is not a permanent arrangement. While reintroducing the crib may need some repetition before it becomes regular, the whole sleep training process often lasts three weeks or more.
2. What If My Baby Gets Sick or Gets a Nightmare?
If you’ve ever had vivid nightmares when ill, you’ve most likely experienced a fever dream. When an adult or kid has a fever, they may have these terrifying and strange dreams. Follow these strategies to reduce your child’s chance of nightmares:
Ascertain that they sleep.
Maintain a positive attitude about the bedtime routine.
Assure your child.
Discover remedies to your nightmares.
Also Read:
Infant Sleeping Positions
Ferber Sleep Method for Baby
How to Make a Infant Sleep at Night
Read more
Chickenpox (Varicella) Vaccine for Babies
Despite the worries we have when a baby gets the chickenpox, modern medicine has ensured that this disease will not cause any long-term harm. It is, however, a disease associated with a lot of inconveniences and unpleasant symptoms for the affected. Keep yourself up to date with the disease symptoms and why you should ensure that your child gets the prescribed dose of the Varicella vaccine.
What is Chickenpox?
Chickenpox or Varicella is a contagious, viral infection. It most commonly afflicts young children and common symptoms include itchy blisters all over the body, fever and loss of appetite. Headaches and fatigue are also symptoms of chickenpox, along with swollen lymph nodes and sore throats.
What Are the Types of Chickenpox Vaccine?
The vaccine is of two types. One is a chickenpox only vaccine, which contains a weak version of the virus. The other one is a combo of vaccines for measles, mumps, rubella and chickenpox.
Who Should Get Chickenpox Vaccine?
Children should get the chickenpox vaccine, and also adults who involved in healthcare and jobs that require them to be near children. Non-pregnant women of child-bearing age are also recommended to get the vaccine. Older children and adults who are living with younger children can also take the Varicella vaccine.
Benefits of Chickenpox Vaccine for Infants
The chickenpox vaccine is very effective and should be administered to young children. Here are some benefits of the vaccine:
98 percent of recipients do not contract the disease.
The risk of contracting shingles, a disease caused by the ‘reawakening if the dormant virus’ is reduced. If it does occur, the severity is less.
Reduces risk of related ailments like pneumonia and skin ailments
With every generation, the disease is less prevalent because of wise adoption of vaccines. Children are now less likely to be exposed to the disease because of the vaccine’s effectiveness.
How Safe is Chickenpox Vaccine for Babies
There are no major risks for babies from the chickenpox vaccine as it prepares their immune system against severe infection. A consultation with a doctor is recommended to check if the baby has certain allergies that may interfere with the treatment.
There may be a bit of soreness and swelling at the place of injection. Getting the vaccine for chickenpox is recommended because it is safer than getting the disease itself, not to mention the inconvenience caused by the latter scenario.
Recommended Schedule of Chickenpox Vaccination
A lot of concerned parents ask when do babies get chickenpox vaccine – the first shot is given when the child is between 12 to 18 months. The second vaccine shot is given when he or she is between 4 to 6 years.
Older children and adults can also be given the vaccine, for them, the time between the two shots should not be more than 4 to 8 weeks.
What is the Cost of Chickenpox Vaccine in India?
The Chickenpox vaccine price in india is around ₹ 1625 – ₹ 2259.
How the Vaccine is Given
Each Varicella vaccine dose is administered by subcutaneous injection and is around 0.5 ml. There are two doses.
Who Should Avoid Getting Vaccine Varicella?
Pregnant women should not get the vaccine, as its effect on the child has not been substantiated. There is a gelatin-free version of the vaccine, for those who are allergic to gelatin. Subjects who suffered an allergic reaction from the initial shot should not go ahead with the next one, and those allergic to neomycin also need to avoid the vaccine.
Others who need to avoid getting the vaccine include those who were involved in a blood transfusion process in the previous five months, patients being treated with steroids, and patients undergoing certain cancer treatments.
Is Varicella Vaccine a Live Vaccine?
The Varicella vaccine, named after the virus that causes chickenpox, is a live vaccine. It is derived from an attenuated sample. Attenuated viruses are very weak, but enough to cause the immune system to respond.
Can You Still Get Chickenpox After Vaccination?
The chickenpox vaccine protects children from future severe infections. Small minorities of children do get infected again, but this is a milder form of the disease, characterized by lower fever, fewer blisters and a very fast rate of recovery.
Are There Any Risks of Chickenpox Vaccine?
There are no serious risks to babies when they contract the chickenpox. In severe cases, side effects of chickenpox vaccine in babies can include bacterial skin infection, pneumonia and swelling of the brain (encephalitis).
It is extremely rare for pregnant women to contract the chickenpox and most of the afflicted recover well with no side effects on the baby.
Chickenpox was so common that it was part and parcel of growing up – it was considered a rite of passage. Now with vaccination and high levels of immunity amongst the population, children do not have to face this so often. It is essential to continue the vaccinations and protect your child from the discomfort and symptoms of the disease.
Disclaimer: Vaccination prices referenced here vary with location. Please consult your paediatrician or registered medical store before making any purchase.
Also Read: A Complete Guide To Diphtheria Tetanus Pertussis (DTaP) Vaccine
Read more
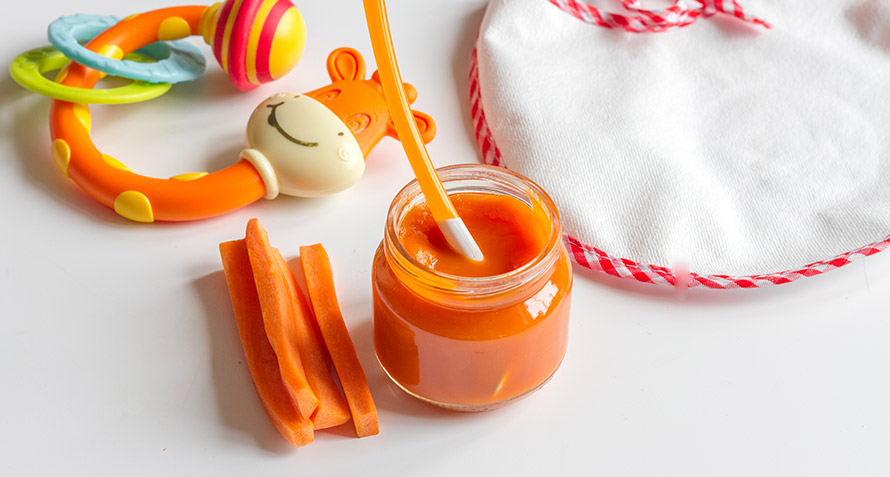
How to Ensure Your Child Gets Adequate Nutrition When in Day Care
Nutrition is a crucial aspect of development and is necessary for maintaining good health and physical & mental development. Ensure that there is no compromise!
As more and more women join the workforce, moms around the world are running around in an effort to manage work and home, all the while ensuring their little one gets the best parenting and care. Everything ranging from food & nutrition, hygiene and discipline needs to be taken care of. While hygiene and discipline can be managed with the help of a day care facility with the progress easy to track, food and nutrition are tough to follow. In such a scenario, how should a mom ensure that her child is getting adequate nutrition in day care?
We list a few ways which might help:
Reviews and Certification
First things first, check the chosen day care of its reputation and certification by a genuine authority. These two aspects will rest you assure of the respect and name that the day care has. An ideal day care should have a 5-star rating only if the nutritional and hygiene aspect is well taken care. Do not compromise on the quality of the day care. When it comes to your child, nothing should be left alone.
Make Nutrition a Top Priority
Keep nutrition a top priority when you choose a day care. Ask for the diet routines from the management. These routines are extremely crucial as you can analyze the complete nutrition cycle for your baby. Look for the cereals and nutrition fruits in the diet. Also, check if there is an adequate amount of fat and carbs. All of it is important as you will not be physically present to monitor the same.
Check Practices
Have a feel around the safe practices that are followed around the day care. Especially the hygiene aspect. What procedures are followed while cooking food All these will impact to a great extent on the quality of nutrition served to your baby. Mishandling food served to your child can adulterate the foods nutritional quality.
Ask What You Need
If you are in need of a thing, you will ask for it! The same principle is applied here in making sure your child gets the right food. Ask for the special diet and service and judge if it will suit your kid. Your child’s needs are not the same as everyone else’s and you need to ensure they are met at all times.
Taking Part
Be involved with the day care facility at a deeper level to ensure the best for your child. Getting involved and meeting them frequently will build a confidence from both the sides- an added benefit for your little one.
Day care centers are external agencies which are committed to your child to a certain extent and are obliged to ensure their healthy development. However, your little one can, at times, get lost among other children. So, the onus is upon you to make sure that child gets adequate nutrition at his daycare.
Read more
Tools And Trackers


.svg)


Sort By
 Latest
 Most Popular
 Trending
Please select atleast one Filter