

















.svg)
.svg)
.png)


Big Kid



Suggested articles for you
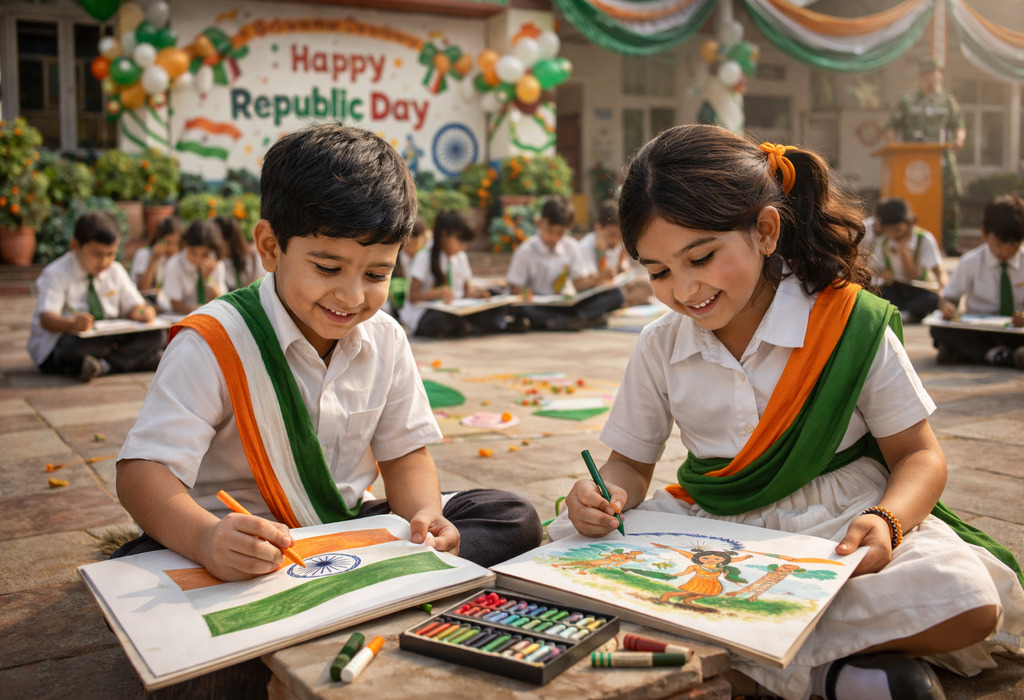
20 Easy & Creative Republic Day Drawing Ideas for Kids to Try in 2026
Republic Day has been, and continues to be, a special occasion for children too. The school corridors waft with shades of crayons and poster colours, and all children want their artwork to be different on the notice board. The day marks more than just a holiday for parents and teachers as well. It is an opportunity to gently introduce children to the idea of freedom, unity, and pride in our country through creativity.
When children sit down to make a Republic Day drawing for kids, they are not just filling a page with colours. They are expressing what India means to them in their own simple way. Some may draw the flag, others may sketch soldiers or monuments they have seen in books or on TV. A Republic Day best drawing may not always be the most perfect one. It is the drawing that comes from a child’s imagination and emotion, even if the lines are a little uneven.
Simple Republic Day Drawing Ideas for Kids
Republic Day drawing activities should be relaxed and enjoyable for young children. When simple concepts are conveyed, children feel more confident and motivated to try themselves. These drawing exercises are meant for happiness expression and positive learning. A calm session helps children connect emotionally with the day and enjoy art naturally, while a painting Republic Day drawing moment often becomes a proud memory for both kids and parents.
1. Indian Flag with Blue Sky
Image Credit: Pinterest
Materials Required
Drawing sheet.
Pencil.
Crayons.
Drawing Steps
Draw a straight flag pole to give the drawing a clear base.
Sketch a flowing flag shape to show gentle movement.
Colour the flag and sky softly to keep it bright and clean.
2. Tricolour Kite Flying
Image Credit: Pinterest
Materials Required
White paper.
Pencil.
Colour pencils.
Drawing Steps
Draw a diamond-shaped kite in the centre for balance.
Add a long string to show the kite flying high.
Fill the kite with orange, white, and green colours.
3. Ashoka Chakra Circle Art
Image Credit: Pinterest
Materials Required
Drawing book.
Pencil.
Blue crayon.
Drawing Steps
Draw a large circle as the main shape.
Add small straight lines inside to form the spokes.
Colour evenly to keep the design simple.
4. Happy Child Holding Flag
Image Credit: Pinterest
Materials Required
Plain sheet.
Pencil.
Crayons.
Drawing Steps
Draw a smiling child figure with simple lines.
Add a small flag in one hand for focus.
Colour gently to keep expressions soft and happy.
5. Red Fort Easy Sketch
Image Credit: Pinterest
Materials Required
Drawing sheet.
Red and brown crayons.
Pencil
Drawing Steps
Draw a wide fort shape using basic lines.
Add small windows and a gate for detail.
Colour lightly without making it crowded.
6. Tricolour Flower Pot
Materials Required
Paper.
Pencil.
Colour pencils.
Drawing Steps
Draw a small flower pot at the bottom.
Add three flowers above it.
Colour each flower using tricolour shades.
7. India Map with Heart
Image Credit: Pinterest
Materials Required
White sheet.
Pencil.
Crayons.
Drawing Steps
Draw the outline of India carefully.
Add a heart in the centre to show love.
Fill the map with tricolour colours.
8. Soldier Saluting
Image Credit: Pinterest
Materials Required
Drawing book.
Pencil.
Colour pencils.
Drawing Steps
Sketch a simple soldier standing straight.
Draw a raised hand to show a salute.
Colour the uniform neatly and calmly.
9. Tricolour Hot Air Balloon
Materials Required
Paper.
Pencil.
Crayons.
Drawing Steps
Draw a big round balloon shape.
Add a small basket below it.
Colour the balloon in three sections.
10. Flying Dove of Peace
Image Credit: Pinterest
Materials Required
Drawing sheet.
Pencil.
White and blue crayons.
Drawing Steps
Draw a flying bird with open wings.
Keep lines smooth and simple.
Colour lightly to show peace and calm.
11. Children Marching Together
Image Credit: Pinterest
Materials Required
Sketchbook.
Pencil.
Colour pencils.
Drawing Steps
Draw two or three children in a line.
Add small flags in their hands.
Colour clothes in bright, happy shades.
12. Tricolour Rainbow
Materials Required
Paper.
Pencil.
Crayons.
Drawing Steps
Draw three curved rainbow bands.
Keep the shapes wide and clear.
Colour with orange, white, and green.
13. National Flag in a Frame
Materials Required
Drawing sheet.
Pencil.
Crayons.
Drawing Steps
Draw a square or rectangle frame.
Add the flag neatly inside it.
Colour carefully within the lines.
14. Republic Day Badge
Image Credit: Pinterest
Materials Required
White paper.
Pencil.
Colour pencils.
Drawing Steps
Draw a round badge shape.
Add Ashoka Chakra in the centre.
Decorate using simple tricolour touches.
15. Tricolour Balloons in the Sky
Materials Required
Drawing book.
Pencil.
Crayons.
Drawing Steps
Draw a few round balloons floating upward.
Add thin strings below each balloon.
Colour balloons using tricolour shades.
16. Smiling Sun with National Flag
Materials Required
Plain sheet.
Pencil.
Colour pencils.
Drawing Steps
Draw a big smiling sun in one corner to add warmth.
Sketch a small national flag beside it.
Colour the sun bright and the flag neatly.
17. India Gate Simple Drawing
Image Credit: Pinterest
Materials Required
Drawing sheet.
Pencil.
Brown and grey crayons.
Drawing Steps
Draw a tall gate shape using straight lines.
Add a small flag on top for identity.
Colour softly to keep the structure clear.
18. Tricolour Butterfly Art
Image Credit: Pinterest
Materials Required
White paper.
Pencil.
Crayons.
Drawing Steps
Draw a butterfly with wide open wings.
Divide the wings into sections gently.
Fill each section with tricolour shades.
19. Republic Day Cap Drawing
Materials Required
Drawing book.
Pencil.
Colour pencils.
Drawing Steps
Draw a simple cap shape.
Add tricolour stripes on it.
Colour cleanly to keep it playful.
20. Happy Family Celebrating Republic Day
Image Credit: Pinterest
Materials Required
Drawing sheet.
Pencil.
Crayons.
Drawing Steps
Draw a small family standing together.
Add a flag in the centre of the group.
Colour faces and clothes gently to show happiness.
Why Are Republic Day Drawing Activities Important for Kids?
Republic Day gives children a gentle way to learn about the country beyond books and speeches. Drawing allows them to understand big ideas like freedom, unity, and pride in a simple visual form. A quiet drawing on 26th January often becomes a meaningful moment of connection rather than just an activity.
Helps children understand national values through Republic Day-related drawings without pressure or memorising facts.
Encourages emotional expression as kids show what the country means to them in their own way.
Builds focus, patience, and fine motor skills while keeping the experience enjoyable.
Boosts confidence when children see their artwork displayed or appreciated.
Creates positive memories linked to national celebrations that stay with them as they grow.
Tips to Help Kids Create Republic Day Drawings
Children feel more confident with art when they know there is no right or wrong way to draw. A calm and patient approach makes the activity enjoyable and meaningful. Whether it is a Republic Day parade drawing or a Republic Day celebration drawing, the focus should always stay on joy and self-expression.
Allow children to choose their own drawing idea and colours freely.
Keep drawing materials organised before starting to avoid distractions.
Stay nearby to support them, but avoid taking control of the drawing.
Appreciate effort and imagination rather than pointing out small mistakes.
Share simple stories about Republic Day to inspire ideas naturally.
Display their drawings proudly to boost confidence and happiness.
Republic Day drawing activities give children an innovative and positive manner in which they could comprehend the significance associated with the event. By drawing, children learn about their feelings and values that relate to their nation without being exposed to overwhelming facts. The significance of drawing also allows children to comprehend their feelings, which they may not fully understand. When adults allow children to explore their capabilities without correcting them, children feel more self-assured. Such instances associated with creativity create lasting memories that relate to events concerning the nation. With time, children learn to develop their association with values through various practices. Most importantly, Republic Day drawings for children teach them that learning can be an artistic and creative process.
Also Read:
Republic Day Quiz for Kids
Republic Day Poems in English for Kids
Republic Day Speech in English for Students and Kids
Read more




120+ Disney Jokes for Kids That Spark Laughter
Children have a natural sense of wonder, and the simplest joke can light up their entire day. When humour is paired with your kiddo’s beloved Disney characters, the humour is tenfold. From Mickey’s cheerful personality to Olaf’s silly one-liners, Disney characters have always had a way of lighting up our spirits with laughter and joy. Sharing Disney jokes for kids induces tons of laughter and also strengthens the bond with children. If you are looking for some lighthearted entertainment during car rides or hoping to sprinkle fun into story time with your students, Disney-themed humour is just the right thing. These jokes are playful, age-appropriate, and easy for children to remember and retell, making them perfect for keeping everyone smiling.
Classic Disney Jokes for Kids
Nothing warms our hearts like watching kids erupt in giggles over a playful joke, especially when their favourite Disney characters are involved. Check out these classic Disney jokes for kids designed to spark laughter at home, in the car, or anywhere you want to see a smile. Sharing these jokes is one of my favourite ways to turn an ordinary day into a memorable moment.
Why did Mickey bring a pencil to the party?
He wanted to draw something fun.
How does Goofy fix a flat tyre?
With a little Goof-Off glue.
What song does Elsa sing when she can’t find her shoes?
Let it go and let it flow.
Why does Donald Duck like rainy days?
He enjoys a good splash.
What does Simba pack for school lunch?
A lion’s share sandwich!
Why did Minnie put her clock in the refrigerator?
She wanted a cool time.
What’s Woody’s best subject in school?
Toy-ology!
How does Cinderella keep her shoes so shiny?
She uses fairy polish.
Why does Olaf always carry a notebook?
He loves making cold notes.
What game does Pluto play at the park?
Catch the stick.
What did Buzz Lightyear say to the stuck door?
This door needs a space ranger.
Where does Ariel go on weekends?
She visits her shell-ter.
How does Tiana serve her pancakes?
With extra hop.
What does Rapunzel use to brush her hair?
Her favourite tower comb.
Why did Moana bring sunscreen to the beach?
Because the ocean calls, but the sun shines.
Why is Belle always borrowing books?
She wants to read a happily ever after.
What is Stitch’s favourite greeting?
Aloha with a laugh.
Why does Dory like puzzles?
She enjoys finding the pieces.
What kind of music does Mufasa like?
Anything with a roar.
What does Aladdin use for cleaning?
A magic rag.
How did Peter Pan learn to fly?
By thinking light thoughts.
Why is Pocahontas good at camping?
She always finds the right path.
What is Snow White’s favourite fruit?
Dwarf apples.
Why does Lightning McQueen hate red lights?
He prefers to keep racing.
Where does Elsa keep her savings?
In a snow bank.
AI-Generated Image
Funniest Disney Jokes for Kids
Sharing the funniest Disney jokes for kids always feels like sprinkling happy dust in the air. Kids light up when they spot their favourite princess, fairy, or Mickey Mouse in a silly new light. These jokes are friendly, easy to remember, and perfect for those storytelling moments at bedtime or rainy days inside. Using characters from Frozen or The Little Mermaid, each joke below is new, keeping things fresh and sparking big smiles.
Why did the princess bring sneakers to the dance?
She wanted to run for the crown.
How does a fairy open her favourite book?
With a sprinkle of sparkle.
What does Mickey Mouse take to school?
His ear-book!
What do you call Olaf on a sunny beach?
A puddle with a smile.
Why did the mermaid blush at the party?
She saw the ocean’s current star.
What’s a princess’s favourite homework subject?
Royal-ty math!
Why do fairies never get lost in the forest?
They always follow a twinkle trail!
What’s Mickey Mouse’s favourite snack?
Cheese in the shape of a heart.
How does Elsa make a phone call?
She uses her ice pad.
Where do mermaids like to shop?
At the clam mall.
Why did the fairy wear bright shoes?
Because she wanted to be light on her feet.
What does a princess say to her frog friend?
You make me hoppy!
What is Mickey Mouse’s secret hobby?
Drawing hidden smiles.
What’s Olaf’s favourite board game?
Chill and ladders.
Why do mermaids write messages in bottles?
For shore delivery.
What do princesses eat for breakfast?
Raisins in a royal bowl.
How does a fairy tell her best joke?
With a little pixie puns.
What does Mickey wear when it snows?
His red cosy gloves.
Why did Elsa skip the swimming pool?
She didn’t want to ice it over.
Where can you find a mermaid’s lost comb?
In the wave pool.
What’s the princess’s favourite dance move?
The castle twirls.
Why do fairies make great storytellers?
They always add a bit of magic.
What did Mickey Mouse say at the surprise party?
Oh, Joy! This is Mickey-nificent!
Why does Olaf like winter picnics?
Because he brings the cool snacks.
What do princesses and mermaids both love?
Making days a little brighter.
Each one of these princess, fairy, Mickey Mouse, Frozen, and mermaid jokes is made for real laughter and light moments with kids in mind.
AI-Generated Image
Short and Sweet Disney Jokes for Kids
Short and sweet Disney jokes for kids have a way of sparking instant grins. These are the kind of funny jokes children love to share at the table or whisper during a quiet moment with friends. Quick to tell and even quicker to get a laugh, they bring a little magic to any day.
Why did Mickey eat lunch in the garden?
He wanted some mouse-rooms!
What does Olaf wear to bed?
Frosty pyjamas.
Why did Goofy jump into the pool?
To practice his doggy paddle.
How does a princess clean her room?
With royal effort.
Why did Dory love going to school?
She liked swimming in new ideas.
What did Simba say after a funny joke?
I just can’t wait to be pun.
Where does Belle buy her books?
At the story castle.
Why did Rapunzel look out her window?
She needed a little air.
What is Peter Pan’s favourite colour?
Neverland green.
What does Elsa use to fix things?
Ice tape!
What makes Lightning McQueen go faster?
A speedy smile.
Why is Ariel’s hair always tidy?
She uses sea spray.
Where does Aladdin take his dates?
On magic car-pet rides.
Why does Tiana like green?
She says it helps her hop to it.
What did the fairy use at school?
Pixie pens!
How does Mickey write funny jokes?
With his big, round ideas.
Why does Olaf love art class?
It lets him draw chilly scenes.
What does Cinderella keep under her pillow?
A dream slipper.
Why does Moana like maps?
She loves finding new waves.
What is Woody’s favourite hat?
The sunny side up.
Why does Aurora nap so often?
She’s always dreaming up something new.
What did the seven dwarves eat for breakfast?
Gem toast!
Why does Buzz Lightyear like cookies?
Because they are out of this world.
What does Merida take to archery class?
Her happy quiver.
Why does Pocahontas sing?
It helps the colours of the wind.
Disney Character Jokes for Kids
Disney characters have a special place in the hearts of kids all over the world. Their funny quirks and memorable moments make them perfect stars for jokes that everyone can enjoy. Here are some of the best Disney jokes that bring these beloved characters to life with a playful twist.
Why did Mickey bring a ladder to the party?
Because he wanted to reach the high notes.
What do you call Donald Duck when he wins at cards?
A quacking champion.
Why does Goofy always carry a map?
Because he is great at getting lost.
How does Elsa cool down her friends?
With a chilly surprise.
What is Buzz Lightyear’s favourite type of sandwich?
One with extra space jam.
Why did Cinderella get kicked off the soccer team?
Because she kept running away from the ball.
What’s Olaf’s favourite subject in school?
Chill-ology.
Why don’t Simba’s jokes ever get old?
Because they are roar-some!
What did Minnie say when Mickey tickled her?
You’re so mouse-terious!
What does Woody use to fix his hat?
A toy glue stick!
Why is Belle such a good reader?
Because every book has a happily ever after inside!
What does Ariel sing when she washes dishes?
Under the suds!
How does Moana keep up her energy?
She rides the wave of fun!
What’s Rapunzel’s favourite type of hairdo?
The tower twist!
Why did Tiana bring a frog to the party?
Because she heard it was a hoppin’ time!
What is Peter Pan’s favourite fruit?
Neverland figs!
Why does Lightning McQueen never get tired?
Because he has a fast nap!
What’s Donald Duck’s favourite game?
Duck, duck, goose!
Where does Elsa keep her secrets?
In an ice chest!
What did Buzz say when he entered the bakery?
To infinity and beyond the cookies!
Why does Goofy love cooking?
Because it is a goofy good time!
What did Cinderella say when she lost her shoe?
Looks like I’m one step behind!
Why can’t Simba keep a secret?
Because he always lets out a roar!
How does Minnie celebrate her birthday?
With a mouse-tastic party!
Why did Olaf never forget his keys?
Because he had a cool lock!
AI-Generated Image
Disney Knock-Knock Jokes for Kids
Knock-knock jokes have a special way of getting kids giggling fast. When you mix in familiar Disney characters, the fun multiplies. These amazing kids’ Disney jokes are perfect for sharing on car rides, at lunch, or any time a quick laugh is needed.
Knock knock!
Who’s there?
Mickey!
Mickey, who?
Mickey your day with a smile!
Knock knock!
Who’s there?
Frozen!
Frozen, who?
Frozen the door open just for you!
Knock knock!
Who’s there?
Buzz!
Buzz, who?
Buzz you later, alligator!
Knock knock!
Who’s there?
Dory!
Dory, who?
Dory you remember me, or should I swim around again?
Knock knock!
Who’s there?
Goofy!
Goofy, who?
Goofy times ahead, so get ready!
Knock knock!
Who’s there?
Elsa!
Elsa, who?
Elsa be your friend forever!
Knock knock!
Who’s there?
Ariel!
Ariel, who?
Ariel we having fun yet!
Knock knock!
Who’s there?
Simba!
Simba, who?
Simba later when the sun goes down!
Knock knock!
Who’s there?
Tinker!
Tinker, who?
Tinker bells are ringing for you!
Knock knock!
Who’s there?
Rapunzel!
Rapunzel, who?
Rapunzel round to open the door!
Knock knock!
Who’s there?
Peter!
Peter, who?
Peter out of cloud nine!
Knock knock!
Who’s there?
Olaf!
Olaf, who?
Olaf your friends ready to play!
Knock knock!
Who’s there?
Belle!
Belle, who?
Belle we’re going to tell some jokes!
Knock knock!
Who’s there?
Woody!
Woody, who?
Woody like to join the fun!
Knock knock!
Who’s there?
Mulan!
Mulan, who?
Mulan your way inside soon!
Knock knock!
Who’s there?
Donald!
Donald, who?
Donald you want to open the door!
Knock knock!
Who’s there?
Pocahontas!
Pocahontas, who?
Poca-honest you’ll laugh at this!
Knock knock!
Who’s there?
Lightning!
Lightning, who?
Lightning fast with these jokes!
Knock knock!
Who’s there?
Tiana!
Tiana, who?
Tiana moment for a smile?
Knock knock!
Who’s there?
Anna!
Anna, who?
Anna one wanna hear a joke?
Knock knock!
Who’s there?
Flounder!
Flounder, who?
Flounder around for the best joke!
Knock knock!
Who’s there?
Lady!
Lady, who?
Lady let me in please!
Knock knock!
Who’s there?
Pinocchio!
Pinocchio, who?
Pinocchio more jokes coming your way!
Knock knock!
Who’s there?
Dumbo!
Dumbo, who?
Dumbo you wanna laugh with me!
Knock knock!
Who’s there?
Cinderella!
Cinderella, who?
Cinderella you forget your keys again!
Sharing Disney jokes with kids is more than just sharing laughs. It’s a window for fueling endless laughter and memorable moments. Disney jokes for kids, simple and age-appropriate, carry the magic of their favourite characters and stories into everyday life. Perfect for all occasions, these puns can be enjoyed anywhere and anytime—at home, in school, or on the go. So keep these jokes close and spread the happiness. After all, a little laughter is the most magical thing of all.
Also Read:
Hilarious Christmas Jokes for Kids
Funny Knock Knock Jokes for Children
Funniest Thanksgiving Jokes for Kids
Car Jokes and Puns for Children
Read more
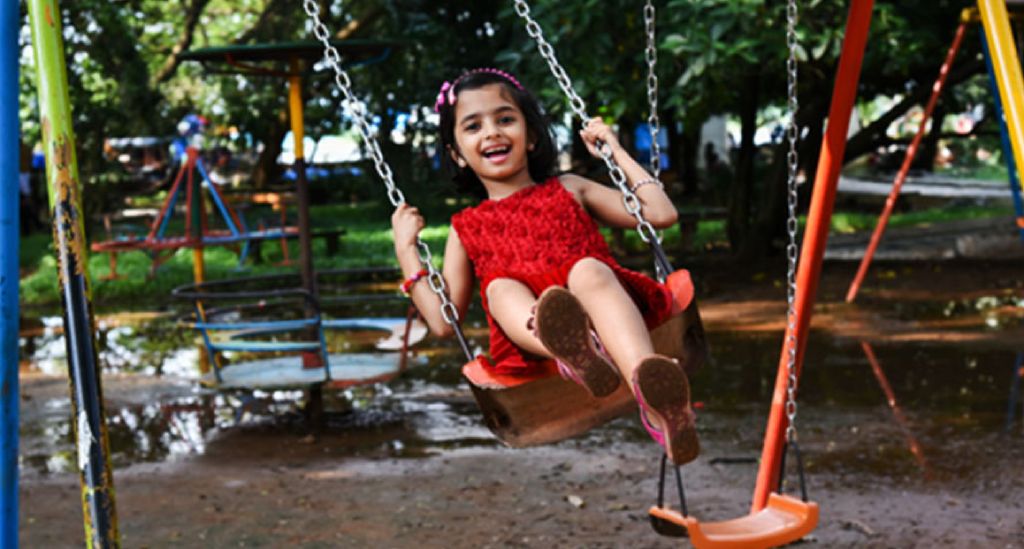
How To Teach Kids To Pump A Swing In The Playground
As adults things like cycling, swinging and sliding down a slide may seem like no-brainers, but for a little child, these tasks are much more daunting! If you want to teach your child to use a swing, you first need to understand how to break down the motion. Let’s look at how your child can learn to pump a swing with ease.
As your child turns 4-years-old, he can keep himself in motion on a swing all by himself. Here, we list some easy tips that can help you teach your kid to pump a swing in the playground. Scroll down to discover them.
1. Choose A Low-Hanging Swing
Initially, make your preschooler sit on a low-hanging swing so that he can sit on and get off it all by himself. Being on a low-hanging swing makes it easy for your preschooler to reach the ground to jump off, which otherwise was difficult with a high-hanging swing.
2. Feel The Motion Of The Swing Alone
Once your preschooler sits on the swing, tell him to hold and pull on the chains or ropes of the swing. Now, ask him to lean forward and backward all by himself by holding onto the ropes. When this motion continues, the swing tends to move with the weight of the child, slowly increasing in speed.
3. Bend Knees And Kick The Ground Backwards
As your preschooler learns to move the swing slightly by leaning forward and backwards, teach him to enjoy long swings forward and backwards. Tell him to bend his knees and hit the ground with his toes and ball of the foot backwards. This will make his swing propel forward at a greater distance. As your preschooler swings far forward, he is bound to swing back automatically. As he swings back, tell him to bend his knees and continue enjoy swinging.
4. Use ‘Kick and Bend’ Trick To Pump a Swing
If your kid is finding it difficult to learn to swing easily, try this trick. Stand at a safe distance in front of your preschooler who is sitting on the swing, stretch your hands flat forward, and tell your little swinger to kick your hand. This will make your preschooler put his feet up high in the air and then bend his legs to pump the swing. Make another grownup person to stand at a safe distance behind your swinging preschooler. Tell your little swinger to bend his knees as he swings backwards, after hitting your hand in the front. Repeating ‘Kick and Bend’ trick will train your preschooler to pump a swing on his own and enjoy swinging without your assistance soon.
5. Demonstrate Swinging
Watching others swinging and learn to swing simultaneously is a brilliant idea to teach your preschooler pump a swing all by himself. If you find an empty swing next to your preschooler’s swing on the playground, sit on the empty swing and demonstrate step-by-step swinging to your kid. First, demonstrate slow motion swinging and then fast swinging. Tell your preschooler to follow your lead and swing side-by-side to help him understand the technique till he gets it.
6. Praise Your Child
Make sure you appreciate your preschooler’s efforts to pump a swing on his own. A little encouragement from your side can boost his confidence. Appreciate even the smallest improvement made by your child, it does wonders for overall physical and emotional development.
Pumping a swing is a delightful pastime that your kid is ready to enjoy anytime. As your preschooler enjoys swinging, you can find a pleasant smile and happiness on his face. Pumping a swing is not only a fun activity but also a great way to hone your preschooler’s large muscles of his legs and arms, improve coordination, and promote the development of his gross motor skills as your child learns to pump a swing.
Read more

Fun Facts About Cars for Kids
Cars today are an integral part of daily lives, as they take us to places much quicker and safer than ever before. So, no wonder that kids are always fascinated by cars. It is magical for kids to ride on a four-wheeler car and increases their curiosity about cars.
The following article is a fantastic resource for youngsters and anyone interested in learning more about cars and automobiles.
History of Cars
People tried making cars that would run on steam in the 1770s. While some cars worked well, most did not. In the 1880s, inventors tried better experiments to make cars run on gasoline, steam, or even electricity. Karl Benz was the first to invent the car with a gasoline-powered engine in 1886. In the 1890s, Americans bought and drove cars made by Duryea, Winton Haynes, and others. On the other hand, Europeans believed and drove cars made by Benz, Panhard, Daimler, and others.
In the 1950s, the United States of America made, sold, and used maximum vehicles than the rest of the world. The Duryea brothers made the first modern car in North America, while Benz produced the first car. Henry Ford sold most vehicles to most people, and its Model T car put America on wheels.
For the last 120 years, cars have been through various developments, transformations, and improvements. This has resulted in the evolution of modern vehicles, not just passenger cars but also sports cars. Internal combustion engine helps power many automobiles and has seen a change where the engine can use gasoline or diesel to work. With the intent to reduce harmful emissions and consider other car pollution facts and statistics, automobile manufacturers across the globe are innovating and inventing sustainable electric cars.
What Are The Various Parts of a Car
A car has countless parts that work in perfect synchronization to make the car work and run. A single component, if malfunctioned, can affect the car’s performance. It is a good idea to get acquainted with the most essential parts of a vehicle, along with its functions.
Chassis: It is the entire framework of the car upon which all other parts of the car are fixed and screwed unto
Engine: Internal combustion engine forms the core of any car. The engine has various parts: a crankshaft, spark plugs, pistons, valves, timing chain, and camshaft.
Battery: The battery provides electricity and power to make the electrical components work together. A car won’t run without a battery.
Gearbox: The Transmission also has gears and gear trains that help the engine’s torque to change gears and power the car.
Radiator: The radiator helps to cool the engine by removing heat through the coolant to pump back through the engine
Alternator: The alternator helps to charge the car’s battery and power the electrical system when the vehicle is in motion
Front Steering and Suspension: This helps improve the ride, drive, and hold the car’s grip. Ball joints, shocks or struts, tie rod ends, idler/pitman arms, rack, pinion steering system together make up the steering and suspension system.
Front Axle: Front-wheel hubs are attached to the front axle, which is part of the suspension system
Muffler: Its function is to reduce and muffle the noise produced by the car engine. One gets a quiet car riding experience due to the muffler.
Brakes: Brakes are primarily crucial for car safety. It helps to slow down or bring the car to a complete halt. Different brakes are disc brakes, drum brakes, power boosters, anti-lock brakes, master cylinders. These are attached to all four wheels of a vehicle.
Catalytic converter: It controls the emission system of the car. It helps transform pollutants and harmful gases into less harmful emissions before they come out of the car’s exhaust system.
Tailpipe: The tailpipe, also known as the exhaust pipe, carried the exhaust fumes from the muffler to the outside of the car
Fuel Tank: This stores the gasoline that powers the car. It is safely located before the rear axle to avoid areas that could crumple in the event of a crash.
Rear Axle: Rear or back wheel hubs are attached, an essential part of the suspension system.
Rear Suspension: Like the front suspension, these also help improve the quality of ride of the car. It usually has shocks, ball joints, coil springs, CV joints, and ball joints.
How Do Cars Work?
On the outside, it would seem a driver operates the car by turning the engine on, pressing pedals to make the car move, and using the steering wheel to guide the vehicle to follow a route. However, all of this is part of a more extensive system.
Internal combustion engines power cars. The basic principle is igniting a small amount of gasoline, where the gasoline and air enter a tube-like cylinder through valves in the machine. The air and fuel mixture is ignited with the help of an electric spark that comes from the spark plug. As a result, an explosion produces gases to expand rapidly and push the pistons located at one end of the cylinder. The piston moves up and down as and when the gas continues to expand or contract. The movement of the piston is transferred to the crankshaft by a connecting rod. The crankshaft revolves back into its starting point and gets pushed upwards again. The crankshaft’s continuous movement helps move the wheels that further propel the car to move forward.
Car engines generally have four to eight cylinders. The battery provides the required electric current and powers the gasoline gauge. Furthermore, it also helps to fuel the starter, lights, horn, windshield wipers, turn signals, etc. The engine powers up a car to move, and the power train helps to turn the car’s wheels.
Other Information About Cars For Children
Here are some exciting and cool car facts that kids would love to read:
There are more cars in the world than the number of people.
There are as many as 30,000 parts in a vehicle.
One billion cars are currently being used across the world.
The battery stores the electricity for a car
Detroit, Michigan, is known as the Motor City of The Unites States.
World’s largest car manufacturer in China.
While many may not know, Volkswagen is not a single brand. It owns multiple brands, including Lamborghini, Audi, Porsche, Ducati, Seat, Bentley, Bugatti, Skoda, Scania, and MAN.
Ferrari has a strict policy of manufacturing not more than 14 cars in a day.
Bugatti Royal Kellner Coupe, made in 1931 and costs $8.7 million, is the most expensive car ever made.
Toyota is the largest manufacturer of cars in the world. They manufacture 13000 vehicles every single day.
In The United States, more than 12 million cars are recycled every year.
A car is also known as an automobile.
When Hitler was in jail, he begged for a car loan from Mercedes-Benz.
Google has developed a prototype of self-driven cars that may soon be available for commercial purchase.
Self-Driven cars are a reality, and they would need a driver’s license.
Allen Swift from Massachusetts is known to own the oldest living car for 82 years – the Piccadilly-P1 Roadster.
The first stoplight was installed in 1930, which included the red, yellow, and green lights.
Car racing became popular in The United States since 1910
Mary Elizabeth Anderson from America was the one to have invented the first windshield wipers.
Due to its aerodynamic downforce, Formula 1 cars can drive upside down in a tunnel at a speed of 120mph.
Ralph Teetor, who invented cruise control, was a blind man.
Hennessey Venom GT1 is the world’s fastest car, with a top speed of 270.49mph.
75% of all cars ever manufactured by Rolls Royce are still on the road.
It is a criminal offense to drive dirty cars in Russia.
Japanese car manufacturers are Suzuki, Nissan, Toyota, Mazda, Mitsubishi, Daihatsu, Honda, and Isuzu.
Cars have been through a fantastic transformation from the time it was invented. Modern cars have air conditioning, airbags for safety, power windows, GPS computers installed, voice activation, instant starters, seat warmers, hands-free telephones, and automatic parallel parking despite needing regular car maintenance. They are available in a wide range of colors, shapes, and sizes. Electric cars are gaining popularity. Explore and discuss these facts with your kids who are car enthusiasts.
Also Read:
Science Facts for Children
Magnet Facts for Children
Static Electricity Facts for Children
Read more
How to Draw a Rakhi: 10 Easy Steps for Kids
How to draw a rakhi is a fun and creative way for children to explore the beautiful tradition of Raksha Bandhan. A rakhi is a decorative thread traditionally exchanged during the festival, representing love, care, and the special bond between brothers and sisters.
In this tutorial, children will learn how to draw a colorful rakhi using simple shapes such as circles, petals, beads, and lines. The drawing is suitable for school projects, festival activities, greeting cards, coloring pages, and Raksha Bandhan decorations.
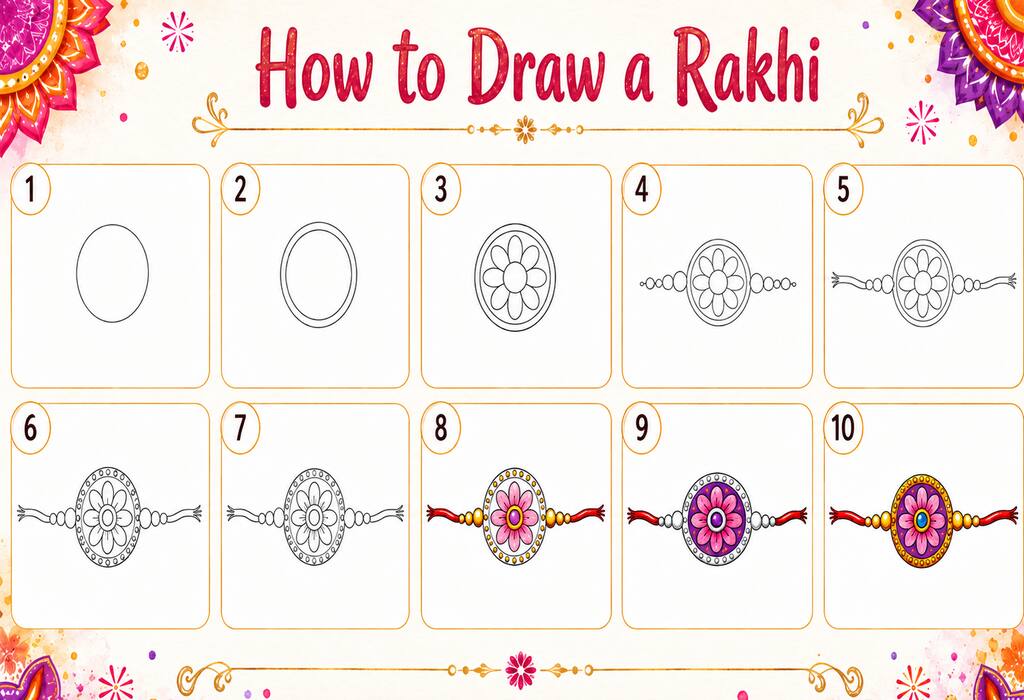
How to Draw a Rakhi: Easy Step-by-Step Guide for Kids
Rakhi drawing is a fun way for kids to celebrate Raksha Bandhan while exploring their creativity. In this easy step-by-step guide, children can learn how to draw a rakhi using simple shapes, patterns, beads, flowers, and decorative details. The activity is beginner-friendly and perfect for festive crafts, school projects, and coloring activities.
Materials Needed
Before you begin, collect the following materials:
Drawing paper
Pencil
Eraser
Black pen or marker
Ruler
Colored pencils, crayons, or sketch pens
Gold or silver color
Optional glitter or decorative stickers
Start with a pencil so that you can easily erase or correct the drawing.
Step 1: Draw the Center Circle
Begin by drawing a medium-sized circle in the center of your paper. This circle will become the main decorative part of the rakhi. Try to make the circle as smooth as possible. You may lightly trace around a round object if you need help.
Step 2: Add a Second Circle
Draw another circle around the first circle. This creates a border for the central rakhi design. The two circles should be close together and evenly spaced. This outer ring will later be decorated with dots, beads, or patterns.
Step 3: Draw the Flower Design
Inside the center circle, draw a small circle. Around it, add several oval-shaped petals to create a flower. You can draw six, eight, or ten petals depending on the design you want. Try to keep the petals similar in size. This flower will give the rakhi a traditional and attractive appearance.
Step 4: Add Decorative Beads
Draw small circles on both sides of the central design. These circles represent decorative beads attached to the rakhi.Beads make the rakhi look colorful and festive.
You can use different sizes:
One large bead near the center
Two medium-sized beads beside it
Several smaller beads toward the ends
Step 5: Draw the Rakhi Threads
Use two long, slightly curved lines extending from the left and right sides of the central design. These lines represent the colorful thread or ribbon used to tie the rakhi. You can make the threads straight, wavy, or braided. At the end of each thread, draw a few short lines to show loose decorative strands.
Step 6: Add Small Patterns
Decorate the outer circle with small dots, lines, triangles, or leaf shapes.
You can also add:
Small flower petals
Star shapes
Curved lines
Tiny circles
Geometric patterns
Keep the design balanced by adding similar patterns on both sides of the rakhi.
Step 7: Add Extra Details
Now improve the drawing by adding fine details.
You may draw:
Lines inside the petals
Small circles in the center
Curved patterns around the border
Lines on the beads
Decorative shapes on the thread
These details make the rakhi appear more carefully designed.
Step 8: Color the Threads and Beads
Start coloring the outer parts of the rakhi.
Bright colors work especially well, such as:
Red
Pink
Orange
Yellow
Purple
Blue
Green
You can color both threads the same color or use two different colors. For the beads, try using gold, yellow, silver, or orange.
Step 9: Color the Center Design
Color the flower and the inner circle carefully.
For example:
Use pink for the petals
Use purple or blue for the center
Use orange or gold for the outer border
Use yellow for the decorative dots
Try coloring in one direction to keep the drawing neat.
Step 10: Outline and Finish the Rakhi
When the colors are dry or complete, outline the main design with a black pen or dark marker.
Trace carefully around:
The outer circle
The flower petals
The beads
The threads
The decorative patterns
Erase any extra pencil marks. You may also add a little glitter or metallic color to make the rakhi look festive. Your colorful rakhi drawing is now complete.
Fun Ways to Decorate Your Rakhi Drawing
After drawing the rakhi, children can turn it into a complete Raksha Bandhan artwork.
They can:
Draw a gift box beside the rakhi.
Add flowers and stars around the design.
Write “Happy Raksha Bandhan.”
Draw two siblings celebrating together.
Create a Raksha Bandhan greeting card.
Paste the drawing on colored paper.
Add cotton, glitter, sequins, or small stickers.
FAQs
1. What is the easiest way to draw a rakhi?
The easiest method is to begin with a large center circle, add a smaller circle and flower petals, then draw beads and threads on both sides.
2. Which colors are best for a rakhi drawing?
Bright colors such as red, pink, orange, yellow, purple, blue, and gold work well for a festive rakhi.
3. How can I make my rakhi drawing look realistic?
Add shadows to the beads, use darker outlines, include small decorative patterns, and use gold or silver colors for the border.
4. Can this drawing be used for a school project?
Yes. It can be used for Raksha Bandhan homework, festival artwork, greeting cards, classroom displays, and coloring activities.
Drawing a rakhi is a simple and enjoyable way for children to celebrate Raksha Bandhan. By using basic shapes and following each step carefully, anyone can create a colorful rakhi design.
Start with the center circle, add the flower and beads, draw the threads, and finish with bright colors and decorative details. Most importantly, enjoy the creative process and make the design your own.
Also Read:
Story of Raksha Bandhan
Essay on Raksha Bandhan
Raksha Bandhan Gift Ideas
Rakhi Making Ideas for Kids
Read more

How to Stop Bribing Children
When your little angel turns into a little devil by screaming, crying, and throwing tantrums, all you wish for is some peace. At times like this, maybe, your first thought is to bribe your baby. “Stop screaming, and I will give you another scoop of your favourite cookie dough ice cream!”. There, you’ve done it again. You’ve bribed your baby into good behaviour by offering a generous scoop of your child’s favourite ice cream.
A lot of parents do this. You may think it is a harmless thing to do, but it is not. When you bribe your child, you let him or her have it her way, and this is not the best parenting approach. Bribing is a dishonest means of persuasion, where there is a trade-off that works in favour of both parties. In this case, it is you and your child. If you continue this habit, tomorrow, it will be your child and another person, where bribing isn’t just a harmless approach anymore.
Why Do You need to Stop Bribing Your Child?
Now that we’ve established that bribing is wrong let’s get into the reasons as to why you need to stop bribing your child.
Firstly, when you bribe your child, you do so because you expect him or her to behave in the right manner. Behaving the right way does not require incentives – it is just the way you are supposed to be. When you tell your child that he will get chocolate if he is a good boy, then he will begin to think that he is entitled to receiving chocolate just because he was good. This is simply not the case. Being good is a responsibility, it is the right behaviour.
Secondly, childhood is the foundation stone for the rest of the child’s life. If you bribe him as a child, he will be corrupt when he is an adult. You do not want your child expecting bribes when he grows up, or worse still, bribing his way through life. Your child has to know that he will not always get rewards for what he does.
Thirdly, when you reward a child for good behaviour, he will end up doing less of it. Let’s take this example – you tell your child that if he eats the vegetables on his plate, you will read his favourite book before his bedtime. Research suggests that when you attach a ‘reward’ or bribe to a specific behaviour, your child labels this behaviour as unpleasant. In the long run, in the absence of a bribe, your child simply won’t practice this behaviour.
Ways to Stop Bribing Kids
Getting into a bribing trade-off is extremely easy, but reversing this habit is anything but easy. We will now dive in deeper into the many ways that you can stop bribing your kids –
1. A No is a No
Sometimes, you need to be firm without being mean or unkind. You need to tell your child that he is in the wrong and that some kinds of behaviour are unacceptable.
2. Let Your Child Figure it Out
Let’s say your child wants to wear a sleeveless top to her friend’s birthday party. You don’t want her to wear that, because it’s a cold winter night. Don’t bribe her. Instead, tell her to wear the dress, and then go out on the porch for two minutes. Let her see for herself that it is cold outside. This way, you’ll get your child to listen to you, and your child will realise that it was her decision and she wasn’t being forced.
3. Stop and Assess
Sometimes, there might be an underlying reason as to why your child is throwing a tantrum. If your child is screaming and crying all the way to school, on every single day, maybe it isn’t just another fit of a tantrum. You might want to look deeper. For instance, your child may be getting bullied.
4. Ask Your Child
Present the situation to your child, but with different characters. For example, take her favourite teddy bear. Ask your child if she would like it if her teddy bear threw a tantrum or didn’t follow orders. Will she like it? This way, you’ll be telling your child how you feel, by making her exercise empathy.
5. Sometimes, You have to Ignore
This might be a hard approach, but if your child is throwing a tantrum for no reason, then ignoring the child will let your child know that his tantrums are futile, and nothing is going to change with bad behaviour.
Children look up to their parents. Everything you say or do, in their world, is law. You need to teach the right ideas, patterns, and ways of thinking if you want your little one to grow up into a smart individual. Parenting is not easy, and no one gets it right all the time. Taking small steps to tie up loose ends can sometimes make all the difference.
Also Read: Rewarding Kids With Money for Good Grades
Read more
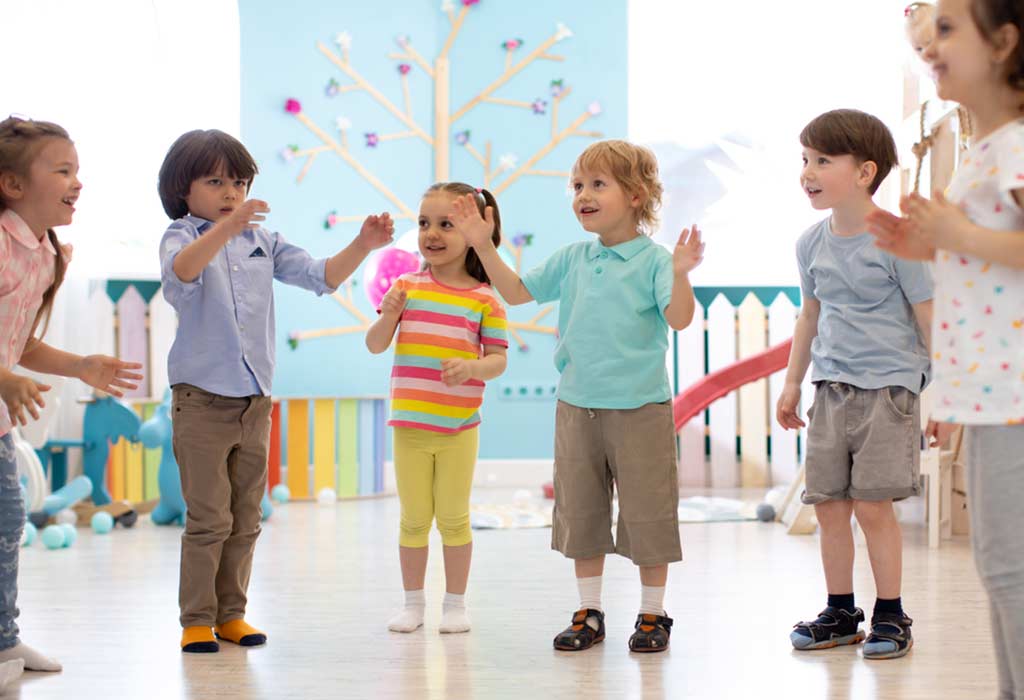
15 Best Good Morning Songs for Kids to Start a Fresh Morning
Good morning songs for kids are a refreshing way to start the day. When you’re introducing new kids to the classroom or letting the group settle in, a good morning song can be just the right thing to cheer everybody up.
Preschool children and toddlers benefit from learning new words, and this expands their vocabulary. What we love about these good morning songs for preschoolers is that they are cheerful and begin the day on a beautiful note. There are themes related to the sun and moon, Sesame Street characters, and so much more.
In this article, we have covered some beautiful morning songs for your little one to sing and learn. Let’s see!
15 Amazing Good Morning Songs for Children
When you’re picking a good morning song for the kids, you want to make sure it’s simple and easy to follow along. You can even add your own lyrics to give an extra layer of a challenge if you think these songs are too easy. If you can play the animated videos that accompany these songs on a big flat-screen, that will be just icing on the cake. The visuals make these preschool good morning songs engaging. We love it!
Now, time to get on to the list.
1. Sun, Moon, and Stars
For children who are currently in preschool or kindergarten, this song is a perfect introduction to the concept of space and solar systems. Plus, it’s one of the top good morning songs for preschool circle time.
Song Lyrics
Song Verse 1:
Up there in space
I see the sun
It’s hot and bright
At night it’s gone
Pre-chorus 1:
I put my helmet on
I take my rocket ship
I want to fly up high
So I can say
Chorus:
Hello sun
Hello moon
Hello stars
I just want to say hi
Verse 2:
Up there in space
I see the moon
In different shapes
Crescent or Full
Pre-chorus 2:
I put my moon boots on
I take my rocket ship
I want to fly up high
So I can say
(Chorus)
Verse 3:
Up there in space
I see the stars
They’re big and small
They’re near and far
Pre-chorus 3:
I put my spacesuit on
I take my rocket ship
I want to fly up high
So I can say
(Chorus)
2. Good Morning Song by the Singing Walrus
We love this good morning song because of how simple and catchy it is. There’s a bit of clapping, counting numbers, and well wishes mixed into this song. What a polite and cheery way to start the day!
Song Lyrics
Good morning!
Good morning!
Good morning!
Good morning!
One, two – one, two, three!
Good morning!
Good morning!
Hello, and how are you?
Early in the morning
I say ‘Good morning’
Hello, and how are you?
Good morning!
Good morning!
Hello, and how are you?
Early in the morning
I say ‘Good morning’
Hello, and how are you?
In the morning
I clap my hands
In the morning
I do my dance
In the morning
I shout ‘Hurray!’
This is going to be
A wonderful day
Good morning!
Good morning!
Hello, and how are you?
Early in the morning
I say ‘Good morning’
Hello, and how are you?
Good morning!
Good morning!
Hello, and how are you?
Early in the morning
I say ‘Good morning’
Hello, and how are you?
In the morning
I clap my hands
In the morning
I do my dance
In the morning
I shout ‘Hurray!’
This is going to be
a wonderful day
Good morning!
Good morning!
Hello, and how are you?
Early in the morning
I say ‘Good morning’
Hello, and how are you?
(chorus)
Good morning!
Good morning!
Hello, and how are you?
Early in the morning
I say ‘Good morning’
Hello, and how are you?
(chorus)
Hello, and how are you?
Hello, and how are you?
3. Good Morning Song
Want a cheerful way to start the mornings for your kids? Try this song. It’s one of the best good morning songs for toddlers. For kids being introduced to new playgroups or having trouble working together, this is a song that’ll help them bond.
Song Lyrics
Good morning, good morning.
How are you today?
Good morning, good morning.
I’m happy let’s play.
Good morning, good morning.
How are you today?
Good morning, good morning.
I’m happy let’s play.
Stretch up, stretch down.
Spin your head, turn around.
Move your shoulders, up and down.
Stretch your arms and turn around.
Good morning, good morning.
How are you today?
Good morning, good morning.
I’m happy let’s play.
Good morning, good morning.
How are you today?
Good morning, good morning.
I’m happy let’s play.
Yeah, let’s play!
4. Sesame Street: Good Morning Mister Sun!
Who doesn’t love the characters of Sesame Street? It’s one of the kids’ favourite shows and this song is a fantastic way to get kids acquainted with basic alphabets. You use this for good morning kindergarten song classes. We know, we know. There’s no Cookie monster featured in this song but Mr Sun is just as good! It’s a classic which is why we recommend it.
Song Lyrics
Good morning,
Mister Sun,
Welcome to the sky-
Shine on all the
Little creatures
As you’re passing by.
Stop yawning,
Mister Sun,
Time to make a day.
Brightening every
Little corner
As you go your way.
The moon and stars are
Fine at night.
But when it’s day,
We need your light
So, we say, “Keep shining,
Mister Sun,
Smiling in the blue.”
You’ll see all the
Little children,
Smiling back at you.
And birds and bees,
The flowers, the trees,
The whole wide world
Will seem to say,
“Good Morning,
Good Morning,”
Mister Sun.
Good Morning,
Have a nice day.
5. Good Morning Song by The Kiboomers
This is a cheerful good morning song for the preschool kids who can’t wait to get started with their day. It’s best sung along in a group but you can get kids to sing it solo for practice too.
Song Lyrics
Good Morning Everyone!
Good Morning, Miss Melody!
Are you ready for a brand new day?
Good morning
Good morning
How are you?
how are you?
It’s so nice to have you here with me today
Good morning
Good morning
How are you?
Just fine!
Howdy, how do you do?
Hello, good day!
Now that we’re together
Learning so much fun
The more of us the better
C’mon everyone!
Good morning
Good morning
How are you?
Just fine!
Howdy, how do you do?
Hello, good day!
(laughter)
Good morning
Good morning
How are you?
How are you?
It’s so nice to have you here with me today
Good morning
Good morning
How are you?
Just fine!
Howdy, how do you do?
Hello, good day!
Now that we’re together
Learning so much fun
The more of us the better
So c’mon everyone!
Good morning
Good morning
How are you?
Just fine!
Howdy, how do you do?
Hello, good day!
Howdy, how do you do?
Hello, good day!
6. Hello Good Morning – Hello Music Kids (Miss Karen)
Song Lyrics
Hello good morning, hello good morning
how is everyone today CHA CHA CHA
Hello good morning, hello good morning
I’m so glad you came to play CHA CHA CHA
The sun is shining, the birds are singing
What a way to start the day CHA CHA CHA
If we keep singing, hello good morning
We’ll be happy come what may CHA CHA CHA
Welcome to the show!
7. Good Morning Song – Learning Station
Song Lyrics
Good morning (good morning) to you. It’s so nice to see you.
It’s fun greeting you. Here we are (good morning) and we’ll shine like a star.
We could just wave… (Good morning, good morning, good morning)
Or we could shake hands… (Good morning, good morning, good morning)
(Hey, hey, what do you say? Let’s celebrate. It’s a brand new day.)
(Hey, hey, what do you say? It’s a beautiful day.)
Good morning (good morning) to you. It’s so nice to see you.
It’s fun greeting you. Here we are (good morning) and we’ll shine like a star.
We could just wave… (Good morning, good morning, good morning)
Or we could shake hands… (Good morning, good morning, good morning)
(Hey, hey, what do you say? Let’s celebrate. It’s a brand new day.)
(Hey, hey, what do you say? It’s a beautiful day.)
Good morning (good morning) to you. It’s so nice to see you.
It’s fun greeting you. Here we are (good morning) and we’ll shine like a star.
We could just wave… (Good morning, good morning, good morning)
Or we could shake hands… (Good morning, good morning, good morning)
(Hey, hey, what do you say? Let’s celebrate. It’s a brand new day.)
(Hey, hey, what do you say? It’s a beautiful day.)
Good morning.
8. Good Morning Mama – Lulu Kids Fun
Song Lyrics
Here comes early morning
All the birds are singing:
Good morning, dear mama.
Oh how much I love you.
Here comes early morning
All the birds are singing:
Good morning, dear papa.
Oh how much I love you.
Here comes early morning
All the birds are singing:
Good morning, my sister.
Oh how much I love you.
Here comes early morning
All the birds are singing:
Good morning, my brother.
Oh how much I love you.
9. Jesus in the Morning – The Holy Tales Bible
Song Lyrics
Jesus, Jesus,
Jesus in the morning, Jesus in the noontime;
Jesus, Jesus,
Jesus when the sun goes down!
Love him, love him,
Love him in the morning, love him in the noontime;
Love him, love him,
Love him when the sun goes down!
Thank him, thank him,
Thank him in the morning, thank him in the noontime;
Thank him, thank him,
Thank him when the sun goes down!
Praise him, praise him,
Praise him in the morning, praise him in the noontime;
Praise him, praise him,
Praise him when the sun goes down!
Jesus, Jesus,
Jesus in the morning, Jesus in the noontime;
Jesus, Jesus,
Jesus when the sun goes down!
10. Breakfast Time – Kidsa English
Song Lyrics
Let’s sit at the table
It’s time for breakfast
Do you like cake?
Yes, yes, yes!
Do you like fruit?
Yes, I do!
Let’s eat!
Let’s eat!
Let’s eat!
Let’s eat!
Let’s sit at the table
It’s time for breakfast
Do you like milk?
Yes, yes, yes!
Do you like juice?
Yes, I do!
Let’s drink!
Let’s drink!
Let’s drink!
Let’s drink!
11. Bath Song – Cocomelon
Song Lyrics
I jump in the bathtub, it’s time to get all clean
I’ll be the cleanest kid you’ve ever seen!
The soap and the bubbles are filling up the tub,
So I’ll jump in the water and scrub, scrub, scrub!
Wash my hair, do do do do do do
Wash my hair, do do do do do do
Wash my hair, do do do do do do
Wash my hair!
Wash my face do do do do do do
Wash my face do do do do do do
Wash my face do do do do do do
Wash my face!
Wash my arms do do do do do do
Wash my arms do do do do do do
Wash my arms do do do do do do
Wash my arms!
Wash my hands do do do do do do
Wash my hands do do do do do do
Wash my hands do do do do do do
Wash my hands!
Wash my knees do do do do do do
Wash my knees do do do do do do
Wash my knees do do do do do do
Wash my knees!
Wash my toes do do do do do do
Wash my toes do do do do do do
Wash my toes do do do do do do
Wash my toes!
12. Brush Your Teeth – Super Simple Songs
Song Lyrics
Brush your teeth up and down.
Brush your teeth round and round.
Brush your teeth from left to right.
Brush your teeth in the morning and night.
Brush brush brush.
Brush brush brush.
Brush your teeth in the morning and night.
Brush your teeth to keep them white.
Brush your teeth so your smile is bright.
Brush your teeth. It’s so much fun.
Brush your teeth when the day’s begun.
Brush brush brush.
Brush brush brush.
Brush your teeth when the day’s begun.
Brush your teeth, just open wide.
Brush your teeth from side to side.
Brush your teeth, you sleepy head.
Brush your teeth before you go to bed.
Brush brush brush.
Brush brush brush.
Brush your teeth before you go to bed.
Brush your teeth up and down.
Brush your teeth round and round.
Brush your teeth from left to right.
Brush your teeth in the morning and night.
Brush brush brush.
Brush brush brush.
Brush your teeth in the morning and night.
13. Breakfast Song – Cocomelon
Song Lyrics
Everybody wake up in the morning
Everybody’s hungry I know
Everybody wake up in the morning
It’s breakfast time, let’s go!
Breakfast is a-cooking in the kitchen
Something yummy I know
Breakfast is a-cooking in the kitchen
Cooking on the stove!
Pancakes, bacon and ham
Buttered toast and berry jam
Pancakes, bacon and ham
Buttered toast, berry jam
Eggs fried sunny-side up
Hard-boiled in a little tea cup!
Eggs fried sunny-side up
Hard-boiled in a cup.
Waffles baked with buttermilk
Yogurt soft and smooth as silk!
Waffles baked with buttermilk
Yogurt smooth as silk!
Sausage patties, muffins baked
Yummy fruit salad, coffee cake
Sausage patties, muffins baked
Yummy fruit, coffee cake!
14. Are You Sleeping Baby Bear – Super Simple Songs
Song Lyrics
Are you sleeping?
Baby bear?
The morning sun is rising.
Come and play.
Are you sleeping?
Baby bear?
The world outside is waiting.
Come and play.
Are you sleeping?
Baby bear?
Let’s all rest together.
Close your eyes.
Close your eyes.
Close your eyes.
15. Hello Song (Early Morning Song) – Sing With Bella
Song Lyrics
Hello, Hello, how are you?
Hello, Hello, how are you?
Hello, Hello, How are you?
How are you today?
I am fine; I am great
I am fine; I am just great
I am fine; I am great
I’m very well today!
Hello, Hello, how are you?
Hello, Hello, how are you?
Hello, Hello, How are you?
How are you today?
I am hungry; I am tired
I am hungry; I am tired
I am hungry; I am tired
I’m not so good today.
Hello, Hello, How are you?
Hello, Hello, How are you?
Hello, Hello, How are you?
How are you today?
FAQs
1. How Can Parents Use Good Morning Songs to Encourage Literacy and Reading Readiness in Preschoolers?
Parents can use good morning songs for kindergarten kids to boost literacy and reading readiness by choosing age-appropriate, rhyming songs with repetition. Incorporate new vocabulary, focus on phonemic awareness, and use visual aids. Encourage active participation, create a routine, and connect songs to books. Foster imaginative play and explore diverse genres for a holistic learning experience.
2. What Games or Activities Might Be Used to Reinforce the Lessons Learned From the Good Morning Songs?
Games like rhyming word matching, alphabet scavenger hunts, and storytelling with picture cards can reinforce lessons from morning songs for kids. Activities like drawing or acting out song themes also enhance comprehension.
If you’re trying to get the kids in the mood to sing, decorate the classroom. Put up good morning stickers and wall vinyl with pictures and cartoons of favourite characters. Make the environment look colourful, warm, and welcoming. The songs will make the experience of singing so much better. Preschool kids should be introduced to these songs because they’re absolutely essential. And who doesn’t love singing about the sun, moon, and stars? Even we do!
Do try out these five good morning songs. They’re an absolute hit in classrooms and younger groups get really excited once they get the hang of them!
Also Read:
Animal Songs for Children
Best Counting Songs for Kids
Popular Pop Songs for Children
Best Songs for Kids Halloween Party
Read more
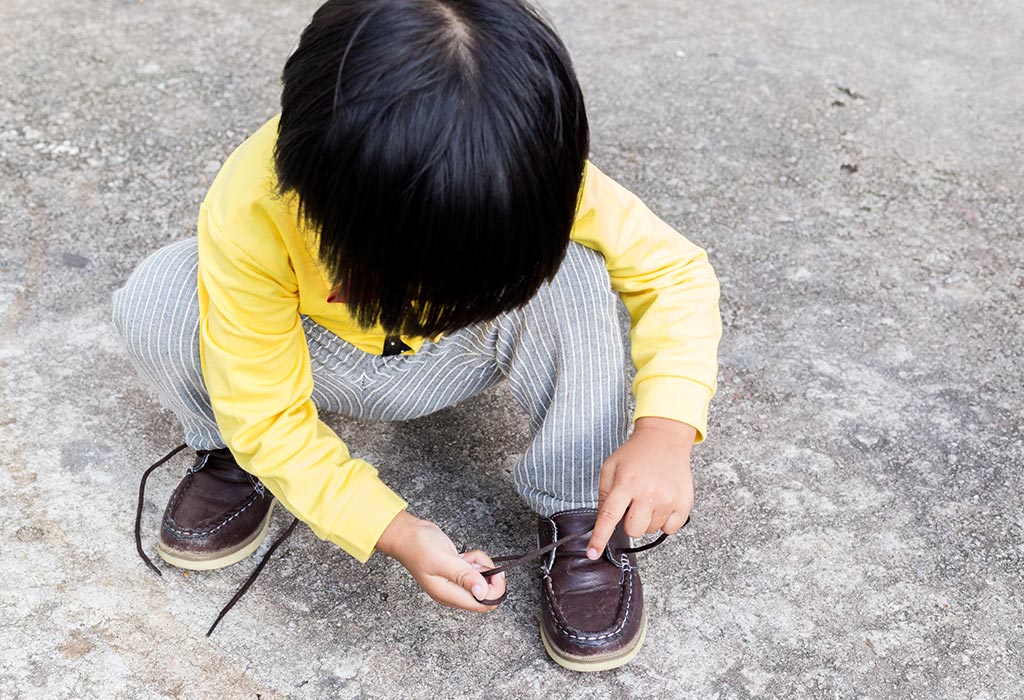
Teaching Kids to Tie Shoelaces – When and How
As a parent, you might ask what age should a child learn to tie their shoes? And what is the best way I can help my child to do that? Let’s see how.
Why Is It Important to Teach Your Child to Tie His Shoelaces?
Tying shoelaces can teach your child important skills like following directions, sorting, sequencing, and planning.
When you teach your child how to tie shoelaces properly, you are also helping them learn how to listen and follow given directions.
As your child uses their fingers to tie the laces, they will learn dexterity which will help them in holding a pen properly and other such activities in the future.
The entire process of putting on a shoe and tying the laces will help them understand sequencing, like for example, the socks go first, followed by the shoe and then the tying of the shoelaces.
They will learn to classify and sort objects while listening to you talking like how there are certain shoes for the summer and certain others for the winter.
Also, it is one job less for you when you are taking your child outside!
How Do Kids Develop their Shoe-Wearing Skills and When Can They Learn to Tie their Shoe Laces?
Most children start learning how to tie their shoelaces by the age of six.
At 12 months, babies are able to stick out their feet to put a shoe on them.
At 2 years, toddlers can remove low top shoes
At 2.5 years, many toddlers can somehow wear their shoes with some help
At 3.5 years, kids can put their shoes on the right foot and take them off too, including untying the shoelaces.
At 6 years, kids can tie and untie their shoelaces by themselves after seeing it demonstrated a few times.
Skills that Affect How Children Learn to Tie the Laces
Sometimes, our children may not have developed some of the underlying skills that are needed to tie their laces. Let’s look at a few skills which they need:
Hand-Eye Coordination: The eyes need to guide the hands in tying shoelaces. Catching a ball, neat handwriting and cutting on a line are few skills that require hand-eye coordination. If your child might be having trouble with that, you can do some hand-eye exercises that might help.
Fine Motor Skills: If your child seems reluctant with paper-pencil tasks and using scissors to cut paper, then he or she may be struggling with developing fine motor skills. It would be good to work on these skills first so that your child can strengthen his or her hand and finger muscles.
Bilateral Coordination Skills: If your kid finds it difficult to get both hands to work together, then tying shoelaces can be hard. Any difficulty with skills like using a knife and fork, fastening buttons, and scissor cutting can be a major clue.
Visual Perception: If your kid struggles to see which lace is which and if both seem to merge or overlap around each other, then he or she may have trouble with visual perception. Simply, this means that the brain does not make sense of what the eye sees. Using dual coloured shoelaces or textured shoelaces can help.
Tactile Perception: This skill basically helps your child to know what his or her fingers are doing without being able to see what they are doing. Your kid needs to feel how and where the laces overlap and pull them through without really seeing what the fingers are doing. If your kid has poor tactile perception skills, there are many fun activities and solutions to help them with that.
Activities to Strengthen Skills Required for Shoe Tying
Before you teach your child to tie shoelaces, there are a few fun exercises he or she can practice to master visual perception, hand dexterity and finger manipulation, bilateral coordination and the ability to logically think and execute a new motor skill.
1. Bead Threading
Take some different beads in hand
Take some coloured pipe cleaners
Ask your child to choose the beads that match the colours of the respective pipe cleaners
Tell him or her to now thread the beads through the pipe cleaners
2. Rings and Pins
Take some cloth pins and rings in different colours.
Ask your child to attach the pins on the rings corresponding to their colours
3. Cardboard Weaving
Cut heart-shaped pieces out of a cardboard box
Ask your child to paint the hearts in different colours
Punch two holes in each heart once the paint is dry
Ask your child to thread the hearts together using some yarn
Your child can hang the hearts in his or her room.
Simple Shoelace Tying Method for Kids
Let’s look at a few below which your kid can practice.
1. Circle Method for Tying Shoes
Put the shoes on the flat ground and spread the laces on each side
Tie the laces into a simple knot
Make one more knot but keep it very loose. There will be a circle formed by this knot. Hold it in place and let it stay flat.
From the front, put one of the laces inside the circle. Keep the string loose but do not let it slide out of the circle.
From the back, put the other shoelace inside the circle. Now you have two loops on each side of the knot.
Pull the loops tight, and you’re finished!
2. Beginner’s Knot
Put the shoes on the flat ground and spread the laces on each side
Take the laces and make a basic knot by crossing them one over the other and pulling them tight.
Keep both sides of the lace over your fingers
Keep your right thumb and forefinger under the lace on one side and the left thumb and forefinger over it on the other side.
Grab the opposite sides with your fingers and pull tightly to make a knot
3. Bunny-Ears Knot
Put the shoes on the flat ground and spread the laces on each side
Take the laces and make a basic knot by crossing them one over the other and pulling them tight.
Make a bunny ear loop with one of the strings by grabbing it between your thumb and first two fingers
The loop will be small and the rear end long
Form another bunny loop with the other shoelace string
Cross the loops over each other and bring one from below
Pull the loops tightly, and you’re finished!
4. Ian Knot technique
Put the shoes on the flat ground and spread the laces on each side
Take the laces and make a basic knot by crossing them one over the other and pulling them tight.
Use your right thumb and forefinger to make a loop with one of the shoelaces with the loose end on the front
Use your left thumb and forefinger to make a loop with the other shoelace with the loose end on the back
Pass the loose ends through each other’s loop. Pull and tighten.
Tips to Consider while Teaching Children Tying Shoelaces
How to teach children to tie shoelaces? Luckily, we have the below tips:
Eliminate distractions. Teach them in a quiet room.
Teach one method at a time. Don’t overcrowd their minds.
Use cotton flat laces and mark the laces with colours to make it easier.
Sit next to your child, not opposite to teach from the same vantage point.
Work in 20-minute intervals
Practice constantly
The teacher should have the same dominant hand as the child
Don’t get fooled and buy shoe tying toys.
If you want to get your kids Velcro shoes, stick to teaching them how to tie their shoelaces. It’s a necessary skill and above all, fun!
Also Read: Communication Skills for Kids – Importance and Activities to Improve
Read more
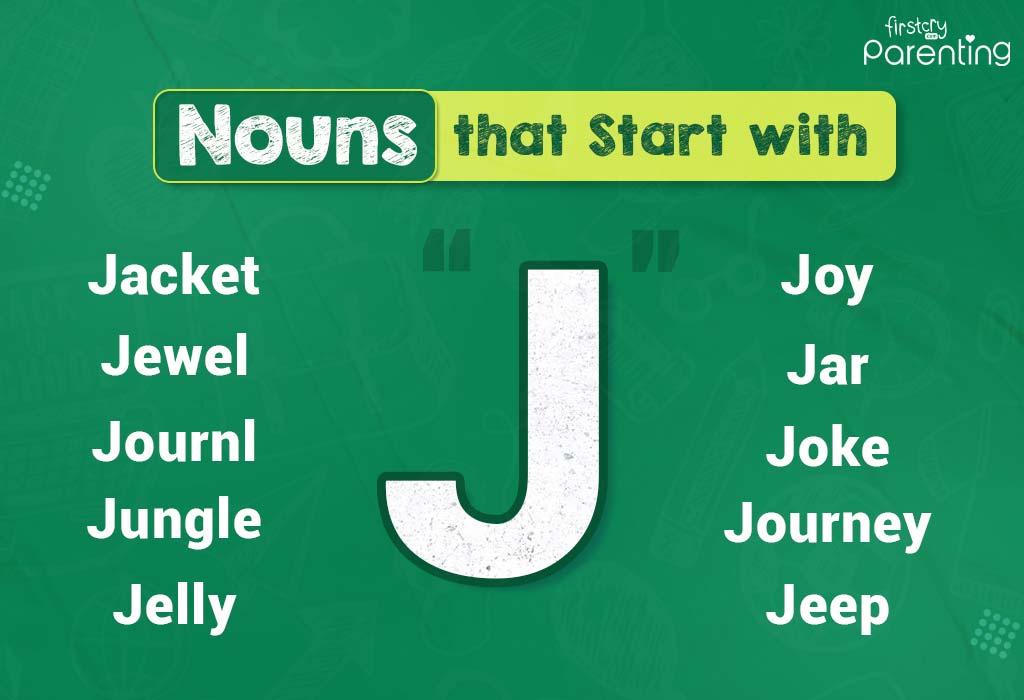
Nouns That Start With J (With Types and Example Sentences)
Diving into the English language opens up a world of discovery and delight, especially when we focus on expanding the horizons of young minds. Today’s adventure takes us through a fascinating exploration of nouns that start with the letter J for preschoolers and kids in English. This journey is not just about learning; it’s about creating a joyful pathway to enhance our kid’s vocabulary, making every new word an exciting treasure to be unearthed. Engaging young learners with these nouns encourages curiosity, enriches their language skills, and lays the foundation for a lifelong love of reading and learning. So, let’s embark on this educational adventure together, exploring the jovial, jazzy, and just plain fun nouns that begin with J.
What Are the Nouns?
Nouns are the cornerstone of the English language, representing people, places, things, or ideas. They serve as the subjects and objects in our sentences, grounding our thoughts and conversations in our world’s tangible and intangible aspects. Whether it’s a person’s name, a city, a cherished object, or a fleeting feeling, nouns help us to categorise and make sense of our experiences, laying the foundation for rich, expressive communication.
List of Some Commonly Known Nouns That Start With J
Diving deeper into our exploration, we encounter a treasure trove of nouns that start with the letter J. These words are not just stepping stones in expanding vocabulary but also gateways to new concepts and ideas for young learners. Here, we’ll highlight a selection of nouns that start with the letter J, each accompanied by a brief definition and a vivid example sentence to spark imagination and understanding.
1. Jacket: An item of clothing worn on the upper body outside for warmth or fashion.
Example: She zipped up her jacket as the chilly wind blew.
2. Jewel: A precious stone that is used to decorate jewellery.
Example: The jewel sparkled brightly in the sunlight, catching everyone’s eye.
3. Journal: A daily record of news and events of a personal nature; a diary.
Example: He wrote in his journal every night, documenting his thoughts and adventures.
4. Jungle: A dense, tropical forest with many plants and animals.
Example: They explored the jungle, amazed by the sounds and sights around them.
5. Jelly: A spread made from fruit juice and sugar, often used on bread.
Example: She preferred toast with jelly and a cup of tea for breakfast.
6. Jigsaw: A puzzle consisting of many irregularly shaped pieces that fit together.
Example: On rainy afternoons, they enjoyed assembling a jigsaw puzzle as a family.
7. Joy: A feeling of great pleasure and happiness.
Example: The surprise birthday party filled her with joy.
8. Judge: A public official appointed to decide cases in a court of law.
Example: The judge listened carefully to the evidence before making a decision.
9. Jar: A wide-mouthed cylindrical container made of glass or pottery, especially one used for storing food.
Example: She opened the jar of cookies and shared them with her friends.
10. Joke: Something said or done to provoke laughter or cause amusement.
Example: He told a joke that made the whole room laugh.
11. Journey: An act of travelling from one place to another.
Example: Their journey across the country was full of unexpected adventures and new friendships.
12. Jewellery: Ornaments such as necklaces, rings, or bracelets made from or containing jewels and precious metal.
Example: She admired the jewellery displayed in the shop window, each piece more exquisite than the last.
13. Jam: A sweet spread or preserve made from fruit and sugar boiled to a thick consistency.
Example: She spreads jam on her toast every morning, preferring strawberries the most.
14. Jeans: Pants made from denim, typically blue.
Example: He wore his favourite jeans and a T-shirt to the casual event.
15. Jack-o’-lantern: A carved pumpkin, especially one illuminated from within by a candle.
Example: They placed the jack-o’-lantern by the window to welcome trick-or-treaters on Halloween night.
Different Types of Nouns That Begin with J
As we journey through the alphabet, it’s fascinating to see how nouns that start with J can vary widely in type and context. From concrete objects that we can touch and see to abstract concepts that we feel or imagine, these nouns enrich our conversations and writings in diverse ways. Let’s delve into the different types of nouns, beginning with J, exploring their unique characteristics and roles in language.
Common Nouns That Start With J
As we continue our exploration of the English language, we now turn our attention to common nouns that start with the letter J. Often found in our daily conversations and writings, these words represent general items, places, people, or concepts. They are not specific names, making them versatile and widely applicable across various contexts. Let’s delve into some common nouns, uncovering their meanings and how they fit into our everyday language.
1. Jacket: A piece of clothing for the upper body, typically with sleeves and fastened in the front.
Example: He hung his jacket on the rack by the door as he entered.
2. Jam: A thick sweet spread made from fruit and sugar, commonly used on bread.
Example: She made her jam from the berries picked in the garden.
3. Jar: A round, often glass container with a wide mouth and lid for storing food.
Example: He sealed the jar tightly after adding the homemade pickles.
4. Jeep: A rugged vehicle with four-wheel drive used for off-road travel.
Example: They rented a jeep to explore the mountain trails during their vacation.
5. Jewellery: Decorative items such as rings or necklaces are worn for personal adornment.
Example: For her birthday, she received beautiful jewellery from her family.
6. Journal: A personal record of experiences, observations, or thoughts written down regularly.
Example: She writes in her journal every night before bed, reflecting on her day.
7. Joke: A thing said or done for amusement or laughter.
Example: He loved to share a good joke with friends to lighten the mood.
8. Journey: The act of travelling from one place to another.
Example: Their journey took them across several countries with unique cultures and sights.
9. Judge: A person appointed to decide the outcome of contests or competitions.
Example: The judge at the baking contest had a hard time choosing the best pie.
10. Jigsaw: A puzzle consisting of numerous interlocking pieces that form a picture when assembled.
Example: On rainy days, assembling a jigsaw puzzle became their favourite pastime.
More Common Nouns That Begin With Letter J
Our adventure through English takes us further into the vast array of common nouns, starting with the letter J. Below, we present a table of common nouns that begin with J, offering a broad spectrum of terms accessible to kids and widely used in everyday language.
Jack
Journey
Jacket
Joy
Jam
Judge
Jar
Juice
Jasmine
Jumper
Jeep
Jungle
Jelly
Junior
Jewel
Junk
Jewellery
Jupiter
Jigsaw
Jury
Job
Justice
Jog
Jute
Journal
Abstract Nouns That Start With J
In the vast landscape of the English language, abstract nouns hold a special place, capturing concepts, feelings, and ideas that are not tangible but deeply felt and experienced. As we explore abstract nouns that start with J, we delve into words that express emotions, qualities, and states of being, enriching our ability to convey the complexities of human experience. These nouns invite young learners to think and express themselves in more nuanced and profound ways.
1. Joy: The emotion of great delight or happiness caused by something exceptionally good.
Example: The joy of her first bike ride stayed with her for years.
2. Justice: The quality of being just, impartial, or fair.
Example: The story taught them the importance of justice and fairness in all situations.
3. Jealousy: The feeling of envy towards someone else’s achievements or advantages.
Example: Jealousy can sometimes ruin friendships if not addressed openly.
4. Jubilation: A feeling of great happiness and triumph.
Example: The jubilation in the room was palpable when they won the championship.
5. Judgement: The ability to make decisions or reach sensible conclusions.
Example: Good judgement is often learned through experience.
6. Journey: Used metaphorically to describe the progression of experiences or events in a person’s life.
Example: Life is a journey filled with ups and downs.
7. Joviality: The quality of being cheerful and friendly.
Example: His joviality made him popular among his classmates and teachers.
8. Jeopardy: The danger of loss, harm, or failure.
Example: The adventurers knew they were in jeopardy when the storm began.
More Abstract Nouns That Begin With J
Venturing further into abstract nouns that start with the letter J, we continue to enrich our linguistic toolkit with words that describe concepts, feelings, and ideas beyond the physical world. Here, we present a collection of additional abstract nouns, broadening our exploration and understanding of these vital components of the English language.
Joyfulness
Jolliness
Justice
Jadedness
Jealousy
Jauntiness
Jubilation
Jeering
Judgement
Jest
Journey
Jubilee
Joviality
Judgmentalism
Jeopardy
Juncture
Justification
Jurisdiction
Jitteriness
Justness
Jocularity
Juxtaposition
Jointness
Judiciousness
Positive Nouns That Start With J
English is a treasure trove of words that convey positivity, uplifting our spirits and enriching our conversations. Among these, positive nouns that start with J shine brightly, offering glimpses of joy, accomplishment, and beauty. These words enhance our vocabulary and outlook on life, reminding us of the good that surrounds us. Let’s explore some positive nouns, each conveying hope and happiness.
1. Joy: A feeling of great pleasure and happiness.
Example: The joy on her face when she saw the puppy was infectious.
2. Jewel: A precious stone is considered a symbol of purity and perfection.
Example: The jewel in her necklace sparkled in the moonlight.
3. Jubilee: A special anniversary of an event, especially one celebrating twenty-five or fifty years of a reign or activity.
Example: The city was adorned with lights and decorations for the jubilee celebration.
4. Justice: The quality of being fair and reasonable.
Example: He was always known for his sense of justice and fairness.
5. Journey: Travelling from one place to another often implies a process of personal change and development.
Example: The journey through the mountains was challenging, but it taught them many life lessons.
6. Jamboree: A large celebration or party, typically lively and noisy.
Example: The annual jamboree attracted visitors from all over the country.
7. Joviality: The state or quality of being jovial; merriness.
Example: The joviality of the festival made it a memorable event for everyone.
8. Jackpot: A large cash prize in a game or lottery, often a source of sudden wealth.
Example: Winning the jackpot was a dream come true for them.
More Positive Nouns That Start With Letter J
The journey through the alphabet brings us to a collection of positive nouns starting with the letter J, each word brimming with optimism and the potential to bring a smile. Let’s explore an expanded list of these positive nouns, offering a broader vocabulary for expressing the joyous aspects of our experiences and the world around us.
Josh
Jollity
Jolly
Juncture
Jaunty
Justness
Jiggle
Jocosity
Jettison
Jubilance
Jam
Jocundity
Jaunt
Jest
Juggler
Jollification
Jubilation
Jovialness
Joke
Justification
Jestfulness
Jingle
Jasmine
Jauntiness
Proper Nouns That Start With J
Proper nouns hold a unique place in English, naming specific people, places, or organisations and always beginning with a capital letter. When we explore proper nouns that start with J, we uncover a world rich with cultural landmarks, influential individuals, and significant events. Let’s dive into some notable proper nouns beginning with J, bringing stories and facts into our learning and conversations.
1. Japan: A country in East Asia known for its rich culture and technological advancements.
Example: Japan is famous for its cherry blossoms in spring.
2. Juliet: A fictional character from Shakespeare’s play, “Romeo and Juliet.”
Example: Juliet is one of literature’s most beloved heroines.
3. Jupiter: The largest planet in our solar system, named after the Roman king of the gods.
Example: Jupiter can be seen from Earth with a telescope.
4. January: The first month of the year in the Gregorian calendar.
Example: New Year’s Day is celebrated on the first of January.
5. Jerusalem: A city in the Middle East, significant to Christianity, Islam, and Judaism.
Example: Jerusalem is a city rich in history and religious significance.
6. J.K. Rowling: The author of the Harry Potter series.
Example: J.K. Rowling created the magical world of Hogwarts and its characters.
7. Java: A programming language widely used in computer science and web development.
Example: They learned Java in their computer science class.
8. Jackson: A common surname or given name, and the capital city of Mississippi, USA.
Example: Jackson, Mississippi, is named after Andrew Jackson, the seventh President of the United States.
More Proper Nouns That Begin With J
As we delve further into the fascinating world of proper nouns, starting with J, we uncover names and places integral to our understanding of the world’s geography, history, and culture. Below is an expanded list of proper nouns beginning with J, highlighting various significant locations, influential figures, and notable entities that spark curiosity and encourage further exploration.
Jamaica
Jurassic
Johannesburg
Jeddah
Jordan
Jackson
James
Jakarta
Juliette
J. K. Rowling
Java
John
Jefferson
Jane
Jules
Japan
Juventus
Jerusalem
Jupiter
JetBlue
January
Johnson
June
Julia
July
Countable Nouns That Start With J
Countable nouns represent items we can count, offering a tangible way to measure and understand the world around us. When we focus on countable nouns that start with J, we open the door to a fascinating array of objects, places, and things that can be quantified. Let’s explore some countable nouns beginning with J, each bringing its unique essence into our daily language.
1. Jacket: A clothing for the upper body that can be counted.
Example: She packed three jackets for her trip, expecting cold weather.
2. Jar: A container with a wide opening for storing food, liquids, or other items.
Example: He bought two jars of honey from the local market.
3. Jewel: A precious stone that can be counted and collected.
Example: The treasure chest contained exactly twenty-four jewels.
4. Joke: A funny story or quip that can be told and shared.
Example: He knew several jokes about pirates and shared them at the party.
5. Journal: A diary or notebook used for personal or academic purposes.
Example: She keeps all her thoughts in seven different journals, one for each year.
6. Jigsaw: A puzzle of numerous pieces that fit together to form a picture.
Example: They completed the 100-piece jigsaw in just under an hour.
7. Jellybean: A small, bean-shaped sugar candy with soft candy shells and gel interiors.
Example: For Easter, they bought a bag containing over 200 jellybeans.
8. Jump: A leap or bound that can be counted in exercises or games.
Example: In the game, each player had to make five jumps to reach the finish line.
More Countable Nouns Beginning With Letter J
Expanding our exploration into the realm of countable nouns that start with J, we find ourselves surrounded by a rich assortment of words representing quantifiable things, ideas, and experiences. Below is a curated list of additional countable nouns beginning with J.
Job
Jail
Jump
Javelin
Jewel
Jellyfish
Jacket
Jackpot
Jar
Jamboree
Jigsaw
Jury
Journal
Junction
Joke
Junior
Jellybean
Jogger
Jeep
Juicer
Jasmine
Jockey
Jackal
Journalists
Jet
Uncountable Nouns That Start With J
Uncountable nouns, or mass nouns, refer to substances, concepts, or masses that cannot be divided into separate elements or counted. These nouns embody ideas from abstract concepts to physical substances that flow or exist as wholes. When we explore uncountable nouns, starting with J, we uncover a unique aspect of language that challenges and enriches our understanding of quantity and form. Let’s dive into some uncountable nouns that start with J, offering insights into how these words shape our world perception.
1. Joy: A profound feeling of happiness or delight that cannot be quantified.
Example: The joy of spending time with family is immeasurable.
2. Justice: The concept of moral rightness based on ethics, law, fairness, and equity that defies physical measurement.
Example: Justice is a foundational principle of society.
3. Jealousy: An emotion that can’t be counted, reflecting feelings of envy or covetousness.
Example: Jealousy often complicates relationships.
4. Jazz: A genre of music characterised by its complex harmonies and rhythms.
Example: The smooth jazz filled the room, setting a relaxed mood.
5. Jam: A musical session where musicians play together informally, not quantifiable as individual units.
Example: They enjoyed the jam session late into the night.
6. Jargon: Special words or expressions used by a profession or group that are difficult for others to understand.
Example: Medical jargon can be confusing for those outside the field.
7. Judgement: The ability to make considered decisions or come to sensible conclusions, not easily quantified.
Example: Good judgement comes from experience.
8. Journalism: The activity or profession of writing for newspapers, magazines, or news websites.
Example: Journalism plays a crucial role in keeping the public informed.
More Uncountable Nouns That Begin With J
Delving further into uncountable nouns opens up new avenues for understanding and communication, mainly when focusing on nouns that start with J. Here, we present a comprehensive list of uncountable nouns beginning with J, each contributing to the rich tapestry of the English language and offering endless possibilities for learning and expression.
Juiciness
Jurisprudence
Jealousy
Junk
Juxtaposition
Jitteriness
Jelly
Justification
Jalopy
Jollity
Jive
Jeering
Journalism
Jubilance
Jute
Jocularity
Jubilation
Jingoism
Jeopardy
Judiciousness
Juice
Juncture
Jelly
Jurisdiction
Joviality
Inforgraphic
FAQs
1. What is the significance of teaching nouns starting with J to your child?
Teaching nouns starting with J to your child helps broaden their vocabulary, encourages curiosity about language, and supports their overall linguistic development.
2. How can you make learning nouns that begin with “J” enjoyable for kids?
Learning nouns that begin with “J” can be enjoyable for kids by incorporating interactive activities such as “J” word scavenger hunts, crafting stories with “J” nouns, or playing matching games with “J” word cards.
Exploring nouns that start with the letter J offers a delightful way to enrich a child’s vocabulary and spark their imagination. By incorporating these words into engaging activities and daily conversations, we can create a joyful learning environment that fosters a love for language. As children discover the vast world of nouns beginning with J, they expand their linguistic skills and develop a deeper appreciation for the nuances and beauty of the English language.
Read more
30 Easy and Fun Party Game Ideas for Kids
Keeping your kids engaged throughout the day can quickly deplete your go-to list of ideas and activities. Now imagine a lively group of children gathered for a party, all eager to jump into something fun and exciting. When it comes to parties, one of the best ways to keep kids entertained and ensure they have an unforgettable experience is by organizing a variety of games for kiddies parties. These games, whether an indoor party or outdoor party, add energy and joy to the event, lighting it up and creating a festive atmosphere. We’ve put together some fantastic game ideas that are sure to make the party even more delightful, keeping little ones entertained and filling the day with laughter and memories.
Indoor Party Games for Children
Indoor party games for toddlers are much sought after as they’re very popular with the kids! Some of the indoor party games for kids include:
1. Passing the Parcel
It is one of the most popular games and is loved by all. Either you can play it the traditional way by playing with a cushion or you can spice it up. To make it more fun, here is what you will need.
What You Will Need
The main gift
Variety of tiny gifts
A lot of wrapping paper or old newspaper
How to Play
Wrap the main gift with a new wrapping paper.
Now use the newspaper to keep wrapping it in multiple layers. You can slip in a few smaller gifts in the certain layers, like sticker sheets, chocolates, toffees etc.
Let all the children sit in a circle. One kid holds the parcel. Play their favourite music and let them pass the parcel around.
When the music stops, the kid with the parcel has to unwrap a layer. If he finds a gift in that layer, he gets it.
This continues until a kid unwraps the final gift.
2. Chocolate Eating Monsters
This children’s party game will leave your kids wanting to play so much more, because who wouldn’t want to play a game where you get to eat unlimited chocolate?
What You Will Need
A large slab of chocolate or chocolate cake
A plastic knife
A hat
A jacket
A pair of gloves
Dice
How to Play
Let the kids sit in a circle. Place the cake or chocolate in the centre with a knife. Keep the hat, jacket, and gloves on one side.
Ask one kid to start rolling the dice. Each kid rolls it once and passes it to the next kid once the number has been seen.
Whenever a kid rolls a 6, he needs to quickly wear the hat, the jacket, and the gloves. Once he has worn them, he can use the knife to cut a small slice of the cake and eat it.
The kid can continue eating it while others keep rolling the dice. The moment somebody else rolls a 6, the first kid needs to hand everything to the other kid, who needs to wear it all so that he can start eating the cake.
3. Pin the Tail on Me
The classic version of this game uses a donkey but you can replace that with any other favourite cartoon character or replace it with a birthday party version.
What You Will Need
A large board
A favourite image
An object to pin up with a pushpin attached to it
A cloth
How to Play
If it is your child’s birthday, you could use his photo as an image and make the pinup object as the birthday hat or a pair of sunglasses, and so on.
Each child will get his turn. Blindfold a child and give him the object that is to be pinned.
He has only one chance to move towards the board and pin the object.
Once he pins it, remove the blindfold and let everyone vote on how close it was. The kid who pins the object closest to the right position gets a prize.
4. The Silent Animal Gets the Fruit
Introduce this kids’ party game smartly when kids are getting out of control and are all over the place. It is bound to calm them down for a while.
What You Will Need
A gift
Anything that makes funny sounds
How to Play
Turn a room into a forest (not literally) and let all kids be animals. On your cue, every animal has to lie down on the floor and sleep instantly.
You can then walk through the forest, talking to them, making funny sounds, telling jokes, etc.
The moment any kid moves or laughs or giggles, he would be out of the game and is moved out of the jungle.
The last kid who remains silent throughout the game will win the game.
5. Catch the Monster Before It Catches You
An extremely exciting game that is bound to leave everyone happy and filled with energy and laughter.
What You Will Need
A large room
How to Play
One child will be ‘himself’ and stand at one end of the room facing the wall.
The rest of the kids are monsters who will stand on the other side of the wall.
The monsters have to touch the kid but they cannot move when the kid is looking at them. The kid has to touch any monster before they touch him.
When the game begins, the monsters need to start moving towards the kid without making sounds. At any point, the kid can suddenly turn around and open his eyes. The monsters need to freeze precisely where they are.
Whoever touches the other, wins the game.
6. The Memory Game
Looking for a game for six-year-olds? Here’s a game that allows kids to sit in one place and rack their brains for a change.
What You Will Need
A variety of items – small and large
A big tray or table
A big box
Papers and pencils
How to Play
Lay down all the items that you have on the table or the tray as closely as possible so that those can be covered with a box.
Give every kid a paper and pencil and let them sit or stand such that they can easily see the items.
When the game begins, lift the box and reveal the items for a specific amount of time, say 10 seconds or so. Cover the items with the box later.
Now, each kid needs to list out the items. The one who can list the most wins.
7. Dance to The Music, Statue to the Silence
A nice way to get a party started and get the kids on their feet.
What You Will Need
Speakers and music
How to Play
Let all kids stand wherever they are in the same room. The rule is to dance when the music plays and freeze when the music stops.
Start the music. Let the kids get into the groove and stop the music at a random point.
The kid who lasts the longest wins the game.
8. The Cotton Ball Handler
Seems very easy until kids actually start playing it and end up pranking their friends.
What You Will Need
Two bowls
Cotton balls
A spoon
A blindfold
How to Play
Blindfold a kid and bring him to the table that has two bowls.
Place all cotton balls in one bowl and keep the other ball empty and at a distance.
The kid is supposed to use the spoon and put the cotton balls in the other bowl using only one hand.
To make it a prank, you can remove the cotton balls after blindfolding the kid and let him continue doing the act of shifting the balls with the spoon.
9. Don’t Be the Donkey
An exciting game where everyone will fight to not become a donkey.
What You Will Need
A large bedsheet
A feather
Music
How to Play
Let all kids sit in a circle and hold the bedsheet such that it is taut. Place the feather right in the middle of it.
Start the music and the kids can start tipping the bedsheet to a side. All kids need to be sitting at all times.
As the feather moves to a side, the kids need to blow it to the other one.
Whoever the feather touches becomes the donkey.
10. Hide and Seek
This game has been around for a long time now and can be played indoors as well as outdoors. The place doesn’t matter, kids love this game.
What You Will Need
A house with a lot of space
How to Play
In this game, one person, also called ‘denner’ will cover his eyes and count aloud. He can count to 50 or 100 while other players hide.
Once the denner is done with the counting, he will start looking for other kids (hiders).
The first person who the denner finds becomes the new denner.
11. Balloon Pop Surprise
A fun game for kids who love surprises and quick challenges.
What You Will Need
Balloons
Small pieces of paper with activities or prizes written on them
How to Play
Place a small note with a fun activity or small prize in each balloon before inflating it.
Let each child pick a balloon to pop.
When a balloon is popped, the child completes the activity written on the note or claims their prize.
Continue until all balloons have been popped and prizes claimed.
12. Treasure Hunt with a Twist
A creative game that involves problem-solving and teamwork.
What You Will Need
Clues or small items hidden around the room
A final “treasure” item
How to Play
Hide small items or clues in different locations around the party room.
Give each child or team the first clue leading to the next location.
The first team to follow all the clues and find the final “treasure” wins a small prize.
13. Freeze Dance Relay
A combination of dancing and relay racing, perfect for energetic kids.
What You Will Need
Music player
Small objects to act as batons
How to Play
Divide the kids into two teams, each starting at opposite ends of the room.
Start the music, and each team sends a child to dance across the room with the baton.
The kids freeze when the music stops.
Continue until every child on each team has had a turn; the first team to complete the relay wins.
14. Stack ‘Em Up
A game that requires balance and precision, adding excitement and suspense.
What You Will Need
Paper or plastic cups
How to Play
Challenge each child to stack a certain number of cups without letting them fall.
Kids take turns stacking, and whoever builds the tallest or most stable stack within a time limit wins.
15. The Mummy Wrap Challenge
Perfect for Halloween-themed parties or just some creative fun.
What You Will Need
Toilet paper rolls
How to Play
Pair up the kids and give each pair a roll of toilet paper.
One child wraps the other like a mummy in a set amount of time, making sure to cover as much as possible.
The pair with the best-wrapped mummy wins a prize.
Outdoor Party Games for Kids
When the celebration is on a lawn or a garden, outside party games for kids are extremely useful in bringing life to the party.
1. Racing with Eggs and Spoons
The all-time classic game that never fails to make an impression.
What You Will Need
Spoons
Eggs or plastic balls
How to Play
Make all kids stand in a line and hold a spoon with an egg or a plastic ball balanced on it.
On cue, they need to start walking as fast as they can towards the finish line without dropping the egg or plastic ball.
The first to reach the finish line wins the game. You can keep moving the finish line further away as well.
2. Turn to the Left, Turn to the Right
A quick game that can be played in teams and increases the competitive spirit.
What You Will Need
Balls
How to Play
Split the kids into 2 teams and let each team form a line. Give a ball to the first kid in the line.
On the cue, every member has to pass the ball to the one behind him. If the second person receives the ball from his left, he needs to pass it behind from his right.
When the ball reaches the end of the line, the last kid runs ahead to become the first and continues the game. This goes on until the original kid comes back to the front.
The first team to complete an entire cycle wins.
3. Finding the Buried Treasure
This game is quite messy, but kids will surely have fun playing it.
What You Will Need
A large tub
Sand
Gifts and chocolates
How to Play
Keep chocolates and gifts at the bottom of the tub and cover it with sand.
Make the kids stand around the tub. On your cue, the kids need to start digging through the sand and find the treasure.
Whatever they find, they can keep for themselves.
4. Fox and the Doughnuts
A modern take on the fable of the fox and the grapes. Only this time, the grapes are not sour.
What You Will Need
A long rope
Doughnuts
A bundle of thread
Scissors
How to Play
Tie a rope between two trees at a certain height and hang the doughnuts off it by tying them with threads.
The kids need to stand under the rope and attempt to eat the doughnuts without using their hands.
There’s no winner in this since the doughnut is the prize. You can lower the rope for other kids after the first round.
5. We are the Explorers
Just like the treasure hunt, this game is fun too.
What You Will Need
Various items
Riddles or maps
How to Play
Hide various items in a garden or your building.
Make two teams of kids. Give each team a map with riddles that depict where the items could be.
Let the kids rack their brains to solve the riddle and rush to the location to find the items.
The team that finds the most items wins.
6. Duck and Goose Chase
The game you might have played as kids, which your kids will also love.
What You Will Need
An open space
How to Play
Make kids sit in a circle. One kid will walk around the circle tapping everyone’s head and saying ‘duck’.
At any point, if he says ‘goose’, the person needs to get up and chase him before he can run around and sit on the spot where ‘goose’ was sitting. The other person who is chasing will now repeat the cycle.
7. Sack Race
The sack race is an all-time favourite game. You will need to arrange sacks, but we assure you that kids will love this game.
What You Will Need
Many sacks
How to Play
Opt for a softer area for this game. All kids need to stand inside the sack in a horizontal line.
On the cue, they need to hop with the sack and reach the finish line first. Many will fall, but they should get up and continue running.
The first to reach the finish line wins.
8. Catch the Dragon’s Tail
Catch the dragon’s tail is a fun game and should be played when there is a large group of kids.
What You Will Need
An open space
How to Play
Make two teams of kids. Each team makes a long line. One is the head, and the other is the tail.
The head needs to bite the tail, and the tail needs to run away, but they all need to run without letting go of each other.
If the head bites the tail, the roles switch, and the game continues.
9. Pop the Balloon
This game will seem like a riot but will leave everyone tired yet happy. Know how to play this game.
What You Will Need
Balloons
Strings
How to Play
Tie a balloon to each kid’s ankle with a string.
Now every kid needs to protect his balloon while stomping on another kid’s balloon.
The child who keeps his balloon safe until the end is the winner.
10. Ring Toss
A game where everybody can win if they are good at it.
What You Will Need
Big plastic rings
Various gift items
How to Play
Place the items away from the kids on a table. Each kid gets a fixed amount of rings to toss around the items.
The kid who throws the ring correctly (most items are captured in separate rings) will win the game.
11. Tug of War
A classic game that brings kids together in a fun and friendly competition.
What You Will Need
A long, sturdy rope
A designated area with a soft surface
How to Play
Divide the kids into two teams, ensuring an equal number on each side.
Have each team grab opposite ends of the rope.
On your cue, each team should start pulling to bring the other team across the designated center line.
The first team to pull the other team over the line wins.
12. Water Balloon Toss
Perfect for a hot day, this game is fun and refreshing.
What You Will Need
Water balloons
How to Play
Pair up the kids and give each pair a water balloon.
Have each pair stand close together and gently toss the balloon back and forth.
With each successful toss, each player should take a step back, making the game more challenging.
If a pair’s balloon breaks, they’re out. The last pair with an unbroken balloon wins.
13. Obstacle Course
An exciting game to burn off some energy and encourage teamwork.
What You Will Need
Cones, hula hoops, ropes, and any other items to create obstacles
How to Play
Set up a course with obstacles like jumping over cones, crawling under ropes, or hopping in hula hoops.
Split the kids into teams or let them go one by one.
Each player has to complete the course as quickly as possible.
The team or individual with the fastest time wins.
14. Three-Legged Race
This game is a fun way to teach coordination and teamwork.
What You Will Need
Ropes or scarves to tie ankles together
How to Play
Pair up the kids and tie one person’s right leg to the other person’s left leg.
On your cue, they have to race to the finish line.
The first pair to reach the finish line wins, but everyone will have a blast trying!
15. Balloon Relay Race
A simple, energetic game for kids of all ages.
What You Will Need
Balloons
How to Play
Divide the kids into two or more teams and line them up.
Each team member must place a balloon between their knees and hop to a designated point and back without dropping or bursting it.
If the balloon drops, they have to start over.
The first team to finish the relay wins the game.
FAQs
1. How can I keep shy children engaged during party games?
Encourage shy kids to join by starting with games that don’t require direct competition or too much interaction, like quiet observation-based activities or partner games, where they can team up with a friend or family member to feel more comfortable.
2. What are some ways to ensure party games are safe for kids of different age groups?
For safety, modify games based on age by choosing gentle activities with soft materials and clear boundaries, and avoid games that require fast movements or physical contact for younger children or those less coordinated.
3. How can I keep the excitement up if kids lose interest in games quickly?
To keep the excitement high, mix up short games with quick, fun rewards after each round, like stickers or small treats, and switch activities before they get bored to maintain engagement throughout the party.
These were some amazing party game ideas for kids. Parties and gatherings are a fun way to get kids together and interact with each other. And games make the parties all the more interesting. So, try these games and make your child’s birthday party a memorable affair.
Also Read:
One-Minute Games for Kids
Memory Games for Kids
Music Games and Activities for Children
Animal Games and Activities for Kids
Group Games and Activities for Kids
Read more
Compound Words for Kids – Definition, Types, Benefits, and Examples
Have you ever seen two ordinary words come together and make something totally new? That’s the magic of compound words! For kids just learning to stretch their vocabulary, this can be such a fun part of reading and writing. Think of a snowman. It’s not just “snow” and “man”—it’s that frosty friend we build in the yard when winter rolls in! Compound words help children understand how language grows and connects, and once they catch on, it becomes like a puzzle game they can’t stop playing.
Teaching compound words in English is a great way to encourage kids to be curious about how words work. Whether your child loves books, drawing stories, or even naming their toys, learning about compound words makes their language more colourful and creative. In this article, we’ll explore what these words are, the different types, how they help young learners, and, of course, some fun examples!
What Is a Compound Word?
A compound word is made when two small words are joined to form a new word. This new word has its own meaning and is often easy for kids to understand when they look at the parts. Teachers and parents use these words to help children grow their vocabulary. If you want to define a compound word, just say it is two words that become one. Kids enjoy finding these in books or making them up for fun. Learning compound words for kids can be both playful and helpful for reading and writing.
Here are some easy and fun compound word examples kids can learn and remember
Toothbrush
Rainbow
Cupcake
Snowman
Football
Bookshelf
Starfish
Sunflower
How Are Compound Words Formed?
Compound words are formed by joining two smaller words to make one new word. Each small word has its own meaning. When they come together, they create a new meaning. Some are written as one word, like toothbrush. Others stay apart like ice cream. Some use a hyphen like mother-in-law.
Image Credit: Pinterest
When to Teach Compound Words to Kids?
You can start teaching compound words when kids begin to read simple words. This is usually around age five or six. At this age, they can understand how two words can come together. It is best to begin with fun and common words like snowman or cupcake. Use pictures and games to make it easy and fun. Teaching slowly with real-life examples helps kids learn better.
Benefits of Teaching Compound Words to Kids
Teaching compound words to kids helps them become better readers and improves their vocabulary. These words make learning fun and show children how smaller words come together to form new ones with different meanings. It also builds their confidence and makes spelling easier over time.
1. Improves Vocabulary and Word Knowledge
When children learn compound words, they are exposed to many new words at once. For example, the word sunflower teaches them both sun and flower. This way, they understand the meaning of each part and how they work together. It builds their vocabulary naturally and helps them improve their use of new words in sentences.
2. Makes Reading More Enjoyable
Compound words often appear in storybooks, rhymes, and everyday reading material. Once kids know how to break them into parts, they find it easier to understand longer words. It reduces reading frustration and makes stories more fun to read. They can guess meanings from familiar parts, which boosts their interest in reading more.
3. Encourages Better Spelling
Learning how two words join together helps children understand spelling patterns. Words like notebook or basketball become easier to spell when kids see them as smaller words joined together. It also helps them identify which letters go where and makes them more confident while writing new words on their own.
4. Builds Word Formation Skills
Understanding compound words lays the foundation for building new words. Children become more aware of how language works and can even try creating their own compound words. This builds creativity and makes language lessons more exciting. They learn that language can be flexible and fun when words are combined smartly.
5. Helps in Daily Communication
Compound words are commonly used in everyday life. Teaching them early helps children understand common words like toothbrush, raincoat, or birthday. Learning such words improves their listening and speaking skills because they can understand and use such words in conversations. It also makes schoolwork and activities easier for them.
Image Credit: Pinterest
Different Types of Compound Words
Compound words are made by joining two or more smaller words to create a new word with a different meaning. These words help children understand how language works and improve both reading and writing skills. There are three kinds of compound words that children can learn easily through examples and fun activities.
1. Closed Compound Words
Closed compound words are single words with no spaces or hyphens. They are very common and often used in daily language. Examples include ‘sunflower,’ ‘notebook,’ and ‘classroom.’ Kids can spot these words in storybooks or school lessons. Learning closed compound words improves spelling and reading fluency because they look like long words but are made from simple parts. This type is helpful while teaching compound word examples in early classes.
2. Open Compound Words
Open compound words are written with a space between the two words. Even though they are two separate words, they work together to form one idea. For example, ‘post office,’ ‘ice cream,’ and ‘full moon’ are open compound words. Children can learn them by matching word pairs and using them in simple sentences. Teaching open compound words also helps improve vocabulary and daily communication. These are great for explaining the types of compound words to kids in a fun way.
3. Hyphenated Compound Words
Hyphenated compound words are spotted with the help of a hyphen. The words are connected using a hyphen in the middle. They are often used in writing to avoid confusion or to join two words that work together. Some examples are ‘mother-in-law,’ ‘well-known,’ and ‘part-time.’ These words help kids understand punctuation and sentence structure better. By using picture cards or worksheets, parents and teachers can make this concept more engaging. This is one of the three types of compound words that can be taught with easy examples.
4. Blended Compound Words
Blended compound words are created by combining parts of two words rather than whole words. These are less common but still important for learning word formation. Examples include ‘brunch’ (breakfast + lunch) and ‘smog’ (smoke + fog). Teaching blended words can help kids discover how language evolves. This also builds creativity and word-building skills. It adds to the overall understanding of three kinds of compound words in a more modern and interesting way.
Image Credit: Pinterest
List of Compound Words for Kids
Kids come across many compound words every day while reading or speaking. Learning these words helps them grow their vocabulary and understand word meanings in a better way. Below is a simple and fun list of some compound words that children can learn and enjoy using.
This is a commonly used compound words list A to Z to help kids see how these words are formed. Each word is made by joining two simple words to create a new meaning. Here is a table of 200 compound words to explore.
Column 1
Column 2
Column 3
Airport
Armchair
Afternoon
Backpack
Baseball
Bedroom
Birdhouse
Bookshelf
Boardwalk
Bookstore
Brainstorm
Bunkbed
Butterfly
Carpool
Cartwheel
Chalkboard
Cupcake
Daydream
Doorbell
Dragonfly
Earthworm
Eyeglasses
Firefighter
Firefly
Fishbowl
Football
Footprint
Hairbrush
Haircut
Handshake
Handbag
Headphones
Homework
Horseshoe
Houseboat
Iceberg
Ice cream
Jellyfish
Keyboard
Ladybug
Laptop
Lighthouse
Mailbox
Moonlight
Newspaper
Notebook
Pancake
Playground
Popcorn
Postcard
Raindrop
Rainbow
Sailboat
Sandbox
Shoelace
Skyscraper
Snowball
Snowflake
Snowman
Spaceship
Starfish
Starlight
Stopwatch
Strawberry
Sunglasses
Sunflower
Sunrise
Sunset
Superman
Supermarket
Tablespoon
Tailbone
Teacup
Toothbrush
Toothpaste
Treehouse
Turtleneck
Underwear
Volleyball
Waistcoat
Wallpaper
Wardrobe
Washing machine
Waterfall
Waterproof
Wheelchair
Windmill
Windowpane
Windshield
Workshop
Wristwatch
Zookeeper
Zipline
These words are simple and easy to remember. Using a fun table like this helps kids find and learn new words quickly. Let your child explore this table and pick their favourites to use in writing or games.
Some Compound Word Sentences for Kids
Using compound words in simple sentences helps kids understand how these words work in real life. It also shows them how two small words can come together to create a new meaning. Below are easy sentences for children to read and learn from. Each one is an example of compound words with meanings that is clear and fun to read.
Here are 10 simple sentences with compound words:
I packed a cupcake in my lunchbox.
The rainbow appeared after the rain stopped.
We built a snowman in the front yard.
My dad used a toothbrush after breakfast.
She wore sunglasses on the sunny beach.
He found a starfish while walking near the sea.
Mom rang the doorbell before walking in.
I read a storybook before going to bed.
The football match was fun to watch.
We saw a ladybug on the flower.
Each sentence helps kids see how compound words fit naturally in daily talk. These are great for reading practice and learning new words with fun.
Image Credit: Pinterest
How to Teach Compound Words to Kids
Teaching compound words can be easy and fun when done in a simple way. Kids enjoy learning when they see how two small words turn into one new word. These methods are great for home or classroom and work well when teaching a compound word for kindergarten learners, too. Thus, helping kids learn while building strong word skills step by step.
1. Use Pictures
Show pictures of things like a ‘snowman’ or ‘cupcake,’ and ask kids to name the parts.
2. Word Matching Game
Give kids cards with words like tooth and brush, and let them match them.
3. Read Storybooks
Pick books that have simple compound words and read them aloud.
4. Play Word Puzzles
Use fun puzzles where kids join two words to form one.
5. Make a Compound Word Chart
Hang a chart with colourful compound words for daily learning.
6. Use Real Life Examples
Point out things at home, like ‘mailbox’ or ‘toothbrush,’ and say the word parts.
7. Sing Songs or Rhymes
Create or use rhymes that include compound words for better memory.
8. Let Kids Create Their Own Words
Ask them to make silly or real compound words by joining two things they know.
FAQs
1. Why should kids learn compound words early?
It helps children grow their word power and understand word meanings better. It also builds reading and spelling skills in a fun way.
2. What are some good compound words for classes 1, 2, and 3?
Words like toothbrush, rainbow, football, cupcake, and snowman are easy and fun compound words for classes 1, 2, and 3 young learners. These words are part of daily life and help kids connect learning with things they see around them.
Compound words are a fun and innovative way to help kids grow their vocabulary. They show how simple words can come together to create something new and valuable. Learning them builds reading, spelling, and speaking skills. Kids enjoy spotting these words in books and using them in stories. Teaching compound words with games, songs, and pictures makes learning easy and fun. Whether in class or at home, they are perfect for kids of all ages. Start early and let kids explore the magic of words every day.
Also Read:
Concrete Noun for Kids
Opposite Words for Kids
How to Teach English to Kids?
Read more
Rickets in Children
Rickets is a preventable disease of bones that is caused by the deficiency of vitamin D and calcium. It occurs in children only in their growing years and leads to softer, weaker bones that bend into abnormal shapes or fracture. Rickets can affect babies as young as three months and go all the way up to adolescence. With early treatment involving adequate supplementation of vitamin D and calcium, rickets can be treated effectively. If left untreated, rickets can cause physical disability that can be permanent.
Video: Rickets in Children – Causes, Symptoms and Treatment
What Is Rickets?
Rickets is a deficiency disorder that results in weakening and deformation of bones in children. It is caused by the prolonged deficiency of vitamin D, which is necessary for the absorption of calcium by the body. Lowered levels of calcium either due to poor absorption or a lack of sufficient amounts in the diet cause the bones to become soft and weak. The bones take a slightly bowed shape and give the children a deformed appearance in the legs. Globally rickets is common in children between the ages of three and 18 months. Rickets in babies less than a year old is mostly caused by vitamin D deficiency.
Who Is at the Risk of Getting Rickets
Infants and children are at the highest risk of rickets. Children who come from poverty-stricken backgrounds suffering from malnutrition have a high risk. Children who are less exposed to sunlight can have a deficiency of vitamin D as sunlight is needed for its production. Those growing up as vegans have a zero intake of dairy products and get lesser calcium. A lack of both vitamin D and calcium gives rise to the highest risk of rickets in children. In sunny countries, rickets is caused more by a lack of calcium intake than due to low vitamin D levels. Other risk factors involve children who suffer from diseases that interfere with the absorption of vitamin D such as inflammatory bowel disease, celiac disease, cystic fibrosis and kidney-related issues.
Causes & Risk Factors of Rickets in Children
Rickets is mainly caused by insufficient amounts of:
Vitamin D (either through diet or sunlight exposure)
Dietary calcium
Both vitamin D and calcium
Vitamin D is produced naturally in the body when the skin is exposed to sunlight. It is also found in foods such as oily fish and eggs. A deficiency of vitamin D stops the body from absorbing calcium and phosphorus. Calcium is mainly found in dairy products such as milk and is essential for children to develop strong bones.
There are several risk factors for getting rickets and include the following:
Age: Rickets broadly occurs between the ages of six and 36 months. This is a period of rapid growth in children and their bodies need a good supply of calcium and phosphates to build their bones.
Diet: Children raised as vegetarians or vegans have a greater risk of developing rickets as meat, eggs and dairy products contain ample amounts of calcium and much-needed nutrients. Children who have lactose intolerance or have a hard time digesting milk or dairy products are also at risk. Babies who are only breastfed also have a risk of developing rickets as breast milk lacks enough vitamin D to prevent rickets.
Skin colour: Children with darker skin have a natural barrier against sunlight in the form of melanin. This means their skins produce lesser vitamin D when exposed to the sun.
Geographic location: Exposure to sunlight is needed by our bodies to produce vitamin D and children living in latitudes with lesser sunlight are at a risk.
Hereditary: Hereditary rickets is one form of the disease that can be passed on through genes. Such children have kidneys that do not absorb phosphates well.
Rickets Signs and Symptoms in Kids
The symptoms of rickets include:
Tenderness or pain in the bones of the arms, legs, spine and the pelvis
Short stature and stunted growth
Weak bones that fracture easily
Muscle cramps and in severe rickets, seizures
Dental problems such as:
Delayed formation of teeth
Enamel erosion and holes
Defects in teeth
A high number of cavities
Abscesses
Skeletal deformities such as:
Bowlegs; legs that look curved like a bow
Oddly shaped skull
Protruding breastbone
Oddly curved spine
Deformities in the pelvis
Bumps in the ribcage
Thickened ankles and wrists
What the Complications Might Be
If left untreated, rickets can cause physical deformities and serious effects such as failure to grow, abnormally curved spine, deformities in the limbs and dental defects. The delay in teething is accompanied by weak tooth enamel and malformed teeth. In babies, it can lead to the delay in the closing of the anterior fontanelle which is the soft spot at the top of the baby’s skull. In severe rickets with very low levels of blood calcium, children can develop seizures. It is a medical emergency and should be treated immediately.
How Is the Diagnosis Done?
Rickets is diagnosed by a complete physical exam combined with the assessment of medical and nutritional history. In the physical exam, the doctor will gently press on the bones to look for tenderness and pain. Apparent signs of deformations in the limbs and skull are also made a note of. If the child doesn’t have severe symptoms such as tetany or seizures, X-rays of long bones and ribs are obtained. Laboratory testing for vitamin D, alkaline phosphate, electrolytes and the parathyroid hormone is conducted to check for their levels. If there is a match between those and X-rays revealing obvious deformities in the skeleton, rickets is confirmed. The laboratory tests also reveal different causes of rickets which can then be used for treatment.
Treatment for Rickets in Kids
Since most cases of rickets are caused by the deficiency of vitamin D and calcium, treatment involves increasing the child’s intake of vitamin D and calcium. The doctor determines how much of the two is needed based on the child’s age and cause of rickets.
Treatment can involve:
Intake of foods rich in vitamin D and calcium.
Intake of vitamin D and calcium supplements.
Vitamin D injections administered every year in case the child is unable to take supplements by mouth.
Exposure to the sun in the form of outdoor activities or sunbathing.
When rickets is a complication of another medical condition, treating the underlying condition often resolves rickets.
Children with deformed bones or spine may be advised corrective surgery and the use of braces and supports may be needed till the bones get stronger.
Children with genetic rickets would need a combination of a special form of vitamin D and phosphate supplements for treatment.
What to Expect After Treatment
Regular follow up is needed to check for healthy levels of vitamin D, calcium and phosphorus levels in the blood and body. X-rays will be done at regular intervals to check for bone growth and density. Treatment outcomes are excellent in children with nutritional rickets when diagnosed early. Adequate supplementation with vitamin D and calcium can start showing results in a matter of weeks to months. Bowing of the legs in some of the longer-standing rickets cases can also resolve on their own without surgical intervention. However, in children with an advanced stage of rickets, some of the damage can be permanent.
How to Prevent Your Child From Getting Rickets
Several preventive measures can be taken to ensure your child doesn’t get rickets. If the child spends enough time playing outside in the sun and eats nutritional food rich in vitamin D and calcium, it keeps rickets at bay. Few minutes of sunlight a day, few times a week is helpful in producing vitamin D. The daily requirement for both infants and adults is about 10 micrograms (mcg) of vitamin D a day. Pregnant and breastfeeding women should consider taking the recommended 10mcg of vitamin D a day as a supplement to ensure the baby has enough. Also, children between one to four years old should be given a 10mcg vitamin D supplement on a daily basis.
When to Seek Medical Advice
When children show signs of rickets although they are given plenty of nutritious food rich in calcium and vitamin D, its time to seek medical advice. Genetic disorders and other illnesses can affect the absorption of vitamin D, calcium and phosphorus leading to rickets. A different treatment approach is needed in these cases.
Rickets is an easily preventable disease with proper nutrition and supplementation. It can be avoided by getting enough sunshine every day and eating foods rich in vitamin D.
Also Read: Tuberculosis in Children: Causes, Symptoms and Treatment
Read more
12+ Easy and Scary Halloween Makeup Ideas for Kids
Halloween is the perfect time for kids to get creative with fun and easy makeup looks that bring their costumes to life. Instead of relying only on store-bought masks, face paints and child-friendly makeup can transform little ones into adorable animals, spooky ghosts, friendly witches, or even their favorite superheroes. Parents can use simple, non-toxic paints to create designs like pumpkins, bats, cats, or skeletons without spending hours on preparation. The best part is that makeup allows room for imagination kids can mix and match colors and characters to make their looks unique. Quick designs such as a spider web on the cheek, vampire fangs with red lipstick, or glittery fairy wings are perfect for last-minute ideas. With safe, washable products and a little creativity, Halloween makeup for kids can be both fun and hassle-free, making trick-or-treating extra exciting.
How to Do Halloween Makeup for Children?
Here are some easy ideas your kids could try this year!
1. Pirate
Dress up your little boy as a young pirate!
What You Will Need
Sponge
Brown and yellow eyeshadow
Black eyeshadow for eyebrows
Pencil eyeliner (black or dark brown)
Eyebrow brush
Eyeshadow blending brush
Stippling sponge
Eyepatch
Fake moustache
Eyelash glue, liquid latex
Costume
How to Do
Start by dirtying up the face of your kid with a sponge. The cheeks, forehead, and neck should be smudged by using brown and yellow eyeshadows.
The eyebrows should be darkened using an eyeliner pencil or eyeshadow, making them look unkempt and full. The pirate will look more menacing when the eyebrows are darker and the arch is more severe.
On the eye without the eyepatch, add dark brown eyeshadow below the eye to mimic dark circles.
Add facial hair by dipping sponge into a wet brown eyeshadow or face paint then dab it on the chin and above the lip so that the pirate will have an unshaved look. You could also use a fake moustache instead of the makeup. Stick them using an eyelash glue or spirit gum. Make sure that your child is not allergic to these products.
Finally, you can put together some ripped clothing and add other accessories like a pirate hat, gold coins, or a hook.
2. Lion
Turn your little kid into a roaring lion this Halloween. This could also work for a cat Halloween makeup look.
Image Source : Pinterest
What You Will Need
Face paint kit (with the colours white, yellow, orange, brown, and black)
Wedge or circular sponges
Paintbrush (thin-detailed)
Cup of water
Makeup blending brush
Eyeshadow (brown)
How to Do
Start by dampening a sponge and then pick up some yellow face paint. When you are using dry face paint, make sure you use a wet brush or sponge before dipping into the paint.
With the use of a sponge, include the orange with the yellow paint and try and blend out to create an ombre effect. Paint the orange like brushstrokes to resemble fur.
Apply white paint using a clean sponge under the eyes. Add the colour above the top lip blending them onto the cheeks to resemble the muzzle of the lion.
With dark brown or black paint, darken the eyebrows and thicken them. Focusing on the bottom lip, paint the nose black.
The top lip should be painted black, and the colour must be extended to the cheeks. Add black dots to the white area above the lip, add whiskers, too, with short strokes near the cheek and mouth area.
A line of black paint should be painted under the eyes. This is to create cat eyes.
Shade down the nose using a blending brush and add a few strokes of white to the chin and forehead for a little definition and depth.
3. Bunny Rabbit
This is a really cute and popular type of costume.
Image Source : Pinterest
What You Will Need
White paint
Light pink paint crayons (or) wet light pink paint
Dark pink paint crayons (or) wet dark pink paint
Sponges (large and soft brushes)
Black paint crayons (or) wet black paint
Think brushes
Bunny ears
How to Do
Wash your child’s face to get rid of the grease and the dirt because the paint cannot be applied properly and dirt might mix in it which will change the colour. Make sure the face is all dry, clean, and not greasy and wash the face using soap and water.
Add white patches over the child’s eyelids after the child closes the eyes. Use wet paint and not paint cakes so that it will look blended and smooth.
It is best to use a makeup sponge or a soft, large, puffy makeup brush so that the texture is really smooth.
Add a nose patch using the same paint. For the best nose patch, use a puffy brush or a makeup pad. To add the teeth, use a paint stick or a small brush. This can also be painted with a watercolour pencil dipped in water, but it might not sometimes look very suitable for the child’s face.
When the white paint has dried, outline it with pink. You can use a thin brush, paint stick, or even a wet watercolour.
Add a pink nose and outline everything you did in black. Add little whiskers and whisker dots with the help of a thin brush. You could also add bunny ears and give cute little bunny costumes to complete the outfit.
4. Goblin
Dress your kid as a goblin this year!
Image Source : Pinterest
What You Will Need
White paint
Green paint
Green fake nose and ears (optional)
Hair doughnut
Green lipstick
Brown or green eyeliner
How to Do
Paint the face with white face paint (except for the lips and the brows). Before doing this, make sure your kid is not allergic to the contents in the paint.
Cover the neck and the face with green colour on top of the white coating.
Attach a fake nose that matches the paint colour of the green skin. Put this fake one to cover your real nose. Do the same thing for the ears. Add fake ears on top of your child’s real ones.
Tie your child’s hair into a bun using a hair doughnut on the back of the head.
You can use green lipstick on the lips and line the eyes using a green or brown eyeliner. Place three dots of green colour on the cheeks. The size does not have to be the same.
5. Cobweb Eyes
Spooky spider eyes are an entertaining makeup idea for your kid.
What You Will Need
Foundation
Eyeliner
Pencil Liner
Eyeshadow (sparkly)
Liner brush
How to do
Add a little foundation and rosy blush if necessary onto the face. The eyeliner must be applied thickly below and above the eyes to have a smoky eye effect.
For a really intense look, you can top it off with a pencil liner making sure the skin is completely covered up.
Use a sparkly eyeshadow above the eyelids. Using a fine liner brush, include some dots and then add some arches.
To create the look of cobwebs, cross-hatch the lines. You can also use black mascara for your top and bottom eyelashes.
6. Zombie
Zombie makeup for kids is very easy and does not involve much time.
What You Will Need
Gelatin (optional)
Sponge
Makeup
Pencil eyeliner
Lipstick
Fake blood
Red, green shadow
How to Do
First, prepare the face by washing it using a bar of soap and water. Remove the oil from the skin.
For a zombie-like effect, you can use gelatin to add a few wounds, bite marks, bloody gashes, and broken noses. Gelatin is really easy to work with. This should be done during the makeup process and before you start using paints.
Using a sponge or a soft makeup, cover the face with white paint. Allow the colour to dry completely. For a mottled effect, add extra colour to the white base. This can be grey for a decaying effect and red or purple to add a bruised effect. You can add yellow and green for a gangrenous effect.
Add some dark circles using a dark pencil eyeliner. Blend the edges with red or purple shadow.
Blend black powder or paint in the cheeks to create hollows and get a sunken effect.
Apply dark lipstick with some shadowy lines and draw some bloody-looking scratch using a sponge.
Finally, add some fake blood to the hairline. Splatter it on the face using a blood splatter.
7. Vampire
Vampire Halloween makeup for kids is a really popular look and is easy to create.
What You Will Need
Whiteface paint
Charcoal eyeshadow
Fake blood
Red lipstick
Red eyeshadow or blusher
Makeup sponge
Black eyeliner
Fake fangs
Black mascara
How to Do
Apply white face paint to the entire face. Don’t make it too pasty or sticky but make sure that you apply it lightly.
Use the charcoal eyeshadow on the eyelids and use it up to the eyebrows. The charcoal should be smudged under the eyes for theatrical flair.
Apply red blusher or red eyeshadow below the smudged charcoal under the eyes. Use the sponge to smear the red lightly.
Using black eyeliner, line the lower and upper eyelids. Use black mascara on the eyelashes.
Use red lipstick on the lips because the lips have to stand out from the pale skin.
Sprinkle several fake drops of blood on the edges of the lips and cover the teeth with vampire fangs.
Darken the eyebrows with an eyebrow pencil to increase a theatrical flair.
8. Clown
This one is a classic Halloween costume kid could try.
What You Will Need
Cream makeup (white, blue, pink, red, and yellow)
Flat makeup
Craft brushes
Black eyeliner pencil
Makeup sponges
Red foam nose
Red lip liner
Liquid eyeliner
How to Do
Apply white paint using a makeup sponge to just the nose and eyes. Around the edges of the face, feather the makeup so that it softly fades without having a tough makeup line.
With the help of a makeup brush, draw a half circle of blue over one eye flooring the eyebrow line. Blend the white and blue. Repeat the same design on the other eye using red paint and add yellow to the rest of the brow.
Now make a half circle above the natural eyebrow using black eyeliner. It should be thin at the edges and thick at the centre.
Make three circles of red using a craft brush on one cheek. Draw the circles in different sizes and on the other cheek use pink face paint.
To make a clown mouth, use a red lip liner outside the lips, then fill the lips. Extend the edges and add some circles using black liquid eyeliner to outline them.
Draw some lines using the eyeliner just below the lower eyelid to add some final touches.
9. Fish
This makeup is really exciting to do.
What You Will Need
Sponge
Orange paint
Paintbrush
Black eyeliner or paint
Orange lipstick
How to Do
On the side of the neck and over the cheekbones, use orange face paint using a sponge.
Draw black outlines for the orange paint using a paintbrush to make fin-like designs.
Draw scaled on the chin and the forehead. These should be U-shaped and should be orange-coloured. Outline the scale using black paint.
With a lipstick, draw an orange heart over the lips. Outline it with black paint as well.
10. Bat Mask
Let your kid go as a comic character this year.
What You Will Need
Liquid eyeliner
Black pencil
Eyeshadow
How to Do
Draw a wing using liquid eyeliner. Keep drawing a black, thick line below the eye by connecting the outer corner of the top wing to the inner corner.
Fill the bottom lash wing with shadow. Exaggerate the eyebrows to give a comical look with black eyeliner and give a smoky effect.
With a black pencil, draw the outline of the mask to the centre of the kid’s nose in a V-shape and connect the inner corners of the eye.
Do the same thing on the other side and make it look symmetrical. The black line below must be thick.
The outer corners of the hairline should be connected with your child’s hairline. Following the shape of the brow, draw a wide U-shape over the nose.
Finally, fill this mask with eye paint and outline everything else.
11. Butterfly
This one’s a total hit among girls as it’s their chance to raid mommy’s makeup kit!
What You Will Need
White pencil
Pink, yellow and blue eyeshadow
Makeup brush for each colour
How to Do
Using the white pencil, draw the outline of the butterfly from the tip of the nose upwards towards the forehead and tapering down the cheeks around the eyes.
Add white dots wherever needed to give it a realistic effect.
Use the blue eyeshadow to colour the eyelids and the area around them.
Use the pink eyeshadow and fill in the areas on the forehead and cheeks.
Now, use the yellow eyeshadow to draw semi-circles or borders at the top and base of the butterfly wings.
Complete the look by drawing cute little antennas at the top with the white pencil.
12. Witch
A classic Halloween choice, the witch makeup is both eerie and enchanting.
What You Will Need
Green face paint
Purple and black eyeshadows
Black eyeliner
Red lipstick
Sponge and brushes
How to Do
Start by applying the green face paint evenly all over your child’s face.
Using the purple eyeshadow, create a smoky eye effect around the eyelids.
With black eyeshadow, deepen the creases and add some below the lower lash line.
Draw dramatic eyebrows with the black eyeliner and create a sharp cat-eye.
Finish off with a dark red or even black lipstick for a wickedly beautiful touch.
13. Fairy
Turn your child into a magical fairy with a touch of shimmer and sparkle.
What You Will Need
Light blue and purple face paints or eyeshadows
Silver glitter
Mascara
Pink blush and lipstick
Stick-on jewels (optional)
Brushes and sponges
How to Do
Begin by applying light blue face paint or eyeshadow over the eyelids.
Blend the purple shade around the outer corners and under the lower lash line.
Apply the silver glitter over the eyelids for a magical shimmer.
Add a light coat of mascara to the lashes.
Gently dab pink blush on the cheeks and swipe the pink lipstick on the lips.
As a final touch, add stick-on jewels around the eyes or forehead for extra sparkle.
Children love dressing up for Halloween and going trick-or-treating to collect candy from all the neighbours. Use our tips to create scary looks and amazing Halloween costumes for your kids.
Also Read:
Best Halloween Costume Ideas for Children
Simple and Scary Halloween Party Games for Kids
How to Enjoy Halloween at Your Home with Kids
Read more

Problem Solving for Kids – Strategies and Games
Problem-solving skills are important for a child’s overall development and can sharpen a child’s brain. In fact, the earlier parents start engaging their kids in activities that develop their problem-solving skills, the better. Children may have to deal with a difficult situation at one point or the other, and it could appear in any form. It could be a math problem or fixing a bicycle. For that, they need problem-solving skills.
Video : 10 Best Tips to Develop Problem Solving Skills in Your Children
Therefore, it is important to teach your children how to deal with their issues by teaching them some problem-solving tactics. In this article, we shall acquaint you with some tried and tested problem-solving strategies for kids. We will also discuss some fun ways of teaching the same to your child.
Why Kids Need Problem Solving Skills
We all need to deal with one or the other problem in life, be it big or small. Children have their own set of problems, too. A child’s problem could be related to academics, sports, or peer pressure. To adults, these problems may not appear big, but you need to teach your child to find solutions on his own. In case your child needs help, you can always help him, but as parents, it’s important that you teach him how to manage his problems so that he does not take impulsive decisions, which may lead to problems later in life.
Tips to Develop Problem-Solving Skills in Children
Children are always eager to learn something new, but any kind of undue stress or pressure may give birth to feelings of hopelessness or despair. Young children may feel extremely overwhelmed when they may be required to deal with their problems on their own. Here’s what you can do to teach problem-solving strategies to your child. It may help in educating your child about the problems and also how to deal with them effectively:
1. Know the Problem
If you have a teenager who seems troubled, is not behaving the way he usually does, or has started keeping to himself, it could be due to some problem that he is unable to share. As a parent, what you can do is talk to your child about the issue that could be bothering him. Try and ask him about the problem. If he is unwilling to share, do not force him to speak to you. Let him know that whatever it is, he could share it with you. Tell your child that he can share his problems with you whenever he is ready. Gain your child’s trust, and he will come to you. Your child may be afraid because of some kids who might be bullying him in school, or he could be afraid because of low grades. Talk it out with your child; sharing the problem with you will help your child, and we’re sure you will also have a solution to his problem.
2. Help Your Kid Find the Solution
Once your child has shared his concerns with you, ask him how he would deal with that problem. Don’t ignore your child’s problem by calling it trivial or unimportant. If you do so, your child may not come to you again whenever he is in trouble. Also, don’t make fun of your child if he comes up with irrelevant solutions. Appreciate his efforts and then work out solutions that may help him in dealing with his problem.
3. Do Not Be Too Intrusive
It is important to be a part of your child’s life, but sometimes it is okay to let your child deal with his problems on his own. Give your child some freedom so that he thinks on his own and tries to find a solution to a problem on his own if something is bothering him. Do not think for your child; teach him to think on his own, and come to you only when he is not able to find answers to a problem. Your child shouldn’t come rushing to you for small issues.
4. Help Your Child Understand the Pros and Cons of a Solution
If you are helping your child with a problem, you should teach him to weigh the pros and cons of the solutions before he makes a decision. This way, you teach your child to be responsible for his decisions.
5. Help Him Make the Right Decision
Once your child weighs the pros and cons of the solutions, encourage him to make an informed decision and take complete responsibility for his decisions.
6. Try Various Solutions
There will be times when your child will think that there’s only one solution for a problem, but it may not work. In such situations, you need to encourage him to try to approach the problem from a different point of view so that he can find other solutions to it.
7. Lead By Example
Young children are impressionable. Whatever they see their parents doing, they are likely to imbibe and imitate. As parents, it becomes your responsibility to teach your child the best things. If your child sees you having a positive approach to your problems, then he may deal with his problem in a positive and less stressful way. If you wish, you can create a family-problem-solving-culture at home, where anyone can come and discuss their problems with the rest of the family.
8. Try Creative Play
Certain fun activities may lay the foundations of problem-solving in children from a young age itself. You may include games like stacking blocks, building blocks, etc., where your child may be required to put his problem-solving skills into practice. Before you know it, your child will have honed his problem-solving skills, all by means of fun!
9. Teach Them Basic Steps
You may teach some basic steps that may be applicable in most situations. You may ask your child to identify the problem and break it is smaller parts. Once the problem is identified and further broken into parts, it may make it easier for your child to deal with it.
10. Teach them About Failure
As parents, you must teach your children that it is okay to fail and make mistakes. Inability to accept failure may hamper your child’s ability to perceive his problems and work towards finding its solutions in a better way.
You may make use of the above-mentioned problem-solving strategies for preschoolers and kids and help them in dealing with their problems. Along with these, problem-solving games can also help you teach your children these strategies.
Problem Solving Games for Kids
Anything taught in a fun and exciting way will always grab your child’s attention. If you are sceptical about how to teach your child various problem-solving skills through games, we have some interesting problem-solving exercises for kids that you may try:
1. Find the Treasure
This is a great activity to teach the various problem-solving attributes to your child. This game may also help in understanding the concept of teamwork and working together in a group. Identify a few locations in the house and leave a clue at each location. Make sure one clue leads to another, and there are goodies in the end.
2. Puzzles
Assembling the jumbled pieces of puzzles is a great way of teaching problem solving to your child. You may either procure problem-solving puzzles for kids from the market or let your child draw one by using crayons and then cutting it into various shapes.
3. Don’t Touch the Ground
This is an interesting game that can be played in confined places. The rules are simple; the child has to reach place A to place B without stepping on the ground. He needs to use various other objects like chairs, stools, trampoline etc., to navigate his way without his feet touching the ground and reach till the end.
4. Fastest Plane
Most kids master the technique of making paper planes at school. Ask the kids to make planes that can fly the farthest. The children need to put on their thinking hats and use various techniques of making the plane that would fly the longest distance.
5. Join the Dots
This game requires you to draw dots vertically and horizontally at equal distance on a sheet of paper. The aim is to join the dots and make vertical or horizontal lines to make squares. The player, who makes the square, may write his initials in it. The player with a maximum number of squares will be the winner.
6. Building a Maze
You may build a maze using various articles like cardboard boxes, books, blocks, etc., and can ask your child to find his way through it. This is a fun and exciting way of helping your kid learn various problem-solving skills.
7. Building a Skyscraper
You can ask your child to do it by himself or conduct a contest among your kid’s friends to make the tallest skyscraper. All you need is a box of blocks. If you wish to use any other material for the construction of the building, you may do so; however, ensure that the building stands independently. This activity requires kids to make strategies in order to construct the biggest skyscraper with the blocks.
8. Fit It Right
Your kitchen can provide stuff, such as containers, bottles, storage boxes, etc., for this activity. Take out their tops and place them in a box and ask your child to screw the correct lid to the correct container. This activity will help improve your child’s problem-solving skills and spatial awareness.
You may also try maths problem-solving activities for kids apart from the above-mentioned activities. All these activities may help your kid learn problem-solving skills and think independently.
Unleash the genius in your child by helping him master his problem-solving skills. We hope that you will make use of some of our strategies in achieving the same.
Also Read: Tips and Activities To Help Children Develop Decision-Making Skills
Read more

20+ Creative Grandparents' Day Crafts for Children
Grandparents’ day crafts for preschoolers make for great projects for the kids to create for their beloved grandparents! 👵👴 Watching grandparents bond with their grandchildren is simply a treat to watch! 💖 Won’t you agree? This special occasion is the perfect time to explore some delightful grandparents day art activities. Bring both the generations together with these creative and easy-to-make crafts for Grandparents’ Day that will surely leave lasting memories. 🌟📸
DIY Grandparents’ Day Crafts For Kids
Scroll down to get some inspiring ideas on grandparents day crafts for toddlers and preschoolers.
1. Handmade Card for Grandparents’ Day
Source: Pinterest
This simple and cute DIY handmade card for grandparents is just perfect for the occasion! Your little one can choose to surprise his grandparents with this cute little card, which they would cherish forever!
Materials Needed
Plain white card paper
Paint
Paintbrushes
Pencil
Eraser
Colour pens
Instructions
Get a plain white card paper and draw an image of your choice. Here we recommend drawing beautiful flowers like roses or lilies. Maybe, you can draw something, if your child is too young to draw something.
Next, use bright colours to paint the flowers, stems, and leaves using the paintbrush, and let it dry.
Once this is dry write a cute little message on the card for the grandparents using the colour pens, your beautiful card is ready!
2. Cute Little Clay Photo Frames
Source: Pinterest
These DIY clay photo frames make an excellent gift for grandparents’ day! You can also use it for other special occasions or gifting purposes. Here, we have recommended a magnet, but you can also add a stand and place it on your study table.
Materials Needed
Air-hardening clay in any colour
Decorative gems
Photograph
Card
Glue
Double-sided tape
Magnet
Instructions
Take the clay and roll it out into the shape of the photo frame you would like to make. Kids love to roll the clay so you can let them roll it easily into a flat even shape and then use a ruler if you want to make a square or rectangle-shaped photo frame. For a round shape, you can use a cookie cutter to get the perfect shape.
After you make the desired shape, make a hole in the centre that is a little smaller than the size of your photograph.
With the clay tool or an old pen write your name at the bottom of the clay and affix the decorative stones and gems onto the sides of the clay. Let it harden for a day.
Affix your photograph at the back of the dried clay photo frame with the help of the double-sided tape.
Measure and cut a piece of the card paper and attach it at the back of the double-sided tape. Now, use the glue to stick the magnet on the card paper, and the frame is ready!
3. Family Tree Craft Idea
Source: Pinterest
This family tree would serve as an excellent gift on the occasion of grandparents’ day!
Materials Needed
White card paper
Brown paint
Paintbrushes
Pencil
Eraser
Colour pens
Glue
Green and yellow colour chart paper
Instructions
Draw a large tree with branches on white paper using a pencil. The number of branches should be equal to the number of family members.
Now, let the kids paint the branches and truck using brown paint.
Cut out lots of leaves from the green and yellow chart paper, and on each leaf, draw a member of your family.
Finally, glue the leaves to the tree branches, and the family tree is ready.
4. Family Collage cum Bulletin Board
This family bulletin board is a simple craft but makes for a cute grandparents’ day craft activity.
Materials Needed
Cork notice board
Poster colours
Colour pens
Glue
An assortment of old photographs
Instructions
Use the poster colours to paint the cork noticeboard. Let the kids get creative with this one and paint tiny flowers or a simple background on the notice board. Leave some space to write cute messages here and there on the collage.
Now, help the kids glue the photographs randomly on the bulletin board, carefully avoiding the flowers and leaves.
Once the pictures are dry, the kids can write some cute messages or merely describe something about the grandparents and the photographs affixed on the board.
5. Handprint Painting
Source: Pinterest
A cute keepsake gift for your little one’s grandparents, the handprint painting is a cool and fun DIY that your kids are going to enjoy.
Materials Needed
Plain white card paper
Brown paint
Colourful stickers in the shape of leaves
Instructions
Get a plain white card paper ready. Now, comes the fun part, get the kids and cover their palms and wrists with brown paint.
Stamp firmly onto the paper with the fingers wide open to create the shape of branches of a tree. Let it dry.
Once it is dry, let the kids affix the colourful stickers like the leaves, flowers, and fruits onto the tree branches.
You may choose to frame this painting and gift it to the grandparents.
6. Footprint Magnet DIY!
Source: Pinterest
Simply adorable, these DIY footprint magnets would serve as the perfect gift for grandparents. It’s an enjoyable project to do with your child, and you can change the words on it according to the occasion!
Materials Needed
Cardboard
Chart paper
Glue
Self-adhesive magnets
Pencil
Colour pens
Scissors
Magnet
Instructions
Use a pencil to trace the tiny footprints of your little one onto the cardboard.
Cut out the cardboard in the shape of the footprint and use it to trace the footprint on the chart paper.
Cut out the chart paper and use glue to stick it onto the cardboard.
Use colour pens to write a cute message on the chart paper. If you like, you can decorate it, as well.
Now, apply a magnet to the back of the footprints, and it’s ready!
7. Grandparents’ Day Poem
This one is perfect for kids who love to read or write poems. You can help them formulate cute sentences or messages in the form of a poem or simply get a meaningful poem from the internet.
Materials Needed
Plain white card paper
Colour pens
Photograph
Paint
Paintbrush
Instructions
Get a plain white card paper and affix a photograph, probably one of your kids with their grandparents or a family photo.
Now, ask the kids to write a poem below the photograph using colour pens.
Once the poem is done, ask the kids to paint in the background to decorate it, and once the paint dries, your gift is ready.
8. Paper Plate Memento for Grandparents’ Day
Source: Pinterest
This is an excellent craft idea for toddlers and preschoolers. You may need to help them a bit with cutting the ribbon and helping them write a message neatly.
Materials Needed
Paper plate
Yellow paint
Paintbrush
Marker
Scissors
Hole punch machine
Ribbons or red construction paper
Decorations – pom poms, glitter glue, stickers, etc.
Instructions
Let the kids paint the paper plate using the yellow paint and let it dry.
Once the paint has dried, write grandma/grandpa in the centre of the paper plate.
Next, affix the stickers around the name, preferably things that the grandparents like, something related to their hobbies, interests, favourite food items, etc.
Cut out a pair of ribbons from the construction paper using a scissor. If you’re using a ribbon, just cut it into two uneven sizes.
Now, glue them onto the back of the paper plate, and the gift is ready!
9. DIY Handprint Flower Pot
Source: Pinterest
This is a perfect gift for grandparents who love to plant trees and flowers or enjoy spending their time in the garden.
Materials Needed
Terracotta pot
Acrylic colour paints
White spray paint
Paintbrushes
Varnish
Instructions
Clean the pot thoroughly so that there is no dirt or soil on it.
Next, lightly spray paint the white paint onto the pot. You can do the spray painting as it will be difficult for the kids to apply the right amount of pressure.
Once the pot is dry, cover your kid’s tiny palm with paint and firmly stamp it onto the pot. Make two-three impressions depending on the size of the pot.
The kids can add some more decorations like painting colourful dots on the brim, and you can write your little one’s name on the pot too.
Once the paint dries, your pot is ready to be gifted.
10. DIY Rock Photo Holders!
Source: Pinterest
This one is incredibly easy and absolutely adorable. A beautiful gift that your kid’s grandparents will cherish for life.
Materials Needed
Smooth flat river rocks
Acrylic paint
Paintbrush
Copper wire
Needle nose pliers
Mod-Podge
Instructions
Get the kids to paint the rocks in beautiful bright colours and let them dry. Once dry, they can use tiny brushes to make some dots or designs on the rocks.
Once it is completely dry, apply a layer of mod-podge to protect the paint from getting scratched.
Next, take a copper wire and wrap it a few times around a pen or a marker and straighten out the wire beneath the loop you created.
Wrap the copper wire a few times around the rock.
And that’s it! It’s ready now you can simply stick photos in between the loops!
11. Clay Figure
This could be a fun activity for your child, and the grandparents are bound to love it too! Nothing is more personal than making something for someone you love. No matter what your child makes, it will be special to their grandparents!
Materials Needed
Non-toxic clay
Clay shaping tools
Glitter and other powdered colours
Instructions
Give your child an array of coloured clays.
You can show them a picture or video of clay modelling and help them out if needed.
Make use of clay shaping tools which are child-safe.
Once your figurine is ready, you can decorate it with glitter or other powdered colours.
12. DIY Mud Pot
This will allow your child’s creative side to shine and be the perfect gift for their grandparents. You can either get a potted plant or an empty pot and allow your child to paint on it under your supervision. If the paint is non-toxic, let them paint with their fingers!
Materials Needed
Non-toxic and water-proof paint
Paintbrushes
Tissues
Water
Bowls
Plastic or mud pot
Instructions
Buy a new plastic or mud pot and clean it with a disinfectant wipe.
Give your child paintbrushes, water-proof paint and water.
Allow your child’s creativity to flow. Once your child has painted the pot, leave it out to dry for a few days.
You can then proceed to either add the plant to it or gift it just as it is.
13. Beaded Bracelet for Grandma and Grandpa
These beaded bracelets can serve as a heartfelt gift, made with love by your child for their beloved grandparents. Each bead can signify the beautiful memories and the bond they share.
Materials Needed
String or elastic cord
Multicolored beads
Lettered beads (optional, to spell out “Grandma” or “Grandpa”)
Scissors
Instructions
Measure the string around your child’s wrist to ensure it’s not too long or too short. It’s always better to have a little extra length.
Allow your child to thread the beads onto the string in any pattern they like. They can use lettered beads to spell out “Grandma” or “Grandpa”.
After finalizing the design, knot the bracelet’s end to hold the beads firmly.
Cut off any excess string, and the bracelet is ready to be gifted!
14. Handmade Floral Bookmarks
Craft a set of beautiful bookmarks using pressed flowers and leaves. Kids can forage in the backyard with their grandparents to collect various flower petals, leaves, and small foliage. These can be pressed and placed between laminating sheets to create stunning bookmarks that grandparents can use in their favorite books.
Materials Needed
Pressed flowers
Laminating sheets
Scissors
Hole punch
Ribbon
Instructions
Arrange the pressed flowers and leaves on one laminating sheet.
Place another laminating sheet on top and carefully seal them together.
Cut the sheet into bookmark-sized strips.
Punch a hole at the top and tie a ribbon through it for a finishing touch.
15. Handprint Apron
Source: Pinterest
Turn a plain apron into a cherished keepsake by decorating it with handprints and personalized messages. This is perfect for grandparents who love to cook or garden.
Materials Needed
Plain apron
Fabric paint
Fabric markers
Instructions
Spread the apron on a flat surface.
Have the kids dip their hands in fabric paint and press them onto the apron.
Once dry, use fabric markers to write cute messages or the kids’ names next to the handprints.
16. Family Time Capsule
Create a family time capsule that can be opened on the next Grandparents’ Day. This is a fun and meaningful activity that involves collecting small mementos, letters, and photographs.
Materials Needed
A small box or container
Paper
Photos
Small items
Instructions
Gather small mementos like family photos, letters, or tiny toys.
Place all items into the container.
Seal the container and decorate the outside.
Decide on a future date to open the time capsule together.
17. Painted Rock Garden Markers
Source: Pinterest
For grandparents who love gardening, painted rock garden markers can be a great gift. Kids can paint flat rocks with the names of herbs, flowers, or vegetables and place them in their grandparents’ garden.
Materials Needed
Flat rocks
Acrylic paint
Paintbrushes
Clear varnish
Instructions
Clean the rocks and let them dry.
Paint the rocks with bright colors and write the names of plants on them.
Seal the paint with clear varnish and let it dry completely.
18. Paper Flower Photo Frame
Source: Pinterest
Combine a love for photos with a fun craft by making a paper flower photo frame. This easy project allows kids to create a colorful frame that holds a cherished family photo.
Materials Needed
Cardboard
Colored paper
Scissors
Glue
A photograph
Instructions
Cut out a frame shape from the cardboard.
Create flowers by cutting and folding colored paper.
Glue the paper flowers around the frame.
Place a photo in the frame, and it’s ready to display.
19. DIY Polymer Clay Tray
Source: Pinterest
Create a small tray from polymer clay that can be used by grandparents to hold keys, jewelry, or other small items. This project is both functional and decorative.
Materials Needed
Polymer clay
Rolling pin
Butter knife
Oven
Instructions
Roll out the clay and cut it into the desired shape.
Mold the edges to create a shallow tray.
Bake according to the clay’s instructions and let it cool before gifting.
20. Blowing a Kiss Card
This adorable card features a handprint that represents blowing a kiss. It’s a simple, heartfelt craft that kids can make with minimal materials.
Materials Needed
Construction paper
Scissors
Glue
Markers
Instructions
Trace and cut out the child’s handprint on construction paper.
Fold the fingers down except for the thumb and index finger to create a “blowing kiss” gesture.
Attach the handprint to a card and write a message.
21. Grandparents’ Day Puzzle Art
Create a personalized puzzle using a family photo or a drawing made by the kids. This craft is not only fun to make but also offers an interactive gift that grandparents will enjoy putting together.
Materials Needed
A printed photo or drawing
Cardboard or thick cardstock
Scissors
Glue
Puzzle template or pencil to draw puzzle pieces
Instructions
Glue the photo or drawing onto the cardboard or thick cardstock.
Let it dry completely.
Use a puzzle template or freehand draw puzzle shapes on the back of the cardboard.
Carefully cut out the puzzle pieces.
Place the pieces in a decorated box or envelope for gifting.
FAQs
1. What are some fun Grandparents Day games to play at home?
To make the day extra special, you can organize simple games like a “Grandparents Trivia,” where family members answer questions about their grandparents’ lives. Another idea is a “Memory Scavenger Hunt,” where kids find items around the house that remind them of special moments with their grandparents.
2. What are some engaging craft activities for a Grandparents Day school event?
During a Grandparents Day event at school, students can engage in group crafts like creating a large family tree mural, where each child adds their grandparents’ names or photos. Another idea is to host a craft station where students and their grandparents can work together to create keepsake items like decorated flower pots or memory books.
We hope that you and your kids enjoy indulging in the National Grandparent’s Day craft ideas mentioned above. It’s also fun to involve the grandparents in making these crafts and remember, no matter what those tiny hands make, the grandparents will always treasure it!
Also Read:
Grandparents Day Activities
Importance of Grandparents in Children’s Lives
Grandparent’s Day Quotes for Your Grandma and Grandpa
Best Gift Ideas for Grandparents That Will Make Them Happy
Read more
30 Fun and Engaging Hands-on Activities for Preschoolers & Kids
Hands-on activities for preschoolers and kids are a game-changer! Let us tell you why. Young children learning with their hands, splashing paint on paper, stacking blocks higher and higher, or feeling the texture of sand between their fingers may feel like a normal, daily activity, but hold much more potential for children’s future. Such activities build problem-solving, creativity, and confidence in ways no worksheet ever could. Parents and teachers alike are turning toward more sensory-based, play-driven learning because kids truly thrive when they can touch, move, and experiment. Through hands-on activities for preschoolers and kids, learning transforms into a joyful, memorable experience where curiosity leads the way.
Each task becomes an opportunity to explore, make mistakes, and discover something new because children don’t just learn by listening; they learn by doing. And in those messy, laughter-filled moments, real education comes alive.
Hands-on Activities for Preschoolers
Perfectly designed for ages 3–5, these activities are simple, easy to do at home or in class, and help develop creativity, focus, and problem-solving skills while keeping learning playful and stress-free. If you’re looking for fun, hands-on activities for kindergarten, these ideas will inspire every curious child.
1. Rainbow Rice Sensory Bin
Image Credit: Pinterest
What You Will Need:
Uncooked rice
Food coloring
Ziplock bags
Plastic bin
Small toys or scoops
Instructions:
Add a few food colouring drops to uncooked rice in ziplock bags.
Shake each bag until the rice is evenly colored.
Let the rice dry on a tray for 30 minutes.
Fill a bin with the colourful rice and hide small toys inside.
Encourage your child to dig, scoop, and explore the textures.
2. Paper Plate Animals
Image Credit: Pinterest
What You Will Need:
Paper plates
Colored paper
Glue stick
Child-safe scissors
Crayons or markers
Instructions:
Help your child pick an animal they love, like a lion or elephant.
Cut out ears, eyes, and shapes from colored paper.
Glue them onto the paper plate to form the animal’s face.
Add fun details like whiskers or spots with crayons.
Let the plate dry and display it as their handmade art piece.
3. Ice Cube Painting
Image Credit: Pinterest
What You Will Need:
Ice cube tray
Water
Food coloring
Popsicle sticks
Paper
Instructions:
Mix water and a few drops of food colouring in each tray compartment.
Insert popsicle sticks and freeze overnight.
Once frozen, give the colourful ice cubes to your child to “paint” on paper.
Watch how the melting colours blend into beautiful patterns.
Talk about colour mixing and what new shades appear.
4. Shape Sorting Treasure Hunt
Image Credit: Pinterest
What You Will Need:
Colored paper cut into shapes (circle, square, triangle, etc.)
Basket or small box
Tape
Instructions:
Place different paper shapes around the room.
Give your child a basket and ask them to find all the shapes.
As they collect them, name each shape aloud together.
Sort the shapes into groups once they’re all found.
Encourage them to count and compare which shape appears the most.
5. Playdough Volcano
Image Credit: Pinterest
What You Will Need:
Playdough
Small cup
Baking soda
Vinegar
Food coloring
Instructions:
Shape playdough around a small cup to form a volcano.
Add a spoonful of baking soda to the cup.
Mix vinegar with food colouring in another cup.
Slowly pour it into the volcano’s centre.
Watch it fizz and “erupt,” then talk about what’s happening.
6. Leaf Collage Art
Image Credit: Pinterest
What You Will Need:
Leaves of different sizes and shapes
Glue
Paper
Crayons or markers
Instructions:
Take your child outside to collect interesting leaves.
Bring them home and let them choose their favourites.
Glue the leaves onto paper to make a collage.
Add drawings or patterns around the leaves.
Discuss the colours, veins, and shapes they notice.
7. DIY Counting Cups
Image Credit: Pinterest
What You Will Need:
Paper cups
Marker
Small items (buttons, beans, or pom-poms)
Instructions:
Write numbers (1–10) on paper cups.
Spread small items across the table.
Ask your child to count and place the right number of items in each cup.
Encourage them to say each number aloud.
Mix up the cups and repeat for extra fun and memory practice.
8. Cotton Ball Clouds
Image Credit: Pinterest
What You Will Need:
Cotton balls
Blue construction paper
Glue
Crayons
Instructions:
Hand your child the blue paper as the “sky.”
Let them glue cotton balls to create cloud shapes.
Add sunshine, birds, or rain using crayons.
Ask what kind of weather each picture shows.
Display the artwork and name it together, “Sunny Day” or “Rainy Sky.”
9. Straw Rockets
Image Credit: Pinterest
What You Will Need:
Paper
Straw
Tape
Scissors
Markers
Instructions:
Draw a small rocket shape on paper and cut it out.
Tape a rolled paper tube to the back (large enough to fit the straw).
Insert the straw and blow to launch the rocket.
Try different rocket sizes and compare how far they go.
Count down like a real astronaut before each launch for excitement.
10. Sink or Float Experiment
Image Credit: Pinterest
What You Will Need:
Large bowl of water
Small objects (toy, spoon, leaf, coin, plastic cap)
Paper and pencil
Instructions:
Fill a bowl halfway with water.
Show your child each item and guess whether it will sink or float.
Drop them one by one and observe what happens.
Write down the results together in two columns: Sink and Float.
Discuss why heavier or lighter objects behave differently.
Creative Hands-on Activities for Kids
Children between the ages of 6 and 8 are bursting with imagination, curiosity, and energy. They’re ready to create, explore, and experiment in ways that go far beyond ordinary play. Through crafting, model building, and mini science experiments, hands-on learning activities keep learning lively and blend fun with hands-on discovery.
1. Eggshell Garden Experiment
Image Credit: Pinterest
What You Will Need:
Empty eggshell halves
Soil
Small seeds (like herbs or beans)
Watering spray bottle
Instructions:
Gently wash and dry eggshell halves.
Fill each shell with soil and place a few seeds inside.
Lightly spray with water every day.
Watch the sprouts grow and note changes in height and colour.
Talk about what plants need to grow: light, soil, and care.
2. Rainbow Walking Water
Image Credit: Pinterest
What You Will Need:
6 clear cups
Paper towels
Food colouring (red, yellow, blue)
Water
Instructions:
Line up cups in a row, filling every alternate cup with water.
Add food colouring to each water cup.
Roll paper towels and place them between each cup.
Watch as colours travel and mix through the paper towels.
Ask your child to describe how the colours blend and move.
3. Marshmallow Toothpick Towers
Image Credit: Pinterest
What You Will Need:
Mini marshmallows
Toothpicks
Flat surface
Instructions:
Connect marshmallows with toothpicks to form shapes.
Build cubes, triangles, and towers of different sizes.
See which shape stands strongest and tallest.
Encourage testing and rebuilding to make it sturdier.
Talk about how engineers build structures safely.
4. Balloon Rocket Race
Image Credit: Pinterest
What You Will Need:
Balloon
Straw
String
Tape
Instructions:
Thread the string through a straw and tie it across the room.
Blow up a balloon without tying it.
Tape it to the straw and release.
Watch the balloon zip across the string.
Discuss how air pushes the balloon forward, like a real rocket.
5. DIY Rain Cloud in a Jar
Image Credit: Pinterest
What You Will Need:
Clear jar
Shaving cream
Water
Food coloring
Instructions:
Fill the jar three-quarters with water.
Spray shaving cream on top to form a “cloud.”
Drop food colouring on the foam.
Watch it slowly fall through, like rain from clouds.
Explain how clouds hold water before it rains.
6. Magic Milk Experiment
Image Credit: Pinterest
What You Will Need:
Milk (in a shallow bowl)
Food coloring
Dish soap
Cotton swab
Instructions:
Pour milk into the bowl.
Add drops of food colouring.
Dip a cotton swab in dish soap and touch the milk surface.
Watch colours swirl and dance.
Explain how soap breaks surface tension.
7. Paper Towel Art Prints
Image Credit: Pinterest
What You Will Need:
Paper towels
Washable markers
Spray bottle
White paper
Instructions:
Colour a paper towel with markers.
Spray lightly with water.
Place the paper towel on the white paper and press gently.
Lift to reveal a colourful print.
Let your child create patterns or rainbows with different colours.
8. Homemade Compass
Image Credit: Pinterest
What You Will Need:
Sewing needle
Magnet
Small bowl of water
Leaf or cork piece
Instructions:
Rub the magnet along the needle several times in one direction.
Place the needle on a leaf or cork floating on water.
Watch it slowly turn to point north-south.
Use a real compass to check its accuracy.
Talk about how magnets help with navigation.
9. Nature Scavenger Hunt
Image Credit: Pinterest
What You Will Need:
Paper bag or basket
Checklist (leaf, rock, flower, stick, etc.)
Instructions:
Make a list of natural items to find outdoors.
Give your child a bag and a checklist.
Let them explore safely and collect items.
Discuss textures, shapes, and colours.
Sort and display their findings as a mini nature table.
10. Recycled Bottle Bowling
Image Credit: Pinterest
What You Will Need:
6 empty plastic bottles
Ball
Paint or paper for decoration
Instructions:
Clean and decorate bottles as bowling pins.
Arrange them in a triangle shape.
Use a soft ball to knock them down.
Count how many pins fall each time.
Encourage friendly scoring for fun competition.
11. String Telephone
Image Credit: Pinterest
What You Will Need:
Two paper cups
String
Pencil or sharp point
Instructions:
Poke a hole in the bottom of each cup.
Thread the string through and tie knots inside.
Pull the string tight and talk into one cup.
Listen to the sound waves travel through a string from the other cup.
Experiment with distance and different materials.
12. Salt Dough Ornaments
Image Credit: Pinterest
What You Will Need:
1 cup flour
½ cup salt
½ cup water
Cookie cutters
Instructions:
Mix flour, salt, and water to make dough.
Roll it flat and cut shapes.
Bake at low heat until hard.
Let it cool, then paint and decorate.
Hang as keepsakes or gifts.
13. Balloon-Powered Car
Image Credit: Pinterest
What You Will Need:
Plastic bottle
Straws
Balloon
Bottle caps (for wheels)
Tape
Instructions:
Cut holes for straws and attach wheels.
Tape a balloon to one straw end.
Blow the balloon and release it to power the car.
Test on flat surfaces and adjust balance.
Talk about air pressure and movement.
14. Ice Excavation Game
Image Credit: Pinterest
What You Will Need:
Small toys
Water
Container
Salt and spoons
Instructions:
Freeze small toys in a container of water.
Once solid, give kids spoons and salt to “rescue” toys.
Sprinkle salt to melt ice faster.
Watch the joy as toys appear.
Discuss why salt melts ice quickly.
15. DIY Kaleidoscope
Image Credit: Pinterest
What You Will Need:
Paper towel roll
Small mirror pieces or shiny paper
Transparent plastic
Beads or sequins
Instructions:
Line the inside of the roll with shiny paper.
Cover one end with plastic.
Add beads or sequins inside.
Seal and decorate the outer surface.
Look through and rotate to see colourful reflections.
16. Build a Mini Bridge
Image Credit: Pinterest
What You Will Need:
Popsicle sticks
Glue
Toy cars
Instructions:
Design a small bridge layout together.
Glue sticks in layers for support.
Let it dry fully.
Test how many toy cars it can hold.
Discuss how real bridges are built for strength.
17. Create a Comic Strip
Image Credit: Pinterest
What You Will Need:
Paper
Pencil and colours
Ruler
Instructions:
Divide the paper into panels using a ruler.
Draw characters and story scenes.
Add dialogue bubbles.
Colour and name the comic.
Encourage them to write their own sequels.
18. DIY Shadow Puppet Show
Image Credit: Pinterest
What You Will Need:
Cardstock
Sticks
Flashlight
Sheet or blank wall
Instructions:
Cut shapes or animals from cardstock.
Attach to sticks with tape.
Turn off the lights and use a flashlight to project shadows.
Create a story using shadows.
Record or perform for family fun.
19. Paper Spinner Toy
Image Credit: Pinterest
What You Will Need:
Circle cutout of paper
String
Markers
Instructions:
Decorate both sides of the paper circle.
Poke two holes in the centre.
Thread the string and tie the loops at each end.
Spin fast between fingers to see the designs blur.
Experiment with colours and speed.
20. Mini Volcano Eruption
Image Credit: Pinterest
What You Will Need:
Baking soda
Vinegar
Food coloring
Small cup
Instructions:
Fill the cup with baking soda and food colouring.
Pour vinegar slowly.
Watch the bubbly eruption.
Try different colour mixes.
Explain how acids and bases react to form bubbles.
Benefits of Hands-on Activities for Children
Children learn best when they’re actively involved in the process through touching, building, and exploring. These experiences turn abstract ideas into something real and meaningful. Here are some of the most valuable benefits that children gain through hands-on activities for 3rd grade and beyond.
1. Strengthens Critical Thinking and Problem-Solving Skills
When children engage in hands-on learning, they begin to think like young scientists, asking questions, testing ideas, and observing outcomes. Whether they’re figuring out why a paper bridge collapses or how colours mix, they learn to approach challenges logically and creatively. This type of thinking builds the foundation for lifelong learning and innovation.
2. Encourages Creativity and Imagination
Hands-on experiences give children the freedom to express ideas in their own way. Instead of memorising instructions, they get to design, explore, and build something new. A cardboard rocket or a homemade painting becomes a product of imagination, one that boosts confidence and self-expression.
3. Builds Fine Motor Skills and Coordination
Simple activities like cutting paper, pouring liquids, or connecting blocks help refine hand-eye coordination. These small but essential skills improve precision, writing readiness, and even concentration. The more they practice through tactile play, the stronger their coordination becomes.
4. Promotes Teamwork and Communication
Many hands-on projects require working together, sharing ideas, dividing roles, and helping each other. This not only teaches cooperation but also empathy and listening. Children learn that collaboration makes big ideas possible and that every voice in a group matters.
5. Deepens Understanding Through Real Experience
Kids remember what they do far longer than what they hear. When they build, experiment, or explore concepts physically, those lessons stay with them. It’s the difference between reading about gravity and actually watching an apple fall; they grasp the concept because they’ve seen it in action.
6. Boosts Confidence and Independence
Completing a project—no matter how small—gives children a sense of accomplishment. Each success reinforces the idea that they’re capable of learning and solving problems on their own. This growing independence encourages them to take initiative in other areas of life, too.
FAQs
1. How can parents encourage kids to enjoy hands-on activities at home?
The best way is to make it feel like play, not a lesson. Keep materials simple, like paper, colours, or building blocks, and let children take the lead. Ask open-ended questions like What do you think will happen if we mix these? rather than giving instructions. When kids feel free to explore, they become naturally curious and confident learners.
2. Are hands-on science activities suitable for younger children?
Absolutely. Hands-on science activities can be adapted to any age with a few safety adjustments. For younger children, you can try simple experiments like colour mixing, floating and sinking, or making baking soda volcanoes. The goal isn’t perfect results. It’s sparking curiosity and helping them see how the world works in small, exciting ways.
3. How often should hands-on learning be included in a child’s routine?
A little every day makes a big difference. Even 15 to 20 minutes of building, crafting, or experimenting can boost focus and imagination. The key is consistency, not complexity. Blending small, interactive moments with regular study helps kids connect what they learn in books to what they experience in real life.
Preschoolers and young children learn best when their little hands and big imaginations work together. Hands-on learning offers children something deeper than just knowledge: understanding. When kids experiment, build, or create, they connect theoretical lessons to real-world experiences that make learning interesting. These activities nurture patience, problem-solving, and confidence in ways that traditional learning often can’t. From painting and gardening to simple science play, each moment shapes the way children see the world. Parents and teachers don’t need fancy tools; they can do just fine by encouraging curiosity in children and giving them a little time together. So, go ahead, have a fun bonding and learning experience with your children!
Also Read:
Indoor Games for Kids To Play
Fun Learning Activities for Kids
Creative Activities for Kids
Fun Outdoor Activities for Kids
Read more

Best Foods to Increase Height in Children
Helping children grow to attain their optimum height is often a big concern for parents. Of course, there’s nothing wrong with your child being short for his age or growing at a slower rate than his peers. However, sometimes, comparatively shorter kids are made fun of, which may make them fearful and impact their self-confidence. Inadequate nutrition can stunt the growth of a child, no matter how strong his genes are (2). In this article, we’ll provide you with the top foods to increase height for a child.
The Relationship Between Food and the Height of Children
If you and your partner are tall, the chances of your child being tall are very high. Similarly, if both parents are short, the child will also mostly be on the shorter side. But what a lot of parents are unaware of is that it is in their hands to enable their kids to grow to their full height, which might be more than their genetically determined height, if the recommended diet to increase height in children is followed. It might not make a dramatic difference, but it can boost the predetermined height of the child by a couple of inches.
A child starts growing almost instantly after birth. It is important to know that women reach their full height approximately by age 19, and men can grow up until age 25. In our bodies, the pituitary gland plays the biggest role in determining our height. The pituitary gland secretes the Human Growth Hormone (HGH), which is responsible for an increase in height. A number of foods can help stimulate the function of the human growth hormone so that one can achieve the maximum possible height in their growing years.
When it comes to the relation between food and child growth, you should understand what nutrients help the child and how. Read on for a list of foods that can help your child grow tall.
So, which are the foods that can help children grow taller naturally? To understand this, let us look at the nutrients that help your child grow and the foods that contain those nutrients.
Nutrients Essential to Achieve Optimum Height
Here are some essential nutrients to achieve height in kids.
1. Proteins
This is one of the most important dietary factors when it comes to boosting height in kids. Protein is essential for building, developing and maintaining muscles and tissues in the body. In a 2013 study, it was stated that higher protein consumption during infancy and early childhood is strongly linked to heightened growth and an elevated body mass index in childhood (1). Protein deficiency can lead to stunted or abnormal growth as well as low muscle mass. Hence, you should ensure that your child’s diet is balanced with enough proteins.
2. Minerals
Certain minerals in food are essential for supporting a child’s growth in terms of height. Foods rich in iron, magnesium, phosphorus, iodine, manganese, and fluoride are known to enhance growth in children and teenagers. Calcium is crucial as well, as it not only supports growth but also makes the bones strong.
3. Vitamins
When it comes to bone health and height, Vitamin D plays a crucial role. This is because it helps in the absorption of calcium in the body. A deficiency in Vitamin D can lead to not only weak bones and stunted growth but can also have a negative effect on height. Apart from this, the other vitamins essential for proper growth in kids include Vitamin A, Vitamin B1, Vitamin B2, Vitamin C, riboflavin, ascorbic acid and Vitamin F. Vegetables and fruits rich in vitamins are essential in a healthy, balanced diet.
4. Carbohydrates
Carbs are usually considered harmful, but they are actually essential in a diet for kids to increase their height. Carbohydrates give energy to the body, especially in the case of kids. Having said that, you obviously need to ensure that your child’s diet comprises healthy carbohydrates. The carbohydrates he consumes should be from whole-grain foods like wheat and cereals. Food comprising refined flour, such as pizza, burgers, and white bread, is rich in carbohydrates that can be harmful.
Besides carbohydrates, proteins, vitamins and minerals, your child also needs the recommended amount of omega-3 and omega-6 fatty acids in his diet to ensure good health and optimum height. Encourage your child to pick foods which contain these nutrients when making meal choices.
Foods That Help to Increase Height
There are plenty of natural ways to help children grow taller. One of them is the essential diet. Your child can get the above-mentioned nutrients from a variety of foods. Here are some foods that help kids grow:
:
1. Dairy Products
Dairy products like milk, cottage cheese, and curd are all high in essential minerals like calcium and vitamins like A, B, D, and E. Milk is also a good source of protein and calcium, which helps in the cell growth and bone development of the baby (8). No child’s diet is complete without a big glass of milk every day. Yoghurt is a great option, too!
2. Eggs
Boasting 13 essential micronutrients (i.e. biotin, choline, riboflavin, pantothenic acid, vitamin B12, vitamin A, vitamin E, folate, vitamin D, magnesium, calcium, sodium, potassium, phosphorus, and zinc), eggs are essential additions to your child’s diet if you want to boost his height (7). The white in the egg (or albumin) is 100% protein. in fact, there are nine deemed essential amino acids that a human body cannot produce on its own and needs to source from outside food (5). Surprisingly, eggs are a powerhouse of all these essential amino acids, while plant-based food sources may lack one or two amino acids (3) (4). So, if you want to keep the fat away, you can feed him only egg white and not the yolk. The best part about eggs is that they can be prepared in so many ways that your child could have them every day and not get bored! From the humble boiled egg to tasty omelettes, there are a variety of ways to cook eggs!
Caution:- Do not eat raw, half-boiled, or refrigerated eggs during pregnancy to keep yourself away from bacterial infection (6).
3. Chicken
Chicken is also high in protein, just like eggs; in fact, it is one of the highest protein-content items among animal-based foods. Chicken helps build your child’s tissues and muscles, which, in turn, helps him grow taller.
4. Soybean
This is another underrated nutritious food that helps boost your child’s health and height! It is rich in proteins, folate, vitamins, carbohydrates and fibre and is a good alternative for those looking for vegetarian protein options as it is equivalent to animal protein (10). It has even been researched that women who consume soy have less chance of contracting breast cancer (9). Tofu made from soybeans is beneficial for health, too!
5. Banana
Rich in potassium, manganese, and calcium, the humble banana is a simple fruit which can really help in boosting your child’s health.
6. Nuts and Seeds
Nuts and seeds are also great foods to give your kid when he is growing. Nuts and seeds are rich in essential minerals and vitamins as well as healthy fats and amino acids, which are vital for growth. You can add them to breakfast cereals or other breakfast preparations or give them to your child as a snack.
7. Leafy Green Vegetables
Your kid might make a face when he sees green veggies, but you know how good they are for him! Green veggies like broccoli, spinach, peas, okra and brussels sprouts are rich in essential minerals, vitamins, calcium, and fibre. All these elements are imperative for good overall growth and development. Green veggies should be included in his diet, no matter how many excuses he makes not to eat them! If your little one is lactose intolerant, then green leafy vegetables are the best alternatives as the calcium and vitamin K content in these are super high and enough for healthy bone development (11) (12).
8. Fruits
The intake of fresh seasonal fruits is also good for your child. They are so rich in vitamins, minerals and fibre that any child’s diet would be incomplete without them. So, make sure you feed your child all types of fruits, especially those rich in calcium and Vitamin C and A, like figs, papayas, kiwis, oranges, watermelons, mangoes, apples, and apricots (13).
9. Fish
Another non-vegetarian option, fish is rich in proteins and Vitamin D, which are necessary for bone and muscle development.
10. Carrots
It’s no secret that carrots are rich in vitamins A and C. These vitamins are essential for preserving calcium in the bones and keeping them healthy.
11. Whole Grains
Whole grains are very healthy and are essential for kids. They are a storehouse of energy, being very rich in fibre, vitamins, iron, magnesium and selenium. Whole-grain bread and pasta are great options to include in your child’s diet to boost his height!
12. Red Meat
Meant to be given in moderation, red meat is another non-vegetarian food option which is super rich in protein. However, since too much red meat is not good for the body, its consumption should be moderate.
13. Beans
Beans are another food that’s known to stimulate the growth hormone in the body. Whether they’re boiled, baked or cooked, they are great for your child! Plus, beans come loaded with fibre. proteins, and other nutrients as well.
Foods to Avoid
While the above foods help increase height in children, there are some which are detrimental to growth as well. The intake of excessive sugar, salts, coffee, fat and aerated drinks should be curbed. This is because these foods, known as calcium inhibitors, can impact the absorption of calcium in the body in a negative way. Smoking and consumption of drugs in your child’s growing years can also stunt growth and take a negative toll on health. Children with poor eating habits can also develop health complications like obesity, heart disease, type 1 diabetes, arthritis, and osteoporosis in the long run!
Here are some more tips that you can follow in addition to providing your child with a healthy diet that can help boost his growth:
Make sure your child has a regular sleep routine. The body releases the growth hormone while we rest, so it’s imperative that your child doesn’t skimp on sleep at all. Depending on the age of the child, the hours of sleep required can vary; newborn babies need at least 14-17 hours of sleep every night, while 3- to 11-month-olds need 12-17 hours of sleep per night. As the child grows older, the duration tends to decrease and comes down to 10-13 hours of sleep for ages 3 to 5. Sleeping and waking up at the same time every day not only has health benefits but instils discipline, too.
Encourage your child to exercise and play every day instead of being sedentary. Some activity or sports outdoors every day is bound to do him good, not only in terms of helping him get essential Vitamin D from the sun but also by exercising his muscles in the process. If possible, engage in some fun outdoor activities with your child that both of you can enjoy and bond over.
Ensure that your child maintains a good posture. This will not only help keep the muscles in his back and neck healthy, but it will also help him look taller. Slumping, hunching over, and slouching can make your child look shorter than he is and lead to pain in his back and neck, too.
Exercises like swimming, those that involve jumping (like basketball), certain yoga poses like Surya Namaskar, stretches, skipping, and jogging can also go a long way in boosting your child’s height during his growing years. Do remember that this works best when supplemented with a balanced diet and lifestyle.
Make sure your child has a healthy lifestyle. The type of lifestyle you lead as a family can really help in boosting your child’s health and height as well. Keep your child off junk food and make sure he enjoys home-cooked meals, which is how you can also make sure that the diet is balanced in every aspect.
Ask your doctor to recommend some good supplements to boost your child’s health and immunity. Vitamin and mineral supplements can help your child get a good balance of nutrients in the body. But this should be done only on a doctor’s recommendation. Over-the-counter products marketed as ‘height enhancers’ for children may not work. Avoid giving them to your child without consulting your doctor first.
What Causes a Child Not to Grow in Height?
Your child’s height serves as a crucial indicator of nutritional well-being and physical development (14). In addition to genetic factors and diet, delayed growth may have various causes that warrant consideration:
1. Growth Hormone Deficiency
Partial or complete Growth Hormone (GH) deficiency can result in stunted growth. This deficiency, whether congenital or acquired, may manifest during infancy or later in childhood (15).
2. Congenital Growth Delay
Children with this condition exhibit normal growth rates but are shorter than average. Delayed bone growth is common, leading to below-average height in adolescence. However, these individuals often catch up with their peers in adulthood (16).
3. Turner Syndrome
Found in girls, Turner syndrome results from a complete or partial absence of the X chromosome during embryonic development. The primary features include short stature and premature ovarian failure (17).
4. Hypothyroidism
A prevalent endocrine disorder arising from an underactive thyroid gland. In hypothyroidism, insufficient thyroid hormone production can lead to symptoms such as fatigue, weight gain, and decreased growth (18).
FAQs
1. Can medicine help to increase a child’s height?
If the case is of a stunted growth due to any medical disorder like endocrine disorders or growth hormone deficiency, then medicines can help increase a child’s height. Doctors may prescribe hormone replacement therapy to boost height in children (19).
2. How long does it take for dietary changes to show an impact on a child’s height?
It is not certain to map the efficiency of dietary changes in the increase of a child’s height. If you put your child through the consumption of extra food or vitamins, it’s only going to excessive weight issues (20).
3. Can physical activity and exercise contribute to a child’s height growth?
Physical activity and exercises are one way to keep the body fit and toned. If the stunted growth of a child is genetic, then, unfortunately, exercise may not help. However, that should not discourage a child to keep away from exercise as it has many other benefits and is necessary for overall growth.
Your child’s height is majorly determined by the genes. And while there is no magic potion which can boost your child’s height overnight, a good diet and lifestyle can go a long way in making your child taller. Plus, a healthy and balanced diet has other advantages too, such as helping your child maintain his overall health and boosting his development.
Infographics: 10 Best Foods to Increase Height in Children
References/Resources:
1. Hörnell. A, Lagström. H, Lande. B, Thorsdottir. I; Protein intake from 0 to 18 years of age and its relation to health: a systematic literature review for the 5th Nordic Nutrition Recommendations; Food & Nutrition Research; PubMed Central; https://www.ncbi.nlm.nih.gov/pmc/articles/PMC3664059/; May 2013
2. Short stature; MedlinePlus; https://medlineplus.gov/ency/article/003271.htm
3. Yes, It Really Is Incredible – The Indisputably Potent Protein Eggs Supply; American Egg Board; https://www.incredibleegg.org/professionals/manufacturers/product-development/market-trends/white-papers/real-eggs-not-all-proteins-are-created-equal?site=a
4. Protein; Harvard T.H. Chan; https://www.hsph.harvard.edu/nutritionsource/what-should-you-eat/protein/
5. Amino Acids; MedlinePlus; https://medlineplus.gov/ency/article/002222.htm
6. FOUR REASONS TO ADD EGGS TO THE MENU; University of Utah; https://healthcare.utah.edu/healthfeed/2015/04/5-reasons-add-eggs-menu; April 2023
7. Baum. J. I, Miller. J. D, Gaines. B. L; The effect of egg supplementation on growth parameters in children participating in a school feeding program in rural Uganda: a pilot study; Food Nutr Res.; PubMed Central; https://www.ncbi.nlm.nih.gov/pmc/articles/PMC5475308/; June 2017
8. Rozenberg. S, Body. J. J, Bruyère. O, Bergmann. P, Brandi. M. L, et al.; Effects of Dairy Products Consumption on Health: Benefits and Beliefs–A Commentary from the Belgian Bone Club and the European Society for Clinical and Economic Aspects of Osteoporosis, Osteoarthritis and Musculoskeletal Diseases; Calcif Tissue Int.; https://www.ncbi.nlm.nih.gov/pmc/articles/PMC4703621/; January 2016
9. Soy and Health; Physicians Committee for Responsible Medicine; https://www.pcrm.org/good-nutrition/nutrition-information/soy-and-health
10. Soy; MedlinePlus; https://cybercemetery.unt.edu/archive/oilspill/20120925011234/http:/www.nlm.nih.gov/medlineplus/ency/article/007204.htm
11. Hip Fractures and Leafy Vegetables; Tufts Journal; https://tuftsjournal.tufts.edu/2008/06/briefs/04/
12. Calcium; Harvrd T.H. Chan; https://www.hsph.harvard.edu/nutritionsource/calcium/
13. Calcium Content Of Common Foods; International Osteoporosis Foundation; https://www.osteoporosis.foundation/patients/prevention/calcium-content-of-common-foods
14. Fafard St-Germain. A. A, Siddiqi. A; The Relation Between Household Food Insecurity and Children’s Height in Canada and the United States: A Scoping Review; Adv Nutr.; PubMed; https://pubmed.ncbi.nlm.nih.gov/31075160/; November 2019
15. Growth Hormone Deficiency; Boston Children’s Hospital; https://www.childrenshospital.org/conditions/growth-hormone-deficiency#symptoms-and-causes
16. Aguilar. D, Castano. G; Constitutional Growth Delay; StarPearls; NCBI; https://www.ncbi.nlm.nih.gov/books/NBK539780/
17. McCarthy. K, Bondy. C. A; Turner syndrome in childhood and adolescence; Expert Rev Endocrinol Metab.; PubMed Central; ncbi.nlm.nih.gov/pmc/articles/PMC2752892/; 2008
18. Hypothyroidism in Children; CHOC; https://www.chop.edu/conditions-diseases/hypothyroidism
19. Growth Problems; Boston Children’s Hospital; https://www.childrenshospital.org/conditions/growth-problems
20. Growth and Your 6- to 12-Year-Old; Nemours KidsHealth; https://kidshealth.org/en/parents/growth-6-12.html
Also Read:
Ways to Increase Height in Kids
How to Calculate Height in Children?
Healthy Foods for Brain Development in Kids
Read more
Easy and Innovative Ways to Tie-Dye Shirts With Kids
Kids just love fun craft ideas, especially ones that involve colours and some DIYs. In this post, we have some easy and innovative tie-dye techniques for kids. So, what are you waiting for, add it onto your summer bucket list activities for kids! We assure you that these tie-dye activities would be a fun-learning and interactive session for both you and your kids!
What is Tie-Dyeing?
If you haven’t heard about the tie-dyeing technique, then it’s just like the name suggests. You just have to twist the cloth like you’re squeezing out the water from it, tie it with rubber bands on different spots and then dye it. When you finish the folded portion of the cloth reveals a design or pattern which looks super cool and breezy! Now, you can rinse the cloth thoroughly and then dry to make a cool and classic fashionable piece. That’s it, and you’re done! There’s no specific pattern or design in tie-dyeing, and someone has very rightly said that it’s impossible to get a tie-dye wrong! So, go ahead and give it a try. We are sure you and your kids would love it!
How to Prepare for Tie-Dyeing
Wondering how do you make tie-dye shirts at home with kids? Read the following tie-dye instructions for kids to make cool and classic shirts!
If it’s a new shirt you are using for the project, then wash and dry it beforehand. Make sure you don’t use any fabric conditioner to avoid any kind of residue on the shirt which may cause the ink to repel. If possible, set up the workplace outdoors so that any mess created is manageable. If preparing indoors, then cover the workplace with a plastic sheet.
The ink needs to be prepared before the project. If you have bought a tie-dye kit, prepare the ink according to the instructions given on it. In case of a powdered or liquid dye, prepare the ink according to the instructions given and put them into the squirt bottles.
Get the dry shirt ready by sprinkling some water on it from the spray bottle. This will dampen the shirt, and now you may twist and tie the rubber bands according to the patterns you have selected.
Dye the shirt by squeezing the ink onto the shirt according to the instructions given or the pattern you have selected. Once done, place the shirt in a sealed plastic container for 24 hours. This allows the ink to seep in and the colours to become more vibrant.
Next, after the completion of 24 hours, you can rinse your shirt. Put on a pair of rubber gloves and rinse the shirt in cold running water without removing the rubber bands. Wash until the water comes clear without any dye. Now, remove the rubber bands and rinse again. Next, wash the shirt and dry it under the sun. Do not wash and dry other clothes with this load, as the dye may bleed and ruin other clothes.
What All You Will Need for This
Here’s a list of all the materials you’ll need for the project:
A white cotton shirt
Squirt bottles
Rubber bands
Rubber gloves
Zip plastic bags (gallon sized)
Water
Paper towels or something to clean up the spills
Spray bottle for sprinkling water
Creative Ideas and Steps to Tie-Dye Shirts With Kids
Read on to follow some creative and easy tips for tie-dye shirts:
1. Striped Pattern Tie-Dye
Fold the shirt with small even pleats from the bottom up until the shirt looks like a long and thin log. Now, take the rubber bands, around five to eight of them, and tie them evenly across the pleated shirt. Now, put on a pair of rubber gloves and dye the shirt you can choose a different coloured dye for each section between the bands. Ensure that the ink fully seeps in through the layers of the shirt and all around.
2. Circle Pattern Tie-Dye
One of the easiest tie-dyes for kids is a circle pattern! In this pattern, you’ll get the circle or bull’s eye pattern. For this, choose the area on the shirt where you want the pattern to come up. Next, squeeze out a tiny bit of the cloth and tie it with a rubber band. Follow this pattern in other areas where you want the circles. Next, choose the colour you want the circles to be in and use the shirt bottles to put on the colours. Make sure the colour is well saturated on the shirt. Next, choose a colour you want the shirt to be in and dye the front and back of the shirt with this colour, avoiding the circle dye. And it’s ready!
3. Splotched Pattern Tie-Dye
This pattern can also be termed as a crumpled pattern. For this, randomly crumple the shirt and tie about 4-6 rubber bands haphazardly on the shirt. It’s so simple to do that you cannot mess up this pattern! Squirt the dye onto the shirt; you may choose a single colour or multi-colours but make sure that the entire shirt is soaked in the dye. And we’re done!
4. Polka Dot Pattern Tie-Dye
Our personal favorite, we feel that polka dots look super cute on kids! You will need some extra beads for this project, though. Cut some plastic wrappers into pieces that are about 3-4 times larger than the beads. Now, place the bead inside the shirt and the plastic wrapper on the top of the shirt. Wrap with a rubber band tightly around the bead from the front part of the shirt. Repeat the pattern with other beads on the shirt. Wet the shirt, and it’s ready to be dyed using your favourite color.
5. Swirl Pattern Tie-Dye
An interesting tie-dye pattern and we are sure you’ll love the end product! For this, you need to lay the shirt flat on a plane surface. Use a fork and hold it in the center of the shirt and twist. Keep twisting and gather into circles. Now wrap 4-6 rubber bands on this rounded shirt. Wet the shirt and squirt the dye. And we are good to go!
6. Rosette Pattern Tie-Dye
For this pattern, lay the shirt on a flat surface. Pinch out a 2-inch section from both the layers and tie a rubber band around it. Try to make a doughnut shape out of the knot by pushing your finger through the rubber band. Repeat the procedure and make some more rosettes. Now, it’s ready to be dyed. The finished product looks super cute and classy just like some tiny funky flowers!
7. Ringer Pattern Tie-Dye
A cute and simple design, this one is pretty simple to create! Pinch the center of the shirt (only the top layer) for about 1-2 inches and pull the cloth tightly into a point, let the remaining part of the shirt just fall away. Smoothen the pinched part of the fabric into a cone shape and tightly tie the rubber band around it. You can move the rubber band up or down to make the circle smaller or larger. If you wish to make a wider ring, then wrap 2-3 more rubber bands around the same point. Wet the shirt, and it’s ready to be dyed!
Tie-dye is super easy a fun to do with the family, giving each one a way to explore their artistic talent. The best part, you get to wear your creations and proudly show them to the world! We hope that you enjoy the above easy tie-dye patterns with kids on a lazy summer afternoon! Happy holidays!!
Also Read: DIY Tie-dye Napkin
Read more
Green Tea for Kids – Benefits and Risks
A decade ago, green tea was a relatively unknown beverage, but today it has secured a lasting spot in kitchens across our nation. Recognized for its numerous health advantages, you might be curious if green tea is good for children and if you can add it to their diet. Delving into this query, it is crucial to understand the potential benefits and considerations associated with introducing green tea to a child’s nutrition. From enhancing metabolism to providing antioxidants, green tea offers a range of advantages, yet moderation and age-appropriate consumption should be prioritized to ensure the well-being of the younger demographic. Let’s read on to learn more about green tea for kids.
What Is Green Tea?
Green tea is one of the most consumed beverages in the world and is made from unoxidized (unfermented) leaves found mainly in Japan and China. It’s laden with several antioxidants and heart-healthy nutrients, thus, having a powerful effect on the body, making it one of the healthiest drinks.
Can Children Have Green Tea?
Whether or not green tea can be given to children depends on their reaction to the caffeine content in it. If your child exhibits hyperactivity and wears out too quickly to the brink of exhaustion, then it’s best to not give green tea or any other tea to your child. Other telltale signs of whether green tea is suitable or not for your kids are insomnia, lack of focus, and short attention span. If your child doesn’t show these symptoms after sipping on a little green tea, then you can give it to him.
Benefits of Drinking Green Tea for Children
The following are the benefits of drinking green tea for toddlers and children.
1. Good Oral Health
Children who drink green tea are less likely to experience cavities or any form of tooth decay. ‘Catechins’ contained in green tea fight against cavity-causing bacteria and sulfur compounds which cause bad breath.
2. Fights Against Flu
Green tea has antiviral properties which fight against infections like the flu. But it should be given to kids only in moderation. Do not give more than 1 cup of green tea to your child.
3. Prevents Clogged Arteries
Green tea is highly beneficial for cardiovascular health since it prevents arteries from clogging up, keeping the blood flowing and heart pumping. And the result is regulated blood pressure (1).
4. High in Antioxidants
Antioxidants are known to prevent oxidative stress, fight against free radicals and prevent the formation of cancers and various diseases by boosting immunity. Green tea improves cognitive health and prevents Parkinson’s disease as well.
5. Improves Bone Density
Want your kids to have healthy bones? Science says that regular intake of green tea over a prolonged period has been shown to improve bone density and prevent osteoporosis in later ages.
6. Supports Digestive Health
Green tea can aid in promoting healthy digestion by soothing the digestive tract and potentially reducing the risk of gastrointestinal issues in children. Regular consumption may contribute to a balanced digestive system.
Side Effects of Giving Green Tea to Kids
It’s not all sunshine and rainbows when it comes to giving green tea to kids. Green tea has its share of side effects, particularly for those who are sensitive to caffeine and have an underdeveloped immune system. The following are its side effects:
1. Hyperactivity
Your kid may become hyperactive after drinking green tea. For kids who are sensitive to even the tiniest amount of caffeine, this is what happens. Green tea contains smaller traces of caffeine than coffee and soda drinks, but it is still not recommended. Some kids may even develop allergic reactions after drinking green tea. Hence it is best avoided.
2. Insomnia
Children have developing metabolism and it processes caffeine and sugar too fast. This is also another reason to avoid giving them green tea. Your child may remain awake until the middle of the night after drinking green tea. Therefore, it’s best not given in the first place. Caffeine may also affect a child’s bodily processes.
3. Acidity
Green tea contains caffeine in small amounts, which may cause acidity. This can even lead to issues like stomach pain and even nausea.
4. Anaemia
This is a condition when the blood doesn’t have enough iron. This is because green tea has tannin which reduces the ability of the body to absorb iron from iron-rich sources (2).
5. Vomiting
Taking green tea in excess of 400 mg per day or on an empty stomach may lead to vomiting. Green tea has polyphenols known as tannins which increase stomach acid, which can cause stomach ache, nausea, a burning sensation, or even constipation.
6. High Blood Pressure
If the green tea consumed has high caffeine content, then your blood pressure is likely to spike due to the high-absorption rate of flavonoids.
Tips on Giving Green Tea to Kids
Introducing green tea to children’s diets requires thoughtful consideration to ensure they reap its benefits safely. As a parent, it’s essential to be aware of the appropriate practices when incorporating this beverage into your child’s routine. Here are some valuable tips to guide you through the process.
1. Consult With a Pediatrician
Before introducing green tea to your child, consult with a pediatrician to ensure it aligns with their health and dietary needs. Professional advice can help determine the suitable quantity and frequency.
2. Choose Quality Green Tea
Opt for high-quality, organic green tea to minimize the presence of pesticides and ensure your child receives the maximum nutritional benefits without unnecessary additives.
3. Limit Caffeine Intake
While green tea contains less caffeine than other beverages, it’s crucial to monitor your child’s caffeine intake. Limit the consumption to avoid potential side effects like sleep disturbances.
4. Avoid Sweetened Varieties
Opt for unsweetened green tea to prevent unnecessary sugar intake. If your child finds the taste challenging, consider adding a touch of honey or lemon for a natural, healthier sweetness.
5. Monitor Serving Size
Be mindful of the serving size, as excessive consumption can lead to potential health issues. One cup per day for older children is generally considered safe, but moderation is key.
6. Introduce Gradually
Gradually introduce green tea into your child’s routine to allow their palate to adjust. Starting with small quantities and observing their response ensures a smoother transition.
Green Tea Recommendations for Kids
When selecting green tea for children, it’s crucial to prioritize quality and consider factors like caffeine content and potential additives. Here are some recommendations to guide you in choosing the right green tea options for your child’s well-being.
1. Organic Green Tea Bags
Opt for organic green tea bags, as they are free from pesticides and harmful chemicals. This choice ensures that your child enjoys the health benefits of green tea without unnecessary additives.
2. Decaffeinated Green Tea
Consider decaffeinated green tea options to minimize the intake of caffeine, especially if your child is sensitive to stimulants. This allows them to experience the positive aspects of green tea without the potential drawbacks of excessive caffeine consumption.
3. Flavored Green Tea
To make green tea more appealing to children, explore naturally flavored options. Citrus-infused green teas or those with a hint of fruit can provide a more enjoyable taste for young palates without relying on added sugars.
FAQs
1. At What Age Can Children Start Drinking Green Tea?
The appropriate age for children to start drinking green tea varies. In general, it is advisable to wait until a child is at least 2-3 years old before introducing green tea. However, it’s crucial to consult with a pediatrician for personalized advice based on the child’s health and development.
2. What Tea Is Safe for Kids?
Herbal teas, such as chamomile or peppermint, are generally considered safe for children. These caffeine-free options provide a soothing and mild taste. When it comes to traditional teas, like green tea, it’s recommended to wait until the child is a bit older and to choose decaffeinated or low-caffeine options to ensure their safety and well-being. Always consult with a healthcare professional for guidance on tea consumption based on the child’s individual health needs.
Whether or not you should give green tea to your kids will depend on their age. Think about their age, nutrition, and activity levels before giving green tea to them. You could always try experimenting but it’s always best to ask a paediatrician before you take matters into your own hands especially when their nutrition is concerned. Try and choose green tea without caffeine to negate some of the side effects of green tea. Drinking green tea occasionally won’t hurt and if your kids stay healthy and seem fine (without showing any signs of the reported side effects), then they can keep drinking it.
References/Resources:
1. Green Tea Extract; Stanford Medicine; https://www.stanfordchildrens.org/en/topic/default?id=green-tea-extract-19-GreenTeaExtract
2. Fan. F; Iron deficiency anemia due to excessive green tea drinking (Clinical Case Reports); National Library of Medicine; https://www.ncbi.nlm.nih.gov/pmc/articles/PMC5093162/; November 2016
3. Tea; Harvard T.H. Chan; https://www.livestrong.com/article/13721339-tea-health-benefits/
4. Patrick Van Negri explains benefits of matcha green tea; World.Edu; https://world.edu/patrick-van-negri-explains-benefits-of-matcha-green-tea/
5. Chacko. S, Thambi. P, Kuttan. R, Nishigaki. I; Beneficial effects of green tea: A literature review (Chinese Medicine); National Library of Medicine; https://www.ncbi.nlm.nih.gov/pmc/articles/PMC2855614/; April 2010
6. Caffeine and Kids; Columbia University Irving Medical Center; https://www.cuimc.columbia.edu/news/caffeine-and-kids
7. Healing Through Wholeness; Health Sciences; https://hsc.unm.edu/news/news/healing-through-wholeness.html
Also Read:
Tea and Coffee for Kids
Easy Summer Drinks for Children
Best Healthy Drinks for Kids
Yummy Juice Recipes for Children
Read more
Importance of Positive Environment in Your Child’s Life
The importance of a positive environment in parenting can never be undermined. Read this article to know how you can create a stimulating, challenging environment for your little one, so that he is never short of confidence.
Environment plays a crucial role in shaping your child’s perceptions. A nurturing environment not only broadens his horizons, but also keeps his curiosity quotient high. In a positive environment, a child is not inhibited to ask questions or form opinions. He surges ahead in life with cheer and spirit.
But, what exactly is environment? If viewed from your preschooler’s perspective, it is the combination of many factors or components such as –the visual, the auditory, the emotional and the social. A positive environment consists of all these factors in the right proportion. As a parent or caregiver, creating the right sort of environment is a challenge; you need to learn new things constantly.
Creating a Cheerful Environment for Your Little One
1. Visual Environment
Right since the time he is born, your little one watches the world with eyes wide open. As a preschooler, he begins assimilating these facts. Hence, look at your child’s nursery with his eyes. Are the walls too bleak? Or too cluttered? Is your child overwhelmed with too many brightly-colored shelves? If yes, then now is the time to re-define and un-clutter. A place where your child spends most of his time would have to be visually stimulating for his little developing brain. Don’t overwhelm with too many bright visual props. Instead, opt for a cleaner approach. Designate a space on the nursery wall to showcase his little creations; for example, the drawings which he has completed or his latest origami craft. You could also put washable paint in your child’s room, so that he can give vent to his creativity. Let your child’s nursery be the place of his pride – his own little personal nook.
2. Auditory Environment
A stimulating auditory environment can enliven your kid’s environment. It also helps him to discern patterns and rhythms. Sing as you play with your child. Designate one day in a week, where all the members in the family could sit in a circle and sing their favourite songs. Also, encourage your child to form opinions. Encourage him to participate in group activities like choir, etc. Play soft music before putting him to sleep.
3. Integrated Environment
Do you find yourself often complaining that your child is messy? There could be two reasons for this: Either he is too young to realise the importance of staying organised or he is unable to keep it organised. Ask yourself if the closet racks are too high? Are his favourite books always out of reach? Does he keep searching for all his favourite puzzles just because you hid them away for the fear of losing? Are your child’s favorite toys always invisible? If that is the case, you need to re-think about many things. Help your child feel that he’s in control of his life. Simplify the environment around him. Buy clothes which he can easily put on himself. Buy boxes or stools so that he can reach out for bathroom shelves and faucets. Teach him the importance of safety. Keep sharp objects out of his reach.
4. Emotional Environment
The positive emotional environment at home is very important for normal child development. If a child feels safe and secured at home, then he will feel free to express himself and explore new things. Parent-child interaction must be emotionally nurturing. Generally, kids who grow up in such environment are sensitive and responsive to their needs. Encourage your child to try new things and express his ideas. A caring and responsive parent can provide a positive climate for kids, and this will help in cognitive development of kids.
Finally, remember the right kind of environment makes the task of parenting much easier. Create the right environment and bring positivity into your preschooler’s life.
Read more
Tools And Trackers

.svg)


Sort By
 Latest
 Most Popular
 Trending
Please select atleast one Filter