

















.svg)
.svg)
.png)


Toddler Food Recipes
Suggested articles for you

Dhansak Recipe
Dhansak is a popular Parsi dish prepared on a Sunday. Most Parsi households whip this up in their kitchen and eat as a family together. It is an interesting dish that combines dals and vegetables with spices to make a mouth-watering meal. This simple Dhansak for babies can be served with brown rice and makes for a gratifying meal. Traditionally, it is made with meat but we have given the recipe for a vegetarian variety.
Cooking Time
Type
Time (hh:mm:ss)
Preparation Time
00:15:00
Cook Time
00:20:00
Total Time
00:35:00
Cooking Method
Gas Stove, Induction
Type of Meal
Vegetarian
Suitable For
Toddlers above 20 months of age
Meal Schedule
Lunch or Dinner
Recipe Type
Main Dish
Ingredients
Ingredients
Quantity and Volume
Toor Dal
½ cup
Moong Dal
2 teaspoons
Masoor Dal
2 teaspoons
Udad Dal
2 teaspoons
Potatoes (finely chopped)
¼ cup
Brinjals (finely chopped)
¼ cup
Bottle Gourd or Dudhi (finely chopped)
¼ cup
Red Pumpkin (finely chopped)
¼ cup
Spring Onion’s whites (finely chopped)
¼ cup
Tomatoes (finely chopped)
½ cup
Salt
As per taste
Oil
1 teaspoon
Tamarind pulp
2 teaspoon
TO BE GROUND INTO A SMOOTH PASTE ( in about 2 tablespoons of water)
Garlic Cloves
4
Whole red chilies
1
Coriander seeds
1 teaspoon
Cumin Seeds
½ teaspoon
Green Chilli
1
Peppercorns
2
Cloves
3
Cardamom or Elaichi
2
Coriander (finely chopped)
2 tablespoon
Instructions
A Parsi dish may sound daunting to make. But just follow this step-by-step guide to learn how to make Dhansak:
Combine the toor dal, masoor dal, moong dal, urad dal, potatoes, tomatoes, brinjals, bottle gourd, red pumpkin, and spring onions whites and greens in a pressure cooker.
Add salt and pressure cook it for about 3-4 whistles.
Let the steam escape before you open the lid.
Once cooled, pour the contents into a blender or mixer jar and blend into a smooth puree. Keep aside.
Now add oil to a kadhai and pour the prepared paste and sauté for about 2-3 minutes on a low flame. Keep stirring continuously.
Add the dal-vegetable puree and ½ cup of water. Mix it well and cook on a slow flame for about 3-5 minutes.
Now add the tamarind pulp and mix well. Cook for another 2 minutes on a medium flame. Keep stirring occasionally.
Once done, serve with rice.
Recipe Tips
Follow these tips to perfect this home-made Dhansak baby food recipe:
Make sure to wash and rinse the vegetables and dal before use.
Allow the cooked dal and vegetables to cool before blending it in the mixer jar.
Do not add too much water while making the spice paste. It should be finely ground as a thick paste with just enough water content.
Nutrition Information (Per 100 Grams)
Nutrient
Value
Energy
127 kCal
Protein
7.2 g
Fiber
0.8 g
Fat
1.8 g
Cholesterol
20.2 mg
Vitamin A
177.3 mcg
Vitamin C
9.4 mg
Vitamin E
0.2 mg
Folic Acid
37.9 mcg
Calcium
34.4 mg
Iron
1.2 mg
Health Benefits
Here are the health benefits of home-made Dhansak baby food recipes.
Dals are a powerhouse of protein and essential vitamins and minerals. This recipe combines the goodness of moong dal, toor dal, urad dal, and masoor dal. All these dals help in giving the body adequate amounts of protein needed for muscle growth.
Tomatoes are rich in antioxidants, lycopene and Vitamin C. It helps to boost immunity and also protects the skin.
Brinjals are rich in antioxidants and nutrients essential for healthy growth.
Red pumpkins are rich in Vitamin A, calcium, and magnesium. They are rich in antioxidants too and fiber which aids in digestion.
Bottle gourd is full of water content and helps to maintain the hydration level of the body.
Spring onions are excellent sources of dietary fiber, Vitamin C, and calcium.
Buying Guide
Buy organic dals and vegetables as they are free from chemicals and pesticides.
Buy dals that are unpolished as they are more nutritious.
Buy ripe and firm tomatoes as they cook well.
Buy ripe brinjals as they enhance the taste of the dish.
Make sure the skin of the bottle gourd is light green and free from cuts and blemishes. It should be firm to touch.
Dhansak is a wholesome dish that combines the nutrients in vegetables and proteins in dal to make a nourishing meal. The pureed form makes it easier to serve it to your baby too. It tastes best with rice and can be served just as it is too.
Read more




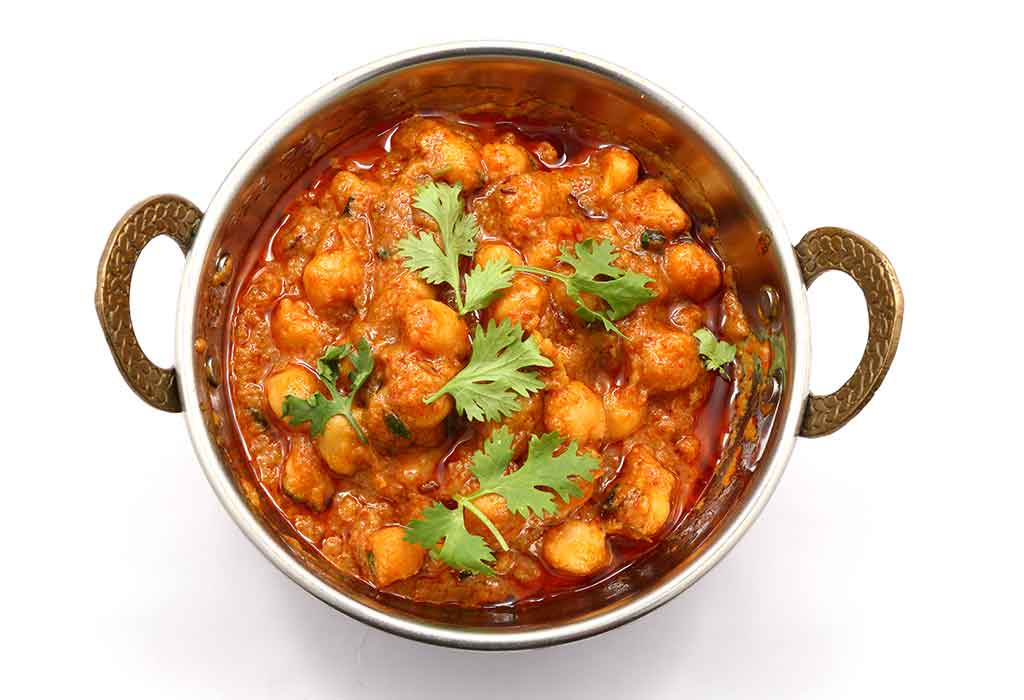
Chana(Chickpea) Curry Recipe
Chana Masala also is known as Chole Masala is a popular roadside eatery. A mixture of boiled chickpeas, onions, ginger-garlic, and spice powders, it is made in different ways in every Indian household. Traditionally, it is a Punjabi recipe that can be prepared with ease and very versatile. This simple Chana (Chickpeas) Curry recipe is a quick version of making it, more suited to your munchkin’s taste buds.
Cooking Time
Type
Time (hh:mm:ss)
Preparation Time
00:10:00
Cook Time
00:25:00
Total Time
00:35:00
Cooking Method
Gas Stove, Induction
Type of Meal
Vegetarian
Suitable For
Any toddler above 20 months of age
Meal Schedule
Breakfast, Lunch or Dinner
Recipe Type
Main Dish
Ingredients
Ingredients
Quantity and Volume
Chickpeas or Kabuli Chana (soaked overnight and drained)
1
Ghee
2-3 tablespoons
Cumin Seeds or Jeera
½ teaspoon
Onions (finely chopped)
½ cup
Tomatoes (finely chopped)
½ cup
Ginger (finely chopped)
½ teaspoon
Garlic (finely chopped)
1 teaspoon
Chole Masala
1 ½ teaspoon
Red Chilli Powder
1 teaspoon
Amchur Powder or Dry Mango Powder
1 teaspoon
Turmeric Powder
¼ teaspoon
Coriander Powder
1 teaspoon
Cumin Seeds Powder
½ teaspoon
Salt
As per taste
Coriander leaves (finely chopped)
1 teaspoon
Instructions
This lip-smacking dish is a simple process. If you wish to learn how to make Chana (Chickpeas) Curry, then follow this step-by-step guide:
Add the soaked chickpeas and salt in a pressure cooker and cook it for about 5-6 whistles.
Once the steam escapes, drain the water and keep the chickpeas aside. Do not get rid of the water.
Heat the ghee in a deep kadhai and add the cumin seeds.
When the seeds crackle, add the onions and saute them on a medium flame.
Now add the ginger and garlic and saute until the raw smell disappears.
Add the coriander powder, turmeric, chili powder, cumin seeds powder, amchur powder, and chole masala. Mix well and cook on low flame for about 3-4 minutes. Keep stirring continuously to avoid burning.
Now add the tomatoes and cook until they are mushy.
Once everything has blended well, add the cooked Kabuli chana or chickpeas. Cook on a medium flame for about 5-8 minutes stirring continuously.
If you want it to be a slightly watery gravy then add the water from the drained chickpeas.
Garnish with coriander leaves and serve hot.
Recipe Tips
This home-made Chana (Chickpeas) curry baby food recipe can be perfected if you follow these simple tips:
Make sure you soak the chickpeas overnight as they will cook well. If you are short on time then soak them in hot water for about 4-6 hours.
Add some of the finely chopped ginger when cooking the chickpeas as it will enhance the flavor.
Use a sharp knife to chop the ingredients finely.
Mash the cooked chana lightly with a masher as it will help to thicken the gravy. Take care not to over mash it.
Nutrition Information (Per 100 Grams)
Nutrient
Value
Energy
223 kCal
Protein
7.2 g
Carbohydrates
26.8 g
Fiber
11.7 g
Fat
9.7 g
Cholesterol
0 mg
Sodium
10.5 mg
Health Benefits
Chana (Chickpeas) curry for babies is loaded with nutrients that will satisfy all your requirements of a healthy diet. Read on to find out about the innumerable benefits:
Chickpeas are rich in proteins, vitamins, and minerals.
Chickpeas aid in improving the digestion process.
The protein equivalent in chickpeas is equal to that found in meat and is ideal for vegetarians and vegans.
Chickpeas contain iron and zinc which help build immunity and resistance in babies.
Babies are prone to anaemia and chickpeas, being iron-rich, help in the development of red blood cells.
Chickpeas contain calcium that supports bone and teeth development.
Chickpeas contain folate that helps to repair cells and tissues.
Onions contain folate too and are helpful in digestion.
Tomatoes are a good source of antioxidants, Vitamin C and lycopene. They help in providing resistance to cold, flu, cough symptoms, and are excellent for the skin.
Buying Guide
Just follow these simple tips while buying ingredients for Chana (Chickpeas) Curry:
Buy chickpeas in packaged form and check the expiry date before use. Chickpeas need to be stored in an airtight container.
Buy ripe and firm tomatoes so that they cook well and the spices blend well.
Onions must also be fresh so that they cook well. The onions, ginger, and garlic are what lends the dish the special taste.
Buy chole masala of reputed brands from the supermarket. Make sure you check the expiry date before use.
Try to buy organic vegetables as they are free from chemicals.
A spicy, tangy, and savory dish, Chana (Chickpeas) curry can be served for breakfast, lunch, or dinner. Your toddler will enjoy it with rice, roti, parathas, or pooris.
Read more

Til (Sesame) Ladoo Recipe
Made with til (sesame seeds), jaggery, cardamom powder, peanuts, and ghee, Til (Sesame) Ladoo is a popular winter sweet in India. It helps to keep the body warm and provides energy during the cold months. You can make this simple Til (Sesame) Ladoo recipe with the ingredients at any time. There is an aromatic appeal to this recipe and your munchkin will love the combination of roasted sesame seeds sweetened with jaggery and laced with cardamom powder.
Cooking Time
Type
Time (hh:mm:ss)
Preparation Time
00:05:00
Cook Time
00:15:00
Total Time
00:20:00
Cooking Method
Gas Stove, Induction
Type of Meal
Vegetarian
Suitable For
Toddlers older than 20 months of age
Meal Schedule
Dessert or mid-day snack.
Recipe Type
Main Dish
Ingredients
Type
Quantity
Sesame seeds (Til)
1 ¼ cups
Ghee
1 tablespoon
Jaggery (roughly chopped)
1 ¼ cups
Peanuts (roasted and crushed)
¼ cup
Cardamom powder
½ teaspoon
Instructions
To make this all-time favorite home-made Til (Sesame) ladoo baby food recipe, you only need to follow this simple step-by-step process:
Heat a pan or kadhai and dry roast the sesame seeds on a low flame for about 8-10 minutes. Make sure you stir the mixture continuously. Once done keep it aside on a separate plate.
Now heat the ghee in the pan and add the jaggery. Stir gently until it melts and cooks on a low flame for about 5 minutes
Add the roasted sesame seeds, crushed peanuts, and cardamom powder to the jaggery. Mix gently and cook it on a low flame for about 2 minutes. Keep stirring the mixture continuously.
Grease a tray with ghee and pour the mixture into the tray. Let the mixture cool down lightly for about 2-3 minutes.
Now grease your palms with some ghee, take some mixture and roll into a ball.
Repeat the process for the rest of the mixture until all the ladoos are made.
Store in an air-tight container and eat as required.
Recipe Tips
Now that you have learned how to make Til (Sesame) ladoo, just follow these simple tips to perfect it:
Roast the sesame seeds and make sure that you stir it constantly. The sesame seeds should not burn as it will lend a bitter taste.
You can even powder the seeds after you roast them.
Try to use white seeds instead of black ones. The white seeds have a rustic flavor and taste nice when roasted.
Nutrition Information (Per 100 Grams)
Type
Value
Calories
62 kCal
Carbohydrates
7.4 grams
Protein
1.2 grams
Fat
3.2 grams
Sodium
0.8s grams
Fiber
0.9 grams
Cholesterol
0
Health Benefits
Til (Sesame) Ladoo for babies is a great snack that will give loads of health benefits to your child. Read on to find out more about the nutrition that a Til Ladoo can give:
Sesame seeds are a rich source of fiber, protein, and other essential nutrients.
The fiber in sesame seeds aids digestion.
The protein helps to build muscles and also repair tissues.
Sesame seeds help to fight infection through the formation of antibodies.
Sesame seeds also form enzymes that are helpful for digestion.
Sesame seeds are rich in iron that help generate red blood cells.
Jaggery is rich in antioxidants and essential nutrients.
Jaggery contains carbohydrates which provide energy.
Jaggery helps in digestion and also cleanses the liver by flushing out all the toxins.
Buying Guide
When sourcing ingredients for Til (Sesame) Ladoo, just make sure you follow the below tips:
Buy sesame seeds in packed form. Make sure you check the expiry date on the packaging. If you are using it at a later date, then store it in an air-tight container and a cool place.
Buy jaggery in packed form and check the expiry date on the packaging.
Always try to buy organic products as they are free from chemicals.
Peanuts must also be bought in packed form.
You can buy cardamom powder from the store. If you have the whole cardamom, you could just roast it for a few minutes and grind it. While grinding cardamom, add a little bit of sugar so that it grinds into a fine powder.
Although the Til Ladoo is a winter delicacy, made especially during Makar Sankranti, you can serve it to your toddler anytime. It is a healthier and great alternative to store-bought desserts or chocolates that are harmful for your child.
Read more
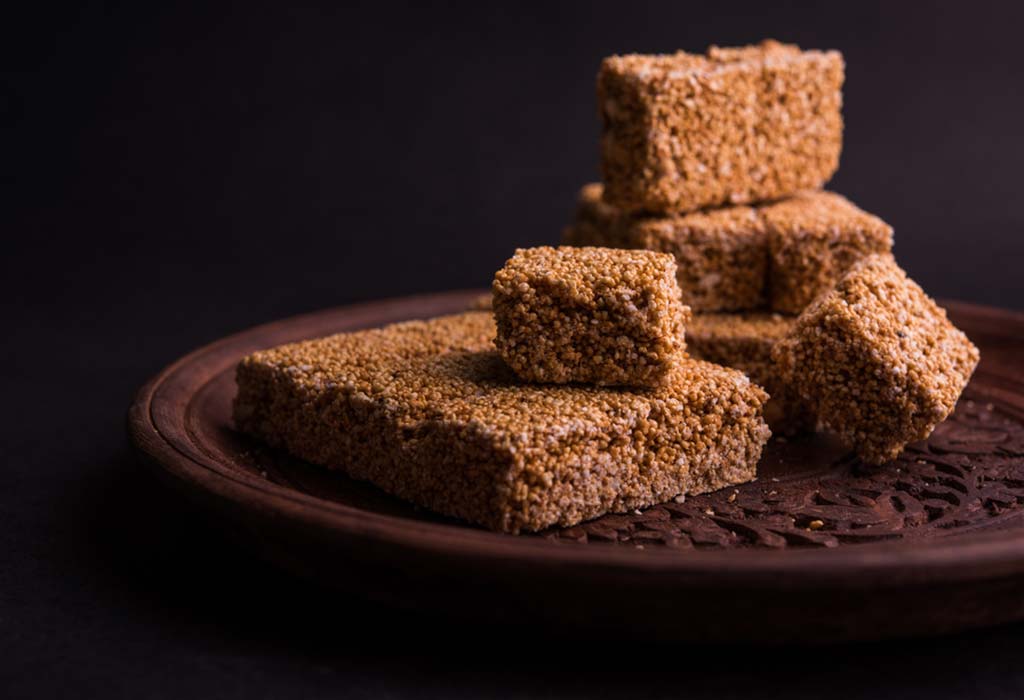
Rajgira Chikki Recipe
Rajgira Chikki is crispy, sweet, and nutty and the combination of amaranth seeds and jaggery. A great delight for the taste buds, it has a rich and enriching taste. The jaggery blends well with the amaranth seeds that taste grainy and the nutty taste of cashew nuts. This Rajgira Chikki for babies is one of the best desserts or snacks you can offer to your growing munchkin!
Cooking Time
Type
Time (hh:mm:ss)
Preparation Time
00:15:00
Cook Time
00:05:00
Total Time
00:20:00
Cooking Method
Gas Stove, Induction
Type of Meal
Vegetarian
Suitable For
Toddlers older than 19 months of age
Meal Schedule
Dessert or mid-day snack.
Recipe Type
Main Dish
Ingredients
Type
Quantity
Amaranth Seeds ( Rajgira)
1 ½ cups
Ghee
2 tablespoon
Rock salt or Sendha Namak
A pinch
Jaggery chopped or powdered
1 cup
Cashewnuts chopped
¼ cup
Cardamom powder or elaichi powder
½ teaspoon
Instructions
Simple and easy to make, learn how to make Rajgira Chikki for babies by following this simple step-by-step process:
Heat a pan or kadhai and add the ghee. Now add the rock salt and jaggery. Mix well and cook on a medium flame for about 3 minutes and keep stirring occasionally.
Now add the amaranth seeds, cardamom powder, cashews, and mix well. Stir this mixture constantly on a slow flame for about 3-5 minutes.
Once it comes together, pour it into a tray that is greased with butter.
Cut into small pieces in shapes of your choice and let it cool.
Let it cool for about 30 minutes and then store the pieces in an air-tight container.
Recipe Tips
This home-made Rajgira Chikki baby food recipe can be perfected if you follow these simple tips:
Make sure you melt the rock salt and jaggery well before you add the other ingredients.
Try not to eliminate the rock salt as it enhances the flavor of the jaggery.
Make this chikki in ghee as it enriches the taste.
Nutrition Information (Per 100 Grams)
Type
Value
Calories
194 kCal
Carbohydrates
32.8 grams
Protein
5.1 grams
Fat
4.7 grams
Sodium
0 grams
Fiber
2.9 grams
Cholesterol
0
Health Benefits
Rajgira Chikki for babies is a powerful source of nutrients for kids. It may seem a dessert that you think you might be indulging your child in, but it has its health benefits. Read on to find out more:
Rajgira seeds or amaranth seeds are rich in Vitamin C. They are rich in iron, calcium, magnesium, potassium, and phosphorous.
The amount of calcium in Rajgira seeds is double that of what milk contains making it very beneficial for the healthy development of bones.
The iron content is good to help in treating anemia.
Vitamin A in rajgira seeds helps in developing vision.
The zinc found in Rajgira is helpful to develop immunity.
Rajgira is also beneficial for healthy skin and hair.
Jaggery treats symptoms of cold, cough, and flu.
Jaggery is also rich in antioxidants and minerals that help to build immunity.
Jaggery is known to prevent constipation and aids in digestion by activating the enzymes in the digestive system.
Jaggery is made of complex carbohydrates and is a rich source of energy.
Jaggery is an unrefined form of sugar and helps to detoxify the body by cleansing the liver.
Buying Guide
A few tips that will help you source the right ingredients for easy rajgira chikki recipe for babies and perfect it:
Do not buy Rajgira seeds that are sold in loose quantity. Amaranth seeds must be tightly packed and airtight. If you plan to make the chikki at a later date, store the seeds in an air-tight jar so that they don’t get rancid.
Try to buy organic Amarnath seeds as they are processed without the use of any chemicals.
Jaggery should also be purchased in packaged form. Make sure you check the expiry date on the package before use.
Buy organic jaggery if possible as it will be free of chemicals.
You can use home-made ghee and if you do have any buy branded ones from the supermarkets. Make sure you check the expiry date before use.
Rajgira Chikki is often consumed on Makar Sankranti and fasting days. The dash of cardamom lends this chikki a wonderful aroma and it makes a great snack for kids, any time of the day. You can make these in batches and use them over a few days.
Read more
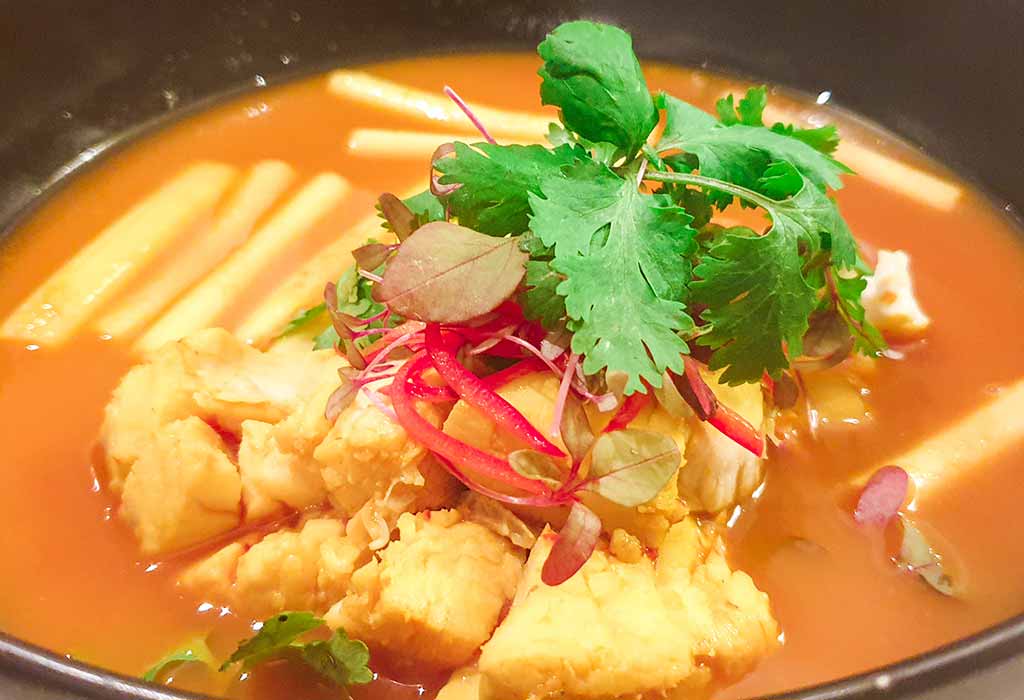
Lotus Stem Soup Recipe
Soups are one of the easiest dishes to feed babies as they are healthy, babies love them and they’re also easy to experiment with and add different veggies and flavours. This Cantonese style soup is an Asian delicacy that is famous for its distinct taste and flavour. Usually, the recipe includes pork ribs; however, we are making a vegetarian version of this soup that is very light on your baby’s tummy and equally nutritious too! Read on this post to learn this simple Lotus Stem Soup recipe!
Video : Easy and Healthy Lotus Stem Soup Recipe for Toddlers
Cooking Time
You need to have ample amount of time at hand to make this sumptuous soup for your little one:
Type
Time
Preparation Time
00:10:00
Cook Time
01:00:00
Total Time
01:10:00
Cooking Method
Gas
Type of Meal
Vegetarian
Suitable For
Toddlers over 17 months of age
Meal Schedule
Lunch or Dinner
Recipe Type
Soups
Ingredients
Here is what goes into making lotus stem Soup for toddlers:
Type
Quantity/Volume
Lotus stem
2 cups
Carrots (cut into cubes)
1 cup
Chinese turnip (cut into cubes)
1 cup
Lotus seeds
1 cup
Goji berries
½ cup
Ginger, chopped
¼ cup
Cilantro leaves, chopped
2 tablespoons
Salt
To taste
White pepper
1 teaspoon
Water
5 to 6 cups
Instructions
Here is the step by step procedure to make this yummy soup:
Wash the lotus stems thoroughly under running water as sometimes dirt may get into the rhizomes, which can be hard to spot. You may soak the stems in water too. Keep them on a paper towel to dry before slicing them.
Slice the lotus stems into small pieces.
Take a heavy-bottomed pan and put the sliced lotus stems, chopped carrots, chopped Chinese turnip, chopped ginger, lotus seeds, goji berries, salt, and white pepper. Cook covered for at least an hour or until all ingredients cook well.
Mash the contents and strain them.
Serve at room temperature, topped with finely chopped cilantro!
Recipe Tips
Keep in mind the following recipe tips while making homemade Lotus Stem Soup baby food recipe:
If your baby is comfortable with chewing and swallowing chunks of food, do not mash the ingredients!
You can add a non-vegetarian twist to the recipe by adding chicken.
You can add a few dates to the recipe to render some sweetness to it.
You can add a handful of peanuts to add a nutty flavour to the dish.
Nutrition Information (Serving Per 100 Grams)
The table below mentions the approximate nutritional content present in 100 grams of lotus stem soup:
Type
Value
Energy
320 calories
Carbohydrates
28 grams
Protein
19 grams
Fats
16 grams
Table Source: https://www.nyonyacooking.com/recipes/lotus-root-soup-with-peanuts~S1dyuPjPGcWQ
The nutritional content mentioned above is for reference purposes only. Actual nutritional content may vary according to the ingredients that you may use for the soup.
Health Benefits
Here are some health benefits of Lotus stem soup for babies:
Goji berries are power-packed with amino acids, vitamin C, and protein. These tiny berries are also loaded with ample iron, zinc, calcium, and selenium. All these nutrients help in the overall growth and development of babies.
Lotus stem is loaded with nutrients that include iron, magnesium, zinc, manganese, copper, etc that help maintain your kiddo’s overall health.
Lotus stem contains impressive amounts of vitamin C and thus the regular intake of these roots may help in keeping coughs, colds, flu, and other such infections at bay.
Regular intake of lotus stem helps in ensuring better blood circulation, which helps in keeping your baby’s body healthier and more energized.
Pyridoxine in lotus stem is beneficial for the brain’s neural receptors, which in turn help in improving your baby’s mental health by reducing irritability and anxiety.
Buying Guide
After learning how to make lotus stem soup, also learn about some buying tips when it comes to picking up ingredients for this soup recipe:
Buy lotus stem that looks crisp and firm. Do not buy the ones that look wilted or have brown spots on them.
When buying lotus seeds, do not forget to check the date of packing or the best before date on the label.
Make sure that you buy fresh vegetables for the recipe, preferably organic ones. Refrain from using non-seasonal, frozen, or tinned ones.
This Cantonese style soup is a delicacy and it is enjoyed by people from almost all parts of the world. We have made some changes to make this recipe suitable for young kids. Next time you have some different cuisine in mind for your baby; do give this recipe a try!
Read more
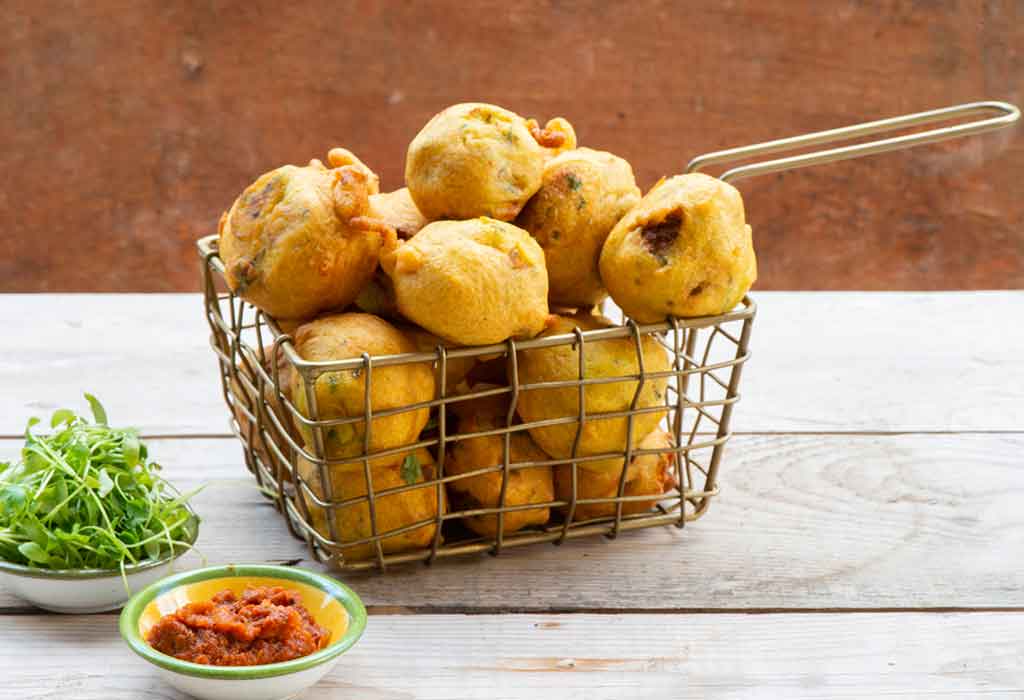
Homemade Batata/Potato Vada Recipe
Batata vada is a famous Maharashtrian street food that is loved by all! This mashed potatoes and gram flour dish is a delicious snacking option for kids too. Well, what if we told you that you can make this recipe for your toddler too! If you wish to know this simple Homemade batata /potato vada recipe, we recommend reading this post for the same!
Cooking Time
The table below shows the amount of time that you may need to invest to make this yummy snack for your munchkin:
Type
Time
Preparation Time
00:05:00
Cook Time
00:25:00
Total Time
00:30:00
Cooking Method
Gas Stove, Frying
Type of Meal
Vegetarian
Suitable For
Toddlers over 20 months of age.
Meal Schedule
Mid Morning Snack or Evening Snack
Recipe Type
Appetizers
Ingredients
You need the following ingredients to make Homemade batata/potato vada baby food recipe:
Type
Quantity/Volume
Potatoes
4-5 medium-sized
Ginger (finely chopped)
½ an inch
Garlic (finely chopped)
4 to 5 cloves
Curry leaves
5-6
Mustard seeds
½ teaspoon
Turmeric powder
1 teaspoon
Coriander leaves (finely chopped)
1 tablespoon
Gram flour
1 cup
Cumin powder
1 teaspoon
Lemon juice
1 tablespoon
Water
As required
Oil for frying
As required
Salt
As required
Instructions
Here are the step by step directions for making batata vada:
Boil potatoes in a pressure cooker for 2 whistles or until they turn soft and tender. Keep them aside to cool. Once cooled down, peel and mash them coarsely.
Heat one tablespoon oil in a pan.
Add mustard seeds and sauté them until they start spluttering.
Add curry leaves and cook them until they turn crisp.
Add chopped ginger and garlic and cook for a minute or two.
Add ½ teaspoon turmeric powder and mix well.
Slowly add coarsely mashed potatoes and salt. Mix well with the rest of the ingredients. Cook on low flame for a few minutes.
Put lemon juice, mix well and remove from the heat. Let it cool.
Mix gram flour, cumin powder, ½ teaspoon turmeric powder, and salt in a deep bowl.
Slowly add water to the flour mixture by whisking it continuously.
Heat oil in a wok for frying.
Scoop out small ball sized potato mix and dip it in gram flour batter. Slowly release the vadas in hot oil. Cook on medium flame until they turn crispy.
Place the vadas on a paper towel to remove excess oil. Serve at room temperature with homemade chutney or dip!
Recipe Tips
To master the correct way of how to make homemade batata /potato vada recipe, keep in mind some of the following tips too:
Make sure the potatoes are not over boiled or else it may spoil the texture of the recipe. You need firm boiled potatoes for the recipe.
The gram flour batter should neither be too thick nor too watery or else the vadas may not turn out well.
You can add a tablespoon of rice flour or cornflour to make crispier vadas.
Nutrition Information (Serving Per 100 Grams)
The following table indicates the nutritional information present in batata vadas:
Type
Value
Energy
250 Calories
Carbohydrates
20 grams
Protein
5 grams
Fat
15 grams
Potassium
385 milligrams
Sodium
750 milligrams
Vitamin A
800 IU
Vitamin C
35 milligrams
Calcium
25 milligrams
Magnesium
15 milligrams
Phosphorus
23 milligrams
Health Benefits
Here are some benefits of Homemade batata /potato vada for toddlers:
The presence of Folate in potatoes helps in the synthesis and repair of DNA, which proves beneficial in keeping various kinds of cancers at bay.
Potatoes are power-packed with calcium, iron, magnesium, and phosphorus, and all these nutrients help in strengthening bones.
The presence of several nutrients such as potassium, vitamin B6, vitamin C, etc is beneficial for maintaining good heart health.
Loaded with starch, enzymes and vitamin C, regular intake of potatoes help in nourishing and protecting the baby’s delicate skin.
Gram flour or besan does not contain gluten, thus it proves to be a healthy alternative for babies with gluten sensitivity.
Buying Guide
Keep in mind the following tips while buying ingredients for the recipe:
Buy fresh and firm potatoes that do not have any marks on them. If possible, buy organic vegetables for the recipe.
Do not buy loose gram flour. Buy pre-packed gram flour from any renowned brand.
Your search for a yummy snacking option ends with this easy to make batata vada recipe! Do try this recipe and bring a big smile on your munchkin’s face!
Read more
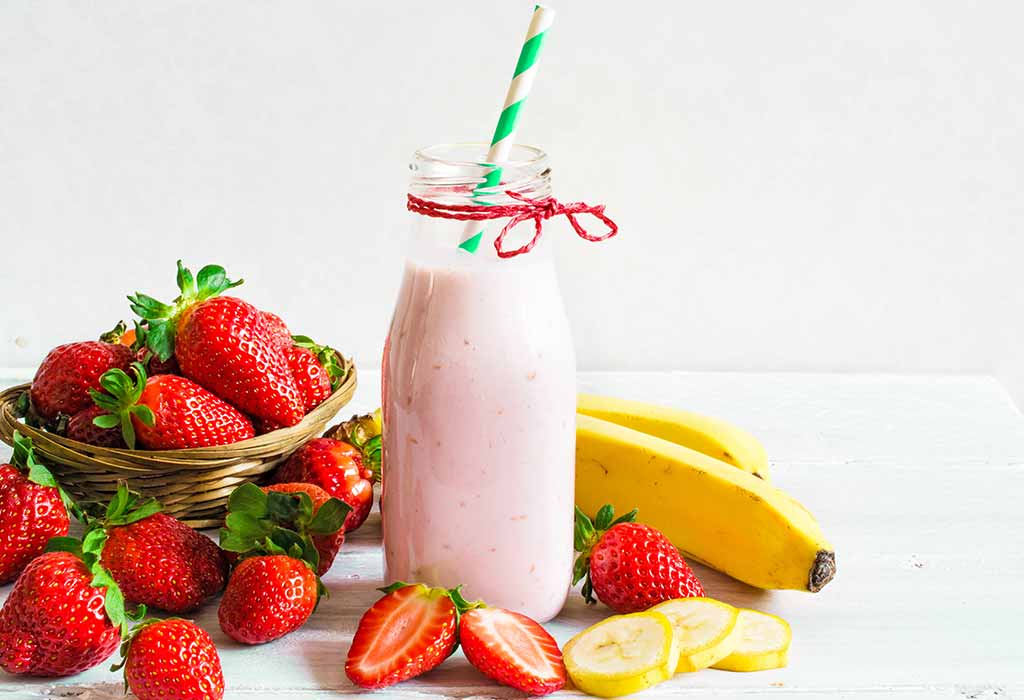
Banana Strawberry Almond Smoothie Recipe
When it comes to a strawberry milkshake or a refreshing banana smoothie nothing can beat the relief which this energizing drink has to offer! Not only amongst adults but with kids too, a strawberry milkshake or a banana smoothie is the best way to include all the vital nutrients with a yummy taste. So here we have a sweet and velvety banana strawberry almond smoothie recipe which will be an instant hit at home! You can introduce this smoothie recipe to toddlers as well, they will love the taste and also get all the vital nutrients loaded in this drink. So scroll on to read how to make a banana strawberry almond smoothie at home for your baby!
Cooking Time
Type
Time (hh:mm:ss)
Preparation Time
00:05:00
Cook Time
00:10:00
Total Time
00:15:00
Cooking Method
No cooking required
Type of Meal
Vegetarian
Suitable For
Toddlers older than 20 months of age
Meal Schedule
In between-meal option, Breakfast
Recipe Type
Beverage
Ingredients
Type
Quantity
Banana
01 ripe
Strawberries
07 – 08
Yoghurt
4 tablespoons
Milk
4 tablespoons
Soaked Almonds
07 – 08
Instructions
Below mentioned are the step by step directions to make a banana strawberry almond smoothie:
Make sure that you have stocked up all the required ingredients.
Chop the bananas into small pieces and keep them aside. Slice the strawberries and keep them aside.
Take a blender and chop the bananas into the jar. Add the sliced strawberries, yoghurt, milk, and almonds into the jar.
Blend it for 4-5 minutes or until it turns out to a smooth creamy smoothie.
Pour into a glass and enjoy the drink!
Recipe Tips
This simple banana strawberry almond smoothie recipe is easy to blend and can be made in a variety of ways.
The homemade banana strawberry almond smoothie baby food recipe is best served immediately after blending or else it might become thick.
For toddlers and very young babies, you may also add breast milk or formula milk instead of regular milk to adjust the consistency of the smoothie.
For adults and kids above 2 years, you may also add cocoa powder for a rich chocolaty taste.
For toddlers and young babies, you may try other combinations with dates or baby spinach to enhance the iron content of the recipe.
It is highly recommended to consult with your paediatrician before introducing any new recipes to young babies.
Nutrition Information (Per 200 Grams or 1 cup serving)
Type
Value
Carbohydrates
72.6 grams
Protein
3.9 grams
Fat
5.6 grams
Potassium
1003 milligrams
Sodium
304.5 milligrams
Calcium
86.4 milligrams
Iron
12.2 %
Copper
9.8 %
Folate
11.8 %
Manganese
30.6 %
Magnesium
20.8 %
Phosphorous
8.3 %
Niacin
6.6%
Pantothenic Acid
4.7 %
Zinc
6.6%
Riboflavin
14.2 %
Vitamin A
23.2 %
Vitamin C
120.3 %
Vitamin E
103.7 %
Vitamin B6
36.2 %
Vitamin D
50%
Calcium
63.1%
Health Benefits
You would be delighted to know that this tasty and healthy beverage is fully loaded with many health benefits:
A banana strawberry smoothie is an excellent source of Vitamin C, an antioxidant that fights against viruses helps in healing wounds, and also helps reduce the damage caused by free radicals.
Banana contains healthy fibre that aids in digestion and easy bowel movements in children.
The high potassium content in banana also makes it an excellent fruit to eat that decreases the risk of kidney stones.
Strawberries are known to improve eyesight and also help decrease the symptoms of arthritis.
Strawberry is an excellent source of antioxidants that helps protect against oxidative stress and ageing of the cell.
The banana and strawberry in the smoothie contain folate which is very good for expecting mothers and the growing baby. Folate helps ward off the birth defects of the spine in babies.
The almonds in the smoothie are highly nutritious and very rich in healthy fats.
Almonds are a rich source of vitamin E that lowers the rate of heart diseases, cancer, and Alzheimer’s diseases.
Buying Guide
Below mentioned are certain buying tips while choosing the ingredients for baby food recipes:
Make sure that the bananas you choose are ripe and do not have black spots on the skin.
Buy fresh and organic strawberries for this recipe.
You can use vanilla flavoured yoghurt and low-fat skimmed milk for this recipe.
Banana Strawberry Almond Smoothie for babies can be easily made at home within no time! It’s a gluten-free recipe that’s best had in the morning to kick start a day filled with energy!
Read more
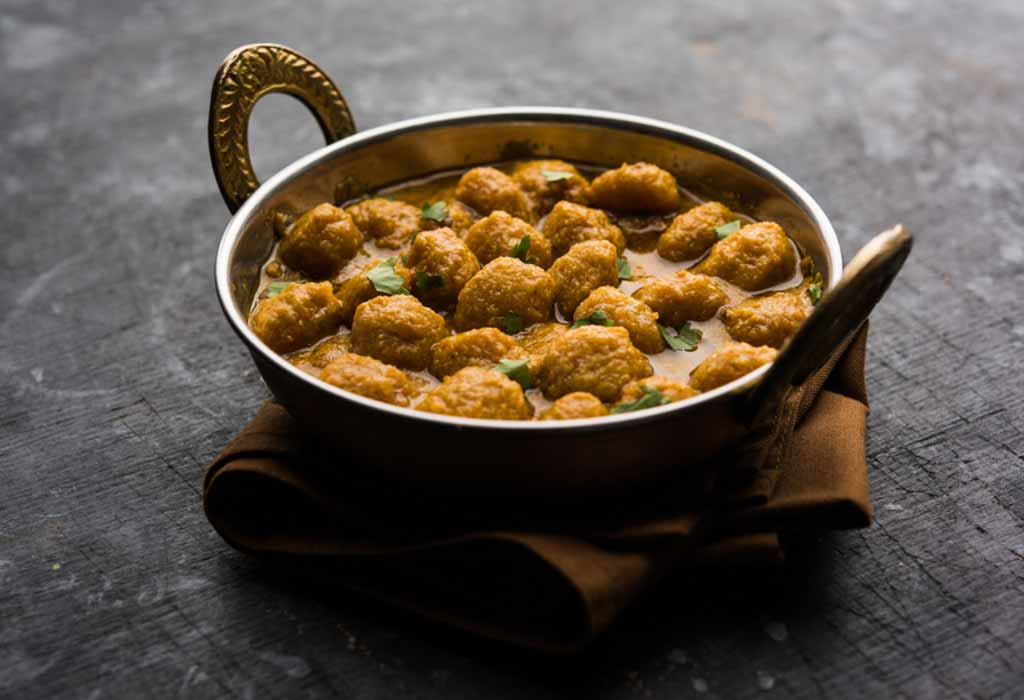
Soya Curry Recipe
One of the best sources of protein after breast milk is poultry and soya! Children, during their growth years, need a protein-rich diet for their overall growth, development, and energy requirements. Soya nuggets or soya chunks are one of the best sources of protein especially for kids as they would love the texture and taste of a well-cooked soya bean. Including soya bean in the everyday diet of kids will make sure that they get the required amount of protein and essential nutrients. This soya chunks curry is easy to cook and is enriched with delightful flavours! Read on to find out how to make soya curry at home for your baby.
Cooking Time
Type
Time (hh:mm:ss)
Preparation Time
00:20:00
Cook Time
00:20:00
Total Time
00:40:00
Cooking Method
Gas
Type of Meal
Vegetarian
Suitable For
Toddlers older than 20 months of age
Meal Schedule
Breakfast, Lunch or Dinner
Recipe Type
Main Dish
Ingredients
Type
Quantity
Soya chunks
1 Bowl
Oil
1 tablespoon
Onions
1 medium-sized
Tomato
1 medium-sized
Ginger garlic paste
1 teaspoon
Garam masala powder (optional)
½ teaspoon
Turmeric powder
1 teaspoon
Water
2 cups
Salt
As required
Coriander leaves
A handful
Instructions
Below mentioned are the step by step directions to make Soya curry:
Get all the ingredients ready for a hassle-free cooking experience. Soak the soya chunks in a bowl of water for about 1.5 to 2 hours. Once soggy, squeeze out the excess water from the soya chunks and keep it aside.
Heat oil in a pan and add onions. Cook on medium flame until the onions turn translucent.
Next, add the ginger-garlic paste and cook for another 1-2 minutes until the raw smell goes away.
Once the onions and ginger garlic paste is done, add the tomatoes. Cook till the tomatoes soften and turn mushy.
Now, add turmeric powder, salt and garam masala powder, and mix well.
Add water to the pan and then the soya chunks. Cook on low flame for about 10-12 minutes until the soya chunks have absorbed all the flavour.
Open the lid and stir occasionally. Once done, add the coriander leaves and serve hot with chapati or rice.
Recipe Tips
This simple soya curry recipe can also be made with some veggies of your choice.
The homemade soy curry baby food recipe is best served hot along with chapati or rice.
For toddlers and very young babies, you may skip the garam masala powder or reduce the quantity accordingly.
Adjust water according to the consistency that you prefer.
It is highly recommended to consult with your paediatrician before introducing any new recipes to young babies.
Nutrition Information (Per 200 Grams or 1 cup serving)
Type
Value
Carbohydrates
7.5 grams
Calcium
86.4 milligrams
Iron
3.7 milligrams
Protein
15.6 grams
Fat
7 grams
Fibre
8.3 grams
Magnesium
63 milligrams
Phosphorous
248.4 milligrams
Potassium
646.9 milligrams
Sodium
0.7 milligrams
Zinc
1.2 milligrams
Folic acid Vitamin B9
36 micrograms
Vitamin A
153.4 micrograms
Vitamin C
2.2 milligrams
Vitamin E
0.3 milligrams
Vitamin B1
0.3 milligrams
Vitamin B2
0.1 micrograms
Vitamin B3
1.1 milligrams
Health Benefits
Soya chunks are considered to be vegetarian’s meat! But did you know that this simple to make and super tasty soya bean chunk is loaded with so many health benefits:
Soya beans are a great source of protein and a decent source of carbohydrates and fats.
Research shows that soya beans may help lower cholesterol, it helps reduce the LDL cholesterol and also helps in raising the HDL cholesterol.
Soya beans also boost fertility in women, it is considered beneficial for women trying to conceive and undergoing fertility treatment. It helps boost ovulation and menstrual cycles in women with PCOD and hormonal imbalances.
The isoflavones in the soya beans aid in reducing the menopause symptoms in women.
Soya beans are the best source of plant-based protein and also an excellent source of many nutrients and phytochemicals.
Soya contains prebiotic fibre and also provides a small amount of vitamin E, niacin, vitamin B6, and pantothenic acid.
Buying Guide
Below mentioned are certain buying tips while choosing the ingredients for baby food recipes:
Always buy the soya chunks from a trusted source or brand.
If including veggies in the recipe then make sure that you buy organic veggies and wash them thoroughly before cooking.
Soya curry for babies can be made in a variety of different styles at home. It is an easy to cook recipe, that will be loved by kids and adults both!
Read more
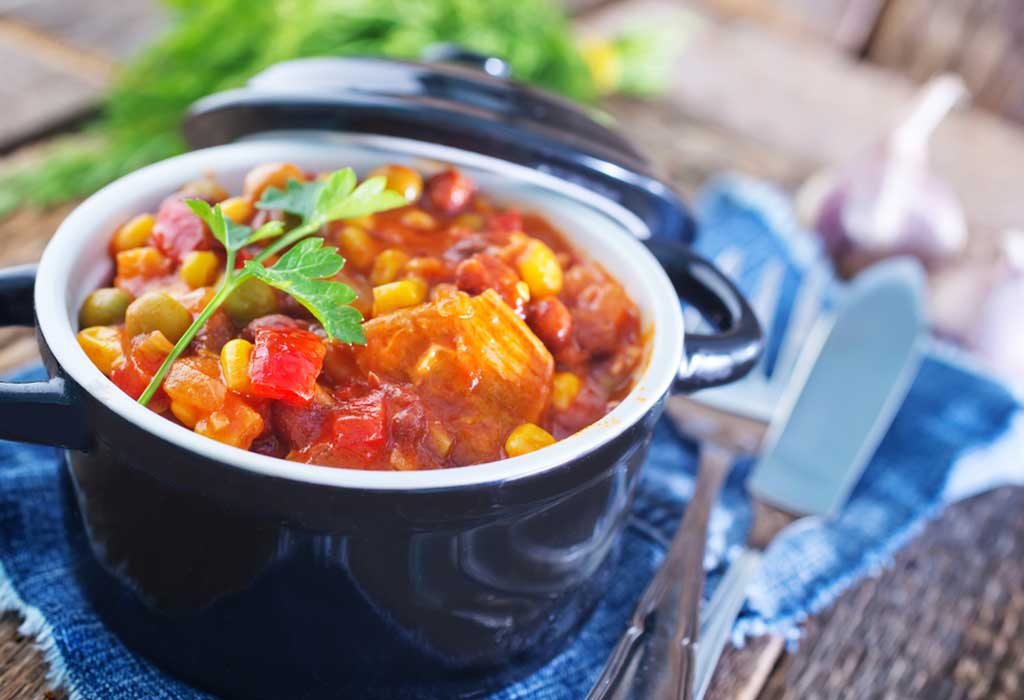
Vegetable Stew Recipe
Introducing solids to your weaning baby is a vital process of establishing a healthy eating habit and limiting fussy mealtimes. This milestone can be crossed smoothly by feeding vegetables in the form of stew to your baby. The choice of varied vegetables used to cook this recipe encourages the acceptance of different textures, colours, flavours, and consistencies. Once your baby’s tummy gets adjusted to clear vegetable stew it is time to cook a mix of vegetables in a mildly spiced stew. Easy to cook, vegetable stew can be accompanied by steamed rice, bread, or appams. Note down the recipe of how to make vegetable stew most simply and it could become a regular item in your baby’s weekly diet.
Video: Vegetable Stew Recipe for Toddlers – An Step-by-Step Guide
Cooking Time
Type
Time (hh:mm:ss)
Preparation Time
00:10:00
Cook Time
00:30:00
Total Time
00:40:00
Cooking Method
Gas
Type of Meal
Vegetarian
Suitable For
Toddlers older than 15 months of age
Meal Schedule
Breakfast, Lunch or dinner
Recipe Type
Main Dish
Ingredients
Type
Quantity
Carrot
1 Tbsp.
Beans
1 Tbsp.
Green Peas
10 taken from the pod
Water
As Needed
Salt
As Per Taste
Ghee/Clarified Butter/Oil
¼ Tbsp.
Tomato
¼ Cup
Pepper Powder
½ tsp
Minced Garlic
2-3 Cloves
Small Onion
1
Corn-starch
1 Tbsp.
Dried Rosemary/Celery
1 Tbsp.
Ginger
1 Inch
Potato
1
Instructions
Follow the step by step directions given here to master the art of making the perfect vegetable stew for your little one.
Wash the vegetables in running water. Peel and cut the carrots, potato into small dices. Chop the beans into equal sizes. De-seed the peas from the pod.
Steam the chopped veggies in a steamer for about 10 minutes.
Once the vegetables are soft, cool, and blend them in a mixer till smooth.
Heat butter in a pan. Add the onion and sauté till it turns transparent.
Add the minced ginger, garlic, chopped tomatoes, and stir. As the tomatoes become mushy, pour in the vegetable broth.
Turn up the heat to boil. Mix 1 tsp of corn-starch with 2 tablespoons of water in a bowl.
Add the corn-starch to the stew. Stir it till the consistency becomes thick. Add more water if needed.
Add seasonings like salt, pepper powder, and herbs on top.
Switch off the flame and serve warm.
Recipe Tips
This simple vegetable stew recipe can be made using coconut milk instead of water. While adding curry leaves replaces the Italian seasoning.
Strain out the tomatoes if you think its skin or seed might cause choking while eating.
Sterilize the vessels well that is used for cooking and feeding your baby.
Make the baby sit in an upright position to feed the baby to avoid choking.
Feed each of the vegetables used in this recipe individually to ensure no allergies have been found.
You can pressure cook the vegetables with three whistles before making the stew.
You can even use a combination of dals with vegetables for this homemade vegetable stew baby food recipe.
Nutrition Information (Per Serving)
Type
Value
Carbohydrates
23.25gram
Calories
134kcal
Protein
6.33gram
Sodium
540mg
Fiber
4.1gram
Fat
2.32gram
Potassium
526gram
Calcium
38mg
Vitamin C
20.3mg
Vitamin A
4130IU
Iron
1.74mg
Sugar
4.61gram
Health Benefits
A warm bowl of vegetable stew has the best therapeutic property for a sick child. Nevertheless, you can make this dish on other times too to meet the nutritional needs of a growing child:
By sneaking vegetables into this dish, you can ensure that your child is getting well benefited from the essential vitamins and minerals present in the vegetables.
Carrots are a rich source of fibre, beta-carotene, potassium, Vitamin K1, and antioxidants. Carrots promote good eye health and are used in an effective weight-loss diet.
Beans are a good source of protein, vitamin C, folate, Vitamin A, fibre, and antioxidants. Start beans in small quantities for babies as undigested beans can increase flatulence.
Buying Guide
This shopping guide helps you to make informed choices about the products that are needed to make the tastiest vegetable stew for your baby.
Use unsalted butter for cooking for babies. Branded butter can be bought from a reputed store.
Spices can be bought in small quantities as they lose their aroma and colour easily. Check the expiry date of the sealed pack of spices.
It is always better to choose organically grown vegetables. Fresh vegetables can, however, be bought from the local farmer’s market.
Check the ingredients mentioned on the label of the edible oil packet.
Self-fed or spoon-fed, homemade vegetable stew for babies always tastes best when made with love and care by doting mothers. This rich, savory broth is surely a healthy substitute for any packaged products that are readily available in the market. Serve it a little warm and your kid is sure to love it!
Read more
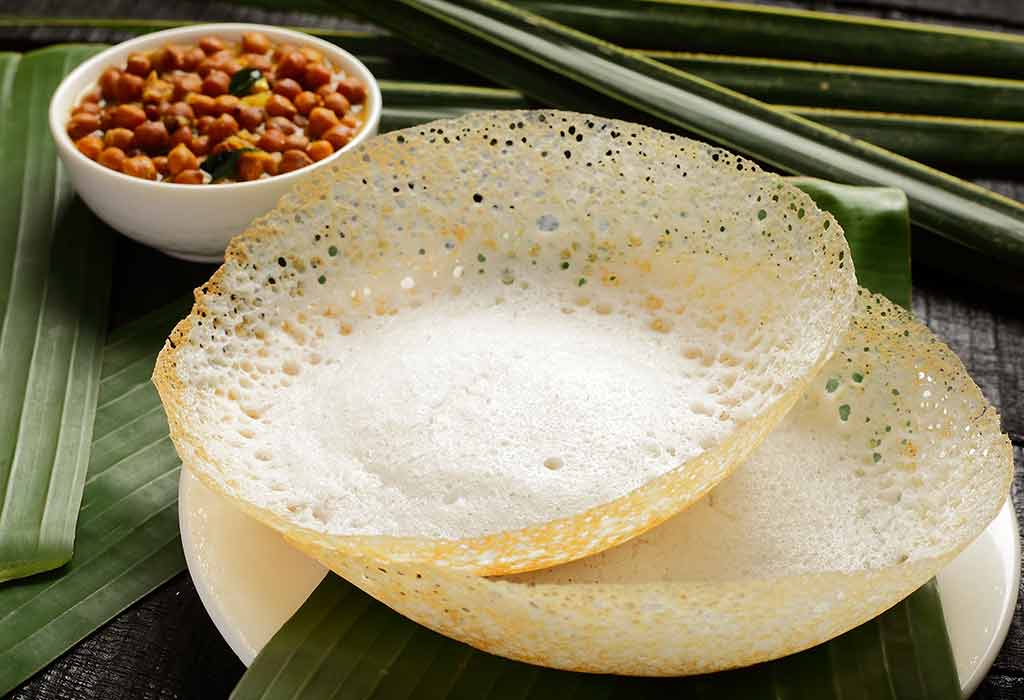
Appam Recipe
Making a delicious breakfast that your toddler will relish is not an easy task, but worry not as we bring to you a simple appam recipe. Appam is a south-Indian delicacy mostly popular in Tamil Nadu and Kerala. This is a delicacy with lacy border and spongy inside, isn’t that interesting? It is also a healthy recipe as it requires very little oil. Let your little one feast on this delicious appam as it is or just generously pour coconut milk on the appam and let them enjoy it.
Cooking time
Type
Time(hh:mm:ss)
Preparation time
00:15:00
Cooking time
00:07:00
Total Time
00:22:00
Cooking Method
Gas Stove
Type of Meal
Vegetarian
Suitable For
Toddlers above 20 months
Meal Schedule
Breakfast or dinner
Recipe Type
Main Dish
Ingredients
Idli rice
½ cup
Raw white rice
½ cup
Urad dal
1 tbsp
Fenugreek (Methi ) seeds
1 tsp
Sugar
1 tsp
Coconut Milk
½ cup
Salt
As per taste
Cooked white rice (optional)
1 tbsp
Oil
To drizzle on Appam
Water
As required
Instructions
The following instructions explain How to make appam in a simple way:
In a large bowl filled with water soak idli rice, raw rice, urad dal and methi seeds for at least 5 hrs.
Grind the soaked rice and dal mixture in a mixer along with cooked white rice into a fine batter and let it ferment for 7-8 hrs.
After the batter is fermented well add salt, sugar, and coconut milk and give it a good mix.
Adjust the consistency of the appam batter a little thinner than that of a dosa batter.
In an appam pan which is similar to a small kadai, pour a ladle of batter in the centre and swirl the batter around the pan to coat the sides of the pan.
Add 1 tsp oil on the sides of the appam and close the lid and cook for 2-3 minutes.
Once you see the appam turning light brown in the corners you can remove it from the heat and serve with coconut milk or any chutney of your choice.
Recipe tips
As you are now aware of the step by step instructions for a traditional appam recipe, note down the following pointers to get the perfect texture and taste.
Usually, appam batter should have a thin consistency to get the appams crispier towards the sides and soft and fluffy in the centre.
If the batter is not fermented enough you add a pinch of baking soda to it.
Homemade coconut milk enhances the flavour of appam than canned coconut milk.
Leftover appIam batter can be stored in the refrigerator for up to 3 days.
You can use coconut oil or groundnut oil for preparing this recipe instead of refined sunflower oil for added health benefits.
Nutrition value (Per 100 Grams)
Nutrient
Value
Energy
100 cal
Carbohydrates
18 g
Fat
1.5 g
Protein
1.5 g
Vitamin A
1 mcg
Calcium
2.1 mg
Cholesterol
0 g
Fibre
0.8 g
Folic Acid
1.5 mcg
Magnesium
20 mg
Phosphorus
36 mg
Sodium
1.5
Zinc
0.3 mg
Health benefits
Appam is wholesome breakfast with the following health benefits for babies:
Rice is abundant with complex carbohydrates which essentially provides energy to the little ones to keep them active all day long.
Since appam is low in calories it helps in keeping obesity at bay for your munchkin.
Urad dal has immense dietary fibre which is very much essential for improved digestion in babies.
Rice also has vital proteins that are needed for proper muscle development in children.
Coconut milk has mostly essential fats that are required by toddlers for better brain development and glowing skin.
Coconut milk also has antimicrobial lipids that protect babies’ body from germs and bacteria.
Buying guide
Making delicious home-made appam baby food recipe also dependants on the quality of ingredients used in it, so check out the buying guidelines below:
Always make appam using fresh and white raw rice as it will yield whiter appams.
Check the expiry date of the rice and dal you buy.
Choose the coconut which is browner and free from cracks as it will have more white than water.
Buy organic rice to keep your baby away from crops that are grown using chemicals and pesticides.
Your baby is sure to enjoy a plate of appams which is crispy outside and fluffy inside. Our babies are a priceless possession, therefore opt for home-made breakfast ideas like this appam recipe than depending on store-bought cereals. Get started to make these delicious appams right away!
Read more
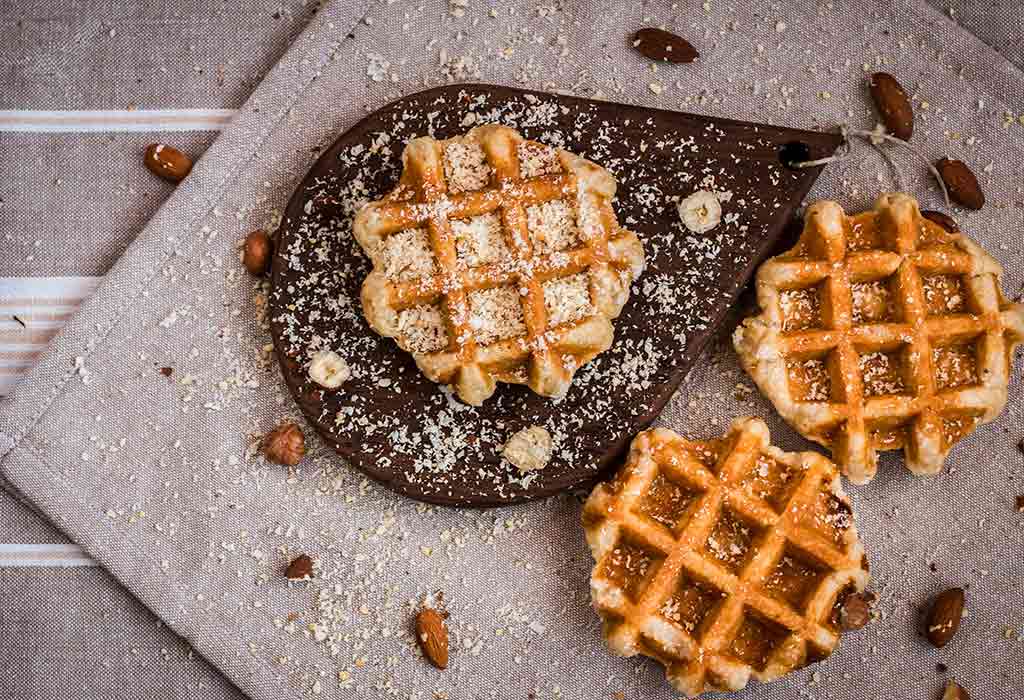
Almond Waffles Recipe
When you have picky eaters, breakfast ruts get real and become a serious concern for mothers. If you’re one of them and want to make sure your kid has eaten a balanced breakfast, almond waffles can be a good option. This kid-friendly recipe helps you to make the perfect waffles that are light, crispy on the outside, and fluffy from inside. Quick and fun-to-make, almond waffles are extremely delicious to taste and provides the best nourishment that your child needs to remain active all day. As you get creative with your cooking skills and find out how to make almond waffles most simply, the joy of watching your child enjoying the dish will surpass the effort you make.
Video : Healthy and Tasty Almond Waffles Recipe for Toddlers
Cooking Time
Type
Time (hh:mm:ss)
Preparation Time
00:10:00
Cook Time
00:20:00
Total Time
00:30:00
Cooking Method
Waffle Maker
Type of Meal
Non- Vegetarian
Suitable For
Toddlers older than 22 months of age
Meal Schedule
Breakfast, Evening-Snacks
Recipe Type
Main Dish
Ingredients
Type
Quantity
Almond flour
2 Cup
Egg
3
Milk
1 ¼ Cup
Baking Powder
1 Tsp
Salt
½ Tsp
Vanilla Extract
1 Tsp
Maple Syrup/Honey
2 Tbsp.
Arrowroot Starch
1 Tbsp.
Oats Flour
2 Cup
Water
1/3 Cup
Extra-virgin olive Oil
1 Tbsp.
Sugar
2 Tbsp.
Instructions
These step by step directions are easy tricks to remember when you try your hand at this unique recipe:
Take a large mixing bowl and combine eggs, almond flour, oats flour vanilla extract, baking powder, arrowroot, water, salt, sugar, and milk together by whisking everything well.
Add water if the batter seems thick.
Preheat the waffle maker. Grease it by spraying olive oil. Pour 1/4th cup of the batter at the centre of the waffle iron.
Cook until the waffles are puffy and done for about 5 minutes.
Use a fork to carefully remove the cooked waffle from the waffle maker. Transfer it to a plate. Repeat the process with the remaining batter.
Serve warm with your child’s favourite topping.
Recipe Tips
This simple almond waffles recipe made sweeter by adding apple sauce to the batter.
Adding any multi-grain powder makes the waffles more nutritious for your kid.
You can brush the waffle maker with butter or olive oil each time one round of waffles is done to prevent sticking to the base.
This homemade almond waffles baby food recipe can be made healthier by using low-fat buttermilk and unsalted butter to the mix.
Adding sugar or salt is not advisable for children less than one year of age.
Cooking the waffles for a shorter time makes them soft and crunchy if you cook them for a longer time.
Make sure that the batter is smooth and has no lumps in it.
Any varieties of milk like almond milk, soy milk, coconut milk can be used for this recipe.
Nutrition Information (Per 1 paratha)
Type
Value
Carbohydrates
24.4gram
Calories
205kcal
Protein
6.6gram
Sodium
194.5gram
Fibre
2gram
Fat
15gram
Potassium
114mg
Calcium
97mg
Cholesterol
42mg
Sugar
10gram
Iron
1.5mg
Vitamin A
61IU
Health Benefits
Waffles are considered ‘food for life’ as they’re preservative-free convenient and fast breakfast solution. The health benefits listed below will encourage you to invest time and effort in making for your entire family:
Eggs are a valuable source of protein for babies. Considered as the building blocks for growth and regeneration of cells, eggs make babies stronger.
Almonds contain riboflavin and L-carnitine that stimulate brain activity in babies. They contain a high amount of fibre that aids the digestion process and regulates bowel movements.
The fatty acids in almonds have anti-inflammatory properties that ensure good health for children. Phosphorous in almonds enhances bone and teeth health thereby preventing osteoporosis in later life.
The rich composition of antioxidants in almonds helps to fight cancer.
Milk contains calcium and Vitamin D needed to build strong muscles and keep for all-rounded growth and development of your child.
Buying Guide
This buying guide is a ready reckoner for all mothers venturing out to shop the best quality ingredients that will help to bring out the best taste and nutritional value of this dish.
Almond flour can be made at home or bought from a store. Go for extra-fine, high protein variety for the smoothest and healthiest waffle batter.
Check the expiry date on the label of the eggs mentioned in its pack. The eggshell should be clean, smooth, and not cracked.
Buy pasteurised milk that is well within their use-by date. Avoid leaky milk cartons.
As mothers make no compromise with their child’s health, homemade almond waffles for babies have the wholesome goodness that store-bought waffles fail to have. Hence, make sure eating your almond waffles become your child’s favourite weekly treat that not only satisfies hunger pangs but helps create happy memories of mealtimes.
Read more
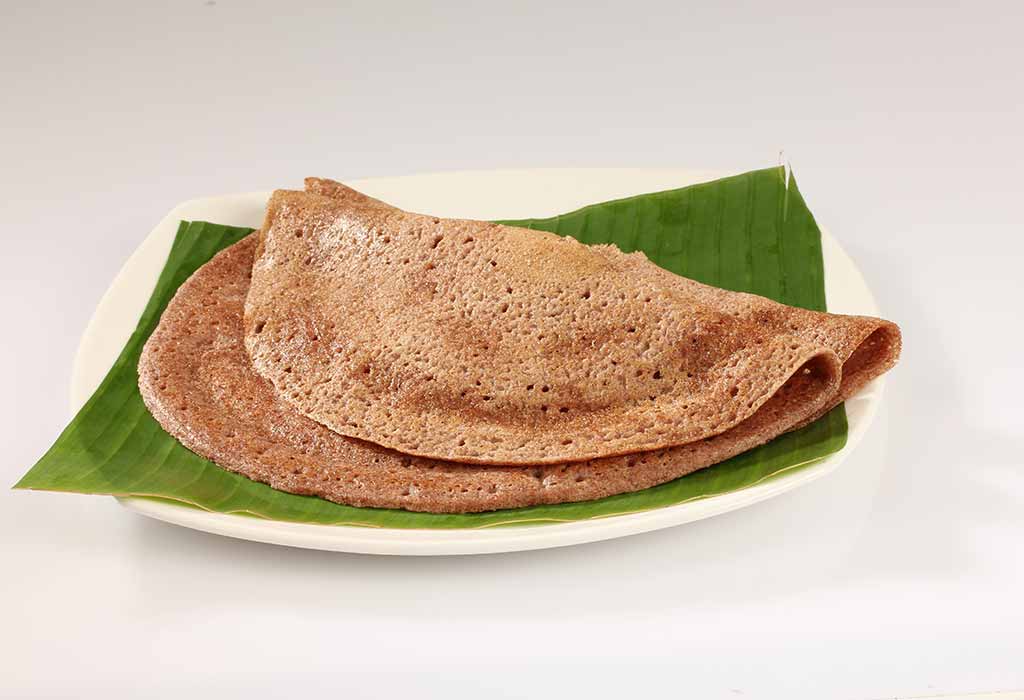
Multigrain Dosa Recipe
Breakfast is an important meal of the day and it should be healthy. If you’re looking for some new breakfast recipes so that your child has his breakfast without making a fuss, give multigrain dosa a try! Multigrain dosa for babies is easy to make and this dosa is high in nutrition. The recipe of multigrain dosa that we’re going to provide you here will help you learn how to make delicious and crispy dosas for your little one. By making multigrain dosas for your child, your baby will get the nourishment of different millets. So read on to know how you can make multigrain dosa for your little one.
Cooking time
Type
Time(hh:mm:ss)
Preparation time
00:05:00
Cooking time
00:06:00
Total Time
00:11:00
Cooking Method
Gas Stove
Type of Meal
Vegetarian
Suitable For
Toddlers above 20 months
Meal Schedule
Breakfast or Dinner
Recipe Type
Main Dish
Ingredients
Ingredients
Quantity and Volume
Finger millet (ragi) flour
¼ cup
Sorghum (jowar) flour
¼ cup
Wheat flour
¼ cup
Rice flour
1/2 cup
Ground oats
2 tbsp
Salt
As per taste
Cumin seeds (jeera)
2 tsp
Corriander leaves
1 tbsp chopped
Curry leaves
1 tbsp chopped
Curd
¼ cup
Water
As required to mix the batter
Instructions
Make this flavorful and nutritious dosa for your little one once or twice a week to ensure that he gets all the essential nutrients for his healthy growth. Follow the instructions given below on how to make multigrain dosa:
Sieve all the flours in a large mixing bowl; add in the salt, coriander leaves, curry leaves, and cumin seeds, and mix well.
Now whisk in the curd then gradually add water to get the consistency of dosa batter.
Let the batter rest for about 30-40 minutes as it will help in fermenting the batter.
Heat a non-stick dosa tawa and pour a ladle-full of batter onto it and swirl the tawa a bit so that the batter spreads evenly on it.
You can add in a little more batter on the tawa if needed.
Pour some oil from the edges if needed.
Once the dosa is cooked from one side, gently flip it and cook for a couple of minutes and serve hot. Once it is properly cooked from both the sides, transfer it to a plate and serve warm!
Recipe Tips
In order to ensure that your homemade multigrain dosas taste delicious, keep a note of the following recipe tips:
You can add finely chopped onions to the batter to enhance the taste of the dosas.
The consistency of the dosa batter should be thin so that the dosas turn out to be crisp.
You can also add some semolina flour for crispier dosas.
Any millet flour can be added to this recipe to make it more nutritious.
Mix the batter completely before making each dosa as this batter tends to settle at the bottom.
Nutrition Information (Per 100 Grams)
Nutrient
Value
Energy
130 cal
Carbohydrates
18.5 g
Calcium
72 mg
Iron
2.7 mg
Protein
3.2 g
Magnesium
35 mg
Fibre
4 g
Phosphorus
82 mg
Sodium
4.5 mg
Potassium
123 mg
Zinc
1.1 mg
Vitamin A
59 mcg
Folic acid
13.3 mcg
Health benefits
This simple multigrain dosa recipe has immense health benefits, some of which are listed below:
Ragi is a rich source of calcium and is one of the non-dairy sources of calcium which is essential for the healthy development of bones and teeth in kids.
Ragi has an abundance of iron in it which helps prevent anaemia.
Jowar has all the essential vitamins and minerals that boost your baby’s immune system and improves heart health.
Multigrain flours used in this recipe are rich in high-fibre which helps in preventing overeating and keeps obesity at bay for your munchkin.
Buying guide
Make this delectable dosa for babies healthier by choosing the best of ingredients available in the market. Now that you know the step by step instructions to this recipe, here are some tips to note down before you head towards shopping:
Buy the flours from an organic shop to make sure you feed your baby with chemical-free produce.
Also, remember to check the expiry date of the flours in the pack.
Select fresh curd over sour curd while buying for better taste.
Buy coriander leaves that are bright green and avoid the ones which have turned pale yellow.
Select curry leaves which are a little small as they are more flavourful than the bigger leaves.
Dosas are healthy and a staple in South India and by using multigrain flours you can make it even healthier for your toddler. Choosing recipes like this for breakfast or dinner over store-bought instant dosa mixes or other quick fix ensures better growth and development for babies.
Read more
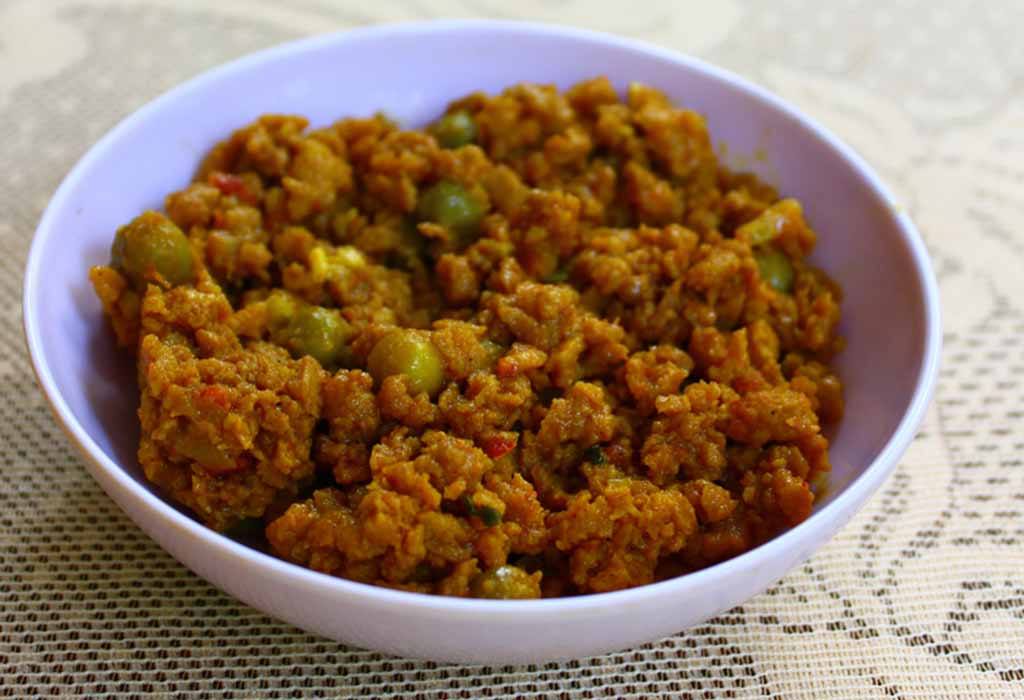
Soya Kheema Recipe
If you are looking for a recipe which is a powerhouse of protein this soya kheema recipe for babies is just for you. Soya chunks or meal-maker is a widely used ingredient in the Indian household for its loaded nutrition value and great taste. A meal with a good source of vitamins, minerals, and carbohydrates for your munchkin is this soya kheema which you can serve with soft rice or soft chapatis. Do not worry if you are wondering How to make soya kheema as you can find the recipe below along with its health benefits:
Cooking time
Type
Time(hh:mm:ss)
Preparation time
00:15:00
Cooking time
00:20:00
Total Time
00:35:00
Cooking Method
Gas Stove
Type of Meal
Vegetarian
Suitable For
Toddlers above 20 months
Meal Schedule
Lunch or dinner
Recipe Type
Main Dish
Ingredients
Ingredients
Quantity and Volume
Soya chunks
1 cups
Ginger garlic paste
1 tsp
Onions
2 medium-size
Tomatoes
2 medium-size
Cinamon
1 inch
Bay leaf
1 no
Oil
2 tbsp
Turmeric powder
¼ tsp
Chilli powder
¼ tsp
Corriander powder
½ tsp
Garam masala
½ tsp
salt
As per taste
Lime juice
½ tsp
Corriander leaves
1 tbsp
Instructions
This simple soya kheema recipe is a healthy dish that goes well with soft rotis. Follow the instructions below to ace this recipe.
Bring 4 cups of water to a boil in a pot and add in the soya chunks and switch off the flame.
Wait till you see the soya chunks swell and find the debris settle under the water.
Now discard the water and squeeze the soya chunks tightly until you remove the water from them.
Grind the soya chunks in a mixer to make soya granules.
Grind the onions into a puree and keep it aside.
Blanch the tomatoes in hot water and make it into a fine paste.
Heat oil in a pan and add in cinnamon and bay leaf followed by ginger garlic paste and onion puree and cook till the onions turn brown.
Now add in the tomato puree and the spice powders like turmeric, chilly and coriander and give it a good mix.
Cook till the raw smell of the tomatoes is gone.
Now, add in the ground soya granules, garam masala, and salt and cook covered on a low flame for 5 min.
Once done, garnish with coriander leaves and a dash of lime juice.
Recipe Tips
Now that you know the step by step instructions to make this delicious soya kheema, keep in mind the following pointers before you start with this recipe:
Always remember to gently grind the soya chunks as it might get powdered very quickly.
You can adjust the consistency of the kheema and make it a little dry by cooking for a few more minutes in the end or leave it a little moist.
You can add cooked fresh green peas while adding the soya granules for added taste and nutrition.
Nutrition Information (Per 100 Grams)
Nutrient
Value
Energy
150 cal
Carbohydrates
7.5 g
Calcium
82 mg
Iron
3.7 mg
Protein
14.2 g
Magnesium
62 mg
Fibre
8 g
Phosphorus
232 mg
Sodium
0.5 mg
Potassium
623 mg
Zinc
1.2 mg
Vitamin A
152.2 mcg
Vitamin C
2.3 mg
Health benefits
A homemade soya kheema baby food recipe has amazing health benefits for your baby, some of them are listed below:
Soya chunks are loaded with proteins that are vital for your little one for muscle growth and a better immune system.
Soya chunks are derived from soya beans and are high in carbs which are essential to keep your baby energetic all day long.
Soya chunks are also a great source of iron and calcium that are necessary for better immune systems and bone strength respectively.
This recipe is loaded with essential amino acids that are needed for building proteins in your baby’s body.
Buying guide
Before you head towards the market to grab the ingredients for this recipe to make soya kheema for babies, note down the buying tips as under:
Buy soya chunks that are organic for more nutritional value.
Select tomatoes that are well ripe and without any black spots for a bright red tomato puree.
Buy the vegetables from a local shop that sells organic produce to keep your child away from harmful chemicals and pesticides.
Always remember to check the expiry date of the packaging before you buy them.
This soya kheema recipe is going to be your child’s favourite for dinner as it is tasty, soft, and full of spices. Encourage homemade food like this soya kheema recipe for your little one than store-bought cereals or packaged ready to eat food to help your baby grow better and stronger.
Read more

Chicken Kheema Recipe
Kheema is essentially minced meat and used in many dishes like curries, samosa, or cutlets. This simple Chicken kheema recipe can be prepared in no time and also be alternated with lamb or egg. Soft, tasty, and delicious, it goes well with chapatis, parathas, and rice. The soft dry curry texture is what makes it a hit with the kids. You can introduce chicken in your baby’s diet for 6 months. Start with soups and gradually introduce whole pieces of meat. Once your toddler is used to eating rice and roti, this chicken kheema will appease their palate as an accompaniment.
Cooking Time
Type
Time (hh:mm:ss)
Preparation Time
00:10:00
Cook Time
00:20:00
Total Time
00:30:00
Cooking Method
Gas Stove
Type of Meal
Non-Vegetarian
Suitable For
Any toddler above 19 months of age
Meal Schedule
Lunch or Dinner
Recipe Type
Main Dish
Ingredients
Ingredients
Quantity and Volume
Bay Leaf
2
Cumin Seeds
½ teaspoon
Cinnamon Stick
1
Green Cardamom
2
Cloves
3
Peppercorns
2
Onions finely chopped
¾ cup
Green Chilli
1 slit
Tomato finely chopped
1
Ginger Garlic paste
1 teaspoon
Meat Masala or Garam Masala
¾ teaspoon
Mint leaves
8
Chicken (minced)
250 grams
Turmeric
¼ teaspoon
Coriander leaves
1 tablespoon
Green peas or cashews ( optional)
¼ cup
Cream or coconut milk (optional)
1/3 cup
Instructions
Just follow this step-by-step guide to learn how to make chicken kheema.
Heat ghee in a pan and add the bay leaf, cloves, cumin seeds, cardamom, and peppercorns. Let them sizzle.
Then add the chopped onions and green chilies. Saute for a few minutes until they cook.
Add the ginger-garlic paste and saute until the raw smell disappears.
Add the tomatoes and cook until they become mushy.
Add the chili powder, mint leaves, and meat masala powder. Fry until they blend well with the onion and tomato mixture. Now transfer this mixture to a plate.
In the same kadhai, add bay leaf and the minced meat. Sprinkle the turmeric and salt.
Cover and cook on a low flame until the meat is cooked in its water.
Once cooked, add the onion-tomato mixture to the meat and mix well.
Cook on a low flame until the meat and onion-tomato mixture blend well. If you are making a dry curry, then wait until all the moisture evaporates.
If you want to make the curry version, add coconut milk to the mixture in the end. Alternatively, if you want to add cream, add the cooked kheema to the cream in parts and blend well.
Garnish with coriander and serve hot.
Recipe Tips
This home-made chicken kheema baby food recipe can be perfected if you follow these simple tips:
Make sure you dice and mince the meat well. You can do it in a food processor as it will chop it finely.
Depending on whether you want to make the dry or gravy version, cook the meat until the moisture evaporates.
Nutrition Information (Per 100 Grams)
Nutrient
Value
Energy
447 kCal
Protein
25 g
Carbohydrates
11 g
Fiber
3 gms
Fat
33 gms
Cholesterol
93 mg
Sodium
117 mg
Potassium
538 mg
Sugar
4 gms
Iron
2.1 mg
Calcium
51 mg
Health Benefits
Here are the health benefits of chicken kheema for babies.
Chicken is rich in protein and Vitamin B6. It is important for muscle growth in the baby.
The iron in chicken helps in the growth of red blood cells and the potassium keeps the blood vessels in good condition.
Calcium and phosphorous present in chicken is helpful for the bones.
Vitamin A and Vitamin C help in building immunity.
Vitamin B12 also called cobalamin helps in brain development.
The zinc and magnesium in chicken content help to develop immunity and resistance.
Buying Guide
A few essential tips to follow when sourcing ingredients for chicken kheema:
Buy chicken in packed form and ensure to check the expiry date before use.
Select chicken which is pinkish.
For kheema make sure you buy chicken with more breasts and flesh in it.
Buy ripe and firm tomatoes for this recipe.
Always buy organic fruits and vegetables as they are free from chemicals.
Your toddler’s health is precious and you do want to make any compromises. By serving them the best nutritional diet you are ensuring their healthier future. This chicken kheema recipe is a simple way to include vital nutrients and elements in your baby’s diet.
Read more
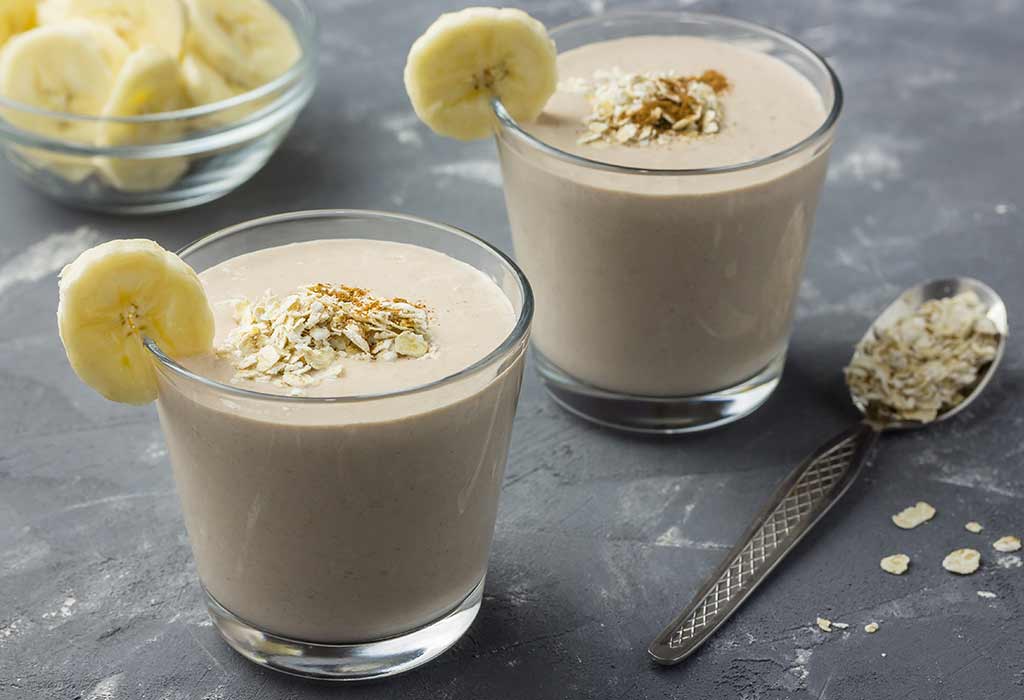
Banana Oats Milkshake Recipe
When you introduce cow’s milk to your toddler, chances are that he will most likely resist drinking it. Breastfed babies generally dislike the formula milk or cow’s milk. Babies do get used to formula milk a lot quicker. But when cow’s milk is introduced, mothers find it hard to include it in their daily diet. This simple banana oats milk recipe can be served as an alternative to plain milk. The combination of bananas and oats makes it perfectly healthy and serves as a distraction to the taste of plain, unflavoured milk.
Video : Banana Oats Milkshake Recipe for Toddlers
Cooking Time
Type
Time (hh:mm:ss)
Preparation Time
00:05:00
Cook Time
00:10:00
Total Time
00:15:00
Cooking Method
Gas Stove, Induction, Blender or Mixer
Type of Meal
Vegetarian
Suitable For
Toddlers older than 19 months of age
Meal Schedule
Breakfast or Mid-day Snack
Recipe Type
Main Dish
Ingredients
Type
Quantity
Banana
1
Oats
1 tablespoon
Full fat milk
1.5 cups
Instructions
This milkshake makes for a perfect breakfast for babies as it includes milk, fruits, and the goodness of oats. And learning how to make banana oats milkshake for babies is no rocket science. Just follow this simple step-by-step guide:
Chop the bananas and add them in a mixer jar or blender.
Add in the oats and blend.
Now add the milk and blend again until the oats and bananas have combined well with the milk.
Transfer the milkshake in a glass and serve it to your baby.
Recipe Tips
This homemade banana oats milkshake baby food recipe is simple but the below tips could get it perfect:
Chop the bananas finely so that they blend well with the drink.
You can also powder the oats separately and add them so that they mix well with the drink.
Use cold milk while blending as hot milk will tend to blow the mixie jar.
Do not add any sugar as babies do not need any added sugar in their drinks. The sweetness of the banana is enough to make the smoothie taste nice.
Nutrition Information (Per 100 Grams)
Type
Value
Calories
490 kCal
Carbohydrates
19.5 grams
Protein
3.8 grams
Fat
2.1 gms
Salt
0.1 gms
Fibre
1.9 gms
Health Benefits
Banana oats milkshake is packed with a whole load of nutrients. The combination of oats, milk, and banana packs in a punch of nutrients that will give your toddler the much-needed batch of nutrition for their daily needs:
Oats are of the most nutritious whole grains and packed with fibre. Slowly digestible and perfect for a healthy bowel movement, they are ideal to keep the tummy full for longer.
Bananas are high in potassium and rich in fibre. They also contain essential vitamins and minerals. The fibre in bananas can help in digestion.
Bananas contain magnesium, iron, folate, niacin, Vitamin B6, calcium, manganese, and other essential nutrients that a child needs.
Bananas are good for bones and improving vision.
Bananas also fuel the development of your baby’s brain.
Milk is full of calcium that is essential for the development of bones and the growth of strong teeth.
Milk also contains protein and serves as a source of energy and repairs muscle tissue.
Milk contains healthy fats and antioxidants that regulate the immunity levels of the body.
The calcium in milk helps to fight childhood obesity.
The Vitamin D content in milk helps to prevent conditions like osteoporosis in the toddler’s later years.
Buying Guide
Sourcing ingredients for banana oats milkshake may seem easy. But you do need to exercise some care and precaution when buying the ingredients. Follow the below tips:
Buy bananas that are just ripe do not use over-ripe bananas. Try to buy organic bananas as they are free from chemicals and pesticides.
Buy oats that are sold in packaged form in supermarkets. Make sure to check the expiry date on the packaging.
Buy full-fat milk as it contains the cream and fat needed for your baby’s growth. Avoid buying skimmed or semi-skimmed milk as your child needs proper nutrition in their growing years. You can choose to buy organic milk if you wish.
Milkshakes, smoothies are a great way to pack a wholesome breakfast for your toddler. It is also a great way to introduce fruits into their diet. The addition of oats introduces them to a grainy and nutty flavour and you can make several other dishes that include oats in them!
Read more
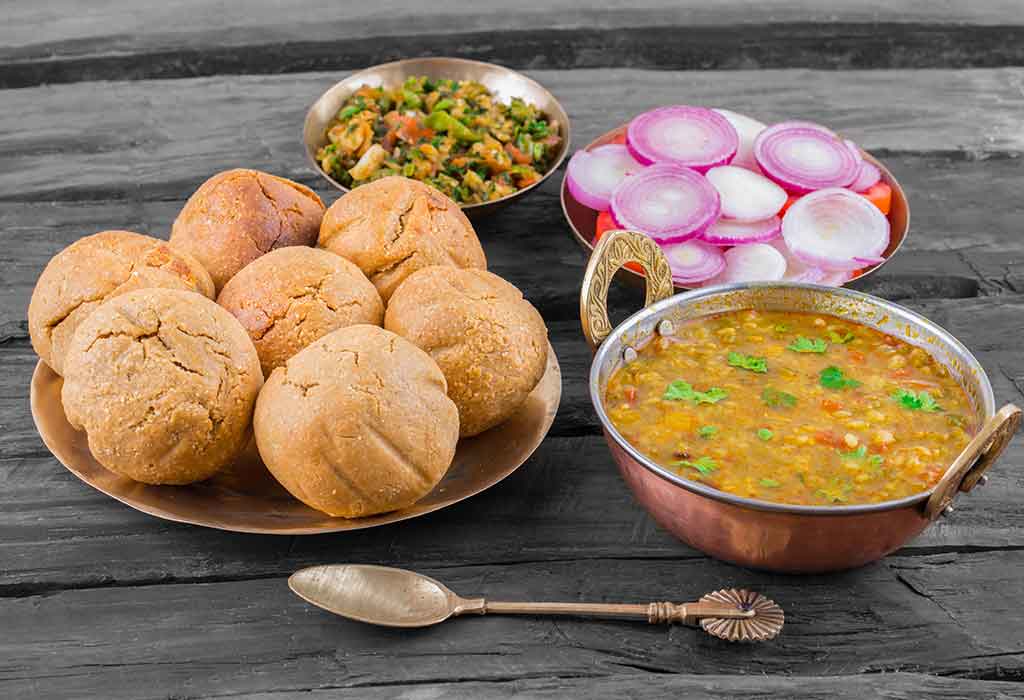
Dal Baati Recipe
Rajasthani cuisine is known for its sweet and spicy combination. It delights and tickles our taste buds. One Rajasthani food, that is devoured all over India is dal baati. Dal baati is a platter of deep-fried baatis, spicy dal, which is consumed hot, especially on cold winter days. If you love eating dal baati and want to make it for your family, make it at home! How? Well, we have a simple recipe for you! Note: Don’t forget to soak the baatis in ghee. Ghee makes baatis rich and delicious.
Cooking Time
Type
Time (hh:mm:ss)
Preparation Time
00:25:00
Cook Time
00:60:00
Total Time
01:25:00
Cooking Method
Gas Stove, Induction
Type of Meal
Vegetarian
Suitable For
For toddlers above the age of 21 months
Meal Schedule
Breakfast, Lunch, or Dinner
Recipe Type
Main Dish
Ingredients
For the Baatis
Type
Quantity
Coarse whole wheat flour (Mota gehu ka atta)
1 cup
Semolina or rava
½ cup
Besan
2 tablespoon
Milk
½ cup
Ghee
4 tablespoon
Fennel Seeds (saunf)
1 teaspoon
Carom seeds (ajwain)
¼ teaspoon
Salt
As per taste
Ghee
As required for deep frying
For Dal
Type
Quantity
Chana dal
5 tablespoons
Tuar dal
5 tablespoons
Green moong dal (split green gram)
5 tablespoons
Urad dal
1 tablespoon
Salt
As per taste
Ghee
3 tablespoon
Cloves
3
Bay leaves
2
Cumin seeds
1 teaspoon
Green chillies
2
Asafoetida (hing)
A pinch
Garlic paste
1 teaspoon
Onions (finely chopped)
1 cup
Tomatoes (finely chopped)
1 cup
Coriander powder
1 teaspoon
Turmeric powder (haldi)
¼ teaspoon
Chilli powder
½ tablespoon
Garam masala
½ teaspoon
Coriander (finely chopped)
1 tablespoon
Instructions
To learn how to make dal baati for babies, just follow this simple step-by-step guide:
For the baatis
In a mixing bowl, take the whole wheat flour, rava, and besan, and mix well. Add fennel seeds, carom seeds, ghee, and salt, and mix and mix well. Using water knead into a semi-stiff dough.
Divide the kneaded dough into 6-8 portions of round balls.
Flatten the balls slightly and press with your thumb in the centre to make an indentation. Keep aside.
Heat ghee in a deep kadhai and fry the baatis until golden brown on both sides.
Place them on an absorbent paper then keep aside.
For the dal
Wash and rinse the dals separately then transfer them in a pressure cooker. Add about 3-4 cups of water and pressure cook for 3-4 whistles.
Heat ghee in a kadhai then add cumin seeds, green chillies, bay leaves, cloves, and asafoetida. Sauté on a medium flame.
Add chopped onions and garlic paste. Sauté on a medium flame for about 3-4 minutes.
Add the chopped tomatoes, turmeric powder, chilli powder, coriander powder, and garam masala. Mix them well with the onions and cook on a low to medium flame for about 2 minutes. Keep stirring occasionally.
Add the cooked dal with the water content, salt and cook for a few more minutes on a medium flame.
Now garnish with coriander and mix well.
How to serve Dal Baati
Place two baatis on a dish. Break them into small bits and pour about 1 tablespoon of melted ghee on top. Now pour about ¼ cup of dal on it.
Garnish with some chopped onions and a dash of lemon juice.
Recipe Tips
Here are some tips you should follow while making dal baati.
Use coarse wheat flour as it lends a granular texture to the baatis.
The dough for the baati should be stiff to make firm baatis.
Ghee gives a rich taste to the baatis. If you want to make tasty baatis, use ghee. Do not use oil in place of ghee.
Nutrition Information (Per 100 Grams)
Type
Value
Calories
258 kCal
Carbohydrates
30 grams
Protein
93 grams
Fat
12 gms
Health Benefits
The ingredients used to make dal baati are very healthy and nutritious. Let’s look at a few health benefits of these ingredients:
Chana dal, toor dal, and green moong dal are rich in protein, which can help in the muscle development of children.
Whole wheat flour is rich in carbohydrates and also rich in iron, calcium, and folate.
Ghee is full of healthy fats and gives the body the needed energy.
Buying Guide
Make note of the following points when going shopping for ingredients required for making dal baati:
Buy branded whole wheat flour.
Try to buy organic dals and wheat flour as they are free from chemicals.
Dal baati tastes delicious and is filling too, so make it for your child and family members on a special occasions. We’re sure they will love it.
Read more
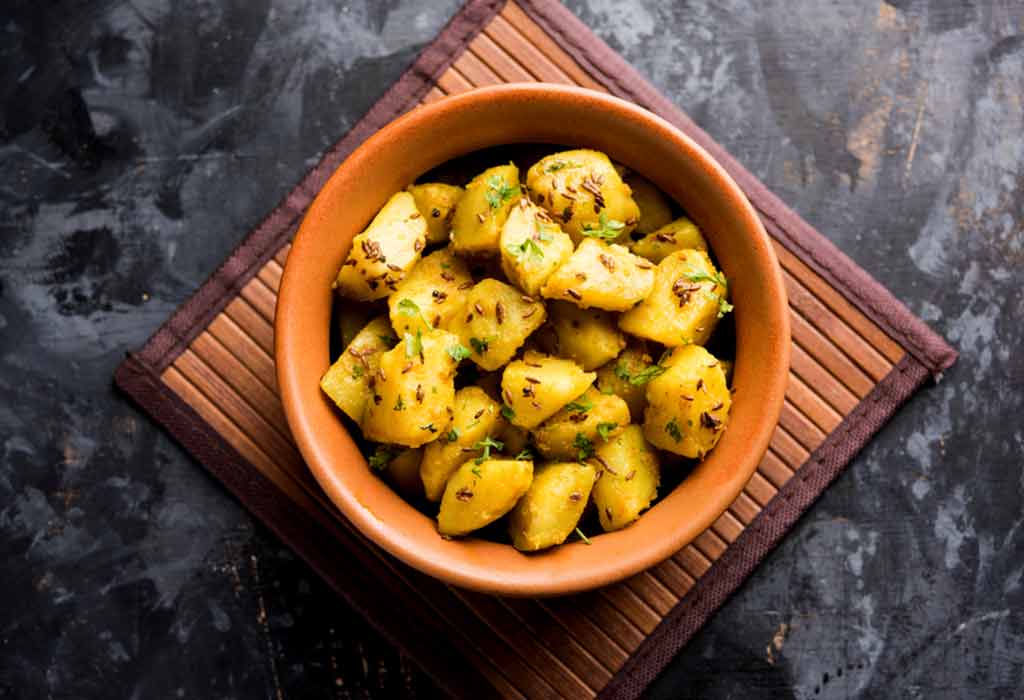
Potato Sabzi Recipe
Potatoes are considered to be one of the most nutritious vegetables for babies. They can be introduced into a six-month-old baby’s diet. They can offer ample energy to your growing baby and contribute to their healthy weight gain. Children love their soft, buttery texture and usually relish all potato dishes. Today, we will tell you how to make potato sabzi for your baby. It is easy to digest and loaded with essential minerals and vitamins, potato sabzi is the perfect dish that can be included in their child’s daily diet. Learn how to make potato sabzi in no time.
Cooking Time
Type
Time (hh:mm:ss)
Preparation Time
00:10:00
Cook Time
00:20:00
Total Time
00:30:00
Cooking Method
Gas
Type of Meal
Vegetarian
Suitable For
Babies older than 11 months of age
Meal Schedule
Lunch or dinner
Recipe Type
Side Dish
Ingredients
Type
Quantity
Potatoes (medium-sized)
3-4
Onions (medium-sized, sliced)
2
Oil
1 tbsp.
Turmeric powder
¼ tsp
Salt
As per taste
Ginger-garlic paste
1 tsp
Parsley/coriander leaves
2 tbsp
Bay leaf
1
Garam masala
1 ¼ tsp
Cumin seeds
½ tsp
Lemon juice
1 tsp
Tomatoes (medium-sized)
2
Mustard seeds
½ Tsp
Coriander powder
1 Tsp
Instructions
The step by step directions given below will guide you to dish out the tastiest potato sabzi:
Wash potatoes and pressure cook them for 3 whistles. Once they cool, peel their skin and cut them into small cubes and keep aside.
Heat oil in a pan. Add the bay leaf, cumin seeds and mustard seeds.
Once the mustard seeds crackle, add sliced onions and fry until soft. Add the ginger-garlic paste and chopped tomatoes. Sauté for 2 minutes and until the tomatoes turn mushy and oil separates.
Sprinkle some turmeric powder, salt, and coriander powder and stir everything well for another 2 minutes.
As soon as the masala turns aromatic, throw in the potato cubes in the pan. Add little water and mix well.
Cover the pan with a lid and cook the sabzi on low flame for about 10 minutes.
Check with a fork if the potatoes are tender. Add lemon juice and garam masala on top.
Garnish with chopped coriander leaves and serve warm in a bowl.
Recipe Tips
Follow the above tips to make sure that you cook delicious potato sabzi.
If your child is older, you can make it spicy, i.e., if your child likes spicy food. You can add red chilli powder or green chillies for older children.
You can add curry leaves or kasuri methi to enhance the taste of this dish.
This homemade potato sabzi baby food recipe can be served with steamed rice, chapatis, parathas, or even dosa.
Make sure you sterilize all utensils and maintain hygiene before preparing food for your baby.
Check with your paediatrician before introducing solids to your baby.
Adding curry powder gives this dish an added flavour.
Nutrition Information (Per Serving)
Type
Value
Carbohydrates
77.8gram
Calories
250kcal
Protein
7.3gram
Sodium
465mg
Fibre
2gram
Fat
16.3gram
Potassium
554mg
Calcium
53mg
Vitamin C
27.9mg
Calcium
53mg
Iron
3.9mg
Sugar
3gram
Vitamin A
550IU
Iron
3.9mg
Zinc
2.2mg
Health Benefits
Power-packed with nutrition, potato sabzi is a wholesome food that ensures that your child develops healthy eating habits.
Potato is a popular edible tuber that causes the least allergenic reactions in children. Due to the presence of carbohydrates, any potato dish is highly satiating and will keep your child energetic all day long.
The presence of a substantial amount of alkaline sugar in potatoes keeps acidity at bay, protects the liver, protects the skin, improves gastronomical health, and supplies essential vitamins and minerals that are needed for a baby’s growth.
Red fleshed potatoes contain antioxidants like anthocyanins that fight various diseases and keep infections at bay.
Buying Guide
Keep the necessary information provided by this buying guide in mind before choosing any product needed to make this dish.
Opt for organically grown potatoes if available easily.
Check the best before date before buying a branded pack of dry masala from a supermarket.
Look for the ingredient label before buying any branded edible oil.
For a child, moms are the best cooks. Hence homemade potato sabzi for babies tastes delicious when cooked with a mother’s love and care. This scrumptious potato sabzi recipe can be served to kids as well as your entire family. So go ahead and make this delicious potato sabzi for your loved ones!
Read more
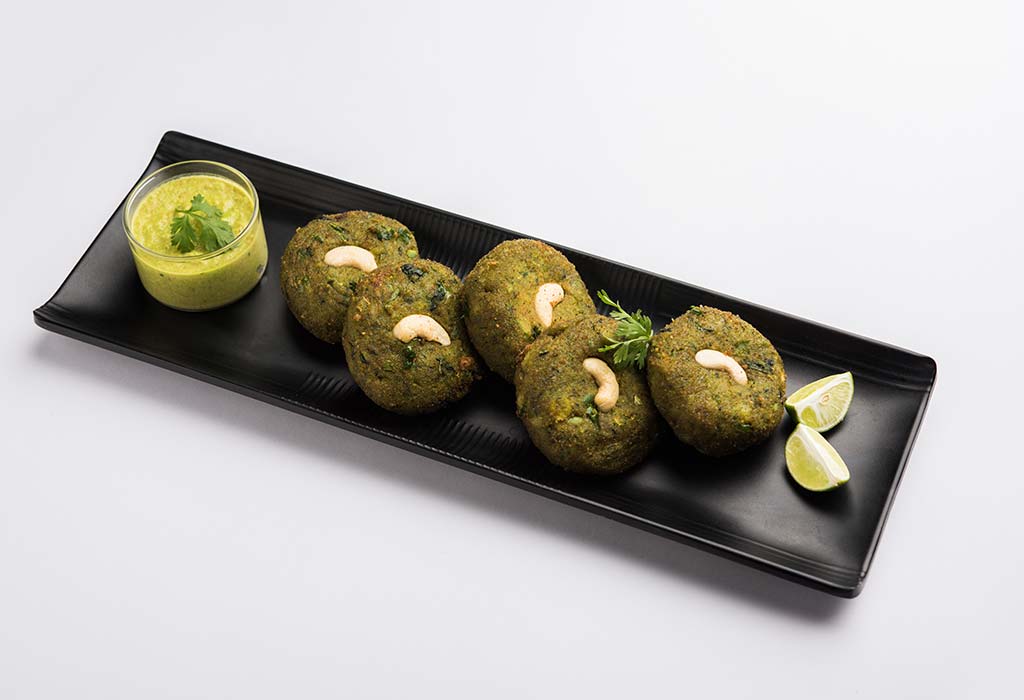
Hara Bhara Kebab Recipe
If you wish to make your child fall in love with green veggies, making the very tasty hara bhara kebab for him once a while would be a great option! Kebabs are a popular Asian snack that can have a variety of filling – both vegetarian and non-vegetarian. Here we will tell you how to make hard bhara kebab! They can be pan-fried, baked, or grilled over hot charcoal or tandoori fire. They taste delicious, no matter how you cook them. Made with a stuffing of spinach, green peas, some flavoured spices, mashed potatoes, it’s simply hard to say no to them. Hara bhara kebabs can be the perfect answer to your child’s hunger pangs on weekends. Without further ado, check out the recipe of hara bhara kebab!
Cooking Time
Type
Time (hh:mm:ss)
Preparation Time
00:25:00
Cook Time
00:15:00
Total Time
00:40:00
Cooking Method
Gas
Type of Meal
Vegetarian
Suitable For
Toddler older than 15 months of age
Meal Schedule
Lunch or dinner
Recipe Type
Snack
Ingredients
Type
Quantity
Oil
2-3 tsp
Potatoes
300 gram
Green peas
1 cup
Coriander leaves
½ cup
Salt
As per taste
Bread crumbs
¼ cup
Garam masala
½ tsp
Ginger garlic paste
1 ½ tsp
Lemon juice
1 tbsp
Chaat masala
1 tsp
Cumin seeds
2 tsp
Cornstarch
1 tbsp
Spinach
2 cup
Instructions
Keep the step by step directions given here in mind to make the yummiest Hara bara kebab for your little munchkin.
Wash spinach and put it in a pan on medium heat.
Add 1 tablespoon of water and cook for 2-3 minutes till the leaves shrivel.
Boil potatoes with green peas and keep aside.
Heat 1 tsp oil in a pan and sauté ginger-garlic paste in it until the raw smell disappears.
Add palak and sauté till it wilts off. Add the boiled green peas, salt, chaat masala, and gram masala. Stir fry for a minute until it emanates a nice aroma.
Cool completely and blend the mixture in a grinder to form a paste. Do not add water.
Mash the potatoes and mix them with the palak paste.
Mix cornstarch to the mixture to form a non-sticky dough. Add bread crumbs to absorb any excess moisture.
Add in the lemon juice and mix well. Then divide the dough to make 10 kababs. Flatten them with hand to form patties.
Heat 2 tbsp. of oil in a pan. Place the patties on the pan and pan-fry till golden brown.
Flip on both sides and serve hot.
Recipe Tips
Follow the recipe tips given below to make sure that you make the tastiest hara bhara kebabs ever!
You can add green chillies simple hara bhara kebab recipe can be used to spice up using green chillies for older children.
You can use besan in place of cornstarch to bind the dough.
Frying in ghee instead of oil can enhance the taste of your hara bhara kebab.
Add cashew nuts to the mixture to increase the nutritional value of the kebabs.
You can fry coriander seeds along with cumin seeds in oil before adding the ginger garlic paste.
Bake the kebabs in the oven if you do not want to fry them. Preheat the oven for 15 minutes at 180 degrees C, and grill for 10 minutes on each side after greasing the pan with oil.
Nutrition Information (Per 1 kabab)
Type
Value
Carbohydrates
16gram
Calories
101 kcal
Protein
5gram
Sodium
61mg
Fibre
3gram
Fat
3gram
Potassium
797mg
Calcium
179mg
Vitamin C
79.6mg
Iron
6.9mg
Vitamin A
21%
Vitamin B2
9%
Vitamin B3
2%
Vitamin C
5.4%
Vitamin E
0.3mg
Folic Acid
14%
Magnesium
6%
Phosphorous
5%
Potassium
2%
Zinc
1%
Health Benefits
Hara bhara kebabs have the goodness of greens and ghee. Each vegetable that goes in the hara bhara kebab has its nutrition value. Let’s find out how the ingredients that go in the hara bhara kebab can benefit a child.
Spinach is abundant in flavonoids that protect the body from free radicals. Considered as healthy brain food, spinach contains essential minerals like Vitamin A, C, magnesium, and folic acid.
The dietary fibre in the vegetables used in this dish helps in digestion and reduces constipation in kids. Potatoes are an excellent source of potassium that plays a good role in a healthy cardiovascular system. Green peas contain Vitamin C, k, folate that maintains good eye, brain, and bone health.
Cumin seeds promote digestion and reduce symptoms of irritable bowel syndrome.
Buying Guide
This buying guide has been formulated keeping the best interest of the consumer and your kid’s health in mind:
Look for fresh dark green leaves while buying the spinach.
Look for the expiry date of branded edible oil before buying.
It is always better to choose vegetables that are grown organically and free from harmful pesticides.
Homemade hara bhara kebabs for babies can be a tasty finger snack that you can make for your child and give a few to him in his lunch box. You can even make them as a birthday-party snack. These lip-smacking cutlets are delicious enough to tempt your kids every time you want to perk up their mood. No matter what the occasion, they’re sure to love them.
Read more
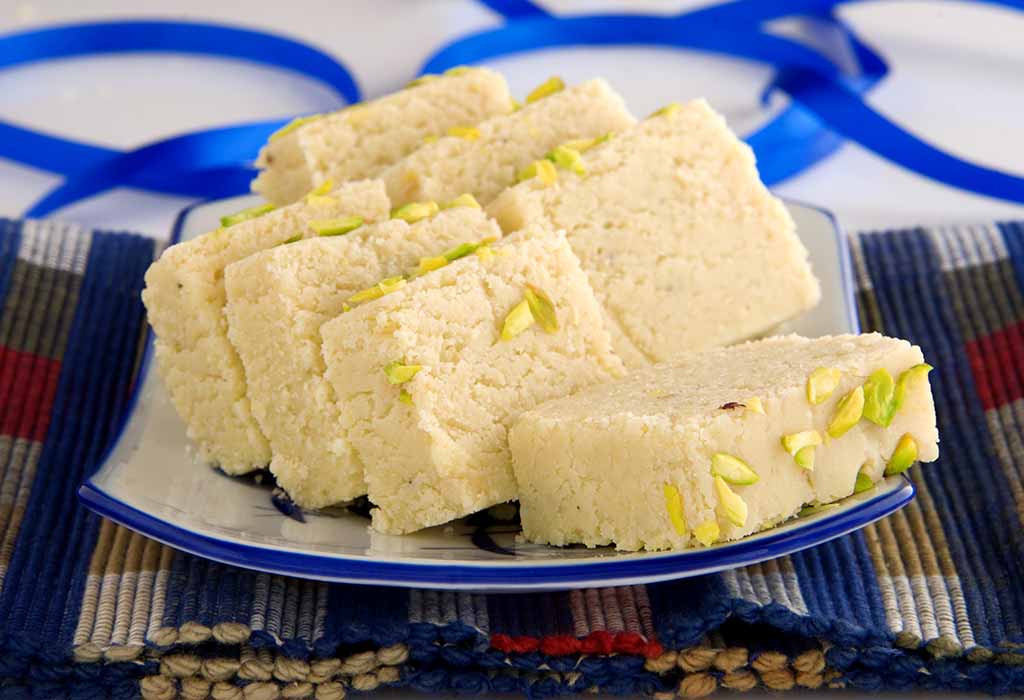
Homemade Mava Barfi Recipe
Barfi is a traditional Indian sweet prepared during festivals and is relished with everyone. There are many variations to barfi. Mava barfi being one of them. Mava barfi is a unique preparation made by mixing dried evaporated milk solids with sugar. Mava or khoya forms the base of most sweets. The extra creaminess of the mava makes this barfi melt in the mouth as soon as you put in your mouth. Whether . Note down how you can make mava barfi and you’ll be surprised to see how the result is worth the effort.
Cooking Time
Type
Time (hh:mm:ss)
Preparation Time
00:05:00
Cook Time
00:20:00
Total Time
00:25:00
Cooking Method
Gas
Type of Meal
Vegetarian
Suitable For
Toddlers above than 18 months of age
Meal Schedule
Breakfast, After Lunch or dinner
Recipe Type
Dessert
Ingredients
Type
Quantity
Crumbled mava
2 ½ cups
Sugar
¾ cups
Cardamom powder
1/8 tsp.
Ghee
1 tsp.
Saffron
1 pinch
Almond/pistachios
2 tbsp.
Milk powder
2 tbsp.
Instructions
Here’s a step-by-step guide on how to make yummy homemade mava barfi:
Grate and crumble the unsweetened mava.
Heat ghee in a large pan. Add the chopped nuts and fry until golden brown. Set aside.
Soak saffron in a small bowl of milk for about 5 minutes. Set aside.
Add the crumbled khoya in the pan and stir on low flame for a couple of minutes. Add in the sugar, cardamom powder, roasted nuts, and saffron milk to the mava mixture. Give it a good mix.
As the mava and sugar start melting, stir uniformly until the mixture thickens.
Transfer the prepared mix into a greased mould layered with a baking paper. Pat it gently to smoothen the mixture.
Sprinkle some chopped nuts on top. Let it sit for 1-2 hours. Alternatively, you can refrigerate for 30 minutes.
Unmould and cut into pieces and serve.
Recipe Tips
Here are some tips that you should follow while making mava barfi at home:
This simple mava barfi can be made aromatic by adding rose essence.
Mava barfi can be stored in an air-tight container and stored in the refrigerator for 4-5 days.
If your barfi doesn’t set or turns sticky, add milk powder and mix well. You can cut the mould into squares, diamonds, or any shape of your choice.
Adding dry fruits to this homemade mava barfi is optional but it makes it delicious.
Use only fresh khoya for making this barfi.
Spread the mixture evenly keeping the thickness of 1 inch at the edge.
Nutrition Information (Per Serving)
Type
Value
Carbohydrates
16gram
Calories
165gram
Protein
6gram
Sodium
90gram
Saturated Fat
5gram
Fat
5gram
Potassium
12gram
Calcium
229mg
Vitamin C
0.3mg
Calcium
229mg
Sugar
8gram
Vitamin A
155IU
Iron
0.1mg
Health Benefits
Homemade mava barfi has some of the best health benefits that will surprise you. Here are some of the reasons that will inspire you to try your hand at this recipe:
The fatty acid present in ghee helps in brain development for a child and keeps them energized all day.
Being a milk product, mava is rich in calcium that is good for strengthening bones and teeth of young children.
Nuts like almonds and pistachios are a powerhouse of nutrients like vitamins, healthy fats, minerals, antioxidants, and dietary fibres. They all contribute to the overall physical and mental development of a child.
Buying Guide
Purchasing top-quality ingredients for making any dish needs a clear understanding and experience of shopping for food items. This buying guide for making mava barfi will help you choose the finest quality ingredients required for making mava barfi.
If you’re making mava at home, then use pasteurised milk alone. If you are buying it from a store, make sure that it is fresh.
You will find enough and more options in sugar; granulated super-fine and confectioner’s sugar, dark brown sugar, cane sugar, and palm sugar are some of the varieties of sugar you can choose from.
Buy only branded saffron from a good store.
Check the ingredients panel on the sealed pack of dry fruits before buying to avoid any additives or preservatives in them.
Royal in taste and luscious in texture, homemade mava barfi is the perfect dessert for babies and adults alike. It also gives a convenient way to incorporate dry fruits and milk solids in a fussy eater’s diet. As children have an innate preference for sweets, make this barfi for your child occasionally. It’s okay to let him indulge once a while!
Read more
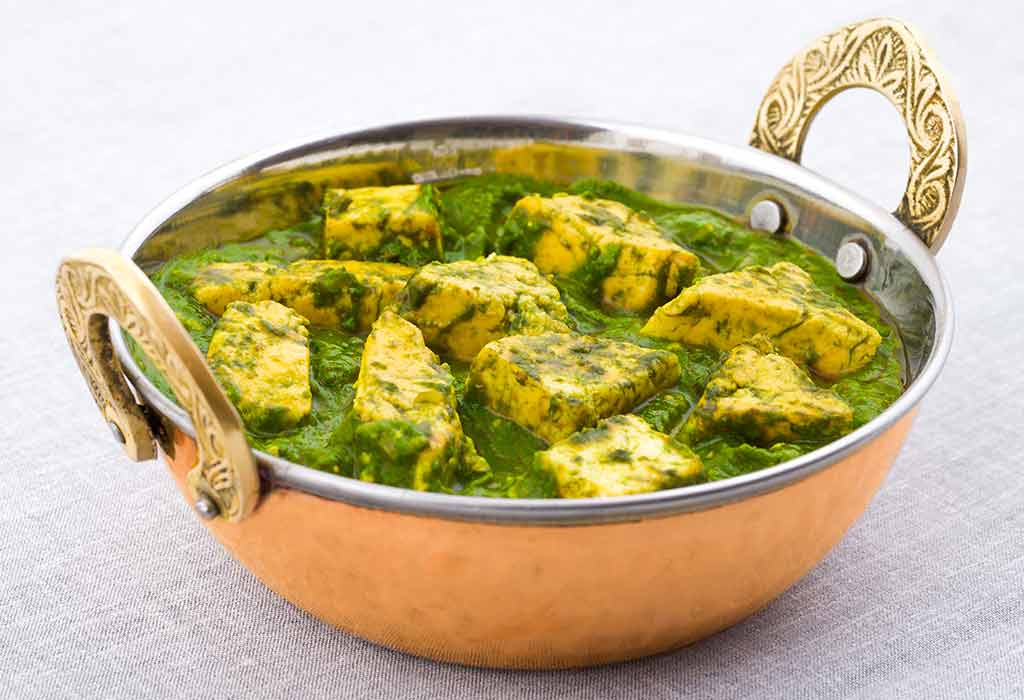
Palak Paneer Recipe
Palak paneer is a traditional dish that has been quite popular in Indian households. This Punjabi style recipe can be made by cooking cottage cheese in a smooth lentil-based gravy. This mild-spiced delicious dish not only has an irresistibly taste but meets the daily nutrition needs of your child. The combination of spinach, herbs, and spices in this rich gravy makes a humble accompaniment for your steamed rice, paratha, or hot chapatti. Bookmark this recipe of how to make palak paneer easily and see how it becomes a staple in your weekly meal plan for the entire family.
Cooking Time
Type
Time (hh:mm:ss)
Preparation Time
00:15:00
Cook Time
00:30:00
Total Time
00:45:00
Cooking Method
Stove
Type of Meal
Vegetarian
Suitable For
For toddlers older than 15 months of age
Meal Schedule
Lunch or dinner
Recipe Type
Side Dish
Ingredients
Type
Quantity
Paneer
150gram
Palak
2 Cup
Ghee/Butter
2 tbsp.
Salt
As Per Taste
Onion
¾ Cup finely chopped
Ginger-Garlic Paste
1 tsp
Garam Masala
½ Tsp
Turmeric Powder
1/8th tsp
Tomato
½ Cup
Cashewnuts
8-10
Cumin
1/8 Tsp
Cardamom
2
Cinnamon
1 Inch
Cloves
2
Kasuri Methi
2 Tsp
Fresh Cream
2 Tbsp
Instructions
This specific step by step directions of making palak paneer will help mothers to follow the guidelines and complete the task at hand successfully.
Select the tender palak leaves and discard the stems as they may have a bitter taste.
Rinse the lentils well and put it in a pan of boiling water. Add a little salt and blanch the leaves for 3 minutes until wilted. Immerse in cold water and strain out the water completely.
Add the spinach in a blender with ginger, garlic cloves and blend into a smooth paste.
Puree to a smooth paste. Take butter in a pan and melt it in a low flame.
Add the whole spices like cardamom, cinnamon, cloves, ½ tsp cumin, and bay leaf to the pan. Add finely chopped onion and ginger-garlic paste to the pan and sauté till the raw smell goes away.
Fry tomatoes and sprinkle salt. Stir till it turns mushy.
Add ¼ tsp of turmeric powder, kasuri methi, and sauté the gravy well.
Pour half cup water and cook in low flame for 10 minutes with the pan covered.
Stir at regular intervals to avoid sticking at the bottom.
Throw in the paneer cubes and add garam masala on top.
Add fresh cream and serve hot.
Recipe Tips
This simple palak paneer recipe can be used to spicier with the addition of green chillies or chilli powder for older children.
Add lemon juice or curd to make the gravy to make it tangier.
Wash the palak thoroughly to remove the soil in them completely.
Put some salt to the palak leaves and boil it in advance to remove its raw smell.
This homemade palak paneer food recipe can be made tastier by adding ½ tsp of sugar.
You can use tofu if your child has lactose intolerance towards dairy products.
Store-bought paneer can be soaked in a bowl of lukewarm water for 15-20 minutes to keep it soft. Choosing good quality paneer is the key to a tasty gravy.
Nutrition Information (Per 1 Serving)
Type
Value
Carbohydrates
10gram
Calories
412 Kcal
Protein
15gram
Sodium
486mg
Fibre
2gram
Fat
34gram
Potassium
235mg
Calcium
484mg
Vitamin C
12mg
Vitamin A
1960IU
Iron
1.1mg
Cholesterol
61mg
Sugar
2gm
Health Benefits
Palak paneer is one of the yummiest choices for mothers for providing nutrition to your baby. Here are some of the health benefits of eating palak paneer:
Spinach protects the liver from infections and reduces gastric problems in children.
Rich in protein and calcium, paneer strengthens bones and teeth of babies.
The folic acid in paneer assists in brain development. Vitamin B in paneer helps in better concentration and memory.
Palak provides instant energy to children and keeps them active all day.
The dietary fibre in paneer improves the baby’s metabolism and boosts the immune system.
Buying Guide
This buying guide can be followed before heading out to purchase the ingredients for making palak paneer.
Buy fresh tender and leafy palak from an organic store to ensure that’s it is naturally grown.
Consider its strong smell and vibrant colour of whole spices to determine the quality of whole spices.
Use homemade clarified butter for cooking. Refined oil can also be used.
Check the expiry date of the pre-packed frozen paneer bought from the store. Three are less-fat versions that can be tried.
Homemade palak paneer for babies is a convenient and healthy dish to make that can make your child excited at the sight of it. This flavourful combination of palak and paneer is sure to tempt your child’s taste buds when they are ready for solids. Try any new food in small quantities and consult your paediatrician in case of any allergic reactions in babies.
Read more
Sort By
 Latest
 Most Popular
 Trending
Please select atleast one Filter