

















.svg)
.svg)
.png)


Safety
Suggested articles for you

How to Hold a Newborn Baby Properly (With Pictures)
New parents are rather nervous about holding the baby as they want to ensure that the baby isn’t hurt in any way. Holding a newborn baby for the first time is a special and delicate experience that requires proper technique to ensure the infant’s safety and comfort. Newborns are fragile, with soft bones and limited head and neck control, making it essential to learn the correct way to hold them. This fear and nervousness about holding a baby can be easily overcome with a clear understanding of how babies react to being held in a certain position and zeroing in on some of the best positions that your baby is comfortable in. In this article, we will learn about the different newborn holding positions to make the experience safe and enjoyable for you and the baby.
Tips to Prepare Yourself to Hold a Newborn Baby
Before you embark on the task of holding a baby, here are a few steps you will need to follow:
1. Wash Your Hands
Babies don’t have a fully developed immune system, and germs and bacteria from an unclean hand may cause infections in the baby. Rinse your hands with some mild soap and water before you pick up the baby. Parents can also keep a sanitiser handy for emergencies.
2. Get Comfortable
Make yourself physically comfortable to leave no room for slips or mistakes. It is also essential that you are confident and calm before you pick the baby up. Also, remove things like watches or pins from clothing that may scratch the baby.
3. Choose Your Position
If you are not experienced with holding a baby, the best thing to do is figure out a comfortable position in which the baby is well cradled and supported.
4. Provide Support
Babies have a heavy neck and have little to no control of their neck muscles. Hence, it is vital that you provide adequate support to their head and neck while holding them. Babies should be supported at the neck and the head at least until they turn three months of age when they develop control of their necks.
How Should You Pick Up a Baby?
While picking up a baby, place one hand under their head and the other under their bottom to raise them up to your chest level. Always ensure to provide support to the baby’s head while you are picking up or holding him or her.
Different Baby Holding Positions
There are many ways to hold a baby, each suited for different situations, like calming them, feeding, or just cuddling. Here’s a list of some of the best positions to hold a baby.
1. Shoulder Hold
One of the most common baby holding positions, this allows your baby to listen to your heartbeat.
Lift your baby to your shoulder height with the baby’s body in a parallel position to you and allow your baby to rest his or her head on your shoulder. Support your baby’s head and neck with one hand and bottom with the other.
2. Football Hold
The football hold is a preferred feeding position for many mothers.
Provide support to your baby’s head and neck with one hand and use the forearm of the same hand to support the rest of the back. Curl your baby towards your body and let the legs extend behind you. Draw her close to your chest while feeding in this position and use the other hand to provide extra support to the neck and the head (1).
3. Lap Hold
This is a comfortable sitting position and can be used while feeding.
With your feet firm on the ground, place the baby on your lap such that the baby’s head is near your knee with face upwards. Place both your hands under the baby’s head for support and your forearms under the baby.
4. Chair Hold
Also called the ‘Hello-World hold’, this is perfect for a baby who is curious and would like to see what’s going on in the front.
Have your baby lean against your chest to provide proper head support. Place one hand on the chest of the baby and the other on the bottom, while providing adequate support.
5. Cradle Hold
One of the most natural positions of holding a baby, this position can be used to put the baby to sleep.
Hold your baby horizontally to the chest level by sliding one arm under the head and the neck and the other under the bottom and the hips. Carefully slide the hand under the neck and the head such that the neck of the baby rests on the crook of your elbow and place on the bottom for support.
6. Hip Hold
This position is recommended only after the baby is over three months of age and can support the head and neck.
Make your baby face forward and place her on your hip bone in a sitting position. Wrap your arm around your baby’s waist and hold the baby firmly.
7. Face-to-Face Hold
This position is perfect for bonding and interacting with your baby.
Provide support to your baby’s head and neck with one hand and support the bottom with the other. Hold the baby a little below your chest such that he or she is facing you.
How to Hold Your Baby After Breastfeeding?
Immediately after you feed the baby, sit the baby in an upright position and pat on the back until he or she burps. Do not bounce or move the baby too much after feeding as it may cause your baby to spit up.
Tips for Holding a Baby in the Right Way
Focus on how your baby reacts while bring held and change the position if your baby seems fussy. Here are a few tips on how to hold the baby right.
Keep the baby’s head free enough to move and breathe.
Maintain skin to skin contact to keep her warm and bond.
If you’re nervous, opt to hold the baby while seated.
Don’t hold the baby while cooking, cleaning or caring dangerous items like knives to prevent harm.
In case you have to carry your baby for too long, try getting an infant support pillow, which is beneficial during breastfeeding as well.
While climbing or descending the stairs, use both arms to hold the baby for added safety.
Don’t hold the baby when you’re arguing and frustrated as you may shake the baby causing severe consequences like brain damage.
You can use baby carriers if you have to hold the baby for long durations.
How to Hold a Crying Baby?
While there is some debate over the crying-to-sleep training method, Dr. Robert Hamilton from Pacific Ocean Paediatrics has demonstrated a position that can almost instantly stop the baby from crying. This position is suitable for babies below three months of age as after that they become quite heavy for it.
Cross the baby’s hands across the chest and hold it in place with your hand.
Use the same hand to support the baby’s chin.
Place the fleshy part of your other hand on the baby’s bottom for a comfortable hold.
Now, holding the baby at a 45-degree angle, gently swing your baby to stop him or her from crying.
How to Hold Your Newborn While Bathing?
You can make bath fun for babies by using this position to hold your baby during bath time (5).
Place one hand on your baby’s back and shoulder and the other on the bottom as you lower your baby into the tub.
Once you have settled the baby in the tub, you can use the hand which was supporting the bottom to wash your baby while the other hand continues to support the head and keeps it above water level.
How to Hold Your Baby When Burping?
Burping is an important step in caring for a newborn, as it helps release trapped air from the baby’s stomach, preventing discomfort and fussiness. Here are some effective positions to hold your baby when burping (3):
Place the baby upright against your chest, with their chin resting on your shoulder. Support the baby’s bottom with one hand and gently pat or rub their back with the other.
Sit the baby on your lap, facing sideways. Support their chest and head by placing your hand under their chin (not on the throat) and lean them slightly forward. Use your other hand to pat or rub their back.
Lay the baby across your lap on their tummy, with their head slightly higher than their chest. Support the baby’s chin with one hand and gently rub or pat their back.
Common Mistakes to Avoid When Holding a Newborn Baby
Holding a newborn requires extra care and attention, as small mistakes can lead to discomfort or even injury. Here are a few ways how not to hold a baby:
Not Supporting the Head and Neck: Newborns lack neck strength, so always support the baby’s head and neck when picking them up or holding them.
Shaking the Baby: Even in play, never shake a newborn, as it can cause serious brain injuries. Always handle the baby gently (2).
Lifting the Baby by the Arms or Hands: Never pick up a newborn by the arms or hands, as this can dislocate their joints. Instead, support the baby’s entire body, especially the head and torso (1).
FAQs
1. Can I use a baby carrier or sling for newborns?
Yes, you can use a baby carrier or sling for newborns, but make sure it is specifically designed for infants and provides adequate neck and back support. Follow the manufacturer’s instructions to ensure the baby is positioned safely (4).
2. What should I do if I feel nervous about holding my newborn?
It’s normal to feel nervous, especially as a new parent. Take your time and practice holding the baby in a seated position initially. You can also ask for guidance from a doctor. Confidence will grow with practice, and you will soon feel more at ease holding your baby.
Remember that it is essential to stay calm and confident before you pick up your baby, to keep the baby relaxed and comfortable throughout.
Infographic: Safe Baby Holding Positions
References/Resources:
1. Morse. J; 10 tips for handling and holding a newborn; University of Texas Southwestern Medical Center; https://utswmed.org/medblog/newborn-holding-tips/
2. A Guide for First-Time Parents; Nemours KidsHealth; https://kidshealth.org/en/parents/guide-parents.html
3. Baby basics: How to burp your baby; UNICEF; https://www.unicef.org/parenting/child-care/how-to-burp-baby
4. 7 Tips for Safe Babywearing; Penn Medicine Lancaster General Health; https://www.lancastergeneralhealth.org/health-hub-home/motherhood/the-first-year/7-tips-for-safe-babywearing
5. Navsaria. D; Bathing Your Baby; American Academy of Pediatrics; https://www.healthychildren.org/English/ages-stages/baby/bathing-skin-care/Pages/Bathing-Your-Newborn.aspx
Also Read:
Baby Sleeping Position – What Is Safe?
How to Protect Your Baby While Keeping Them Happy
Wonderful Ways To Keep Your Baby Safe and Protected
Rules & Tips for Visitors on How to Hold Newborn Baby?
Read more




Mosquito Bites on Babies – Causes and Treatment
As adults, it gets hard to sleep and rest peacefully when there are mosquitoes looming around. Even more so, when it comes to your baby. The nights spent warding off the mosquitoes buzzing around your baby aren’t easily forgotten. Babies are easy targets for these tiny blood-sucking insects. It can be a painful affair, both for yourself and the little one, as you will need to stay up and soothe your crying baby. As your baby’s skin is sensitive, it is essential to know if any remedies you are using are safe for him. Keep reading for everything you need to know about identifying mosquito bites on your baby, treating them with home remedies, and preventing more bites in the future.
Video: How to Prevent Mosquito Bites on Babies (Plus 5 Home Remedies to Treat)
Causes of Mosquito Bites
Babies are unprepared to deal with mosquitoes and, hence, become attractive targets for them. Here’s why your infant may display mosquito bites all over his body:
1. Unclean Environment
Stagnant water and over-flowing/open garbage cans attract mosquitoes. If these are commonly found in your locality, your baby is at risk of mosquito bites.
2. Exposed Skin
When you dress up your baby in short pants/nappies and sleeveless T-shirts, he becomes an easy target for mosquitoes.
3. Dampness
Wet towels and clothes, leaking roofs and dampness are an invitation to mosquitoes and should be avoided when there’s a tiny one at home.
4. Uncovered Food Items
The smell of food can also attract a scourge of mosquitoes. You should maintain hygiene when you have a baby at home.
5. Perfumed Lotions or Creams
If you’ve stocked baby oils, lotions and creams in your baby’s bedroom, that might be one of the causes of mosquito bites. Perfumed powders should be avoided too.
6. Sweat
Mosquitoes are attracted to sweat odour and its warmth. If you find your baby sweating, use a soft towel to wipe it off. Do not allow the sweat to settle on your tiny one’s body.
7. Water-Based Decorations
Fancy waterfalls, flashing lights and gurgling sounds may give your home a unique look, but are breeding grounds for mosquitoes. Your innocent baby can become an easy target for such home-grown mosquitoes.
How To Identify Mosquito Bites on Your Infant?
If you notice any of these symptoms, it means that your infant has been bitten by mosquitoes.
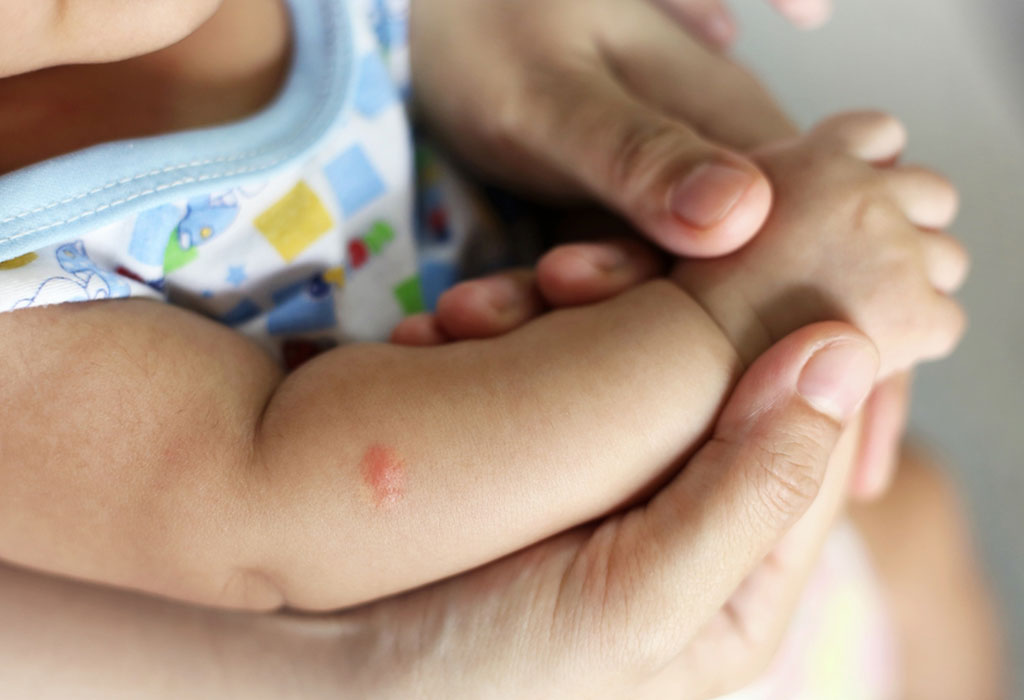
Tiny red bumps
Swollen reddish areas
Dark spots
Baby scratching or crying without any noticeable reason
Raised skin with a prominent white centre and a red spot
Complications of Mosquito Bites in Babies
Although the effects of mosquito bites fade away in a few hours, your baby might experience certain complications in rare cases. Here are some possible complications, in which case you should consult a doctor.
1. Infection
If your baby is older and able to scratch the bites, doing so might cause an infection. One of the main symptoms of an infection is fever, so keep a watch out for an increase in body temperature. You may also notice some blisters in the area of the bite, which indicate infection.
2. Diseases
Some mosquitoes can be carriers of diseases such as malaria or dengue. If these mosquitoes bite your baby, they might transfer the virus. Keep a watch out for symptoms like fever, weakness, and vommiting in your little one, if he has been bitten by mosquitoes.
How To Treat Mosquito Bites on Your Baby?
Try these effective mosquito bite remedies on your baby to heal his skin:
Applying ice brings the itching and swelling under control.
Soothing calamine lotion is also a quick and easy remedy for mosquito bites.
Prevent your baby from scratching the itchy areas.
Home Remedies for Mosquito Bites
If you are looking to treat mosquito bites on babies, a home remedy is a safe solution. These remedies for infant mosquito bite relief are effective and don’t have any side effects. The ingredients needed are available in your kitchen itself!
Lemon – Lemon has excellent anti-inflammatory and anaesthetic properties. This makes it one of the best home remedies available. Cut a lemon into two and apply directly over the bite. You can also use fresh lemon juice for application on the skin.
Garlic – Garlic is a beautiful soothing balm for itchiness and swelling after bites. It helps the swelling to reduce, and the harsh odour keeps mosquitoes away from your helpless baby. Crush garlic and rub it gently over the bite. Clean it with a damp cloth after a few minutes.
Baking Soda – This inexpensive and effective method for curing mosquito bites in babies is highly popular amongst mothers. Baking soda can quickly restore the pH level and helps in reducing itching. Dissolve one teaspoon of baking soda in a cupful of water. Dip a soft towel in it and place it on the bitten areas for 10 minutes.
Ice – Ice is helpful in preventing inflammation and also keeps the bite from affecting nearby areas. Keep a few ice cubes in a clean, soft cloth and dab it on the skin repeatedly. Do not hold it over your baby’s sensitive skin for long as it could cause some discomfort. This simple yet effective treatment heals the condition quickly.
Salt – Clean the skin area with sea salt and water for quick relief. Like lemons, salt is anti-inflammatory and proves to be an effective home-based remedy for mosquito bites. Its easy availability makes it a quick solution to insect bites.
Aloe Vera – This is a natural antiseptic, and its gel is a great reliever for mosquito bites on babies. Keep the gel in the refrigerator for a few minutes and then apply over the affected area. It will reduce the itchiness, swelling and pain due to the mosquito bite.
Honey – Honey finds a lot of applications in the world of home remedies. Since it is anti-bacterial and anti-inflammatory, honey soothes the mosquito bites and keeps inflammation under control.
Prevention
You may wonder how to prevent mosquito bites on babies, to ensure your baby does not suffer and can sleep peacefully. Since prevention is always better than cure, take the following measures to prevent your baby from mosquito bites.
1. Cover With Mosquito Nets
Spread a fine-mesh mosquito net over your baby’s crib and car seat. This protects your baby’s skin from coming in contact with these terrible insects.
2. Keep Your Baby Covered
You should always keep your baby’s arms and legs covered with full-sleeved clothing, especially during the monsoon.
3. Use Insect Repellents
Never apply insect repellents directly onto your baby’s skin. Use them on your baby’s clothes instead. Mosquito repellents consist of DEET, which is unsafe for babies younger than two years.
4. Keep Your Child Away From Water Bodies
Accumulated water and woody areas are the ideal breeding grounds for mosquitoes. When you take your baby out for a stroll, avoid such places.
5. Invest in Window Screens
Cover the windows with nets or screens. This will prevent the mosquitoes from entering your home. You can also turn on a table fan to drive the mosquitoes away.
6. Keep the Doors Closed
Keeping the doors and windows closed once it turns dark can do a lot to protect your baby from mosquito bites.
7. Pay Attention to the Colours
As mosquitoes tend to be attracted to dark colours like navy and black, it makes sense to clothe your infant in light-coloured clothing. You should check if your baby’s room has ultraviolet, blue or fluorescent bulbs and replace them.
When Should You Call the Doctor?
Mosquitoes are effective carriers of various diseases and should be kept away from infants. Your baby will need immediate medical attention if you notice any of the symptoms mentioned below:
Lesions, inflammation and red patches on your baby’s skin
Wheezing and a swollen throat are indicators of anaphylaxis which can turn into a life-threatening condition
Vomiting and nausea
Heavy breathing and reactions in other parts of the body
Pain on or around the affected area
Reduced sensitivity to light
Swollen lips
Swelling around the neck
Enlarged bitten area that contains pus
Fever and chills
FAQs
1. How Long Does the Bite of a Mosquito Last on a Baby?
Mosquito bites can leave bumps on the baby’s skin that last upto a week. This is normal and not a reason to worry. However, if you notice other symptoms such as fever or pain, consult a doctor immediately.
2. What Ointment is Effective Against Mosquito Bites in Babies?
Calamine lotion or hydrocortisone cream will help provide some relief to your baby and ease inflammation and itching. It is always best to consult your doctor before applying these ointments to ensure they are safe for your little one.
It’s not possible to keep mosquitoes at bay at all times. However, the chances of mosquito bites can be minimised. When your baby is sleeping or playing, keep a close watch on the surroundings. Vigilance is all that is needed to keep your home mosquito-free.
References/Resources:
1. Mosquito Bite; American Academy of Pediatrics; https://www.healthychildren.org/English/tips-tools/symptom-checker/Pages/symptomviewer.aspx?symptom=Mosquito+Bite
2. Protect your infant from dengue; Centers for Disease Control and Prevention; https://www.cdc.gov/dengue/resources/educationmaterials_pdfs/15_261427-C_Seda_508_Update_Protect_your_infant_from_dengue.pdf
3. Mosquito Bites; Cleveland Clinic; https://my.clevelandclinic.org/health/diseases/17695-mosquito-bites#symptoms-and-causes; October 2021
4. Mosquito Bite Symptoms and Treatment; Centers for Disease Control and Prevention; https://www.cdc.gov/mosquitoes/mosquito-bites/symptoms.html; May 2023
5. Insect bites and stings; NHS; https://www.nhs.uk/conditions/insect-bites-and-stings/; June 2023
Also Read:
Chikungunya in Children
Bed Bug Bites on Babies and Kids
Homemade Insect & Mosquito Repellent for Babies
Read more
Pain After Vaccination in Babies – Tips to Ease It
Vaccinations offer protection to your baby from many dreadful diseases. Babies are more vulnerable to viruses as their immune system isn’t completely mature. This increased output of viruses, along with typically lesser attention to hygiene, makes children more likely to spread their infection to others. The possibility of transmission is further enhanced when many children are gathered together, such as in childcare centres and schools. Hence, it is imperative that your baby gets all the recommended shots on time
Many moms become upset on seeing their babies in pain after a shot. Vaccinations are for your baby’s good and shouldn’t be avoided. However, you can certainly make the experience less stressful for your baby. Let’s learn about how to relieve pain after vaccination in babies.
11 Ways to Relieve Your Baby’s Pain After Vaccination
Here are a few things you can do to ease your baby’s pain during and after a shot:
1. Cuddle Your Baby
Cuddle him! Babies calm down and cry less when they’re cuddled by their parents. That’s because familiar touch helps them feel protected.
2. Feed Him
Babies focus on one task at a time, so feeding your baby after vaccination can help take his mind off it and also lower the pain considerably. Breastfeeding your baby more often after the vaccination will also keep him hydrated and prevent fever from setting in.
3. Distract Him
Calm baby after shots by distracting him with his favourite toy while he’s getting injected. This can help to keep his mind off the pain.
4. Apply a Cool Compress/Ice Pack to the Injected Area
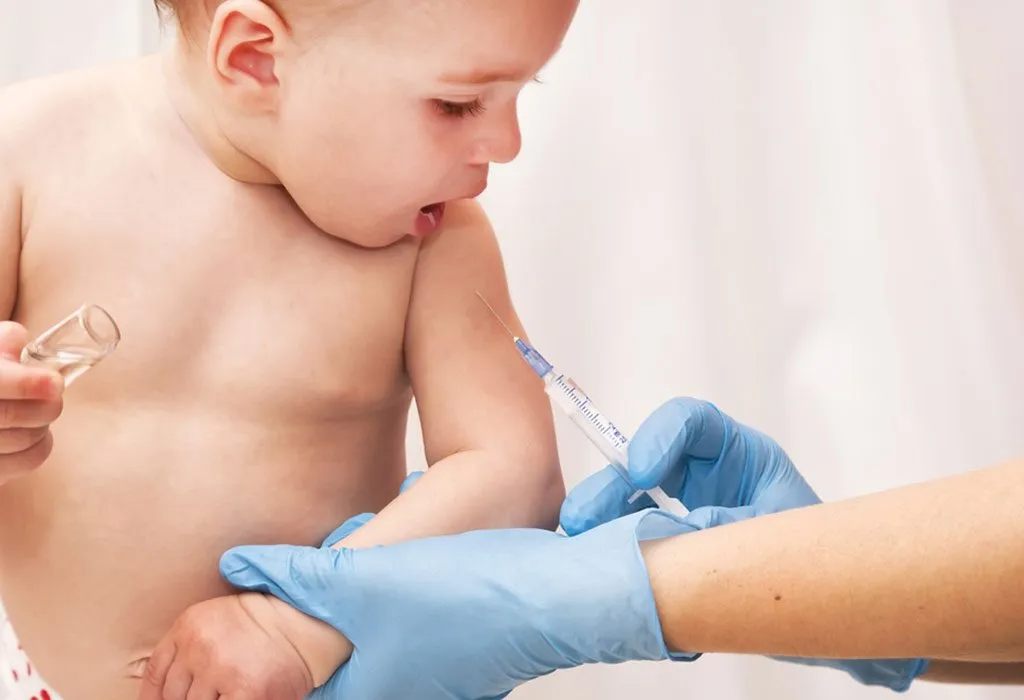
A cool compress can reduce the swelling or soreness at the site of the injection. Soak a cloth in cold water and place it on the injected area. You can also use an ice pack instead to relieve the pain.
5. Inquire About Numbing Creams
You can ask your paediatrician to use a numbing cream or spray before the injection. It’s best if you clarify this beforehand as you may need a prescription for the same.
6. Opt for a Painless Injection
Painless injections or an acellular vaccine, as opposed to whole-cell vaccines, cause no symptoms and little or no pain, as they come with fewer antigens. You can ask your doctor if this option is available and decide if you would prefer to go for it.
7. Check for Combination Shots
Vaccinations for different diseases can be combined together in a single shot to reduce the number of injections that your baby has to take. You can check with your paediatrician about this.
8. Rub Your Baby’s Skin
Gently massaging the area surrounding the injected area before and after an injection can relieve the pain.
9. Stay Calm
Your worrying will only fuel your baby’s fear and make him distressed. Stay calm as you hold your baby, to prevent him from feeling stressed.
10. Use the 5 Ss Approach
You can also use these 5 Ss to calm your baby down after a shot.
Swaddle him immediately after vaccination.
Place him on the side or the stomach
Make shushing sounds
Swing him in your arms or an infant swing
Give him something to suck, for example, your breast, a milk bottle or a pacifier
11. Inquire About Pain-Relief Medication
If your baby cries a lot due to the pain or develops a fever after getting a shot, you can speak to your paediatrician about giving medication like acetaminophen or ibuprofen for pain relief. Treating baby fever after vaccination is imperative.
FAQs
1. Why does my baby experience pain after vaccination?
Babies often experience pain after vaccination due to the body’s natural immune response to the vaccine. The vaccine introduces a small, safe part of the virus or bacteria into the body, prompting the immune system to respond and build protection against the disease. This response can cause discomfort, including pain at the injection site, as well as potential swelling or redness. These symptoms are generally mild and indicate that the vaccine is effectively stimulating the immune system.
2. How long does the pain last after vaccination?
The pain or discomfort after vaccination typically lasts for a couple of days, though every baby reacts differently. Some may experience very mild symptoms, while others may seem more affected. It’s common for babies to have a low-grade fever, appear a little fussier than usual, or have slight swelling at the injection site during this time. If symptoms persist beyond 48-72 hours or if you have any concerns about your baby’s well-being, it’s important to contact your pediatrician.
3. Can I bathe my baby after vaccination?
Yes, you can bathe your baby after vaccination, but it might be wise to wait a few hours before doing so. Some babies may experience tenderness at the injection site, and handling the area too soon could cause discomfort. When you do bathe your baby, check the injection site for any signs of redness or swelling, and be gentle. If the site seems particularly sensitive, a sponge bath might be a more comfortable option until the tenderness subsides.
4. Is it normal for my baby to be fussy after receiving a vaccine?
Yes, it’s quite normal for babies to be fussier than usual after getting vaccinated. This fussiness is generally due to discomfort or pain at the injection site, as well as a possible low-grade fever, which are common reactions to vaccines. These symptoms are usually mild and temporary. You can soothe baby after vaccines with comforting strategies, such as swaddling, skin-to-skin contact, or gently rocking your baby, can help alleviate their distress. If your baby seems excessively uncomfortable or the fussiness persists, consult your pediatrician for advice.
This was all about how to help baby after vaccine shots. It is important for your baby to get vaccinated as it is the best form of protection against life-threatening diseases. So, stay calm and remember that your baby will feel the prick only for a little while. With the above steps, you can try to make the experience less distressing for your baby.
Infographic: Ways to Ease Pain After Vaccination in Babies
References/Resources:
1. How Can I Comfort My Baby During Shots?; Nemours Kids Health; https://kidshealth.org/en/parents/baby-vaccinations.html
2. Reducing the pain and anxiety of vaccination in children; Québec; https://www.quebec.ca/en/health/advice-and-prevention/vaccination/reducing-pain-and-anxiety-of-vaccination-children
3. Pain Management During Immunizations for Children; Immunize Canada; https://immunize.ca/pain-management-children
4. Immunisation – side effects; Better Health Channel; https://www.betterhealth.vic.gov.au/health/healthyliving/immunisation-side-effects
5. Immunization Reactions; Seattle Children’s Hospital; https://www.seattlechildrens.org/conditions/a-z/immunization-reactions/
6. Vaccinations; Centres for Disease Control and Prevention; https://www.cdc.gov/breastfeeding/breastfeeding-special-circumstances/vaccinations-medications-drugs/vaccinations.html
7. Garg, N, Aggarwal. A; Advances Towards Painless Vaccination and Newer Modes of Vaccine Delivery (Indian Journal of Pediatrics); National Library of Medicine; https://www.ncbi.nlm.nih.gov/pmc/articles/PMC7090876/; June 2017
Also Read:
Common Side-Effects of Vaccination in Babies
Vaccine Myths and Facts You Should Consider
Can Babies Have Vaccinations With a Cold or Cough?
Commonly Asked Vaccination Questions with Answers
Read more
How to Clean Baby Car Seats Safely at Home – Step-by-Step Guide
Every parent knows how quickly a baby car seat can go from spotless to messy. One snack spill turns into sticky straps, mystery stains, and that lingering smell nobody wants trapped inside the car. Between milk leaks, diaper accidents, and muddy shoes, cleaning becomes less about appearance and more about hygiene and safety. Many parents worry about damaging the fabric, weakening the harness, or using harsh products around their child, which is why learning how to clean baby car seats properly matters so much. A safe cleaning routine not only keeps the seat fresh but also helps maintain its protective features. The good news is that you do not need expensive tools or professional services for regular upkeep. With the right approach and a few household supplies, you can clean your child’s car seat thoroughly at home without risking safety or comfort.
How Frequently Should You Clean a Baby Car Seat?
Baby car seats go through a lot every single week. Spilt milk, crumbs, sticky fingers, and muddy shoes can make contact with the car seat when least expected. A quick wipe after small messes can keep the seat fresh and make deep cleaning much easier later. Many parents find that giving the car seat a proper clean once every few weeks helps their baby stay comfortable and keeps unpleasant smells away.
Easy Steps to Clean a Baby Car Seat
Cleaning a baby car seat can feel like a big task, especially when you are already busy with everyday parenting. A gentle and careful approach also helps keep the seat safe and comfortable for your child.
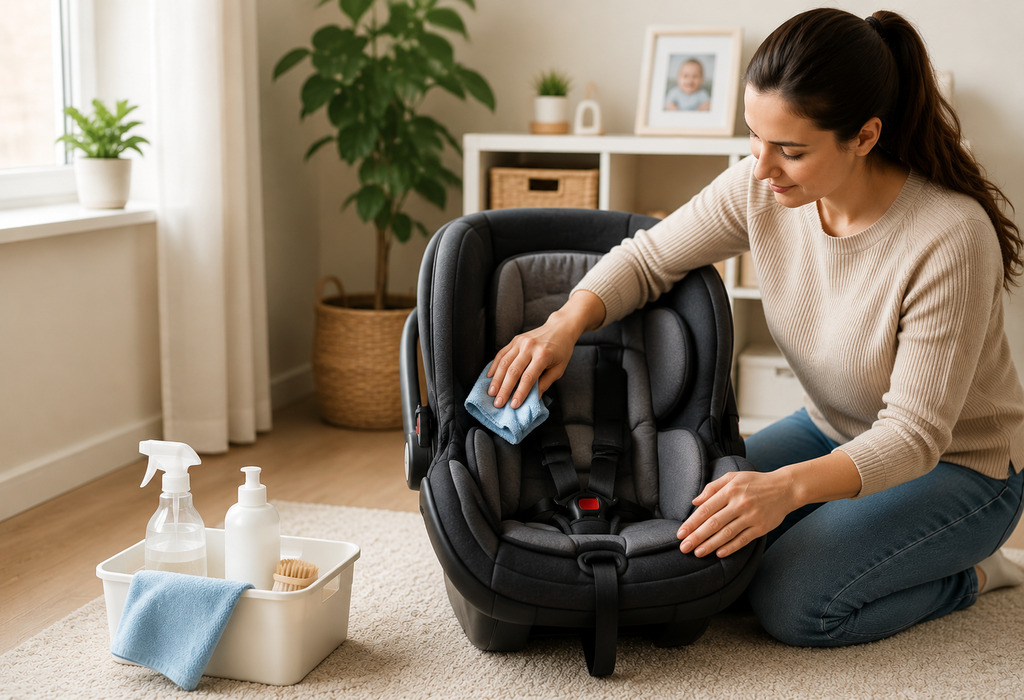
1. Remove the Car Seat From the Vehicle
Take the seat out of the car and place it on a clean surface. This gives you enough space to clean properly without missing hidden crumbs or stains.
2. Check the Instruction Manual
Before using soap or water, read the manufacturer’s instructions. Some parts can be machine-washed while others need gentle hand cleaning.
3. Take Off Removable Covers and Pads
Remove the seat cover, head support, and small inserts carefully. Keeping the pieces together makes reassembly much easier later.
4. Vacuum Loose Dirt and Crumbs
Use a vacuum with a small attachment to clean corners, seams, and buckle areas. Parents are often surprised by how many tiny crumbs hide inside the seat.
5. Wash the Fabric Cover Gently
Clean the cover using mild detergent and warm water. If machine washing is allowed, use a gentle cycle to avoid damaging the fabric.
6. Wipe Down the Harness Straps
Use a soft cloth with mild soap and water to clean the straps. Avoid soaking them because strong cleaning can weaken the material over time.
7. Clean the Plastic Shell
Wipe the hard plastic areas with a damp cloth. Sticky drink spills and snack marks usually come off easily with gentle cleaning.
8. Let Everything Dry Completely
Allow all parts to air dry fully before putting the seat back together. Even slight moisture can create musty smells later.
9. Reassemble the Seat Carefully
Put the covers, straps, and pads back in place using the manual if needed. Double-check that the harness works smoothly and fits properly before using the seat again.
Cleaning Methods for Different Types of Infant Car Seats
Different baby car seats need different cleaning methods because every design is made a little differently. Some seats have extra padding, while others have more straps, clips, or moving parts. Parents often worry about damaging the fabric or cleaning the wrong area too harshly. Knowing the right way to clean each type of seat can help keep your baby safe, comfortable, and happy during every ride.
1. Infant Car Seats
Infant car seats are made for newborns and usually include soft inserts and padded support. Since babies often sleep, feed, and rest in these seats, they can accumulate milk stains, crumbs, and spit-up very quickly.
Tips for Cleaning
Remove the inserts gently and, if allowed, wash them with mild detergent. Wipe the shell and straps carefully and let every part dry completely before use.
2. Convertible Car Seats
Convertible seats are used for several years, so they accumulate everyday dirt and hidden crumbs over time. The deeper shape of the seat can also trap food in small corners.
Tips for Cleaning
Vacuum around the buckle and seams regularly. Spot-clean the harness and wash the removable covers according to the manual instructions.
3. All-in-One Car Seats
These seats are designed to grow with the child from the baby stage to the booster stage. Because they stay in use for many years, they often need more frequent cleaning.
Tips for Cleaning
Do quick cleanups every week to prevent buildup. Gently wash fabric covers and check hidden corners for snack crumbs and spills.
4. Booster Car Seats
Booster seats are commonly used by older children who may eat and drink during car rides. This often leads to sticky marks, crumbs, and drink spills.
Tips for Cleaning
Wipe down the seat after trips and clean cup holders often. A small handheld vacuum works well for removing loose crumbs.
5. Travel System Car Seats
Travel system seats move between the stroller and the car many times during the day. Because of this, they can pick up outdoor dust, dirt, and stains more easily.
Tips for Cleaning
Clean the handles, lower edges, and fabric areas regularly. Use gentle soap and avoid strong cleaning sprays on soft materials.
6. Lightweight Portable Car Seats
Portable car seats are easy to carry and store, but they are often placed on different surfaces during travel. This can cause dirt and dust to collect quickly.
Tips for Cleaning
Shake out loose dirt before wiping the seat. Always let the fabric dry fully before folding or storing the seat.
7. Rotating Car Seats
Rotating car seats have moving bases that help parents place the baby inside more comfortably. Dust and crumbs can collect around the rotating parts over time.
Tips for Cleaning
Use a soft brush or vacuum around the base area. Keep water away from moving parts to help the seat rotate smoothly.
Tips to Keep a Baby Car Seat Clean and Maintained
Keeping a baby car seat clean does not always require deep cleaning every week. Small habits during daily use can make a big difference over time. Many parents search for how to clean infant car seats after stains and odours become difficult to manage, but regular care can help prevent that stress. A little attention here and there keeps the seat fresher, safer, and more comfortable for your child.
• Wipe Small Messes Right Away
Cleaning spills quickly helps prevent stains and sticky buildup. Even a simple wipe with a damp cloth can save time later.
• Vacuum the Seat Every Week
Tiny crumbs often hide under the padding and around the buckle area. A quick vacuum keeps dirt from collecting over time.
• Avoid Eating Messy Foods in the Car
Snacks like chocolate yoghurt or chips can leave difficult stains. Choosing less messy snacks during travel can help keep the seat cleaner.
• Keep a Small Cleaning Cloth in the Car
Having a soft cloth nearby makes it easier to handle sudden spills or sticky hands during trips.
• Use Mild Baby Safe Cleaners
Strong chemicals can irritate sensitive skin and damage seat materials. Gentle soap and warm water are usually enough for regular cleaning.
• Let the Seat Dry Fully After Cleaning
Moisture trapped inside the fabric can create unpleasant smells. Air drying completely helps keep the seat fresh.
• Check the Harness Often
Straps can collect sweat, milk, and dirt over time. Gentle spot cleaning helps keep them comfortable and safe for daily use.
• Wash Removable Covers Regularly
If the manufacturer allows machine washing, clean the fabric covers every few weeks to remove hidden dirt and odours.
• Store Extra Clothes or Bibs During Long Trips
Accidents and spills happen often with babies. Keeping extra clothes, bibs, or burp cloths nearby can help reduce bigger messes inside the seat.
Common Mistakes to Avoid When Cleaning a Baby Car Seat
Many parents try their best to keep the car seat fresh and safe, but a few common cleaning mistakes can accidentally damage the seat. It is easy to rush when dealing with sticky spills, straps, or strong odours, especially after a long day with a baby. Some people even try to deep-clean baby car seat parts completely without realising that certain materials need gentle care. Knowing what to avoid can help protect both the seat and your child’s safety.
• Using Harsh Cleaning Chemicals
Strong bleach sprays or heavy cleaners can damage the fabric and irritate a baby’s sensitive skin. Mild soap and warm water are usually the safer choice.
• Soaking the Harness Straps
Many parents think soaking straps removes stains faster, but too much water can weaken the material over time. Gentle spot cleaning is much safer.
• Reassembling the Seat Before It Dries
Putting the seat back together while parts are still damp can cause musty odours and hidden moisture in the padding.
• Scrubbing Fabric Too Hard
Aggressive scrubbing can damage stitching and labels, as well as soft padding. Slow, gentle cleaning usually works better and keeps the fabric in good condition.
• Ignoring the Instruction Manual
Every car seat has different cleaning rules. Skipping the manual can lead to accidental damage or improper reassembly.
• Forgetting to Clean Hidden Areas
Crumbs and spills often collect under the seat pad and around buckles. These hidden spots can create odours and sticky buildup if ignored for too long.
FAQs
1. How often should I clean a baby car seat?
Small messes should be cleaned right away, while a deeper cleaning every few weeks helps keep the seat fresh and hygienic.
2. Can I machine wash the car seat cover?
Some covers are machine washable, but others need hand washing. Always check the manufacturer’s instructions before washing.
3. Is it safe to use strong disinfectants on a baby car seat?
Harsh chemicals can damage the material and may irritate your baby’s skin. Mild soap and warm water are usually the safer option.
4. Why does my baby car seat still smell after cleaning?
Moisture trapped inside the padding or hidden crumbs under the cover can cause lingering odours. Let the seat dry completely and clean hidden areas carefully.
5. Can I wash the harness straps in water?
Most manufacturers recommend only spot cleaning the straps. Soaking them may weaken the material over time.
Keeping a baby car seat clean is not only about appearance but also about your child’s comfort and safety during every ride. Small cleaning habits can prevent stains, odours, and hidden dirt from building up over time. Using gentle cleaning methods helps protect the fabric straps and the seat’s important safety features. Every car seat is a little different, so checking the manufacturer’s instructions always makes cleaning easier and safer. Even a few minutes of regular care can make daily travel more pleasant for both parents and babies. A fresh, clean car seat creates a healthier and more comfortable space for your little one wherever the journey goes.
Also Read:
Infant Spits Up Through the Nose – Causes & Solutions
Baby Rubbing Eyes – Reasons, Risks and Prevention
Mosquito Bites on Babies – Causes and Treatment
Read more
How to Clean a Stroller: Easy Tips and Tricks
Cleaning a stroller is probably one of those tasks that most parents overlook until they notice crumbs, dirt, and a bit of mystery gunk building up. While it’s not the most exciting part of parenting, knowing how to clean a stroller properly can make all the difference. Not only does cleaning help maintain the stroller’s look and functionality, but it also ensures that your child sits in a clean and sanitised place.
So, how often should you clean a stroller? Well, ideally, a quick clean should be done regularly, especially after park trips or snack-heavy outings, but every stroller deserves a deep clean now and then! Don’t worry; you don’t need a degree in stroller maintenance to do it. With just a few simple tools and some easy steps, you can have your stroller looking brand new in no time.
Let’s jump into the easy steps to get your stroller spotless and germ-free!
Why Should You Clean Your Baby’s Stroller?
Cleaning your baby’s stroller isn’t just about keeping it looking good. It’s also about creating a safe and healthy space for your little one. A clean stroller can prevent bacteria buildup, reduce allergens, and extend the life of the stroller itself.
A Healthy Environment
Babies are notorious for dropping snacks, bottles, and toys, which can lead to food crumbs and sticky messes. These leftover bits can attract bacteria, mould, and even pests. By keeping the stroller clean, you’re ensuring your baby isn’t exposed to unnecessary germs that could cause infections or allergic reactions.
Longer Lifespan
Let’s face it—strollers aren’t cheap. Cleaning it regularly helps maintain its quality, preventing rust from forming on metal parts and fabric from wearing out too quickly. A well-maintained stroller will last longer and perform better.
Hygiene On-the-Go
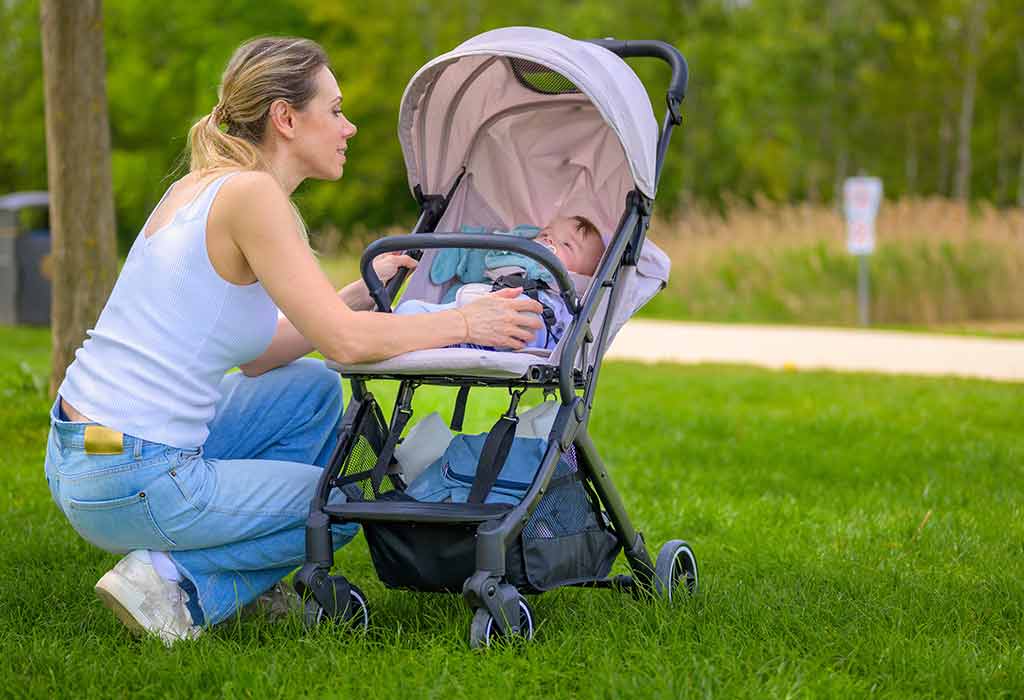
Parents often take strollers everywhere—from parks to malls to grocery stores. This means the stroller’s wheels and handles are constantly exposed to dirt, germs, and who-knows-what from the environment. Cleaning it ensures that you’re not spreading germs from one place to another, especially when your baby touches the stroller.
In a nutshell, a clean stroller isn’t just visually appealing. It’s also safer, healthier, and more durable. Now, let’s move on to the practical side of how to clean your stroller.
How Often Should You Clean Your Stroller?
How often you clean your stroller depends on how frequently you use it and where you take it. A stroller that sees daily action at parks and grocery stores will need more attention than one used occasionally. Regular maintenance helps keep it in top shape.
Weekly Wipe-Down
For everyday use, a quick clean once a week should be enough. This includes wiping down the handles, frame, and seat fabric to remove any crumbs, dirt, or spills. A handheld vacuum can be handy for picking up debris from the seat.
Monthly Deep Clean
Once a month, give your stroller a more thorough cleaning. This means taking it apart, washing the seat covers (if removable), cleaning the wheels, and scrubbing the nooks and crannies. This deep clean will ensure no hidden dirt or grime builds up over time.
Post-Adventure Cleaning
If you’ve taken your stroller on a beach trip, a hike, or a muddy adventure, it’s best to clean it right after. Sand, dirt, and mud can damage the wheels and frame if left for too long. A quick rinse and scrub after these outings will help keep the stroller in good condition.
By cleaning your stroller regularly, you’ll prevent buildup and make each cleaning session easier. It’s all about staying on top of the mess before it becomes overwhelming.
Things You Need to Clean a Stroller
Before you start cleaning, it’s good to have all your supplies ready. Having the right tools will make the process quicker and easier. Most of these items are things you likely already have at home. Here’s a list of essentials to help you clean your stroller effectively:
Mild detergent: Perfect for washing fabric parts like the seat and canopy. Use a baby-safe detergent to clean the stroller seat without irritation.
Soft cloth or sponge: You’ll need these to wipe down the frame and clean the stroller wheels. A soft cloth is gentle yet effective.
Small brush or old toothbrush: Great for scrubbing tight areas like hinges or in between the stroller’s folds.
Vacuum cleaner: Useful for sucking up crumbs and dirt from the seat and storage basket. A handheld vacuum works best for this.
Warm water: Combine with your detergent to clean the stroller seat and fabric parts. Use it for wiping down the frame and accessories too.
Disinfectant wipes: Handy for quick touch-ups, especially on the handles and frame where germs can build up.
Simple Steps to Clean the Stroller
Wondering how do you clean a stroller without too much hassle? It’s easier than you might think. By following a few basic steps, you can have your stroller fresh and ready in no time. Let’s break down the cleaning process into easy steps so you can tackle each part of the stroller efficiently.
1. Remove Loose Items
Start by taking out everything from the stroller—snacks, toys, blankets, or anything stored in the basket. This will give you a clear area to work on and prevent you from missing any hidden messes.
2. Vacuum the Seat
Use a handheld vacuum to remove crumbs, dust, and dirt from the seat, storage basket, and any crevices. A vacuum is especially useful to clean stroller seats, as it gets into tight spots where crumbs love to hide.
3. Wipe Down the Frame
Take a damp cloth or sponge with warm, soapy water and wipe down the stroller’s frame. Pay attention to handles, hinges, and areas where your hands frequently touch. This will help remove dirt, dust, and germs.
4. Clean the Wheels
Next, focus on cleaning stroller wheels. Use a brush or old toothbrush to scrub the wheels and remove any mud or debris stuck in the treads. If the wheels are removable, take them off for a deeper clean.
5. Wash the Fabric
If the fabric parts are removable, detach them and wash them in cold water using a gentle detergent. Let them air dry completely before reassembling. This is the best way to ensure your stroller stays fresh.
6. Disinfect Touchpoints
Once everything is clean, use baby-safe disinfectant wipes to sanitize the handles, seatbelt clips, and other frequently touched areas. This helps keep germs at bay, especially if you’re out in public often.
By following these steps, you’ll have a clean and fresh stroller that’s ready for any adventure!
Tips to Consider While Cleaning the Stroller
When cleaning your stroller, there are a few things to keep in mind to ensure you’re doing it properly and avoiding damage. These simple tips will help make the cleaning process smoother and more effective, whether you’re dealing with stains, dirt, or mould. Let’s look at the best practices to follow while cleaning.
Always Check the Manual: Before you start, check the stroller’s manual for specific cleaning instructions. Some strollers have parts that may be machine-washable, while others require hand washing. This is especially important when you clean stroller fabric.
Use Baby-Safe Products: Stick to mild detergents and baby-safe cleaners. Harsh chemicals can damage the fabric or irritate your baby’s skin.
Avoid Using Too Much Water: When wiping down the frame or fabric, avoid soaking it with too much water. Excess water can cause rust on metal parts or damage the stroller fabric over time.
Clean Mold Immediately: If you notice mould, deal with it right away. To clean mold from stroller, mix water and vinegar in equal parts and wipe the affected areas. Let the stroller air dry in the sun.
Air Dry After Washing: Always let the fabric and frame air dry completely before reassembling. Avoid using a hair dryer. This is because the heat from the dryer can cause shrinkage or damage.
Pay Attention to Wheels: After each outing, especially if you’ve been to the park or beach, inspect and clean stroller wheels. Remove any debris that could affect their movement.
Protect from the Elements: Try to store your stroller indoors or use a stroller cover to protect it from rain and sunlight. This helps prevent damage and keeps the fabric from fading.
Clean Belts and Straps: Don’t forget to clean the seatbelts and straps, as these areas can collect dirt from your child’s hands and clothes. Use soapy water and a brush to scrub them gently.
Use Baking Soda for Odors: Sprinkle baking soda or fabric on the stroller seat to neutralise any lingering odours. Let it sit for a few hours, and vacuum it up afterwards.
Clean Regularly: Instead of waiting until the stroller is very dirty, clean it regularly to keep stains and dirt from building up.
By keeping these tips in mind, you’ll make sure your stroller stays in top condition, lasts longer, and keeps your baby comfortable!
FAQs
1. How often should I deep clean my stroller?
It’s a good idea to deep clean your stroller every month if you use it regularly. A deep clean involves washing the fabric, scrubbing the wheels, and wiping down the entire frame. If you’re wondering how to deep clean a stroller, start by removing the fabric, washing it, and cleaning all the parts thoroughly.
2. Can I use bleach to clean my stroller?
It’s best to avoid using bleach as it can damage the fabric and irritate your baby’s skin. Stick to mild soap, water, and baby-safe disinfectants when cleaning your stroller. For tougher stains or mould, use a mix of vinegar and water instead.
3. How do I remove stains from the stroller fabric?
To remove stains, gently scrub the area with a soft brush and a mix of water and mild detergent. You can also use a baking soda paste for tougher stains. Always let the fabric air dry completely after cleaning to avoid mould buildup.
Keeping your stroller clean doesn’t have to be a difficult task. With regular maintenance, you can keep it in great shape and provide a safe, hygienic environment for your baby. A quick wipe-down after each use and a deep clean every month will prevent dirt and grime from building up. Remember to use baby-safe products and always air dry the fabric to avoid any damage. Clean the wheels and frame regularly, especially after outdoor trips. Following these simple tips will extend the life of your stroller and keep it looking fresh. Now, you can enjoy your strolls with peace of mind!
Also Read:
Choosing the Perfect Baby Stroller
How To Wash Baby Clothes
How to Clean Baby Toys
Read more
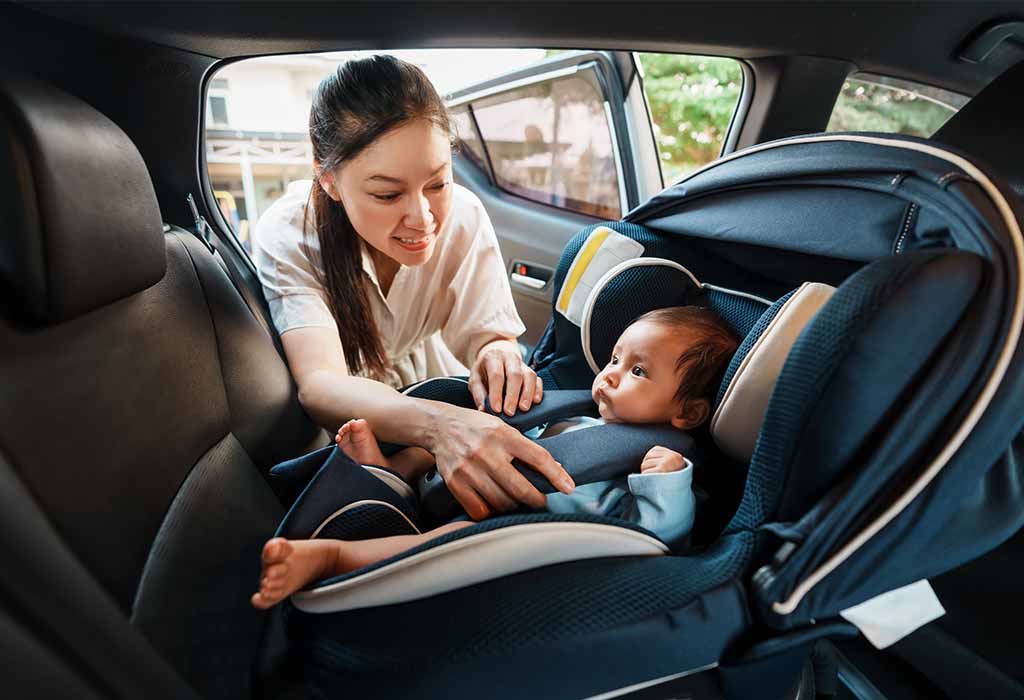
How to Install Infant Car Seat – An Ultimate Guide for Parents
Are you soon going to welcome a new member to your family? The joy and excitement you must be feeling will be unimaginable, but let’s not forget the responsibilities that come with welcoming a newborn baby, especially their safety. One of the most crucial aspects of newborn safety is correctly installing an infant car seat. Whether you are a newbie parent or one with prior knowledge, we suggest refreshing your knowledge about how to install an infant car seat properly to ensure maximum safety for your baby and the whole family. In this article, we’ll walk you through the steps and, side by side, offer tips and insights to make the process as smooth and stress-free as possible.
Where Should You Install the Car Seat?
Choosing the right spot for your infant car seat is just as important as installing it correctly. The location you select within your vehicle can significantly impact your baby’s safety and comfort. The following article will help you understand what you need to consider and remember carefully when deciding where to install the car seat.
Installing an Infant Car Seat Properly
Ensuring the proper installation of an infant car seat is extremely important for your baby’s safety during car journeys. The process might seem overwhelming initially, but by following a step-by-step approach, you can ensure the seat is securely and correctly installed. Here’s a detailed guide to rear-facing infant car seat installation.
Step 1: Read the Manufacturer’s Instructions
Before beginning the installation process, thoroughly read the manufacturer’s instructions for your car seat. These guidelines provide specific information about the model and any particular considerations you need to be aware of. Understanding these instructions will help ensure a secure installation.
Step 2: Choose the Right Location
The safest spot for a rear-facing infant car seat installation is usually the middle of the back seat, away from airbags. If the middle seat is not an option, either side of the rear seat can work as long as it’s done correctly. Avoid placing the seat in the front unless necessary.
Step 3: Position the Car Seat Correctly
Place the car seat in the chosen location, making sure it’s facing the rear of the vehicle. Rear-facing is the safest position for infants, as it provides better support to the neck and spine in the event of a collision. Double-check that the car seat base is flat and stable on the vehicle seat.
Step 4: Secure the Car Seat Using the Seat Belt or LATCH System
Most cars and car seats come equipped with a LATCH (Lower Anchors and Tethers for Children) system. If your car has this, use it to secure the car seat. Attach the lower anchors to the corresponding points in the vehicle and pull tight. If you are using the seat belt, thread it through the designated path on the car seat base and buckle it securely. Make sure there’s no slack in the belt or the LATCH straps.
Step 5: Check the Angle of the Car Seat
Infant car seats need to be installed at the correct angle to keep your baby’s airway open. Most car seats have an angle indicator or adjuster built in. Check this to ensure the seat is not too upright or too reclined. Adjust the base of the seat if necessary to achieve the proper angle.
Step 6: Tighten and Test for Secure Installation
After securing the car seat, press down firmly on the seat and pull the belt or LATCH strap to remove any slack. The seat should not move more than an inch in any direction when tested at the base. This ensures that the seat is firmly attached to the car.
Step 7: Place Your Infant in the Car Seat and Adjust the Harness
Once the car seat is securely installed, place your baby in the seat and fasten the harness. The harness should be snug, while the chest clip should be positioned at armpit level. Ensure the straps are flat and not twisted so there’s no excess slack.
Step 8: Perform a Final Safety Check
Before hitting the road, double-check all clasps, buckles, angles, and other aspects of the installation. Ensure the car seat is secure, the harness is properly adjusted, and the seat is positioned at a correct angle. It’s also a good idea to refer back to the car seat manual to confirm you haven’t missed any steps.
By following these steps, you’ll ensure that your rear-facing infant car seat installation is done correctly, providing maximum safety and peace of mind during every journey.
Installation Mistakes to Avoid
Even with the best intentions, some common mistakes can occur during infant car seat installation that could compromise your baby’s safety. Being cognizant of these pitfalls will help you avoid them and ensure a secure installation. Here are a few key mistakes to watch out for.
1. Incorrect Seat Angle
One of the most common errors in infant car seat installation is not positioning the seat at the correct angle. If the seat is too upright, your baby’s head could fall forward, potentially blocking their airway. Ensure you use the angle indicator on your car seat and adjust it as needed to achieve the proper recline.
2. Loose Installation
Another frequent mistake is not securing the car seat tightly enough. A loose seat can move excessively in a crash, reducing its effectiveness. Always ensure that the car seat doesn’t move more than an inch from side to side or front to back once installed. Double-check the tightness of the seat belt or LATCH system to avoid this issue.
3. Incorrect Harness Use
Improper use of the harness, such as having it too loose or positioning the chest clip incorrectly, can reduce the protection offered by the car seat. The harness should be snug, while the chest clip should be at armpit level. This ensures your baby is properly secured in the event of a sudden stop or collision.
Thus, by avoiding these common mistakes during infant car seat installation, you can provide a safer environment for your child on the road.
How to Maintain Car Seat Safety?
Maintaining car seat safety includes proper installation and regular checks and adjustments to ensure that the seat continues to protect your baby as intended. Even if you have an easy-to-install infant car seat, ongoing maintenance is the key to keeping your little one safe. We suggest keeping these important tips to keep in mind whenever you check your baby’s car seat.
1. Regularly Inspect the Car Seat
Over time, straps can loosen, and components can wear out, compromising the safety of the car seat. Make it a habit to regularly inspect the seat for any signs of damage or any wear and tear. Check that all straps, buckles, and attachments are secure and in good condition, and that the seat itself is firmly attached to the vehicle.
2. Adjust the Harness as Your Baby Grows
As your baby grows, their size and shape change, which means the harness needs to be adjusted regularly. Make sure the harness fits snugly against your baby’s body and that the chest clip is positioned correctly. An easy-to-install infant car seat might come with adjustable features, so take advantage of these to ensure a perfect fit at every stage.
3. Keep the Car Seat Clean and Free from Obstructions
Dirt, food crumbs, and other small things can accumulate in the car seat, potentially affecting its functionality. Regularly cleaning the seat according to the manufacturer’s instructions will ensure it remains in top condition. Additionally, avoid placing any objects under or around the car seat that could interfere with its installation or performance.
FAQs
1. What is the safest position for an infant car seat in a vehicle?
The safest position for an infant car seat is in the rear seat, ideally in the middle, away from airbags and potential impact zones.
2. How tight should the harness be on an infant car seat?
The harness should be snug enough that you can fit only one finger between the harness and your baby’s collarbone, with the chest clip positioned at armpit level.
3. Can I use a second-hand infant car seat?
It is not recommended to use a second-hand car seat unless you are certain it has never been in an accident, has not expired, and includes all original parts and instructions.
4. How often should I check the installation of the infant car seat?
It’s advisable to check the installation every time you place your baby in the seat to ensure that everything remains secure and properly adjusted.
Installing an infant car seat correctly is pivotal in ensuring your baby’s safety during car journeys. We hope you are able to follow the easy to install infant car seat steps outlined in this guide and confidently secure your rear-facing infant car seat. Knowing that your child is protected is the ultimate bliss for a parent. So, don’t miss out on regular maintenance and learn about common installation mistakes to ensure the safety and reliability of your little munchkin’s seat. Remember, your vigilance in keeping the car seat properly installed and adjusted plays a significant role in safeguarding your little one. With this knowledge, you’re well-prepared for safe travels with your precious cargo!
Happy parenting!
Also Read:
Right Age For Your Child to Face Forward in a Car Seat
Types of Car Seats for Your Child
Perfect Car Seats & Restrains For Your Toddler
Read more
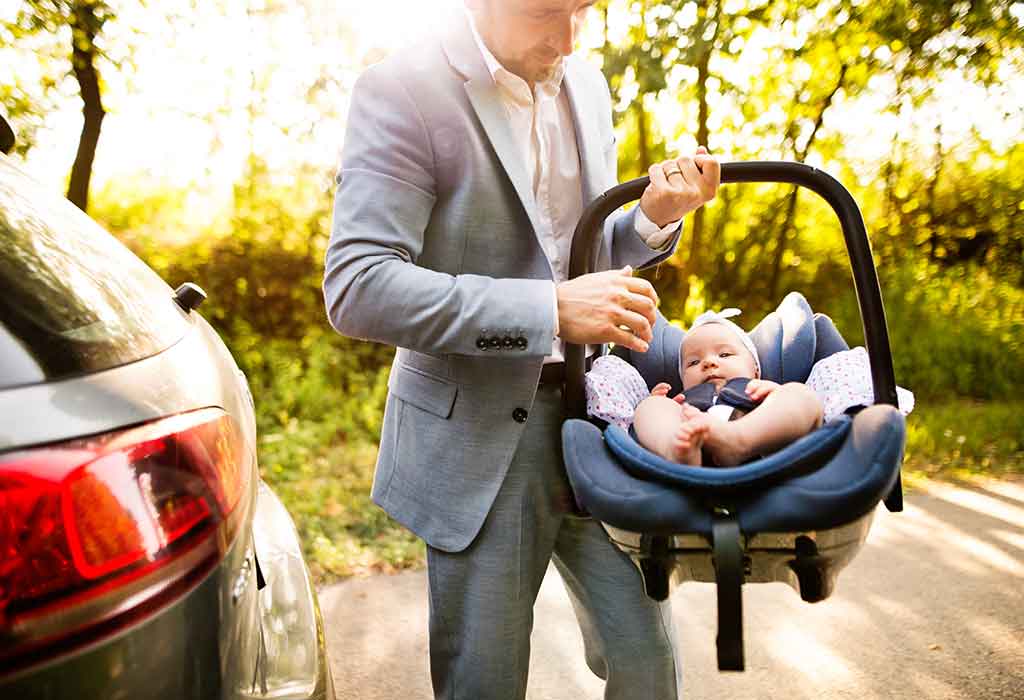
How To Carry A Car Seat – Most Comfortable And Right Ways
Hello, parents, grandparents, caregivers, and anyone else who finds themselves regularly toting around an infant car seat! We all know that carrying these car seats can often feel like participating in an unplanned workout, complete with muscle strain and an awkward balancing act. Perhaps you’re a new parent struggling to figure out the least back-breaking way to carry your new bundle of joy, or you’re a seasoned pro who is tired of the hassle. Either way, you’ve landed on the right page. This guide aims to take you through various methods to carry a car seat, focusing on comfort, safety, and ease to help you and your little one confidently venture into the world.
Easy and Safe Ways to Carry Infant Car Seat
Knowing how to carry a car seat correctly is imperative, not only for your comfort but also for your child’s safety. Here, we’ll explore various approaches to making this task easier and safer.
1. The Classic Elbow Hook
The most common way to hold the car seat is with your elbow bent and the seat hanging on your forearm. Ensure you grip the handle securely to avoid any accidental slips.
2. Over the Shoulder Method
This approach involves running your arm through the handle and resting the seat over your shoulder. This distributes weight more evenly but may obstruct your side view.
3. Two-Handed Grip
If you’re not walking a long distance, using both hands to hold the car seat from the bottom provides maximum control and reduces the risk of dropping it.
4. Side-Hold Technique
Like the Classic Elbow Hook, you hold the handle so that the car seat sits beside you. This gives you a free arm for additional tasks.
5. Using a Car Seat Carrier
A car seat carrier is essentially a small dolly designed for car seats. It allows you to pull the seat along, which is especially useful in airports or malls.
6. Trolley Method
If you’re shopping, many supermarkets offer trolleys that can secure a baby car seat. Just make sure the seat is fastened tightly to prevent tipping over.
7. Stroller Combo
Many modern car seats are part of a system that lets you snap the seat into a stroller. This is convenient for long walks or when shopping.
8. Back-Saving Lift
To protect your back, lift with your legs, keeping the car seat close to your body. This ensures better weight distribution and reduces strain on your back.
9. Teamwork
If you’re not alone, having one person carry the car seat is often easier while the other focuses on additional tasks. Coordination can make all the difference.
What Are Some Other Ways to Carry a Car Seat?
Navigating the world with an infant car seat can sometimes feel like an Olympic sport, especially when trying to simultaneously manage other tasks or kids. While traditional car seat-carrying methods are practical and famous, they might only suit some people’s needs. You may have back issues, or you’re looking for a more convenient setup for quick errands. If you find yourself pondering alternative solutions, we have a couple of out-of-the-box ideas that might make your life a little easier.
1. Car Seat in Centre
Let’s step back and reconsider where we place the car seat in the car itself. Positioning the car seat in the centre of the back seat (1) can make the lifting process less strenuous. You don’t have to lean over as much, which is easier on your back. Additionally, this is often considered the safest spot for your child in case of an accident.
2. Using Baby Carrier
If you have a baby carrier, why not use it? Depending on the carrier’s design and your child’s age, place your child in the carrier on your front or back. Now, your hands can carry the car seat by the handle. This is especially helpful for short trips where bringing the car seat might be necessary, but holding it with a baby inside becomes cumbersome.
What Mistakes Are You Doing While Holding Baby Car Seat?
People make minor but critical mistakes when learning how to hold a car seat. Here are some of the most common errors you should avoid:
1. Bad Posture: Slouching or bending can cause back and shoulder pain. Always maintain good posture.
2. One-Hand Hold: Holding the car seat with one hand can be risky, especially when you have other things to carry.
3. Overloading: Don’t place heavy items on the car seat, as this can cause it to tip over or make it difficult to carry.
4. Ignoring Safety Locks: Always lock the car seat handle before lifting.
5. Speed: Rushing can lead to accidents. Take your time, especially when navigating through stairs or crowded places.
Learning how to carry an infant car seat correctly can make your life easier and keep your little one safe. There are numerous ways to carry a car seat comfortably, from using the Classic Elbow Hook to integrating the car seat into a stroller. Always prioritise safety, be aware of common mistakes, and adjust your methods to suit your circumstances. Safe travels and happy parenting!
References/Resources:
1. Car Seat Safety; Nemours KidsHealth; https://kidshealth.org/en/parents/auto-baby-toddler.html
Also Read:
Infant Car Seat Safety
How to Put Car Seat in Shopping Cart
Read more

Should You Use a Humidifier for Baby’s Room? Benefits and Safety Tips
When it comes to equipping your baby’s nursery, you want everything to be the best to ensure your baby feels comfortable and safe. Be it a crib, bassinet, rocker, lights, or other essential items, you may want it all, but one basic requirement that often gets overlooked is a humidifier for baby’s room. This article covers salient points about using humidifiers for babies, including why you should consider buying a humidifier for your baby, what its benefits are, what safety measures you should follow, and various related topics. A humidifier can help maintain optimal moisture levels, which is especially important for your baby’s delicate skin and respiratory health. Read further to know more about how a humidifier can make a difference in your baby’s comfort and well-being!
What Are Humidifiers?
A humidifier is a machine which is specially designed to add moisture to the air in your room. The main aim of a humidifier is to combat dry weather conditions by introducing moisture into the surroundings (1). There are various kinds of humidifiers available in the market that helps in achieving the same purpose, and you can pick and choose the best humidifier for your baby as per your requirements.
Are Humidifiers Good for Babies?
Humidifiers can be good for babies when used properly, as they help maintain comfortable humidity levels in the room, which can ease dryness in the air and soothe your baby’s skin and nasal passages. Always consult your pediatrician if you have concerns about using a humidifier, especially if your baby has allergies or respiratory issues.
Humidifier Benefits for Infants
If your home is too dry, it is a good idea to place a humidifier for your newborn. Here are some benefits of a humidifier for your baby’s room (2):
1. Helps in Reducing the Chances of Recurrent Infections
Excess amounts of dryness may lead to drying your baby’s mucous membrane. Humidifiers are beneficial in restoring the moisture balance of the mucous membrane. Whenever any kind of bacteria or virus attacks your baby’s respiratory tract, the moist mucous membrane in your baby’s throat prevents it from entering your baby’s body and also helps it in expelling from the body. This keeps your baby safe from recurrent bouts of infections and diseases.
2. Helps Keep the Skin Moist
Dry weather conditions and even extreme cold weather can lead to dry and parched skin. This condition can be very uncomfortable for your little munchkin. However, using a humidifier may come in handy by getting the required moisture in the air and keeping skin dryness at bay.
3. Helps in Preventing the Sinuses From Drying Out
Extreme dry weather conditions or excessive cold can cause inflammation and pain in your baby’s sinuses. This can be extremely difficult for your baby and make him irritable and cranky. Using a humidifier can help in keeping your baby’s sinuses healthy and moist and thus help in preventing the condition.
4. Helps in Reducing Allergens
Using humidifiers is also beneficial in keeping various kinds of allergens at bay. The allergens that can result from moulds, bacteria, animal dandruff, pollens, and dust can make your home unhealthy for your little one. However, humidifiers can help in reducing the growth of these allergens by making the atmosphere difficult for them to thrive.
5. Helps in Reducing Asthma and Cold Symptoms
Asthma is a condition that is characterised by inflamed airways, which makes breathing difficult. If your baby suffers from this condition, then dry weather conditions or extreme cold can take a toll on your baby’s condition. Humidifiers keep the respiratory tract moist, in turn keeping your baby’s cough and breathing difficulties at bay.
6. Helps in Reducing Snoring
Sometimes, your little bundle of joy may snore while sleeping, there is nothing to worry about because this may occur due to disrupted breathing. Disrupted breathing usually occurs because of congestion or cold. However, using humidifiers for babies with colds or using humidifiers for congestion in babies can yield beneficial results.
7. Prevents Nosebleeds
Dry air can cause the delicate blood vessels in your baby’s nose to crack, leading to nosebleeds. A humidifier adds moisture to the air, reducing the risk of this uncomfortable issue.
How Do Humidifiers Work?
Before you pick up a humidifier or if you wish to know how to use humidifiers for babies, it is important to understand what all options are available for you before you get one. Well, humidifiers can be broadly classified into two main categories, warm humidifiers and cold humidifiers. Let’s know about them in detail in the following sections (3):
1. Warm Humidifiers
These kinds of humidifiers come with an in-built heating element. This element helps in emitting warm mist into the air. Most of the time, you may be prescribed by your baby’s doctor to place a warm humidifier in your baby’s room. The warm mist is not only good for killing germs and viruses, but it also aids comfortable breathing for your baby by reducing mucus build-up. These kinds of humidifiers are great for opening up a baby’s respiratory passage.
2. Cool Humidifiers
As the name suggests, these kinds of humidifiers emit cold mist into the air for added moisture. These kinds of humidifiers do not come with heating elements. Your doctor may suggest cool mist humidifiers for babies if your baby has begun crawling or walking. This is because cool humidifiers do not get heated up and are safer for babies in case they touch them. That is why the American Academy of Pediatrics (AAP) also recommends the use of a cool mist humidifier.
You can pick up any humidifier because, ultimately, both are designed to add moisture to the air, with the only difference of cool and warm mist.
What Types of Humidifiers Are Good for Babies?
There are three main kinds of humidifiers that you can pick up for your baby’s room:
1. In-Duct Humidifier
You can install these humidifiers, and they will humidify the air of your whole house. These humidifiers are installed directly into the air ducts of your home. This may burn a big hole in your pocket, but it is very low on maintenance and keeps the air moist in all parts of the house.
2. Console Humidifier
These are large humidifiers that are not installed right into the air ducts, but these consoles are massive, and they have the capability of humidifying the entire house. There are various models in this variety, and each may be able to carry different loads of water. Usually, these consoles may store up to 5 to 9 gallons of water in one go.
3. Tabletop Humidifier
This is the most compact kind of humidifier and is a widely used option of air humidifiers for babies or for a baby’s nursery. These small units are easy to place and carry, which means they can be moved to any room and can be placed anywhere. However, the only drawback is that these kinds of humidifiers only humidify the room they are placed in.
Where to Place Humidifier for Baby
The ideal spot for a vaporizer is at a distance where the mist doesn’t directly reach the bed or your baby, so positioning it at least 6 feet away is recommended. Additionally, it’s essential to secure the cord safely out of reach to prevent your child from pulling on it and potentially knocking the device over. A good solution is to place the humidifier on a dresser located across the room from the crib and hide the cord behind the furniture to minimize both risks.
Precautions to Take While Using a Humidifier in Your Child’s Room
If you are wondering, are humidifiers safe for babies? Well, they are very safe. However, you also need to exercise caution. Here are some precautions that you must exercise before placing humidifiers for a newborn baby or using it in your child’s room (4):
Warm humidifiers emit warm mist, which can be a potential risk to a small baby if it comes in direct contact with the humidifier or touches the hot surface. Therefore, extra care must be taken while placing a humidifier to avoid any mishaps, more importantly, away from places where children can reach.
Make sure cleaning and care instructions are diligently followed as per the manufacturer’s directions because mould, germs, or bacteria build-up takes only 48 hours to surface. Humidifiers must be cleaned frequently to prevent any kind of infestation.
It is also important to let the units dry completely. This is a great way of reducing the chances of germs, mould or bacteria build-up, and it is also good for the durability of the unit.
The kind of water used in the humidifier also requires your attention. Sometimes tap water may contain certain kinds of mineral fragments, which your baby may inhale too. It is always a sensible idea to use distilled water in the humidifier. This is not only safe for your baby, but it is also good for maintaining the unit.
If the humidifier contains a tank to store water, do not let the water in the tank stay there for an extended period of time. Change the water frequently, and keep the tank clean.
If you are thinking of installing a humidifier in your baby’s room, make sure you take note of all the precautions mentioned above.
FAQs
1. Is it safe to use essential oils in a humidifier for babies?
No, it is not recommended to use essential oils in a humidifier for babies. Many essential oils can be too strong for a baby’s sensitive respiratory system and may cause irritation or allergic reactions. Always use the humidifier as intended, with plain water, unless specified otherwise by the manufacturer.
2. Can a humidifier replace a nebulizer for babies with respiratory issues?
No, a humidifier cannot replace a nebulizer. While a humidifier adds moisture to the air and can ease mild congestion, a nebulizer is a medical device designed to deliver medication directly into the lungs. If your baby has respiratory issues, always follow your pediatrician’s advice and use the prescribed treatments.
This was all about humidifier and infants. If you live in a city with extreme climates, such as extreme dryness or cold weather, installing a humidifier can be of great help. A humidifier may help in reducing the chances of colds in your baby, and your baby may also get some peaceful sleep. If you are unsure about which one to pick up, you can discuss it with your paediatrician.
References/Resources:
1. Mayo Clinic – Humidifiers: Ease skin, breathing symptoms
2. The Sleep Foundation – Humidifiers and Sleep
3. Mayo Clinic – Warm-mist versus cool-mist humidifier: Which is better for a cold?
4. EPA United StatesEnvironmental Protection Agency – Use and Care of Home Humidifiers
Also Read:
Baby Fever
Bacterial Infection in Babies
Low Body Temperature in Babies
Effective Home Remedies for Cold & Cough in Babies
Ideal Room Temperature for Newborn and Tips to Follow
Read more
3 Common Things Babies Can Put in Their Mouths and What You Can Do About It
If you have a child up to the age of two, you will know that everything around you can find its way into your baby’s mouth! As babies grow, they try to make the best use of their hands and mouth to feel objects. Their obsession with putting things in their mouth should be kept in mind by parents.
Why Do Babies Put Things in Their Mouths?
To explore their surroundings, babies start putting objects in their mouths after seven months. They usually start by putting their fists and feet in their mouth and then move on to grabbing, poking, shoving, and patting things as they explore their surroundings. This exercise helps children assess things and strengthens their oral muscles.
It is also the time when their teeth begin to pop out. Teething is one of the reasons for your baby trying to taste every possible thing. When children begin teething, it can be uncomfortable for them. This phase can be accompanied by sore gums, cranky behaviour, and the urge to chew on things, like, toys, clothing, hands, etc.
With this urge to chew on things, there comes the fear of choking hazards and germs getting into a baby’s mouth.
3 Common Things Babies Can Put in Their Mouths
Here are a few things that your child can swallow if left unattended and what steps you can take to avoid such situations.
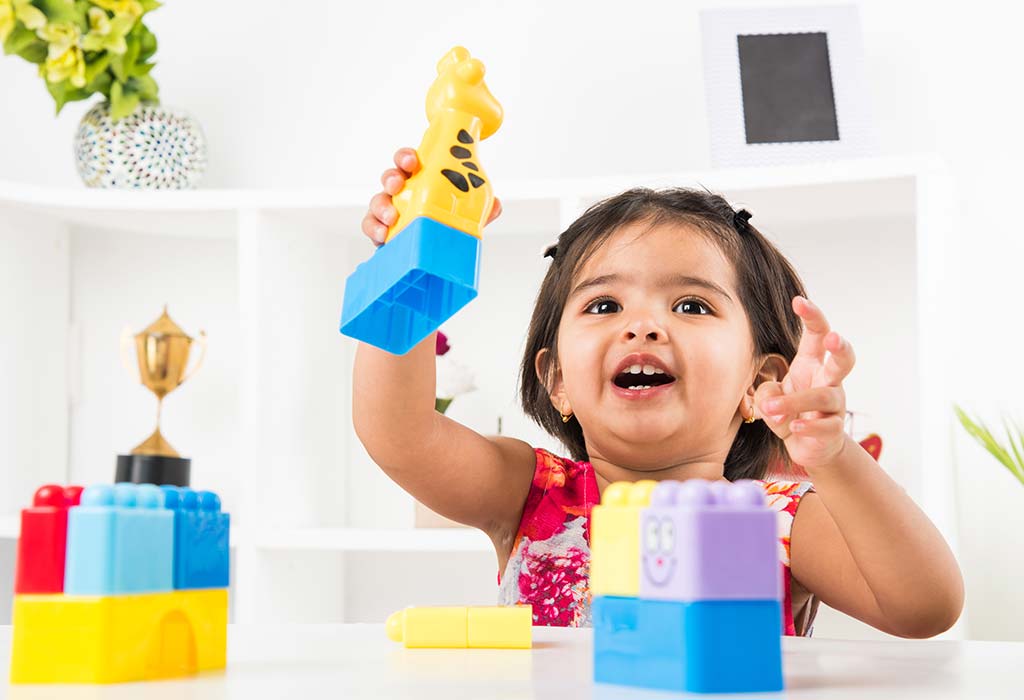
1. Small Toys
You would often find your child putting his toys first thing in his mouth when you give him the toys to play with. Small colourful toys or parts of toys that are small can be mouthed by your baby if left unattended.
What to Do: Make sure that small toys and easily detachable toy parts that can be swallowed are not given to children aged two and below.
2. Plants
A lot of people keep indoor plants in their houses for aesthetics and clean air. But there are some plants that can be poisonous for babies despite being perfect for decoration purposes.
Old leaves or seeds of such plants could fall on the floor and be swallowed by your baby.
What to Do: Get rid of any wild houseplant that can be harmful to your little one by consulting your nearest nursery.
3. Cleaning Supplies
Cleaning supplies and detergents come with fragrances and bright colours. Babies often confuse them with juice or eatable items and try to put them in their mouths or spill them on their hands.
What to Do: It is important to keep chemical products out of your child’s reach in locked spaces.
How to Take Care of Teething Urges and Oral Hygiene of the Baby
1. Rub Your Baby’s Gums
You can gently rub your baby’s gums with a clean and moist cloth, a clean finger, or a cold spoon to reduce some pain in sore gums.
2. Give Him a Teether
Chewing on a clean teether can be soothing for your child’s gums. You must look for a good quality teether that is made of high-quality solid rubber. Teethers that are made of plastic, metals, or liquid-filled teether rings should be avoided as they could harm your baby.
3. Let Him Chew on Cold Things
A cold pacifier also helps children relieve sore gums as they chew on it. You can also give your child some cold sliced fruits to eat if he is in the stage of eating solids. This will not only provide him with nutrition but also reduce the pain.
4. Use Quality Dental Hygiene Products
Brushing from the first tooth is important. Parents often feel that brushing with just water is enough, But you can consult a dentist to learn that usage of toothpaste is essential for effective cleaning.
You can use a baby-safe toothpaste of the size of a rice grain to remove plaque. For example, Colgate Kids 0-2 Yrs toothpaste is designed to be super gentle on your baby’s tender teeth. It has no artificial preservatives or colours or flavours. It is fluoride and SLS free.
Once your child starts chewing on solids, you can introduce Colgate Kids 2-5 Yrs toothpaste, which is designed to protect milk teeth from cavities.
If you wish to know more about Colgate Kids Oral Care Range, view them here.
Disclaimer: This article is intended to promote understanding of and knowledge about general oral health topics for children. It is not intended to be a substitute for professional advice, diagnosis or treatment. Always seek the advice of your dentist or other qualified healthcare providers with any questions you may have regarding a medical condition or treatment.
Read more
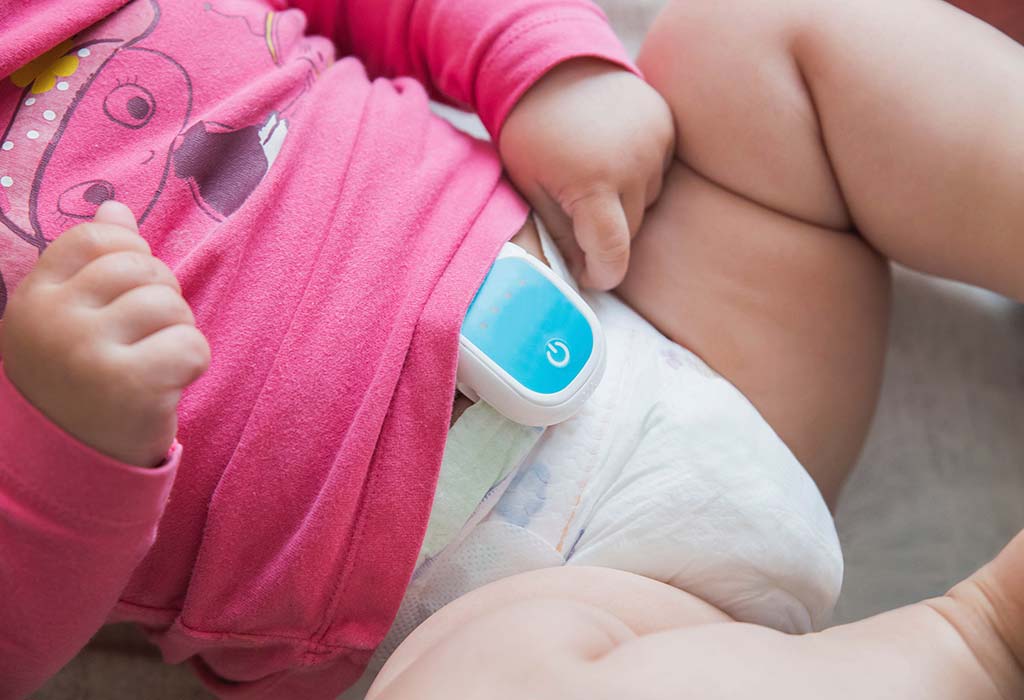
Apnea Monitor – Benefits, Risks and Safety Tips
The apnea monitor for infants is a non-invasive, portable device that can detect and alert patients to apnea. The monitoring system is connected to a wearable computer. It records the time since the patient last breathed and can send alerts to a medical professional in the event of apnea. It also provides additional information on the device and its use, such as the number of wake-ups during sleep. To know its benefits, risks, and safety tips, keep reading the article.
What Is an Apnea Monitor?
An apnea monitor for preemies is a wearable device that tracks your baby’s heartbeat and oxygen levels. There are several apnea monitors, including ones for babies and adults. Most of these devices are connected to your baby’s feet and can be used by adults and children. These wearable trackers are designed to monitor your baby’s health and help prevent apnea in both types of patients.
Why There Is a Need of Sids Monitor for Your Baby?
Although expensive, physicians and scientists feel these gadgets are necessary for SIDS prevention. In addition, researchers have noticed that high-risk neonates’ respiration is not always impeded. The monitoring equipment cannot distinguish high-risk kids from low-risk kids, and a different monitoring system may be wiser. Reasons to get a SIDS sleep apnea monitor for home usage for your infant include the following.
1. Your Infant Kid Was Born Prematurely
An infant born before 37 weeks has a greater risk of experiencing apnea. Apnea is often characterized as a period of shallow or no breathing. When your infant’s breathing is interrupted, their heart rate may slow.
2. Your Child Had a Short Inexplicable Experience (BRUE)
A BRUE happens when your baby’s respiration suddenly ceases, and they remain unresponsive.
3. Your Newborn’s Sibling Passed Away Due to Sudden Infant Death Syndrome (SIDS)
SIDS is described as the untimely death of a sleeping newborn under one year; however, nobody is sure about the reason for such deaths.
Benefits of Apnea Monitor
If your kid has sleep apnea, you may want to consider purchasing a baby apnea monitor. Some of the benefits of cardiac apnea monitor are:
The Device Will Notify You: It is critical to monitor your baby’s heart and breathing rates if they have apnea. The gadget will sound an alert if your baby’s heart rate falls below a certain level or if your youngster has a lengthy period of respiratory stoppage. This monitor is essential since it enables you to check your baby’s breathing and heart rate continuously. The alert can notify you when your newborn is experiencing apnea, which may help you avoid a problem.
Help You Identify Apneic Children: The monitoring equipment may assist you in determining whether or not your child is apneic. The monitor will warn you when your baby stops breathing, which is the most visible indicator of apnea. This monitor is also helpful for detecting variations in heart rate. It may assist you in preventing sleep apnea in your kid by providing critical information. Apnea is quite frequent in toddlers, and any newborn might develop apnea.
Detects Variations in Heart Rate and Breathing: “What does an apnea monitor detect?” Yet another benefit of employing an apnea monitor is that it can detect changes in heart rate and breathing patterns. Additionally, it aids in determining the kind of apnea your infant has. Apnea is classified into two primary types: central obstructive and mixed. Selecting the appropriate monitor for your kid will help avoid overdiagnosis and even save their life.
Assist Avoid Overdiagnosis: Apart from ensuring safety, a baby monitor may also prevent overdiagnosis. Overdiagnosis arises in the case of apnea when an exact discovery of a problem is not beneficial to the patient. A single false alert may set off a chain of events. For example, a parent may get panicked when the low pulse oximetry alert on a consumer apnea monitor sounds. Inadequate interpretation of this data may jeopardize the kid and result in excessive expenses.
Risk of Apnea Monitor
A possible consequence is skin pain caused by the electrodes linked to your baby’s skin, and this is not a significant worry in light of the project’s setting. Unless your apnea monitor is fitted with a backup battery, it is conceivable that it will not operate if you lose power or encounter other electrical difficulties.
Consult your home health care provider to see if your monitor has a battery backup system. If this is the case, you must understand how to maintain a constant charge on the battery.
How to Use an Apnea Monitor?
When a home health care company comes to your home to teach you how to operate a monitor, the authorities deem it an emergency. They will help you as long as you use the computer monitor. If you encounter difficulties with the monitor, you should contact the manufacturer.
Follow these procedures to make use of the SIDS prevention monitor:
To use the electrode patches (also known as stick-on patches) or the belt, you must place them on your baby’s chest or stomach.
The connectors connect the cords from the electrodes to the computer display.
Turn on the computer monitor and keyboard.
Safety Tips While Using Apnea Monitor for Baby
Despite the benefits of the device, you need to exercise precaution when using it. So, keep the below things in mind:
Applying powders or lotions to your baby’s skin before attaching the monitor is not recommended. These will interfere with the sensors’ ability to perform their functions appropriately.
If any sticky pads are on display, they should be removed and replaced. In general, you should not change these sticky pads more often than recommended by the service provider.
Your contact may cause the skin of your baby to become irritated.
Baby’s Skincare While Using SIDS Monitor
When using a SIDS monitor, you must take further care to preserve your baby’s sensitive skin. When using a SIDS monitor, there are many different types of skincare.
Apply a mild moisturizer to your baby’s skin before putting them to sleep.
The second kind is to abstain from using lotions or creams before bed.
To prevent suffocation, ensure that your newborn sleeps on its back on a firm mattress.
Keep pillows, blankets, and soft animals out of the crib.
Avoid applying lotions or powders to your baby’s skin before connecting the monitor. These will block the sensors from functioning properly.
Remove any adhesive pads from the display and replace them as directed by the manufacturer. You should not change sticky pads more often than recommended by the service provider since you risk inflaming your baby’s skin.
How Long Will Baby Stay On SIDS Monitor?
The frequency with which actual warnings are heard determines how long your kid will be on the monitor at any one moment. Real-time notifications notify you if your baby’s heart rate is not steady or if they are having difficulties breathing for any reason.
It is conceivable that the alarm may activate if your baby moves throughout the night. However, it is conceivable that the baby’s heart rate and breathing are within normal ranges. Because your kid is moving about, you shouldn’t be anxious about alarms going off in your house.
Babies are often required to wear a home apnea monitor for 2 to 3 months before being released from the hospital. You should discuss how long your baby will need to be observed with your infant’s healthcare provider.
What You Should Do If SIDS Monitor Alarm Sounds?
Taking prompt action when the alarm sounds are crucial. However, make sure to keep the below process in mind when taking any action:
Take a glance at your baby every time the monitor alarm goes off. A slack belt or sticky pad might cause a false alarm in some instances.
A low battery might potentially cause a false alarm to be sounded. Monitor your child to ensure they are securely attached and fully charged battery.
If your baby’s breathing has stopped, remain calm. Keep in mind that your baby’s doctor has supplied you with detailed instructions on caring for your child.
The provider may urge you to gently massage your baby’s back, arms, and legs to persuade them to breathe.
Do not shake your youngster at all. There is a chance that this might cause permanent brain damage.
To restart the monitor, hit the reset button as soon as your baby starts to breathe.
Suppose your infant does not begin to breathe after you have followed all of the instructions, do CPR on them. Immediately dial 911.
When to Call a Doctor
In emergencies, it is best to call for professional help. So, if you observe any of the following situations, call for your doctor:
If a patient suspects they have sleep apnea, they should consult a doctor right once.
Even if it isn’t essential, wearing a tracker before the appointment may help you provide the doctor with valuable information.
The same will detect how often apnea happens and its impact on the quality of rest.
You may get information about your breathing patterns as you sleep with the help of an apnea monitor. Monitors keep track of things like breathing rates, blood oxygen levels, and heart rates, among other things. This includes checking their body temperature and whether or not they’ve fallen backwards onto their tummies. In terms of pricing, these monitors come in several configurations and sizes. It’s vital to choose a device suitable for the user’s needs in every way, including how comfortable it is. Anyone who has any reason to believe they may be affected by sleep apnea should consult a doctor right away.
Also Read:
How to Choose a Baby Monitor
Apnea of Prematurity in Babies
Checking Your Newborn Breathing
Read more
Babies & Watching TV: Is It Safe?
Watching TV may be entertaining, but is watching tv suitable for babies? Too much watching TV harms the babies’ health. Because infants like seeing vivid colors, don’t force them to watch one station after another as you watch TV. Instead, begin with a single member of the family and work your way up.
Too much television, according to research, may have several harmful consequences, including stunted brain development, diminished brain stimulation, learning difficulties, restless sleep, nightmares, and a lack of focus. Furthermore, relations between babies watching TV and autism may also be present, further presenting reasons for you to keep them away. Keep reading for some safety tips to keep yourself and your children safe when you’re binge-watching TV.
How Safe Is It for Babies to Watch TV?
According to the American Academy of Pediatrics, children under 18 months of age should not watch television (1). While many parents understand that watching TV is bad for their children, the majority are unaware of the negative impact that television can have on young children, especially when music is playing in the background. Babies’ ability to recognize and control their dissatisfaction is impaired as a consequence of extended screen exposure. It also diverts kids from activities that benefit their mental capability, such as exploring and interacting with other children.
What Is the Right Age for Babies to Watch TV?
So, when can babies watch TV? As parents, the question, ‘when is TV viewing safe for babies?’ must be daunting to you quite often. Several studies have found that watching television before 18 months has a long-term negative impact on children’s language development, reading abilities, and short-term memory. As a result, sleep and concentration issues are exacerbated.
What Can Be the Effects of Watching TV on Babies?
Many parents are pleased that various TV programs serve as excellent babysitters and keep children busy while their parents are at work. Parents who watch these programs with their children do not feel bad since they provide ‘quality time’ for their children. But are TV screens bad for babies? Indeed, there is a possibility that the effects of watching TV might be harmful to babies. Check out these effects of TV on infants.
1. Hampers Brain Development
Babies gain nothing from watching TV because they are too young to understand what they see. They like the bright and colorful images but can’t connect them to real-life objects. For example, if they see a toy on TV that they already have, they won’t realize it’s the same toy.
Newborns watching TV regularly can make the babies pay more attention to the screen than to real life, which can affect their brain development. Research shows that TV offers no learning benefits for babies, so there’s no reason for them to watch it (2). Another example is when your kid grins at the television, the television does not reciprocate by smiling back. As a consequence, he may suffer damage to his social and psychological well-being.
2. Lose Chances of Social Interaction
Playing is an excellent method for your child to get acquainted with their environment. He learns how to connect his brain via cause-and-effect experiments. Each time your child interacts with another individual, a developmental milestone is achieved. Your child will lose out on these changes if they are hooked to the screen (3).
3. Impacts Baby’s Communication Skills
Watching TV or listening to music won’t help a baby learn to speak. Babies need interaction and attention from adults to develop communication skills. Ignoring a child’s attempts to communicate can cause them to miss important developmental milestones (4). Listening to cartoon characters speaking in babyish tones does not aid in language development. Instead, children learn to communicate by imitating the speech patterns of adults around them. Additionally, prolonged TV viewing can harm children’s ability to communicate effectively through reading and writing and may lead to concentration and learning difficulties over time.
4. Disrupts Healthy Eating Patterns
Watching TV can disrupt healthy eating patterns (5). Eating while watching TV can prevent the brain from recognizing fullness, leading to overeating. Conversely, some children may eat less due to the distraction of television. Although specific studies on babies are lacking, similar effects might occur, particularly in older babies who eat more solid foods. Over time, this can contribute to malnutrition, either through overeating or undereating.
5. Hampers Healthy Vision Development
Children blink less frequently than adults when watching TV, leading to eye strain, redness, and blurred vision. Constant focus on nearby TV images can make it challenging for a child’s eyes to adjust to distant objects, taking hours to re-focus. Regular TV viewing can worsen short-term eye issues and may increase the likelihood of developing myopia (nearsightedness) early in life, necessitating prescription glasses. According to the CDC, a significant percentage of children aged 2-17 spend more than two hours on screens daily, with 65.7% of boys and 64.6% of girls affected (6).
6. Interferes With Sleep Quality and Routines
Regular TV watching can disrupt a baby’s sleep patterns and bedtime routine, especially if done in the evening. It may reduce nighttime sleep hours as stimulating TV content can keep the brain active even after turning off the TV. Additionally, blue light emitted from TV screens can suppress melatonin production, a hormone crucial for regulating the sleep-wake cycle (7).
7. Misguiding Programs
Most children’s programs and films teach kids incorrect skills due to their target audience. They misrepresent the problem by depicting reality in an exaggerated and cartoonish manner.
Other Alternatives to TV Watching For Babies
While television does not harm children in and of itself, you may have heard many people questioning, “Is watching TV bad for babies?” The answer would be that excessive viewing is bad and may result in sedentary habits and a lack of exposure to various educational possibilities. Children should be exposed to a range of experiences frequently to ensure a well-rounded upbringing. When you include healthful activities into your child’s daily routine, they will acquire a broader range of skills, talents, and experiences than they would without.
When youngsters engage in a variety of activities, they develop into more well-rounded and balanced individuals. Keep a note of the following alternatives to keep babies engaged (8):
1. You May Use Chalk or Paint to Sketch on the Sidewalk
Prepare a colorful box of sidewalk chalk or paint for the children to enjoy on bright, sunny days. Drawing drawings, forming shapes, and writing numbers and letters with your kid may be a lot of fun. You might arrange a playdate with friends or participate in creative activities with your kid . Maintain a record of your child’s accomplishments and share them with family and friends.
2. Helping in Some Manner in the Kitchen
Bring your kid along and allow them to help you with the cooking process. You may also engage them to aid in measuring, mixing, and stirring. Even little children are capable of washing fruits and vegetables and assembling meals in novel ways. It is essential to teach youngsters about nutrition so they may develop a more holistic view of health. When children assist in the kitchen, they develop essential skills such as counting and measuring. Cleaning, rearranging, and mixing things may help youngsters develop their motor skills and teach them critical cooperative qualities.
3. Read
Allow your kid the time and space to study books and periodicals alone or read with them. Choose picture books with big, vibrant pictures to pique your child’s interest in the story. Even if you just read a book for a few minutes a day, you will enhance your child’s growth. Every age group may benefit from reading’s joy, involvement, and security.
4. Engage in Some Physical Exercise and Spend Some Time Outdoors
Toys in the yard, biking, walking, and playing with friends are all enjoyable ways for your kid to get some exercise while enjoying the outdoors. Here are a few suggestions to help you get some fresh air and exercise:
Visit the park and engage in some barbecuing.
Take a walk in the woodland.
Take them along to discover nature in your backyard or on a path.
Visit a zoo or another location where animals are free to wander.
Participate at the playground or park in your area.
Acquire expertise in one of the following activities: fishing, swimming, or snorkeling.
Sandboxing and sandcastle construction are popular hobbies.
It is essential to develop athletic skills via participation in sports or other activities (like throwing and catching)
5. Create a Drawing or a Painting
Additionally, you’ll need a paper or a canvas on which to create your masterpiece. Allow your kid to express themselves artistically via paintings, drawings, and written words. Additionally, they may construct their birthday and holiday cards by hand.
6. Perform Some Kind of Music
Set the tone by playing music and allowing your kid to relax and absorb everything. It’s critical to include a range of musical styles, including classics, dynamic rhythms, and ambient sounds. Play an instrument in front of your kid for a more satisfying musical and family experience. Music listening has been shown to benefit children’s brain development, particularly in pattern recognition and rhythm.
7. Create Something Entirely From Scratch
Your kid may construct structures out of various items, including forts, homes, spacecraft, pillows, and even a deck of cards or a snowball. When your kid creates anything, they will learn the following:
Strengthen their motor and coordination capabilities.
Increase their self-esteem and ability for creative thinking.
Examine the impact of combining and matching different shapes and sizes.
Enhance your motor abilities by experimenting with various activities.
Collaborate with other children
Tips for Safe TV Viewing for Babies
Due to the abundance of content on television that is inappropriate for children to watch, parents must choose appropriate programs for their children to watch. While a baby may like watching tv, it is not something they should do until they are old enough to understand the dangers. Parents need to be vigilant for these kinds of hazards. Otherwise, their child may have difficulty sleeping and end up roaming.
So, is it ok for baby to watch TV? The following are some tips on how to watch television with your baby safely:
Keep an Eye on Children When They Are Watching Television: The activity may be as easy as playing an educational game or as involved as discussing something you both saw on television or in an age-appropriate film.
Conduct Research Before Purchasing Games or Applications for Your Kid: While many applications and games advertise themselves as educational, the reality is that this is not always the case.
Conduct an Online Search: This is to see which ones educators and physicians believe are the finest. If possible, review the material before exposing your kid to it.
Schedule Enough Time in Your Child’s Daily Routine: Scheduled daily exercise will assist them in interacting with people and things other than screens. Without enjoyment, it is impossible to learn or develop as a creative person. Encourage your kid to engage in regular physical activity as well.
You Should Turn Off All Screens During Meals and an Hour Before Sleep: During mealtimes and at least an hour before bedtime, you should switch all screens off. It would be best to keep electrical devices such as televisions and other gadgets out of the bedroom.
Avoid Becoming a Poor Role Model: Avoid becoming a flawed role model for others; instead, be a positive one. When not in use, turn off all screens, including televisions. Never leave a screen on when you are with your kid, and turn off your phone when you are not. This may have a detrimental effect on both your relationships and your child’s leisure time.
FAQs
1. Is background TV harmful to babies?
Yes, background TV can be harmful. Even if a baby is not actively watching, the noise and movement can distract them from play and learning activities, potentially impacting cognitive development.
2. Are educational programs beneficial for babies?
While educational programs are designed to be beneficial, babies under two years old do not gain significant learning from them. Personal interaction with caregivers is far more effective for their cognitive and social development.
3. How does watching TV affect a baby’s physical health?
Watching TV can contribute to sedentary behavior in babies, leading to potential physical health issues such as poor motor skill development and an increased risk of obesity. Babies need active play and movement to develop their physical abilities and overall health.
This was all about babies and TV. If you’re a parent who wants to keep these safety guidelines and tips close at hand so that your baby can watch television in a relaxed and secure environment, this article is for you. So, before allowing your baby to watch TV for an extended time, keep these safety precautions impact of watching TV on babies and guidelines in mind.
References/Resources:
1. Why to Avoid TV for Infants & Toddlers; American Academy of Pediatrics; https://www.healthychildren.org/English/family-life/Media/Pages/Why-to-Avoid-TV-Before-Age-2.aspx
2. Schmidt. M, Rich. M, ifas-Shiman. S, Oken. M, Taveras. E; Television Viewing in Infancy and Child Cognition at 3 Years of Age in a US Cohort (Pediatrics); National Library of Medicine; https://www.ncbi.nlm.nih.gov/pmc/articles/PMC4042392/; June 2014
3. Kim. S, Wi. D, Kim. K; Effect of Media Exposure on Social Development in Children (Global Pediatric Health); Sage Journals; https://journals.sagepub.com/doi/10.1177/2333794X231159224; March 2023
4. Byeon. H, Hong. S; Relationship between Television Viewing and Language Delay in Toddlers: Evidence from a Korea National Cross-Sectional Survey (PLoS One); National Library of Medicine; https://www.ncbi.nlm.nih.gov/pmc/articles/PMC4365020/; March 2015
5. Probing Question: Does eating while watching TV harm kids?; Penn State University; https://www.psu.edu/news/research/story/probing-question-does-eating-while-watching-tv-harm-kids/
6. QuickStats: Percentage* of Children† Aged 2–17 Years With >2 Hours of Screen Time Per Weekday,by Sex and Age Group — National Health Interview Survey, United States, 2020 (Morbidity and Mortality Weekly Report); CDC; https://www.cdc.gov/mmwr/volumes/71/wr/mm7103a6.htm
7. Helm. A, Spencer. R; Television use and its effects on sleep in early childhood (Sleep Health); Science Direct; https://www.sciencedirect.com/science/article/abs/pii/S2352721819300580; June 2019
8. 21 learning activities for babies and toddlers; UNICEF Parenting; https://www.unicef.org/parenting/child-care/21-learning-activities-babies-and-toddlers
Also Read:
Best TV Shows for Infants
Ways to Control the Screen Time for Your Baby
Wonderful Ways to Keep Your Baby Safe and Protected
Read more
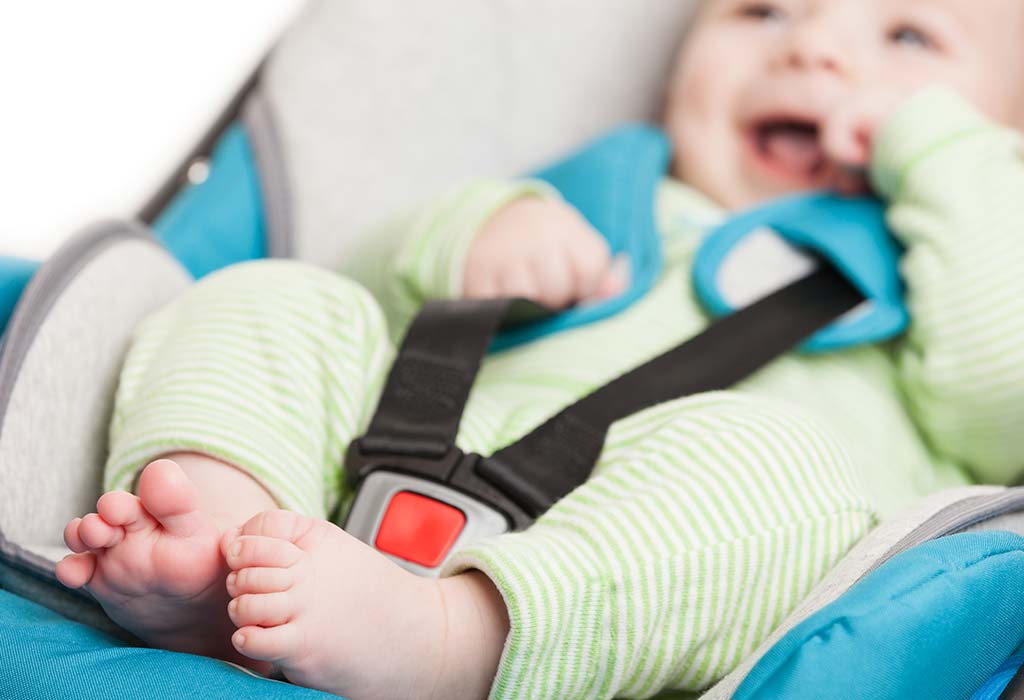
Baby Safety Month 2025 – History and Importance
Welcoming a new baby is an exciting time for every family. However, before the little one arrives home, it is important that the new parents thoroughly examine the environment the baby will be entering. Babies are naturally curious and experimental as they learn to use their minds and bodies, and it’s important to create an environment where they can experiment without danger.
In light of this, the Juvenile Products Manufacturers Association, or the JPMA, initiated Baby Safety Month to educate parents and caregivers on the importance of the safe use and selection of juvenile products. If this is your first baby, you might worry that you are not ready to take care of a newborn. But, rest assured, you’re not alone! There are certain steps you can take to help yourself get ready to welcome your baby home.
What Is Baby Safety Month?
Every September, the JPMA sponsors Baby Safety Month, which is a month-long event to raise consumer awareness about baby safety issues, and to educate parents on how to select the right baby products. The JPMA has been educating parents since 1983, when they launched ‘Expectant Mother’s Day.’ This day was later expanded into a week, and then a month, which came to be known as Safety Awareness Month.
When Is Baby Safety Month?
Baby Safety Month (BSM) takes place every September, and offers an excellent opportunity for parents and retailers to stay updated on the latest baby-proof safety standards and tips.
History of Baby Safety Month
Baby Safety Month was designed by the JPMA in 1983. It began with a single day celebrated as “Expectant Mother’s Day.” Then, In 1986, this day was expanded to a week commemorating baby safety.
In 1991, the week-long celebration officially extended to a month. Throughout the early 1990s, JMPA started involving more retailers in Baby Safety Month, and encouraged them to market their safest baby products during this time.
By 2005, information on baby safety became more accessible than ever, with the advent of the Internet.
Through the 2010s, JPMA started offering baby safety information, certifications, and toolkits, regarding the safety of the products used around kids, to parents and retailers.
Why Baby Safety Month Is Celebrated?
Baby Safety Month, or BSM, is celebrated primarily to:
Educate parents and caretakers on the importance of baby safety.
Help parents make an informed choice about safe baby products, and those that promote safety.
Help retailers and manufacturers of baby products stay updated with the latest baby-proof safety standards and technology.
How You Can Observe Baby Safety Month?
1. Invest in safe baby products
Research new products for your little one that meets all the necessary safety standards. Peace of mind knowing your baby is safe is invaluable.
2. Educate yourself
Once you have read up on what is safe or unsafe for your baby, conduct a thorough check to ensure your products and environment are safe to use.
3. Spread awareness on social media
You can use the hashtag #BabySafetyMonth in your social media posts to reach out to other parents or professionals who work with babies. Who knows? You may even help save a life with your post! Spreading awareness about this month is helpful for all the parents who are struggling to stay updated and to maintain a safe environment for their baby.
Things at Home That Can Be Hazardous to an Infant
According to the JPMA, here are the top 10 hidden hazards in the house:
1. Loose Change
Babies can easily swallow loose change. So keep these in a dish or jar out of reach of babies and toddlers.
2. Pot Handles
These are easy for a toddler to grab, leading to the pot tipping over and causing burns and injuries. Avoid carrying your child while cooking. If you must carry your child, stand far enough so that he is out of reach of the pan handle and oil splatter.
3. Tipovers of Electronics and Furniture
This is a leading cause of injury in children. Furniture straps are a great option to secure furniture to the wall.
4. Loose Rugs and Carpets
These are tripping hazards and can be taken care of with grip tape or a good underlay.
5. Cords
Cords are a strangulation hazard. They should be bound and kept far away from cribs. Take special care of blind cords from window treatments, computer and gadget chargers, home gym equipment, and baby monitors, as your child can easily access these.
6. Hot Mugs
These are easy to leave around unattended and forgotten about. Keep your mugs out of your child’s reach. You can invest in insulated coffee mugs that have secure lids to prevent spills.
7. Button Batteries
These tiny batteries are another serious ingestion hazard. If you suspect your baby has swallowed a button battery, you should seek medical attention at the earliest.
8. Cleaning Products
Detergent pods are particularly attractive to kids, leading the Centers for Disease Control and Prevention (CDC) to declare them an emerging public health hazard due to an increasing number of poisoning cases each year.
Also, the entire cleaning product category is poorly regulated. Most products are available in ‘fun’ spray bottles, with strong dyes and scents that can attract children to play with them and even consume them. Store cleaning products in a locked cabinet, and contact poison control if you suspect your child has ingested such a product.
9. Sharp Objects and Tools
Scissors, knives, gardening tools, and other sharp objects should be kept well out of reach or securely stored to prevent accidental injuries.
10. Pets’ Food and Water
While pets are part of the family, their food and water bowls can pose a choking hazard or lead to infections if an infant comes into contact with them.
Whether you’re expecting your first baby, are adding to your beautiful family, or are a grandparent, relative, or caretaker, now is the perfect time to put into action some simple steps to keep the baby safe. By following the guidelines given above, you can stay assured you are creating a safe environment for your baby to grow, learn, and play!
Also Read:
Easy and Unique DIY Baby Gate Ideas
Easy and Effective Tips to Baby Proof Fireplace
Parents Should Be Aware of While Putting a Car Seat on a Shopping Cart
Read more
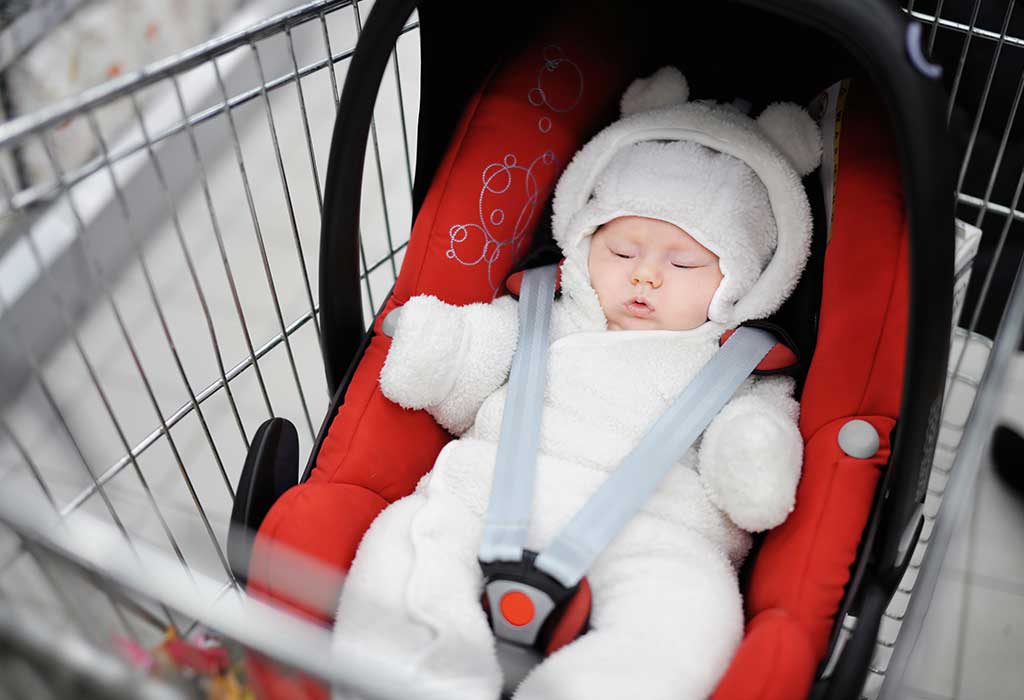
Things Parents Should Be Aware of While Putting a Car Seat on a Shopping Cart
Car seats for kids are not designed to be put into shopping carts. Although you may see other parents put their kids into shopping carts and stroll them around, it doesn’t mean they’re safe. If you look at the making of a baby’s car seat, you’ll realize that the centre of gravity gets affected. Shopping carts have a narrow base when compared to the height, and when you add a car seat to it, the centre of gravity shifts. This increases the risk of children falling or tipping over when mounted on them.
It is not advised to put a car seat in shopping carts due to safety issues. Here is more information on the risks and reasons why doing so may be unsafe.
Should You Put a Car Seat in a Shopping Cart?
There is no storage space underneath a shopping cart. However, there are also no safety devices like belts or locks for infant car seats. Most shopping carts come with a warning saying to buckle your kids onto the cart at all times. It’s a good idea to have a partner look after your child while you’re busy shopping.
Others could accidentally bump into the cart while you’re adding items, making the child topple over. That is why it’s never a great idea to shop with your child sitting in a car seat mounting to the shopping cart.
In short, no – you shouldn’t think of putting a car seat in a shopping cart.
Warnings Issued By Authorities Regarding Placing Car Seats in Shopping Carts
There are weight limits placed on each shopping cart and the reason is that they’re not designed to carry heavy weights. A warning is issued in most cases where the cart specifies the age and height limits it can carry. A vast number of carts don’t have safety measures put in place and a single bump could be dangerous for your child.
Most shopping cart manuals also tell parents not to place their kids in the cart. It’s mentioned in the instruction manual itself and infant car seats cannot sometimes click in place, which makes them insecure by default.
Risks of Putting a Baby’s Car Seat on the Shopping Cart
Here are the risks involved in putting a baby’s car seat on the shopping cart:
Car seats do not secure well in shopping carts. A bit of wind or gust could risk blowing away your child when left unattended.
There is the risk of other kids running around the grocery store or mall and bumping into your baby.
Other shoppers could accidentally bump into your cart.
Infant car seats do not mount properly into shopping carts because they don’t ‘click’ into place.
Alternatives to Placing a Car Seat on a Shopping Cart
Here are a few alternatives to putting a car seat in a shopping cart. If you’re worried about your child’s safety, these will come in handy.
1. Start Shopping Online
If the idea of placing your infant car seat in a shopping cart does not appeal to you, start shopping online or remotely.
2. Go for Shorter Trips
If you have a baby stroller with a lot of storage space underneath it, you can use it for shopping. Visit the mall or convenience store a few times a week and take shorter trips. It will save you money and make the experience hassle-free. Plus, you won’t even need a shopping cart that way.
3. Look for Built-In Child Seats
Most modern shopping carts have built-in child seats which are stable and well-balanced. These come with belts and straps to secure your child in place. Instead of getting a separate infant baby seat, look for shopping carts which feature built-in child seats instead.
4. Let Your Partner Tag Along
It’s a good practice to bring your partner along for shopping when you’re taking the baby with you. In case your attention slips, your partner can look after your child.
5. Use Docking Stations
There are docking stations designed to be used with shopping carts. It makes the transition from car to cart easier for kids and U.S. brands design them specifically for a safer and simpler shopping experience. Some safety docks come pre-installed with GPS tracking to help make locating the carts easier. Some U.S. stores install safety docking stations by default in their shopping carts. If you’re not sure, contact the store before visiting.
Safety Tips While Using a Shopping Cart with a Car Seat
Here are a few things to watch out for when using shopping carts with the car seat:
Check the expiry date – Look at the expiry date of the infant car seat before going for used car seats. If you’re buying a new car seat, it’s okay but be sure to inspect for signs of damages. Manufacturing defects could cause problems later down the line, so be sure to keep an eye out for that.
Review the features – If you’re absolutely determined to use an infant car seat for your shopping cart no matter what, do this – go for infant car seats with safety measures and locks built into them. You want attachments to secure the child to the cart and make sure their centre of gravity stays fixed to the cart.
Switch out with your partner – Don’t go shopping with your baby alone. Bring your partner along with you and go tag-team shopping. You can switch places with them while you’re adding items to the cart or looking around the grocery aisles.
Consider Using a Baby Carrier – You can strap your baby onto a baby carrier which is much safer than a car seat. The base is more stable and there’s no risk of falling over
Check the Registration – Go over the car seat’s registration and check to see if there’s a manufacturer’s warranty added to it. You don’t want a baby car seat that’s unreliable or comes from an unrequited seller. Look for reviews from other customers and see the testimonials if you’re planning to buy online. If you’re buying it from a physical store, you can ask for recommendations and test out the seats before making a purchase.
Avoid Using Them When You Can – There are studies that show that 1 in 10 babies get injured every year when using baby car seats in places other than cars. They’re not safe and can hurt kids when used outside cars. The American Academy of Pediatrics backs this with many evidence-based studies which is why it’s always best to use baby strollers instead of plugging the seats into shopping carts.
Getting an infant car seat for a shopping cart and taking your baby along on it may not be the best move. Hopefully, these tips will help you out. It’s always better to take your child in a stroller and go shopping. Hire a babysitter to look after the kids if you’re planning to go away for long hours and if your partner isn’t available. The safety and wellbeing of your child comes first.
Also Read:
What Is The Right Age For Your Child To Face Forward In A Car Seat?
Safety Tips While Using Car Seat
Types Of Child Car Seats And Its Restraints
Read more
Making a DIY Baby Gate at Home – Step-by-Step Guide
As your toddler gets older, there will come a point when you can no longer just babyproof the furniture or the décor; you’ll have to restrict access to some sections of the house. Baby gates are great to keep your baby in a safe area of the house; however, they can also be expensive if you need to cover more than one area of the house. The most economical way then would be to build a baby gate on your own, and we have some great ideas in this article!
Let’s first understand a little more about DIY baby gates and why baby safety gates are needed.
Why Safety Gates Are Needed for Babies and Toddlers?
Here are the reasons why baby gates are essential for your home:
1. Children fall from stairs.
Children who are just learning to walk are super-curious about the stairs as it is often a challenging barrier. In their attempt to conquer it, they will inevitably tumble down it. As long as you are around, you can make sure they are safe. But the gates are really helpful during times when you may have to take your eyes off them.
2. Children need a safe place to play.
Any open passageway is a big welcome sign for all kids to get to the other side. If your whole house is not baby-proofed, you might want to confine your kid to a safe space and a baby gate can help you do that. The gate also won’t interfere with your movement too much and you can afford to divert your attention to other activities without worrying about it.
3. Pets don’t always get along with children.
There is always a chance something might go wrong with your pet in the same room with your baby, especially if they are new or are the possessive types. Accidents often occur unintentionally so it is good to keep them separate for a while until you are confident your baby and the pet are comfortable with each other.
4. Children are curious.
Kids always want to explore what else is out there, whether it means crawling into the kitchen or to the backyard. Good baby gates in the right height are essential to keep children inside, especially if they are good climbers.
5. Children follow you everywhere.
One moment they are playing with their favourite toy and the next they are already on your trail. Baby gates will ensure you can keep your child confined to one place while you take care of other things. While many of the commercially available models can keep babies where they should be, your little one might know how to exactly beat every obstacle thrown at him. In such instances, you will have to make your own baby gate that is specifically baby-proofed for your smart one!
How to Make a Basic Baby Gate
Here is a design for a basic baby gate that can be used to block off stairs and other areas in the house so your baby won’t be able to crawl or walk into the restricted space.
Supplies
Wooden boards (3 pieces) 1”(in)x4”(in)x8’(ft)
1 ¼”(in) wood screws
2 door hinges, outdoor gate latch
Minwax dark walnut stain
Spray Shellac
Circular saw
Drill and screwdriver
Spirit level
Speed square
Titebond 2 wood glue
220 grit sanding paper
Instructions
The first step is to measure the area of your stairs or the entrance that needs to be covered by the gate. Look in to which way you want the gate to swing and whether the side that is screwed to the wall/frame can be drilled. If it is at the entrance to the stairs, make sure the gate only swings open away from the stairs. In this example, we show you how to build a gate that is 32” wide and 29” tall.
Cut the boards to make the gate. You will have to cut 6 vertical planks 29” tall and two horizontal planks 32” wide to make the gate. Cut one plank using a circular saw and use it as a template to cut the rest. The width of the planks can remain the same at 4”. Lay the horizontal planks parallel to each other 29” apart from each other. Lay the vertical planks equidistantly, perpendicular to the horizontal planks. Adjust the height slightly to screw them into place.
Use a 220 grit sanding paper to sand the surface of the wood smooth. Apply the dark walnut stain and wait for it to dry.
Spray the shellac to give a shiny waterproof finish after the stain dries completely/
Fix the two hinges to one of the vertical planks on one of the gate ends and screw the other side of the hinge to the wall. Do it in a way that the gate opens in your desired direction. Attach the latch to the plank on the opposite side of the hinges and the other part of the latch to the wall on the opposite side.
Other Types of Homemade Baby Gates
When it comes to baby gates, there is no one-design-fits-all. Therefore, here are some baby gates that will suit your living spaces:
1. Barn Baby Gate
Barn door baby gates are perfect for houses that have old country charm. The design is quite robust and a little bit more complicated than the rest of the door designs here. The dimensions of the door are customisable to fit your opening; the door shown here is a 35” square.
Image Credit: Pinterest
Supplies
Wooden planks – (4 equal pieces) cut out of one 1”(in)x4”(in)x12’(ft) length plank, (14 equal pieces) cut out of three 1”(in)x3”(in)x 12’(ft) length planks
2 door hinges, outdoor gate latch
Minwax dark wood stain
Spray shellac
Circular saw
Drill and screwdriver
Spirit level
Speed square
Whitewood glue
220 grit sandpaper
Instructions
Cut the strips into different components that make up the door. Cut the 1”x4” planks 35” long each. Pick up one of the 1″x3″ planks and cut away a 4” in the middle to split the plank into two halves that will make up the half-cross brace.
Make a square frame using the 1”x4” planks by glueing and screwing the planks at the ends. Lay down one of the 1”x3” planks across the frame to make it a full cross brace. Pick up the remaining 1”x3” planks and arrange them tightly behind the cross brace to form the back stiles. Glue and screw the half braces across diagonally, intersecting the full brace in the middle. The gate is done.
Using a 220 grit sandpaper, finely sand the whole gate. Apply a coat of wood stain and allow it to dry before spraying a layer of shellac lacquer. Screw-in the door hinges and the gate latch on the opposite sides of the baby gate.
2. Invisible Baby Gate
The invisible baby gate blends right into your décor! It is an ideal DIY baby gate for stairs with metal railings and the least amount of work involved to build it.
Image Credit: Pinterest
Supplies
1”(in)x2”(in) lumber
Spray paint matching railing’s colour
Mitre saw and drilling machine
Screws
Translucent acrylic sheet
2 small window hinges
220 grit sandpaper
Instructions
Build the gate frame that houses the gate inside. Cut the 1”x2” lumber to fit the size of your stairs and build a rectangular attachment frame out of it. Using the same lumber make another frame that fits snugly inside the bigger one, this will become the actual gate.
Using 220 grit sandpaper, sand the frame smooth so it can take any kind of paint or finish you might want to add to it. Spray painting with matching colour is the simplest idea and doesn’t require any extra surface preparation.
Cut the acrylic sheet to fit exactly over the gate frame from the inner panel using screws placed at 1-inch intervals. Using the hinges, attach the frames such that one is nested inside the other and can swing open.
Install the gate frame by either screwing the bottom into the floor or to the side of the railings. You could also use wall anchors to provide it extra strength in case your child decides to pound on it.
Screw-in a small latch to the side of the gate that swings open. Depending on how long you would want to keep it, you could drill holes into your railings or secure it with zip ties as a temporary solution.
3. Fabric Baby Gate
A fabric gate is a simple but effective idea if you need a more retractable and quick-install solution. Some sewing skills will also go a long way in getting this right in the first attempt. This gate works for stairs that run alongside the wall with one set of the railing.
Image Credit: Pinterest
Supplies
Home décor fabric – 2 yards
Scissors
Sewing machine
Velcro strips
Pins
Bias tape
Cord bundler
Instructions
Start by measuring the width of the entrance to the stairs and cut out two square pieces of the same width (a little extra if needed) from the cloth.
Pull out some of the bias tapes and eyeball it along the length to make a loop that will hook into the cord bundler. Make three of these to form attachment points on one side of the fabric.
Make three longer bias tape loops for the other side of the fabric so that the loops can go around the railing post. Sew in strips of Velcro to opposite sides of the bias tape so they can quickly fasten around the post or can be removed.
Lay the bias tape loops at the corners and one in the middle, on either side of the fabric square. Layout the second fabric cloth over it and use a zigzag stitch, sew along the corners to securely keep the loops in place. Proof test the strength of the stitches by pulling on it to ensure it won’t slip through.
To install the fabric gate, drill three holes into the wall on one side to attach a wall anchor where the cord bundler of the gate goes. Put the gate up by hooking the cord bundlers to the wall anchors and looping the Velcro bias tapes to the railings. Test the gate buy tugging on it harder than your toddler would to be sure it doesn’t give away.
4. PVC Baby Gate
If you are looking for a baby gate that stands out as a DIY project then this PVC version is perfect for you! Although it doesn’t score very high on looks, it is a versatile design that can be expanded or customized for different places in your house.
Image Credit: Pinterest
Supplies
5’(ft) long pieces of SCHD 40 1-1/4”(in) PVC pipe furniture grade – 3
3’(ft) long plumbing grade pipe 1-1/4”(in) – 1
1 1/4”(in) Tees – 12
Slip tees 1-1/4”(in) – 2
1 1/4”(in) 90 degrees elbows – 2
1 1/4”(in) end caps (internal domed) – 2
1 1/4”(in) table caps – 4
1 1/4”(in) PVC fitting caster inserts – 12
Hitch pins ¼”(in) x 3”(in) – 2
Pack of 3/4”(in) wood screws – 1
PVC cement bottle – 1
Power drill
Hacksaw
Miter saw
Measuring tape
Sandpaper
Deburring tool
Instructions
Start by cutting the furniture-grade PVC pipes into five 30-inch pieces, one 20-inch piece, and four 2.5 inch pieces.
Cut the plumbing grade pipe into twelve 3-inch pieces. Use the deburring tool to smoothen rough edges.
Two of the table caps have to be modified to form a catch mechanism. To do that use a hack saw to cut away a 1/3rd arc section in the caps. Start at the joint where the tab meets the cap and cut through the cap horizontally. At the ends of the horizontal cuts, make vertical cuts to remove the arc-segment. Before assembling the gate, layout all the PVC pieces as shown in the picture to form a template.
Start assembly of the gate by fixing a tee on both ends of the 30” pipes to make the inside slats. Use the 3” plumbing pieces to join the tees together at the top and bottom to form the gate.
Attach the four elbows to each corner to put into place the last slats.
On the left end of the gate, slide two slip tees on the last 20” pipe slat. This is where the gate will hinge. The last 20” pipe slat on the right end will have two tees after the elbow, joined by the 3” plumbing pipes. Once you know that you have gotten the connections right, use PVC glue to secure all the pieces in place.
Use the unmodified table caps and two of the plumbing pipe segments to make a wall anchor for the gate. Assemble the table caps and the pipes and trill through them to make a hole for hitch pins. This is where the gate attaches securely to the anchor and remains easily detachable. Using the with PVC cement, insert and secure the last two remaining plumbing pipe segments to the top and bottom tees of the 20” slat on the right side.
Line up the tees of the hinge segments with the table caps and securely fit them together. Screw the table caps into the wall or the door frame to fit the gate. It should swing freely at this point. Screw the table caps with the catch mechanism cut into it to the opposite side of the wall or the door frame. When you put gentle pressure on the gate, the gate should snap right into the catch mechanism.
5. Sliding Baby Gate
A sliding baby gate is a stylish one you can have at your home if you wish to invest some extra time to build it.
Image Credit: Pinterest
Supplies
(4 pieces) of 1”(in)x4”(in) planks at 1’(ft) 9”(in) long each
(4 pieces) of 1”(in)x4”(in) planks at 1’(ft)11”(in) long each
Table saw
Drilling machine
Whitewood glue
2 door hinges
Instructions
The sliding baby gate is built as two identical sections: the fixed and the sliding sections. To build the section, use the 4” planks to construct a rectangular frame. Using a table saw, cut a ½” deep groove into the inner side of the top and bottom boards. Pick the three 1×11” wooden planks and cut them into sections of 1-1/2” wide. You will have six sections each to make the gate slats.
Using the table saw, cut a ½” tongue that fits exactly in the top plank grove on both sides of the slats. Do this for all the slats and the two side planks of the frame as well. Put the gate section together by applying wood glue into the grooves and sliding the slats into the top and bottom section of the frame. Space them apart with equal distance. Join the side planks into the groove using glue to complete the frame.
Use the 3 remaining slats to build the second identical gate section. Once it is dry, sand and polishes it as per your colour requirements. Attach two door hinges to the fixed section on one of the sides and install drawer slides to the top and bottom section of the gate. Attach the roller section of the drawer slide to the sliding gate using screws.
Fasten the door hinge to the wall or the frame using screws to keep the fixed section securely in place. On the other side, attach two planks to the wall to act as a doorstop into which the gate can easily slide and stay firm.
6. Tension Rod Baby Gate
A tension rod baby gate is a quick and easy solution for doorways or narrow spaces where you need a temporary barrier. This no-drill option is perfect for renters or those who want a non-permanent solution.
Image Credit: Pinterest
Supplies
Adjustable tension rod (choose a sturdy one that fits your doorway width)
Dense fabric or mesh panel (width should match the doorway)
Scissors
Sewing machine or heavy-duty needle and thread
Grommets and grommet tool kit (optional)
Instructions
Measure the width of the doorway and cut the fabric or mesh panel to size, leaving a few extra inches on each side for hemming.
Fold and sew the edges to prevent fraying. If using grommets, install them along the top and bottom edges for added durability.
Slide the tension rod into position at the desired height, ensuring it’s tightly secured.
Attach the fabric panel to the tension rod by either looping it over or using hooks through the grommets.
For extra security, add a second tension rod at the bottom and attach the fabric to it as well. Test the gate by gently pushing to ensure it stays in place.
7. Pallet Wood Baby Gate
For a rustic and eco-friendly option, a pallet wood baby gate is both sturdy and customizable. This design works well for wide openings and can be stained or painted to match your home’s décor.
Image Credit: Pinterest
Supplies
Reclaimed pallet wood (enough to cover the desired width)
2”x4” lumber for the frame
Hinges and latch
Wood screws
Drill
Saw
Sandpaper
Wood stain or paint (optional)
Instructions
Disassemble the pallet and sand the wood to remove splinters.
Measure the opening and cut the 2”x4” lumber to create a rectangular frame.
Attach the pallet slats vertically or horizontally within the frame using wood screws. Leave small gaps (no more than 3 inches) to prevent little fingers from getting stuck.
Sand the entire gate for a smooth finish, then apply stain or paint if desired.
Install hinges on one side and a latch on the other, then mount the gate to the wall or door frame. Ensure it swings freely and locks securely.
Things to Consider While Making Baby Gates
Building a homemade baby gate can be a rewarding project, but safety and functionality should always come first. Before you start, keep these key factors in mind to ensure your DIY gate is secure and effective.
Ensure the spacing between slats or bars is no more than 3 inches to prevent your baby from getting stuck. Avoid sharp edges or loose parts that could pose a hazard.
The gate should withstand pushing and pulling without wobbling or collapsing. Test its strength by applying pressure before letting your child near it.
Whether using tension rods, hinges, or wall anchors, make sure the gate is securely fastened. A poorly installed gate can tip over or become a tripping hazard.
Consider how easily adults can open and close the gate while keeping it childproof. A latch or locking mechanism should be simple for adults but difficult for little hands.
Use non-toxic, durable materials like solid wood, PVC, or metal. Avoid flimsy fabrics or weak plastics that could tear or break under pressure.
FAQs
1. Can a baby gate damage my walls or door frames?
Yes, depending on the installation method. Pressure-mounted gates can leave marks or dents on trim, while hardware-mounted gates may require drilling. Use protective pads for pressure gates, and opt for wall anchors in drywall to minimize damage.
2. Can I use a baby gate for a fireplace hearth?
Standard gates may not suffice—look for a hearth gate or a freestanding playpen-style barrier designed to wrap around fireplaces. These provide a wider coverage area and are often heat-resistant.
3. Do baby gates work on angled or unusual staircases?
Most gates are designed for standard straight openings. For angled, spiral, or open-rail stairs, you may need a flexible mesh gate or a custom-built solution that accommodates the unique shape without gaps.
Baby gates are essential for every home with a toddler. While there are many types of gates available in the market, they may not fit your need exactly and might need a little modification. On the other hand, DIY baby gates are much more adaptable to your home and fun to build. Read more and try these steps at home by building your own baby gates and making it safe for your loved ones!
Also Read:
Homemade Toy Ideas for Kids
Making Your Own Baby Carrier
Tips to Keep Baby Safe and Protected
Childproofing With Safety Gates and Barriers
Read more

Living With In-Laws – Is It a Boon or a Bane?
It is actually a boon if the in-laws can understand at least 10% compared to what our parents understand us. I would like to categorise in-laws as –
Educated
Uneducated But Understanding
Now, the first category is for the in-laws who are educated. It is definitely a big boon to a girl. Here are some more pros:
If you are working, then they can understand your goals and dreams, and will definitely support you in your future plans.
If you are working and have kids, they can take care of your kids’ studies, also care for their own health.
If you had to attend something important other than work, they are understanding, and you can just go ahead and be rest assured that somebody is there to take care of your kids.
If you want to spend some quality time with your partner, they know its importance and respect your privacy.
If both you and your partner were occupied with something important and had to reach home late, everything will be taken care of at home, including your kids.
If you have any misunderstandings between you and your partner, they will definitely help you solve the problem. They actually are the backbone for your family.
Some of your kids’ responsibilities can be shared by the in-laws if you are a working woman.
Let’s take a look at the second category – Uneducated but Understanding.
All of the above pros apply even though the in-laws are not educated. But only one thing is you have to put some extra effort into your kids’ studies.
Believe me; it’s a boon. More importantly, kids can learn so many valuable things from elders at home.
There will be a difference between kids who grow with their grandparents and parents, than those who grow only with parents, or those who are raised by their grandparents alone.
However, in my opinion, educated understanding in-laws make for the best parents and grandparents. Whoever is reading this whether it’s a married woman or unmarried, please make decisions maturely and wisely. Give equal importance to your in-laws as you give to your parents.
Disclaimer: The views, opinions and positions (including content in any form) expressed within this post are those of the author alone. The accuracy, completeness and validity of any statements made within this article are not guaranteed. We accept no liability for any errors, omissions or representations. The responsibility for intellectual property rights of this content rests with the author and any liability with regards to infringement of intellectual property rights remains with him/her.
Read more
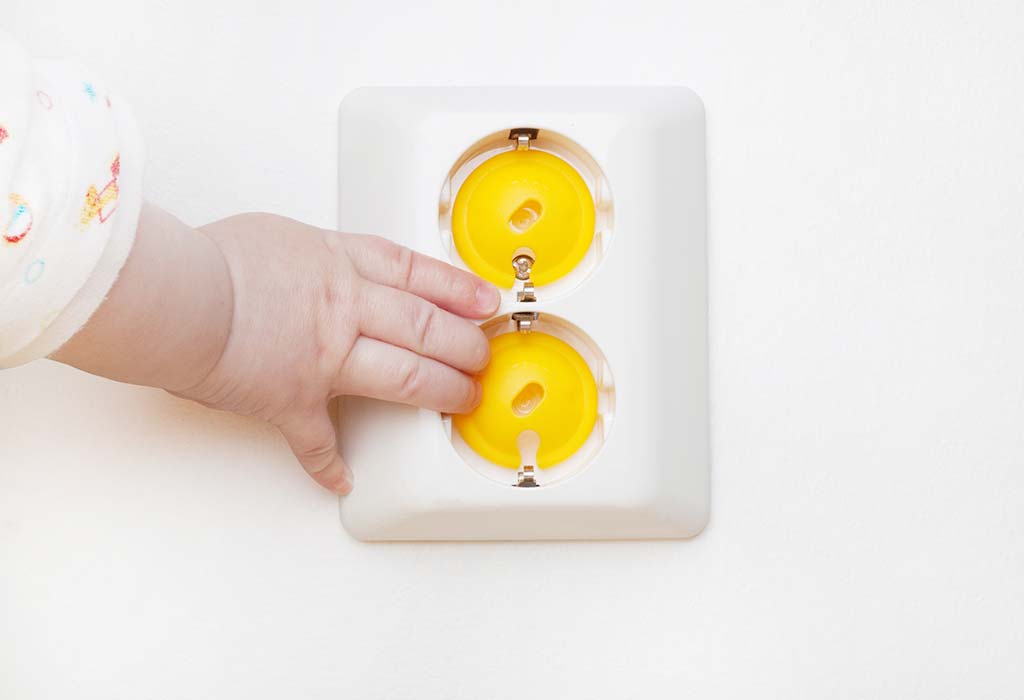
Babyhug Electrical Socket Cover, Must Try for Child Safety!
I live in a joint family with my husband, mother-in-law, and father-in-law. I have been married for two years now, and not long after my marriage, I decided to have a child. I got married at the decent age of 25, and I was worried, as I used to hear a lot about how it’s getting difficult day by day to have kids with illnesses such as PCOS. So, I thought of trying for a child without waiting for long after my marriage. Many mothers of today’s generation will be able to relate with what I am about to explain.
We all must have come across such situations with our elders, similar to my story below. Our elders are always over-concerned about children. They still have an opinion on how our children should be brought up. They get involved with everything related to them and their upbringing. Similarly, my mother-in-law saw my daughter poking her hands in the electrical plug/socket in our room, and her immediate reaction was of concern, that what if she turns on the switch and gets a shock? It didn’t occur to me that such an incident could take place. I understood her concern and told her I would find a way to cover it with tape, or some other solution that won’t lead to such an accident occurring.
I put tape around the socket to prevent her from poking her hands inside, but as we all know, kids these days are so much more smart and advanced then what they used to be back in the day. So, my daughter peeled the tape away with her nails without much effort. So, I had to come up with something else. Hence, I looked online for a gadget that was hopefully invented to prevent such incidents from happening – and there are solutions to every problem in the market.
After much research and search, I found the Babyhug electrical socket cover, so I thought, yes, this looks like something that might be of use to me! So, I decided to give it a try. I received the order very quickly – within two days – and I covered the sockets in my room. My daughter still tried to remove it, but she wasn’t able to, and she wasn’t able to poke her fingers inside the socket anymore. I informed my mother-in-law about this gadget, and showed it to her. She was delighted and relieved that I had found a solution. This led to my safety concern being sorted as a parent, and overall happiness and relief!
Disclaimer: The views, opinions and positions (including content in any form) expressed within this post are those of the author alone. The accuracy, completeness and validity of any statements made within this article are not guaranteed. We accept no liability for any errors, omissions or representations. The responsibility for intellectual property rights of this content rests with the author and any liability with regards to infringement of intellectual property rights remains with him/her.
Read more

Tips to Choose a Safe Bug Spray for Babies and Kids
You must be looking forward to spending some quality time with your kids by taking them for a picnic to a park (or in your backyard) or for some outdoor adventure. Your little ones can benefit from outdoor play and must take in the beauty of nature, but when nature gets a little too much and mosquitoes, ticks, and flies and other pests come out and join you, it can be downright uncomfortable for you and your kids. You want to keep your children safe and protected, but at the same time you want them to have fun, so how do you make sure your child stays safe from those pesky pests outdoors? Easy! By using bug repellents! But if you’re not sure what you should look for when buying a bug spray for kids, we are here to help. Read on to know more about bug-sprays.
Are Bug Sprays Safe for Babies?
As per the Centers for Disease Control and Prevention (CDC), bug sprays shouldn’t be used for babies under 2 months of age. The CDC recommends parents to keep insect repellents away from babies who are younger than 2 months. This is because bug spray can be really dangerous for their sensitive lungs and skin.
However, there are other solutions that parents of infants can try. To protect your little ones from bug bites, you can dress them up in clothing that will completely cover the exposed areas on the legs and arms. When the little one is in a stroller, you could consider using a see-through mosquito net to cover the exposed area.
Is it Safe to Use a Bug Spray on Toddlers and Kids?
Yes, most bug sprays are safe to use on toddlers and kids. But a bug spray should be used only once a day. If choosing chemical-based repellents, go for repellents with a low chemical concentration to avoid the harmful effects of bug spray on infants and kids. Also, read the label to see if your child is allergic to any ingredient and check if the repellent is safe for your little one. You could also check the label to see if it is the right bug repellent for toddlers with sensitive skin.
Types of Safe Bus Sprays for Children
From sprays and aerosols to liquids, sticks, and creams, efficient insect repellents come in many forms and most of them are safe for babies who are above 2-3 months old. For babies who are under the 2-months of age, it is best to not use any bug repellent on them. However, to keep the bugs away, you can place insect nettings around the baby’s bassinet or stroller. If you are considering formulations for the older children, then the four main types you can choose from:
1. Repellents With DEET
Repellents containing DEET is the most effective type of repellent for keeping the bugs away. Depending on the amount of DEET present in the repellent, the protection can last anywhere between 3 and 8 hours. Usually, 10 per cent DEET in the formulation provides protection for about 2 hours, while 24 per cent of DEET in the formulation will provide 5 hours of protection. However, most experts suggest that no matter how strong DEET is in the product, it is best to apply only once a day on children.
However, the AAP (American Academy of Pediatrics) does not suggest the use of DEET bug sprays for babies younger than 2 months old and advises against using 30 per cent DEET products on children of any age. Therefore, the safest option is to use only repellents with 10 per cent DEET in them. DEET and sunscreen may seem like a handy combo but these should not be used together since DEET can make the sun-protection factor less effective.
2. Repellents With Essential Oils From Plants
Bugs can be kept away using purified forms of plants like cedar, citronella, and soybean, though these are not as effective as repellents with DEET. The protection provided by essential oil bug sprays usually last only for a few hours, which means that you will have to reapply the repellent more often. However, these oils should not be used on babies who are below 2 months of age. Some of these repellents may contain oil from lemon eucalyptus, and this should not be used on children who are younger than 3 years old.
3. Repellents With Picaridin
Also known as KBR 3023, Picaridin is known to provide protection just like 10 per cent DEET formulations. Picaridin is usually colourless and odourless and feels light on the skin. Picaridin is also non-greasy and non-toxic, which makes it a better option than DEET but it can cause eye irritation. Furthermore, there’s not enough research done on the long-term effects of picaridin on humans, hence it’s best not used on children.
4. Repellents With Permethrin
Permethrin is a very effective chemical that can kill fleas and ticks on contact. Therefore, repellents with permethrin are ideal to protect the children against Lyme disease and other tick-borne illnesses. However, it does not protect the children against mosquitoes and other flying insects that bite. Moreover, it should only be applied on clothing or on outdoor gear like tents and sleeping bags, and never directly on the skin.
Which Bug Sprays or Repellents Must Not Be Used Around Babies and Kids?
It is best to not use wristbands soaked in chemical repellents (since these may cause localized skin irritations and reactions), ultrasonic devices that send out annoying sound waves (at-bats, birds, and pests), pills with Vitamin B1 or garlic, and bug zappers around children. These are all ineffective ways of protecting children from insect bites.
How to Choose the Best Child-friendly Bug Spray
When choosing a bug repellent for your little one, it is important to make sure that it is completely safe and harmless. Here are a few ways to choose the best bug spray for kids:
When buying a bug repellent, make sure that it either contains DEET or plant-derived chemicals that are considered to be natural bug repellent for babies above 2-3 months of age (such as oil from citronella) since they offer the best protection. Furthermore, before buying a bug spray, you should also read the product labels carefully since not every repellent is safe for children. For example, you should not use repellents with lemon eucalyptus oil for children who are under the age of 3 and you should not use DEET repellents for babies who are below 2 months of age.
Check whether or not the product you choose offers 60 minutes of complete protection after the first application since it is best to apply repellents only once per day on children.
Some repellents may cause irritation, so make sure the ingredients on the label are not known to cause problems to kids. If you are getting a DEET repellent, then it is best to go for low-concentration DEET formulations to avoid skin irritations.
Read the label of the products to make sure that it is effective on the specific insect you want to protect your child from. This is because some repellents may not work on some insects but not on others.
There are also other non-chemical options to protect the little one from insects, in case you cannot use any of these on your children. Before your little one goes outside, you can make sure that he is wearing long pants and shirts with long sleeves. Tuck the pants into their socks and make sure they are wearing closed-toe shoes.
Tips to Use a Bug Spray Safely
Here are some dos and don’ts of using insect repellent or bug spray on kids:
Spray bug repellents only on the open area because you and your child should not breathe the spray in. Also, do not spray the repellent near food.
Apply DEET and other such bug repellents only to exposed skin or clothing but never under the clothing.
Do not use any formulations near your children’s mouth or eyes, and avoid applying it on infected areas, cuts, or on irritated skin.
It is best to spray the repellents onto your hands first and then rub it on the child’s skin so that you can avoid spraying it on the child’s face. Never spray directly onto the child’s face or his hands since children might rub their hands on their eyes and mouths.
After your child comes back from outdoors, wash his hands and face with soap and water and wash the clothing with repellents before it is to be worn again.
Most importantly, follow the instructions given on the repellent before applying it on the child.
If your child happens to show any allergic reaction or has irritated skin, discontinue using the repellent.
The next time you go out with your kids for a fun outdoor picnic, do not let the pesky bugs ruin your time! Take a kid-friendly bug spray along and let your children have a wonderful and bug-free time exploring the outdoors!
Also Read:
Safe & Unsafe Mosquito Repellents for Babies
Homemade Insect & Mosquito Repellent for Infants
Pest Control with an Infant Around
Read more
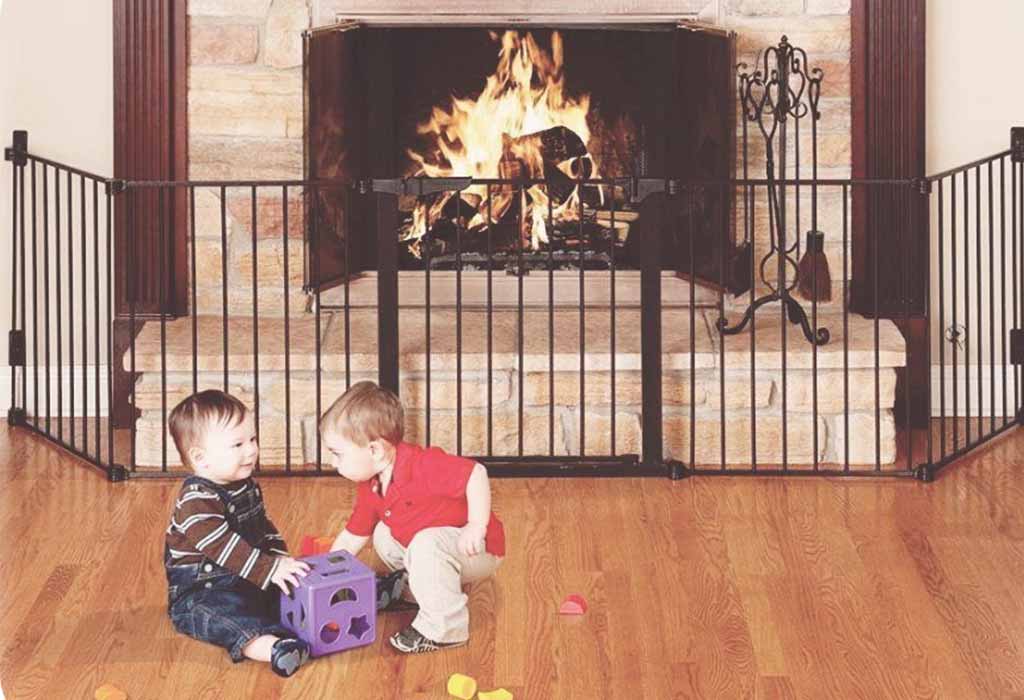
Easy and Effective Tips to Baby Proof Fireplace
Your toddler is starting to walk and won’t stay in a place; it is time to start baby-proofing the house. The fireplace is a special attraction for all babies with its flickering flame inviting them to explore. While the task of baby proofing seems straight forward, there are plenty of hidden dangers and details that are easy to overlook. So, how do you baby proof your fireplace perfectly without ruining the aesthetics of your living room? Continue reading to find out!
How to Baby Proof Fireplace
Baby proofing your fireplace doesn’t only involve keeping your little one away from the flames. Protecting your baby from the adjacent hazards is also equally important. Although you might think that getting a baby proof fireplace screen is all you need to keep your little one away from danger, there are a few more precautions that must be taken to make it entirely baby proof.
To begin with, you have to test it at your child’s level. Despite all the caution you’ve put to cover all your bases, kids can find a way through your defences and get hurt. You would be surprised at how many injuries have occurred even at baby-proofed houses where parents might have overlooked one little detail. Therefore, think like a baby and get on your hands and knee to explore and baby proof all possible unsafe areas in the house. You could end up finding sharp edges, nails sticking out, or rough edges on the gates that are a potential abrasion or pinch hazard. Test your baby-proofing method in all possible ways it can fail, and correct it. While this won’t safeguard your child completely, it does minimise danger.
Make a list of all things that are potentially dangerous for your baby at the fireplace. It’s easy to forget small but significant details when you are busy as a mom, so it’s best to write down everything in a diary. Address each issue and label them as safe, pending, or unsafe, depending on how much you have worked on it. Everything counts, right from the rigidity of the gate to how easily your child can open it by watching you. Watch out for raised surfaces that are tripping or a pinch hazard and fix them with sponge and tape. When you are out shopping, have this list with you to help you buy the appropriate hardware.
Restrict access to the fireplace or space around it as much as possible. Prevention is your best defence against a fireplace injury. It’s straightforward – if your baby can’t get to it, there’s no risk of injury. While some parents would want to completely cut off access to the living room by closing off the door, it’s a luxury all parents don’t have. In such instances, a fireplace gate for baby proofing is a wonderful idea to keep them away. You can use the gates to block the space around the fireplace to have your child confined to one end of the living room.
Identify remaining risks and work on fixing them. Think of every possible thing that can go wrong with your set up. Can your baby push through the gates or are the gates secured enough to do their job or is the gate adequate? These are some of the things that should go on your checklist to be fixed straight away.
1. Baby-Proofing the Hearth
The hearth is where even the older kids get hurt often by tripping or smashing their toes into while running around. While the hearth is essential to keep the embers from flying into your floor carpet, it needs to be baby-proofed when the fireplace is not in use.
1. Things You Need to baby-proof the Hearth
Foam tubing guards are your child’s best friend to keep them safe from sharp edges everywhere around the house. You will also need tape to stick them to the edges of the hearth. Foam protectors that go specifically on corners are also a great option. The idea is to keep all exposed surfaces covered in something soft to minimise risks.
2. Baby-Proofing Flat Hearth
Baby proofing a flat hearth is probably the easiest as it almost levels with your floor and won’t need much cushioning. The simplest solution can be to cover it up with a soft mat so the rough edges aren’t exposed, and your kids can walk over it without difficulty. You will have to remove it when you use the fireplace, however, as it can become a fire hazard. Fireplace screens are also a fantastic option if you wish to cover up the whole section, including the hearth. When using a screen, you won’t need to use a mat as the hearth falls within the screen.
3. Baby Proofing Stepped Hearth
A stepped hearth is a bigger challenge as there are a number of exposed edges, and your child can easily trip and fall over them. The foam protectors that are available for coffee tables and walls can be used as hearth pads to cushion the edges. Hearth pads, in particular, are also made of fire retardant material and are safe to use at all times. The pads come with a double-sided tape that lets it adhere firmly to the edges of the hearth. A downside to these sticky pads is that they can be pulled away by kids with some effort and the ash can degrade the glue. To baby proof the top of the hearth, you can use a fireplace cushion that is soft and fire retardant. These give adequate protection in case they trip on it and can take embers without catching fire.
2. Baby-Proofing Fireplace Doors
Fireplace doors are a potential pinch or cut hazard with or without an active fire. The doors can have sharp edges or crevices at the railings where it’s easy to get the skin pinched. Here is how you baby-proof your fireplace doors:
1. Test Them Before Purchase
Fireplace doors need not be manufactured to be safe for young kids as their primary function is to keep the fireplace closed. If you put in a little extra effort, you can find door models that are extra safe and child-friendly. If you already have an unsafe fireplace door, consider getting it replaced, especially if it cannot be padded to secure its sharp edges.
2. Restrict Access
The ideal way to safeguard your child from the fireplace door is to keep him away from it. Metal fireplace screens and baby gates are excellent fireplace protectors for babies as they keep the door completely out of reach. Although fireplace locks are a safety feature, they won’t stop your child from touching the scorching door after use. Therefore, it’s best to use screens or gates when it is on. The door should also be closed and locked when the fireplace is not in use so it can stop your child from crawling inside. However, it is not advisable to close the door with a burning fire as there’s a risk that you and your family will be exposed to carbon monoxide.
3. Monitor Door Temperature
Pay attention to how long it takes for the doors to cool once you are done using the fireplace. If the doors are safe by themselves, you would still need to wait for them to cool down before removing the baby gates. Knowing the time will give you a good estimate of when to remove the safety barriers.
3. Baby Proofing 3-Sided Fireplace
Three-sided fireplaces throw up a unique safety challenge from the baby proofing standpoint as they occupy a bigger place. Since there are so many designs around, there aren’t any standard safety devices available. However, it is a good opportunity for DIY baby-proof fireplace ideas.
1. Baby Proofing With Gates
The easiest way to baby proof a 3-sided fireplace is to link together a few panels of baby gates to surround the peninsular. This would require some extra length of gates so you can try buying a super long baby gate. The challenge would be to secure the gate to the wall so your child will not figure out their way inside.
2. Fireplace Screens
If the design of the fireplace is simpler with fewer edges and protrusions, you can always repurpose an existing fireplace screen to cover the fireplace glass. This will ensure your child will not be able to put their hands on the glass and burn their fingers. The edges can then be covered with hearth pads for extra safety from bumps and trips.
4. Keeping Baby Safe From Carbon Monoxide
All fireplaces produce some amount of carbon monoxide. It is a toxic gas that can cause suffocation for the baby and the whole family. Here is how you can safeguard your baby from this threat:
1. Ensure Adequate Ventilation
Carbon monoxide forms rapidly in the absence of proper ventilation in the room. Therefore ensure there is a free flow of air through the room and the smoke gets completely carried out through the chimney. Maintain the chute and chimney clear to facilitate the free flow of the burnt gasses. Always clear blockages in your chimney before you start the fire. To set up a clear airflow through the living room, you need to ensure there’s fresh air coming through the ventilation ducts or there’s a window open in the room.
2. Buy a Carbon Monoxide Detector
Carbon monoxide is a colourless and odourless gas that is hard to detect, and the symptoms of its ingestion are nausea and dizziness. Therefore it is impossible to detect this gas unless the symptoms begin to set in. In high quantities, carbon monoxide can be lethal, so it’s essential to have a detector that can warn you when the gas is in high quantities. Carbon monoxide detectors come with some detection feature as well, so they are great safety devices to ensure complete safety when your child is in the living room. If your alarm goes off, take your child outside and call 911.
A childproof fireplace should ideally stop your child from getting too close to the fireplace where he is exposed to the rough edges, corners, and raised surfaces. Baby gates and screens are excellent choices for childproofing most fireplaces along with hearth pads to increase safety.
Also Read: How To Childproof Home with Safety Gates and Barriers
Read more
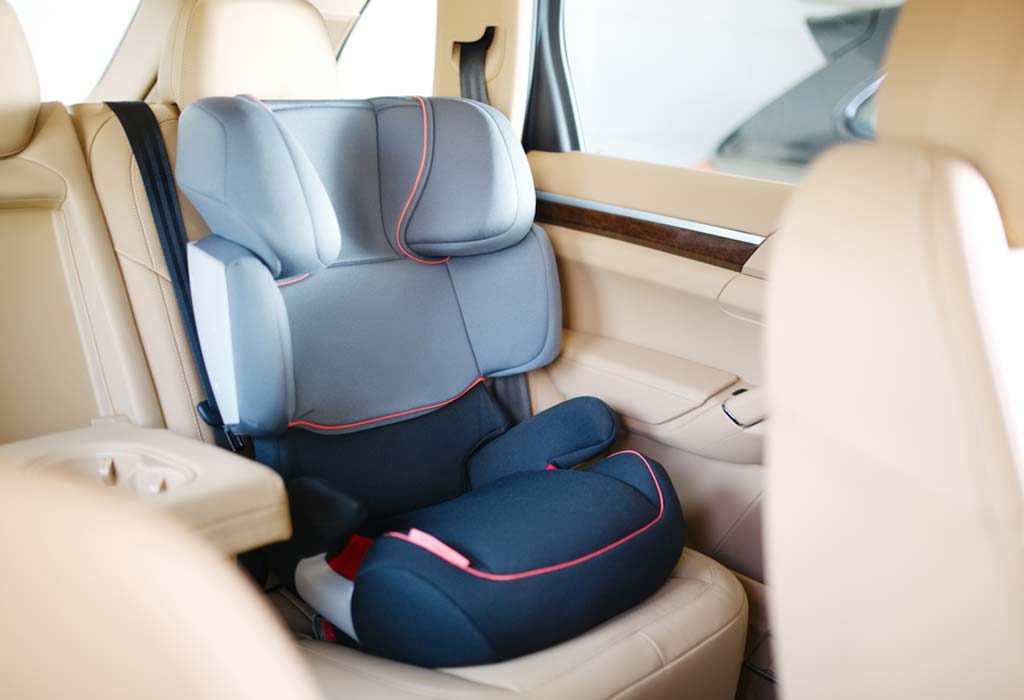
Used Car Seats- Are They Safe for Babies & Buying and Selling Tips
Buying used baby items will help you save a lot of money. All the baby items that you invest in are temporary since your little one will soon outgrow each of these and then finally, you’ll be thinking about what to do with it. Car seats are essential when it comes to baby accessories. Many of us are quite sceptical about going for a used infant car seat, wondering if second-hand car seats are safe, what to look for while buying a used one, etc. This post will guide you through all these details while purchasing a second-hand car seat for your little princess!
Are Used Car Seats Safe for a Baby?
A blunt answer to this question would say that it’s better that you go for a new car seat instead of an old one. This is because all car seats expire and should not be used for babies beyond its expiry date. While buying a used car seat will save you some bucks but there are a few points you need to keep in mind if you plan to buy a used car seat.
Things to Check Before Buying a Used Car Baby Seat
Below mentioned are certain things that you need to check before buying a used baby car seat:
1. Expiry Date
This is the most important aspect that you need to double-check before selecting a used car seat. The expiry date is written right on the car seat itself, you can also double-check with the user manual provided with it. Most car seats come with a life span of 6 years from the date of manufacture – beyond which you must not use them. So, in case only the date of manufacture is provided, you can calculate the expiry date.
2. Inspect for Damages
Inspect the car seat well for any cracks in the shell and the foam. Also, check the straps for any holes, rips, proper routing, elasticity, etc. In case of used convertible car seats, make sure that the transition is still working. The best and only way to check the routing is by reading and making sure that it matches well with the manual.
3. Trusting the Seller
It’s always better to buy a used car seat from a trusted seller rather than from a stranger, as you need to rely on all the information provided by the seller. So, its always better to avoid buying a used car seat from someone you don’t know, as you will be essentially trusting them with the life of your child by taking this decision.
4. Don’t Fall for Appearances
Always remember appearances can be deceptive! While some car seats may look neat and brand new. they could have gone through a crash or even expired! Well, the opposite of this also holds true. So, make sure that you double-check all the specifics before going for the car seat.
5. Check for Crash History
It’s very important to know whether the car seat was ever involved in an accident or has a crash history. This aspect is very vital because the National Highway Traffic Safety Administration (NHTSA) and car seat manufacturers have replacement criteria for the car seat deciding upon if it’s safe to use after an accident. Most of the car seat manufacturers ask to replace the car seat after any crash. While the NHTSA considers the facts like how much damage has been impacted on the car seat, whether or not airbags were deployed, etc. These details cannot be verified by just looking at the car seat, as sometimes the car seat would look undamaged even when involved in a serious crash.
6. Ask for Original Parts and Manual
It’s important to have all the original parts along with an instruction manual of the car seat for proper functioning and safety of the car seat. Sometimes, some parts may get lost over a period of time, so you need to check with the user manual to make sure that all parts are working and available at the time of purchase. An instruction manual is essential for proper installation of the seat.
7. Registration
Make sure that the car seat is registered with the car manufacturer.
8. Certification by Car Seat Checkpoint
Once the installation of the car seat is complete, you need to visit the car seat checkpoint and get it assessed by a certified child passenger safety technician.
Things to Remember When Selling a Used Car Seat
As an owner of the car seat, it is your responsibility to make sure that you consider all the important aspects before selling your car seat.
1. Ensure There is No Accident History
It is important that to know if the car seat was involved in any crash, as most car seat manufacturers ask never used again after involved in any type of crash.
2. Know the Complete History of the Used Car Seat
If you were not the original owner of the car seat and have bought it from another seller, make sure that you know the complete history of the car seat thoroughly. If you do not know the complete history or who used the car seat then it is not wise to sell it off to a new buyer.
3. Make Sure All the Original Parts Are in Working Condition
Before selling the car seat, get the user manual and check if all the original parts of the car seat are present and whether they are in working condition or not. Check for cracks, holes, damages, harness strap functions, and other damages, if any.
4. Expiry Date
Your car seat will have all the information regarding the date of manufacture and expiry. Make sure that your car seat is well within the date of expiry if you intend to sell it off.
5. Label Information
Use a camera to click a picture of the label that contains all the information regarding the name of the manufacturer, brand name, model number, make, etc. of the car seat and include this information in your post while selling the car seat.
Our best recommendation is to go for cheaper car seats that are new instead of cheap used car seats. However, if you have decided to go for a used car seat, then we recommend you to be selective and extra cautious while picking one.
Also Read:
Right Age for Your Child to Face Forward in a Car Seat
Rear-Facing Car Seat for Your Child
Read more
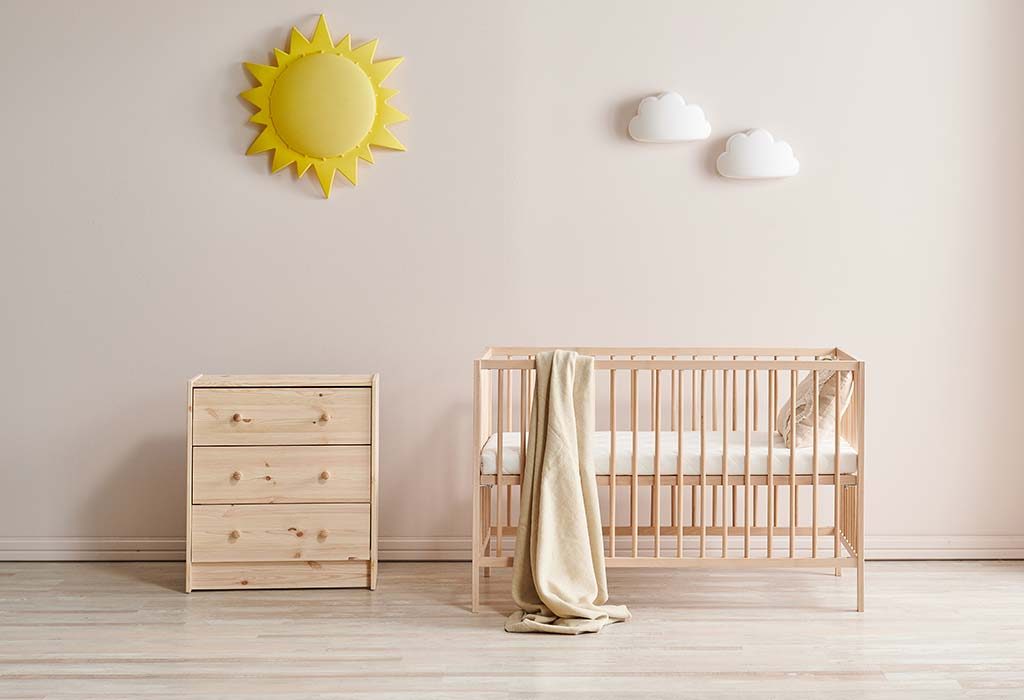
How to Safely Paint a Baby's Crib – Simple Steps to Follow
You have received the good news of your new arrival in your family. You have started preparing and decorating the baby’s room with the most comfortable furniture. The most important furniture for the baby is the crib. It has to be extremely comfortable and safe, as your precious baby will be spending most of its time in that. You can either get a readymade crib from the market or get it custom-made. Also, many times, parents already have the crib of the elder child or cribs given to them by close family or friends who no longer need the crib, which they want to use for the new baby.
It’s the parent’s choice to buy a new one or use the older crib. As long as it keeps your baby safe and comfy, it doesn’t matter if the crib is old or new. However, you may want to paint the crib to match the nursery’s decor. Read on to learn how to safely paint your baby’s crib and how to choose the right crib paint for your child’s nursery.
Can You Paint a Crib?
You have bought a new crib for the baby. Though the crib is comfortable and safe, it is still not in the colour you have decided for the nursery. Or you are using an old crib but its paint has chipped off or looks worn off. In both scenarios, the easy solution is to paint the crib. You can get the painting work done by some professional or do it yourself. Painting a crib is nothing complex and does not need experts. Even if you’re not very talented at DIY projects like this, you can easily paint the crib. You have the flexibility to paint it in your preferred colour and match it to the nursery’s décor and palette. Also, repainting a crib yourself will show your affection for the new baby. Just follow the steps below and enjoy painting your baby’s crib.
How to Choose the Right Paint for the Crib
You have decided to do the DIY crib painting yourself. Now, the most important question is what type of paint to choose so that it is completely safe. You can’t just use any paint for the crib, it has to be a non-toxic paint for baby crib. To choose the right baby-safe paint for the crib, consider the following points before purchasing the paint:
Baby-safe paint for cribs shouldn’t have any lead. Though most paints these days are without lead, still read the contents to be doubly sure.
It should be completely non-toxic.
Purchase paint which is water-soluble. Water-soluble paints are non-toxic and have no lead.
Use paint with low VOCs (Volatile Organic Compound) or with zero VOCs. Low VOCs should be less than 50 grams per litre. Paints with low or Zero VOCs have less harmful chemicals.
The paint should be odourless or have very little odour and very few additives.
Preferably use paint that doesn’t require a primer. It will have fewer chemicals.
Ask for a paint which has antimicrobial agents to keep mould or mildew away.
What Supplies Do You Need to Paint the Crib?
Painting your baby’s crib is easy and can be done with basic supplies. However, having the proper supplies beforehand can make your work easier and make the work enjoyable for you. The supplies you’ll need to paint the crib are:
Vinegar and water mixture in 1:1 ratio or a no-rinse TSP
Ultrafine abrasive pads
Non-toxic liquid sandpaper or a medium/fine grit sandpaper or a de-glosser
Lint-free cloths
Mask
Tack cloth
Spray bottle with fine mist setting filled with clean water
A safe paint with preferably no odour and zero VOC
Round painting sponge
Paint sprayer or high-quality paintbrush with a synthetic bristle
Safe topcoat with no odour and zero VOC
Simple Steps to Paint a Baby’s Crib
You have got the crib, chosen the paint and collected all the supplies required to paint the crib. Now, you just need to follow these simple steps to paint, and your crib will be ready. The steps to paint a crib like a professional are:
Step 1
Place the crib on any used cloth or old newspapers in an open space or in a garage or a room not used for anything. Ensure the crib is absolutely clean with no dirt or dust. Even a small particle of dust can mess up your paint job, so be extra sure of removing every speck of dust. Use water and cloth to clean the dust or use vinegar and water mixture (1:1 ratio) or the no-rinse TSP with non-abrasive pads. Let the crib dry completely before starting to paint.
Step 2
You can disassemble the crib if it’s possible for a thorough painting job, though it’s not necessary. Wear a mask to avoid dust inhalation. Lightly sand or scruff the complete surface of the crib, ensuring no part is left. Use a fine (220#) grit or medium (180#) grit sandpaper or a sanding sponge. Just do a light sanding to roughen up the surface. The old paint should be removed to expose the inner surface. The roughing up will let the new paint adhere to the surface and doesn’t come off. Ensure the scuffing is even for the new paint to form an even bond with the wood.
Step 3
Take a tack cloth, and remove all sanding dust from the crib. Pay extra attention to nooks, inner corners or indentations for remaining sanding dust. Sanding dust left on the crib will blend with the paint and give an uneven surface appearance, ruining your hard work. You can also use a damp cloth to wipe the entire surface for a more thorough job. Just remember to dry the crib afterwards.
Step 4
Paint the crib with safe, non-toxic paint. Wait for four to six hours and then repaint it. Before applying the second coat, check for drips or left spots. Light sand the paint drip and apply spot paint on any spots left. When it dries, apply the second coat. Do remember to use a good-quality brush. You may have purchased the best paint, but a sub-par brush will not produce the best results. A professional paint job is done with a high-quality brush. The paintbrushes should be medium to small size. Medium for large surfaces and small brushes to paint the nooks and difficult-to-reach parts. You can also use a paint sprayer for quick results. After the paint dries, you can make designs of your choice or write anything on the crib using the design stencils available.
Step 5
This is an optional step. When the second coat of paint dries, you can apply a top coat of a safe, clear finish to the crib. The clear finish topcoat doesn’t add any benefit to the painting job, but it just makes the paint more durable, or in case of any scratches, the top coat gets scratched, and the paint remains intact. However, if you have used high-quality, non-toxic paint, then the paint finish will be very durable, and there is no need for the topcoat to refinish a crib.
Step 6
Once the topcoat or the second coat of paint dries, the crib is ready to use.
FAQs
1. Can I use oil-based stain-blocking primer while painting the crib?
It is advisable to stay away from oil-based stain-blocking primer when painting the crib. Oil-based primers are high in VOCs and not safe for babies.
2. What kind of finish should I choose for a crib?
You can choose any finish for your baby’s crib. You can go for eggshell, semi-gloss, or glossy, depending on the nursery’s decor or your personal preference. They are all equally functionally ideal, hardwearing, and durable.
3. If I have already primed the crib, is sanding still needed?
If you have already primed the crib, then there is no need for sanding. Sanding is only required to scruff off the glossy finish or to rough up the surface. With priming, sanding is not required.
4. How can I paint the spindles easily?
Use the painting sponge to paint the spindles with ease. Fill the sponge with paint and quickly paint the spindle in one go. Remember to clean the sponge before painting and use a dry sponge.
Painting your baby’s crib yourself is the best way to express your love for your baby. Painting a crib is very easy and can be done in a day, making it enjoyable for you. Also painting it yourself ensures the crib and the paint is completely safe, without any harmful chemical for your baby.
Also Read:
Are Crib Bumpers Safe for Babies?
What to Buy – Bassinet, Crib or Cradle?
When Does Baby Refuse to Sleep in Crib?
Baby Cradle – Things to Consider When Buying
Read more
Sort By
 Latest
 Most Popular
 Trending
Please select atleast one Filter