

















.svg)
.svg)
.png)


Play & Activities
Suggested articles for you
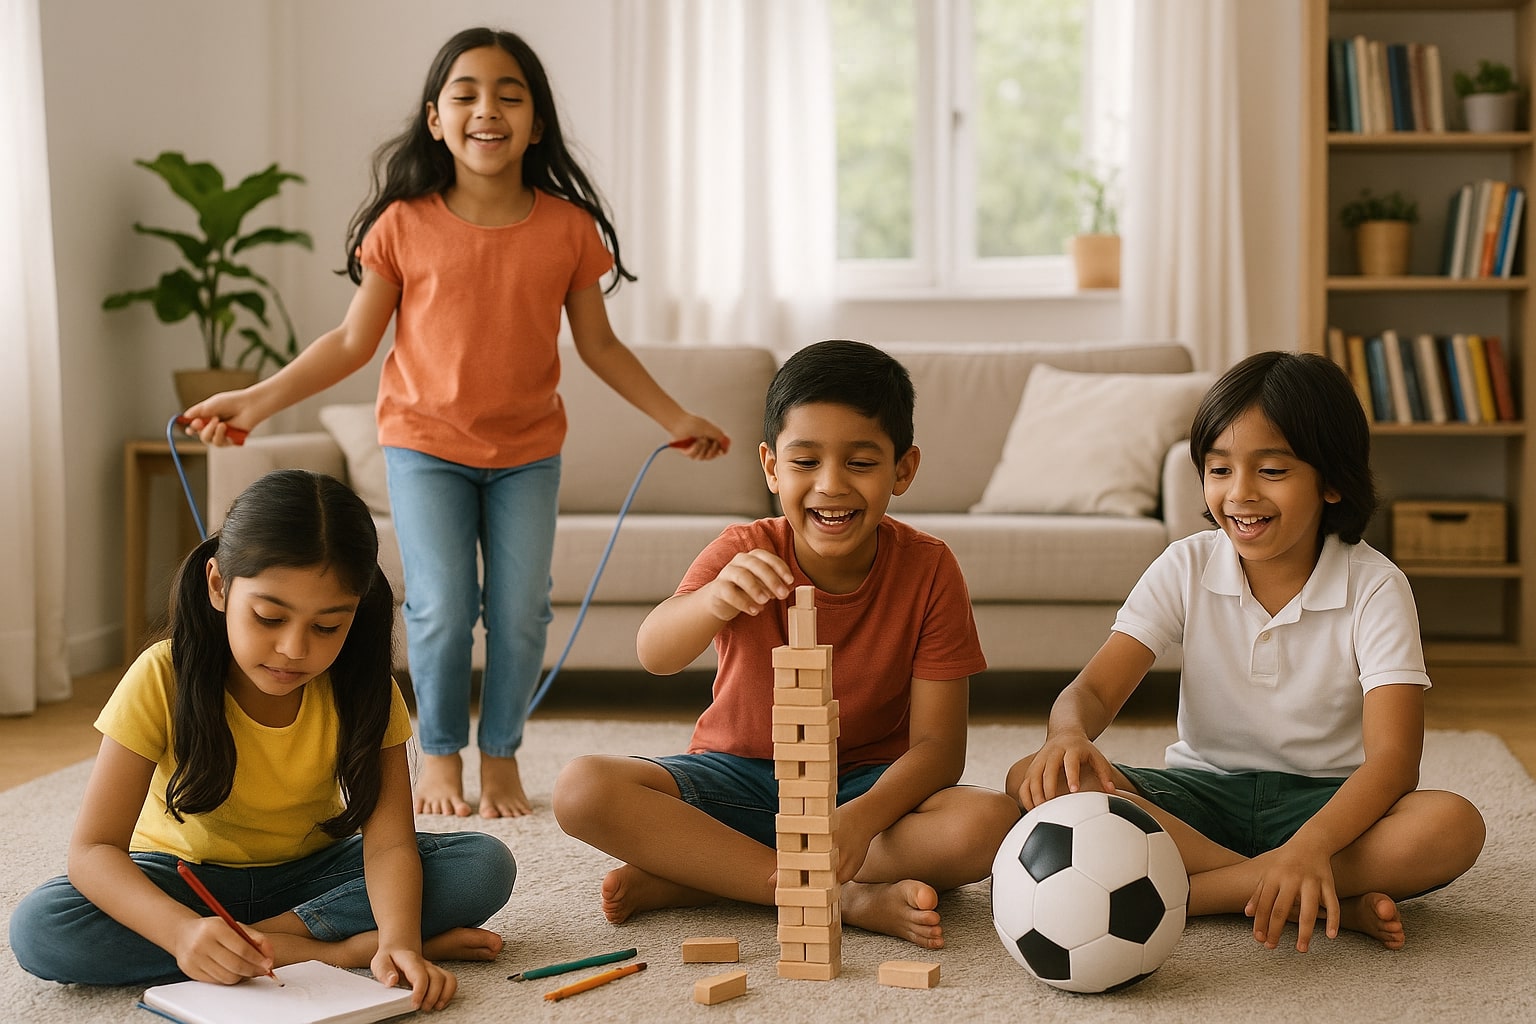
30+ Children's Day Celebration Ideas and Activities
One of the most memorable days of the year for a child is Children’s Day, which is dedicated entirely to kids. This special day gives children the opportunity to make lifelong memories. As a parent, you probably want to plan something special and unique each year, which can be hard when you’re busy throughout the day. Don’t worry; we’re here to help! Looking for Children’s Day celebration ideas? Here is a comprehensive list of fun ways and activities to host on Children’s Day, ensuring that each celebration becomes a cherished chapter in your child’s growing years. It will be difficult to pick a favourite!
Why Is Children’s Day Celebrated?
Children’s Day is celebrated on November 14th all over India. This signifies the birthday anniversary of Jawaharlal Nehru, as he was fond of children and was lovingly called Chacha Nehru by kids across the country. He always believed that children should be given the utmost love and affection, as nurturing them and raising them in the right way would determine the future of India. After all, they are the leaders of tomorrow!
Jawaharlal Nehru believed that education is essential for every child. He also helped set up some of the most reputed schools in India today. Every Children’s Day, schools and colleges set up cultural programs to celebrate both Nehru Ji’s birthday and organise fun-filled activities. Since children are the centre of attention on this day, Children’s Day is looked forward to every year by kids across the country.
17 Fun Ways to Celebrate Children’s Day
Wondering how to celebrate Children’s Day? Remember that the most important thing is for your child to be surrounded by loved ones. Here is a list of 17 creative ideas for Children’s Day.
1. Attend Special Events
Children’s Day is a special day for kids. It’s like a combination of their birthdays, Christmas, and other celebrations. To celebrate this fun day, most malls, parks, and stores also have great events planned for children of all ages.
2. Picnics
Celebrate this special day out with your kids with a good old-fashioned picnic, including kids’ beloved juices, sandwiches, a blanket, etc., at the park. Everybody loves picnics, but Children’s Day picnics are all about family and spending time with your kids. You can make your children’s favourite food and centre the picnic around them.
3. Disney Party
Disney characters are an iconic part of most people’s childhood, so planning a Disney themed party on Children’s Day will make your kids’ party special and fun. You can get themed Disney character costumes, decorations relating to Disney’s fairy tales, and even screen some popular Disney movies.
4. Dance Party
Dancing is fun; there is absolutely no doubt about that. A great and cheap way to celebrate Children’s Day is to clear up the furniture in your living room, put on some of your kid’s favourite songs, and dance it out with them all evening. Once they’re tired, finish the day with ice cream and their favourite foods to experience a truly magical bonding experience with your kids on one of their favourite days of the year.
5. Camping
Children’s Day is all about having fun with your kids. Build some classic memories with them on a camping trip to one of your favourite family spots for a night under the stars. Take some snacks and marshmallows to roast by the bonfire while you bond with your children over famous camping stories.
6. Movie Marathons
There are few things that kids enjoy more than a good movie. Organise a movie marathon for your kids, this Children’s Day, with a screening of their favourite movies, popcorn, and a blanket to cuddle under with them. These are the Children’s Day memories that last, and they are the ones that are the most special.
7. Bake with Them
Sometimes, being a part of the preparations is as special as the main event. Have your kids kneed the dough with you, add some flavour, make some icing, and of course, have them taste the cookie/cake dough while you bake together. You can give them cookie cutters in different shapes, sprinkles, and other decoration items, and this will enhance their creativity. Once you’re done, sit with them and have a small party where you eat those special cookies.
8. Visit a Water Park
Few things are as memorable as a family visit to the water park. Kids adore rides, ice cream, food, and shows at water parks. So, take them to an amusement park or a water park on this special day.
9. Pizza Party
Your kids and their friends, as well as their family, can have a fun time bonding over pizza. Organise a pizza party by baking or ordering your children’s favourite pizzas. You can make the night a little extra special with a chocolate dessert pizza. Make sure the pizza is accompanied by games to make the night a bit extra special.
10. Paint Party
Few things are as fun for kids as painting. This Children’s Day, get a lot of empty canvases and finger paints that are kid-friendly and let your children unleash their creativity. Make sure that you wash their hands clean after the night is done and put up their masterpieces on the fridge to appreciate for years to come.
11. Visit Old-age/Retirement Homes
Apart from parents, children are most loved and pampered either by grandparents or old-age people. If your kids do not have grandparents, then you can visit retirement homes every Children’s Day. Old-age people love kids; they will feel loved and welcomed, and on the other hand, your kids will become more compassionate towards senior citizens. If your kids have grandparents, then you can simply visit them and spend a cheerful day with them.
12. Visit an Amusement Park
Amusement parks are loved by children of all ages! After all, it offers many ride and activity choices, which are so much fun. From going on fun rides to simply strolling around the park, this will surely be on the kids’ list of awesome things to do on Children’s Day!
13. Storytelling Session
This involves inviting a skilled storyteller to entertain children by narrating captivating stories.The storyteller engages the children by making the tales interesting and may even involve them in the storytelling process. It’s a way to ignite their imagination and love for stories.
14. DIY Science Experiments
This involves organizing simple and safe science experiments that children can do at home. These experiments are designed to be hands-on, allowing kids to actively participate in the learning process. The aim is to make science engaging and enjoyable, fostering a love for learning.
15. Art and Craft Marathon
Set up an art and craft station at home with a variety of materials like colored paper, glue, scissors, markers, and more. Let your children unleash their creativity by making handmade cards, drawings, or other crafts. You can turn it into a marathon by setting challenges or themes for different crafting sessions.
16. Sports Day
Organize a mini sports day at a local park or in your backyard. Plan simple games like sack race, three-legged race, and tug-of-war. Create certificates or medals for the participants to make it a memorable and competitive Children’s Day celebration.
17. Virtual Talent Show
Host a virtual talent show where your kids can showcase their talents, whether it’s singing, dancing, magic tricks, or any other skill they possess. Invite friends and family to join the virtual event and cheer for the young performers. This not only celebrates their abilities but also provides a platform for them to express themselves creatively.
14 Interesting Activities for Children’s Day
Children’s Day isn’t all about parties and outings. The activities you plan for your children on this day can be just as special. Here are a few Children’s Day games and activity ideas to try this year.
1. Treasure Hunt
One of the most popular games for Children’s Day, a treasure hunt is a perfect activity to enable your children’s fun-loving and adventurous nature while keeping them occupied and entertained all through this day. Make the prize a Children’s Day themed one to emphasise the special nature of the game for the day.
2. Enact a Play
Children evolve by engaging in different creative activities. On this day, you ask your kids and their friends to enact a play by copying a story or creating an original play by themselves. For a helping hand, you can direct the play and they can act. Activities like these are harmless and will only boost their creativity and confidence.
3. Pool Games
A day at the pool on this Children’s Day can be the perfect recipe for lifelong memories. Add to that fun children’s pool games, and it is a recipe for an unforgettable day. Make sure you take a beach ball with you, so they can play games like water polo. You can also teach them Marco Polo and other fun pool games on this day to make it special.
4. Piñata
This Mexican traditional party game is loved by everyone, be it kids or grown-ups. This Children’s Day, make a cardboard piñata stuffed with healthy and yummy treats and enjoy this game with your kids. Don’t fret if they can’t find or break the piñata. Give them the rewards at the end of the day, anyway, and watch their eyes light up with this fun Children’s Day game.
5. Twister
Twister is an energetic and fun game to be enjoyed with family and friends. On this special day, you can together as a family can play twister and have lots of fun. Whoever conquers maximum colours will win the game. It is important to make sure you don’t make the game too competitive as twister can be harmful to your kids if they overextend or twist their bodies too far to win.
6. Hiking
Some of the best memories that can be made are those sunrises or sunsets over a mountaintop. This is especially true with your kids. Take them out for an easy hike this Children’s Day and have a picnic at the top of the mountain or hill. Watch a sunrise or sunset at the peak before making your way back. Maybe, stop at a local restaurant and order some of your children’s favourite desserts.
7. Take Them to the Planetarium
Kids are full of curiosity. Fill their sense of wonder with a family trip to the planetarium, this Children’s Day, so they can learn all about the stars and planets in the universe. This will entertainas well as educating them. Remember, every astronaut today once began with a small visit to one of these planetariums.
8. Take Them Bowling
Bowling is a great way to bond with your children, so take them out this day and bowl a few frames. Make the day a little extra special by taking them for ice cream and sodas after you’re done playing at the bowling alley.
9. Go to the Arcade With Your Kids
An arcade is a special place for kids. There are prizes, fun games, tickets, and the environment is full of fun and bliss. On this occasion, take your kids for a day at the arcade. Treat them with delicious snacks, ice cream, and sodas, and your kids will have an unforgettable Children’s Day.
10. Have a Costume Party
There aren’t many activities that are as fun or creative for kids as costume parties. The same can be said for adults, too. In this costume party, kids can dress up as their favourite characters, dance, sing, eat cake, play in a bouncy house, and enjoy fun party games like pin the tail on the donkey or duck, goose don’t have much of a downside. Remember, your costume party should also have Children’s Day themed party favours.
11. Go-Karting
Go-karting is an enjoyable and safe family fun activity that all children love to do. This Children’s Day, make sure you go to your local tracks because they have unbelievable discounts on special days. Race with your kids, savour themed foods and snacks, and enjoy a memorable Children’s Day.
12. Balloon Pop Relay
Create a balloon pop relay race for the kids. Fill balloons with small treats or notes and tie them to a string. Divide the kids into teams and have them race to pop the balloons by sitting on them or using other creative methods. The team that pops all their balloons first and retrieves the treats or notes wins.
13. Bubble Wrap Stomp Painting
Spread out a large piece of bubble wrap, add some paint, and secure it to the ground. Let the kids wear old shoes and stomp on the bubble wrap to create a unique and colorful painting. This messy and creative activity is sure to bring lots of laughter and artistic expression.
14. Musical Chairs With a Twist
Put a twist on the classic musical chairs game by adding fun elements like dancing or incorporating small challenges for the kids to complete when the music stops. This variation adds an extra layer of excitement and keeps the children engaged in the game.
So these were some of the many ideas to celebrate Children’s Day. Children’s Day is one of the best days of the year for kids. It should be filled with fun, excitement and joy. Make sure that the Children’s Day activities for kindergarteners you plan are safe and unique. It is also worth remembering that making this day special doesn’t always have to be expensive. It just has to be special for your kids, so instead of buying them expensive gifts, a great way to spend the day would be doing activities like arts and crafts with them. Have a great, unique and special Children’s Day with your children.
Also Read:
Gift Ideas for Children’s Day
Children’s Day Celebration Ideas
Children’s Day Craft Ideas for Kids
Children’s Day Quotes, Wishes and Messages
Read more




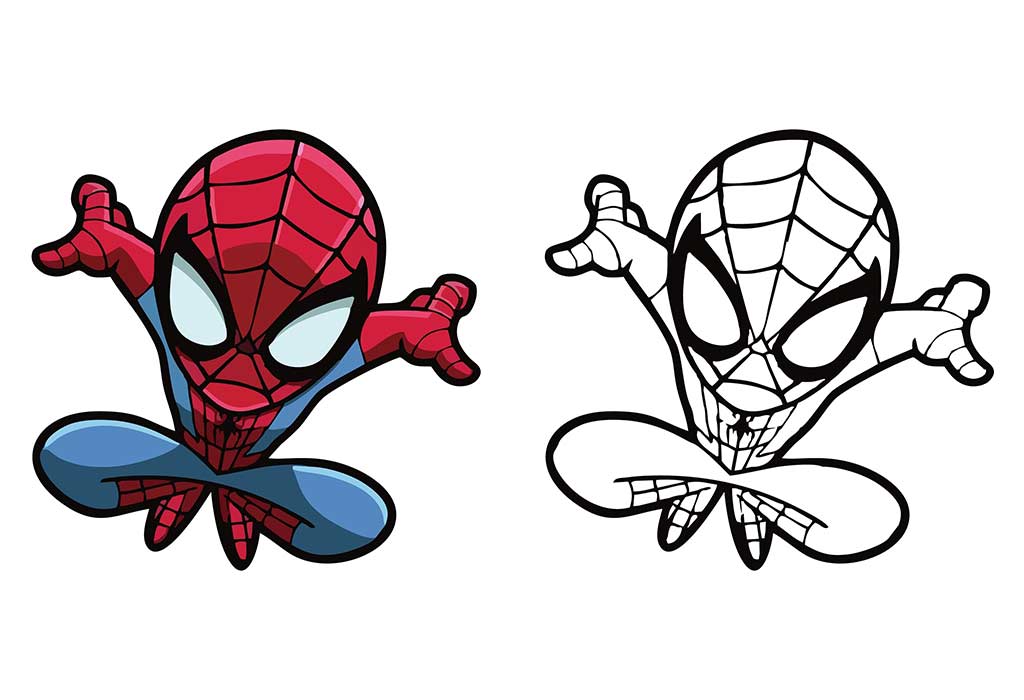
Spiderman Coloring Pages – Free Printable Sheets and Images
Spiderman coloring pages offer exciting coloring time for kids aged 2 to 8, from toddlers and preschoolers to older kids. Our collection of coloring sheets of Spider-Man include Spider-Man climbing walls, swinging through the city, shooting webs, and standing in his classic superhero pose. If you are looking for pictures to color of Spiderman for your kiddos, this is the right spot for your search. Our Spiderman pages to color provide a fun and creative outlet for fans. Download and print these simple printable coloring pages for kids for free and watch as your child brings Spider-Man to life with their vivid colors and boundless imagination.
Best Printable Spiderman Coloring Pages
Our Spiderman coloring pages for kids are perfect for young fans as well as elementary school children. These printable coloring pages of Spiderman are well outlined so children can have a smooth drawing experience. Download for free these easy Spiderman coloring images, print, and get your kiddo coloring!
1. Spidey and His Amazing Friends Coloring Page
The Spidey and His Amazing Friends Coloring Page features Spider-Man along with his friends Spin and Ghost-Spider. Kids can use vibrant colors such as red, blue, and black for their suits. The simple character shapes are great for younger children
2. Spider-Man No Way Home Coloring Page
Spider-Man wears different suits throughout Spider-Man: No Way Home, each with its own design and details. Colour his suit red and blue, then add grey buildings, dark skies, or action lines to create a movie-inspired scene.
3. Spider-Man Miles Morales Coloring Page
Miles Morales is a Spider-Man who wears a black and red Spider-Man suit that makes him stand out from other versions of the hero. Use bold black and red shades, then draw tall buildings behind him to show him jumping through the city.
4. Christmas Spiderman Coloring Page
Christmas Spiderman coloring page combines the merry of Spider-Man with the festive spirit of Christmas. Children can colour Spider-Man in a holiday-themed setting, using the classic Christmas-themed reds, greens, and other festive colours to capture the joy and wonder of the season. For background, you may draw snowy buildings or a cute snowman!
5. Homecoming Spider-Man Coloring Page
Featuring Spider-Man from Spider-Man: Homecoming, this colouring page captures the iconic pose. The sketch depicts Spider-Man jumping and throwing a web. Kids can use Colour his suit in bright red and blue, then add city buildings or tall rooftops to complete this action-filled scene.
6. Spider-Man Venom Coloring Page
This Spiderman coloring page features an amazing Spiderman and Venom combo. Venom is known for his large white eyes, sharp teeth, and long tongue, making him a striking partner for Spider-Man in this scene. Use black and white for Venom and red and blue for Spider-Man to show the contrast between the two characters.
7. Spider-Man: Far From Home Coloring Page
In this Spider-Man: Far From Home coloring page, Peter Parker travels to Europe while trying to balance school life and superhero duties. Picture a young Spider-Man and colour his suit red and blue or try darker shades for a different look, then add buildings and travel-inspired details in the background.
8. Spider-Man: Across the Spider Verse Coloring Page
If you want something unique and thrilling Spider-Verse coloring page scene to colour, then this scene of Spider-Man scaling a towering building is perfect. Kids can use bright reds, blues, purples, and yellows to colour the hero and city buildings.
9. Spiderman Face Coloring Page
The Spiderman face coloring page features a close-up of Spider-Man’s iconic mask. Children can use bright reds and blues to color his face. Kids can even turn this coloured page into a face mask by first coloring the page and trimming the edges of the face and tying a string at both ends of the face, right and left.
10. Spiderman Halloween Coloring Page
Celebrate Halloween with our cute and fantabulous Spidey for a spooky Halloween. Kids can color Spider-Man in a Halloween-themed setting, using orange, black, and other festive colors to bring the scene to life. younger children can enjoy adding bats, stars, or a smiling ghost.
11. Cartoon Spiderman Coloring Page
The cartoon Spiderman coloring page showcases a fun and animated version of Spider-Man. Children can use bright red and blue for his suit. The clear outlines make this page a good choice for beginners.
12. Iron Spiderman Coloring Page
The Iron Spiderman coloring page features Spider-Man in his advanced Iron Spider suit, complete with metallic accents and advanced armour. Kids can use metallic reds and golds to highlight the suit’s sleek design and advanced technology, which blends both Spider-Man’s speed and Iron Man’s technology!
13. Lego Spiderman Coloring Page
LEGO Spider-Man has a block-shaped body and simple features inspired by LEGO minifigures. Use red and blue for his suit, black for the web lines, and yellow for any LEGO-style details, making this design easy for little superhero fans to colour
14. Marvel Spiderman Coloring Page
The Marvel Spiderman Coloring Page features Spider-Man in a classic comic book style, capturing the spirit of Marvel’s superhero universe. Kids can use vibrant colours to illustrate Spider-Man’s dynamic pose and even draw a detailed background.
15. Batman and Spiderman Coloring Page
This unique coloring page brings together two legendary heroes, Marvel’s Spiderman and DC Comics’ Batman. Use black, grey, and yellow for Batman, then add bright red and blue to Spider-Man for a fun contrast between the two heroes.
16. Spiderman Motorcycle Coloring Page
This Spiderman Motorcycle Colouring Page features Spider-Man riding a sleek motorcycle. Kids can colour the motorcycle in Spider-Man’s signature red and blue, and choose black, silver, or yellow for the motorcycle and its details.
17. Spiderman Birthday Coloring Page
Birthday cakes, balloons, and party hats make this Spider-Man colouring page perfect for a superhero-themed celebration. Use bright colours for the decorations, red and blue for Spider-Man, and pink, yellow, or chocolate brown for the cake and icing.
18. Chibi Spiderman Coloring Page
This adorable Chibi Spiderman coloring page features Spider-Man in the popular chibi style, with exaggerated, cute proportions. Using soft and playful colors, young artists can bring out the endearing qualities of this tiny superhero.
19. Spiderman Shoots His Web Coloring Page
In this Spiderman Shoots his Web Coloring Page, Spider-Man is depicted mid-action, firing his web. Bright blues and reds can help bring the scene to life. This action-packed comic style scene is enough to make any superhero fan go crazy!
20. Spiderman Jumping Coloring Page
Kids will love this Spiderman jumping coloring page. Spider-Man is famous for his amazing jumps, quick movements, and ability to move across rooftops. Use bright red and blue for his suit, with grey buildings and a blue sky behind him.
21. Spiderman PS4 Coloring Page
The Spider-Man video game for PlayStation 4 features a suit with a large white spider symbol across the chest. Colour the suit red and blue, leaving the spider symbol white, and add darker shades to bring out the smaller costume details.
22. Spiderman Ready to Shoot Coloring Page
Spider-Man often points his fingers outward to shoot webs from his wrist-mounted web-shooters. Colour his suit in red and blue, then add white web lines and a city background to complete the action scene while keeping the focus on his classic superhero pose.
23. Spiderman Swinging From One Building Coloring Page
Spider-Man uses his webs to swing from tall buildings and move quickly through the city. Choose red and blue for his suit, grey and brown for the skyscrapers, and light blue for the sky to show the height and movement of his swing.
24. Spiderman Kicking The Villain Coloring Page
Spider-Man uses his agility and quick reflexes to fight villains and protect people. Colour his suit red and blue, then choose darker shades for the villain; the action pose offers older children a chance to add shadows and movement lines.
25. Spiderman on the Roof Coloring Page
Spider-Man often stands on rooftops to look over the city and prepare for his next adventure. Use dark blue or purple for the night sky, yellow for glowing windows, and bright red and blue for his suit to create a striking nighttime scene.
Tips for a Fun Coloring Experience
Want to make memories with your kiddo while they enjoy these free coloring sheets of Spiderman? These tips will certainly enhance your fun with these free coloring Spiderman pages!
Create action scenes by drawing additional elements like buildings or vehicles.
Use different shades of red and blue to add depth to Spider-Man’s suit.
Incorporate shadows to make Spider-Man look more dynamic and three-dimensional.
Add speech bubbles with your favourite Spider-Man quotes as they do in comics.
Use reference images from comics or movies for more accurate colouring.
FAQs
1. Who is Spider-Man?
Spider-Man is a fictional superhero created by writer Stan Lee and writer-artist Steve Ditko. He first appeared in Amazing Fantasy #15 in 1962. Spider-Man, also known as Peter Parker, is a teenager who gains spider-like abilities after being bitten by a radioactive spider.
2. What creative activities can kids do with Spiderman coloring pages?
Kids can turn Spiderman coloring pages into fun crafts by cutting out their colored Spiderman and creating masks, puppets, or even a Spiderman mobile. They can also use these pages to design their own Spiderman comic books or storyboards and improve their storytelling skills. These free Spiderman coloring pages are also perfect for making poster that you can highlight in the classroom or even at home.
3. Can Spiderman coloring pages be part of themed parties?
Yes! Spiderman coloring pictures make excellent activities for themed parties. You can set up a coloring station where kids can bring Spiderman to life with their imagination and favorite colors. These pages can also be used to create party decorations, such as banners and table centrepieces, making the celebration even more special.
Hope you enjoy the endless fun and creative opportunities Spiderman coloring pages for kids, toddlers, and preschoolers. Whether for solo play or group activities, these pages are perfect for inspiring imagination and bringing the exciting world of Spider-Man to life.
Disclaimer:
By accessing and using the colouring pages, you acknowledge and agree to abide by the terms and conditions outlined in our disclaimer, which is subject to change in order to ensure continued compliance with copyright laws and regulations. All the materials provided on this platform are strictly intended solely for educational and non-commercial purposes only. Any reliance you place on such information is strictly at your own risk. All rights with respect to Material(s) featured herein are reserved with the original copyright owners. We do not intend to infringe any legitimate intellectual right, artistic rights or copyright. If you are the rightful owner of any of the pictures/wallpapers posted here, and you do not want it to be displayed, then please contact us with requisite details and documents and we will immediately do whatever is needed in this respect. All the colouring pages [Material(s)] displayed on this site are free of charge and therefore we do not gain any financial benefit from the display or downloads of any images.
Also Read:
Hulk Coloring Pages
Naruto Coloring Pages
Ninjago Coloring Pages
Batman Coloring Pages
Read more
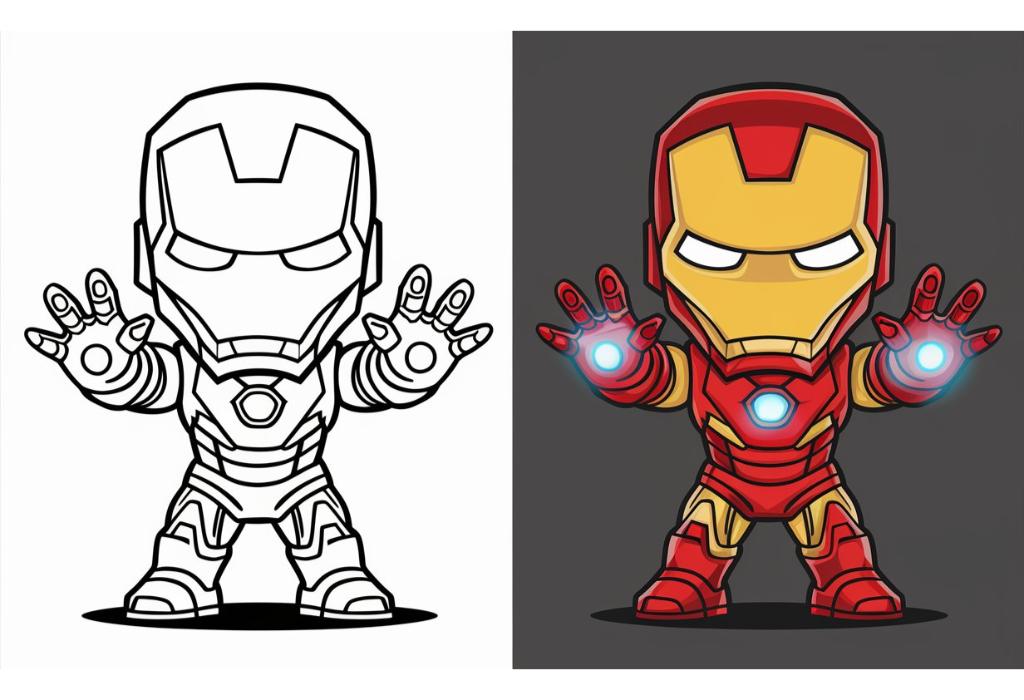
Iron Man Coloring Pages – Free Printable Sheets & Pictures
Iron Man coloring pages offer children aged 2 to 8 a fun experience of coloring their favorite superhero. Iron Man, or Tony Stark, first appeared in Marvel Comics in 1963 and has since become an iconic superhero inspiring many animated series, films, and video games. Our collection includes detailed Iron Man coloring sheets that depict exciting scenes from his heroic journey. Coloring helps improve fine motor skills as children practice holding crayons and filling in different shapes. Enjoy our simple printable coloring pages for kids to ensure a fun and creative activity. Download for free and print these Iron Man coloring pages and start your kiddo’s superhero coloring activity!
Best Printable Iron Man Coloring Pages
Get ready for excitement with the coolest Iron Man coloring pages printable! Explore a variety of Iron Man coloring sheets to print, showcasing Tony Stark’s epic adventures. Perfect for young superhero fans, these Iron Man coloring pages for kids will spark creativity and provide hours of thrilling fun. Simply download, print, and start coloring with your kiddo!
1. Cute Iron Man Coloring Page
Iron Man’s red-and-gold suit makes him easy to recognise, even in this cute, friendly design. For this Iron Man coloring page, kids can use bright red, yellow, and gold to colour his armour. This simple page is a fun choice for toddlers and preschoolers.
2. Iron Man Avengers Coloring Page
Iron Man is a member of the Avengers, a team of superheroes who protect the world from danger. Marvel fans will love the Iron Man Avengers coloring page. Kids can color his armour red and gold. Children can give Iron Man’s suit a realistic metallic sheen using metallic crayons.
3. LEGO Iron Man Coloring Page
LEGO Iron Man has a block-shaped body and a helmet that looks like a toy figure. For this LEGO Iron Man coloring page, kids can use red and gold for his suit, with blue, grey, or black for the background. The moderate design of the illustration is perfect for preschoolers and older kids.
4. Iron Man Helmet Coloring Page
Iron Man’s helmet has glowing eye openings and a gold faceplate surrounded by red armour. This Iron Man mask coloring page is perfect for older kids. Colour the faceplate yellow or gold and the outer shell red, while older children can take their time with the smaller lines and details.
5. Marvel Iron Man Coloring Page
Iron Man wears a high-tech suit that helps him fly, fight, and protect people from danger. Kids can bring this Marvel Iron Man coloring page to life with red and gold. Kids can use gliter pens for detailing as well.
6. Iron Man Hulkbuster Coloring Page
Get ready for some heavy-duty coloring with the Iron Man Hulkbuster coloring page. The Hulkbuster is a large suit of armour built to help Iron Man face the powerful Hulk. Use red and gold for its main parts, adding dark grey to the joints and other details for a bold look that older kids may enjoy.
7. Iron Man Endgame Coloring Page
Relive the epic moments of Avengers: Endgame with Iron Man Endgame coloring pages. In the movie, Iron Man wears advanced armour during the fight to save the universe. Use red and gold for his suit. It is suitable for older children.
8. Among Us Iron Man Coloring Page
Mixing the fun of Among Us with the excitement of superheroes, the Among Us Iron Man coloring page is perfect for kids. Colour the suit red and gold, then choose blue, purple, or green for the visor and background to create a playful design.
9. Flying Iron Man Coloring Page
Soar through the skies with a Flying Iron Man coloring page. Iron Man uses special jets in his suit to fly through the air. Kids can colour his armour in red and gold, then add light blue skies and white clouds for an action-filled scene.
10. Iron Man in Combat Coloring Page
Bring the excitement of superhero battles to life with an Iron Man in Combat coloring page. Iron Man’s armoured suit has built-in tools and weapons that help him fight powerful enemies. Use red and gold for his armour, adding dark grey, blue, or orange to the background to show the energy and movement of the battle.
11. Iron Monger Coloring Page
Iron Monger is a large armoured villain who faces Iron Man in the first Iron Man movie. Choose dark grey, silver, and black for his heavy suit, with touches of red or orange to give this detailed design a powerful look
12. Chibi Iron Man Coloring Page
The Chibi Iron Man Coloring Page showcases a cute, miniature version of our beloved hero. Chibi characters have large heads and small bodies, giving Iron Man a cute, toy-like appearance. Children can colour his helmet red and gold or experiment with new colors.
13. Pepper Potts Iron Man Coloring Page
Celebrate girl power with the Pepper Potts Iron Man Coloring Page. Pepper Potts wears an Iron Man suit as Rescue in Avengers: Endgame, showing that she can be a hero too. Use blue and silver for her armour, adding gold or light blue details to make this superhero design stand out.
14. Iron Man Deadpool Coloring Page
The Iron Man Deadpool Coloring Page features two of Marvel’s most iconic heroes together. Kids can use red and gold for Iron Man and red and black for Deadpool. They can also choose bright colours for the background to bring both Marvel characters together.
15. Mark 2 of Iron Man Coloring Page
Revisit the classic armor with the Mark 2 of Iron Man Coloring Page. The Mark II is one of Tony Stark’s early Iron Man suits, known for its shiny silver finish. Use silver, grey, and white to colour the armour, adding darker shades around the joints to bring out the suit’s shape and details.
16. Mark 3 of Iron Man Coloring Page
Dive into the details of the Mark 3 of Iron Man Coloring Page. The Mark III is the first Iron Man suit in the movie series. Use bright red for the armour and gold for the faceplate and other panels. This advanced suit is depicted in intricate detail, perfect for kids who love a bit of a challenge in their coloring adventures.
17. Iron Man Stops the Enemy Coloring Page
Iron Man uses his powerful suit to protect people and stop dangerous enemies. Colour his armour red and gold, then add dark grey, blue, or orange around the action to show the energy of the scene and his heroic pose
18. Iron Man War Machine Coloring Page
The Iron Man War Machine Coloring Page features the powerful duo of Iron Man and War Machine. War Machine wears dark, heavy armour and is a close ally of Iron Man. Use shades like silver, grey, or black for War Machine.
19. Iron Man Fierce Coloring Page
Feel the intensity with the Iron Man Fierce Coloring Page. This illustration can have deep red and gold for the armour, with dark grey or black around the edges to highlight the suit’s shape and strong features. It’s perfect for kids who admire Tony Stark’s bravery and strength.
20. Iron Man Landing Coloring Page
Capture the epic moment of a superhero landing with the Iron Man Landing Coloring Page. Iron Man is depicted mid-air, about to make a powerful landing. Colour his armour red and gold, then add dust clouds, grey ground, or blue skies to show the moment he touches down.
21. Small Iron Man Coloring Page
Designed with little hands in mind, this chibi version of Iron Man will be a hit among young children. For this Small Iron Man coloring page, children can use bright colours for his helmet and armour. This page is suitable for toddlers who are learning to colour.
22. Fighting Iron Man Coloring Page
In this Fighting Iron Man coloring page, Iron Man’s armoured fists and strong stance make him look ready to face an enemy. Colour his suit red and gold, then add blue, grey, or orange around the action; older children can focus on the smaller armour details.
23. Iron Man With Gun Coloring Page
Iron Man’s suit includes high-tech weapons and tools that help him face dangerous enemies. Kids can try red and gold or yellow for the armour and grey or silver for the weapon, keeping the colours distinct so each part of the design is easy to see.
24. Angry Iron Man Coloring Page
Witness the fierce determination in the Angry Iron Man coloring page. Apart from the classic red and gold for the helmet, adding darker shades around the edges and joints to bring out the finer details for older children.
25. Standing Iron Man Coloring Page
The Standing Iron Man Coloring Page showcases Iron Man in a powerful, confident stance. Kids can experiment with a new color palette, from red to a different one. Perfect for young fans, this coloring page allows children to bring out the classic look of Iron Man.
Tips for a Fun Coloring Experience
These free coloring pages of Iron Man offer a great activity for children. Make the most of your coloring pictures of Iron Man with these fun and engaging tips:
Watch Iron Man movies or cartoons to get inspired and capture the colors and details of his suit accurately.
Use reference images from Iron Man comics to explore different styles and color schemes for your coloring pages.
Mix in other Marvel characters like Spider-Man or the Hulk to create dynamic and exciting scenes.
Encourage kids to imagine and draw their own version of Iron Man’s gadgets and upgrades, adding a personal touch to their coloring pages.
Add special effects like glowing energy blasts or sparks using neon markers and glitter pens to make the pages come to life.
FAQs
1. How can coloring Iron Man pages help with learning about technology?
Coloring Iron Man pages can spark conversations about technology, engineering, and robotics. Parents can use Iron Man’s suit as a starting point to discuss how real-life technology works.
2. How can parents make Iron Man coloring sessions educational?
Parents can turn coloring sessions into learning opportunities by discussing Iron Man’s history, the science behind his suit, and the values he represents like bravery, intelligence, and perseverance.
3. What are some creative challenges for kids while coloring Iron Man?
Parents can challenge kids to create a new version of Iron Man’s suit for a specific environment, like underwater or in space, encouraging them to think about the practical needs of each setting.
4. How does Iron Man’s story inspire kids?
Iron Man’s story teaches kids about resilience and ingenuity. Despite his initial injuries, Tony Stark uses his intellect to overcome obstacles and make a positive impact on the world.
Coloring pages of Iron Man provide an exciting way for kids to explore their creativity and learn about their favorite superhero. Download and print these pages to bring Iron Man’s adventures to life and inspire endless fun.
Disclaimer:
By accessing and using the colouring pages, you acknowledge and agree to abide by the terms and conditions outlined in our disclaimer which is subject to change in order to ensure continued compliance with copyrights laws and regulations. All the materials provided on this platform are strictly intended solely for educational and non-commercial purposes only. Any reliance you place on such information is strictly at your own risk. All rights with respect to Material(s) featured herein are reserved with the original copyright owners. We do not intend to infringe any legitimate intellectual right, artistic rights or copyright. If you are the rightful owner of any of the pictures/wallpapers posted here, and you do not want it to be displayed, then please contact us with requisite details and documents and we will immediately do whatever is needed in this respect. All the colouring pages [Material(s)] displayed on this site are free of charge and therefore we do not gain any financial benefit from the display or downloads of any images.
Also Read:
Hulk Coloring Pages
Batman Coloring Pages
Spiderman Coloring Pages
Ninja Turtle Coloring Pages
Read more
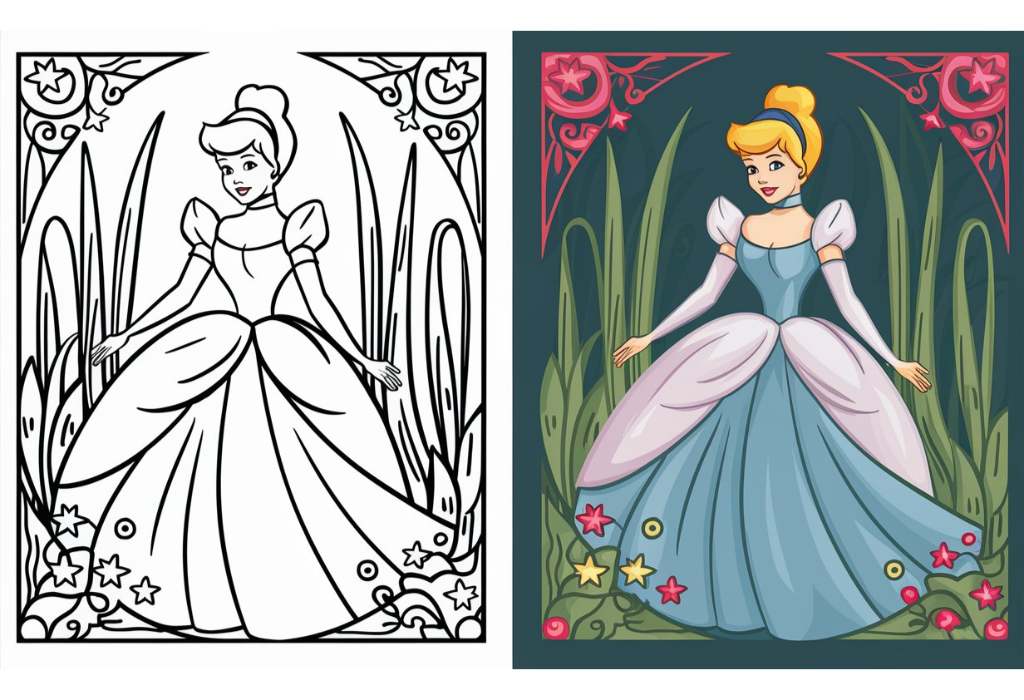
Cinderella Coloring Pages – Free Printable Sheets & Pictures
Cinderella coloring pages are a perfect activity for children aged 2 to 8 years. Our collection of 25 beautiful Cinderella images for colouring features Cinderella in her beautiful ball gown, scenes with her glass slipper, the royal palace, her fairy godmother, and charming carriage illustrations. Coloring these free Cinderella coloring pages ensure creative expression as children choose colors for clothes, objects, and backgrounds. For parents and teachers, we offer easy printable coloring pages for kids to ensure a hassle-free and enjoyable activity. Download and print these delightful Cinderella coloring images to bring the timeless story of Cinderella to life!
Best Printable Cinderella Coloring Pages
From toddlers and preschoolers to older children, these Cinderella Disney coloring pages offer plenty of fun. With a mix of iconic scenes and beloved characters from this classic story, there’s something for everyone. Simply download for free, print, and enjoy free printable Cinderella coloring pages with your kiddo!
1. Beautiful Cinderella Coloring Page
Among the most loved Cinderella coloring pictures, this beautiful Cinderella coloring page is often chosen the most. Children can colour her dress in blue, pink, or purple and add yellow stars or flowers around her. It is perfect for preschoolers and kids.
2. Cinderella Glass Slipper Coloring Page
Add a touch of magic with the. Cinderella’s glass slipper is the special shoe that helps the prince find her in the fairy tale, which is featured in this Cinderella Glass Slipper coloring page. Kids can use light blue, silver, or grey to make the slipper look shiny, and add tiny stars for a magical touch.
3. Cinderella Holds a Flower Coloring Page
Watch as your child colors Cinderella holding a delicate flower. Children can colour her dress blue or pink and choose red, yellow, or purple for the flower, making it a simple activity for toddlers and preschoolers.
4. Cinderella Dancing Coloring Page
Bring the ballroom to life with the Cinderella Dancing coloring page. Children will love coloring Cinderella’s dress in shades of blue, pink, or purple, and use gold for the ballroom decorations. The flowing dress also gives older children a chance to try different shades and different coloring tools.
5. Cinderella and Prince Charming Coloring Page
Kids can dive into the romance of Cinderella and Prince Charming with this coloring page. They can color Cinderella’s gown blue and the prince’s outfit in blue, white, or gold, then add colourful flowers or stars to complete the scene.
6. Worried Cinderella Coloring Page
Cinderella looks worried in this coloring page. Kids can use soft blue, pink, or purple for her dress, and add a simple castle or garden in the background to tell your own story. Parents can encourage their kids to imagine a castle background or a magical forest to bring the scene to life.
7. Fairy Godmother and Cinderella Coloring Page
This enchanting page features Cinderella and her Fairy Godmother in a magical moment. Children can color the Fairy Godmother’s gown in purple or pink, Cinderella’s dress in blue, and the magic wand in yellow. Adding stars stickers or sparkles in the background can make it even more magical.
8. Cinderella With Flower Bouquet Coloring Page
Cinderella holds a bouquet filled with lovely flowers in this pretty scene. Children can choose red, yellow, pink, or purple for the flowers and blue for her gown, while green leaves add a fresh touch to the picture.
9. Cinderella Holds the Little Mouse Coloring Page
This adorable page shows Cinderella holding her little mouse friend. Kids can color Cinderella’s dress blue or pink and the mouse grey or brown. They can also add a few flowers or tiny hearts to make the picture extra sweet.
10. Cinderella in the Pumpkin Carriage Coloring Page
Cinderella rides in her iconic pumpkin carriage in this enchanting scene. Colour the pumpkin carriage orange, its wheels brown or gold, and Cinderella’s gown blue. Add a nighttime sky with twinkling stars to make it truly magical.
11. Cinderella Putting on Her Shoes Coloring Page
Cinderella wears her famous glass slippers when she goes to the royal ball. Prechoolers and older kids can enjoy coloring this page by using pale blue, silver, or grey for the shoes and blue or pink for her gown. They can also add small sparkles around the slippers to show their shine.
12. Cinderella in the Bowknot Dress Coloring Page
Cinderella looks stunning in her beautiful bowknot dress, ready for the royal ball. Let your little artists colour the dress blue, pink, or purple and give the bow a bright shade that stands out, such as yellow or red. They can add a touch of gold for a truly regal look.
13. Sitting Cinderella Coloring Page
In a serene and peaceful moment, Cinderella sits gracefully, awaiting her fairy tale ending. Kids can use soft blue, pink, or lavender for her gown. Once the dress is done, kids can draw and color green grass, colourful flowers, or butterflies to create a peaceful garden in the background. Stickers can also be pasted.
14. Cinderella with Broom Coloring Page
Before the magic happens, Cinderella spends time cleaning her home. Kids can colour the broom brown and her clothes in blue, grey, or pink, keeping the design simple and easy for younger children to enjoy.
15. Sad Cinderella Coloring Page
Capture Cinderella’s emotions in this poignant scene. Little ones can use a mix of soft blues and grays to reflect her mood. They can also add a fairy godmother’s shimmering magic in the background, a yellow star, or a colourful flower in the background.
16. Cinderella Walking with Her Prince Coloring Page
Cinderella and Prince Charming walk together in a lovely fairy tale moment. Children can color Cinderella’s gown in the classic blue or pink shades and the prince’s clothes in blue, white, or gold. Or, they can experiment with new colors.
17. Cinderella Walking Away Coloring Page
Cinderella’s flowing gown moves as she walks away, making this picture fun to colour. Choose blue, purple, or pink for her dress and add soft green grass or a castle in the background, while older children can practise colouring the dress folds.
18. Cinderella And Prince on Wedding Day Coloring Page
Cinderella and Prince Charming celebrate their wedding in this special fairy tale scene. Colour Cinderella’s wedding dress white, pink, or pale blue and the prince’s outfit in blue or gold. This page is suitable for older kids.
19. Crying Cinderella Coloring Page
Cinderella has tears in her eyes in this picture, showing a sad moment from her story. Use blue or purple for her dress and add soft colours to her surroundings, helping children explore different feelings through a simple colouring activity.
20. Cinderella and a Horse Coloring Page
Cinderella stands beside a horse, a friendly animal often seen in fairy tale stories. Children can colour the horse brown, black, or white and Cinderella’s dress blue or pink. The detailed drawing of Cinderella and the horse offers a fun challenge for kids to colour.
21. Cinderella and the Castle Coloring Page
Cinderella stands gracefully in front of her magnificent castle, ready for a magical adventure. Kids can use bright and vibrant colors like blue or purple for the gown and colour the castle grey, pink, or pale yellow. Children can also add green trees and bright flowers to make the scene colourful.
22. Smiling Cinderella Coloring Page
Cinderella’s gentle smile and bright eyes make this princess picture warm and cheerful. Colour her hair yellow or golden, her gown blue or pink, and the background in soft shades, making this portrait a nice choice for beginners.
23. Running Cinderella Coloring Page
Cinderella runs away from the royal ball before the clock strikes midnight. Kids can colour her flowing gown blue or purple and her shoes silver, then add a few stars or a castle in the background to show the magic of her escape.
24. Cinderella and Three Birds Coloring Page
Cinderella is often shown with little birds that keep her company while she works and sings. Kids will enjoy coloring this sweet scene by coloring the birds yellow, blue, or red and Cinderella’s dress blue or pink.
25. Cinderella and Pumpkins Coloring Page
Pumpkins play an important part in Cinderella’s magical journey to the royal ball. Colour the pumpkins orange, yellow, or green and Cinderella’s gown blue or purple, then add brown vines and green leaves for a bright autumn scene.
Tips for a Fun Coloring Experience
Make the most of your Cinderella coloring time with these simple tips:
Watch the Cinderella movie to get inspiration for coloring the scenes and characters accurately.
Read Cinderella storybooks or comics to immerse in the story and find ideas for unique color combinations.
Mix in other fairy tale characters, like adding a fairy godmother or friendly forest animals, to make the pages more imaginative.
Encourage using glitter and sparkly stickers to make Cinderella’s dress and the magical elements stand out.
Use online coloring guides or references to explore different artistic styles and techniques for a more detailed and creative outcome.
FAQs
1. Can Cinderella coloring pages help improve creativity in kids?
Yes, coloring Cinderella pages enhances creativity by letting kids explore color combinations, design unique outfits, and imagine different scenarios in Cinderella’s story, encouraging innovative thinking.
2. Are there any educational benefits to coloring Cinderella pages?
Absolutely. Cinderella coloring sheets teaches children about resilience and hope, as they learn from Cinderella’s story of never giving up and always believing in a better future. It also fosters discussions about kindness and perseverance.
3. Do Cinderella coloring pages promote storytelling and imagination in children?
Yes, coloring Cinderella pages promotes storytelling as children create narratives based on Cinderella’s adventures. They imagine her journey from rags to riches, enhancing their creativity and story-building skills.
Cinderella coloring pages for kids, toddlers, and preschoolers spark creativity and teach valuable lessons from her story. Download and enjoy these pages to bring Cinderella’s magic to life.
Disclaimer:
By accessing and using the colouring pages, you acknowledge and agree to abide by the terms and conditions outlined in our disclaimer which is subject to change in order to ensure continued compliance with copyrights laws and regulations. All the materials provided on this platform are strictly intended solely for educational and non-commercial purposes only. Any reliance you place on such information is strictly at your own risk. All rights with respect to Material(s) featured herein are reserved with the original copyright owners. We do not intend to infringe any legitimate intellectual right, artistic rights or copyright. If you are the rightful owner of any of the pictures/wallpapers posted here, and you do not want it to be displayed, then please contact us with requisite details and documents and we will immediately do whatever is needed in this respect. All the colouring pages [Material(s)] displayed on this site are free of charge and therefore we do not gain any financial benefit from the display or downloads of any images.
Also Read:
Fairy Coloring Pages
Barbie Coloring Pages
Ninjago Coloring Pages
Princess Peach Coloring Pages
Read more
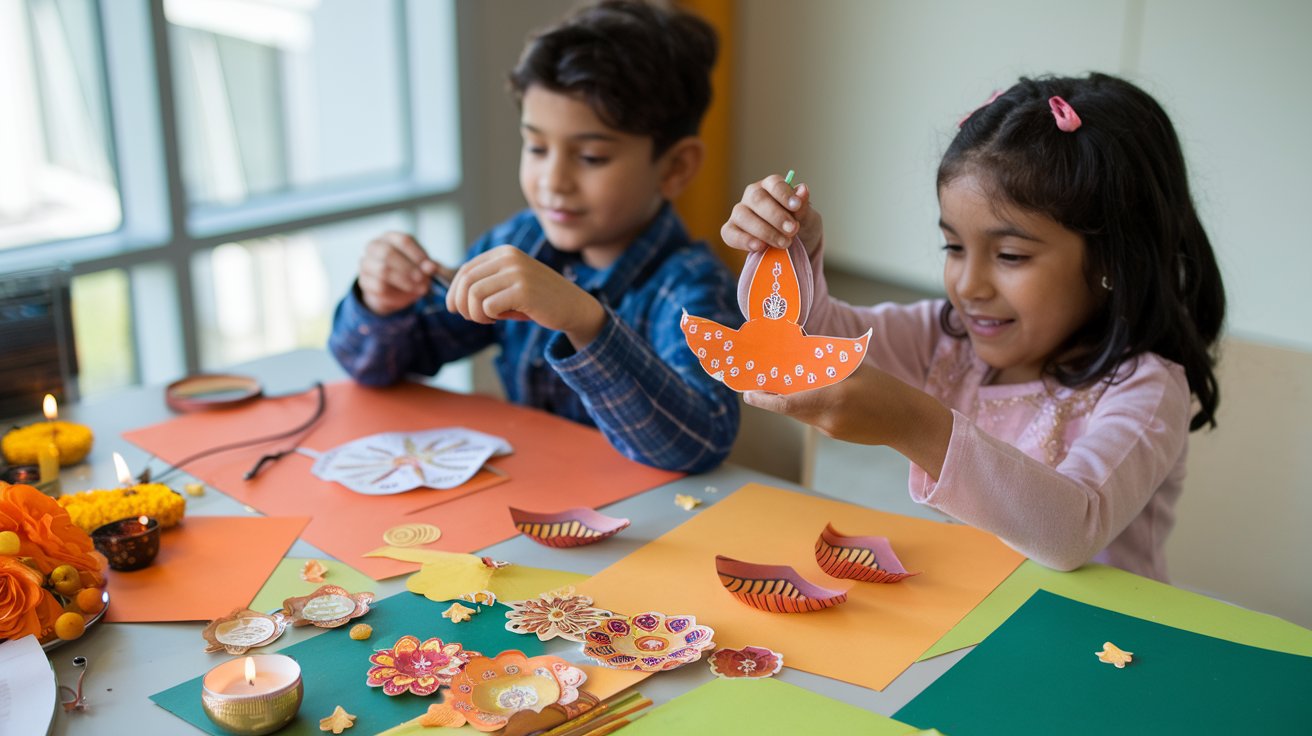
10 Easy and Creative Diwali Card Ideas for Kids
There is not much time for Diwali, and you must be very busy with the preparations already! However, have you started to think about the Diwali cards for kids yet? If you haven’t, to make things are easier for you, we are presenting to you 10 easy and creative Diwali card ideas for kids. Handmade cards are after all everyone’s favourite and carry with it a personalised touch of closeness that no ready-made card can convey.
Amazing Diwali Greeting Card Making Ideas for Kids
Keeping in mind your busy schedule, the ideas for Diwali cards for kids are simple and require just the basic materials. You would have to follow some super easy steps, and your handmade Diwali greeting cards for kids would be good to go! So, the following are 10 creative and easy handmade Diwali greeting cards for kids:
1. Bright As A Diya
The best representation of Diwali is surely a Diya!
Things You Need
Blank greeting card
Marble papers (Red and Yellow)
Pencil
Gum
Sketch Pens
How To Make
Take the blank card and draw the outline of a Diya as in the picture.
Tear the red marble paper into small pieces.
Carefully apply gum on the drawn picture and paste the marble paper inside the Diya to make a collage.
Use the yellow one in the same manner to fill the flame.
Write Diwali greetings inside the card using the sketch pens and your card is ready!
2. Do the Design
You certainly can’t have a Diwali without a beautiful and gorgeous rangoli.
Things You Need
Blank greeting card
Pencil
Sketch Pens
Colours
How To Make
Paint a Rangoli on the blank greeting card with season’s greetings written on it.
The Rangoli design can be something related to the festival like a Diya as shown in the picture.
You can make your child add some personalised greetings inside the card that her friends would surely love!
You can also add some glitters on the Rangoli at the end to make it look more attractive.
3. Burst Of Cracker
Your kids must be very fond of bursting crackers during Diwali. So, her friends too would love a cracker on their Diwali cards!
Things You Need
Blank greeting card
Pencil
Sketch Pens
Colours
How To Make
On the top of the blank greeting card, paint a burning or bursting cracker and colour it using bright colours.
Write season greetings inside the card along with Diwali messages.
4. Crack It Up
How about shaping the card in the form of a cracker? Kids would certainly be excited just by the look of it!
Things You Need
White mount board
Pencil
Sketch Pens
Colours
Scissors
How To Make
Paint a conically shaped cracker on the top of the mount board and colour it using bright colours.
Once done, cut through the outlines so that the shape of the card is that of the cracker itself. On the opposite side, write personalised greetings.
Kids can later use this as a bookmark as well!
5. Doodle It Out
Doodles are in these days and probably the best expression of a festival!
Things You Need
Blank greeting card
Pencil
Sketch Pens
Colours
How To Make
On the blank greeting card, guide your child to draw all the things that come to her mind when Diwali is being talked about.
She can doodle a variety of things like crackers, bombs, lights, candles, Diyas and so on.
Colour them using sketch pens and write Diwali greetings inside the card.
She can also add glitters, at last, to add create a festive effect.
6. Contrast Diya
Diwali is all about brightness and colours!
Things You Need
Blank Card
Watercolours (Three colours including Red and Yellow)
Pencil
Sketch Pens
How To Make
Take the blank card and draw a Diya on it as shown in the picture.
Since Diwali is all about bright lights, using bright watercolours would certainly give the card a feel of the festivity.
Colour the Diya using red colour as shown and the background using a contrast colour and let it dry for some time.
When it dries up, add greetings inside the card, and it is ready!
7. Lovely Lanterns
Colourful lanterns are not only an integral part of Diwali but a treat for the eyes as well.
Things You Need
Blank greeting card
Pencil
Sketch Pens
Watercolours
Coloured tapes
How To Make
Draw hanging lanterns on the greeting card like a shade over the Diwali messages written under them.
Colour them using bright shades of watercolours and write personalised messages inside.
You can also use colourful tapes as borders to make it brighter and more attractive.
8. Light it Up
The best description of Diwali would certainly be the “Festival of lights”. So, do not forget fairy lights while sending your greetings.
Things You Need
Blank greeting card
Pencil
Sketch Pens
Gum
Thread
Coloured papers (Preferably Yellow)
How To Make
Cut out pieces of the coloured paper in the shape of little fairy lights. While cutting them out, make sure that the papers are double layered so that the thread can be passed through.
Keeping the thread in between, stick the paper lights into the blank greeting card so that it seems that the lights have been hung.
Write Diwali messages inside, and the card is ready!
9. Welcome Home Doraemon
When it comes to kids, cartoons especially Doraemon is their favourite. So how about Doraemon wishing them a happy Diwali too?
Things You Need
Blank greeting card
Pencil
Sketch Pens
Colours
How To Make
Guide your kid to sketch Doraemon and colour it on the front side of the blank greeting card.
Then create a dialogue box on top of the sketch writing “Happy Diwali” on it such that it seems as if Doraemon is conveying wishes too.
Your kid can write her personalised wishes inside the card for her friends.
10. Diwali for animals
Crackers cause a lot of harm to street animals and children should be the first ones to be aware and spread awareness. A card explaining this would do this job right.
Things You Need
Blank greeting card
Pencil
Sketch Pens
Colours
How To Make
Guide your child to sketch some animals being hurt due to the careless use of crackers during Diwali.
She can explain her views about this in the form of a message inside the card which states how it Diwali for them too.
This would make the cutest idea of Diwali card making for kids!
FAQs
1. How can kids add a festive touch to their Diwali cards?
Kids can decorate their cards with traditional motifs like diyas, rangoli, peacocks, and fireworks. Adding glitter, glow-in-the-dark paint, and 3D elements makes cards more festive and exciting.
2. Are handmade Diwali cards suitable for gifting?
Handmade cards created by kids are a wonderful gift option for family, friends, and teachers, as they add a personal touch and express creativity. They’re suitable for both classroom activities and at-home celebrations.
Celebrating Diwali with handmade cards is a wonderful activity for kids that combines fun and learning. These Diwali card ideas give children a chance to showcase their creativity while bonding with family and friends. Whether it’s simple DIY decorations or colorful drawings, handmade cards are a thoughtful way for kids to send festive greetings. Inspire your child to make unique Diwali cards that brighten hearts and strengthen traditions.
Also Read:
Diwali Craft Ideas for Kids
Diwali Gift Ideas for Children
Lantern Making Ideas for Kids
Diwali Games and Activities for Kids
Read more
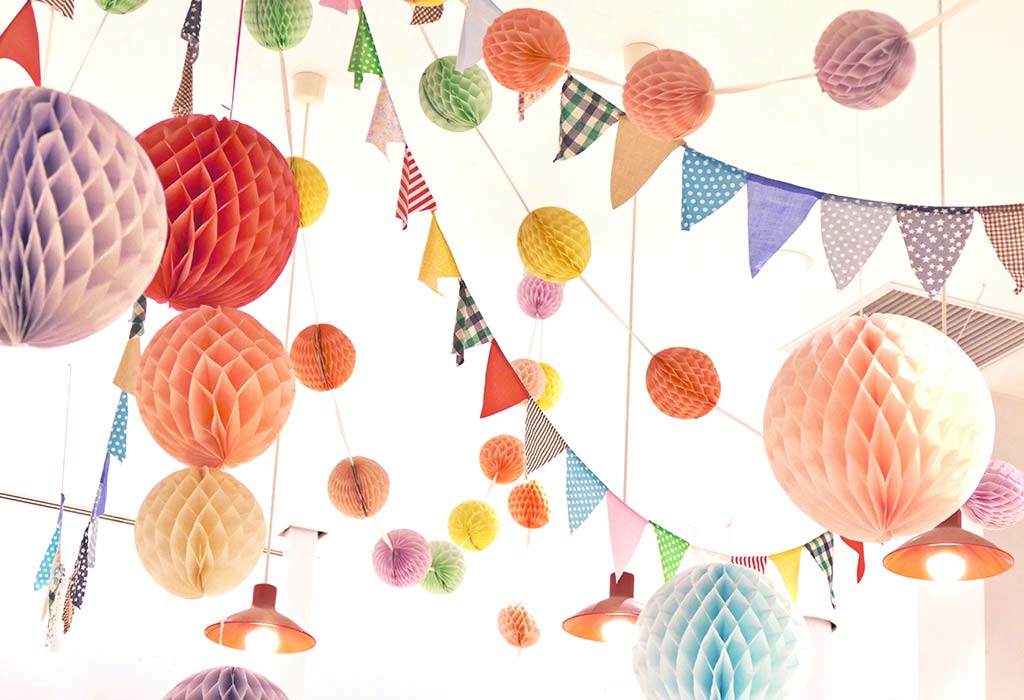
10 Easy Lantern Making Ideas for Kids
Lantern-making is a fun activity to get your kids’ creative juices flowing and to build excitement for Diwali. It’s also a great way to get children involved in decorating the house for Diwali, as they proudly see their hand-made lanterns hanging high and bright. Here is an article on 10 easy lantern-making ideas for kids.
What Is the Significance of Lanterns During Diwali?
Lanterns or akash kandils are a significant part of Diwali across India. The windows and doors of each house are lit by bright lights and decorations, at the centre of which you’ll see a beautiful lantern. But, why do people hang an akash kandil during Diwali? These are essentially a symbol of light, with the main idea being to eliminate any darkness and bring forth happiness in everyone’s life. The lantern also symbolises Krishna’s victory over the demon Narakasura, and is a form of celebration and happiness. While you can easily buy a beautiful akash kandil from the store, making one with your kid is an even better experience, as you can bond and prepare for the festival of lights together.
Hand-Made Lantern Ideas for Children
Listed below are easy lanterns that children of all ages can make. You can make these together with your child as a fun bonding activity. If you’re wondering how to make a lantern, here are 10 different types of lanterns and easy-to-follow instructions on making them.
1. Foam Lantern
Making Chinese/ foam lanterns is extremely easy, and can even be made by preschoolers. Here’s how to make a foam lantern at home.
What You Will Need
Foam sheets (of two different colours)
A stapler
Scissors
A ruler and pencil
2 clothespins
How to Do
Cut a rectangular piece of one foam sheet.
Then, roll it into a cylindrical shape and secure the edges with two clothespins to make the inner foam piece.
Cut a rectangular piece of the second coloured foam sheet (this piece should be 2 inches longer, vertically).
Fold it horizontally and cut slits along the folded side. Stop at least 1 centimeter away from both edges.
Draw lines using a ruler and a pencil to mark where the cuts should be, if your child is doing the cutting work. This will be the outer foam piece.
Now, it’s time to place the outer and inner foam pieces together.
First, join the top of the foam pieces by stapling them together (you will see that the outer foam piece is longer than the inner foam piece).
Then, join the bottom of the foam pieces by stapling them together (you will notice that the outer foam piece will balloon a bit at the centre, where the slits have been made).
Lastly, cut out a thin, long strip to make the handle of the lantern and staple it onto the lantern.
2. Pyramid Lanterns
These lanterns look beautiful and will light up your home during Diwali or a fun get-together.
What You Will Need
Paper
A pencil
A ruler
Colour pencils
Sketch pens
A paper puncher
Tape
A battery-operated candle
How to Do
Draw a triangle on a piece of paper and cut it out. This is your template.
Ask your child to colour a sheet of paper.
Using the template, draw four triangles attached to each other on the back-side of the coloured sheet.
Cut out the these four triangles together (do not separate them).
Tape the ends together.
Punch some holes in the pyramid or cut out any small shapes of your choice.
Place the paper pyramid on top of the battery operated candle.
3. Table Jar Lantern
This is probably one of the easiest lantern crafts for children to make all by themselves.
What You Will Need
A glass Jar
Glue
A brush for the glue
Colourful paper (origami paper, streamers, tissue papers work best)
Candles
A scissor
A battery-operated candle
How to Do
Cut the paper into different sized strips.
Using a brush, cover the outside of the jar with glue.
Then, start sticking the paper strips on the jar, one after the other.
Use more glue wherever required to stick strips in a way that they overlap each other.
Continue sticking until the entire jar is covered with the paper strips.
Once you finish, dab a layer of glue on the entire jar, on top of the glued on paper strips, and leave it to dry overnight.
In the evenings, place the candle inside the jar and light it up.
4. Paper Lanterns
This basic paper lantern for kids will brighten up your Diwali night. Here’s how to make a paper lamp at home.
What You Will Need
Card stock (any dark colour)
Tissue paper/ streamers (2-3 different colours)
A pencil or pen
A stationary knife
Scissors
Glue
A battery operated candle
How to Do
Decide on the size of your lantern and cut a rectangle shape from the card stock sheet.
Now, fold the rectangle equally in three folds, so that when we fold it, it becomes a triangle.
Now, draw a design on the middle portion of the card stock (any design that is easy for the child).
Using a stationery knife, cut out the design. Help your child do this if he is too young.
Then, using glue, stick the different coloured tissue papers on the inner side of the lamp.
Put glue along the extra bit of the card stock and paste the other side of the card stock to it.
5. Sphere Lantern
The sphere lantern is super easy and can make for nice decor in your child’s room or your balcony during Diwali. Here’s how to make an akash kandil in a sphere shape.
What You Will Need
2 – 3, thin, coloured chart paper sheets.
Glue
A thumb pin
A ribbon
Scissors
How to Do
Decide on the size of your lantern and cut different coloured strips of paper.
Arrange the strips, one on top of the other, alternating between each colour.
Attach them with a thumb pin at one end of the strips by putting glue on the prickly side of the pin.
Follow the same on the other side too and spread the strips to form a sphere shape.
Tie a ribbon on top so that it can be hung.
6. Kiddy Lantern
This is a great opportunity for your child to be as creative as possible while making a kandil for Diwali.
What You Will Need
Coloured paper of A4 size
A thin cardboard
Paints
A scissor
A pencil
Glue
Double-sided tape
Regular tape
Old artwork (optional)
How to Do
Starting from one corner of the paper, make diagonal folds till the end.
Unfold the paper and repeat the same from the opposite corner (there will diamond shape formations in the paper).
Roll the paper and paste the sides with double-sided tape.
Using the circle of the base of the lantern, cut out a circle from the cardboard.
Fix this circular cardboard at the bottom, with double sided tape.
Put a regular tape on two opposite sides of the opening and punch a hole, so that the paper does not tear.
Insert a string through the holes and tie the ends.
Decorate the outer side of the lamp by sticking artwork or painting it.
7. Plastic Bottle Lantern
This beautiful lantern can be made from throwaway plastic bottles. It’s a great way to re-use plastic that would otherwise be thrown away as waste.
What You Will Need
A big plastic bottle with a round bottom
Glue
A brush
Origami paper/tissue paper
Scissors
A pencil
A stationery knife
Strings
Coloured tapes (3-4 types)
A battery-operated candle
How to Do
Cut off the bottle top with a stationery knife.
Fold the sheet of paper into a small square and draw a circle.
Then cut out the circle in such a way that you get many circle cut outs in one go.
Cut the other coloured paper in different shapes.
Then, apply glue on the bottle and start pasting the paper cut outs on it.
Once you are finished, apply a final coating of glue on top of it and let it dry overnight.
Cut 5-6 strings, about 20” long, and stick strips of washi tapes around the strings, leaving some space in between. Also, cut the tape at the ends for a flag shape.
Make small holes on the opening of the lantern and tie the strings to it.
Now bring all the strings together and tie them up.
Place a battery-operated candle inside it and hang the lamp.
8. Plastic Cup Lantern
Try this easy and fun way of turning a plastic glass into a lantern. This is another great way to use things you find at home to make a sky lantern.
What You Will Need
A transparent plastic glass
Acrylic paint or permanent markers
A paper puncher
String
A battery-operated candle
How to Do
Make designs on the glass with markers or paint.
Make two holes on opposite sides at the top of the glass.
Insert a string through the holes and tie it up.
Place a battery-operated candle inside it and hang it.
9. Owl Lantern
This is a cute, easy-to-make lantern that will make any child happy.
What You Will Need
Round, ready made, plain paper lamp
Chart paper and printed paper
Glue
Scissors
Sketch Pen
A pencil
How to Do
Cut out big, round eyes, legs, ears, nose, and wings of an owl from the chart paper.
Then, trace the wings on the printed sheet and cut it out.
Paste the printed paper wings onto the chart paper wings.
Draw two small circles inside the eyes and colour the nose and legs.
Now, paste all of them on the lantern.
10. Painted Round Paper Lanterns
This is a cheap and easy do-it-yourself lantern which can be made at home. Your child is sure to have a lot of fun with this.
What You Will Need
Round, ready-made, plain paper lamp
A toothbrush
Paint
A palette
How to Do
Take some paint and add some water.
Paint the entire lantern with different colours.
Your child can mix different colours and be as creative as possible.
The above lantern ideas are easy and can be made by kids without any hassle. However, parental guidance is required while using scissors or a knife. Once your child has finished making the lantern, you can display it in your house for visitors to see!
Also Read:
Easy Piggy Bank Craft Ideas for Kids
Homemade Hat Craft Ideas for Children
Amazing Newspaper Craft Ideas for Kids
Read more
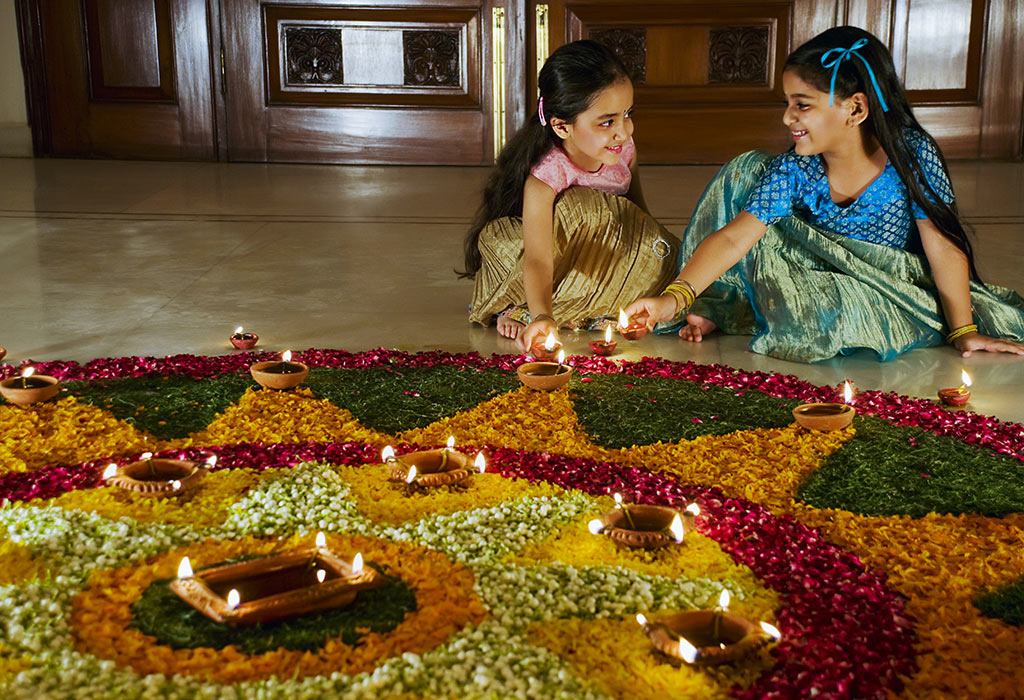
10+ Fun-Filled Diwali Activities & Games for Kids
Diwali, the festival of lights, is widely celebrated in our country. With the entire nation glowing brightly with lights and people celebrating the festivities together, it is a wonderful time for everyone. Parents interact with each other, kids burst crackers, and there is happiness all around. However, kids may get bored after a point, hence you will need something to keep them engaged. So, we have some amazing Diwali activities for preschool kids and children of all ages. Also, there are some awesome games for kids to play this Diwali and make it a memorable one.
Best Diwali Activities for Children
Here are some interesting activities that your little ones can try this Diwali and have a wonderful time together.
1. Quiz
If your house is buzzing with relatives and their kids, it is a good time to get all the kids busy by making them participate in a quiz. Pick certain topics that are relevant to their lives and they will enjoy it. You can divide the kids into two teams and let each team quiz each other. Make sure you keep prizes for everyone so that nobody is sad on Diwali.
2. Write it Down
Some kids prefer engaging in activities solitarily, such as writing down a story or a poem. If your kid seems to have the knack for it, encourage him to write a poem on the ‘festival of lights’ or a short story on Diwali. Publish it later on social media and let him know how everyone liked it and let him tell his friends about it as well.
3. Jewellery Making
Instead of giving your kids actual gems and precious items, let them pick some household items such as pasta covers, beads, and other essential things. Ask them to paint these items using and then sprinkle glitter. Allow them to turn those raw items into great jewellery pieces. These jewellery items can go with their festive wear and on other special occasions as well.
4. Paper Firecrackers
Although crackers are something that kids look forward to on Diwali, it is important to make them realize the negative effects of the crackers on the environment. You can engage them instead in craft activities where you help them create rockets and firecrackers out of colourful paper, decorate them, and hang them or stick them on a wall for a festive look.
5. Origami
This Japanese art form has numerous designs that can be used to decorate your house on Diwali. Let your kids peruse through numerous designs and use coloured papers to form garlands, banners, and many other decorative shapes. Ask them to make some lanterns as well.
6. Diwali Wishes
Every person wishes to celebrate Diwali in their own home but also wants to visit relatives or have them over. But if you are unable to visit them, you can always send Diwali wishes, can’t you? Ask your kids to write some personalized wishes and messages for your relatives this Diwali. Let them go overboard and make amazing Diwali cards and write down personalised wishes on them. Make sure these are decorated in a way that makes them stand out from any other cards.
7. Rangoli Art
Although rangoli is traditionally done by girls and women, let’s evolve in modern times and include all kids to try out their hand at it. Give them some specific designs that they have to make in different areas of the house, which would be supervised by older children. Later on, let them unleash their creative best and come up with some beautiful ways to make your home look the prettiest it ever has in all these years.
8. The Hidden Chef
Some kids enjoy cooking, if your kid is one of them, teach them simple recipes that you make on Diwali. Diwali presents a great time to indulge your kids in cooking since you can use all the help you get, and there are some simple recipes that kids can easily make and this encourages them even more. Give them the task of rolling laddoos or stirring the kheer while it is getting warm. Older kids can help you out with even more complicated tasks such as grating coconut or peeling almonds and so on.
9. Diya Painting
Diwali is a festival of lights and is incomplete if your house is not illuminated with the diyas all around. This Diwali, let those diyas not be bland and allow your kids to paint those diyas with colours of their choice. Make use of watercolours, paints, and everything at your disposal to provide the little ones with the tools to deck up those simple diyas.
10. Diwali Stories
After all, we are celebrating a festival that is deeply rooted in our traditional upbringing and stems from wonderful mythological stories. Introduce your kids to the origins of the celebration and watch them listen to you astounded. If your kids are already aware of the reason (story) why we celebrate Diwali, ask them to narrate the story to you. You can also tell the kids of your society to get together and enact a scene.
Wonderful Diwali Games for Children
Kids are not really interested in the rituals, all they want is to have fun during Diwali. This is where you can make use of some interesting Diwali party games for kids and let them enjoy their Diwali holidays.
1. The Best Dress
The festive occasion makes for a great opportunity to deck yourself up in the most glamorous way possible. Turn this into a competition of sorts if you can. Ask kids to wear dresses that are primarily in the colours of Diwali. If you are looking for something more, combine the enactment of plays with a fancy dress contest, allowing kids to dress in a variety of characters that hail from the mythological stories.
2. Musical Chairs
The simplicity of the game might make you feel like a weird addition for a festive occasion such as Diwali, but when you have siblings, relatives, and friends at one place, any game is fun. Let kids play separately or mix them up with adults as well. Choose the popular songs of the time and let your kids have fun running around and rushing to grab that empty chair.
3. Tambola
This, in fact, should be a Diwali tradition, if it is not already. Diwali is a time of celebrating happiness and togetherness as a family. Gifting is a great form of conveying gratitude but doing so in the form of tambola is even better. Kids will have an awesome time as they compete with each other to try their luck and win the gift of their choosing.
4. Diya Lighting Competition
Older kids can do this themselves but it is best if this is conducted under adult supervision. Young kids won’t be comfortable with flames and candles, so this is the perfect occasion to let them have a chance at it. Arrange multiple diyas and set a time limit within which each kid has to light all the diyas properly. Make sure this is done in an open space in order to avoid any problems.
5. Playing Cards
Gambling is a popular activity during Diwali. While kids might be too young for any kind of gambling, you can indulge them in some simple card games, and use sweets as a prize when they win each game.
6. Passing the Parcel
Children pass around a wrapped parcel while music plays, and when it stops, the child holding it performs a Diwali-themed task like singing, sharing a memory, or reciting a prayer. This game incorporates laughter, learning, and celebration in a playful format.
7. Bursting Balloons with Trivia
Balloons filled with Diwali quiz questions are popped by children taking turns, requiring them to answer the question inside to earn tokens or prizes. This interactive game combines excitement with knowledge about Diwali traditions and stories.
8. Antakshari with Festival Songs
A singing game where children take turns singing festival-related songs or bhajans. It promotes cultural learning and group bonding while spreading festive joy through music.
9. Diwali Bingo
Customized bingo cards featuring Diwali items, rituals, and sweets make learning about the festival interactive and entertaining.
10. Diwali Memory Game
In this game, about 10-15 Diwali-related items like diyas, sweets, and crackers are displayed on a tray for a brief time. Players then try to remember and list as many items as possible. It is a fun and educational way to sharpen memory and introduce children to festival symbols.
Coming up with various Diwali activities for 2-year-olds or even preschool kids shouldn’t be quite difficult. Diwali brings all the family together and this is why kids love it the most. To make it more fun for them, let them indulge in the above-mentioned activities and games. They will always remember it.
Also Read:
Diwali Card Ideas for Kids
Facts about Diwali for Kids
Diwali Safety Tips for Children
Read more
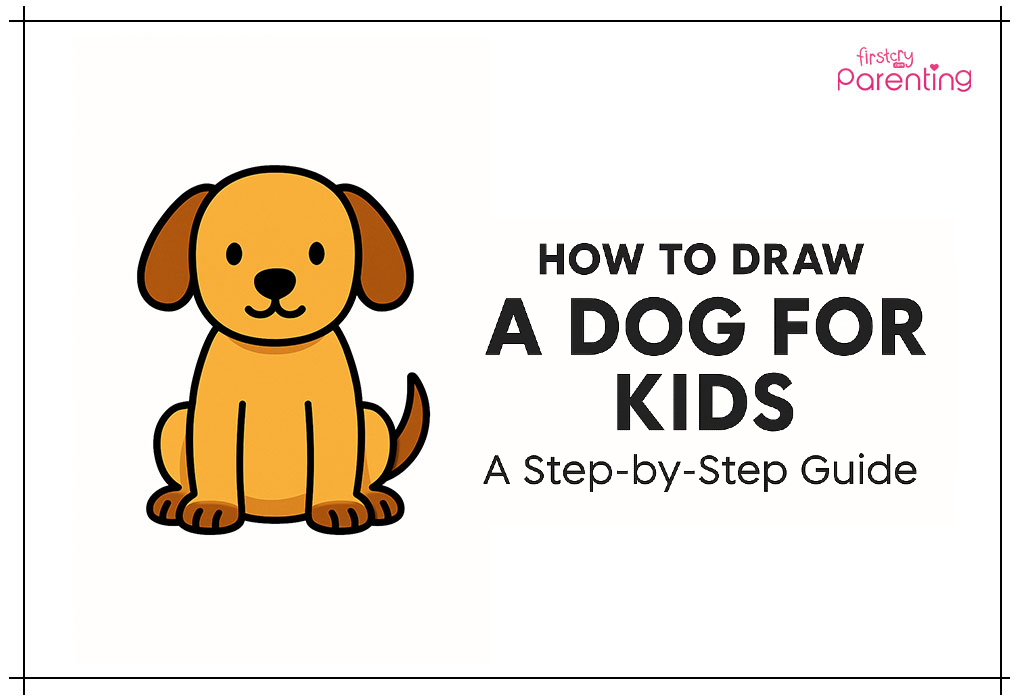
How To Draw a Dog – A Step By Step Guide
Drawing a dog can be a fun and rewarding activity for kids and preschoolers who love animals and enjoy being creative. Then get ready for a super fun activity! In this guide, we’ll show you the basic steps of how to draw a dog in the simplest way. It’s perfect for kids, preschoolers, and anyone who wants to draw a cute little dog without any tricky steps.
You don’t need to be an artist, just grab your pencil, paper, and maybe some crayons if you want to add color later. We’ll go through easy steps on how to draw a dog using shapes like circles, ovals, and lines. Step by step, you’ll see your dog come to life with floppy ears, a wagging tail, and a happy face!
Drawing helps young learners learn, focus, and have fun all at the same time. So if you’re ready to make your own cartoon dog, let’s start drawing together. Woof woof!
Easy Dog Drawing for Kids in 10 Simple Steps
Get ready to learn easy steps on how to draw a dog with this fun and simple guide made just for kids. Follow along and enjoy drawing a cute puppy in just 10 steps!
1. Draw the Head
Start by drawing a big oval or round shape in the middle of your paper. This will be the puppy’s head where the face goes. Make sure it’s big enough for eyes, ears, and a nose!
2. Add Two Floppy Ears
On each side of the head, draw long curved ears that hang down like a cute puppy’s ears. You can make them rounded or pointy on your choice!
3. Draw the Eyes
Inside the head, draw two medium-sized circles for the eyes. Then add tiny black dots inside for the pupils to make the puppy look alive and cheerful.
4. Make a Nose
Right between the eyes but a little lower, draw a small oval or triangle shape. This will be your puppy’s nose don’t forget to color it black!
5. Add a Smiley Mouth
Below the nose, draw a curved smile going from one side to the other. You can add a small U-shape inside for a tongue to make it even cuter.
6. Draw the Body
From the bottom of the head, draw a big round or oval shape. This is the puppy’s body, and it should be wider than the head.
7. Add Front Legs
Draw two straight lines going down from the front of the body and curve them at the bottom to form paws. These are the front legs.
8. Add Back Legs
Now draw two more curved legs on each side of the body near the back. These should look like the puppy is sitting down comfortably.
9. Draw the Tail
On one side of the body, add a small curved tail. You can make it waggy or curly whatever style you like best!
10. Add Final Details and Color
Go over your lines with a black marker to make them bold. Erase any sketch marks and color your puppy using brown, yellow, white, or your favorite shades!
FAQs
1. How can I make my dog drawing look cuter?
Add fun details like big eyes, a wagging tail, floppy ears, or a small tongue. You can also use soft colors and draw a bone or collar for extra cuteness!
2. Can I color the dog any way I want?
Absolutely! You can use brown, black, white, or even rainbow colors—there’s no rule. Let your creativity shine!
3. Can I draw different dog breeds using this method?
Yes! Once you learn the basic shape, you can change the ears, tail, or fur to look like different breeds like a pug, labrador, or dachshund.
Learning how to draw dog is a fun and simple activity that kids will love. With easy shapes and step-by-step guidance, anyone can create a cute puppy even if they’re just starting out. If you’re wondering about drawing a cute puppy, just remember to take it slow, enjoy each step, and let your creativity shine. Kids can make their drawings unique by adding colors, spots, collars, or even a wagging tail. You can also try puppy coloring pages to add more fun and practice your coloring skills. So grab your pencils and have fun turning your ideas into adorable dog drawings!
Also Read:
Drawing a Cat for Kids
How to Draw an Owl for Kids
Step by Step Guide for Drawing Bird
Read more
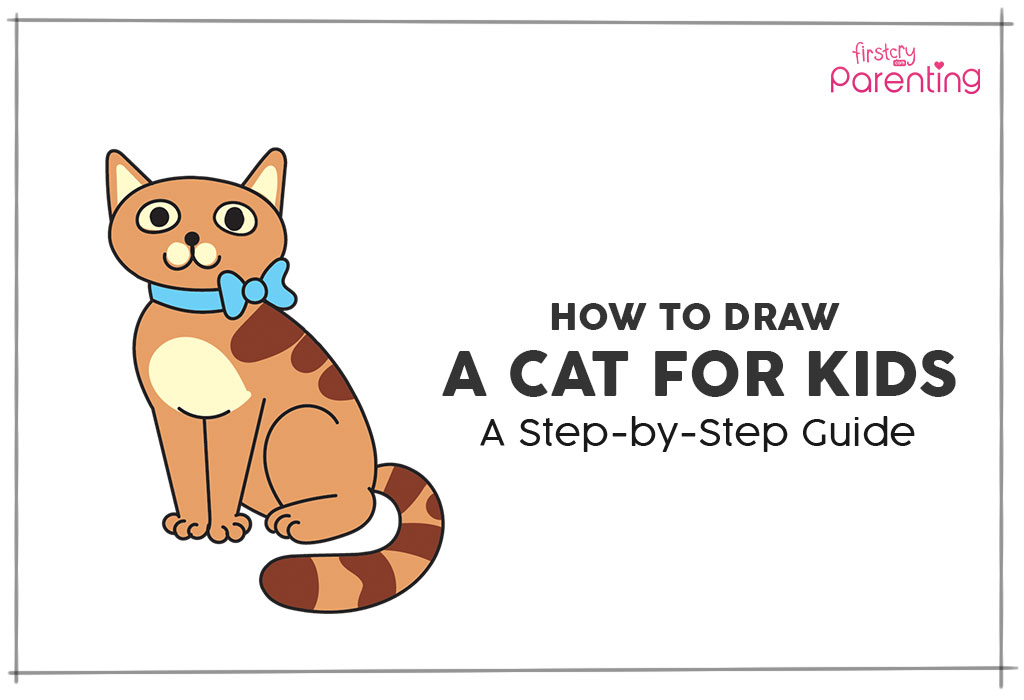
How to Draw a Cat for Kids
Drawing comes naturally to young children and is a wonderful way for them to express their creativity. Whether it’s with crayons, pencils, or markers, drawing offers numerous developmental benefits, such as improving fine motor skills, enhancing focus, and boosting imagination. For beginners, learning how to draw a cat for kids is a simple and enjoyable activity that helps them build confidence in their artistic abilities. Drawing a cat is one of the easiest and most fun activities to introduce them to the world of art. Here’s how you can teach your little one to draw a cat, making the process both engaging and educational!
What You Will Need for Drawing a Cat
Cats are a popular choice for pets. Teaching kids how to draw a cat can nurture their love for animals. Drawing animals can be quite tricky, but once you’ve got it right, it can be rewarding. To make your drawing look as convincing or life-like as possible, you need to observe, make a quick sketch, recognise the structure, and finally refine you’re drawing.
Here’s what you will need as a beginner:
Pencil
Non-dust eraser
Drawing paper
Black marker
Coloring supplies
Printable template (for little kids who are just starting off)
Cat Drawing for Kids in Six Easy & Simple Steps
Learning to draw a front view image of a cat is the most simple activity for kids. Here is an easy, step-by-step guide on how to draw a cat.
1. Draw the Head and the Belly of the Cat
To draw a cat, first draw an outline of the cat’s belly as shown in the figure below (a tilted, big oval circle). Then, on the top of this circle, draw a smaller oval shape or a small circle for the cat’s head.
2. Draw the Cat’s Hind Leg and Ears
On the face or the smaller circle that you have drawn, draw two triangles to make the cats ears. At the bottom half of the lower circle, draw a ‘C’ for the car’s thigh. Then, draw a long u-shape for the hind leg and the paw at the bottom. Then, draw the toes at the end of the paw.
3. Draw the Cat’s Forelegs and Bow
Now, imagine a line running through the centre of the cat’s belly. Draw a large w-shape to form the forelegs as shown in the figure. Once again, draw the paws and the toes. Then, draw a bow across the line that separates the cat’s face from the rest of its body.
4. Draw the Cat’s Eyes
Draw two small circles for the cat’s eyes on the cat’s face. Fill in two smaller circles for the pupils.
To polish whatever you’ve drawn so far, erase any extra lines or curves. And, draw a small curve on the top of the w-shape you drew for the forelegs. Refer to the image given below for a better understanding.
5. Draw the Cat’s Nose, Mouth, and Tail
Draw a small circle just below the centre of the cat’s eyes to form the nose. From this circle, draw two curves, each ending in the opposite direction. If you look closely, the curves look like a horizontal ‘3’. There! You’ve just drawn the cat’s mouth.
Then, draw two lines starting from the back of the bottom circle (from behind the hind leg and join them to make a nice, fluffy tail.
6. Draw Details and Color the Cat
Adding details, such as patches, sharpen the toe outlines, etc. and color the cat in the colors of your choice!
FAQs
1. What are the benefits of cat drawing for children?
Drawing a cat helps children develop fine motor skills, hand-eye coordination, and concentration. It also encourages creativity and imagination as they can add their own details or unique features to the drawing. Moreover, the structured steps of drawing a cat teach kids how to follow directions and improve problem-solving skills. Artistic activities like drawing foster emotional expression, which is important for a child’s overall mental development.
2. How can I help my child stay patient while drawing a detailed cat?
Children can often feel impatient when a drawing becomes complex. To help them stay focused, break down the process into smaller, manageable steps, such as first drawing the basic body structure and then moving on to details like the face or stripes. You can encourage them to take short breaks between steps or use coloring as a reward for finishing each stage. Keeping the atmosphere fun and lighthearted will help them stay engaged and patient.
3. Can drawing a cat help my child understand animal anatomy?
Yes, drawing a cat can give your child an early understanding of basic animal anatomy. As they draw the cat’s skeleton, muscles, and facial features, they begin to see how animals are structured. This awareness can lead to a deeper curiosity about animals and biology, making it a great introduction to understanding living creatures and how their bodies work.
This was all about easy cat drawing for kids. Apart from developing fine motor skills, drawing encourages visual analysis, helps establish concentration through practice, improves hand-eye coordination, and develops social skills and creative problem-solving in kids . Therefore, motivate your child to pick up the pencil and ensure you display his personalised artwork on the living room walls, the refrigerator, etc.
Also Read:
How to Draw a Car for Children
How to Draw a Lion for Kids
How to Draw a Frog for Kids
How to Draw an Owl for Children
How to Draw a Butterfly for Children
Read more
How To Draw A Fish for Kids
If your child is attracted to the enigmatic charm of a fish gliding gracefully in the serene blue water of an aquarium, it’s time to build their relationship with nature and capture the exciting features of a fish in art…
Simple Fish Drawing for Kids in Easy Steps
Originating in the Cambrian period, fishes are aquatic, craniate, gill-bearing animals that lack limbs with digits. Having evolved through the Palaeozoic and Silurian periods, fishes have diversified into a wide variety of forms. From just the prey of arthropods, they became formidable marine predators that can be found in nearly all aquatic environments. From high mountain streams, lakes, rivers, coral reefs, the abyssal, and even the oceans’ deepest depths. Most fish are cold-blooded, which allows their body temperatures to change as ambient temperatures vary. They have fear and pain responses as well! With over 34,300 described species, fish exhibit greater diversity in sizes, shapes, and colors than any other group of vertebrates. Whether your kid likes to admire fishes in the local aquarium or keep them as pets, fishes can be a good theme for an underwater world art project. They also teach kids about the importance of marine conservation and how they contribute towards maintaining the earth’s ecological balance. From developing fine motor skills to visual analysis, problem-solving, hand-eye-co-ordination to boosting self-confidence, art offers a host of developmental benefits for toddlers. One of the first things to keep in mind while sketching a fish is to pay attention to general body proportions, size of the head, mouth position, and placement of the fin. The mouth, location, and several paired and medial fins vary in morphology and number from one species to another; these features play a huge role in identifying species.
Learning how to draw a cartoon fish is important for kids as it is fairly easy, fun, and makes a perfect choice for beginners. Start with the basic structure and then upgrade to learning to draw different types of fish with details like scales, fins, and tails. From spending the summer vacation in a productive way to engaging kids indoors, these simple stepwise instructions can help one master the art of drawing a generic or any specific fish variety that they can display with pride. Artwork is only limited by imagination! Get started with some simple fish drawings, and move on to more complex fishes for further exploration and creative discovery. Each step in this guide contains illustrations and explanatory texts that you can follow to make any of the fish that catches your child’s fancy.
What You Will Need
Drawing Paper
Marker
Pencil
Eraser
Steps
1. Start by drawing an ellipse for the body.
2. Draw a curved line across the front part of the fish to represent its head that often has different patterns of scales.
3. Draw a triangular-shaped tail on one end of the fish’s body.
4. Draw the dorsal fin of the fish as a curve upward on the fish’s body.
5. Draw the bottom fin as the dorsal fin underneath. The side fin as a “D”-shaped curve can be made at the body’s center.
6. Draw the eye for the fish as a big circle with a marker while leaving it as a white dot (un-shaded) in the top right corner. Draw a curved line as the mouth on the front of the fish’s face.
7. Colour it as per your choice.
How to Draw a Koi Fish for Kids
Native to East Asia, Koi fishes are mainly kept in water gardens and koi ponds for decoration. Comprising of complex and beautiful features, it makes your artwork look truly amazing. Found all over the world, their interesting colors and lineage make them special and visually soothing. People in Japan believe the Koi fish symbolizes wealth, prosperity, love, a successful career, and good fortune.
What You Will Need
Pencil
Eraser
Drawing paper
Colored pencils/ crayons
Steps
1. The head of the Koi fish is curvy on three sides. It’s one side longer than the other, like a triangle. The smaller side is flatter and half the size of the neck or long side. Draw the eye of the fish.
2. Draw the long, slender body of the Koi. Making the fish curvy creates an image to show that the fish is in motion. The tail-end is narrower than the front end, which is wider.
3. Add the tail fin or caudal fin, which is slightly rough around the edges or a little sharp.
4. Add two fins on each side. The pectoral fin (one close to the head), the pelvic fin, and the anal fin. The dorsal fin (one on top) has two parts. Add the barbells that are sensory organs used by the Koi for detecting taste and smell.
5. Draw lines inside the fins for details and draw the scales on the body.
6. Color it.
How to Draw Nemo for Kids
If your child has been fascinated by little Nemo from the Disney-Pixar movie, they can learn to bring this cute orange clownfish to life with straightforward materials. Nemo is actually Ocellaris clownfish that belongs to the family Pomacanthidae. With a little practice and perseverance, even a beginner will produce amazing artwork.
What You Will Need
Pencil
Eraser
Drawing paper
Color pencils/Crayons
Steps
1. Draw the body of the fish. Make a circle and draw another curvy sphere intersecting it.
2. Now erase the intersecting line and join the circles to form a single oval shape like a mango.
3. Do a freehand drawing for adding the dorsal fin, caudal fin, pectoral fin, anal fin, and pelvic fin. Make the edges of the fins look rough with a few tiny bumps. Add the eyes and a curvy mouth to make it look happy and smiling.
4. Draw curvy lines across the fish’s body to brighten up the face and indicate the beautiful design of the clownfish.
5. Draw more lines inside the fins to give it a distinct look.
6. Color the fish orange and white.
How to Draw a Bass for Kids
This large-mouthed and spotted fish is usually caught for food or sport in North America and hunted in South Africa. The term comes from Middle English bars, meaning “perch” encompassing both freshwater and marine species belonging to the Perciforms or perch-like fishes. The black bass, temperate bass, and Asian bass are most popular.
What You Will Need
Pencil
Eraser
Drawing paper
Color pencils/Crayons
Steps
1. The black bass has a full mouth, which should look prominent. Begin by outlining the fish with gentle curves. The body of the bass has a wide oval shape while it has a fan-shaped tail. Draw a groove at one end of the body for the fish’s mouth, which is usually seen open, measuring almost one inch wide on paper.
2. Add detail to create a realistic impression of the fish’s head. Draw a slant from the groove you drew before for the mouth. Draw thin lines in and around the mouth to show the folds of the flesh and skin inside the mouth. The lines below the head indicate the gills and pectoral fin.
3. Draw a small circle with a smaller black dot in the center of the head for the eye.
4. Then add the pelvic fin, dorsal fins, and the spiny rays to the sides. Add little details by drawing lines near the neck. Draw a C-shaped line to outline the gills of the fish.
5. Draw small, closely spaced slanting lines on all fins. Draw fish scales with small, bumpy lines on the body to show the scales and body marks.
6. Color the fish.
How to Draw a Clown Fish
A clown fish belongs to the subfamily Amphiprioninae. Depending on the species, anemonefish are yellow, orange, reddish, or blackish in color with white bars or patches. The largest clownfish measure up to 17 cm, while the smallest can be 7–8 cm. Anemonefish live at the bottom of shallow seas in sheltered reefs or lagoons. A comically distorted drawing is mainly done to satirize or ridicule its subject. Characteristics like facial features of the subject are seized upon and exaggerated for amusement. A cartoon drawing is chosen for its simplicity and aimed at the beginner artist by adding an animated eye, plump lips; we distort the fish features to insert human expressions on them.
What You Will Need
Pencil
Eraser
Drawing paper
Color pencils/Crayons
Steps
1. Draw two small circles of the same size joined at the sides.
2. Draw a smaller circle inside each circle with thicker edges.
3. Draw an egg-shaped extension starting from each eye. Do not join the pointed end of the oval.
4. Draw the caudal fin sideways or the fish’s tail shaped like the ears of a bunny.
5. Make a curved line from the center upwards, and extend it a tiny bit to the right to complete the mouth.
6. Color it.
How to Draw a Shark for Kids
Sharks are a group of elasmobranch fish characterized by a cartilaginous skeleton, five to seven-gill slits on the sides of the head, and pectoral fins that are not fused to the head. The earliest species of sharks lived over 420 million years ago and were different from modern sharks. Tiger sharks, hammerhead sharks, thresher sharks, blue sharks, and great white sharks are well-known apex predators. With an average of 15 feet in length and weighing more than 2,000 pounds, sharks are the most efficient macro predators. As they have different features, your child should pay attention to the details to draw a shark more realistically.
What You Will Need
Pencil
Paper
Crayons/Color Pencils
Eraser
Steps
1. Draw a pointy snout for the head in front with the letter “V.”
2. Add a tiny eye in the middle of the snout and mouth inside the head to give it dimension and prevent it from looking flat.
3. Draw a long back attached to two lines on the bottom. Leave space for the front fin. The body of almost all sharks is like a spindle or a teardrop laid on its side.
4. Draw some lines next to the head for gills. Next, draw the gill lines that should go up and down. About five to seven pairs of gill slits are located on each side of the shark’s head. These vertical splits on the neck are an important characteristic that should not be omitted.
5. Add a tall fin on the top of their body, one in the space left on the bottom, and three smaller fins towards the direction of the tail. Draw the thin lower pointy fin below the top fin.
6. Finally, draw a tail with an upper and lower fin on the back, which allows the shark to change directions while swimming. The upper lobe of the tail fan is usually longer than the lower lobe.
7. Color it greyish blue to add more depth and richness to your drawing. Consider advanced techniques like stippling or hatching to add further texture and dimension to the shark.
While trying to make perfect artwork, it is important to know your pencils well. Position your child’s hand closer to the end of the pencil so that they have more control and precision. Subtle shifts in the width and darkness of your lines will create a dynamic, visually interesting drawing. Avoiding smudging makes a clean-looking drawing — the art of drawing a good picture involves practice. There’s no better way to connect with your kid and help them understand more about the world than working on an art project together. It helps to strengthen the bond of the family and create fond memories of childhood to be cherished forever. Instead of indulging in electronic gadgets like smartphones, video games, and monotonous television shows, it is better to cultivate hobbies like drawing or keeping a pet fish that not only lets you bring a piece of the natural world into your home, but reduces stress, anxiety, increases concentration levels, teaches important life skills like love, compassion, responsibility, tolerance, and patience that will shape them into caring adults.
Also Read:
How to Teach Children to Draw
How to Draw a Car for Children
How to Draw an Apple for Children
Read more
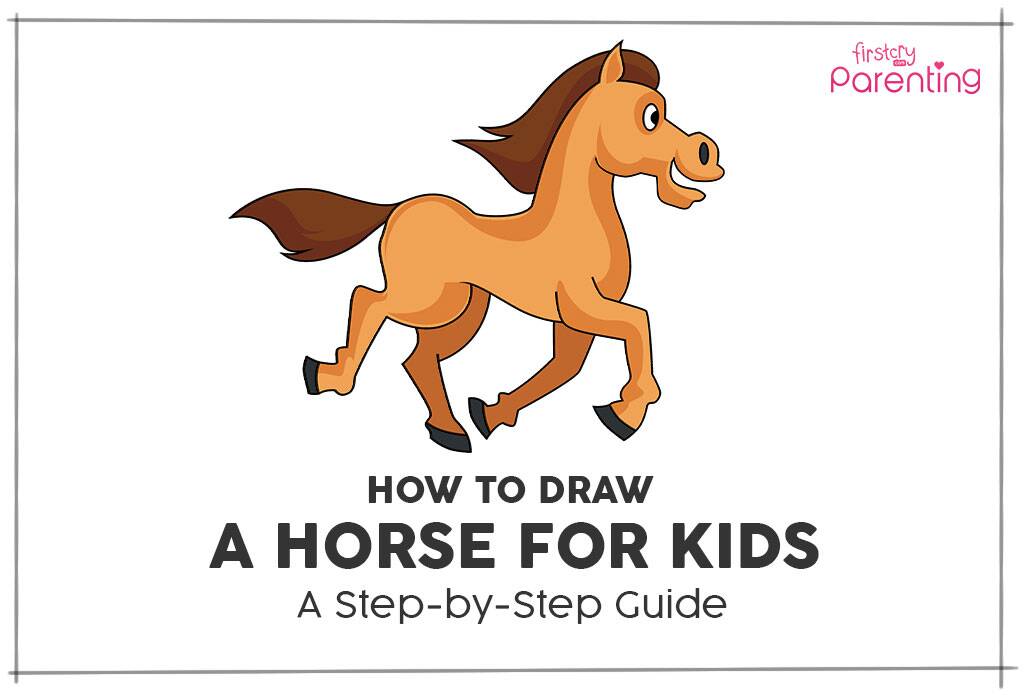
How to Draw a Horse for Kids
As parents or teachers, you could find yourself looking for easy drawings that your kids can enjoy coloring. Animals can be fun to color, but drawing them can be challenging. Horses, in particular, are tricky because they have so many curves, and you have to get the proportions of their body, head, and legs just right. Capturing their elegance, strength, and grace has been made easy, so if you are looking for a quick guide, keep reading to learn how to draw a horse step by step.
Video: How to Draw a Horse – A Step-by-Step Guide For Kids
What You Will Need to Draw a Horse
Drawing a horse is going to be easy and quick. The materials you will need to sketch a horse are easily available at your house:
Drawing paper
Black pen or marker
Crayons or color pens (optional)
Horse Drawing for Kids in 9 Simple Steps
If you are not the best artist or have difficulty drawing objects, here is a simplified tutorial to draw a cartoon horse. It is beginner-level and easy to follow. Here are 9 steps to draw a horse:
1. Start with the face.
First, you draw the horse’s face. Make a U shape if you want to make it quick and simple. You could also make it a bit more realistic by adding a curve on the lower side of the face.
2. Draw the face, neck and chest.
Draw the different facial components of the horse, i.e., the nostrils, mouth, and eyes. Draw the nostril a little bit above the mouth. From the ear, draw a slightly curved line that will form the neck. For the chest, draw a mild ‘S’ downwards from the chin.
3. Draw the mane and the back.
Draw the back at the tip of the horse’s neck. For the mane, you can make a zig-zag starting at the ear and going all the way down the neck, and ending at the back. You can even add a tiny bit of mane in between the ears.
4. Draw the first front leg.
Now you can start drawing the legs. First, draw the front leg, beginning from the end of the neck and chest line. Draw two almost parallel line downwards, then to the left. Draw a hoof at the end of the leg.
5. Draw the second front leg.
Similarly, draw the other front leg, such that it looks like it’s slightly behind the first front leg.
6. Draw the first hind leg.
For the hind leg, you can follow the same steps, or you can make it more realistic by making the calve more defined and angled.
7. Draw the second hind leg and the belly.
You can then add the last leg of the horse. Do it in the same manner as the other three but then draw behind the first ones. If you want to make the horse look like it’s galloping or walking, you can change the angle at which you draw the legs. Draw a connecting line from the first leg to the fourth leg. This will form the horse’s belly.
8. Draw the tail.
Now it’s time to make the tail of the horse at the end of the body. Start by making a backward S and connect it back, such that it looks like a leaf.
9. Colour the horse.
Grab some crayons and get to work or give them to your kids so they can color it.
If your little ones like horses, ponies, or unicorns, this easy tutorial is perfect for you to draw one for them so they can be creative and color or decorate it. You can try this easy step-by-step tutorial with materials already at home!
Also Read:
How to Draw a Lion for Children
How to Draw a Frog for Children
How to Draw a Butterfly for Children
Read more
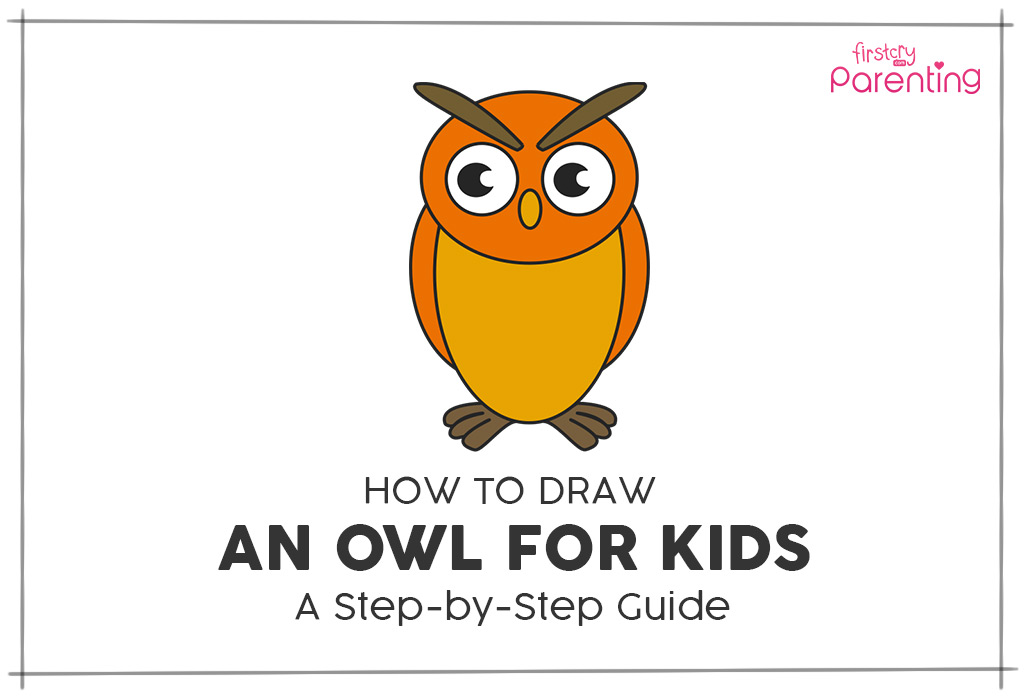
How to Draw an Owl – An Easy Step-by-Step Guide
Owls are not only cute and aesthetic but also a symbol of mystery and wisdom. In Greek mythology, the owl is known to be one of the symbols of the Goddess of Wisdom, Athena. However, it may be overwhelming to draw one in an accurate manner, getting all the proportions and shapes right. If your kids are fans of owls because of Harry Potter, Winnie the Pooh, Animal Crossing, or Pokemon, an owl drawing for them to colour can be the perfect afternoon activity. Want to learn how to draw an owl for kids? You can draw a simple owl by following this easy guide to learning step-by-step how to draw an owl.
Owl Drawing for Kids in 6 Simple Steps
You can first draw a cartoon owl lightly with a pencil and then line over it with a dark marker or pen once you are done. If you want to give your little one a cute drawing to colour or paint, here’s how to draw an owl for kindergarten kids:
1. Draw the base for the head and body.
First, start by drawing the head and body of the owl. Outline the horizontally oval head and the vertically oval body. Make sure they are both aligned.
2. Draw the outlines of the eyes and feet.
Draw two circles for the eyes of the owl. Also, lightly draw the feet of the owl at the base of the bodyby drawing two slightly rectangular shapes. This will form the outline for the actual feet.
3. Fill out the eyes and feet.
For the eyes, draw two crescent shapes to make them look life-like. Lightly draw two diagonal lines over the eyes. These will form the outline for the eyelashes. Also lightly draw a small vertical line between the eyes. This will form the outline for the beak. Elaborate on the details of the feet of the owl by drawing three tiny sausage-like shapes for each foot. Let the middle one be longer than the other two.
4. Draw the eyelashes, beak and wings.
Draw two eyelashes around the lines above the eyes, such that they look like thin leaves. Next, using the outline drawn in the previous step, make the beak of the owl in the center of the head. Next, draw the wings of the owl, starting from the bottom of its head, along its body, almost till the bottom. Make them a little wider near the top and narrower as they come down and pointy at the end. They should look like they curve around the body.
5. Erase the light outlines.
Erase the light outlines which served as the guide to draw the eyelashes, nose and feet.
6. Colour the owl.
Your owl is now ready. Grab some crayons and get to work! You can even color it or decorate it with sequins and glitter. If you want a more realistic owl, color the inside portion of the body and the beak in light brown color. Color the wings and the head with dark brown. Color the eyelashes and feet in a darker shade of brown. Color the pupils black.
Tips to Learn Owl Drawing Easily
Here are some tips to keep in mind when you teach your child a simple owl drawing:
To ensure children learn to draw a neat and clean owl, start by teaching them how to draw a oval shape. Once they skillfully master the oval shape drawing. You can see the drawing and look for different shapes required that make up an owl, including a straight line and a circle.
Tell what an owl is and how they look, so they have a reference.
Teach them about symmetry so they can practice it and draw a symmetrical and neat owl.
Most of all, the practice of shapes is important to ensure an easy drawing of the owls without getting bored. Add colours and make it vibrant.
FAQs
1. What is an owl?
An owl is a solitary creature that stays nocturnal. It means they stay up at night and sleep in the daytime. They have a large head, a stoic stance, and calm energy. Fun fact – when they fly, they make no noise because of their flexible feathers. Their prey are small animals, such as insects, mice, fish, and smaller birds.
2. What are some fun facts about owls?
Some amazing facts about owls are:
Owls have the ability to rotate their necks about 270 degrees. Isn’t that surprising?
Do you know what owls hunt? Well, they hunt other owls. For instance, Great Horned Owls are known for hunting smaller Barred Owls.
Bran Owls can swallow their hunt or prey whole; that includes bones, skin, and everything. They also eat up to 1000 mice in a year.
Owls don’t have eyeballs. They have completely immobile tube-shaped eyes that give them binocular vision and focus on their target.
3. Is owl drawing easy for children?
Drawing an owl is easy and not that difficult for kids. It is a great drawing activity for children who are learning to draw and practising their pencil skills. With oval, circle, and straight-line shapes, the drawing is not so difficult, so they can easily draw an owl.
Giving your kids drawings will keep them entertained, hone their creativity, and also help them learn the colors of objects. You can follow these easy six steps to draw a cute cartoon owl that your little one can color.
Also Read:
How to Draw Frog for Children
How to Draw Lion for Kids
How to Draw a Cat for Kids
How to Draw Butterfly for Children
Read more
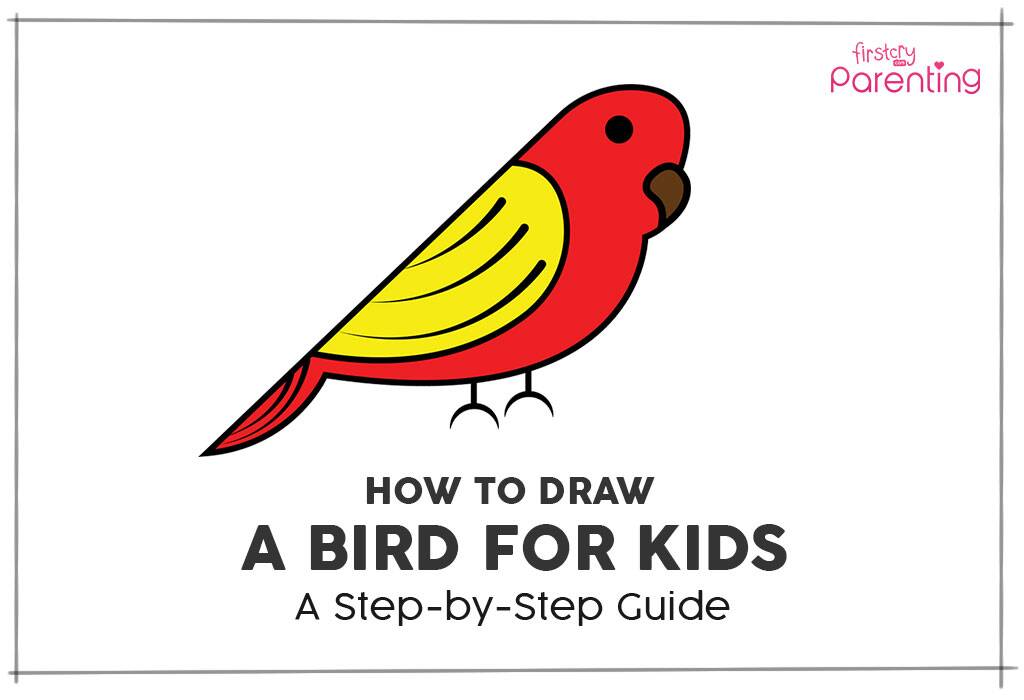
How to Draw a Bird for Kids: An Easy Step by Step Guide
Children are naturally curious and imaginative, and by engaging them in various art and craft activities, parents can enhance their creativity and imagination power. If your child develops or shows an interest in drawing, you could teach him simple designs such as easy bird drawing for kids to hone their skills and keep them interested. Encouraging children to express themselves through art fosters not only their artistic abilities but also their cognitive and emotional development. Read on to learn how to draw a bird for kids and ignite their creativity further.
This step-by-step guide is a great way to get your child to learn a new drawing. This one’s very simple, and your little one will enjoy himself while at it! Is your child ready to learn how to draw a bird?
What You Will Need to Draw a Bird?
You will need the following materials to make a bird drawing in a perfect way.
1 graphite pencil HB or B type
1 eraser
An A4 size plain paper/plain white sheet
Bird Drawing for Kids in 5 Simple Steps
Here is a simple guide on how to draw a bird in 5 simple steps! This simple bird drawing guide is perfect for beginners!
1. Draw the outline
To draw the outline of the bird’s head and body, all you need to do is draw a candy cane. You can draw a line as shown in the image below, and give it a slight curve from the top to make the head. Draw a small curve for the beak.
2. Draw the eyes
Make a small circle under the curved head and fill it to make the eyes. Then draw the beak as shown in the image.
3. Draw the wings and complete the body
To draw the wing of the bird, draw a semi-circle connecting the outline. Draw a bigger semi-circle and connect it at the bottom as shown in the image. The small arc at the bottom will form the tail of the bird.
4. Draw the feathers and the feet
Draw three arcs inside the semi-circle to make feathers of the bird, and two arcs, one below another inside the tail. To draw the feet, make two small lines, parallel to each other, from the outer semi-circle, and make small arcs under the lines.
5. Colour the bird
Colour the bird in orange and yellow. Colour the wings in yellow as shown in the picture, and the remaining body in dark orange. Its beak should be brown.
Benefits of Drawing Birds for Children
Drawing birds can be a delightful and educational activity for children, offering numerous benefits beyond just artistic expression. Moreover, it can enhance cognitive development and provide a sense of accomplishment for young artists. Here are the benefits of drawing pictures of birds for children:
Drawing birds requires careful observation of their shapes, sizes, colors, and patterns, which can enhance a child’s attention to detail.
Children can use their imagination to create unique bird drawings, experimenting with different colors and designs.
Holding a pencil and making precise strokes to depict feathers, beaks, and wings helps in refining fine motor skills.
Through drawing birds, children can learn about different species, their habitats, and behaviors, fostering a deeper connection with nature.
Engaging in art activities like drawing birds stimulates cognitive processes such as problem-solving, spatial awareness, and visual thinking.
Completing a bird drawing successfully can boost a child’s self-esteem and confidence in their artistic abilities, encouraging further exploration and experimentation.
FAQs
1. How can I make my bird drawing look realistic?
To make your bird drawing look more realistic, study reference images of the bird species you’re drawing. Pay attention to the placement of feathers, the shape of the beak, and any distinct markings. Use shading and highlighting to add depth and dimension to your drawing.
2. Do I need expensive art supplies to draw birds?
No, you can use basic pencils, paper, and coloring tools like crayons or colored pencils to draw birds. Expensive supplies are not required to create beautiful drawings.
3. How long does it take to learn to draw birds?
Learning to draw birds, like any skill, takes time and practice. It’s different for everyone, but with regular practice, you’ll see improvement over time.
This was about bird drawing for kids with colour. In 5 simple steps, your child will have learned how to draw a bird. Let him practice how to draw a bird, then you can teach him to draw other animals as well. Drawing is a great hobby that will improve your child’s focus, hand-eye coordination, and imagination. So let him draw and create a beautiful world of his own!
Also Read:
How to Draw a Butterfly for Children
How to Draw a Frog for Kids
How to Draw a Lion for Children
Step-by-Step Guide on How to Draw A Owl
Read more
How to Draw Indian National Flag
India celebrates its Independence Day on August 15 every year. This day is celebrated to commemorate the day when India’s Constitution came into effect after our country gained independence after a very long fight for freedom. 15 August is celebrated with patriotic fervour and festivities all around the country. This is the perfect time to involve your child in activities that teach him about India’s history and its rich cultural heritage.
One of these interesting activities can be learning how to draw the Indian national flag. Doing so will serve a dual purpose – your child will hone his creative skills and, also, learn about the significance of our national flag. Flag drawing for children is one of the best and easiest activities. So, let’s get started! Take a look at how to draw the Indian flag step-by-step.
What You Will Need for Drawing the Indian Flag?
An A4 size plain paper
A pencil
An eraser
A ruler
Colours
Flag of India Drawing for Kids in 9 Simple Steps
Here’s a step-by-step guide on how to draw the Indian flag.
1. Draw the pole
Using a ruler, draw a pair of vertical lines that are parallel and close to each other. Join both the ends of these parallel lines. This is the pole that will support the flag.
2. Draw the flag
Draw a wavy line, extending outwards, from the top portion of the flag pole, and draw a similar line a few inches below, as shown in the illustration. Join the open ends of these wavy lines.
3. Divide the flag into 3 parts
Divide the flag into 3 proportionate sections by drawing 2 wavy and horizontal lines across the flag, as shown in the image.
4. Draw the circle for the Ashoka Chakra
Draw a small circle in the centre of the middle section of the flag.
5. Complete the Ashoka Chakra
From the centre of the circle, draw 24 equidistant lines towards the outline of the circle. These lines will form the 24 spokes of the Ashoka Chakra.
6. Draw the stand for the flag pole
Draw a flat and slightly elongated oval around the bottom of the flag pole, as shown in the image. Below the oval, draw an arc which is parallel to the oval. Join the arc to the oval with two small vertical lines.
7. Draw the cord/rope
From the topmost tip of the flag pole, draw a wavy line flowing downwards, towards the bottom tip of the pole. This wavy line will form the rope or cord used for hoisting the flag.
8. Draw the base for the stand
Draw a second oval below the stand of the flag pole. With this, your flag outline is ready. All that’s left is to colour the flag.
9. Colour the flag
Colour the topmost section of the flag saffron, and the third section dark green. Colour the lines of the Ashoka Chakra navy blue. For the stand and the base, you can use shades of blue and green. While you’re at it, don’t forget to explain to your child what each colour stands for. Saffron stands for courage and sacrifice, white represents truth and peace, and green stands for faith and chivalry. The Ashoka Chakra stands for continuous progress.
FAQs
1. What Is the Meaning Behind Each Colour of the Indian Flag?
The Indian national flag has saffron, white and green colours. The meaning of each colour is:
The Saffron colour – indicates the strength and courage of the country.
The White middle band – indicates peace and truth along with Dharma Chakra.
The Green colour – shows the fertility, growth and auspiciousness of the land.
2. What Does the Ashoka Chakra Signify?
The centre of the Indian flag contains the Ashok chakra, on the white bank. It has 24 spokes and is blue in colour. It represents the constant movement and progress of the country.
3. What Do the 24 Lines in the Ashoka Chakra Represent?
The 24 spokes in the Ashoka Chakra represent the twelve causal links taught by the Buddha and paṭiccasamuppāda (Dependent Origination, Conditional Arising) in forward and then reverse order. The first 12 spokes represent 12 stages of suffering.
Drawing the Indian flag has never been easier with this step-by-step guide for your child. Not only will it keep him engaged and guarantee a fun-filled time, but also instil a sense of patriotism in him, as he learns about the significance of each and every element of the flag.
Also Read:
How to Draw Lion for Kids
How to Draw Car for Children
How to Draw an Apple for Kids
How To Draw a Butterfly for Children
Read more
How to Draw a Frog for Kids
Animal drawings have a magical ability to captivate children and ignite their interest in art and craft activities. This summer, seize the opportunity to introduce your child to the world of drawing by starting with a simple animal drawing. If you want to teach your child how to draw, start with an easy frog doodle. And you’re in luck! We’ve got a step-by-step guide complete with pictures for a cute frog drawing to get your child started. Frog drawing is easy! This fun and educational activity will not only keep your child entertained during the holidays but also nurture their creativity and artistic skills. So, get ready to embark on an artistic journey with your little one and witness their imagination soar.
Benefits of Learning to Draw a Frog for Kids
Learning to draw a frog can be a highly rewarding and educational experience for kids. It not only encourages their creative expression but also offers numerous developmental benefits. Here are some advantages:
Enhances Fine Motor Skills: The precision required in drawing helps children refine their fine motor skills.
Boosts Creativity: Drawing encourages kids to use their imagination and create their own interpretations.
Improves Concentration: Focusing on details in a drawing can enhance a child’s concentration and attention span.
Develops Problem-Solving Skills: Kids learn to analyze shapes and proportions, fostering problem-solving abilities.
Builds Confidence: Successfully completing a drawing can boost a child’s self-esteem and confidence.
Teaches Patience: The process of drawing teaches patience as children work through each step.
What You Will Need to Draw a Frog?
A pencil
An eraser
An A4 size plain paper/plain white sheet
Colors
A reference image of a frog (optional, but it can be helpful)
Frog Drawing for Kids in 12 Simple Steps
Follow this step-by-step guide for a frog jumping drawing.
1. Begin with drawing a horizontal oval on the sheet
Using a pencil, draw a horizontal oval shape on the sheet. The oval shape should be slightly elongated.
2. Draw a smaller oval under the oval drawn in step 1
Draw a smaller horizontal oval shape under the bigger oval – this will form the body of the frog. The bigger oval should overlap the smaller one, as shown in the picture.
3. Draw the limbs of the frog
Draw one oval (the size of your thumb) on either side to make the limbs or hind legs of the frog.
4. Draw the webbed feet of the frog
Draw three ‘V’ shapes under the two small ovals drawn in step 3. The webbed feet should be drawn under the hind legs of the frog.
5. Draw curves and arcs to define the characteristics of the frog
Draw two arcs facing each other inside the oval which forms the body of the frog. Refine its hind legs with curves.
6. Complete the forelegs
Complete the forelegs of the frog by drawing the front webbed feet.
7. Draw the eyes of the frog
To make frog’s eyes, start with drawing two dome-like structures on top of the oval shape drawn in step 1; draw them just like you would draw Mickey Mouse ears. They shall form the base of the frog’s eyes. Inside each dome draw half-a-circle as shown in the illustration.
8. Draw two small circles to complete the eyes
Draw a circle inside each half-circle drawn in the above step. These circles will form the black part of the frog’s eyes. To make the white part of the eyes, draw two little circles on the top left and top right in the left and right eyes respectively. Check the image below for reference.
9. Draw the mouth of the frog
Drawing the mouth of the frog is very easy; all you have to do is draw a curve inside the oval shape drawn in step 1.
10. Draw the nostrils
Draw two small dots about 1 cm above the curve drawn in step 9 to make the nostrils of the frog.
11. Draw the toes
Just like the dots drawn in the above step, draw dots at the end of the pointed webbed feet of the frog.
12. Colour the frog
Colour the body of the frog green and its eyes and toes black.
How to Draw a Jumping Frog in 9 Steps
Learning to create a captivating frog jumping drawing is an exciting venture that allows you to capture the dynamic and lively nature of these amphibians. In nine straightforward steps, you can master the art of illustrating a frog mid-leap, creating a fun piece of artwork.
1. Draw the Frog’s Head and Body
Source: Pinterest
Begin by sketching the head and body of the frog, creating a basic outline of its form.
2. Begin Drawing the Arms
Source: Pinterest
Extend two curved lines from the body to create the frog’s arms, forming a V shape.
3. Start on the Legs
Source: Pinterest
Add the hind legs by drawing two elongated bent lines, giving the frog its characteristic posture.
4. Add the Frog’s Hands and Legs
Source: Pinterest
Draw the hands and feet by adding webbed fingers and toes to the ends of the arms and legs.
5. Draw Small Balls on the Frog’s Hands and Feet
Source: Pinterest
On the frog’s hands and feet, add small round shapes to represent the finger and toe pads.
6. Draw the Frog’s Face
Source: Pinterest
Create the frog’s face by adding eyes, a nose, and a wide smile, giving it a friendly expression.
7. Add Three or More Lily Pads
Source: Pinterest
Draw three or more lily pads in the background to place the frog in its natural habitat.
8. Draw Water Puddles and the Sun
Source: Pinterest
Add wavy lines below the frog and lily pads to represent water and a shining sun in the sky.
9. Fill in the Color
Image Credit: Pinterest
Color the frog, lily pads, and background as desired to complete the drawing.
For the finishing touches, trace the outline with a marker and proceed to add vibrant colors.
Frog Drawing Tips for Children
Drawing a frog can be an enjoyable and educational experience. To help kids make the most of their artistic journey, here are some valuable tips to keep in mind while crafting a frog sketch:
1. Start Simple
Begin with basic frog shapes and gradually move to more complex details as your child’s skills improve.
2. Use References
Encourage kids to look at pictures of real frogs or other easy frog drawings as references for their own creations.
3. Practice Regularly
Like any skill, drawing improves with practice, so make it a regular activity.
4. Experiment With Colors
Let children explore their creativity by using a variety of colors for their frogs.
5. Be Patient
Remind kids that it’s okay to make mistakes and that practice makes perfect.
6. Offer Encouragement
Praise their efforts and celebrate their progress to boost their confidence.
7. Make It Fun
Keep the process enjoyable and stress-free to nurture their love for art and creativity.
There you go – in a few simple steps, you can teach your child how to draw a frog. Let him practice this cute and simple frog drawing daily – he will surely get better at it. Once he gets the hang of it, you can teach him to draw other intricate frog drawings too!
(P.S. Once your child learns how to draw a frog, you can teach him about its body parts!)
Also Read:
How to Draw a Lion for Kids
How to Draw Butterfly for Children
How to Draw An Apple for Kids
How to Draw a Christmas Tree for Kids
Read more
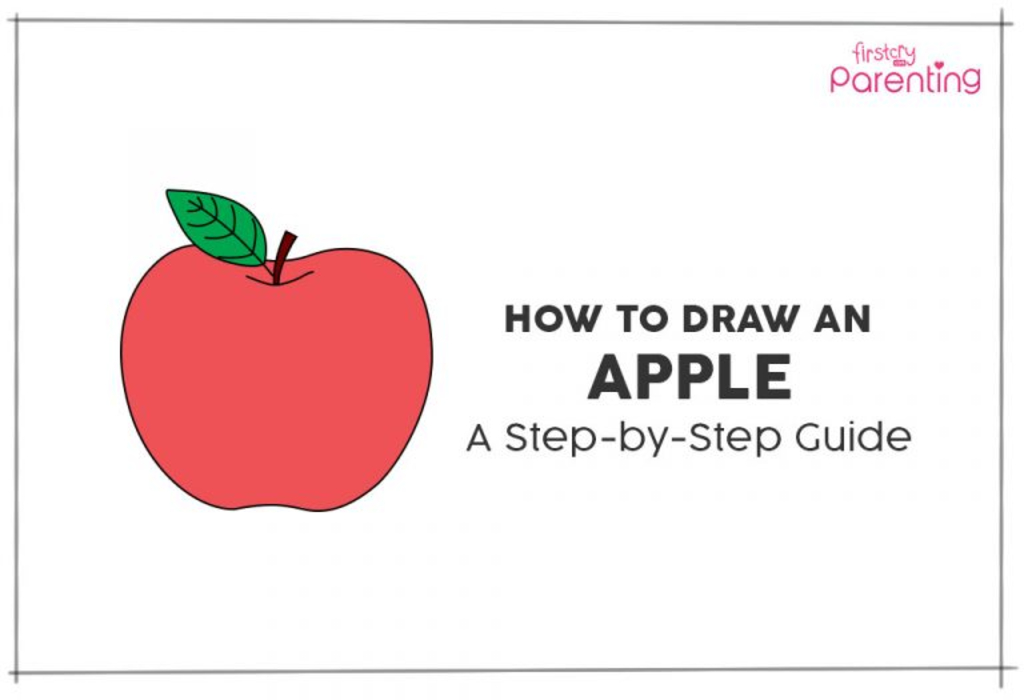
How to Draw An Apple for Kids
An apple a day keeps a doctor away. The fruit has been a part of your child’s diet since was a little baby. Remember all the apple puree you fed your little munchkin while weaning? Now that your baby is old enough to chomp on and relish slices of the fruit to her heart’s content, let’s use the fruit as a subject and teach your child how to draw an apple, step by step.
Encouraging your child’s creativity through drawing not only fosters artistic skills but also enhances cognitive development. Engaging in such activities not only sparks your child’s imagination but also provides an opportunity to discuss the importance of a balanced diet and the health benefits of consuming fruits like apples. Take this chance to bond with your little one through art and valuable conversations. Read on for easy instructions to draw an apple.
What You Will Need to Draw an Apple?
A drawing paper
Red, green and brown paint/ crayons/ sketch pens
A black-coloured sketch pen
A pencil
An eraser
A circular lid (3 to 5-inch diameter or of your preferred size)
Apple Drawing for Kids in 8 Simple Steps
Here’s an easy guide on how to draw an apple, step-by-step.
Step 1: Draw a Circle
Using a pencil, draw a circle with the help of the circular lid. We’ve given a size specification, but you can choose to draw your apple as big or small as you want. You can also go free-hand with the circle.
Step 2: Draw a Wave in the Top Half Part of the Circle
Leave some distance from the top of the circle, and draw a wave-like pattern that dips in the centre as shown in the figure below. This dip/ trough is where we will draw a stalk later. Let the ends of the wave overlap the circle on each side. It should look like a hairline on a face.
Step 3: Draw a Wave in the Bottom of the Circle
Draw another wave-like pattern at the bottom of the circle with its centre raised, as shown in the figure. Once again, let the ends of the wave overlap with the sides of the circle. The bottom curve is where the stamen of the apple is located. The drawing now probably looks like someone wearing an oversized pair of glasses, but it actually is the body of the fruit. Easy to draw, right?
Step 4: Draw a Small Curve Under the Top Wave-Like Pattern
Just under the top wave pattern, draw a curve underneath the gentle trough, as shown in the figure.
Step 5: Draw a Stalk and a Leaf
Draw two slightly curved lines projecting upward from the centre of the small curve you’ve just drawn. Join the ends of these lines. There, you have the stalk! It should look like a gently sloping elongated triangle.
Now, draw a leaf from the left base of the stalk, as shown in the figure. An easy way to draw a leaf is to draw a line projecting outwards from the base of the stalk and then draw an oval-shaped blade around it.
If you’re keen on learning how to draw different types of leaves, do leave a comment below.
Step 6: Draw the Veins of the Leaf
Now, on the leaf, draw slightly curved lines projecting out from the centre line. These are the veins of the leaf.
Step 7: Final Touches
Now, erase the unwanted lines and, with a black sketch pen, outline the apple.
Step 8: Paint It Red!
Colour the apple in a vibrant red colour. Use green for the leaf and brown for the stalk.
What Are the Benefits of Learning to Draw an Apple for Children?
Learning the drawing of an apple can offer numerous benefits for children, encompassing both artistic and educational aspects. As they engage in the creative process of drawing, children develop essential motor skills and cognitive abilities. Here are some specific benefits:
Fine Motor Skills Enhancement: Drawing involves precise hand movements, contributing to the refinement of fine motor skills in children.
Cognitive Development: The process of visualizing and replicating an object on paper enhances cognitive abilities and spatial awareness.
Creativity and Imagination Boost: Drawing encourages creative thinking and allows children to express their imagination freely through art.
Educational Engagement: Using a familiar object like an apple turns the drawing activity into an educational experience, providing an opportunity to discuss topics like nutrition and healthy eating habits.
FAQs
1. What Age Is Suitable for this Drawing Activity?
This drawing activity is suitable for children of various ages, but it is often recommended for kids around 4 years old and above. Younger children may need more assistance, while older kids can enjoy it independently.
2. How to Make My Apple Look More Realistic?
To make your apple look more realistic, focus on shading and texture. Add shadows to create depth, and consider using different shades of color. Pay attention to details like the stem and leaf, and observe real apples for inspiration.
3. What Other Fruits Can I Teach My Child to Draw?
Expand your child’s artistic skills by teaching them to draw various fruits. Start with simple shapes and gradually add details. Some other fruits to consider include bananas, oranges, strawberries, and grapes. Use a step-by-step approach to make it fun and easy for your child to learn.
There you have it! With this step-by-step, easy-to-draw apple guide, you can teach your tiny tot how to draw an apple! Let your munchkin draw as many apples as they want and show them off to your friends and family. Don’t forget to reward your kiddo with one of some delicious apple recipes. The apple of your eye deserves it!
Also Read:
How to Teach Kids to Draw?
How to Draw a Lion for Kids?
How to Draw a Butterfly for Children?
How to Draw a Christmas Tree for Kids
Read more
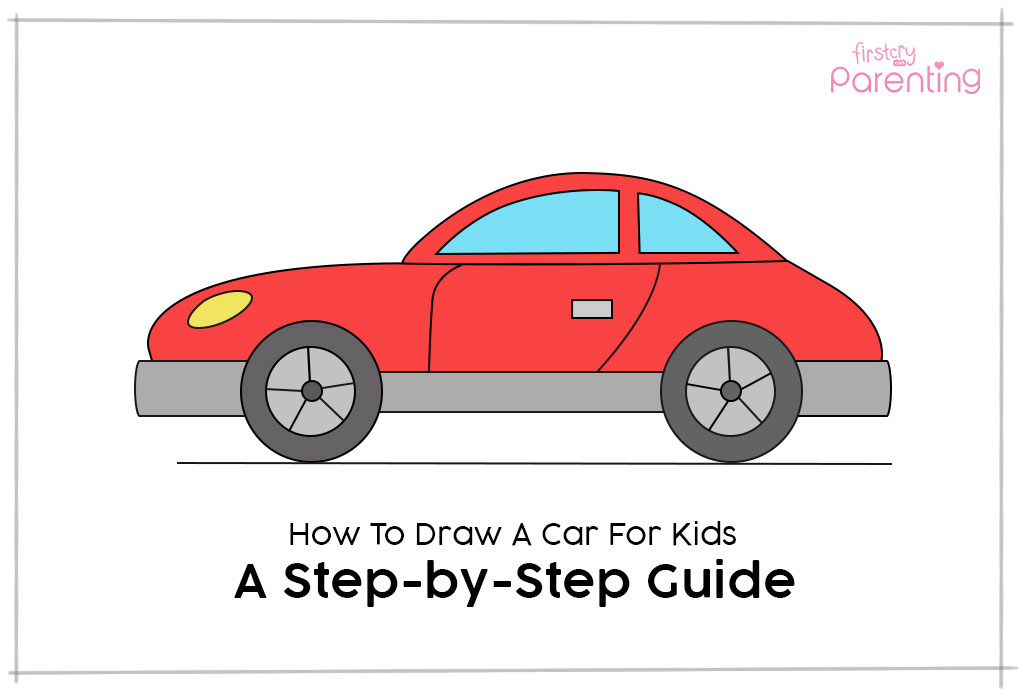
How To Draw A Car for Kids: Step by Step Guide
Cars are one of the most loved toys among kids. If you’ve seen them play with their cars, you’d know how fascinating their journeys are when they go around the house. And why just play with toy cars? Your kids could even draw and paint them in vibrant colours! Car drawing for kids enhances their motor and cognitive skills and allows them to imagine exciting adventures as they craft their unique vehicular masterpieces. Encouraging their artistic expression adds an extra layer of joy to their playtime.
Wondering how you could make drawing a car simple for your kid? Here’s how to draw a step by step car guide:
What You Will Need for Drawing a Car?
If you want to learn how to draw a car, here’s what you will need:
An A4 size plain drawing paper
A pencil
An eraser
A scale
Colours (crayons, watercolour, or sketch pens)
Car Drawing for Kids in 10 Easy Steps
Here are 10 steps that will teach you how to draw a car easily:
Step 1: Draw a Horizontal Line and Two Circles Over It
Using a scale, draw a horizontal line on the bottom half of the A4 sized drawing paper. Then draw two circles over the line, as shown in the figure. These circles are the wheels that will take you places!
Step 2 : Draw Smaller Circles Inside the Wheels
Now, draw another circle on the inside of the car wheels, as shown in the figure below. This is what we call the barrel of the wheel.
Step 3 : Draw the Third Set of Circles Inside the Wheels
Draw a small circle in the centre of each wheel. Your drawing might look like scary eyes right now, but trust me, it is your car. We’re just making it simple for you. These little circles, by the way, are the centre caps.
Step 4 : Draw Lines From the Innermost Circle Till the Second Circle
On each wheel, now draw five equidistant lines starting from the innermost circle and ending at the second circle. These lines are the spokes of the wheels. You may choose to use your scale to draw these lines or go freehand.
Step 5 : Connect the Wheels With Two Horizontal Lines
Now connect the wheels with two horizontal lines. You can use your scale here as well. These lines form the base of the car. Before we proceed, is it just us or does the drawing look like a pair of glasses on a pair of eyes?
Step 6 : Draw Two Rectangles on Either Side of the Wheels
Now, on either side of the wheels, draw two rectangles extending away from each other, as shown in the figure below.
Step 7 : Draw the Body of the Car
To make this part of the drawing simple, we’ll break it down in three steps –
First, from the left-hand side of the drawing paper, and from above the rectangle, draw a curved line that stops just above the end of the wheel on the right-hand side. The front portion of this curve will be the hood of your car.
Then, to connect the rear of the car, draw another curved line from the end of the rectangle on the right-hand side till the point where the first line stops. This part is the trunk of your car.
Now, draw a semi-circle on the top, starting from the point where the first two curved lines met till the end of the first wheel. Voila! You just drew the windshield and the roof of the car!
Step 8 : Draw the Car Door and the Headlight
Now, let’s add a car door and a headlight. For this step, you have to draw two slightly curved lines in the centre portion of the car, as shown in the figure below. Add a small rectangle near the second line for the handle. This completes your car door!
Drawing the headlight of the car is even more simple! Just draw an oval on the hood of the car (the curve on the extreme left of your drawing paper).
Step 9 : Draw the Windows With Two Quadrants
Now, draw two quadrants, one big and one small to make the windows of your car. You can use your scale to get the lines straight, but it’s not required. Just make them look like the car windows given in the image below.
Step 10 : Paint It On!
Wow! Your car has really come together well! Now all that’s remaining is to gather your favourite colours and paint that car!
FAQs
1. Can Drawing and Colouring Cars Help Children In Understanding The Colours?
Drawing and colouring cars can help children understand colours better. It allows them to explore different shades and learn about colour combinations, helping develop their colour recognition skills while having fun.
2. How Can You Make The Car Drawing Process Fun and Engaging for Children?
To make car drawing enjoyable for children, consider these tips:
Provide a variety of coloured pencils, crayons, or markers to encourage creativity.
Show them simple step-by-step tutorials or templates, making the process less intimidating.
Incorporate storytelling, asking them to draw a car for a specific adventure or character.
Offer praise and positive feedback to boost their confidence and motivation.
3. How to Help Your Kids to Avoid Mistakes While Drawing Cars?
Here are a few tips to help kids avoid mistakes while drawing cars:
Demonstrate patience and emphasising that mistakes are a part of learning.
Encourage them to start with basic shapes and lines, gradually adding details.
Offer gentle guidance without taking over, allowing them to problem-solve.
Use erasable materials to reduce the fear of making errors, fostering a stress-free creative environment.
With this easy guide on drawing a simple car step-by-step for kids, you can add another dimension to your kid’s life. Won’t you be the cool parent when you participate and use these simple steps to draw another car with your kid? Encourage your little one to go crazy with the colours, abstract with the spokes, or even redesign the complete car. Let them know that the sky is the limit when it comes to his/her abilities!
Also Read:
How to Draw a Frog for Children
How to Draw a Lion for Kids
How to Draw a Butterfly for Children
How to Draw a Christmas Tree for Kids
Read more
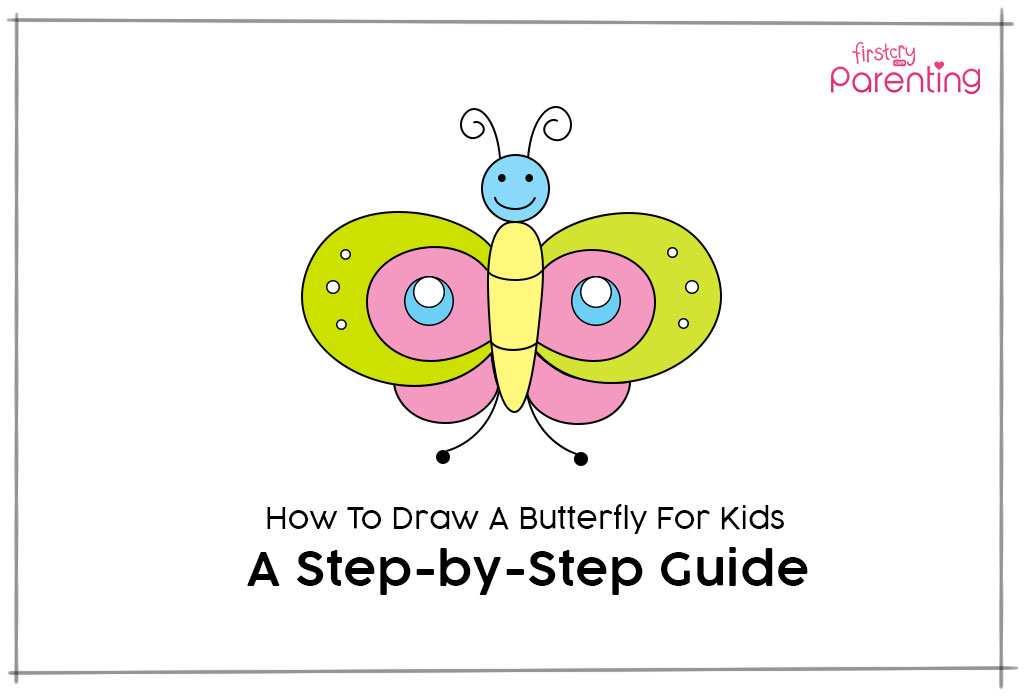
How to Draw a Butterfly – An Easy Step-by-Step Guide
Butterflies exist in various shapes, sizes and colours. And did you know they can see colours too? These delicate little creatures fluttering their many-hued wings can hold your kid’s attention for hours. Then, how about encouraging your little one to draw one? It can turn out to be a great indoor activity and also polish your child’s drawing skills. With their intricate wing patterns and symmetrical designs, butterflies may seem challenging to sketch, but don’t worry! In this step-by-step guide, we’ll break down how to draw a butterfly for kids with simple and easy-to-follow instructions so that they can confidently create a stunning butterfly drawing. Grab your pencil and paper, and let’s get started.
What You Will Need to Draw a Butterfly?
Before you start drawing your beautiful butterfly, make sure you have the right materials ready. You don’t need anything fancy, just some basic art supplies will do! Here’s a simple list to help you get started on your creative journey.
An A4 size plain drawing paper
Colours (crayons, sketch pens or watercolours)
A pencil
An eraser
Butterfly Drawing for Kids in 12 Easy Steps
Here’s a step-by-step guide on easy butterfly drawing for kids.
Step 1: Draw a circle.
First, draw a circle on the top half of your drawing paper. This will be your butterfly’s head/ face.
Step 2: Draw a stretched oval connecting the circle.
From the bottom of the circle, draw an oval shape that stretches downwards and tapers at the bottom. Ensure the oval shape touches the bottom of the circle. This forms the body of the butterfly.
Step 3: Draw two curved lines on the body.
Draw two curved lines, equidistant to each other on the body of the butterfly, as shown in the figure. This is the butterfly’s abdomen.
Step 4: Draw a smiley.
Now, on the face (the circle which was drawn in Step 1), draw a smiley with two small circles for the butterfly’s eyes and a curved line for its smile.
Step 5: Draw two lines at the end on the head.
On the head of the butterfly, draw the antennae with two curved lines spiralling out in opposite directions, as shown in the figure.
Step 6: Draw two circles on each side of the butterfly’s body.
Draw two circles overlapping the butterfly’s body at the centre. These circles are the butterfly’s fore wings. Use the curved lines of the abdomen for reference to get the shape as perfect as possible.
Step 7: Draw a curve at the bottom of each wing.
Draw a curve at the bottom of each wing and connect it to the bottom part of the butterfly’s body. These are the butterfly’s hind wings.
Step 8: Draw curves from the lines on the abdomen.
Now, connecting the two curved lines on the abdomen, draw a curve inside each fore wing, as shown in the figure.
Step 9: Draw two curved lines at the bottom of the body.
From the point where the butterfly’s body meets the hind wings, draw a curved line on each side, pointing away from each other. Draw a small circle at the end of each of these lines. These lines are the butterfly’s legs.
Step 10: Draw circles in the centre of each fore wing
In the centre of each fore wing, draw two concentric circles, touching each other as shown in the figure below.
Step 11: Draw tiny circles on the fore wings.
On the outermost part of the fore wings, draw three tiny circles on each side of the wings.
Step 12: Colour the butterfly.
Now, pull out all your colours and decorate the butterfly in as many shades as you want.
FAQs
1. How can kids add details to their butterfly drawing?
Children can add patterns like dots, swirls, and lines on the wings. They can also draw antennae on the head and decorate the butterfly with different colours.
2. What are some fun variations to make the butterfly unique?
Kids can add a background with flowers, a garden, or a rainbow. They can also experiment with different wing shapes to make their butterfly look more imaginative.
With this easy-to-understand guide, your kid can learn how to draw a simple butterfly. When your little one masters this drawing, encourage him/her to draw more butterflies in various sizes, prettier shapes and colour them as vibrant or subtle as they want. Don’t forget to put the drawings on the refrigerator. You will give them wings to explore the art form by doing that!
Also Read:
How to Draw Bird
Steps to Draw Owl
How to Draw Frog for Kids
How to Draw a Lion for Kids
How to Draw a Christmas Tree for Children
Read more
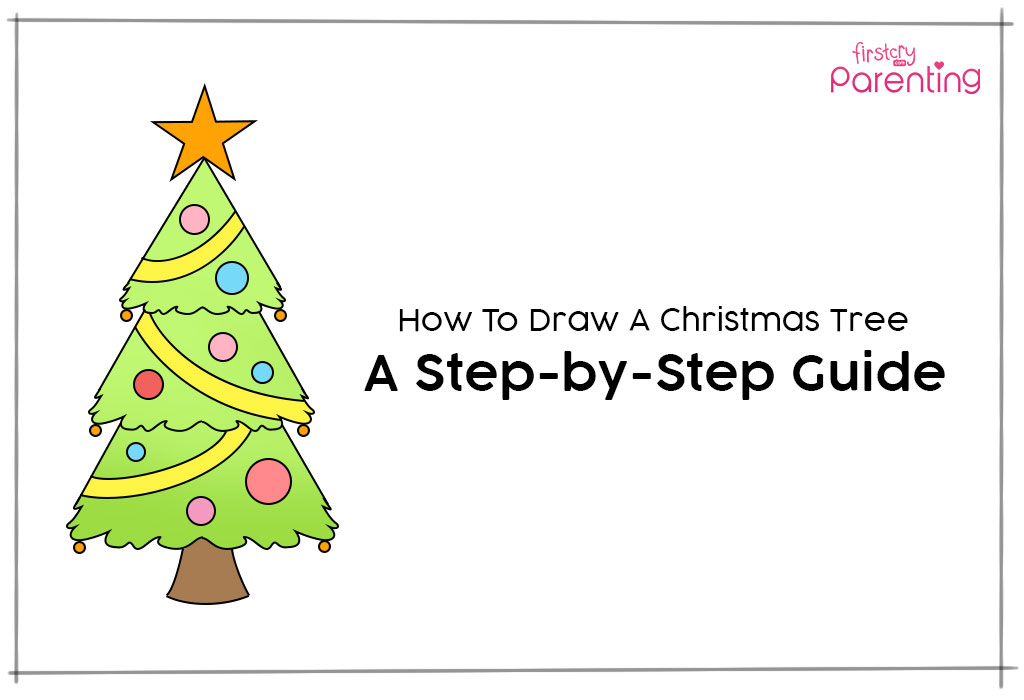
How to Draw a Christmas Tree for Kids
It’s the merriest time of the year, and what better way to get your little ones into the Christmas spirit than an easy Christmas tree drawing for children. Drawing helps bring out creativity and also keeps the kids occupied for hours. Who knows, you may even uncover a hidden talent in your child. So, bring out the colours and sit down with your kids, and we’ll tell you how to draw a Christmas tree, step by step.
Christmas Tree Drawing for Kids in 10 Simple Steps
Are you ready for the easiest Christmas tree drawing for kids? We’ll show you how in 10 simple steps.
1. Draw an inverted ‘V’
Start by drawing an unfinished ‘A’ or inverted ‘V’ shape. This will be the topmost section of the tree!
2. Begin connecting the ends from the left-hand side
It’s time to connect both the ends. Draw an uneven, frill-like design, as shown in the illustration, from the left end towards the centre.
3. Do the same from the right-hand side
Draw the same uneven, frill-like design from the right side towards the centre, connecting the open ends of the inverted ‘V’ shape.
4. Draw a similar, mid-section of the tree
Draw a similar, but larger shape, right under the first one. This forms the mid-section of the tree.
5. Draw another similar, yet larger shape
Draw the last similar, yet larger shape under the previous section, to finish the basic outline. You’re almost done! Can you see your tree coming together?
6. Draw the trunk of the tree
For the base of the tree, draw two lines curving away from each other and connect them, as seen in the image.
7. Draw some lights on the tree
Draw two lines across each section, as shown in the illustration. These will become the lights!
8. Decoration Time!
What tree is complete without a star? Draw a star at the top of the tree! Add circles at the ends of each section for the decorations.
9. Add some finishing touches
Draw circles in the empty spaces of each section, as seen in the illustration. Your tree is now drawn and ready to be coloured in!
10. Bring out the colours
Its time for the most fun step. Let your kids use their creativity and colour each part of the tree. They can use the illustration as a reference as well!
10 simple steps later, there you have it! A colourful Christmas tree, drawn from scratch by your kids! With some practice, they’ll learn how to draw their own variations and use their creativity. This is also a fun activity at any Christmas party for kids! The perfect way to get into the Christmas spirit, isn’t it?
Infographic : How To Draw a Christmas Tree for Kids
Also Read:
Christmas Tree Facts for Kids
Christmas Party Games for Kids
Stories about Christmas for Children
Christmas Art and Crafts Activities for Kids
Read more
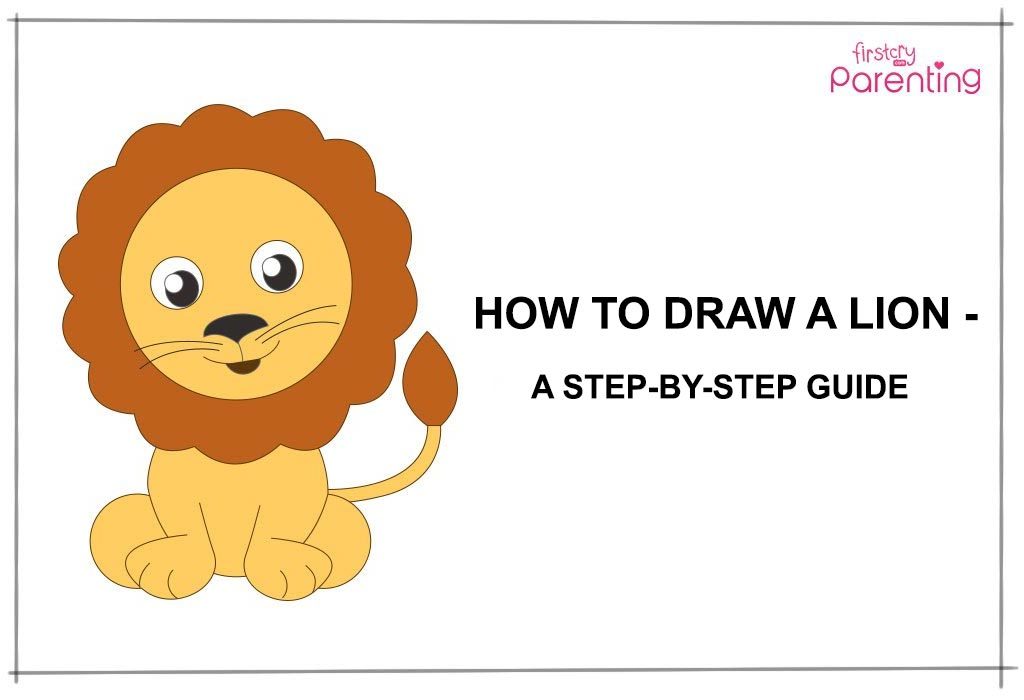
How to Draw a Lion – A Step-by-Step Guide for Kids
Does your little one enjoy arts and crafts? With a little nudge in the right direction, he could turn into the next little Picasso! Drawing and colouring reach a level of excellence when practised often, if not daily. If you’re looking to hone your little one’s artistic talent, drawing a day is a step in the right direction. Since kids are easily captivated by animals and birds and are often taught animals, colours, and birds early on, a drawing on such topics can be a great idea; for instance, a lion drawing for kids. You can start with an easy lion drawing for your kiddo and take their skills to the next level with other animals. This article is a simple guide on lion drawing for kids step by step.
This step-by-step guide is a great way to get your child to learn a new drawing. This one is simple and turns out great! Ready to see how simple it is to draw a lion?
What You Will Need
1 pencil
1 eraser
An A4 size plain paper/ plain white sheet
Colours
Lion Drawing for Kids – 13 Easy & Simple Steps
Let’s quickly learn how to make a cute lion drawing, shall we? All you need is a pencil, an eraser, an A4-size white sheet, and colours.
Step 1: Draw a lion face.
Draw a circle with a diameter of 5 cm or more on a plain sheet. To draw a lion face, make a small circle inside this circle. The space between the two circles should be about 1 cm. The outer circle should be sketched lightly so that it can be erased later.
Step 2: Draw the mane of the lion.
Draw frill-like semi-circles on the circumference of the bigger circle to draw the mane of the lion. Then erase the outer circle.
Step 3: Draw an egg shape.
Draw an oval or egg-like structure starting from 1 cm below the centre of the circle as shown in the illustration.
Step 4: Draw two small circles on the left and right sides of the oval shape.
Draw two small circles along the base of the oval shape. The two circles should be drawn on the left and right side of the oval shape respectively such that they intersect with the oval shape as shown in the image.
Step 5: Draw two arcs inside the oval shape.
Draw two arcs inside the oval shape on the left and right sides respectively, as shown in the image.
Step 6: Erase the top-half of the oval shape.
Erase the above half of the oval shape.
Step 7: You will get a U-shape.
You will get a U-shape, which will form the base or the body of the lion.
Step 8: Draw the lion’s feet.
To make the lion’s legs and feet, draw a ‘J’ on the left, as shown in the image and an ‘L’ on the right. Draw two arcs on both feet as illustrated.
Step 9: Draw the tail of the lion.
Now to make the tail of the lion, draw two parallel lines going upwards on the right. Draw a leaf-like shape on the end of the lines.
Step 10: Draw the facial features.
To make lion’s eyes, start with drawing two small circles inside the smaller circle drawn in step 1.
Draw an oval shape inside the above two circles respectively and colour them black.
To make the white part of the eyes, draw a little circle on the top left inside each oval shape.
To draw a nose, draw a wide ‘V’ under the eyes of the lion. Draw an arc to connect the ends of the ‘V’ shape.
Step 11: Draw the tongue of the lion.
Draw a small line from the centre of the lion’s nose and draw a half-circle curved upwards (towards the nose). Draw a small semi-circle underneath to make the tongue of the lion. Next, draw two whiskers on each side as shown in the image.
Step 12: Colour the nose and tongue of the lion.
Colour the tongue and the nose of the lion black.
Step 13: Colour the body of the lion.
Colour the body of the lion mustard yellow and his mane and tail brown.
In 13 simple steps, your kids will have learned how to draw a lion.
FAQs
1. What are the advantages of lion drawing for children?
Lion drawing, first of all, teaches children about what a lion looks like. This drawing is a great way to introduce children to animals one by one and teach them the trivia. Instead of rote learning, kids will enjoy learning about animals like lions in a fun and creative way.
2. What colours can children use to fill in a lion drawing?
Yellow, brown, and orange can be used to colour a lion. For children beginning their colouring journey, they can use pencil colours or oil pastels as they glide smoothly. Remember to use child-safe colours only.
3. What else can we draw on a lion drawing?
You can make trees, rocks, vines, sand dunes, mountains, and other animals to give the drawing a vibrant look.
With some practice (and patience), your kiddo will learn how to draw a lion and other animal figures. And once he gets the hang of it, he can teach his friends, too!
Also Read:
How to Draw a Frog for Kids
How to Draw an Owl for Children
How to Draw An Apple for Kids
How to Draw Butterfly for Children
Read more
Sort By
 Latest
 Most Popular
 Trending
Please select atleast one Filter