Homemade Musical Instruments for Kids: 15 Easy DIY Ideas to Try
Engaging your kids in fun activities can be difficult, especially if they get bored easily. Next time, try making musical instruments at home with your kids! It’s a creative, hands-on activity that’s sure to leave them giggling and happy. Studies have shown that playing music makes kids smarter, kinder, and more cheerful, as it enhances their cognitive skills and sparks imaginative thinking. Plus, crafting instruments together is a wonderful way to bond and encourage self-expression. This post features a list of hand-picked homemade instrument ideas that are simple, fun, and perfect to make with your kids right away. Get ready to turn everyday items into DIY musical instruments for kids!
Fun DIY Musical Instruments Ideas for Children
Join hands with your kids to make music and handmade instruments with these simple ideas. Don’t worry if you don’t know how to make homemade musical instruments; we’ve included easy, step-by-step instructions to help you build DIY instruments for kids.
1. Hand Drum
Looking for lovely afternoon project ideas to do with your kids? Make this super easy hand drum from materials that are already in your house!
What You Will Need
- Empty ribbon spools measuring around 3.25 inches
- Colourful paper straws
- Card stock
- Coloured washi tape
- Ribbon
- Colourful wooden beads
- Hot-glue gun or glue
Procedure
- Using a pencil or a sharp object, poke a hole on the bottom side of the cardboard spool for the straw to be inserted.
- Next, poke a hole on opposite sides of the spool through the center, for the beads to go through.
- Insert the paper straw into the first hole at the bottom.
- Take two six-inch-long strips of ribbon, and make a knot on one end of the ribbons.
- Glue the ribbon to one of the holes on the side of the spool, and repeat at the other side.
- Measure 3.25-inch circles in the card stock and cut two of them.
- Let your child decorate the card stock circles with washi tape or paints.
- Glue the decorated circles on the ribbon spools.
- Help your kid string the beads through the ribbon and tie a knot.
- Secure the beads with glue to finish.
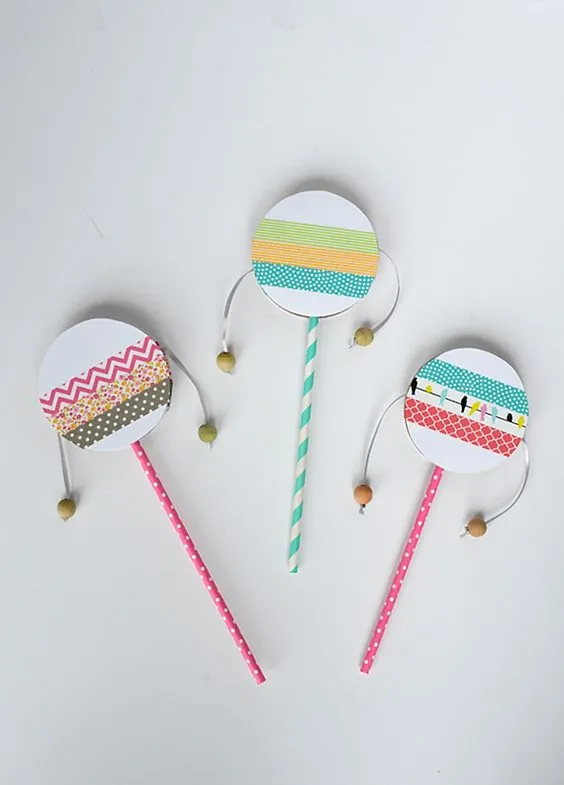
Image Credit: Pinterest
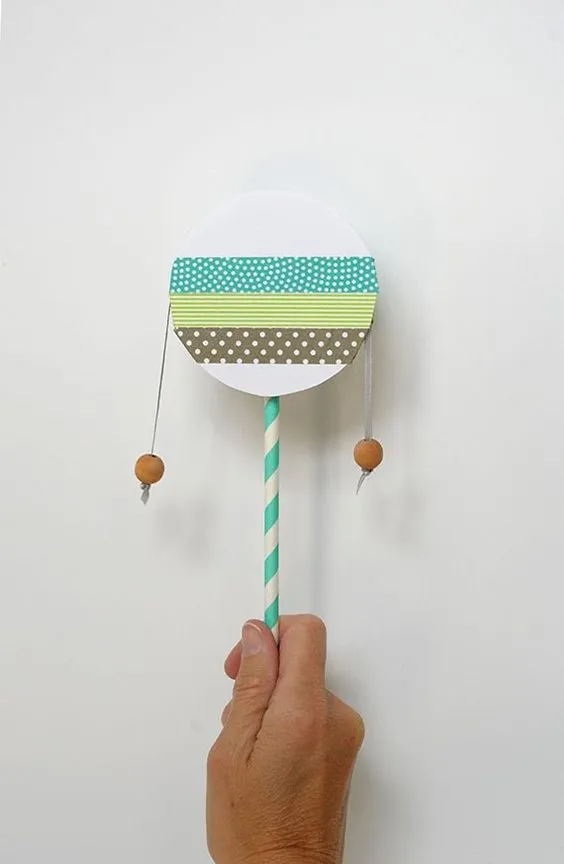
Image Credit: Pinterest
2. Tin Can Drum
If you are on the lookout to do fun activities with your kids, the tin can drum is just the right choice.
What You Will Need
- Big and small cans
- Safety can opener
- Big and small balloons
- Rubber bands
Procedure
- To begin with the making of the drums, remove the top lid of the cans using a safety can opener.
- Wash the interiors of the cans and dry them thoroughly.
- Cut the bottom of a balloon, and expand it tightly over the open top of the can.
- Using a rubber band, secure the balloon.
- Voila! Your drum is ready to play in just four easy steps!
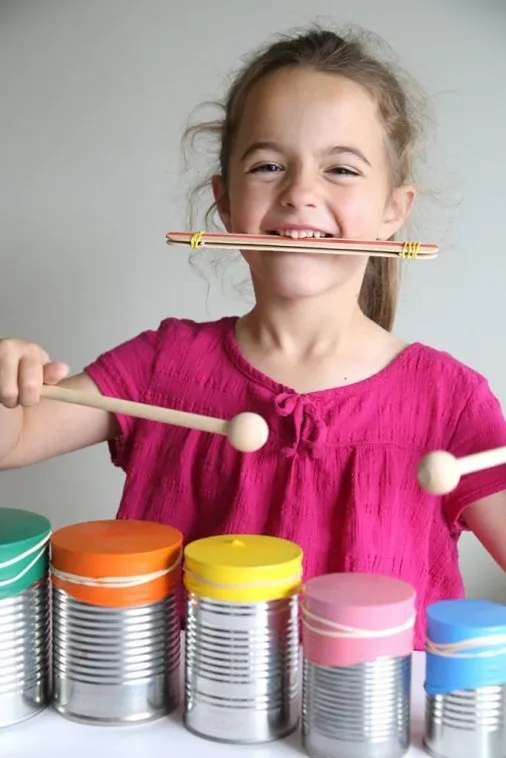
Image Credit: Pinterest
3. Lolly Stick Harmonica
Listen to the sweet tunes played by your little tots with these little harmonicas, which are made from simple materials such as wooden lolly sticks and paints!
What You Will Need
- Wooden lolly sticks
- Wooden matchsticks or toothpicks
- Paintbrush
- Paint
- Elastic bands
- Greaseproof paper
- Pencil and ruler
- Scissors
Procedure
- Take two lolly sticks, let your kids paint it on both sides, and allow them to dry.
- Cut a section of the greaseproof paper corresponding to the same width and length of the lolly sticks.
- Place the paper between the lolly sticks.
- Take the matchsticks, and cut them to about 2 cm in length.
- Place one matchstick vertically between the sticks and greaseproof at one corner.
- Using an elastic band wrap around the lolly sticks such that it goes around either side of the matchstick to secure in place.
- Repeat the same steps at the other end of the lolly stick.
- To play the harmonica, blow in between the small gaps of the lolly sticks.
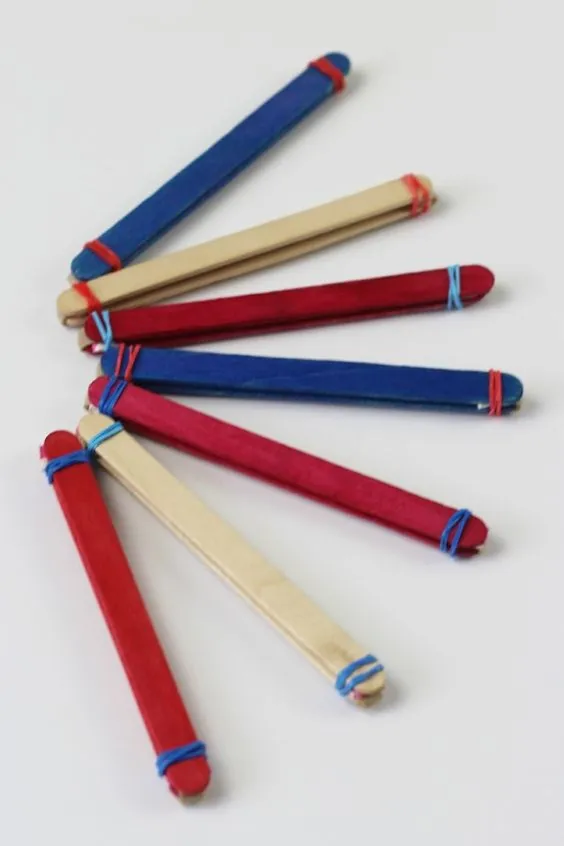
Image Credit: Pinterest
4. Paper Straw Flute
Making a fancy pan flute with straws together with your kids has never been this easy!
What You Will Need
- Any coloured or patterned paper straws
- Coloured string
- Feathers
- Masking tape
- Scissors
- Glue
- Ruler
- Pencil
Procedure
- Take around 15 straws. With the help of a ruler, cut the first straw such that it is 10 cm in length.
- Keep adding 0.5 cm to the subsequent straws i.e., the second one is at 10.5 cm, the third straw at 11 cm, the fourth at 11.5 cm, and so on till the fifteenth straw. Through this pattern, the fifteenth straw’s measurement will be at 17 cm.
- Place the straws in ascending order of height, and glue the straws together.
- While the glue dries, cut a length of around 50 cm of any coloured string.
- Paste one end of the string between the first and the second straw.
- The other end of the string should be glued between the penultimate and the last straw.
- Add feathers or beads on the strings and wait for them to dry.
- Finish the panpipe by wrapping the masking tape around the straws at the top for a seamless appearance.
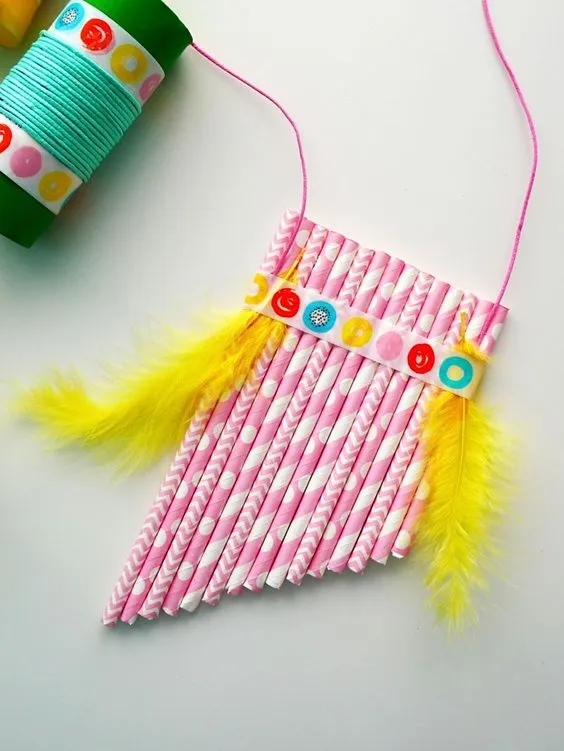
Image Credit: Pinterest
5. Pringle Can Drum
If your kid loves drumming and creating a vivacious uproar in your home or neighbourhood, then the Pringle can drum is the right craft activity to do with your kids.
What You Will Need
- Seven empty Pringles cans
- Duct tape
- Drum sticks
Procedure
- Take the Pringles cans and arrange them in a circle such that there are six on the outside and one in the centre.
- With the help of duct tape, tightly tape and secure the cans together.
- You can also create a strap for the Pringles cans drum using duct tape to help your kids hang it around their necks.
- Measure the correct length of the strap, and fold the tape on its self in half.
- Attach the strap to the drum, and it’s done!
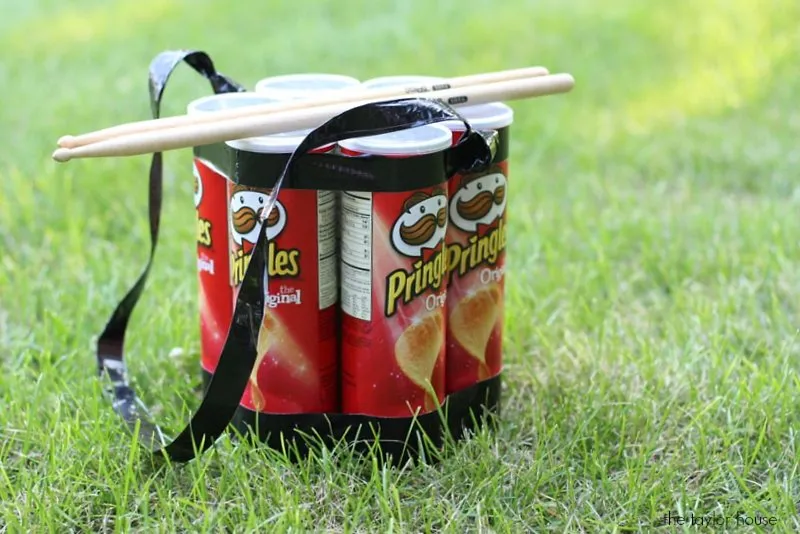
Image Credit: Pinterest
6. Mini Lid Banjo
One of the easiest homemade string instruments, the mini lid banjo is undoubtedly an extremely amusing instrument that instantly fills your kid with joy! This fun activity for kids also doubles as a show-piece, as this miniature banjo is adorable.
What You Will Need
- Jumbo craft sticks
- Mini lids of jars
- Loom Bands or rubber bands
- Colourful washi tape
- Duct tape
- Glitters or sequins
- Craft glue
- Plastic gem or marker
Procedure
- Take a lid and place four loom bands over the lid.
- Make sure the loom bands are in place by securing them with a piece of duct tape. Do not try to secure them using a hot glue gun, as the loom bands will melt and snap.
- After the loom bands are secured over the lid, keep it aside.
- Cut a small end from your jumbo craft stick.
- Decorate this craft stick with colourful washi tapes.
- Now, attach the craft stick to the lid with a piece of duct tape.
- Decorate your banjo with sequins or glitter using craft glue.
- Finish it by using plastic gems or a marker to sketch the tuning knobs on the banjo handle to give it a realistic feel!
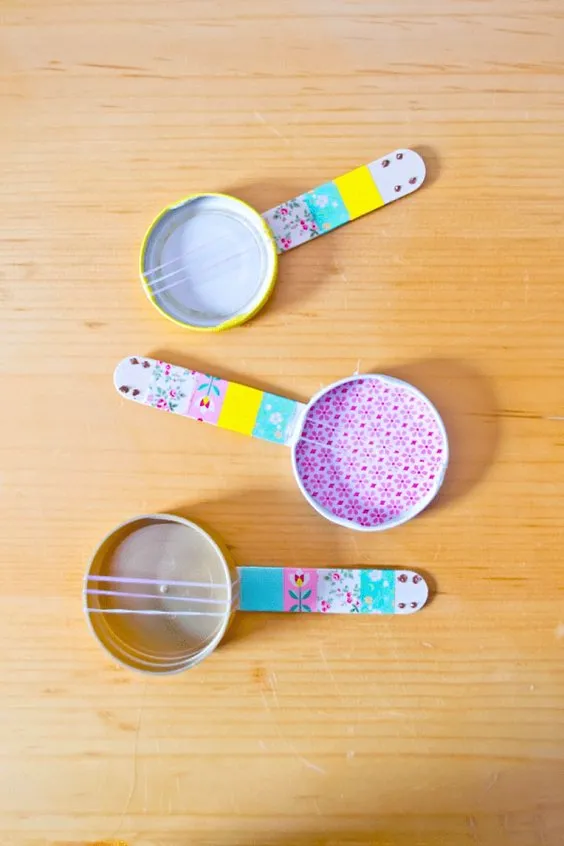
Image Credit: Pinterest
7. Spoon Maracas
Engage your kids and their friends in making this music instrument craft at an Easter party or during a Sunday afternoon.
What You Will Need
- Plastic Easter eggs
- Plastic spoons
- Dry ingredients such as dry beans, rice, or plastic beads
- Different patterns or colours of washi tape
Procedure
- Take the plastic Easter eggs, and have your kids fill them with dry beans, rice, or plastic beads. This activity is not only fun, but also helps in improving the motor skills of your young tots.
- Next, take two spoons together, and place them such that the heads of the spoons face each other.
- Use glittery washi tape and start wrapping the handles of the spoons tightly. You can get creative at this point, and use different patterns or colours of washi tape.
- Slightly open the heads of the spoons, and place the plastic eggs with the dry ingredients in between.
- Tightly wrap the egg and spoons with washi tape around the seam 3-4 times till they are very secure.
- You can also wrap the head of the maracas with different washi tape, and your maracas is ready!
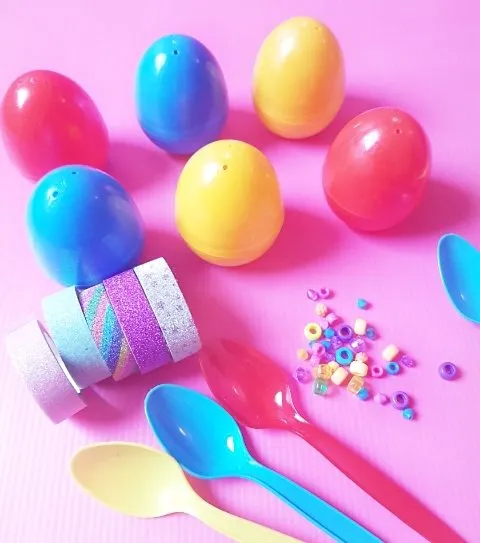
Image Credit: Pinterest
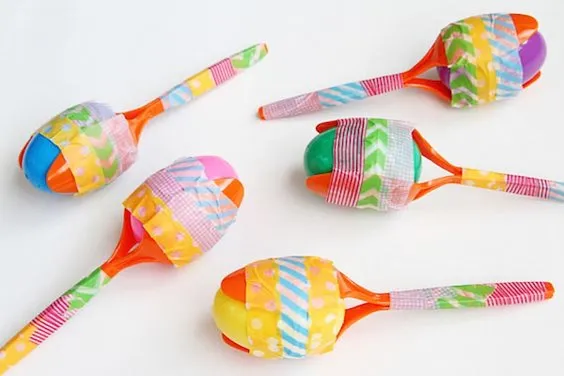
Image Credit: Pinterest
8. DIY Wood Xylophone
Looking to make homemade instruments with different pitches? The DIY wood xylophone is what you need to make with your kids! This cannot be completely handled by your kids as it involves screws and hammering, so ensure that your kids are not left unattended.
What You Will Need
- Vertical wood strips
- Paint
- Markers
- Screws or nails
- Hammer
- Felt covered drumsticks
Procedure
- Take vertical wood strips that increase equally, such as 8″, 10″, 12″, 14″, 16″, 18″, and 20″.
- Paint the wooden strips to decorate them. You can let your kids paint according to their choice, or choose a theme, like Christmas or a rainbow.
- After the paint has dried, screw or nail the painted boards parallel to each other, starting from the smallest to the longest, on two support boards.
- Make two felt-covered drumsticks, and dance to the melodious tunes of your kids’ music!
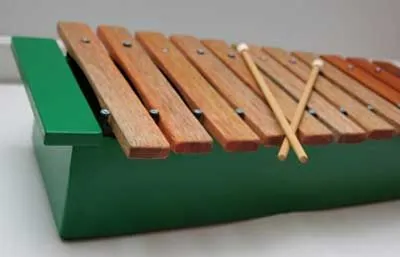
Image Credit: Pinterest
9. Rainbow Rain Stick
Making this rainbow rain stick is a great way to spend a cosy rainy afternoon with your kids.
What You Will Need
- A cardboard tube
- Different coloured or patterned washi tape
- Raw dried beans or rice
- White duct tape
Procedure
- Begin by wrapping the cardboard tube with white duct tape.
- After wrapping it fully, add some dried beans or rice into the tube. It’s great if you have some expired beans or rice, as this is a smart way to recycle them.
- Then, close the tube ends with tape.
- To decorate it outside, you can let your kids paint the tube with the rainbow colours after coving it with paper. Alternatively, you can also wrap coloured washi tapes around the tube.
- The rain stick is ready to be used by your kid, who is sure to have a lot of fun with it!
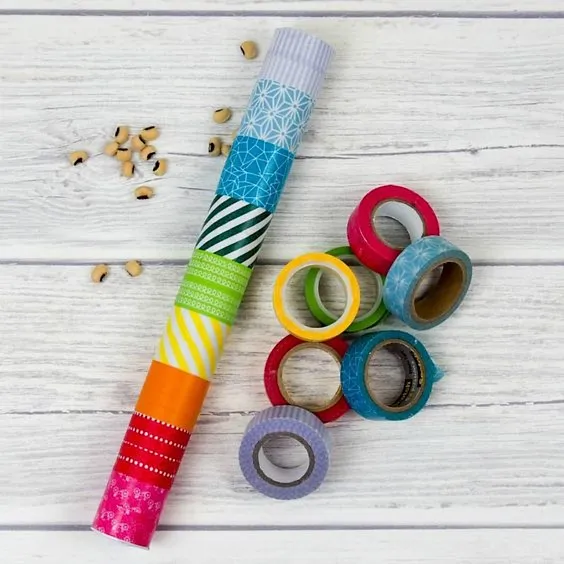
Image Credit: Pinterest
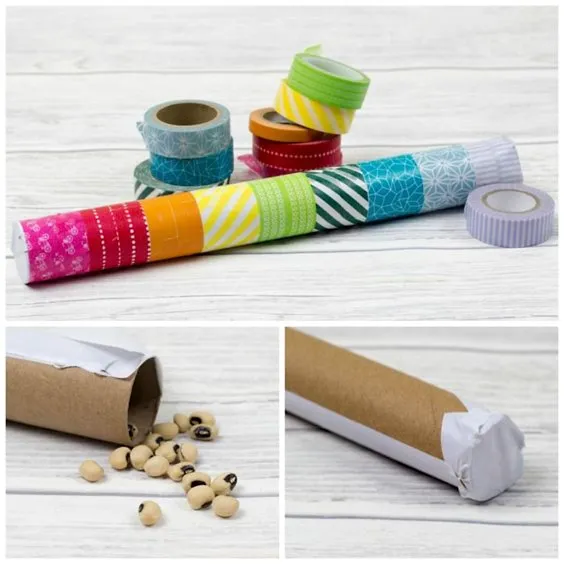
Image Credit: Pinterest
10. DIY Kazoo
A unique instrument that gives you the feel of tribal music, the kazoo is undoubtedly every kid’s favourite!
What You Will Need
- Empty toilet paper rolls
- A sheet of wax paper
- Rubber bands
- Markers
- Paint
Procedure
- Let your kids paint the toilet paper rolls as they wish.
- Cut a square sheet out of the wax paper, and wrap it over one end of each roll by securing it with a rubber band.
- The homemade musical instrument is ready to play. Teach your kids to hum or sing into the roll, and some funky music is ready to roll!
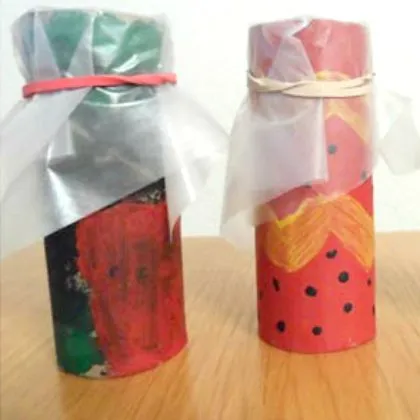
Image Credit: Pinterest
11. Bell Bracelet
The colourful beads and their clanking and jingling sounds are sure to pique your kids’ interest to make this simple musical instrument with you!
What You Will Need
- Colourful pony beads
- Jingle bells
- A pipe cleaner
- A pair of scissors
Procedure
- Start by measuring the size of your kid’s arm by clasping the pipe cleaner around to figure out the length of the bell bracelet.
- After deciding on the length of the bracelet, cut the pipe cleaner accordingly, and ensure to leave some more margin than the actual length.
- Lay down the colourful beads, and have your kids choose their favourite colours.
- If your child is young, help him to string the beads through the pipe cleaner. If your kid is older, let him creatively thread the pony beads through the pipe cleaner.
- Make sure to string one or two jingle bells at equal intervals between the pony beads.
- After your child strings the pony beads and jingle bells, carefully take it from him and secure the ends together as a tight knot.
- The bell bracelet is ready. You can make a similar bracelet to match it with your kid’s bracelet.
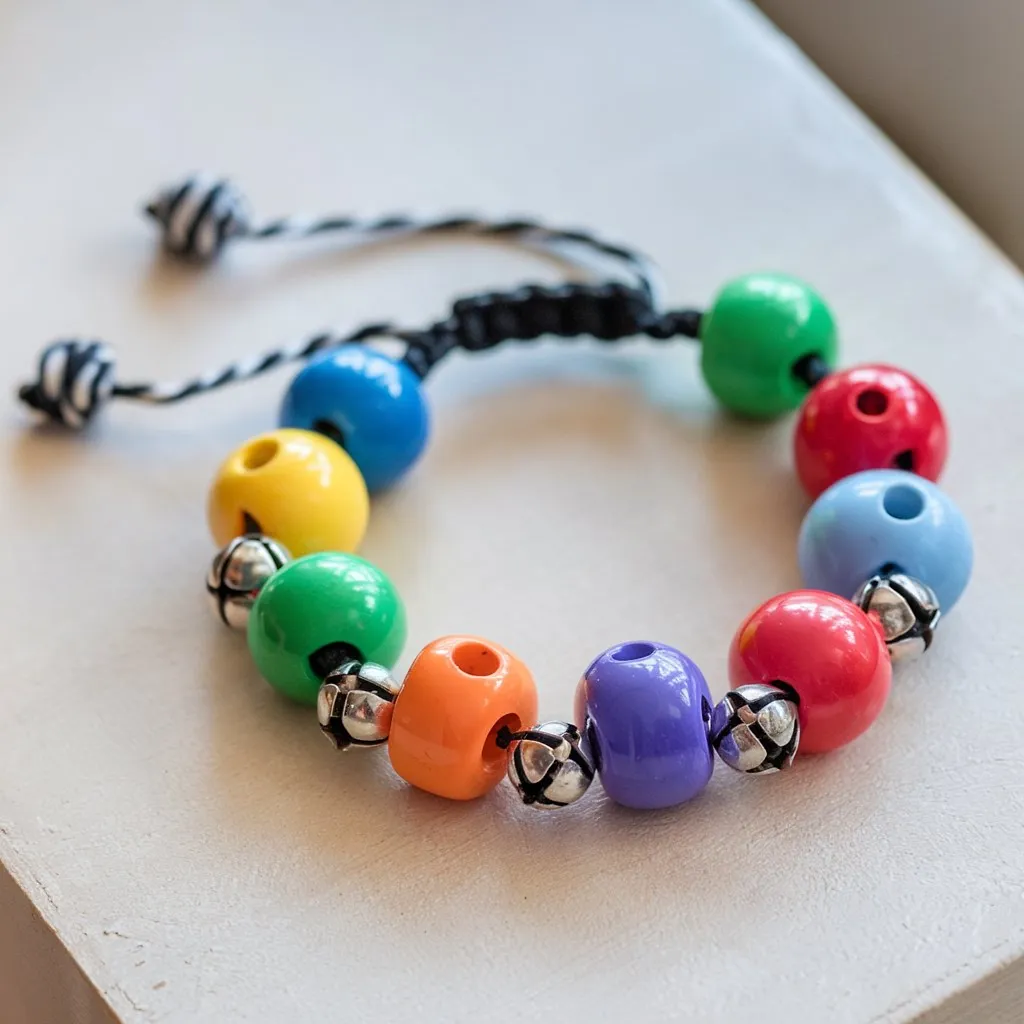
Image Credit: AI-Generated Image
12. Paper Plate Cymbals
Another fun musical instrument is the paper plate cymbal, which can be easily made with supplies available at home.
What You Will Need
- Two paper plates
- Poster colours or acrylic paint
- Coloured ribbons
- A paintbrush
- Coins
- A pencil
- A glue gun
Procedure
- Take two paper plates of identical size, and with the tip of a pencil make two holes right in the middle of each paper plate.
- Ensure that the distance between the holes is at least 3-4 inches, or as wide as the palm of your hand, to comfortably hold the cymbals.
- Paint the paper plates fully with any colour of choice.
- Next, take a pair of 10-inch long coloured ribbons, and insert them through the holes.
- Tie the loose ends of the ribbons on the other side of the plate tightly, and adjust the fit according to your kid’s palm.
- Turn the cymbals to make each plate facing up, and with the help of a glue gun, fix small coins around the frame of each plate.
- Let the glue dry, and bang the cymbals to create sound!
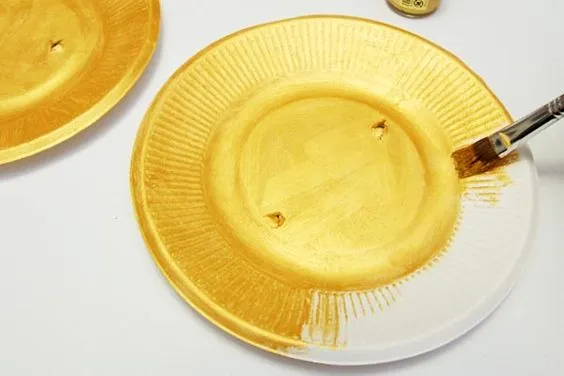
Image Credit: Pinterest
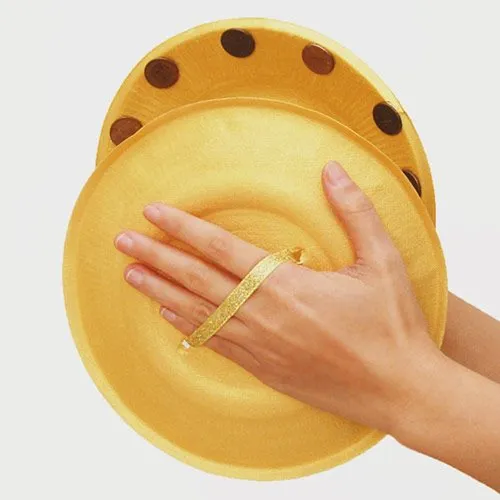
Image Credit: Pinterest
13. Paper Plate Tambourine
A simple tambourine that’s perfect for little hands to shake along with a beat.
What You Will Need
- 2 paper plates
- Dried beans or small bells
- Stapler or glue
- Crayons, markers, or stickers for decoration
Procedure
- Let your child decorate the bottom of each paper plate.
- Place a small handful of beans or bells between the two plates.
- Staple or glue the edges shut.
- Shake to hear the jingling sound!
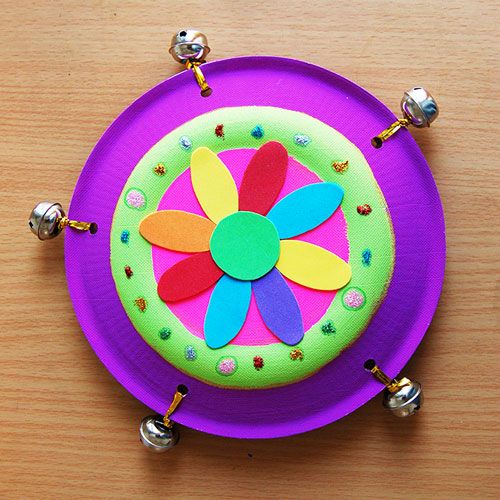
Image Credit: Pinterest
14. Rubber Band Guitar
Explore pitch and vibration with this homemade string instrument.
What You Will Need
- Empty tissue box or small shoebox
- Rubber bands
- Paper towel roll
- Glue and tape
Procedure
- Stretch rubber bands around the box opening.
- Tape the paper towel roll to one end as the guitar neck.
- Let kids pluck the bands and listen to the changing sounds.
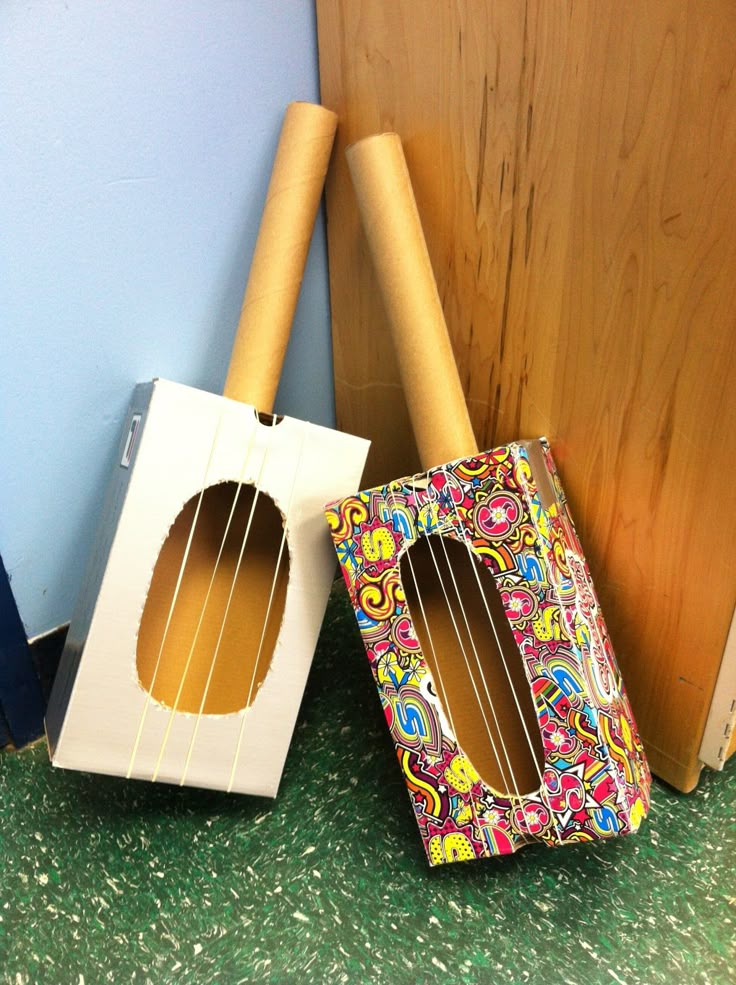
Image Credit: Pinterest
15. Bottle Cap Castanets
Teach rhythm and coordination with this hand-held instrument.
What You Will Need
- Thick cardboard or craft sticks
- 2 metal bottle caps
- Glue or tape
Procedure
- Fold cardboard in half.
- Glue a bottle cap to each inner end.
- Let kids press to create a clicking sound.
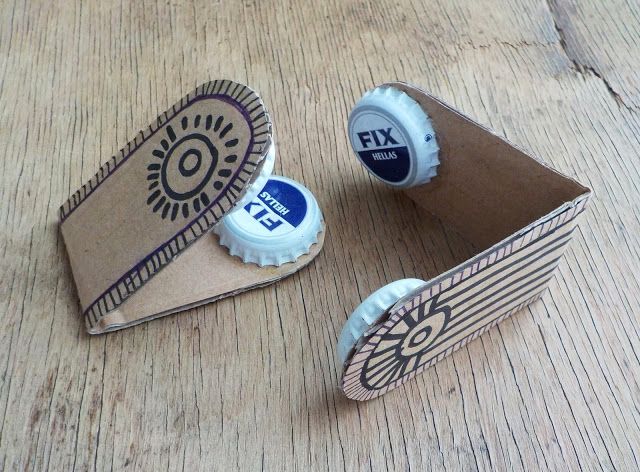
Image Credit: Pinterest
FAQs
1. How do homemade instruments support child development?
Creating and playing instruments supports sensory development, coordination, problem-solving, and creative thinking.
2. What age group are these DIY instruments suitable for?
These DIY children musical instruments are generally suitable for kids aged 3 and up, with adult supervision. Simpler instruments like shakers and tambourines are perfect for toddlers, while older kids can try more detailed builds like rubber band guitars or pan flutes.
There can be no better match than music and art to help you bond with your kids. These crafts are easy to make, and are definitely bound to leave you with a ton of memories.
Also Read:
Homemade Toys for Kids
DIY Dollhouse Ideas for Children
DIY Mask Making Ideas for Children
Easy Unicorn Crafts and Activities for Kids
Was This Article Helpful?
Parenting is a huge responsibility, for you as a caregiver, but also for us as a parenting content platform. We understand that and take our responsibility of creating credible content seriously. FirstCry Parenting articles are written and published only after extensive research using factually sound references to deliver quality content that is accurate, validated by experts, and completely reliable. To understand how we go about creating content that is credible, read our editorial policy here.





.svg)


