Easy and Innovative Ways to Tie-Dye Shirts With Kids


Kids just love fun craft ideas, especially ones that involve colours and some DIYs. In this post, we have some easy and innovative tie-dye techniques for kids. So, what are you waiting for, add it onto your summer bucket list activities for kids! We assure you that these tie-dye activities would be a fun-learning and interactive session for both you and your kids!
What is Tie-Dyeing?
If you haven’t heard about the tie-dyeing technique, then it’s just like the name suggests. You just have to twist the cloth like you’re squeezing out the water from it, tie it with rubber bands on different spots and then dye it. When you finish the folded portion of the cloth reveals a design or pattern which looks super cool and breezy! Now, you can rinse the cloth thoroughly and then dry to make a cool and classic fashionable piece. That’s it, and you’re done! There’s no specific pattern or design in tie-dyeing, and someone has very rightly said that it’s impossible to get a tie-dye wrong! So, go ahead and give it a try. We are sure you and your kids would love it!
How to Prepare for Tie-Dyeing
Wondering how do you make tie-dye shirts at home with kids? Read the following tie-dye instructions for kids to make cool and classic shirts!
- If it’s a new shirt you are using for the project, then wash and dry it beforehand. Make sure you don’t use any fabric conditioner to avoid any kind of residue on the shirt which may cause the ink to repel. If possible, set up the workplace outdoors so that any mess created is manageable. If preparing indoors, then cover the workplace with a plastic sheet.
- The ink needs to be prepared before the project. If you have bought a tie-dye kit, prepare the ink according to the instructions given on it. In case of a powdered or liquid dye, prepare the ink according to the instructions given and put them into the squirt bottles.
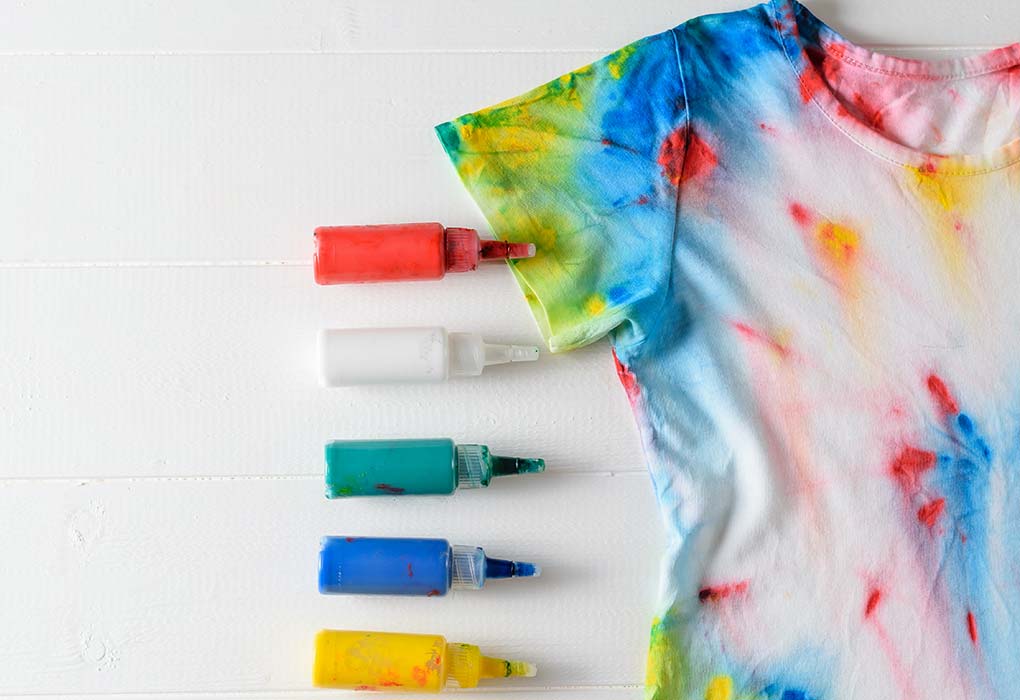
- Get the dry shirt ready by sprinkling some water on it from the spray bottle. This will dampen the shirt, and now you may twist and tie the rubber bands according to the patterns you have selected.
- Dye the shirt by squeezing the ink onto the shirt according to the instructions given or the pattern you have selected. Once done, place the shirt in a sealed plastic container for 24 hours. This allows the ink to seep in and the colours to become more vibrant.
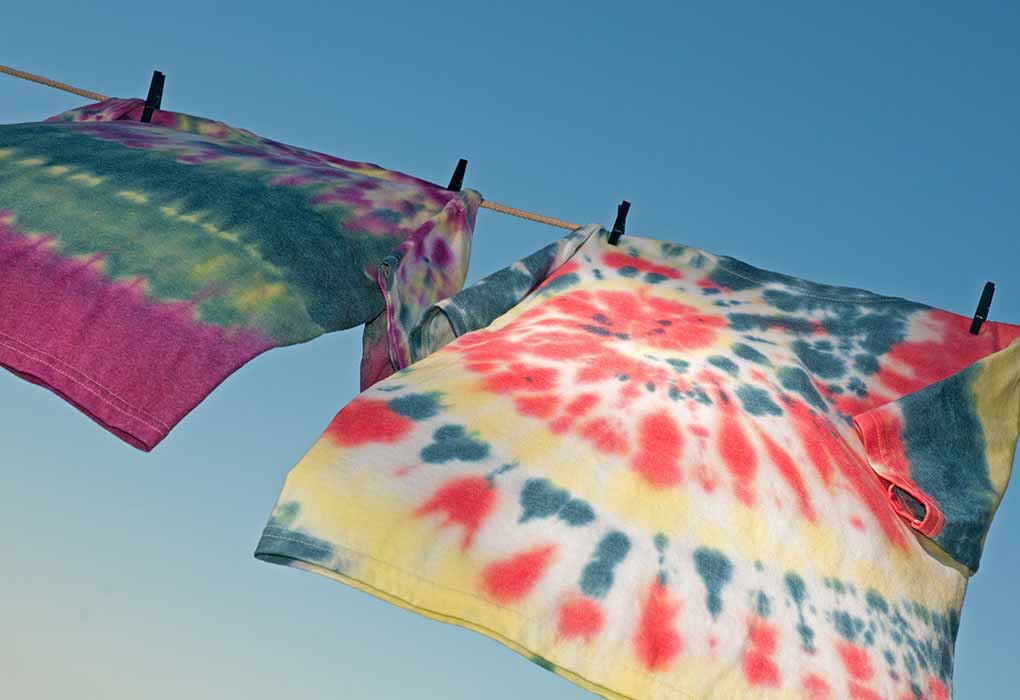
- Next, after the completion of 24 hours, you can rinse your shirt. Put on a pair of rubber gloves and rinse the shirt in cold running water without removing the rubber bands. Wash until the water comes clear without any dye. Now, remove the rubber bands and rinse again. Next, wash the shirt and dry it under the sun. Do not wash and dry other clothes with this load, as the dye may bleed and ruin other clothes.
What All You Will Need for This
Here’s a list of all the materials you’ll need for the project:
- A white cotton shirt
- Squirt bottles
- Rubber bands
- Rubber gloves
- Zip plastic bags (gallon sized)
- Water
- Paper towels or something to clean up the spills
- Spray bottle for sprinkling water
Creative Ideas and Steps to Tie-Dye Shirts With Kids
Read on to follow some creative and easy tips for tie-dye shirts:
1. Striped Pattern Tie-Dye
Fold the shirt with small even pleats from the bottom up until the shirt looks like a long and thin log. Now, take the rubber bands, around five to eight of them, and tie them evenly across the pleated shirt. Now, put on a pair of rubber gloves and dye the shirt you can choose a different coloured dye for each section between the bands. Ensure that the ink fully seeps in through the layers of the shirt and all around.
2. Circle Pattern Tie-Dye
One of the easiest tie-dyes for kids is a circle pattern! In this pattern, you’ll get the circle or bull’s eye pattern. For this, choose the area on the shirt where you want the pattern to come up. Next, squeeze out a tiny bit of the cloth and tie it with a rubber band. Follow this pattern in other areas where you want the circles. Next, choose the colour you want the circles to be in and use the shirt bottles to put on the colours. Make sure the colour is well saturated on the shirt. Next, choose a colour you want the shirt to be in and dye the front and back of the shirt with this colour, avoiding the circle dye. And it’s ready!
3. Splotched Pattern Tie-Dye
This pattern can also be termed as a crumpled pattern. For this, randomly crumple the shirt and tie about 4-6 rubber bands haphazardly on the shirt. It’s so simple to do that you cannot mess up this pattern! Squirt the dye onto the shirt; you may choose a single colour or multi-colours but make sure that the entire shirt is soaked in the dye. And we’re done!
4. Polka Dot Pattern Tie-Dye
Our personal favorite, we feel that polka dots look super cute on kids! You will need some extra beads for this project, though. Cut some plastic wrappers into pieces that are about 3-4 times larger than the beads. Now, place the bead inside the shirt and the plastic wrapper on the top of the shirt. Wrap with a rubber band tightly around the bead from the front part of the shirt. Repeat the pattern with other beads on the shirt. Wet the shirt, and it’s ready to be dyed using your favourite color.
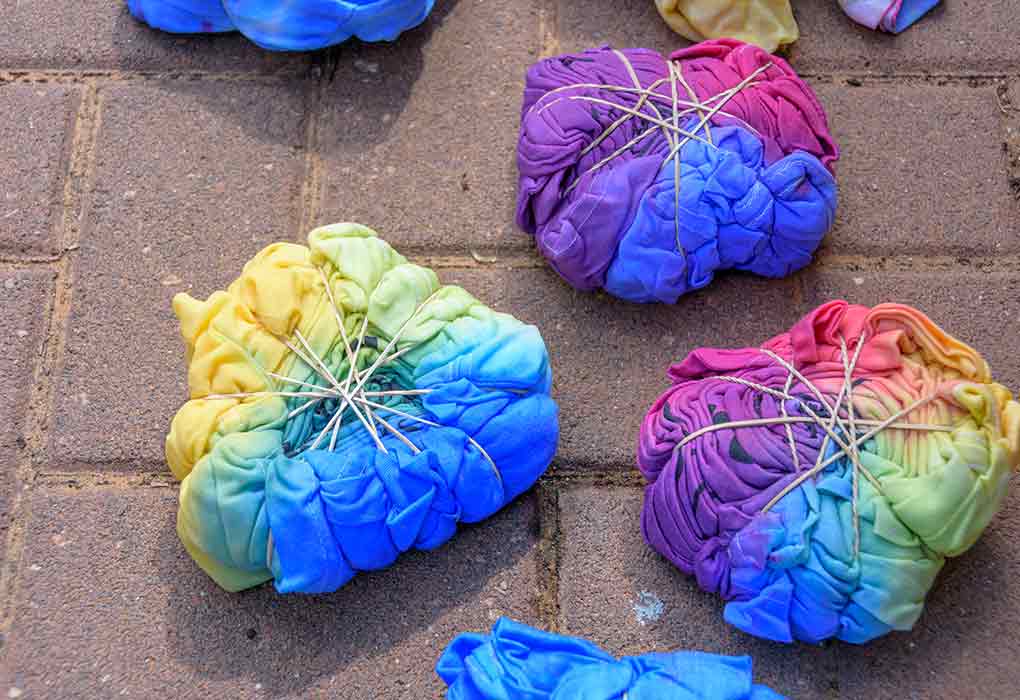
5. Swirl Pattern Tie-Dye
An interesting tie-dye pattern and we are sure you’ll love the end product! For this, you need to lay the shirt flat on a plane surface. Use a fork and hold it in the center of the shirt and twist. Keep twisting and gather into circles. Now wrap 4-6 rubber bands on this rounded shirt. Wet the shirt and squirt the dye. And we are good to go!
6. Rosette Pattern Tie-Dye
For this pattern, lay the shirt on a flat surface. Pinch out a 2-inch section from both the layers and tie a rubber band around it. Try to make a doughnut shape out of the knot by pushing your finger through the rubber band. Repeat the procedure and make some more rosettes. Now, it’s ready to be dyed. The finished product looks super cute and classy just like some tiny funky flowers!
7. Ringer Pattern Tie-Dye
A cute and simple design, this one is pretty simple to create! Pinch the center of the shirt (only the top layer) for about 1-2 inches and pull the cloth tightly into a point, let the remaining part of the shirt just fall away. Smoothen the pinched part of the fabric into a cone shape and tightly tie the rubber band around it. You can move the rubber band up or down to make the circle smaller or larger. If you wish to make a wider ring, then wrap 2-3 more rubber bands around the same point. Wet the shirt, and it’s ready to be dyed!
Tie-dye is super easy a fun to do with the family, giving each one a way to explore their artistic talent. The best part, you get to wear your creations and proudly show them to the world! We hope that you enjoy the above easy tie-dye patterns with kids on a lazy summer afternoon! Happy holidays!!
Also Read: DIY Tie-dye Napkin
Was This Article Helpful?
Parenting is a huge responsibility, for you as a caregiver, but also for us as a parenting content platform. We understand that and take our responsibility of creating credible content seriously. FirstCry Parenting articles are written and published only after extensive research using factually sound references to deliver quality content that is accurate, validated by experts, and completely reliable. To understand how we go about creating content that is credible, read our editorial policy here.
- Author


.svg)


")


