Creative DIY Teepee Ideas for Kids


Kids are not hard to please, but because their interests change so fast as they discover new things, keeping up with them can be difficult sometimes. One thing that is uniformly loved by all kids, regardless of interests, is the teepee. There is a certain magic about a tent-like area that triggers the sparks of imagination in a child.
If your little one is the type who loves to read, a teepee is a great place to get cosy with a good book. It is also where your kids can gather together and tell stories, playhouse and come up with all sorts of other interesting games. It could even end up simply being their headquarters, where they gather to discuss their next prank.
How to Make a Teepee for Kids – Step by Step Instructions
Instead of running off to buy a tent or a teepee that is way too expensive, why not put your creative skills to the test and make one? You may be a little intimidated at first, but building a teepee is not that difficult once you try it. Not only that, but you will have acquired some new and useful skills. For those who are DIY veterans, you will just need to take one glance at the instructions and know that this is a job that is going to be a breeze.
Here are some DIY kids tepee ideas you can try:
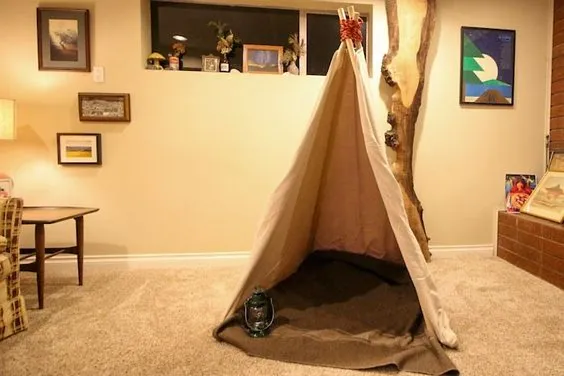
1. Basic Sew Teepee
This teepee pattern is true to the Native American style that is most commonly observed. It has a cone shape and is bound to get the little one’s imaginative games rolling in the Native American way.
Required Materials
For the Frame
- Wooden dowels- 5, 6 feet
- Rope- 1 yard, 1/4 inch
- Sandpaper
- Drill machine
For the Tent
- Bias tape- 4 yards
- A strong fabric of your choice- 60″, 4 1/4 yards OR drop cloth as a cheaper alternative
- Fabric chalk
- Trim- 4 yards
- Measuring tape
- Pins
- Sewing Machine
- Thread
- Buttons
- Scissors
How to Build a Teepee
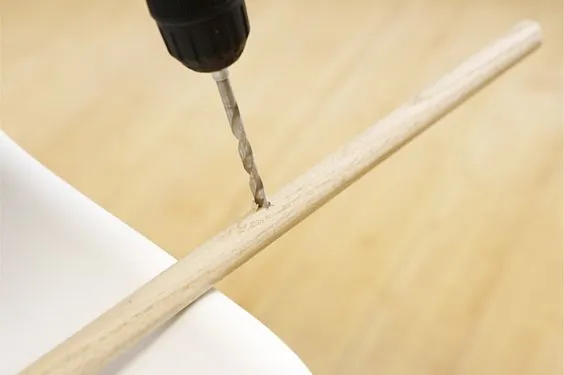
- Take your wooden dowels and drill a hole in each of them, 10 inches from the top. Your drill should be a little larger or just equal to the thickness of your rope. The rope will have to go through these holes. With your sandpaper, smoothen the area around the freshly drilled holes. This way you can avoid splinters.
Source: Pinterest
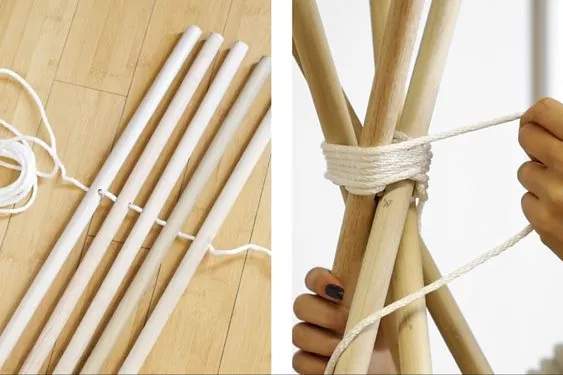
- Lay your wooden dowels flat and thread your rope through the holes you just made. Then stand them up and arrange them into the frame of the teepee. Once you are satisfied with the shape of the frame, loop the remainder of the rope around the dowels. It helps to first loop the rope around each of the dowels individually before circling all of them together. Once you are done tying everything together, you can cut off any excess rope.
Source: Pinterest
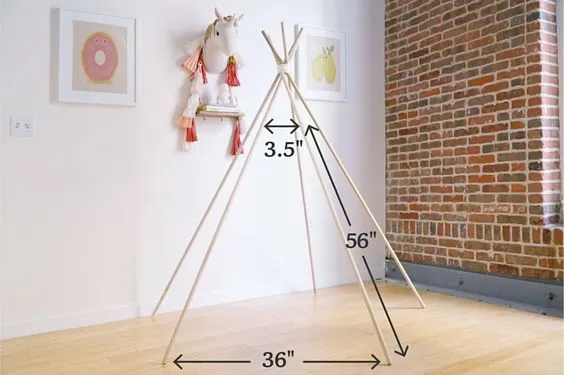
- You will need to take measurements for your cloth. This should be in the shape of your frame. You will need to measure the height by taking the length of the wooden dowel from bottom to the top, where you want your fabric to start from. Measure the height as the dowel is resting in its angled state. This is because this will be the area that your fabric will need to cover. You will also need to measure the top. Here you will need to measure the distance between the wooden dowels. Next, measure the bottom. You will need to measure the distance between each of the dowels on the floor.
Source: Pinterest
- Each of your fabric panels will need to be made in the measurements that you have just taken. It is better to add an inch or two extra to the measurements. This will allow you to have a proper 1/2 to 1-inch hem on both the top and the bottom to make the overall look of your teepee neater.
Source: Pinterest
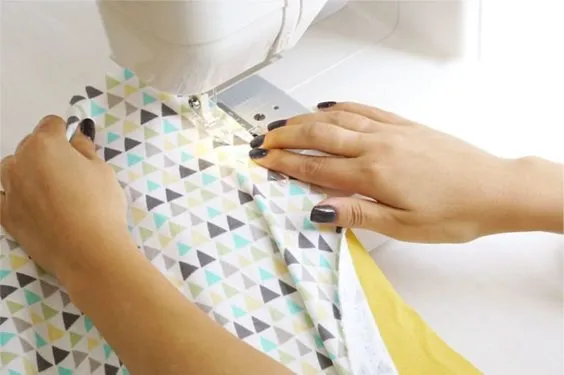
- You will now need to sew the panels together. Do this right sides out, unlike the usual sewing method. It will seem odd to you, especially because the seams will be sticking out, but you will resolve that in just a little while. Hem both the bottom and the top of your teepee covering. The hem should be opposite to where the seams stick out at the top.
Source: Pinterest
- You will now need to sew on the side slits, where your wooden dowels are supposed to go through. The right sides should be facing inward. Make sure that you measure it correctly. Ensure that as you measure out the slits, you measure double the size of the thickness of the dowel. If your dowel is 3/4 inches, make sure to measure 1 1/2 inches for your slit. This will make sure that your dowels can be slid through with ease. Once you are done, cut out a door from the front panel. All you need to do is cut it from the bottom to however high you want the entrance to be.
Source: Pinterest
- You can now assemble the tepee. Make the inside of the tepee feel cosy and inviting by adding a soft rug, or large cushion that your child can lay comfortable on. You can add some blankets and pillows too.
Source: Pinterest
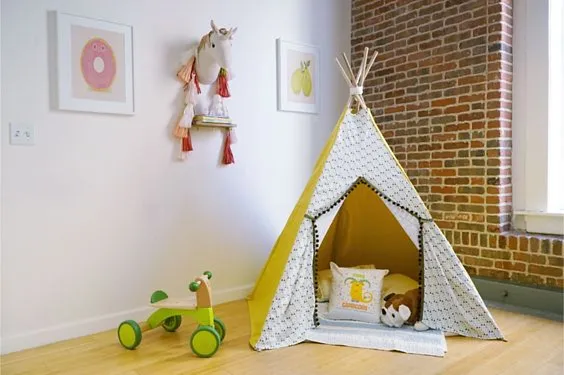
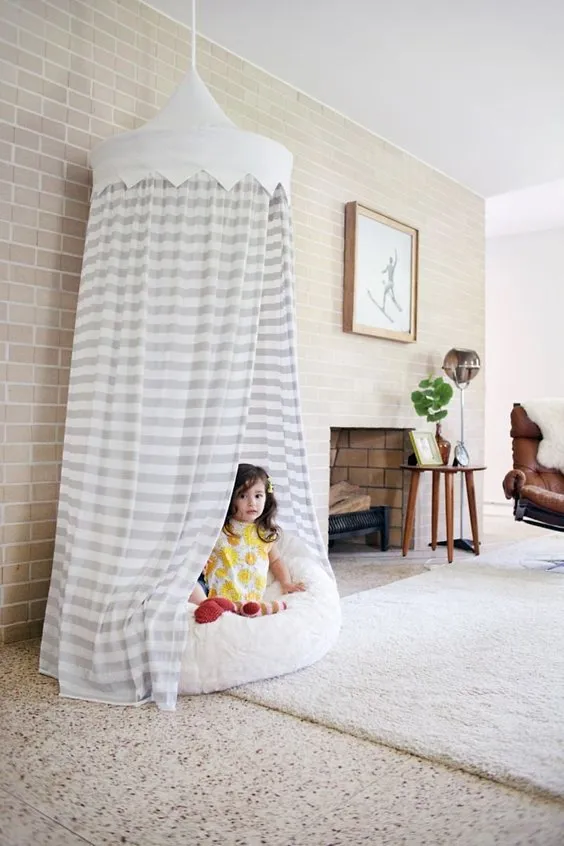
2. Hula-Hoop DIY Teepee Tent
This is a great choice if you have to set up a tent in the living room. This style of homemade teepee has a more polished visual and might even add some charm to your living quarters.
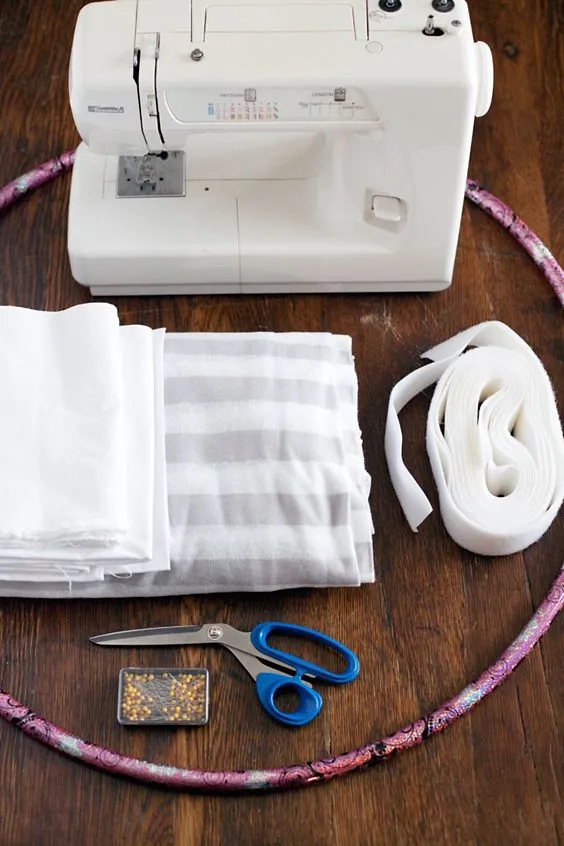
Required Materials
For the Frame
- Hula-Hoop
For the Tent
- Drape fabric- four yards for a small hoop, six for a large hoop
- Tent roof fabric- two to three yards
- Velcro- strong, non-adhesive
- Ceiling hook to hang the tent from
- Scissors
- Pins
- Fabric chalk
- Sewing Machine
How to Build a Teepee
- Once you have all your required materials, you are ready to start.
Source: Pinterest
- Cut the cloth being used for the drapery into two sections. If your hula-hoop is small, you can get by using two drapes. Connect these together with a middle seam. For larger hula-hoops, three will need to be used.

Source: Pinterest
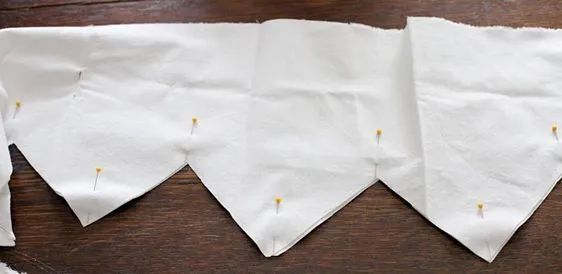
- You will need to make the border strips for the tent top. The strips should as wide as 8″. The length should match the circumference of the hula-hoop you have chosen to use. Trace out the pattern for the edges of the border strip and cut them out carefully. Layer two of the fabrics together, one on top of the other so that you can cut them both in one go.
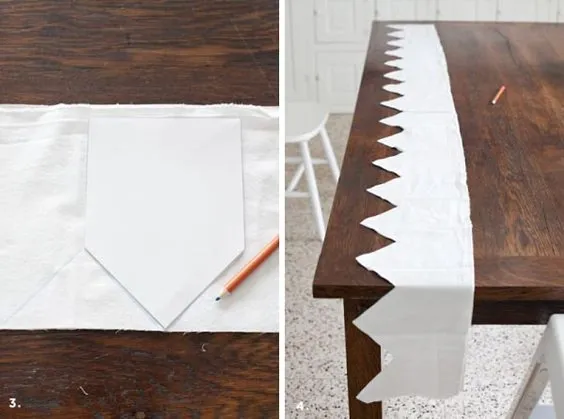
Source: Pinterest
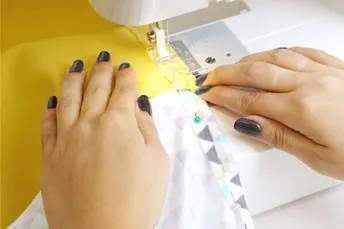
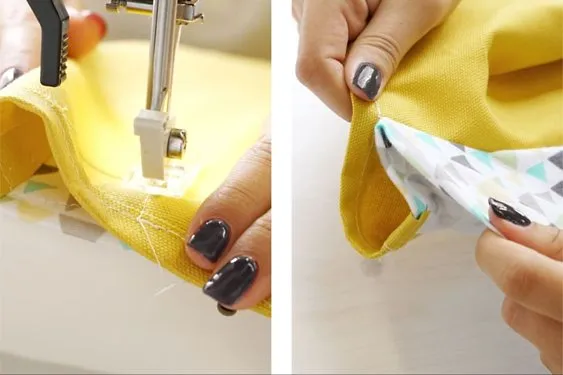
- Pin the sides of the two layers together so that when you open it out, it forms a circle. Sew the edges together. This should fit the circumference of your hula-hoop. Place the two circles you made face to face and then pin the zig-zag edges together. The good side should be facing the other. You now have to stitch the pinned edges of the zig-zag at least ¼” from the edge. Trim the tip of the peaks so it looks like it is a flat tip, and in the valleys, make a small slit, being very careful not to cut the stitching. Your fabric will lay better this way. Now flip it inside out and iron it.
Source: Pinterest
- Take the fabric that you have kept aside to be used for your tent top. Out of this, make a strip that will be used to hang the tent from the hook of the ceiling. How long you make this will depend on how high your ceiling is. With the rest of the fabric, you will need to cut out eight triangles. These will be stitched together to make the tent top. The base of the triangle should be 1/8th of the circumference of the hula-hoop plus an inch and a half. the top should be 3/4th of the diameter of the hula-hoop. Once you have cut out all the triangles, stitch them together from the sides. Before you connect the first two halves, make sure that you add the hanger strip in the middle. Once you have stitched all the triangles together, you will have the tent top made. Place your hula-hoop on it and trim the edges. Leave at least an inch extra.
- Now you need to connect the drapes to the ends of your zigzag border. You can pin the drapes in place first and then proceed to sew them together. Finally, add the tent top. Pin the sides that need to be stitched together and then stitch it on the sewing machine. In the place where the hem is connected to the top of the tent, you will need to stitch Velcro pieces in place. This will be how the hula-hoop is connected to the tent. Your tent is now ready to be hung.
Source: Pinterest
3. No-sew Teepee
If all that stitching was starting to seem like a drag, or if you don’t have a sewing machine, you can still make a fun teepee for your kids. You won’t need to sew anything, just cut fabric for a teepee, and screw it on your frame. Here is how to do it:
Required Materials
- Wooden dowels- 4, 6′ in length
- Canvas- 6×9 inches
- Rope- 1/4″, 20′
- Screws- 1″
- Drill- drill bit 3/8″
How to Build a Teepee
- Drill a hole in each of the dowels. From the top, you will need to measure five inches.
- Slip the rope through the first dowel and make an overhand knot so the rope stays put.
- Take another dowel and put the rope through the hole.
- You will now need to bring the poles together until the tops of the poles crisscross.
- Next, weave the rope around both of the dowels.
- To secure the dowels tightly, you will need to loop the rope around the dowels in the figure eight at least a couple of times.
- Repeat this same step with the other dowels until you have your teepee frame.
- As you are looping in more dowels, make sure that the legs of the dowels are spread out. You need to secure them in the right position.
- Now you can drape your canvas around the frame.
- Once your canvas is falling correctly, you will need to take your screwdriver and attach screws at the top and the bottom so that the canvas stays in place.
- Before you begin to screw the canvas in place, make sure everything is set right. The legs should be three feet apart from each other, forming a square at the bottom. The canvas should be covering everything well.
- Now roll back the opening, tucking the material into the floor if you need to.
- Adjust a comfortable blanket, and if you want, some props as well.
- You are all done!
Source: Pinterest
Truth be told, even adults crave a place that feels like a magical hideout from the world. For an adult, this hideout often turns into that cabin in the woods that is visited every so often or the cosy study that is a personal and sacred place. Kids are really no different. The teepee just may end up being the place your child goes to when they feel like they need a break from everything else. It can turn into their magical getaway, where it feels like they are far away from everything in this world.
Also Read:
DIY Dollhouse Ideas for Kids
DIY Fairy Garden Ideas for Kids
DIY Sensory Board Ideas for Kids
Was This Article Helpful?
Parenting is a huge responsibility, for you as a caregiver, but also for us as a parenting content platform. We understand that and take our responsibility of creating credible content seriously. FirstCry Parenting articles are written and published only after extensive research using factually sound references to deliver quality content that is accurate, validated by experts, and completely reliable. To understand how we go about creating content that is credible, read our editorial policy here.
- Author
Related Articles
-

Famous Super Why Characters That Will Encourage Your Kid to Read More
-

Benefits of Singing and Tips to Help Your Child Sing
-

12 Interesting Ganesh Chaturthi Games and Activities for Kids
-

Top 13 Country Songs for Kids
-

20+ Super Fun Swimming Pool Games for Kids
-

Sensory Swing for Kids - Types and Benefits

.svg)


")


