Amazing DIY Sensory Board Ideas for Children


In this Article
- What Is a Sensory Board?
- Importance of Sensory Boards for Children
- How to Make a Basic Sensory Board for Babies and Toddlers
- Other DIY Sensory Board Ideas
View More
Toddlers learn about the world around them by seeing, touching, and feeling. They use their senses to explore and get feedback about things that they encounter on an everyday basis. However, as parents, we have to make sure that we expose them to a variety of sensory experiences. Sensory boards are a good way to do that. You can get one at a low price from your nearest dollar store, buy from Amazon, or if you’re like us and can’t decide, make your own at home. It’s very easy, fun, and won’t take you more than a few minutes. And the best part is that these boards last quite a long time!
What Is a Sensory Board?
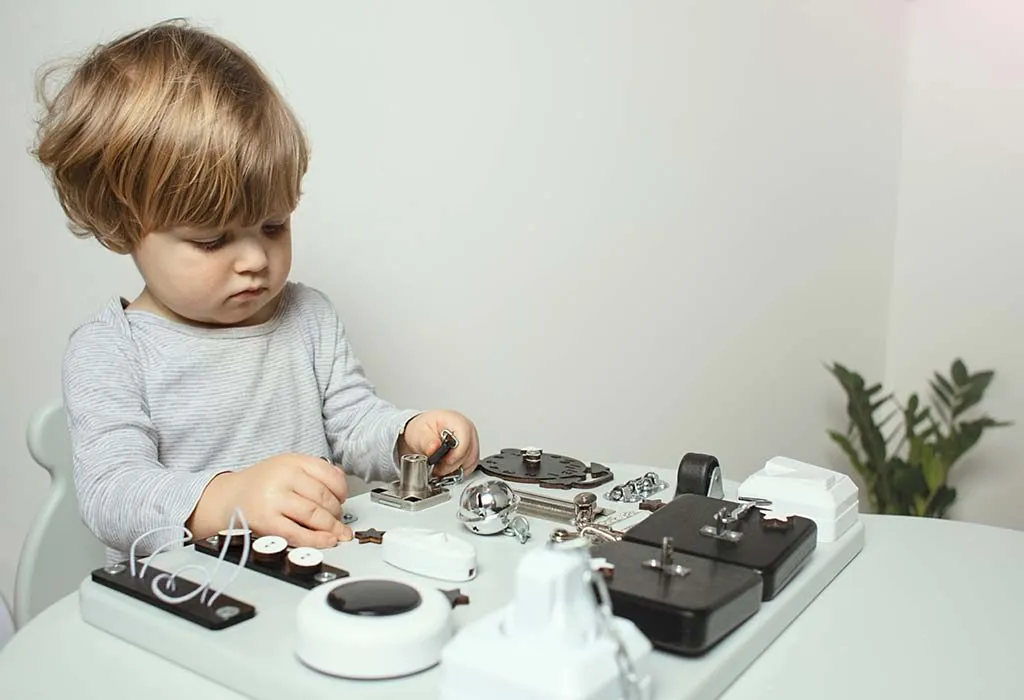
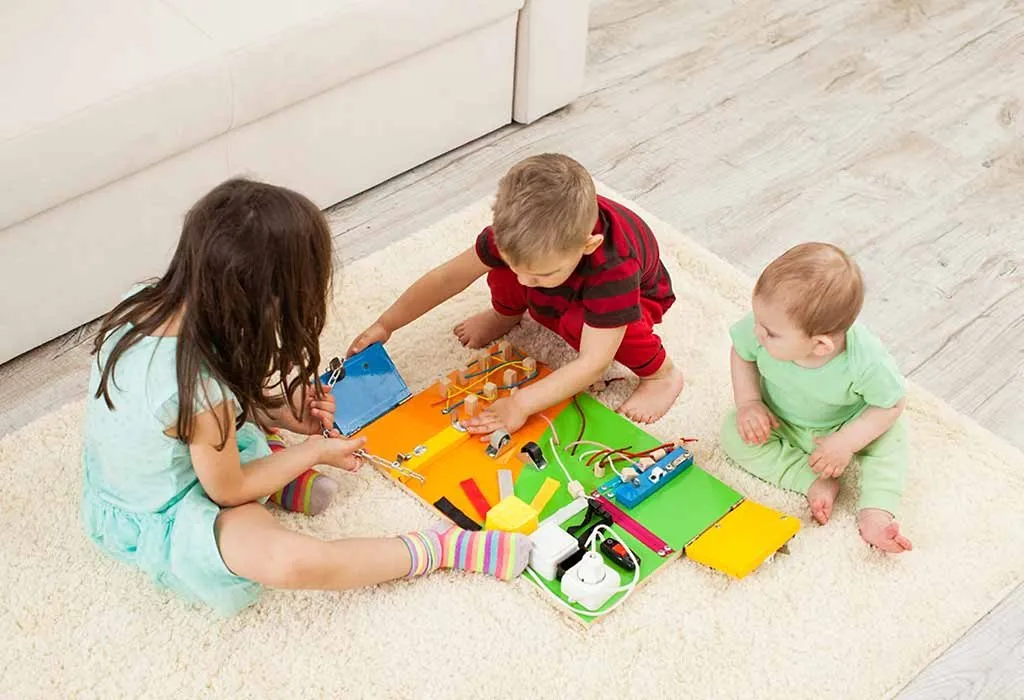
A sensory board is a board that features a range of toys, textures, and objects put together to provide a unique sensory experience to kids. These boards can be touched, felt, and played with, and keep kids busy. If your child struggles to focus or has a short attention span, you’ll find them to be of great help.
While creating a sensory board, however, you have to be careful. Making sure that the board doesn’t comprise of parts that are a choking hazard is important.
Importance of Sensory Boards for Children
When your child is growing up, they start getting curious and learn through their senses. Sensory boards don’t just teach children how to work with their hands and senses, but other things too. They could take apart the items on the board and study them. By playing around with a squishy ball or pushing it off the board, they get a sense of what happens when they push, pull, or interact with different objects.
Every object on a sensory board is wildly different, which is what makes the activity fun. Also, the pulling, pushing, and twisting motions involved in exploration end up exercising their gross motor and fine motor skills. As a result, your child builds hand-eye coordination, which is an essential skill for proper growth and development. The most basic sensory boards come with calculators, locks, and latches, but if you’re making your own DIY versions at home, you can get creative. You can even add items that light up, emit sounds and smells, and do different things when they’re touched or played with.


Here is a list of sensory board benefits for children:
- Hands-on activity – Kids learn how to use their hands and make different motions with their fingers. As they pick up, plop, and drop the boards and their items, they work on their dexterity and become smarter.
- Encourages creative play – Sensory boards that involve drawing or some form of painting activity can be an excellent way to bolster a child’s imagination. Some boards that have sounds and lights help kids with paying attention and teach them how to focus.
- Teaches basic vocabulary – The coloured letters, numbers, and shapes work on children’s vocabulary. Not only do they build their visual vocabulary, but the boards end up teaching them about the alphabet and basic preschool lessons.
- Various sensations – The sensory boards deliver a variety of feelings and sensations. As your child grows older, they understand what textures feel like and can tell by touching. Learning how to work with their senses is an important life skill that’s often overlooked.
- Easy to make – You don’t need fancy equipment to make these boards. If your children are a bit older, you can let them join in and build them together with you. Granted, parental supervision is advised when they’re playing with these boards.
How to Make a Basic Sensory Board for Babies and Toddlers
If you’re trying to make a basic sensory board for your kids, the good news is that it’s not too difficult. You will have to visit a hardware store along with your local arts and crafts store to gather the supplies. Here’s how to get started.
Materials Needed
You’ll need the following materials:
- Sandpaper
- Paint tubes
- Old latches
- Doorknobs
- Old locks
- Abacus
- Wood glue
- Nails and screws (1-inch size)
- Chain
- Calculator
- Old switches
- Coloured numbers and shapes
- Plywood (60 cm X 60 cm) or a wooden base
How to Make
- Clean up the plywood using sandpaper and make sure there aren’t any dust shavings on it.
- Get a screwdriver or hammer and attach the calculator, chain, and other materials in place. Use the nails to make holes for these fixtures and make sure the items are evenly spaced out.
- Use wood glue to attach the coloured numbers and shapes on the board. This makes for an excellent handmade sensory board for children.
Other DIY Sensory Board Ideas
You don’t have to make sensory boards from scratch every time your child gets bored with an existing one. Just by doing a few tweaks and additions, you can change the board’s entire look completely. Add new textures, colours, items, and get those creative juices flowing.
We’ll be covering some of the top DIY sensory board ideas out there that you can use below.
1. Plywood With Colours
For this sensory board idea, you will need plywood and a few materials. It’s pretty easy to make and takes a few minutes to set up. You can secure the items below using double-sided sticky tape.
Materials Needed
- Paper cut-outs
- Foam stickers
- Measuring spoons
- Squishy balls
- Colourful pompoms
- Child’s mirror
- Paper clips
- Beaded necklace
- Dolls and locks
2. Sensory Board With Feathers
This sensory board takes your kids on a sensorial ride with the textures of light feathers and bathroom loofas. It’s an interesting experience building it.
Materials Needed
- Feathers
- Bathroom loofas
- Tissues
- Felt
- Coloured pompoms
- Trash bag
- Pipe cleaners
- Popsicle sticks
3. Glitter Sensory Board
If you’d like to make your sensory boards pop out, try using some glitter. With just a base, tape, and the materials below, you will be set. All you have to do after that is play around with the board’s placement in the living room and let your child go wild. It’s a great DIY activity board for the kids.
Materials Needed
- Felt
- Plastic buttons
- Different coloured fabrics (with various textures)
- Straws
- Googly eyes
4. DIY Fabric Sensory Board
Get a wooden board and glue the following items onto it. Your unique sensory boards with lots of q-tips, fabrics, and colourful textures will be ready in no time. It’s a suitable homemade sensory board for babies and older kids alike.
Materials Needed
- Straws
- Sponges
- Beans
- Textured papers
- Rug
- Buttons
- Glitter paper
- Hair elastics
- Textured cardboard
5. Textured Sensory Board
Just a few household materials, a hot glue gun, some free time and voila – you have yourself a textured sensory board! You can use a latch board base like plywood or wood if you don’t have cardboard.
What All Materials It Uses
- Bubble wrap
- Cardboard base
- Hot glue gun
- Rock
- Wood
- Different coloured fabrics
- Straws
- Non-slip rubber
- Cupcake wrappers
- Clean face washer
It’s important to make sure that you give enough time for the glue to dry out. Creating a sense of spacing between each of the items is key and will encourage your baby to explore the pieces. Double-check and be sure that the parts you use for making the sensory boards aren’t choking hazards. Latch them onto your board correctly so that your little one can touch, feel, and explore them, but cannot remove them. And that covers the basics of making your own DIY sensory boards. Be sure to have fun with the process and take your time. You can tweak these five boards and make them your own. In fact, that’s exactly what we encourage.
When your child is playing with the sensory board and feeling out the items, you can describe them in words and call them out one by one. This will help them in understanding what they’re interacting with and make more sense of the world around them. Words like fluffy, tight, rough, squishy, and simple sounds are some of the best ways to describe these items. Don’t be afraid to let them push, pull, or slam the board onto the ground. If you’re using a plywood base, the boards won’t break and survive the wear and tear.
Also Read:
Sensory Bags for Kids
DIY Magic Sensory Bottle
Sensory Activities for Children
Was This Article Helpful?
Parenting is a huge responsibility, for you as a caregiver, but also for us as a parenting content platform. We understand that and take our responsibility of creating credible content seriously. FirstCry Parenting articles are written and published only after extensive research using factually sound references to deliver quality content that is accurate, validated by experts, and completely reliable. To understand how we go about creating content that is credible, read our editorial policy here.
- Author
Related Articles
-

15 Easy Fish Crafts for Kids - Fin-tastic DIY Ideas
-

Interactive Space Crafts and Activities for Kids and Preschoolers
-

20 Dog Crafts for Kids That Are Simply Paw-fect
-

Frozen Coloring Pages - Free Printable, Sheets and Images
-

Best Toys for 3 Months Old Babies
-

Kitten Colouring Pages - Free Printable Pages For Kids

.svg)


")
")


")