

















.svg)
.svg)
.png)


Play & Activities
Suggested articles for you

Your Baby Transitioning Into a Toddler Can Be Difficult for Both the Child and Parent!
A tiny, sweet grandmother approaches me at the end of one of our church meetings. “Your son is so well behaved—you’re doing such a great job with him!”
I smile graciously, hoping my grin is masking my confusion. My son?
My mind flashes to earlier that day, to the screaming tantrums during bath time; the whiny baby syllables for wanting to be held ALL the time; the loud angry noises for swatting off his hands from putting things in his mouth.
The woman’s remark makes me feel like a hypocrite. I’m doing such a great job with him? Me? Are you sure?
Then it suddenly dawns on me – maybe he shows me his worst sides, his moments of weakness, because there is nowhere else he feels safer than with his mamma. He feels safe to push his own boundaries. To get frustrated. To act out. I must be doing something right.
And so, I brush off those moments of cranky tantrums with a soft kiss.
The best part of being a mom is when your baby looks up at you and smiles or stares because they know YOU are their person. In their eyes, no one else is more admirable than you. They know you will always be there for them like no other. That bond is unparalleled. So, if you feel you’re not doing a good job, you’re wrong. If you managed to bathe, dress, undress, put on a sock/shoe on your little human(s), you’re amazing and perfect for your kid.
I am often asked if I miss my life before I had my baby. The answer is “no”. I miss certain things about my life before becoming a mom – I miss uninterrupted sleep, I miss taking long, relaxed showers, I miss leaving the house whenever I want, I miss restaurant visits where I don’t have to calm a little human while I’m eating, I miss being able to spend much time with my husband, just getting on our bike and driving wherever we felt like, I miss finishing a thought without getting interrupted.
BUT, I’ll have all of the things above again, soon. But, I will never have my little one as a baby or a toddler again. He’ll grow up faster than I know – so missing all the things above for a micro-part of life, is nothing compared to how I’ll miss my little one later in life, like the days when I get to sleep through the night again, but also wishing he would stumble in and ask me to hold him. That’s the real loss.
Disclaimer: The views, opinions and positions (including content in any form) expressed within this post are those of the author alone. The accuracy, completeness and validity of any statements made within this article are not guaranteed. We accept no liability for any errors, omissions or representations. The responsibility for intellectual property rights of this content rests with the author and any liability with regards to infringement of intellectual property rights remains with him/her.
Read more




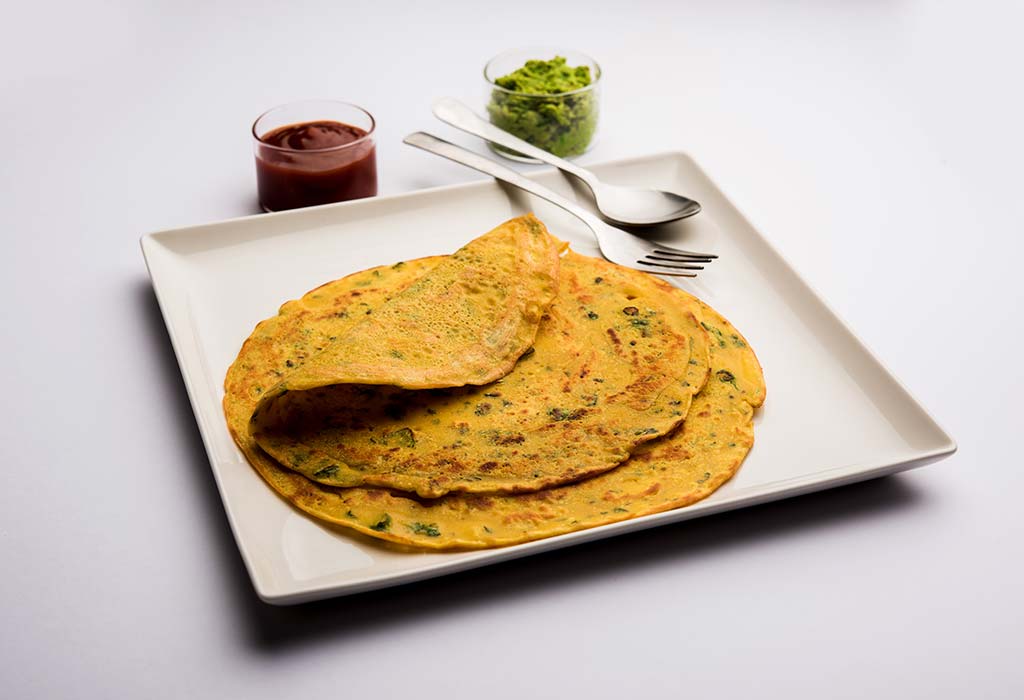
10 Healthy Recipes That You Can Make With Your Kids!
Do you always wonder what you will cook for breakfast or snacks for your kids. It can be hard to think of a new recipe daily. But if you’re willing to try some new recipes, I have some suggestions for you. The recipe that I have compiled here are tasty, healthy, and can be made in no time. These are quick, tried and tasted by my toddler and he even enjoys cooking these nutritious dishes with me. You can adjust the measurement as per number of people you are cooking for.
1. Rava Oats Chilla
Mix equal quantities of rava and powdered oats with curd. Add 1 chopped onion, salt to taste, half a teaspoon each of garam masala and coriander powder. Keep aside for 20 minutes. Then use the batter to make instant chilla non stick pan.
2. Green Moong Dal Chilla
Soak green moong dal overnight in water. Rinse moong dal and grind with ginger and salt. Add water as required to adjust the consistency and use this batter to make moong dal chilla.
3. Poha
Wash poha in a seive and keep aside. Chop one onion and one potato. Heat some oil in a pan, add mustard seeds, saunf, kadhi patta, few groundnuts/green peas, chopped onion, chopped potato and little salt. Put a lid and let it cook until potato is soft. Till then mix turmeric, little sugar, and salt in poha. Remove the lid and add turmeric to veggies. Add poha and mix again. Cover and switch off the gas. Keep for 5 minutes then serve. Garnish with freshly chopped coriander leaves and a dash of lemon juice.
4. Rava Appam
Mix rava and curd and keep aside for 10 minutes. Chop 1 onion, 1 capsicum, some coriander leaves, and keep aside. Grate 1 carrot and some ginger, and keep aside. Add the chopped and grated veggies to the batter and add water as required and salt. Use this batter to make instant appam for breakfast.
5. Besan chilla
Mix a cup of besan and some rava in a mixing bowl. Add some chopped coriander leaves, 1 chopped tomato and onion, some salt, ajwain, garam masala/kanda lehsun masala in the besan and rava mix. Add water and make batter. Keep aside then mix well. Use this batter to make besan chilla.
6. Pancakes
You will need 1 egg to make 2 small pancakes. Break one egg, add 1 heap spoon wheat flour, a pinch of salt, half a spoon sugar, and 2 spoons of milk. Mix well. Take non stick pan and put some butter. Pour half the batter and cover with lid. Cook for 30 seconds and flip. Cook thoroughly and serve pancakes with maple syrup or honey.
7. Bread Omelette
Whisk one egg in a bowl, add salt and black pepper. Grease non-stick pan with butter. Dip a bread slice in egg batter and put on the pan. Pour remaining batter over the bread and cover the lid. Flip after 10 seconds. Cook thoroughly and serve with ketchup.
8. Gud Paratha
Mix wheat flour and gud powder and 1 spoon of ghee. Make dough with water. Make paratha with ghee. Serve hot.
9. Cheese Tomato Sandwich
Take a whole wheat bread slice. Take finely chopped tomato and add little salt and pepper to it. Grate cheese over the bread slice then put finely chopped tomatoes on top then cover with other slice. Now make sandwich with butter. Serve with ketchup.
10. Chicken Strips
Take boneless chicken breast piece. Slice it into thin strips. Mix chicken strips, 1 egg, little olive oil, salt, black pepper, ginger garlic paste in a mixing bowl. Heat a non-stick pan and pour extra virgin olive oil to cover base of the pan. Now on low flame, place the strips one by one and cover the lid. Cook for two minutes then flip. Cook for another 3 minutes. You will see a change in colour and the chicken pieces will turn soft. Do not overcook. Serve hot!
Disclaimer: The views, opinions and positions (including content in any form) expressed within this post are those of the author alone. The accuracy, completeness and validity of any statements made within this article are not guaranteed. We accept no liability for any errors, omissions or representations. The responsibility for intellectual property rights of this content rests with the author and any liability with regards to infringement of intellectual property rights remains with him/her.
Read more
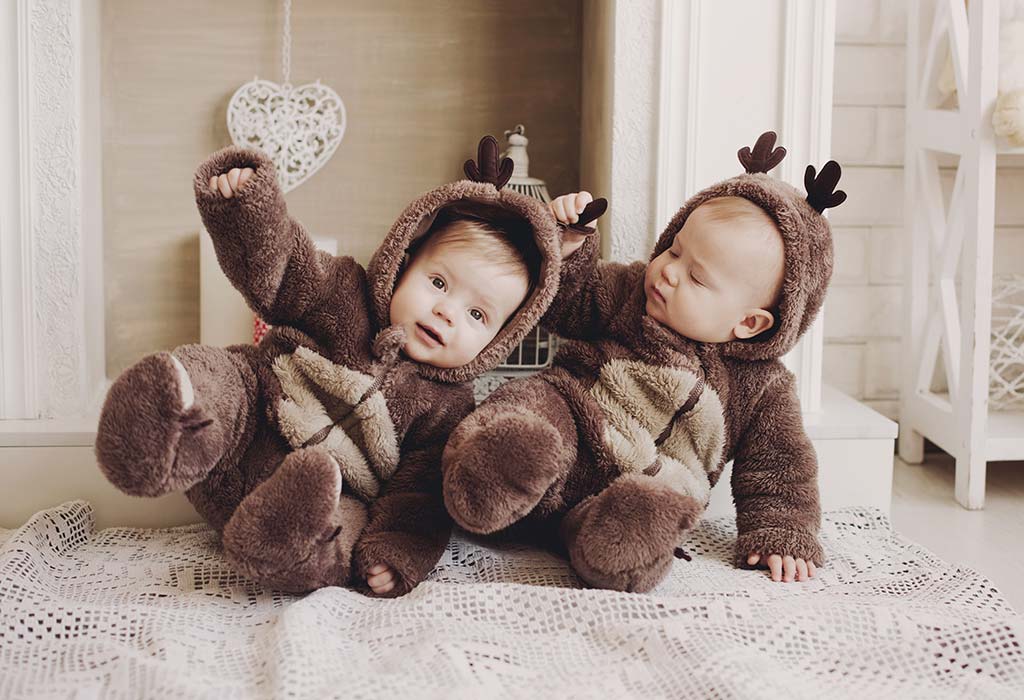
15 Halloween Costume Ideas for Twins
Halloween comes once a year, and this is the time when adults and children look forward to having fun and playing dress-up. For those with a particular love for Halloween drama, preparations start a long time in advance, with the entire costume needing to be put together with care. At the same time, some prefer last-minute dress-up with easy-to-find materials.
When you have twins to dress, things can get all the more fun and exciting when deciding the costumes. You can put them in themed or matching costumes that can be so much fun to put together. If you are looking for some great ideas or inspiration for twin costumes, you have come to the right place.
15 Best Twin Halloween Costumes to Dress up Your Twins
Whether you have twin boys, twin girls or a pair of fraternal twins with one boy and one girl, we have a lot in store for you. Check out some creative twin Halloween costume ideas given below.
1. Salt and Pepper
Your little ones may be just infants, but that doesn’t mean they can’t be included in the dress-up fun! Whether they are twin boys, girls, or one of each, you can go with a salt and pepper dress for each. This idea is one of the easiest infant twin Halloween costume ideas that you can put your kids in, especially if it’s a last-minute deal.
Image Credit : Pinterest
2. Hansel and Gretel
Hansel and Gretel are two famous siblings from the Grimm brothers tales and are every children’s beloved fairy tale characters. These boy-girl twin Halloween costumes are easy to make and will make your kids the centre of attention for creativity.
3. Mandrakes
Harry Potter fans will definitely appreciate this one. Just pick up two simple, lightweight flower pots that are big enough to hold a baby comfortably. You can keep it simple, add leaves to your babies’ hats, and put them in brown suits to get the perfect twin baby Halloween costumes. As parents, don’t forget your earmuffs, just in case the mandrakes decide to wail!
Image Credit : Pinterest
4. Clark Kent and Superman
Which young kid doesn’t like to be dressed up like a superhero? Well, Superman is the most popular of all, and you have the perfect opportunity to dress up your twin boys creatively. Dress one twin as Clark Kent and give him a nerdy appearance with spectacles, and dress the other one as Superman with a cape and slicked hair.
5. Phil and Lil
‘Rugrats’ was a popular show back in the 90s, so if you are a fan of that show, then you can dress up your little twins as Phil and Lil. This costume will go great if you have fraternal twins of both genders, as this is one of the most classic twin toddler Halloween costumes of all time.
Image Credit : Pinterest
6. Peter Pan and Wendy
The one night of the year when you are allowed to escape reality is the perfect time for a trip to Neverland. If you have fraternal twins of each gender, you may want to consider giving Peter Pan and Wendy a try. This is another simple costume idea since it involves green tights, a shirt and cap, and a pretty blue dress.
7. Anna and Elsa
Frozen has become every young girl’s favourite animation, and your twin girls may love dressing up as the two royal sisters, Anna and Elsa. These twin girl Halloween costumes ensure that your girls are dressing up like the princesses, which they are.
Image Credit : Pinterest
8. Tweedle Dee and Tweedle Dum
You can use Disney’s fantastic movie – Alice in Wonderland for inspiration and dress your twin boys as Tweedle Dee and Tweedle Dum. This costume is super easy to make. All you need are red pants, yellow shirts or sweaters, blue bow ties, and red caps. These twin boy Halloween costumes work best for the more mischievous boys, who love making people guess who is who.
9. Betty and Velma
Head back to the stone age with your twin girls to dress them up as beautiful cartoon characters – Betty and Velma. It is simple enough to put together a stone age dress, so you will need one blue cloth material and one white to stitch up two easy outfits. Add a pearl necklace and an orange wig for Velma, and a simple necklace for Betty. Voila! You have two perfect little stone age darlings.
Image Credit : Pinterest
10. Woody and Buzz
Who doesn’t love the perfect chemistry of two best friends? And none can be better than these two Disney Pixar characters of the popular Toy Story movie – Woody and Buzz Lightyear. If your twins are a fan of Toy Story, then these characters are just perfect. Getting together a cowboy outfit will not be very difficult, and a Buzz Lightyear costume can always be bought or put together quickly. These two characters are very much loved by kids and show the meaning of teamwork – something twins are good at.
11. Lilo and Stitch
Lilo and Stitch are a famous Disney’s duo, loved for their teamwork, friendship, and fun-loving nature. Their colourful costumes are sure to attract everybody’s attention at the party. Lilo’s dress reflects tropical vibes; therefore, you need a red blouse, artificial flowers for the garland around the neck, and large leaves for the skirt. You can buy Stitch’s costume at any costume shop. Its blue colour is eye-pleasing, and your kid will be fantastic in it.
12. Ketchup and Mustard
Can you ever forget ketchup and mustard while eating a burger or a sandwich? Definitely not. This Halloween, dress up your twins in this popular spice-duo and add some spice to the party. You can use red and yellow/mustard-coloured onesies for your twins. To the front of the onesie, you can paste a cut-out of Tomato ketchup and Mustard ketchup.
13. Thing 1 and Thing 2
Thing 1 and Thing 2 are mischievous characters known for their distinctive red and blue outfits.To complete the look, consider adding matching blue wigs or hair accessories that evoke the playful spirit of these beloved characters.
14. Peanut Butter and Jelly
Celebrate the classic duo of peanut butter and jelly with this whimsical costume idea. One twin can be the peanut butter, dressed in shades of brown. Consider a brown shirt or jumpsuit paired with matching pants. The other twin can be the jelly, adorned in various shades of purple. A purple outfit with complementary bottoms works perfectly.
15. Mario and Luigi
Mario and Luigi are iconic video game characters known for their distinct red and green outfits. Dress one twin as Mario, featuring a red cap with an “M”, blue overalls, and a red shirt. The other twin can be Luigi, sporting a green cap with an “L”, green overalls, and a green shirt. To add authenticity, consider applying temporary mustaches using costume makeup.
Whether you love to put together outfits or are content with throwing together something from the things that you have on hand, there are infinite creative options available to choose from for your little ones. No matter what you plan on dressing them, it will require a little time to put things together, but it can be a project that you and your kids work on together. While getting their costumes ready, don’t forget to have fun and pick something that makes everybody happy. So pick your costume and get started!
Also Read:
Cute Fancy Dress Theme Ideas for Kids
Scary Halloween Costume Ideas for Girls and Boys
Pretty and Scary Halloween Makeup Ideas for kids
Read more
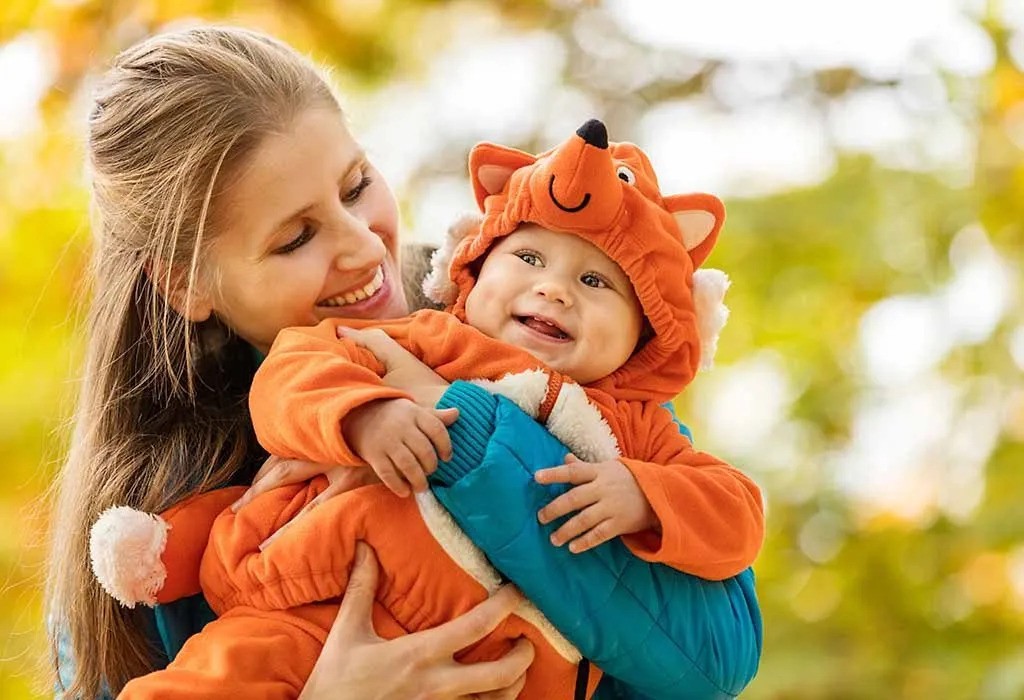
Baby's First Halloween Celebration Ideas
Babies are constantly learning and experiencing new things around them, since the day they are born. Your baby’s first Halloween is a big deal since Halloween is packed with a lot of new experiences! When your babies are very young, everything around them is completely new, making this occasion a super fun experience for the little one! Even though the baby might not understand a lot of what is happening during Halloween, celebrating it is a great way to help them get used to the Halloween spirit.
Tips For Celebrating Your Baby’s First Halloween
When preparing for your baby’s first Halloween, it is important to keep everything fun, instead of too spooky. This might make it a bit difficult for you to come up with ideas but here are a few tips and tricks you could consider!
1. Let Them Be a Part of the Candy Giving Process
One of the best parts of Halloween is the candy giving tradition. Though babies cannot eat much candy at this age, they can still watch their dad and mom give candy to other children after hearing the “trick or treat” at their doorstep. Your child would love seeing the joy during this time and will slowly start learning the importance of candy giving and enjoying the excitement around them.
Your baby will most probably go to bed in between the candy giving, but it will help them learn the important traditions of Halloween. As they get older, they can start helping you give out the candy. No matter how you celebrate Halloween, the important thing is to celebrate it in a fun way with your family. As long as the little one sees how fun the celebrations are, you can never go wrong.
2. Go for a Simple Costume
Elaborate costumes combining too many accessories does sound fun and will surely make you smile, but when you make your little one wear it, you will most probably spend the day pleading with your baby to keep it all on. If this is your baby’s first Halloween, go for something simple. The simpler your baby’s first Halloween costume, the better! You could consider using one costume piece, such a cute rabbit or kitty ears that go with the baby’s normal clothes, or a small dress with a small crown. You could also go for cute animal onesies like little rabbits or raccoons. You could even go for onesie Disney costumes like a Minnie Mouse onesie as your baby girl’s first Halloween outfit and a Mickey Mouse for your baby boy!
3. Decorate Your House Early
You can start decorating your house for Halloween a bit early, like during the first few days of October. Decorating your house early would give your baby more time to experience all the Halloween spirit with all the new things. Early decoration would also provide more time to take pictures of the little one with the decorations. You could even try out various Halloween costumes on the little one, for each day till Halloween. This would result in a ton of pictures, trips to the park to show off the little one in their outfit, and so many happy moments you and your family would cherish forever.
4. Attend Exciting Mom and Tot Events for Halloween
No matter where you live, you will have tons of Halloween Mom and Tot event options to choose from. Most small communities have craft groups, reading clubs, and other special events that are Halloween-themed where the mother and the baby will have a great time. At these events, you and your baby will have so much fun making homemade Halloween decorations, baking together with other mothers and their children, and being a part of the sing-along and story-telling groups. This will help your baby learn to socialise while enjoying the spirit of this popular holiday. Complete the picture by dressing up your baby in adorable Halloween costumes for these events!
5. Video Tape the Halloween Preparations!
You could take a video of some or all of the Halloween baking, decorating, and other general preparations you are going to do with your children. This would be a wonderful collection to your photo albums and videos, and watching these together when the children are older would bring back so many memories. You will have a chance to remember and look over at all the fun things that happened during your baby’s first Halloween. You could even record the Halloween decorations your babies made and save these up for every Halloween. Babies are usually visual and things like these would help them learn about what to expect for future Halloweens. They could also help the parents for the Halloween preparations in the coming years.
6. Orange-Themed Baking
Another fun part of Halloween is the themed cupcakes, treats, cookies, and other Halloween goodies that both the adults and the children would love. Now that your little one has arrived and is going to celebrate their first Halloween, you can make healthier versions of these Halloween treats with nutritious and healthy ingredients. Your baby can see you make all the orange-themed goodies and learn more about the Halloween menu, a part of your family tradition. As they grow older, they can help you with the food preparations and can help take pictures of the special day. A few fun treats you could bake with your babies are little ghost cookies, pumpkin-shaped cookies, and pumpkin pies!
7. Get a Halloween Bib and Pyjamas!
If you get cute Halloween bibs and pyjamas, you can use them for the entire month of October and let your little one enjoy the Halloween spirit a bit longer! You will be able to find these in most retail stores before the month of October at affordable prices. Take cute pictures of your little one to mark their first Halloween, making it a great memory you will cherish for years! Saving it for the last day can also be fun, but most moms use these for the whole month of October though it goes through a lot of wear and washes. The important thing here is to create memories and new experiences for the little one. The parents can also wear funky Halloween pyjamas and costumes to get into the Halloween season.
8. A Special Halloween-Themed Meal
The Halloween-themed meal could be anything the parents like! You could stick with any colour theme and make your food according to that. For example, if you go for the orange-theme, then you could have orange squash or peppers with beef or chicken in the red sauce along with orange rice or sweet potatoes. For desserts, you could go for Halloween cookies, pumpkin pies, or a fruit platter that is arranged in a Halloween style.
As your babies get older, you could plan more elaborate meals. For now, however, it is best to stick with simple finger foods and drinks your baby loves or finds interesting while staying within the Halloween theme. During your baby’s first Halloween, they will surely spend a lot of time exploring the sounds, colours, pictures, and textures. Therefore, let them explore the various textures and Halloween colours during this fun occasion with the rest of the family.
9. Take Part in an Indoor Trick or Treat
You can take your babies to an indoor Trick or Treating venue if they are too young to go out, if they are scared of the dark, or if you feel want to protect them from seeing scary costumes of other older children. If you check around, you will be able to find a lot of places that host indoor trick or treating for young children and their parents and the children really have a lot of fun. Here, parents and the children can wear costumes and spread the joy of Halloween.
10. Pumpkin Carving With the Baby
Carving the pumpkin is an exciting Halloween tradition that children and adults love equally! Of course, a baby would not be able to carve the pumpkin for the first few years, but watching the adults do it makes a very fun craft project for the little ones! When they are watching, you could talk to them and explain what you are doing just like you do for all the other activities. This way they can slowly pick up on everything that is happening and finally help you with carving when they are older!
11. Read Halloween Books
Reading to a child is not just a great tool for family bonding, but it also helps with their brain development and increases their interest in learning. You could pick out some fun Halloween stories from your local book store or a library and read it to your child. Books can also be your baby’s first Halloween gift.
12. Invite Grandparents Over
Inviting extended family for trick or treating can help your little one enjoy this tradition in a warm and safe environment. It is also a great time to take videos and pictures and simply enjoy being together as a family.
Some children that come to your home for trick or treat may have very scary costumes that might scare your baby. So, keep an eye out for children coming up your walkway and let your baby have a fun Halloween experience for the first time!
Also Read:
Halloween Costume Ideas for Kids
Simple Halloween Crafts for Kids
Halloween Makeup Ideas for Children
Halloween Costume Ideas for Twin Babies
Read more
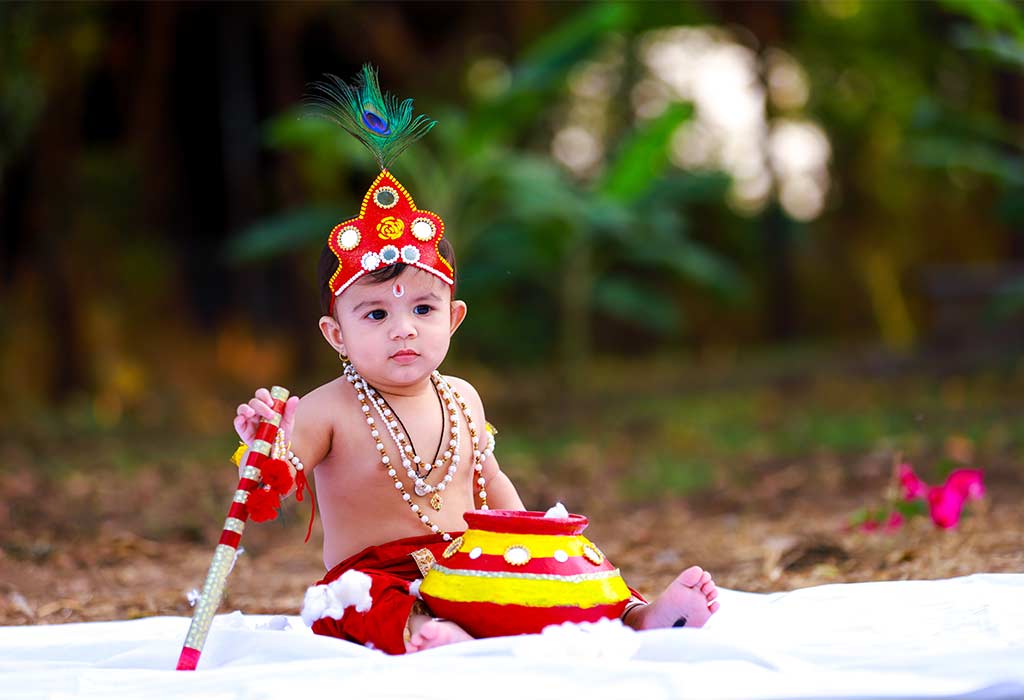
9 Tips for Dressing Your Baby as Lord Krishna
Krishna Janmashtami is a Hindu festival that celebrates the birth of Lord Krishna. It is widely celebrated in North India, but several other states also have people celebrating it with equal enthusiasm. Parents even love to dress up their babies as Lord Krishna for the occasion. If you are also thinking of dressing up your baby as Lord Krishna, you will find this article very helpful. Read on for some costume ideas and useful tips for dressing your little one as Krishna.
Things You Need to Put Together a Krishna Costume for Your Baby
Before dressing your baby in a Krishna costume, take note of the following points. These are the elements required to put up a Krishna outfit together.
1. Dhoti
Dhoti is a traditional Indian outfit for men. Although men wear it occasionally in urban areas, it is a common part of the clothing in most rural parts of India. It is also an important aspect of the Krishna Dress. A cotton or silk dhoti in your preferred colour will ensure your child is comfortable, especially if you are planning for a photo shoot.
2. Crown
The crown or the ‘mukut’ is another important part of Krishna’s look. Crowns are easily available in the market. Do not compromise on the quality, as a cheap quality crown may harm your baby’s delicate skin. If you have a creative streak, you can even make one at home.
3. Peacock Feather
A peacock feather is synonymous with Lord Krishna, and thus, is a very important accessory for kids who want to dress up as Krishna. It is believed that Krishna once danced with the peacocks when he played one of his divine tunes on his flute, which is the next important element of the Krishna dress.
4. Flute
Lord Krishna is also called ‘Murlidhar’, which means the one who adorns a ‘Murli’ or a flute. Krishna is believed to have played numerous enchanting tunes and enthralled everyone around with his flute.
5. Butter Pot
Lord Krishna loved ‘maakhan’ or butter. There are several stories about him stealing milk, butter and curd from the houses of the Gopikas in Vraj, and therefore, butter is also a common offering to Lord Krishna.
6. Jewellery
Another important aspect of the Krishna costume is jewellery. Without jewellery, the Lord Krishna dress would be incomplete. Krishna is usually adorned in precious and semi-precious ornaments, such as necklaces, bracelets, anklets, etc.
7. Make-Up
The next essential part of the Krishna look is the ‘tilak’, which is applied on the forehead. It has a spiritual significance and also brings the look together. Putting any other make-up on your baby is a complete ‘No’ as it may harm his delicate skin. Also, do not put kohl or liner in your baby’s eyes.
8. Sandals or Barefoot
When it comes to completing your baby’s charming Krishna ensemble, the choice between soft sandals or going barefoot can be a delightful consideration. Based on what your baby feels cozy in, you can either go for gentle sandals or let them be without shoes to finish the adorable outfit.
Now that you know what elements together make a Krishna dress, you can make a stunning Krishna outfit easily at home. The DIY ideas given below will also make the task extremely enjoyable for you.
How to Make Krishna Dress at Home?
Making a Krishna dress for your little one can be a fun activity for the entire family. Read on to know how you could make each element of the Krishna costume at home.
1. Dhoti
Draping a dhoti might seem like a challenge, but it is fairly easy. If you already have a mundu or a dhoti, you can fold it in half and use it or cut a silk or cotton dupatta or saree to make one for your child.
Things You Will Need:
Silk or a cotton dupatta/saree or a Mundu.
Method:
Take a dupatta or a mundu and fold it lengthwise. You can choose to cut the fabric lengthwise, too, to if you think the additional layer will make your child uncomfortable.
Wrap it around the child’s waist like you would tie a sarong, keeping about 1/4th of the fabric on one side and the remaining (the longest side) on the other.
Tie the knot in the centre.
Then, take the lower front corner of the short end of the fabric, and from between the legs, drape one leg and take the end behind from under the fabric. Tug it gently so that it fits properly and tuck it in the centre over the fabric.
Then, take the longest end of the fabric and hold its width with both your hands. Now, make pleats and bring the two corners neatly together. Tuck it in the centre where the knot is tied.
You will have a loose opening of the fabric length after tucking in. Gently pull it out and make pleats. Tuck these pleats in next to the centre (the side would depend on the side the fabric was)
Any excess material can be wrapped around the waist to give it a finished look.
2. Flute
If you cannot buy a flute for your baby, make one with some paper.
Things You Will Need:
Newspaper
Glue
Scissors
Paint
Embellishments such as lace, tassels, etc.
Method:
Take a newspaper and roll it till you get the desired thickness.
Glue the loose ends of the paper properly. Let it dry.
Then, cut a conical shape or a blunt point on one end of the roll. Glue any loose edges and leave it to dry.
Decorate the flute with a golden paper, some ribbons, tassels, etc.
3. Butter Pot
You can choose to decorate a clay pot you have at home and fill in some cotton for the butter or make one with some paper.
Things You Will Need:
Large-sized balloon
Lots of paper (preferably newspaper)
Glue
Water
A pair of scissors
Plastic or a wooden bangle
A string of thread.
Method:
Blow the balloon till it inflates to medium size.
Tie the opening and push it inside the balloon till you reach the bottom of it.
With another hand, hold the pushed end at the bottom and secure it with a thread.
You should get a pot-like shape instead of a usual oblong. Mix some water and glue in a bowl.
Shred the newspaper into small pieces. Dip each piece and stick it all over the balloon. Ensure each piece overlaps with the other pieces surrounding it. Cover the entire balloon this way, leaving a circle at the top centre. This will be the mouth of the pot.
Keep sticking the newspaper pieces till you have a nice thick layer of paper over the balloon. Leave it to dry.
Take another sheet of newspaper and dip it in the water and glue solution. Cover the entire bangle till you get a rim of your preferred thickness. Keep it aside to dry with the pot.
Once the pot and the ring are completely dry and hard to touch, burst the balloon and remove it.
Draw a circle (a little smaller than the size of the circular paper ring) at the opening of the paper pot and cut the rough edges.
Glue the ring on the opening. Leave it to dry.
Fill the pot with some cotton.
There you have it; your butter pot is ready.
4. Jewellery
Since your child could get cranky if you make him wear metal ornaments, go for paper, threads and beads to make some fancy but comfortable ornaments for your little one’s Krishna costume.
Things You Will Need:
Gold-Coloured Paper
A soft but thick thread or soft yarn
Some beads (optional; do not use beads for infants and toddlers)
Glue
Scissors
Method:
Cut triangles and circles from the gold-coloured paper.
Cut one string or soft yarn for the necklace, two for the bracelets and two for the anklets. Measure them before cutting them. Ensure you have enough to tie the ornaments.
Glue the triangles and circles on each string and the order you like and leave them to dry.
Once they are ready, tie the strings around the neck, the ankles and the wrists. Ensure your child is comfortable in the jewellery.
5. Crown
Things You Will Need:
A yellow chart paper
Glue
Scissors
Sketch pens
Embellishments
Thread/Measuring Tape
Pencil
Method:
Cut a 2-inch thick strip from the yellow chart paper.
Measure the circumference of your child’s head.
Cut the strip in that length.
Now, use a pencil to outline the top of the crown. Give it a shape you desire.
Cut along the outline.
Glue the ends of the strip.
Decorate the crown with your favourite colours and embellishments.
6. Peacock Feather
If you do not have a peacock feather, try this DIY feather to complete the look.
Things You Will Need:
Chart Paper
Iridescent blue, light blue, a bright shade of green, copper, and turquoise paint
Scissors
Pencil
Paintbrush
Method:
Draw a feather outline on the chart paper. You can even take a printout.
Paint the feather; It’s alright if it is not perfect.
Then, cut along the outline leaving the bottom thick to enable you to glue it to the crown or tuck it in a ponytail.
There you have it; your peacock feather is ready.
With the DIY ideas and some elements, it can be quite simple to put a Krishna dress together. If you want some more ideas, here they are. These Krishna costume ideas for baby will make this Janmashtami one of the most memorable events.
Krishna Costume Ideas for Baby
Krishna is adorned in several ways. Whether it is a regal look or a humble one, no Krishna costume idea will disappoint. Here are some you can consider to put up a Krishna dress for your tiny tot.
1. Pristine White Minimalistic Krishna Costume
This idea needs just a white coloured dhoti and some accessories, such as gold-coloured necklaces, pearl-coloured bracelets, armlets, a red or a maroon dupatta, and a peacock feather.
Dress your little one in the white dhoti. Then, take the dupatta and roll it loosely before you wrap it around your baby’s waist. Tie a knot to secure the dupatta on your little one’s waist. Use one of the necklaces as the crown and secure it with a hairpin. Tuck in the peacock feather and you are good to go.
2. The Maakhan Chor Costume
While we’ve recommended blue and gold in this idea, you can play around with the colours of your choice. You will need a dhoti in your little one’s size, some accessories, such as a pair of bracelets, anklets, a black thread and a dull gold coloured scarf.
After dressing your baby in the dhoti, loosely scrunch or gather together the scarf lengthwise. Then, wrap it around your baby’s head and tie a gentle knot. Tuck a peacock feather in it. Then tie the black thread around the waist or the neck and put some baby-safe kajal to complete the look.
3. Bright Yellow Krishna Costume
For this Krishna costume idea, you will need a yellow coloured dhoti and kurta (kurta is optional), some gold paper ornaments, a yellow/gold comfortable fitting crown or a yellow coloured, traditional-print bandana, and a peacock feather. This look won’t need much; just give your little one a flute and put a tilak.
4. Krishna Angrakha and Dhoti Costume
Dressing up your little bundle of joy in a Krishna Costume is the best way to see Lord Krishna in your child. All you need is an angrakha shirt, preferably in white or orange, and a yellow colour dhoti to go with it. If it’s your baby’s first Janmashtmi, you can get the angrakha customised with baby Krishna’s image on it. Add in some accessories like a mukut and pearl mala too.
These are just a few Krishna costume ideas you could use to make one for your little bundle of joy. You may experiment with other colours, too, and give accessories that help create the entire look. Don’t forget the hair and the footwear though. If your child has long tresses, tie them in a comfortable but neat ponytail before you put the crown on and the feather on. Many choose to go bare feet, but you could also get a pair of juttis in the colour-scheme you choose for your little one to wear.
But, that’s not all. You might need to take care of a few more things before you dress your child in a Krishna costume. Let’s take a look at some useful tips to ensure your baby is comfortable and has an equal amount of fun being the ‘Krishna’ in the house.
Tips to Keep in Mind Before Dressing Up Your Baby as Lord Krishna
Before you begin dressing up your little one as Lord Krishna, you may like to keep the following tips in mind:
Feed your baby, make sure his tummy is full and he is not hungry.
Before dressing him up, ensure that he has slept enough. If he doesn’t get enough sleep, he will be cranky during the day.
Do not go overboard with accessories; make him wear comfortable accessories.
If your baby gets irritated because of a certain piece of jewellery, take it off.
Adopt the mantra ‘less is more’, keep the dress and jewellery hassle-free and simple. Make sure the jewellery has no sharp edges, and it is child-friendly.
Do not paint your baby’s skin as it may cause harm.
Make sure the costume that you choose for your baby is made of good fabric (preferably cotton or silk).
Choose a hairstyle that complements the look without causing any discomfort or hindrance to your baby’s movements.
If your baby wears diapers, opt for a costume that allows easy access for diaper changes. This will save you from having to fully undress your baby each time.
Where You Can Buy Krishna Costume for your Baby?
Finding the perfect Krishna costume for your little one is easier than ever with online shopping. You can find a wide range of Krishna and Radha-themed outfits, complete with dhoti, mukut (crown), bansuri (flute), and jewellery, in various sizes and price ranges. For a good collection of Janmashtami costumes for baby girls, you can check out FirstCry’s Janmashtami costume collection, which offers adorable Radha-Krishna outfits along with matching accessories to complete the look.
These were some basic things that you need to remember to dress up your baby as ‘Lord Krishna’. Festivals are a great time to dress up your kids. All you have to keep in mind is that your baby should feel happy and comfortable. There is no point in putting in so much effort and energy if your baby gets irritated. The idea is to have fun with your baby and enjoy the festive fervour, therefore keep it simple and hassle-free for your baby.
Also Read:
Story of Lord Krishna Birth
Child Safety on Dahi Handi
Krishna Celebration and Activities for Kids
Read more

PLayDoh Provides Great Learning Experience for My Baby
https://www.youtube.com/watch?v=iLstsETBfao
I have always used only Play-Doh for Aryaa and she loves playing with it. Thanks to its non toxic feature, it has been my go to choice always. Aryaa is a creative child as she is a lefty, so art and craft is what she indulges in all time. We encourage her further by providing learning experiences with products that inspire her. Be it colours, books, craft material or Play Doh, we keep trying out new ways to inculcate her hobbies. We recently got Aryaa the Letters and Language set from Play-Doh’s ‘Shape & Learn’ range as she has recently started learning to read and write A,B,C,D in school. It not only is a great way of teaching her the letters through a multi-sensory experience, but it also helps us in understanding her progress, and of course a great way to spend time with her. She loves the entire kit as it contains different colours of Play-Doh, letter stamps, a rolling pin and a stylus which helps her create some beautiful letters. The Together Time Guide is full of fun ideas and skill building activities that makes play-time with her even more rewarding. We definitely are seeing it benefit Aryaa and she also comes back happier from school as she knows her letters a lot better now. For early thinkers like Aryaa, the ‘Shape & Learn’ range is definitely a great product!
Disclaimer: The opinions expressed in this post are the personal views of the Blogger. The Blogger is a Mom of a 3 Yr old & is an active user of FirstCry Parenting.
Read more
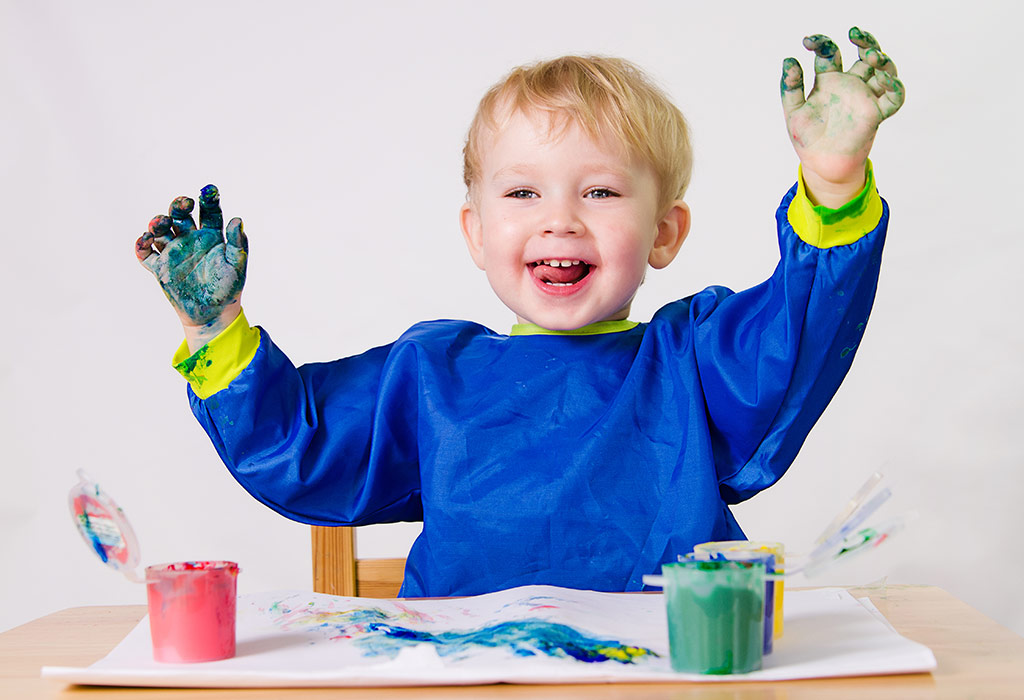
Best Activities for 20 Months Old
Each child develops at a different pace. Therefore, every month is different from the other, and sometimes you may just run out of ideas to keep your growing toddler engaged. In this article, we will share ample learning as well as fun activities for 20-month-old toddlers that will not only keep your little one occupied but also help develop several essential skills. These activities are also a great way to create a long-lasting bond with your baby, fostering their cognitive, physical, and social development while ensuring their happiness and overall well-being. So, let’s dive into these ideas for 20-month-old activities at home and watch them thrive with joy and curiosity.
The Best Learning Activities for a 20-month-old Baby
There are several indoor and outdoor activities you can involve your 20-month-old toddler in. Here are some simple activities for your fast-growing toddler.
1. Smear the Colours
Smear the colours is a great way to develop your little one’s motor skills. On an advanced level, this activity can be done to teach your child how to identify colours. Here’s what you need.
Things You Will Need
Finger paint
Wax paper
Plain paper
How to Do It
Take the wax paper and put it on the floor or any solid surface. It will help prevent stains on the surface.
Use tape to stick it to the floor so that it doesn’t slip.
Keep a plain paper over the wax paper.
Now, drop a small amount of paint and smear it with your finger.
Allow your toddler to do the same.
Then drop different colours and let your baby smear each of them.
2. Find It For Me
This simple activity will improve your baby’s observation skills. At times, you can choose to move the object to another hand to add an element of surprise to this activity.
Things You Will Need
An object small enough to hide in your palm.
How to Do It
Sit in front of the baby, and hold both your hands with the palms facing upwards.
Place this object in one of your palms.
Ensure your baby sees the object properly.
Now, close both your palms, with the object hidden in one hand.
Put both your hands behind your back, then bring them to the front and ask your little one where the object is.
Once your baby points it out, open both your hands to reveal the object.
3. Help Me Out
Toddlers imitate their parents commonly. This simple activity can help you connect with your child and also develop his motor skills. And, all you need is a little time along with the material mentioned below.
Things You Will Need
Two small pieces of clean cloth.
How to Do It
Find a clean surface that your baby can access easily.
Clean the surface with a cloth.
Then hand the second piece of cloth to your baby and let him do the same.
Remember not to throw away your piece of cloth when your little one starts cleaning. Spend time with him and keep talking or singing songs when you make him do this activity.
4. Take Your Baby Out
This activity will improve your child’s observation skills, and communication skills and will also encourage him to explore his surroundings. To ensure your baby makes the most of this activity, choose a time of the day when your baby is active, well-fed, and well-rested.
What You Will Need
A spacious and safe place where your toddler can roam on his own (a park, a garden, or a mall).
Some free time on hand.
How to Do It
Once you reach the location, let your toddler lead the way and explore things around him at his own pace.
Keep following him and do not let him go out of sight.
Strike a conversation with your little one about anything that fascinates him and teach him new words.
5. Match the Following
This activity will teach your toddler about various day-to-day objects. It will also enable him to identify the similarities and differences such as colour, shape, and size.
Things You Will Need
Objects in pairs, like socks, hair clips, books, spoons, etc.
Some space to place the objects.
How to Do It
Hold up one of the objects and show it to your baby.
Name the object in your hand for your baby and ask him to find its pair from the objects laid on the surface.
6. Prepare a Stew
This activity will help in developing your baby’s fine motor skills, bilateral as well as hand-and-eye coordination. It will also stimulate your baby’s visual and tactile senses.
Things You Will Need
A bucket
A stick
Some random objects like leaves, pebbles, flowers, etc.
How to Do It
When you step out with your little one next time to go to a park or a garden, carry a bucket.
Stop at a place where there are some pebbles, twigs, leaves, and flowers.
Fill the bucket with some water and ask your baby to pick pebbles, leaves, flowers, twigs, or just about anything safe to handle and ask him to put it in the bucket.
Take a long stick and help your baby stir the ingredients.
Slowly, you can start telling your baby about how heavy things like pebbles sink in water, and lighter objects like leaves float on it.
7. Fun With Flowers
This activity is not only fun for your baby, but it will also help in developing his fine motor skills and hand-and-eye coordination.
Things You Will Need
A mat
Dried flower petals
How to Do It
Spread a mat in the garden or veranda.
Place dried flower petals on the mat and allow your baby to explore them with his hands and feet.
Let him stomp these petals or pull them apart.
You can also pick some petals up and say the colour out loud.
8. Play With Pasta
This enjoyable activity will help in the development of your baby’s fine motor skills. It will also help strengthen his pincer grasp and improve finger isolation and the coordination of all the senses.
Things You Will Need
Different kinds of uncooked pasta
Playdough
How to Do It
Place the pasta and playdough on a table or the floor.
Make imprints with pasta on the play dough.
You can also hide the pasta inside the playdough and ask your baby to dig it out.
9. Egg Carton Colour Fun
This activity can help improve your child’s observation skills and hand-and-eye coordination.
Things You Will Need
A large egg carton
A paper cut in the size of the egg carton.
Some paint
Coloured objects or Lego
Pencil
Ruler
How to Do It
Using a pencil, draw an equal number of squares on the paper and paint them in different colours. Let it dry.
Keep the sheet in front of your little one and make him drop a similar coloured object or logo in the exact hollow of the egg carton that mirrors the coloured square.
10. Sensory Play With Textures
Engaging your 20-month-old in sensory play with textures can be a delightful and educational experience. This activity enhances their tactile awareness and fine motor skills while providing a sensory adventure.
Things You Will Need
A shallow container or tray
Various textured materials like sandpaper, soft fabric, bubble wrap, cotton balls, and more
How to Do It
Place the textured materials in the shallow container or tray.
Encourage your toddler to touch, explore, and feel the different textures with their hands.
Describe the textures as your child explores them – “This is soft like a teddy bear,” or “This feels bumpy like a road.”
You can even incorporate a matching game by providing a set of objects with textures similar to those in the tray, and your child can match them.
Children learn every day through the various activities that they are involved in. All you need is a little time and patience. Do not leave your baby alone during any of the activities and participate, not only for fun, learning, and bonding but also to ensure your baby’s safety while he is doing them. So do try these activities with your 20-month-old, and let us know how they go!
References/Resources:
1. Speech and language development (from 12 to 24 months); NHS Foundation Trust; https://www.gosh.nhs.uk/conditions-and-treatments/procedures-and-treatments/speech-and-language-development-12-24-months/
2. Development Matters in the Early Years Foundation Stage (EYFS); The British Association for Early Childhood Education; https://dera.ioe.ac.uk/id/eprint/14042/7/development%20matters%20in%20the%20early%20years%20foundation%20stage_Redacted.pdf
3. Why to Avoid TV for Infants & Toddlers; American Academy of Pediatrics; https://www.healthychildren.org/English/family-life/Media/Pages/Why-to-Avoid-TV-Before-Age-2.aspx#
4. Carroll. P; Effectiveness of Positive Discipline Parenting Program on Parenting Style, and Child Adaptive Behavior; National Library of Medicine; https://www.ncbi.nlm.nih.gov/pmc/articles/PMC9560916/; July 2021
5. Fortier. J, Stewart-Tufescu. A, Salmon. S, MacMillan. H.L., et al.; Associations between Lifetime Spanking/Slapping and Adolescent Physical and Mental Health and Behavioral Outcomes; Sage Journals; The Canadian Journal of Psychiatry; https://journals.sagepub.com/doi/10.1177/07067437211000632; March 2021
6. Neppl. T.K., Jeon. S, Diggs. O, Donnellan. M.B.; Positive Parenting, Effortful Control, and Developmental Outcomes across Early Childhood; National Library of Medicine; https://www.ncbi.nlm.nih.gov/pmc/articles/PMC7041851/; March 2020
7. Dicataldo. R, Roch. M; How Does Toddlers’ Engagement in Literacy Activities Influence Their Language Abilities?; National Library of Medicine; https://www.ncbi.nlm.nih.gov/pmc/articles/PMC8744843/; January 2022
8. Hnatiuk. J, Salmon. J, Campbell. K, Ridgers. N, Hesketh. K; Early childhood predictors of toddlers’ physical activity: longitudinal findings from the Melbourne InFANT Program; International Journal of Behavioral Nutrition and Physical Activity; https://ijbnpa.biomedcentral.com/articles/10.1186/1479-5868-10-123; November 2013
Also Read:
20 Months Old Baby Food
Fun Activities to Do With Your Baby
Intense Mood Swings in Your 20 Months Old
20 Months Old Baby Growth and Development
Read more
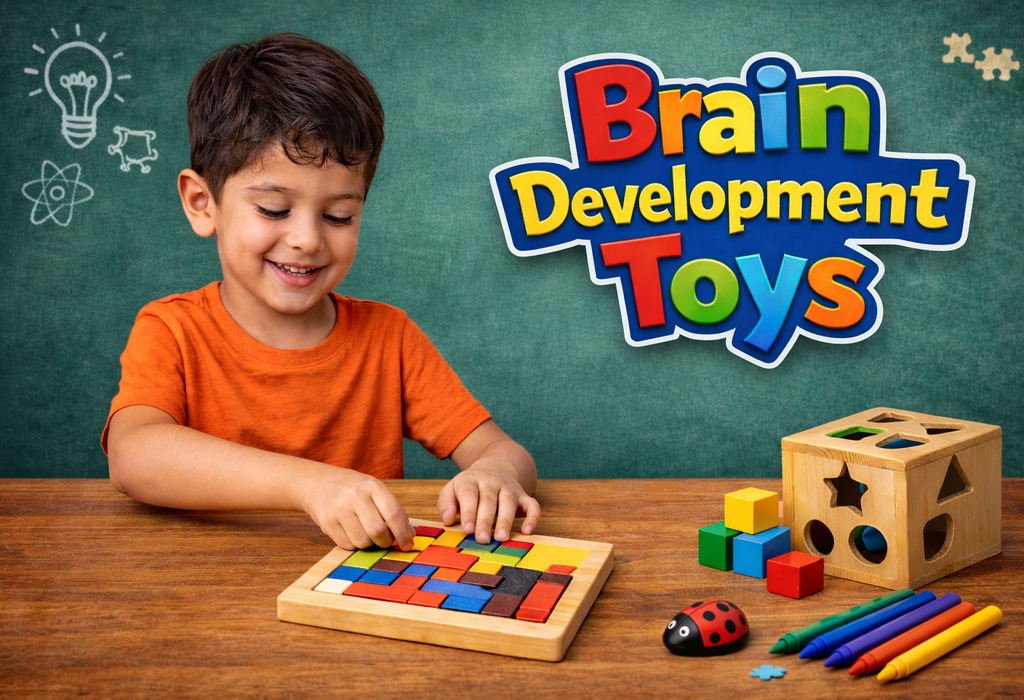
20+ Best Brain Development Toys for Babies and Toddlers
Witnessing your baby discover something new for the first time is a magical feeling. Something as simple as a rattle, a soft block, or a colourful puzzle can make them curious and confident and lay the foundation for future learning. This is why selecting the right baby brain development toys is very critical. These early experiences influence how their child will think, reason, and interact with their world.
If you have ever seen a toddler stack blocks with intense focus or laugh while figuring out how a toy works, you already understand how powerful play can be. The right toys for brain development 1-2 years are not just about entertainment. They support memory, motor skills, language growth, and emotional development in ways that feel natural and fun.
This topic goes beyond just picking toys from a shelf. It is about understanding what truly helps your child grow and making choices that support their development in simple, meaningful ways.
Different Types of Brain Development Toys and Their Advantages
Every child learns at their own pace and in their own way, and toys are one of the ways in which this learning takes place. Some toys encourage physical activity, while others encourage mental or imaginative activity. Bear in mind that the toy’s ability to promote your child’s natural curiosity is more important than its aesthetics.
1. Sensory Toys
Sensory toys engage a baby’s senses through touch, sound, and sight. Think of soft fabrics, textured balls, or crinkly toys that babies love to explore. These toys help build early brain connections and improve awareness of the world around them.
2. Stacking and Building Toys
Stacking rings, cups, or blocks are simple, but they teach important skills. Children learn balance, size, coordination and patience. They learn as they watch a tower fall and try to build it again.
3. Shape Sorters and Puzzles
These toys gently challenge children to think and solve problems. Matching shapes or fitting pieces together improves memory and reasoning skills. Over time, you can see children become more confident in figuring things out on their own.
4. Musical Toys
Musical toys playfully introduce rhythm, sound, and patterns. A simple drum or xylophone can keep a child engaged for a long time. They also support listening skills and early creativity.
5. Pretend Play Toys
Pretend play toys like kitchen sets, dolls, or toy tools help children express themselves. They copy what they see around them and begin to understand emotions and social roles. This builds strong communication skills.
6. Push and Pull Toys
These toys encourage movement, especially for toddlers learning to walk. As children push or pull, they develop balance and coordination. It also gives them a sense of independence as they explore their surroundings.
7. Interactive Books
Books with textures, flaps, or sounds make reading more engaging for young children. They help build language skills and improve focus in a gentle way. Sitting together with a child and exploring a book often becomes a bonding experience as well.
Brain Development Toys for Babies
In the early months, babies learn by touch, sound, and observation of everything around them. Even the smallest interaction with their toys can make them curious, creating new connections in the brain. The right toys should be simple and appropriate for what your child is learning at the time. Simple and thoughtful mind development toys can create meaningful moments with your child.
1. Soft Sensory Cloth Toys
These toys come with different textures and gentle sounds that babies love to explore. They are safe, easy to hold, and perfect for tiny hands learning to grasp.
2. Baby Rattles
Rattles are often a baby’s first favourite toy. The sound and movement help babies understand cause and effect while improving hand coordination.
3. Teething Toys
Teethers are for soothing gums and helping babies learn to grip and explore. They come in different shapes to keep babies engaged.
4. High Contrast Flash Cards
Black and white cards help babies focus better, especially in the early months. They support visual development in a simple but effective way.
5. Activity Play Gym
A play gym encourages babies to reach, kick, and move. Hanging toys and mirrors makes it more engaging and supports physical development.
6. Crinkle Books
These soft books make a gentle crinkling sound when touched. Babies enjoy the sound and texture while slowly getting introduced to books.
7. Musical Soft Toys
Toys that play soft music or lullabies can calm babies while also stimulating their hearing. They often become comforting companions.
8. Baby Mirrors
Unbreakable mirrors help babies discover their own reflection. It may seem simple, but it builds awareness and curiosity.
9. Stacking Rings for Infants
Large soft stacking rings are easy for babies to handle. They help develop coordination even before babies fully understand stacking.
10. Tummy Time Toys
Toys designed for tummy time encourage babies to lift their heads and look around. This strengthens muscles and supports early movement skills.
Toys for Brain Development for Toddlers
Toddlers are naturally curious and want to explore everything around them. Children learn best by moving, touching, and solving problems at this age. The right toys for brain development for 1-2 years can make them confident while learning how things work. What’s surprising is that children learn so much through small play experiences.
1. Stacking Rings
Stacking rings helps toddlers understand size order and balance. They also build hand control and patience as children try again and again.
2. Shape Sorter Toys
These toys encourage toddlers to match shapes with the right spaces. It gently builds problem-solving skills and helps them think more clearly.
3. Building Blocks
Blocks give toddlers the freedom to create and explore. They learn balance, coordination, and even early planning while stacking and knocking them down.
4. Push and Pull Toys
These toys support walking and movement. Toddlers feel a sense of independence as they move around with something they can control.
5. Musical Instruments
Simple instruments like drums or xylophones introduce rhythm and sound. They joyfully help toddlers express themselves.
6. Peg Boards
Placing pegs into holes improves fine motor skills and focus. It may look simple, but it requires attention and coordination.
7. Nesting Cups
Nesting cups teach size comparison and sequencing. Toddlers enjoy stacking and fitting them together in different ways.
8. Interactive Board Books
Books with flaps, textures or sounds keep toddlers engaged. They slowly build language skills and improve their attention span.
9. Pretend Play Sets
Toy kitchens, dolls, or toy sets allow toddlers to copy everyday actions. This helps them understand emotions and social roles.
10. Puzzles
Simple puzzles help toddlers recognise shapes and patterns. Completing even a small puzzle gives them a sense of achievement.
11. Ride On Toys
Ride-on toys improve balance and coordination. They also give toddlers a fun way to stay active.
12. Sorting Games
Sorting colours or objects helps toddlers notice differences and similarities. It builds early thinking and memory skills.
13. Ball Drop Toys
Dropping balls and watching them roll teaches cause and effect. Toddlers love repeating this action and learning from it.
14. Lacing Toys
Lacing beads or shapes helps improve hand control and focus. It also prepares them for skills they will need later, like writing.
15. Activity Cubes
Activity cubes combine different small games in one toy. They keep toddlers engaged while supporting multiple areas of development.
Tips for Choosing Brain Development Toys
Choosing the right toy for your child can sometimes feel confusing with so many options around. As parents, you want something that is fun but also truly helpful for growth. The best toys for cognitive development are often simple, thoughtful, and suited to your child’s stage. It is less about having more toys and more about choosing the ones that really support learning through play.
Choose toys that match your child’s age and ability, so they feel confident and not frustrated.
Look for toys that can be used in different ways, as they keep children engaged for longer.
Prefer toys that encourage hands-on play instead of passive watching.
Focus on safety and quality since babies and toddlers explore everything closely.
Pick toys that allow interaction so you can play and bond together.
Avoid toys that are too noisy or distracting, as they can reduce focus.
Notice what your child enjoys and choose toys that build on their natural interests.
FAQs
1. How many toys does a baby or toddler really need?
Children do not need many toys to learn well. A few meaningful toys that they can use in different ways are often enough.
2. Are expensive toys better for brain development?
Not always. Simple, well-designed toys often support learning better than expensive ones, as they allow more creativity and exploration.
Choosing the right kind of toys for your baby or toddler is about understanding their learning and development process. Simple toys promote curiosity and learning through play. Learning through play is an important aspect of development, and the best part is that as your child grows, the learning opportunities through play continue to evolve. The most important thing in the entire process is to provide your child with the opportunity to learn and play on his or her own. Being present during playtime makes the learning process an emotional one, and in the end, it’s the learning experience that you create around the toys.
Also Read:
Horse Jokes for Kids That Will Make Everyone Laugh
Science Trivia for Kids (Questions and Answers)
Fish Jokes for Kids That Will Make Them Giggle
Read more
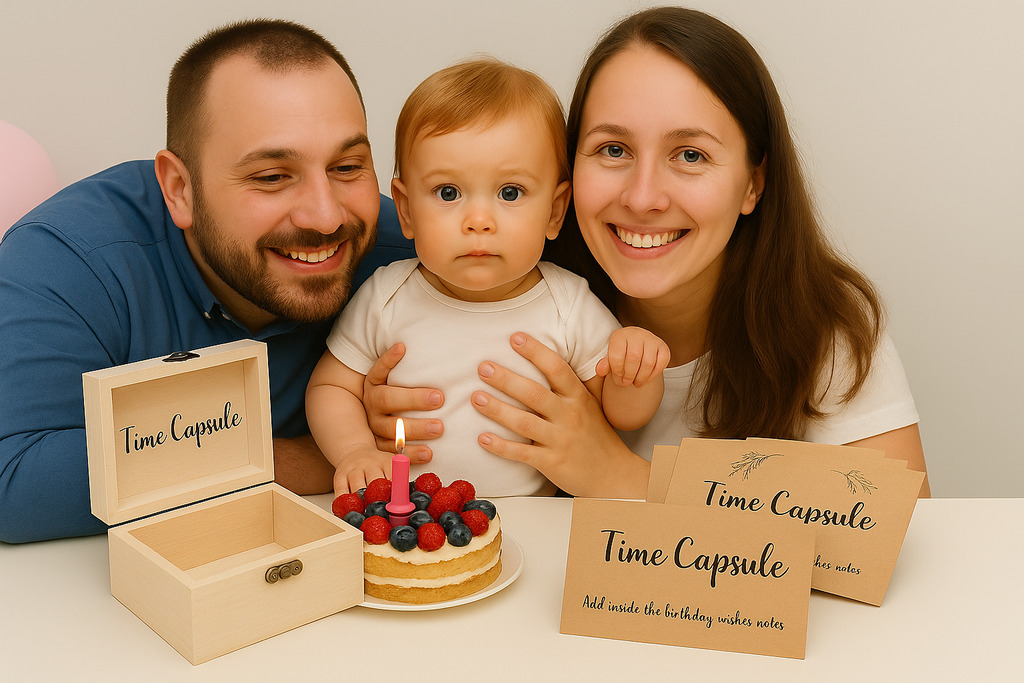
1st Birthday Time Capsule Ideas to Create Lasting Keepsakes
A first birthday time capsule is a beautiful way to capture memories and milestones that your little one can cherish when they grow older. Parents, friends, and family can all contribute to this thoughtful keepsake by adding letters, photos, favourite toys, or even newspaper clippings from the year your child was born. A birthday time capsule isn’t just a gift for today, but a treasure for the future, something your child can open years later to see how loved and celebrated they were. What matters more is choosing the right time capsule idea for a first birthday, which transforms the celebration into something even more meaningful, as it becomes a personal memory chest filled with love, laughter, and cherished moments. From heartfelt notes to tiny mementoes, every item you place inside becomes part of your child’s story, creating a lasting keepsake that holds the essence of their early years.
What Is a First Birthday Time Capsule?
A 1st birthday time capsule is a collection of memories, keepsakes, and messages created on your child’s first birthday. It can include letters, photos, small toys, or newspaper clippings that capture the moment in time. The capsule is sealed and saved for your child to open on a future milestone birthday, making it a meaningful way to preserve early memories.
Why You Should Make a First Birthday Time Capsule?
Creating a time capsule box for a first birthday is a heartfelt way to celebrate your little one’s journey and preserve the love surrounding them during their early years. It allows parents and loved ones to pass on memories, advice, and thoughtful messages that the child can treasure in the years to come. Beyond being a creative keepsake, it serves as a window into the past, showing your child what life was like when they were one year old. A first birthday time capsule also brings the family closer, as everyone contributes something personal and unique. Most importantly, it creates a lasting bond across generations, ensuring your child feels the warmth, love, and excitement of their first milestone birthday even years later.
How to Create a 1st Birthday Time Capsule?
A 1st birthday time capsule is a wonderful way to capture memories and save them for your child to cherish in the future. Here’s a simple guide on how to create a meaningful keepsake for your little one.
1. Choose a Container
Pick a strong, durable container, such as a wooden box, metal tin, or sealed plastic case, to store the keepsakes. Ensure it can withstand moisture and dust to preserve memories well over time.
2. Add Personal Mementos
Place meaningful items that represent your child’s first year, like a favourite toy, baby socks, milestone cards, or family photos. You can also include newspaper clippings or trending items from that year to mark the moment in history.
3. Collect Messages and Letters
Invite family and friends to write letters filled with love, blessings, and advice for your child’s future. These personal notes will become the most heartfelt part of the capsule and a beautiful keepsake when opened years later.
4. Seal and Store Safely
Once everything is placed inside, seal the container securely and note the date it was created. Store it in a safe, dry place and decide the special milestone birthday—like 16 or 18 years old—when it will be opened.
First Birthday Time Capsule Ideas for Girls
A 1st birthday time capsule for girls is a heartfelt way to preserve memories, milestones, and keepsakes from her special day. Here are some thoughtful ideas to make her time capsule truly meaningful.
1. Handwritten Letters from Family
Ask parents, grandparents, aunts, uncles, and close friends to write letters filled with love, blessings, and memories. These heartfelt words will be cherished treasures when your daughter reads them years later.
2. Baby’s First Outfit or Dress
Include her first dress, onesie, or a tiny accessory she wore on her birthday. This adds a personal touch and gives her a glimpse into her earliest fashion and milestones.
3. Favourite Storybook or Lullaby Book
Place a storybook or a lullaby that she loved during her first year. It will remind her of bedtime cuddles and the comfort of childhood stories.
4. Photos from Her First Birthday Celebration
Add printed photos or a small album capturing moments from her birthday party. These memories will allow her to see the joy and love that surrounded her special day.
5. A Small Piece of Jewellery or Hair Accessory
A delicate bracelet, locket, or pretty hairband is a sentimental keepsake that she can cherish as a token of her babyhood. It gives the time capsule a timeless and elegant touch.
6. Special Newspaper or Magazine from the Year
Include a newspaper or magazine that highlights important events from the year she was born. This adds historical value and gives her a glimpse into what the world was like at that time.
7. A Personal Note About Hopes and Dreams for Her
Parents can write a personal note sharing their wishes, hopes, and dreams for her future. This heartfelt message will make the capsule even more meaningful when she opens it later in life.
1st Birthday Time Capsule Ideas for Boys
A first birthday time capsule for boys is a wonderful way to preserve memories, milestones, and special keepsakes from your little one’s early years.
1. A Tiny Sports Jersey or Cap
Include a small jersey or cap from a favourite sports team to reflect his early introduction to the world of sports and play.
2. Baby’s First Pair of Shoes or Sneakers
Add his very first pair of shoes or sneakers to represent the first steps he’s taking in life and the adventures ahead.
3. A Character Toy or Action Figure
Include a toy representing his favourite cartoon or superhero character from his first year to capture his early interests.
4. A Recorded Voice Message or Video
Save a digital recording or video of his first words, laughter, or a birthday message from family members, preserving his early voice and personality.
5. Milestone Cards or First Year Highlights
Add milestone cards or a small scrapbook detailing important first-year moments like first smile, first crawl, or first word.
6. A Classic Children’s Book or Nursery Rhyme Book
Place a timeless children’s book that you read to him often, reflecting the start of his love for stories and learning.
7. A Small Toy Car or Building Block
Include a small car, truck, or building block toy representing his curiosity and developing motor skills during infancy.
What Is the Right Time to Give Your Child Their Time Capsule?
The best time to give your child their time capsule is on a milestone birthday like 16, 18, or 21, when they can appreciate the memories inside. Other special occasions, like graduation or a wedding, also make meaningful moments to open it. Choose a time that feels most special for your family and child.
Creating a first birthday time capsule is a thoughtful way to preserve precious memories that your child will treasure for a lifetime. Including time capsule letters for the first birthday adds a personal touch, filled with love and hopes for their future. While preparing the capsule, you might also consider some first birthday time capsule questions to ask family and friends, making the experience even more meaningful. This special keepsake not only celebrates your child’s first year but also becomes a heartfelt gift that connects past moments with their future, creating lasting joy and nostalgia.
Also Read:
Return Gifts on 1st Birthday
First Birthday Photoshoot Ideas
First Birthday Party Games and Activities
1st Birthday Party Ideas – Themes, Foods and More
1st Birthday Wishes, Messages & Quotes for Baby Girl & Boy
15 Ways to Celebrate Your Baby’s First Birthday Without a Party
Read more
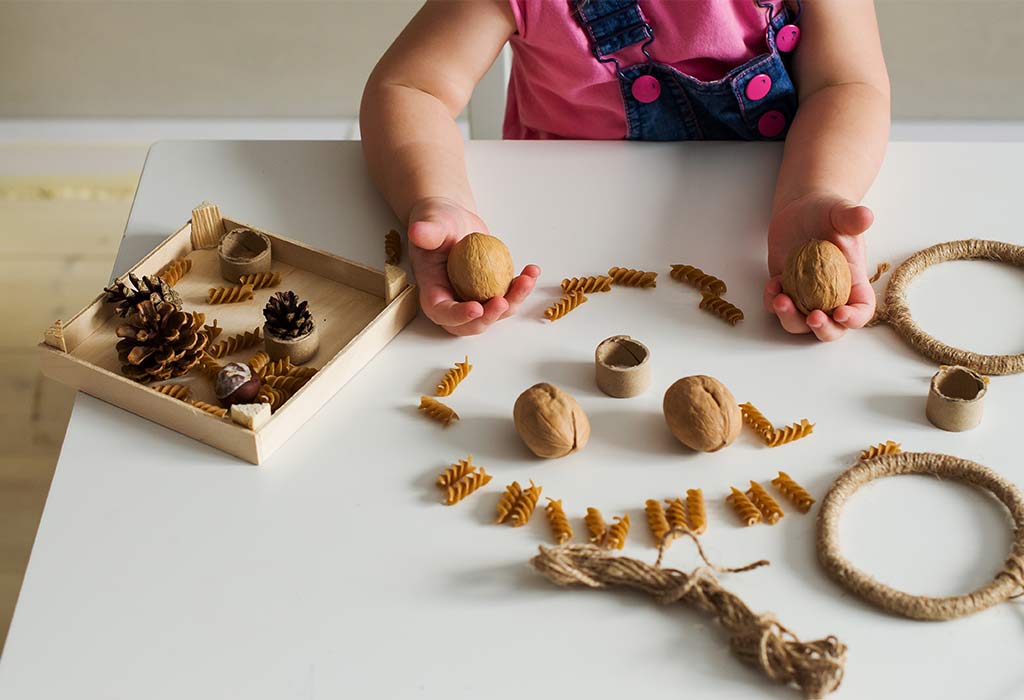
30+ Best Sensory Activities For 1 Year Olds
Congratulations on reaching this exciting milestone of parenting—a curious and active one-year-old! Sensory activities are your go-to solution if you’re looking for ways to engage, stimulate, and entertain your little one. Keep reading to discover why these activities are beneficial and some fantastic ideas for trying them at home.
What Are Sensory Play Activities?
Sensory play activities are interactive tasks designed to engage a child’s senses—sight, touch, taste, smell, and hearing (4). They entertain and educate, laying the foundation for various cognitive and motor skills. From squishy mud pies to colourful sensory bottles, these activities open a world of joy and learning for your child.
Amazing Benefits of Sensory Activities for One Year Old Babies
Sensory activities are more than just a way to keep your one year old busy; they are essential for overall development. Here are some incredible benefits of incorporating sensory activities for 1 year olds into your child’s daily routine.
Cognitive Development: Sensory activities boost cognitive growth by encouraging your child to explore various textures, colours, and sounds (1). They help improve memory, attention, and problem-solving skills, laying the groundwork for later academic success.
Motor Skills Development: Fine and gross motor skills are honed when your one-year-old grasps, pinches, or stacks objects. Whether picking up water beads or squishing playdough, these activities provide ample opportunity to refine motor abilities (5).
Enhanced Emotional Regulation: Sensory activities allow one year olds to experience a range of emotional responses in a controlled environment. They learn how to manage feelings of excitement, frustration, or joy, which contributes to better emotional regulation as they grow.
Improved Social Skills: When engaging in sensory activities like group painting or sharing a sensory bin, your child learns essential social skills. These can include sharing, taking turns, and effective communication—skills beneficial in nursery and beyond.
Increases Attention Span: The various sensory inputs maintain a child’s interest longer than other types of play, fostering an enhanced ability to concentrate. This can be particularly beneficial in preparing them for more structured learning environments in the future.
Sensory activities offer many invaluable benefits for one-year-olds, from emotional regulation to cognitive and motor skill development. Why not start incorporating some into your child’s daily routine?
Best Sensory Activity Ideas for Your 1 Year Old
As your child hits the one year mark, you’ll be amazed at how quickly they’re growing and learning. This is the perfect time to introduce sensory activities for 12 month old toddlers to boost their cognitive and physical development. Here’s a roundup of ten fabulous activities you can easily set up at home.
1. Texture Walk
Lay down different textured materials on the floor, such as bubble wrap, carpet, and tin foil. Let your little one walk or crawl over them to feel the various textures.
2. Colour Sorting
Use coloured balls and matching coloured containers for a simple sorting game. This helps recognise colours and hone fine motor skills.
3. Scented Playdough
Make your playdough with different scents using extracts like vanilla, lemon, or even spices like cinnamon. It’s a fun way for your 12 month old to explore different smells.
4. Animal Sounds Game
Create flashcards of different animals and make the corresponding sounds. This is an excellent activity for auditory discrimination.
5. Simple Musical Instruments
Gather household items like spoons, pots, and shakers to create simple musical instruments. Allow your child to explore different sounds.
6. Edible Sand
Crushed graham crackers or biscuits can be used to make edible sand. Provide cups and spoons for scooping and pouring for tactile fun.
7. Feather Touch
Let your child feel the soft sensation of feathers by gently brushing them on their arms, legs, and face. It’s an easy and soothing tactile experience.
8. Peek-a-Boo Fabric Box
Place different fabrics in a box and play peek-a-boo. Encourage your child to feel each fabric and discuss its texture, making it a multi-sensory activity.
9. Mirror Play
Set up a safe mirror at your child’s level. Make faces or play peek-a-boo, encouraging self-recognition and emotional development.
10. Water Pouring Station
Set up a small station with cups and bowls filled with water. Show your child how to pour water from one container to another. It’s a great way to develop coordination and enjoy water play.
So there you have it! Ten easy-to-set-up sensory activities for one year old toddlers that engage and contribute to their overall development.
Messy Play Sensory Activities for Your 1 Year Old
Embrace the mess and let your child dive into the wonders of sensory play! Messy play is a cornerstone of sensory exploration and provides endless opportunities for tactile experiences. Below are ten DIY sensory activities that are as easy to set up as they are fun to explore.
1. Finger Painting
Lay out some non-toxic paint and paper, and let your little one go to town with their fingers. This activity enhances creativity while being a sensory delight.
2. Oobleck Exploration
Create oobleck with just cornstarch and water for a fascinating lesson in fluid dynamics. This easy sensory activity is safe and fun to poke, stir, and walk on!
3. Cloud Dough
Mix flour and baby oil to make soft, moldable cloud dough. This dough is excellent for squishing and moulding and provides a wonderful tactile experience.
4. Spaghetti Worms
Cook spaghetti noodles and let them cool. Add a bit of food colouring, and you’ve got yourself some squishy worms for your child to play with.
5. Whipped Cream Play
Spread whipped cream on a plastic sheet. Let your child swirl, dab, and even taste this delightful treat.
6. Mud Play
Take some garden soil and water and have a natural mud pit. Perfect for digging, scooping, and generally getting messy.
7. Rice Sensory Bin
Coloured rice in a bin with scoops and small toys makes for hours of sensory fun. It’s an easy sensory activity that can be set up quickly.
8. Ice Cube Painting
Freeze coloured water in an ice tray and let your child paint with the melting cubes. It’s a beautiful mess that’s incredibly engaging.
9. Jelly Dig
Fill a small container with jelly and hide some small toys within. Your little one can dig them out and experience the jelly’s strange and compelling texture.
10. Scented Shaving Foam
Add food colouring and essential oils to shaving foam for a fragrant and colourful sensory experience.
Indulging in these DIY sensory activities with your child makes for engaging playtime and stimulates their sensory development in many ways. The best part is that these are easy sensory activities you can set up with everyday household items. So, why not roll up your sleeves and get messy?
Sensory Bottle Activities for One-Year-Olds
If you’re looking for mess-free options that still engage your little one’s senses, sensory bottles are the way to go. These fun sensory activities are perfect for tiny hands to shake, roll, and observe. Here are some ideas for sensory bottles specially designed for one year olds.
1. Glitter Swirl Bottle
Fill a bottle with water, add glitter, and add a drop of food colouring. Seal the bottle tightly, and let your child shake it to see the swirling glitter.
2. Ocean in a Bottle
Combine water and blue food colouring in a bottle, adding small sea creature toys or shells. Watch your child’s amazement as they hold the ocean in their hands.
3. Rainbow Rice Bottle
Take coloured rice and layer it in different colours in a clear bottle. When shaken, it’s a visual treat and a noisemaker, providing multi-sensory stimulation.
4. Nature Bottle
Collect twigs, leaves, and flowers to place in a bottle filled with water. This allows your child to explore natural textures and colours safely.
5. Pom-Pom Bottle
Fill a bottle with colourful pom-poms and tiny beads. Your child can roll or shake the bottle to move the pom-poms around, providing visual and auditory stimulation.
These sensory bottle activities are not just fun sensory activities; they are also incredibly versatile and educational. You’ll love watching your one-year-old explore, shake, and become fascinated with the world in a bottle!
Sensory Bag Activities for 1-Year-Olds
Sensory bags offer a squishy and safe way for little explorers to experience various textures and materials. These zip-lock wonders are perfect for tactile fun without the mess, providing an ideal sensory playground for your one-year-old.
1. Gel and Bead Sensory Bag
Fill a zip-lock bag with hair gel and add water beads or marbles. Seal the bag and tape it to a window or table. Your child will have a blast pushing the beads around through the gel.
2. Paint Swirl Sensory Bag
Put different non-toxic paint colours in a zip-lock bag and seal it tight. Your child can then squish the colours together, creating new shades and patterns without mess.
3. Alphabet Soup Sensory Bag
Fill a bag with water and add foam letters or numbers. Your little one can push the letters around in the water, making it a fun and educational sensory activity.
Sensory bags are fantastic for on-the-go or at-home play. They’re easy to make and easier to clean up, making them the perfect choice for busy parents and curious one-year-olds alike.
Water Sensory Activities for Your One-Year-Olds
Water activities are a splash hit with one-year-olds for a reason! They offer endless opportunities for sensory exploration and are perfect for hot summer days or indoor fun. Here’s a list of refreshing water-based sensory activities to get those little hands splashing and learning.
1. Floating Objects
Fill a tub with water and add various objects that float and sink. Let your child explore what stays on top and what goes under.
2. Ice Melting Experiment
Put small toys in an ice tray, fill it with water, and freeze. Let your child use warm water to melt the ice and free the toys.
3. Rubber Duck Race
Create a small water channel and let rubber ducks float down. Your child will love to watch and even try to race them.
4. Water Painting
Give your child a brush and a cup of water to “paint” on a sidewalk or fence. As the water dries, the painting will disappear, ready for another masterpiece.
5. Sponges and Buckets
Provide different-sized sponges and buckets. Show how to squeeze water out of the sponges into the buckets and transfer it back and forth.
6. Fish Netting
Add some small toy fish to a water tub and give your child a small net to catch them.
7. Water Bead Play
Non-toxic water beads provide a wonderful sensory experience. Add them to water and let your child scoop, pour, and feel them.
8. Soap Foam Bin
Whip up some soap foam and fill a bin. Add spoons and cups for endless scooping and moulding fun.
9. Rainy Day Drip
If it’s raining, set up a bucket to catch the rainwater. Your child will be fascinated by the dripping sound and the slowly filling bucket.
10. Waterfall Wall
Create a waterfall using a pegboard, funnels, and tubes. Your child can pour water at the top and watch it descend.
Water sensory activities are not only enjoyable but also offer a multitude of learning experiences for your one year old. So, roll up those sleeves and dive into some water-filled fun!
Tips to Follow While Doing Sensory Activities With Your 1-Year-Old
Sensory activities are a fantastic way to stimulate your child’s development, but it’s important to approach them correctly. Here are some tips to ensure a safe and enjoyable sensory play experience for your one-year-old.
1. Supervise at All Times
Constant supervision is crucial, especially for activities involving small objects or water. Never leave your child unattended during sensory playtime.
2. Test for Allergies
Before introducing a new material, especially food-based items like dough or edible paint, test for allergies by applying a small amount on your child’s skin.
3. Set Boundaries
Make sure to establish some ground rules to keep the play safe. For example, food used in sensory bins should not be eaten, and water activities should stay within a designated area.
4. Clean Up Safely
After messy play, ensure that the area is thoroughly cleaned to avoid any slipping hazards or ingestion of materials.
Following these tips will make sensory play a positive and enriching experience for you and your little one. Happy playing!
FAQs
1. When should you start sensory activities for your infant?
You can start as early as a few months, but tailor the activities to your child’s developmental stage.
2. What are some early indications of sensory issues?
Aversion to certain textures, extreme reactions to sounds, and difficulty with balance can be early indicators.
3. Are sensory issues a sign of autism?
While sensory issues can be a symptom of autism, they are not a definitive sign (3).
4. Can sensory issues lead to speech delay?
In some cases, sensory issues may contribute to speech delays, but they are not a direct cause (2).
Sensory play is more than just a fun pastime—it’s vital to your child’s development. Through various textures, sounds, and interactive experiences, your one-year-old learns about their world and their place within it. There are endless ways to engage your child’s senses, from messy play to water activities and from sensory bags to sensory bottles. As a parent, embracing these moments provides your child with valuable learning experiences and allows you to bond and create cherished memories. So roll up your sleeves, prepare to get a little messy, and most importantly, have fun exploring the world of sensory activities with your little one. Happy playing!
References/Resources:
1. BENEFITS OF SENSORY PLAY IN EARLY YEARS; Jasper Place Family Resource Centre; https://jasperplace-cfrc.com/benefits/
2. Tung. L. C, Lin. C. K, Hsieh. C.L, et al.; Sensory integration dysfunction affects efficacy of speech therapy on children with functional articulation disorders; Neuropsychiatric Disease and Treatment; https://www.ncbi.nlm.nih.gov/pmc/articles/PMC3552545/#:~:text=When%20a%20child%20has%20defects,speech%20development%20and%20articulation%20disorders.; January 2013
3. McCormick. C, Hepburn. S, Young. G. S, Rogers. S. J; Sensory symptoms in children with autism spectrum disorder, other developmental disorders and typical development: A longitudinal study; PubMed Central; https://www.ncbi.nlm.nih.gov/pmc/articles/PMC4918912/; September 2015
4. Top 5 Benefits of Sensory Play; Jersey Shore Learning Center; https://jerseyshorelearningcenter.com/2019/09/30/top-5-benefits-of-sensory-play/
5. THE BENEFITS OF SENSORY PLAY; ST MARY’S NURSERY SCHOOL; https://www.stmarysnurseryschool.org.uk/blog/2021/3/15/the-benefits-of-sensory-play
Also Read:
Activities for a 1-Year-Old
Five Senses Activities for Children
Read more
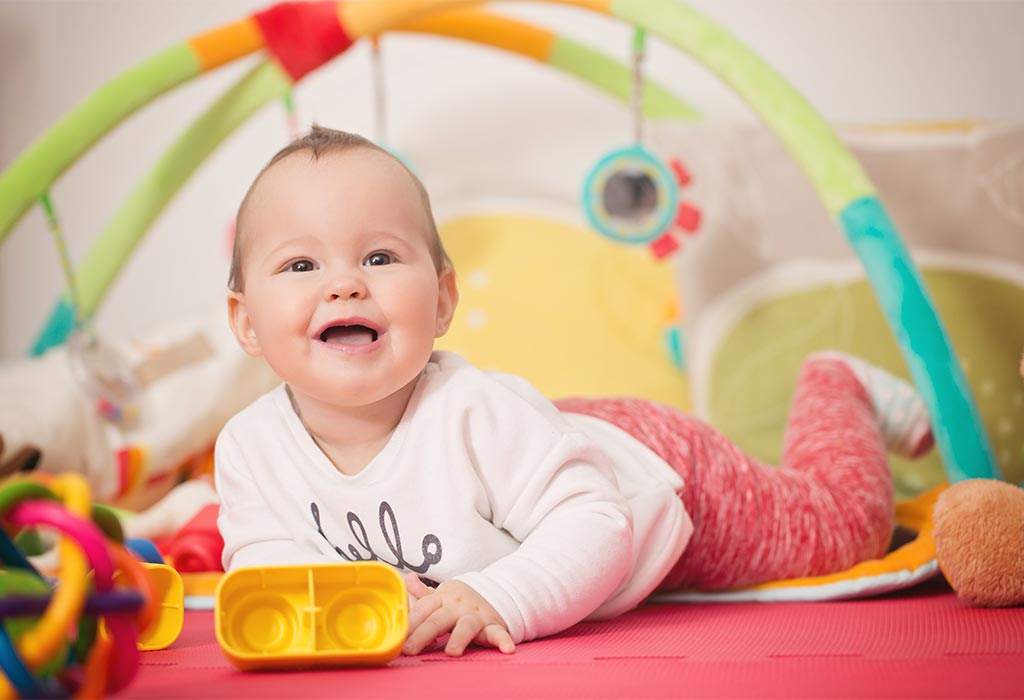
Best Fun & Developmental Activities For an 8-Month-Old Baby
There’s a unique charm in observing the fascinating milestones of an 8-month-old baby. From their babbles to their tentative scoots, they are constantly evolving. But as parents, it’s natural to wonder how we best support our baby’s growth. This article unfolds some of the best indoor, sensory, and educational activities for 8-month-old babies that promise fun and bolster development.
The eighth month of a baby’s life marks an explosion of physical and cognitive skills. This period sees your little one trying to sit without support, perhaps crawling or at least showing intentions to, and displaying an intense curiosity about the world. It is crucial to introduce activities that foster their development while ensuring they have a great time. Dive in to discover some enriching 8-month-old activities.
Development Boosting Activities For 8-Month-Old Babies
The eighth month of a baby’s life is like opening a window to a world filled with wonders. Their rapid development during this period warrants activities that keep pace with their boundless curiosity and burgeoning skills. Fortunately, there are a plethora of 8-month-old baby activities designed specifically for this phase. Parents can ensure that their little ones are constantly learning and having a blast by incorporating educational and indoor activities. Let’s explore some of these activities that promise fun and learning, including sensory activities for 8-month-olds.
1. Peek-a-Boo!
Why: Introduces the concept of object permanence (1).
How: Playfully hide your face behind your hands or a cloth and then reveal it with a cheerful “peek-a-boo!”
2. Sensory Bags
Why: Encourages tactile exploration and improves fine motor skills (2).
How: Fill ziplock bags with gel, rice, or beans and let the baby feel the different textures.
3. Sing-along Sessions
Why: It stimulates the auditory senses and vocal cords and improves language, cognitive, social, and emotional skills (3).
How: Sing familiar nursery rhymes, encouraging your baby to join with babbles or claps.
4. Crawling Tunnel
Why: Strengthens muscles, supports mobility, improves gross motor skills, and develops sensory perception (4).
How: Use soft cushions to make a makeshift tunnel, or get a play tunnel for your baby to crawl through.
5. Mirror Play
Why: Encourages self-awareness (5) and cognitive development.
How: Place a baby-safe mirror before them and let them observe their reflection.
6. Ball Roll
Why: Enhances hand-eye coordination and gross and fine motor skills (6).
How: Sit opposite your baby and gently roll a soft ball towards them.
7. Stacking Soft Blocks
Why: Fosters understanding of balance and spatial relations, gross and fine motor skills, hand-eye coordination/dexterity, and problem-solving skills (7).
How: Provide large soft blocks and encourage your baby to stack them up.
8. Textured Toy Exploration
Why: Offers sensory stimulation and development of gross and fine motor, cognitive, and social skills (8).
How: Introduce toys with different textures and materials for tactile development.
9. Storytime with Touch & Feel Books
Why: Develops listening skills and enhances tactile senses (9).
How: Read colourful touch-and-feel books that offer varied textures on each page.
10. Shake & Rattle
Why: Strengthens grip/ motor skills and stimulates auditory senses (10).
How: Hand them baby-friendly rattles or homemade shakers filled with rice or beans.
11. Floor Play with Toys
Why: Encourages mobility, core strength, exploration, and independence (11).
How: Spread out various toys at a slight distance and motivate them to reach or crawl towards them.
12. Puzzle Boards
Why: Introduces basic problem-solving skills, sequencing, fine motor skills, and hand-eye coordination (12).
How: Offer simple wooden-shaped puzzles suitable for their age.
13. Water Play
Why: It introduces the concept of liquid, stimulates tactile senses, and improves well-being and creativity (13).
How: Fill a small tub with lukewarm water, introduce splash-friendly toys and supervise closely.
14. Finger Painting
Why: Fosters creativity and sensory exploration (14).
How: Use edible, baby-safe paints and let them smear and play on a large sheet.
15. Dance & Wiggle
Why: Boosts balance and spatial awareness and introduces rhythm (15).
How: Play gentle tunes and dance with your baby, holding them or letting them wiggle on the floor.
Introducing these indoor activities ensures that your baby remains entertained, engaged, and educated within the comfort and safety of your home. Each has its unique blend of fun and learning, making them perfect for an 8-month-old’s development journey.
FAQs
1. What you should expect from your 8-month-old?
Your baby will be more active and curious at eight months. Expect them to try sitting without support, begin showing signs of crawling, babble more coherently, show recognition towards familiar people and objects, and express emotions like joy, fear, and anger. Your baby’s activity at 8 months will centre around exploring toys, responding to their name, and developing a solid bond with primary caregivers.
2. How can you develop a sense of object permanence in an 8-month-old?
Developing a sense of object permanence is pivotal at this age. Start with games like Peek-a-Boo. When playing, cover a toy with a cloth and reveal it after a moment, demonstrating that objects still exist even when not in sight. Consistent exposure to such indoor activities helps solidify this concept in their young minds.
As your baby approaches the end of their first year, treasure these moments of growth and exploration. Tailor these activities according to your baby’s preferences and watch them blossom. The activities listed above are not just fun but foundational, setting the stage for continuous learning and discovery. Happy parenting!
References/References:
1. Peek A Boo; Parent Trust for Washington Children; https://www.parenttrust.org/2017/07/12/peek-a-boo/
2. Ratnam, G.; Sensory Bags for Children – Importance and Easy DIY Crafts; FirstCry; https://parenting.firstcry.com/articles/sensory-bags-for-children-importance-and-easy-diy-crafts/; September 2020
3. Four benefits of singing with young children; Community Early Learning Australia; https://www.cela.org.au/publications/amplify!-blog/jan-2023/four-benefits-of-singing-in-early-childhood
4. The 9 Best Toddler Crawling Tunnels of 2023; Wonder Baby; https://www.wonderbaby.org/articles/crawling-tunnel
5. Reflecting on babies and mirror play; First Things First; https://www.firstthingsfirst.org/first-things/reflecting-on-babies-and-mirror-play/
6. Infant and Toddler Activity Pages: Roll the Ball; MSU Child and Family Development; https://www.canr.msu.edu/resources/infant-and-toddler-activity-pages-roll-the-ball
7. The Benefits of Block Play For Infants and Toddlers In Your Childcare Centre; The Power of Play; https://info.scholarschoice.ca/blog/the-benefits-of-block-play-for-infants-and-toddlers-in-your-childcare-centre
8. What Is Sensory Play? The Benefits for Your Child and Sensory Play Ideas; Cleveland Clinic; https://health.clevelandclinic.org/benefits-of-sensory-play-ideas; March 2022
9. Why you should share “touch and feel” books; First 5 Forever; https://www.slq.qld.gov.au/first5forever/blog/why-you-should-share-touch-and-feel-books; June 2021
10. Paulus, M., Hunnius, S., van Elk, M., and Bekkering, H.; How learning to shake a rattle affects 8-month-old infants’ perception of the rattle’s sound: electrophysiological evidence for action-effect binding in infancy; Dev Cogn Neurosci; https://www.ncbi.nlm.nih.gov/pmc/articles/PMC6987660/; January 2012
11. When and Why Baby Should Play on the Floor; Pathways; https://pathways.org/when-why-baby-play-on-floor/
12. Five Things Children Gain from Puzzle Play; Illinois Early Learning Project; https://illinoisearlylearning.org/blogs/growing/puzzle-play/
13. The benefits of water play for children’s development; St. Nicholas; https://stnicks.org.au/news/the-benefits-of-water-play-for-childrens-development/
14. 8 Ways Finger Painting Helps Children’s Development; Fraser; https://www.fraser.org/resources/blog/8-ways-finger-painting-helps-childrens-development
15. Benefits of dance for early literacy and development; State Library of Queensland; https://www.slq.qld.gov.au/first5forever/blog/benefits-dance-early-literacy-and-development
Also Read:
Best Activities for 9 Months Old Infants
Best Learning Activities for 7-Month-Old
Read more
20 Perfect Ideas for Your Baby's First Easter Basket
Your baby might not be ready to make Easter crafts or make some DIY items for the celebration, but that does not mean you cannot make their first Easter a grand one. When it comes to buying Easter gifts for your kids, shopping for them is the easiest, and here are some ideas you cannot miss out on.
What to Put in Your Baby’s Easter Basket?
When designing a baby’s 1st easter basket for your infant’s first Easter, the options are endless. You could go for super-cuddly soft toys, chewable, or anything useful to them.
Baby’s First Easter Basket Ideas – Cute and Useful!
To help you out, here are the top baby Easter basket ideas you could go out for.
1. Squeaky Eggs
These are fun games that your baby would love. These are hard plastic eggs with chicks inside them. The chicks are in different colors, which helps them learn their colors. They could sort and crack and would hear a gentle squeak with each squeeze.
2. Easter Basket Playset
Image Source : Pinterest
Babies love to play and giggle the whole day, and what better way to celebrate their first easter if not with an easter basket playset! If you cannot make a basket on your own because of so many responsibilities and taking care of your infant, these basket ideas are excellent options. Go for woolen easter eggs, soft parrot toys, elephants, chicks, and more.
3. Unisex Onesies
Kids should always wear soft clothes, and what better way to do it if not with soft and cozy onesies. They are available in many designs and are pretty, convenient, and useful.
4. Baby Paper
Babies love playing with the wrapping papers that you have at home. This Easter, gift them a baby paper that would be exciting to play with. Crinkly and fun, this gift would cheer up your baby and make your Easter basket unique.
5. Baby Shoes
Yes, they are either in your arms or in their father’s, but looking at cute baby shoes, you will not be able to stop yourself from purchasing them. Available in so many different colors, this would be a pretty useful gift.
6. Footprint Art
Go for a footprint art that would be a keepsake in the future. You can take your baby’s footprint and then get it printed out. A perfect first infant easter basket idea that you would be able to keep forever.
7. Sippy Cups
As a mother, you know sippy cups are indispensable. As your baby grows, at approximately the age of 6 months, you could start introducing your child to sippy cups so they can become independent and not rely on you. There are so many colorful cups available that the transition journey becomes a joyous one.
8. Teether
When it comes to infants, including teethers in your Easter basket for your baby would be a useful gift. Babies are always dropping off their teethers on the floor, and as a parent, it could get tedious trying to keep them clean all the time apart from all other parent duties. Keep a handful of teethers to keep your baby busy.
9. Soft Blocks
Soft blocks can be your baby’s constant companion. Playing with soft blocks is a sensory activity, and by touching different parts of the block and hearing different noises, they would be able to learn a lot.
10. Interactive Books
As your child grows, you need to introduce them to different touch and feel books. These are interactive books that babies would have fun with. Touch and feel books with chicks, animals, and food would be a perfect choice.
11. Bunny Ears
Enjoy the easter spirit by going for some bunny years for your baby. Take adorable photos of your baby with these bunny ears!
12. Headbands
We have to tell you how cute babies look with headbands on! It is a great gift for your baby girl; take some snaps and keep it as a keepsake.
13. Oball
This is an interesting toy that your baby would love. It is not hard, made of really flexible material, and could be easily grasped. The rattle inside the ball will introduce them to sounds.
14. Hooded Towel
Image Credit : Pinterest
Are they not just the cutest first easter basket idea? Add little bunny or duck hooded towels to the Easter basket and wrap them with them after their bath.
15. Baby Bibs
Image Credit : Pinterest
They truly are a necessity for new parents. There are so many patterns to choose from, and they are perfect for babies between the ages of 3 and 9 months. And trust us when we say you will be using many of them.
16. Plush Bunny
Image Credit : Pinterest
A baby easter basket cannot be complete without a plush toy. A plush toy is the perfect transitional toy for moving onto a proper stuffed one. Your kid would love it.
17. Rainbow Balls
Image Credit : Pinterest
Rainbow balls would entertain your kids, making all rattling noises. It would be a great simulation for the baby.
18. Soft Plush Bunny
A cuddly stuffed bunny is a classic Easter gift that your baby can hug, hold, and grow attached to. It provides comfort and can become a cherished companion.
19. Handmade Blanket
A soft, handmade or personalized blanket can provide warmth and comfort while being a meaningful keepsake for years to come.
20. Baby-Safe Easter Eggs
Instead of traditional plastic eggs, opt for soft fabric or wooden eggs that are large enough to be safe for little hands. They make great sensory toys for exploring colors and textures.
Wrapping up, we hope you enjoy these Easter basket ideas filled with different goodies for your baby. Easter is a wonderful and merry time to spend with your family. This year, make it even more special with these cute ideas.
Also Read:
Easter Inspired Baby Names
Easter Food Ideas for Children
Easter Pregnancy Announcement Ideas
Read more
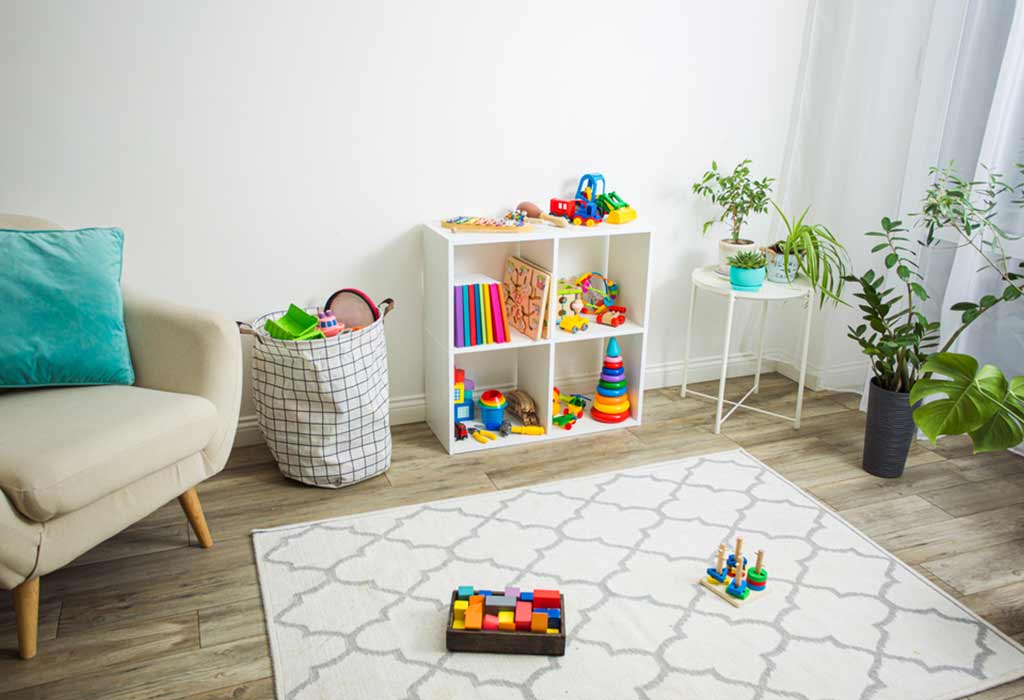
Amazing Nursery Organization Ideas and Tips
Even the most organized parents and caregivers may get overwhelmed by baby clutter. (It is conceivable that it multiplies rapidly.) And that’s completely understandable – you’re so busy being the center of your child’s world that things are going to get a bit out of hand at times! Whether you’re dealing with a poop-losion and looking for diaper wipes in the middle of the night, it’s all too easy to become overwhelmed, especially when sleep deprivation is combined with an inability to locate what you’re looking for.
Video : 10 Best Tips on How to Organise Your Baby’s Nursery
Having said that, although life with a newborn may undoubtedly be chaotic, there are methods to maintain order by looking through newborn closet ideas and nursery dresser organization ideas. Utilize these space-saving techniques such as bookshelf ideas for nurseries to create a more orderly nursery quickly.
Best Ideas for Organizing Nursery Closet
Have you recently had a baby? We don’t need to emphasize how crowded and unorganized the nursery becomes with baby things, clothing, and other necessities. What you need to assist you with that new parenting job are these oh-so-clever ideas for small nursery and DIY nursery storage ideas that make the baby room seem more lovely than ever while also keeping everything easily accessible.
1. Organize your diapering materials
Your changing-table routine will be more efficient, which will make life easier for both you and your child. Make the most of your time by having everything you may need on hand. Keep diapers, wipes, and creams in a basket or caddy, along with a cloth diaper or rag in case there are any unexpected accidents to clean up.
SOURCE: PINTEREST
2. Makeover the clothes in your child’s closet
The temptation to hang onto every bib and little onesie you’re given is strong, but you’ll likely end up with much more than you need. If your child’s wardrobe is bursting at the seams with clothing, put any excess away for your next child or give them to a women’s refuge. It’s important to remember that you shouldn’t require more than a week’s supply of anything.
3. Decorate the nursery differently each season
While all of those handmade blankets and framed pictures are definitely worth preserving, you don’t have to put them all on display at the same time – after all, who wants to spend all of their free time cleaning and organizing? With this, you can turn the closet into a nursery. Partition your seasonal décor into four piles, then rotate among them as the seasons and holidays change.
SOURCE: PINTEREST
4. Look for a crib that has storage space built-in
Even though babies are small, their possessions vary from bite-sized to gigantic — and there is more than enough of them. To save space, look for a crib with additional storage (like one with shelves or drawers) where you can store extra crib sheets or bulk purchases, such as backup diapers.
SOURCE: PINTEREST
5. You can adorn open shelves with baskets
Wide shelves are ideal for storing baby toys and books – provided you have the time and energy to arrange everything perfectly. Line shelves with canvas bins and fill them with anything you choose for uncomplicated storage. A bonus is that when children are a little older, it is simple to keep this arrangement tidy.
6. Stock and back stock should be kept in different locations
It may seem a brilliant idea to keep your whole supply of a particular item or commodity in one place, but this is a mistake. Few helpful nursery drawer organization ideas include certain goods, particularly disposable items, like diapers and toiletries, that you must have quick access to but do not need to have your whole supply within reach at all times.
SOURCE: PINTEREST
7. Build the baby’s closet from top to bottom
If the clothing in your newborn’s closet used to be for adults, redesign it to accommodate a pint-sized collection. You may increase the amount of room in your closet by installing second clothes rod a few feet below the existing one. Increase the amount of overhead space available by installing additional shelves, which are ideal for storing items you will keep for a long time.
SOURCE: PINTEREST
8. Rearrange things according to who has access
If you decorated your baby’s nursery when you were pregnant, you’ve undoubtedly realized that some of your pre-baby choices aren’t serving you as well as they might. If this is the case, read on. Perhaps the backup diapers are kept too far away from the changing table, or the sound machine is kept on a low shelf where the baby can now easily reach. If you want to save time in the long term, consider scheduling an afternoon for a fast rearrangement based on what you often use.
SOURCE: PINTEREST
9. Make use of the resources you currently have
The most effective organizational tools are often things that you already have. That over-the-door shoe organizer you never use? It’s time to throw it out. Instead of socks, loveys, and ribbons, use such organizers to store them. Don’t want to spend the money on a glider? The old chair in the basement may be just what you’re looking for. Once you start searching for items that can serve two purposes, you’ll see that they’re all over the place.
SOURCE: PINTEREST
10. Maximize the available space
Save space in the baby’s room by working smarter, not harder. For instance, can you store your child’s dresser inside the closet to provide more floor room for playing and reading? Could you position a floor light behind the glider instead of in the center of the room? Being inventive with the arrangement may make a significant impact.
SOURCE: PINTEREST
If you follow these Organization and Relocation principles, you may create the structured nursery of your dreams. Now that all of your baby items are organized, you don’t have to hunt for anything or go out of your way to get anything. We hope that this article helps you go through your transition phase.
Also Read:
Baby Nursery Rhymes with Lyrics
Amazing Woodland Themed Nursery Ideas
Gender-Neutral Nursery Ideas for Your Child’s Room
Read more
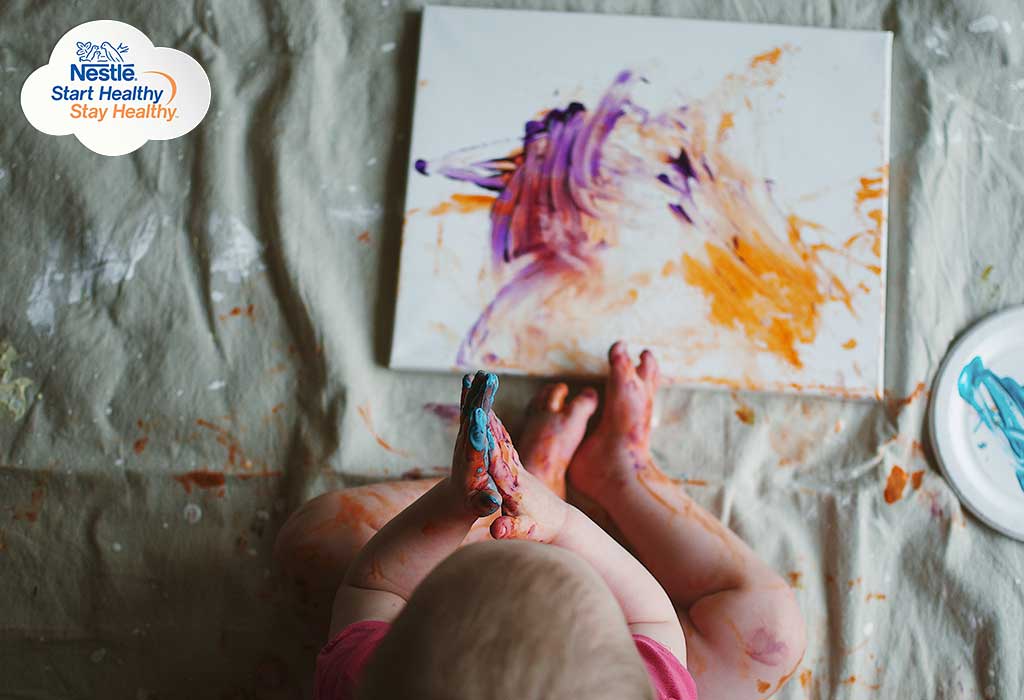
Four Tips to Develop and Nurture Your Baby’s Learning Skills for the Future
In collaboration with Nestlé Start Healthy Stay Healthy.
Did you know that babies begin learning from the time they are born? Yes. They are very quick at observing the environment they are brought up in. They can also demonstrate their understanding by responding, identifying, and differentiating between people, objects, and sounds. In a nutshell, learning begins in infancy. Therefore, it is very important for parents to have a healthy and positive environment around their little ones to nurture their learning skills and help them become future-ready, because learning never stops!
Your child’s future can be more challenging and demanding than the present. Therefore, you must begin to invest your time and energy to help your infant develop her learning skills.
So, what is it that you need to focus on right now? You need to help your baby develop some key skills, such as thinking, problem-solving, gathering and organising information, communicating, and developing judgement. It may sound like too much for your little one to handle, but these skills can be developed gradually. And, to help you do so, we have put together some tips that can come in handy when you need them.
Tips to Develop and Nurture Your Baby’s Learning Skills for the Future
Nowadays, each day demands a new plan, a new perspective, persistence, and patience. If you are all geared up to raise your munchkin to face the challenges her future would pose, remember that each baby has their own pace of learning. Go slow with these tips and enjoy the journey.
1. Nourish Your Baby’s Body
Step one for bringing about physical and mental development in your baby is to provide her little body with enough nourishment to grow. Breastfeeding plays an important role here. It is the only source of macro- and micro-nutrients that your little one needs to build immunity until she is ready to gum on some delicious solid food. Breastmilk contains nutrients like phospholipids, especially sphingomyelin, along with DHA (docosahexaenoic acid), ARA (arachidonic acid), choline, iron, zinc, and folic acid, which help establish early brain connections and set the foundation for learning. However, if you’re unable to breastfeed, your doctor will point you toward alternatives that ensure your baby’s nutrition needs are met. So, be sure to consult your paediatrician for proper guidance.
2. Talk to Your Baby
Your little one’s little brain is active, receptive, and responsive to sounds and actions. Talking to her will prove to be very helpful to develop her language and communication skills. She will listen to the sounds you make, watch your actions, and eventually, will even respond to them by smiling, laughing, or making sounds.
3. Stimulate Your Baby’s Brain
Games, such as hiding games, playing peekaboo, imitating, and copying, can help stimulate your child’s learning. You may also get a bunch of developmental toys, like coloured blocks, stackable cups or rings, object permanence boxes, etc., to take it a step further. Other than these, letting your baby read picture books and reading stories to her can also help.
4. Keep Your Baby Active and Fit
An active baby remains fit and has fewer learning issues as compared to inactive kids. All the nourishment you will be providing will need to be exhausted physically too. Activities like light stretching during bath time, sitting up, playing with toys, grasping and throwing toys, tummy time, bouncing in your lap, crawling, walking, etc., can help her develop those muscles and remain fit.
The future calls for your child to be healthy, attentive, confident, and courageous. She may have to face complex situations and juggle through several things simultaneously. The time you invest in her now will ease some stress for her in the future as she would be able to think, solve problems, and manage most things independently and creatively. While these tips can help you prepare your baby for learning, you must also consult your paediatrician and gain thorough guidance, as each infant requires different levels of attention and care.
Also Read:
Montessori-Inspired Toys for Babies, Toddlers, and Preschoolers
Montessori Mobiles for Babies – Types and Benefits
Importance of Sensory Bins for Infants and Toddlers
Read more

11 Proven Ways to Develop Better Memory & Concentration in Babies
In collaboration with Nestlé Start Healthy Stay Healthy.
Early parenthood is a memorable time as it is filled with witnessing your baby’s many firsts. His first smile, his first grimace, and even the first time he babbles something. But this may also lead you to wonder – does your baby remember these events?
As parents, this is one of the many questions you may have on your mind– when will my baby start remembering things? Is it right after birth or much later than this? Also, since babies learn to speak only around the time they turn one, it’s difficult to tell what your baby is thinking about and how good his memories are since he can’t communicate verbally.
Well, turns out he has already started! Your baby’s memory is developing in multiple stages. There’s no particular age at which it happens, and it’s a gradual process. But memory in babies begins very early, in fact, even before they are born!
What and When Does a Baby Remember?
According to a publication by Dr. Sinead Mullally and Dr. Eleanor Maguire, babies recognise their caregivers by their face, voice, and smell within the first few weeks of birth. Newborns can recognise their mother’s voice at birth, while breastfed babies can recognise their mother’s smell after one week. At three months, babies can remember new toys or pictures shown to them one to six days prior. By the time the baby is nine months old, he will remember more specific details, like where his toys are in the house. He’ll also be able to copy actions he has seen as long as a week before. While memory is fragile in the first months of life, it improves with age.
Is There a Link Between Memory and Concentration?
Concentration is the ability to sustain one’s attention and focus on an event or task at will. On the other hand, memory is the ability to recall, preserve and obtain information that has happened in the past. In terms of concentrating and remembering information, these abilities are important to the infant’s development. Yes, there is a strong link between memory and concentration. If you cannot concentrate long enough to focus on the details, it is impossible to remember this information at a later stage correctly.
Ways to Boost Your Baby’s Memory
Here are the things you can do during your baby’s first year to help strengthen his memory skills.
1. Add new skills.
Introduce your baby to a new skill over short periods of playtime. For example, if a new toy requires a skill your baby hasn’t learned yet, you can spread out playtime with that particular toy over the entire week. Teach your baby how to play with it, and then reintroduce the toy for five minutes at a time over a couple of days. This will help your little one remember the skill longer than him playing with the toy for a longer period for only a day or two.
2. Encourage consistency.
Keep your baby’s surroundings consistent and create daily routines. Make his playtime predictable for him. If he plays with the same toys at the same time and in the same room every day, he will remember the arrangement much longer than if playtime changes every day. Right now, your baby is only developing his short-term memory.
3. Talk to him.
Talk your baby through your actions to help him remember cause and effect. For example, when you flip the light switch down, show that the light comes on. When you flip it up, the light goes off. Say the words “Light off” and “Light on.” These actions will help your little one learn simple laws and anticipate them the next time you perform the action.
4. Say his name.
Call your baby by his name as much as possible. By four months, he’ll begin to recognise the sound of his name and associate it with your attention to him. When talking to him, saying his name aloud as often as possible will help him remember that the name belongs explicitly to him. Ensure you call yourself “Mommy” as much as possible to help him build the connection.
5. Make sure he’s getting rest.
Your baby will retain information better if he feels relaxed and rested. Don’t try to force him to learn something at every point in time. Let him explore freely during playtime or simply lie with him on the playmat and spend time with him. Make sure you take multiple breaks as this will help your baby consolidate his memories and retain them for a longer time.
Ways to Improve Your Baby’s Concentration
You can try these effective tips to improve his concentration skills.
1. Play games with him.
Playing games with your baby that require him to concentrate is a fun way to help him develop. Simple age-appropriate jigsaws, peg puzzles, and even assembling coloured blocks will help him focus on a task while playing.
2. Focus on foods that can boost his brain development.
The first three years of your child’s life are critical for his mental development. Hence, during this period, the right nutrition, along with proper stimulus can work wonders for his brain development. This, in turn, will help him concentrate better.
3. Turn off unnecessary distractions.
This includes the television. Although concentration is mostly about ignoring distractions, turning off the television will allow your baby to concentrate more fully on you or the activity he’s doing.
4. Observe your baby.
Observing the way your baby chooses to spend his time will make you realise that he is not just lying there but actually doing something. He could be gazing towards a window, staring at the ceiling fan, or simply grasping at dust particles in the sunlight. Every time you interrupt your baby’s musings, you’re discouraging his concentration.
5. Don’t encourage distraction.
It is quite common and sometimes even advised to distract your baby with a toy on the diaper changing table to “get the work done.” But what this does instead is it trains your baby not to pay attention. Baths, diaper changes, and feedings are not unpleasant chores for babies. Your baby will want to be invited to participate in an activity as much as he can.
6. Let your baby choose.
Over time you’ll observe that your baby will be more interested in the things he chooses than the things you choose for him. Therefore, allowing your baby to choose what he can do in his play environment instead of directing him to your choice of activity will better engage his focus, interest, and heightened concentration.
Most of the memories during infancy are short-term memories. Hence a child can recall a memory or remember things from three years onwards. It takes time for a baby’s brain to form a long-term memory structure. As a parent, your role is crucial in your child’s memory development. You can thus enhance his memory development through various memory-boosting games and exercises like the ones given above.
In case of any questions or clarifications regarding your baby’s nutrition or development, do get in touch with your paediatrician.
Also Read:
Water Play for Babies and Toddlers – Benefits and Fun Activities
Fun Sensory Activities for Babies
Fun Activities That Help You Teach Your Baby Say Mom
Read more
8 Unique Ways to Celebrate Your Baby's First Thanksgiving
First Thanksgiving of their baby is extra special for all parents. The parents want to express their gratitude uniquely by celebrating Thanksgiving with extra festivity to make it memorable. It is also the time when the extended family and friends gather to greet the little one and shower them with blessings and gifts. Planning everything for a perfect Thanksgiving for their child is a difficult task, so for the new parents, it can be a stressful time. They have to plan everything from the guest list to gifts and alongside make sure the baby is comfortable and happy on the special occasion. However, with a little bit of planning, everything can be managed flawlessly. So plan your baby’s first Thanksgiving and make the special day unique and memorable.
How to Prepare for Baby’s 1st Thanksgiving?
The birth of the baby is in itself special occasion for all parents. All the festivals in the year of the baby’s birth become extra special for the whole family. Each festival is special this year. So it’s no wonder that parents are extra enthusiastic for their newborn first thanksgiving. Though to make the baby’s first Thanksgiving enjoyable and memorable, planning is key. There are plenty of things to be planned from baby’s clothes to food and from gifts to whom to invite. Some ideas on how to prepare for baby’s first Thanksgiving
1. Make the Plan With the Family
Thanksgiving is celebrated to show gratitude to God for the blessing in form of a loving family. So it’s essential to celebrate it with the family from both parents’ sides. To ensure every family on the guest list is available for the party, inform them of the plan beforehand. This will give them time to plan their travel and holiday.
2. Pack the Baby’s Things
Thanksgiving Day will become hectic and busy with all the preparations and spending time with the family. Babies are messy and will require frequent change of clothes or a certain toy. So finding their clothes or toys in a crowded house becomes difficult. So it’s best to pack all the baby essentials in a bag or keep in an easily accessible place together. This will make sure the parents need not search for small things like warmer, thermals or toys everywhere. They just need to open the bag or cupboard and take the thing out without any time wasted in searching for it. Keeping all the things together saves time and energy of the parents.
3. Finalise the Decoration/Food/Activities/Games/Gifts Beforehand
It’s always best to plan everything from decoration to food and from gifts to games. Last-minute preparation creates panic and unnecessary tension. So once you have finalised the guest list, decide the other things such as decorations, food, gifts, etc. in advance. This will give you ample time to get things or change the things if required. Preparation will spare you from running to arrange things and instead you’ll be relaxed to enjoy the happy occasion.
4. Ask a Relative to Take Care of Your Baby
Being a new parent is 24 hours’ work, leaving no time for you to relax and enjoy. So to enjoy your baby’s first Thanksgiving, you should also have some time when you are not taking care of the baby. So ask a relative or two to step in and take care of your baby along with you.
Baby’s First Thanksgiving Outfit Ideas
Your baby is the star of the Thanksgiving celebration. Therefore, the star should be dressed in an outfit fit for the star. The family and friends will be there to meet the little one only. So, your baby has to look adorable and dressed up to the occasion. Few tips and ideas for baby’s first thanksgiving outfit are:
The obvious pilgrim outfit will make your baby look cute with everyone oohing and awing over the cutest pilgrim. The pilgrim outfit of a black creeper with a decorated belt and soft felt hat will also be comfortable for the baby.
In case you want the baby to be comfortable in his/her usual clothes and don’t want to go for the themed outfit, then just get a pilgrim baby hat or turkey baby hat. The baby hats are soft and cute, so comfortable for your baby to wear.
You can also get a customised onesie made for your little one. The customised onesie will be in a soft fabric with your preferred slogan perfect for the occasion.
A cute Thanksgiving bodysuit in navy blue is the perfect outfit for your baby boy’s first thanksgiving. It is comfortable and the colour is ideal for a baby boy.
Whatever outfit you choose for your baby, make sure it is warm and comfortable for the baby. Also, the baby should be wearing as many layers as you are wearing to stay warm.
Activities and Games Ideas
Any family get-together or party is incomplete without some fun-filled activities and games. Some games and activities to make your baby’s first Thanksgiving memorable are:
1. Football Game
If you have a backyard or garden, then playing football or any other outdoor game with family is the perfect Thanksgiving afternoon activity.
2. Make Pumpkin Craft
Let your family members’ bring out their creativity in pumpkin craft. You can give them craft supplies to make different pumpkin-themed crafts. Later these crafts can be given as gifts or displayed in your home as memories of your baby’s first Thanksgiving.
3. Create a ‘Thankful’ Tree
Thanksgiving is all about being grateful for you have received in life. What better way to express gratitude than a ‘Thankful’ tree. For this simple activity take a big board and draw a tree on it. Give your guests a chit of paper for them to write their ‘Thankful’ thoughts. You can pin or paste these chits on the tree to complete your ‘Thankful’ tree.
4. Thanksgiving Treasure Hunt
People of all ages enjoy treasure hunt, so hide different cute little things in your home. Give your guests some clues to find the hidden treasures. Your guests will spend hours playing this engaging game.
Travel Ideas
Travelling with your little one can be a bit difficult especially during Thanksgiving crowd. So in case you are travelling with your little one for their first Thanksgiving holiday, find below a few tips to make your travel comfortable.
Carry all the essentials of your baby in the diaper or a tote bag. In case you are flying to your destination, don’t check this bag. Carry it with you. This will ensure you have all the essentials of your baby at all times.
When travelling takes a few home items which your baby is familiar too with you such as the blanket or the toy on the crib. These items will help you to calm your baby when they feel overstimulated with the change in place or routine.
Maintain the same schedule for your baby. Babies don’t understand special occasions. So any change in their napping or feeding routine makes them uneasy. By maintaining the same routine you provide them with the security to adjust to new places.
Your baby is young, so they might feel overwhelmed surrounded by many relatives or posing for numerous pictures. Everyone in your family might want to hold the baby or get their pictures clicked with the baby, but you need to understand your baby’s boundaries. So know when enough is enough and politely ask your family to not overwhelm the baby.
Food Ideas
Any celebration is incomplete without special food. Your baby’s first Thanksgiving would be incomplete without them tasting the festival food. Some food tips and ideas for your baby’s first Thanksgiving:
In case your baby is still young to eat solid food, puree the seasonal foods such as pumpkin, sweet potato, peas, etc. to feed them.
Avoid salt and seasoning in the baby’s food. They may be able to taste pureed food but not old enough to eat salt and spices.
Mash the food item you want to feed your baby beforehand. This way they can enjoy the food with the family.
In case your baby is still young for solid food, don’t fret. Just their being there with the family is good enough to make the Thanksgiving feast special.
Consult the baby’s doctor beforehand if feeding solid food to the baby for the first time.
Other Things You Can Try for Your Child’s 1st Thanksgiving
Some other tips and ideas to make your baby’s first Thanksgiving special:
1. Start a family Thanksgiving Tradition
To make the baby’s first thanksgiving unique start a family tradition. It could be anything from watching a Thanksgiving movie or parade to making a special dish for Thanksgiving. Choose anything which bonds the whole family and creates memories.
2. Give Back to Society
Thanksgiving is the time to show gratitude for what you have. So what better way than to give back to society in some way. It can be volunteering at any retirement home or orphanage. You can also give gifts or Thanksgiving meals at any NGO.
3. Make a Personalised Gift for Baby by Yourself
Making a special gift for your baby by yourself to make your infant first Thanksgiving extra special. It can be anything from a card to a hand-knitted warmer or a collage of baby’s pictures or an onesie with baby’s name.
4. Record Memories
Your baby’s first Thanksgiving should be recorded to be shown to the baby when they grow up. Take pictures or record video of your baby during different activities with family members’. Though do remember to not to tire the baby or overdo the pictures.
Your baby’s first Thanksgiving is a joyous event for the whole family. Be it a simple meal with the family or a party for the extended family, anything would be special which involves the whole family. So celebrate your infant’s first Thanksgiving in your own unique way and make it memorable.
Also Read:
Thanksgiving Stories for Kids
Thanksgiving Songs for Children
History and Tradition of Thanksgiving
Pregnancy Announcement on Thanksgiving
Read more

20 Ideas to Make Baby's First Christmas Special
After your little one is born, you will probably want to document every little milestone in his life! While you love making these memories, you should definitely know that Christmas is an important season! Your baby’s first Christmas will be a magical experience for everybody in your family, and these are memories you will cherish for years to come. Make this holiday season less about giving gifts, and more about creating new family traditions and moments with the newest little member!
20 Exciting Ways to Celebrate First Christmas With Your Baby
Here are a few exciting activities and ideas to celebrate your little one’s first magical holiday season!
1. Have a Christmas Family Photo Shoot
The first Christmas of your little one is the perfect occasion to start the family tradition of taking family portraits together every year! Professional photos with the little baby are something you will definitely cherish forever. You could either go for natural lights and an outdoor setting for the photos, or if you feel like the indoors are better, decorate your home in the Christmas spirit to make the perfect backdrop. These would also make adorable Christmas cards you could send to your extended family and friends!
2. Make a Holiday Countdown Jar
Instead of going for a typical Advent calendar, why not make it more fun with a countdown jar? Take 24 strips of green and red paper, and write out special activities you can do with your little baby. These can include some cute and classic activities you can do with your baby, like reading a Christmas-themed book or and walking on the snow. Toss all these activity papers into a jar, and take one out to do each day. By Christmas Eve, you will be able to make an entire month’s worth of beautiful memories for your little one’s first Christmas, instead of just two or three days. You could even download pre-stamped strips from the Internet, which will contain all the fun activities you could do with your baby, or you can take blank strips to write down some of your own ideas.
3. Visit a Christmas Tree Farm
A trip to pick up the tree from the Christmas tree farm is an adventure your baby would definitely enjoy. Your baby will surely have a good time with the entire family, and you could take a lot of videos and pictures! Moreover, it is the perfect occasion to start teaching your baby a few Christmas traditions.
4. Preserve Your Baby’s Handprint
During your baby’s first Christmas season, you will definitely take a lot of pictures that you can look back on. But, there is simply something a bit extra about preserving your little one’s handprint in paint or salt dough. This way, you can always remember how tiny and adorable your little one was during his first Christmas. You could even turn this into your baby’s first Christmas ornament, and hang it on your Christmas tree. There are adorable kits that can provide you with enough materials to preserve your baby’s handprint which you can find in your local stores. You could also paint the baby’s palm, and imprint it onto paper to make it a fun activity.
5. Make a Holiday Card
You would probably want to show off your perfect angel to your family and friends, so why not go for it during this holiday season? Collect a few toys and accessories that are related to Christmas, like a Santa hat or a reindeer soft toy, and take pictures as the little one explores these objects. If your baby is too little to hold things to play with, place him in front of a holiday setting, or lay him down on a Christmas-themed gift wrap. After you are done taking pictures and getting the perfect shot, you could either upload the photo to digitally create adorable holiday cards, or you could give the photo to a local store that would make the holiday cards of your baby.
6. Dress Up
Make the holiday season more exciting by dressing up your little one in a variety of festive holiday attire! This can be anything from green and red onesies and wintry hats to formal baby clothes. You could also go for popular Christmas characters, like Santa, a reindeer, or even a little elf. Or, go for characters from your baby’s favourite Christmas-themed books to make your baby’s first Christmas photo ideas unique! These outfits will make your holiday extra special, and taking photos and videos of these would make a wonderful addition to your photo albums. Dressing up is perfect for making a Christmas-themed holiday card, and the entire family can participate by dressing up as various characters of Christmas.
7. Get a Special Gift
Your little one would definitely not remember what gift he got during his first Christmas, but it would not stop him from enjoying and playing with his new favourite present. You do not have to go overboard with the present – choosing something special for your baby’s first Christmas gift to bring him joy is enough! You could either pick the perfect baby’s first Christmas toy or even an heirloom gift your baby would treasure as he grows older.
8. Hang Your Little One’s First Stocking
Now that your family has expanded with the arrival of your little bundle of joy, it is time to go shopping for an adorable Christmas stocking to add to your mantle. There are so many cute options for your baby’s first Christmas stocking, along with sweet stuffers to put in it!
9. Meet Santa for the First Time
One of the most iconic moments of your baby’s first Christmas is meeting Santa! This is something you will not want to miss, and it is the best way to celebrate your little one’s first Christmas. Even though the baby will not know or understand who Santa is, or have any memories of taking a picture with Santa, the photo op is simply too cute to ignore, and the memories will be great to look back on.
10. Begin a Christmas Cookie Tradition
If making cookies is not already a part of your Christmas tradition, now is the perfect time to begin! You could make cookies in your baby’s favourite flavours, and turn this into a family tradition. You will be able to find many Christmas-themed cookie recipes online, and this is something everyone will definitely look forward to having every holiday season. Your baby can watch you make the cookies, and as he grows older, he can even help you every year!
11. Read Holiday Books
Take a break from popular children’s storybooks you may have, and get a few special Christmas books. You could either get them from your local book store or borrow a few from the library. For each day of December, you could read a new Christmas-themed story and bond with your little one. You could go for classics like “The Night Before Christmas” and “The Polar Express”. This would be something everybody in the family could look forward to, and is a wonderful idea for baby’s Christmas presents.
12. Make a Christmas Eve Box
This is a wonderful idea for an adorable holiday tradition you could start with your baby’s first Christmas. All you have to do is take an empty box, gather a few Christmas Eve-related things like holiday pyjamas, cookie cutters to make cookies for Santa, Christmas books, and a few carrots for the reindeers!
13. Slice Off a Christmas Tree Round
This could be another wonderful family tradition. If the Christmas tree in your home is fresh, you could saw off a round of the tree’s trunk, and write on it a few details, like the date, and sweet messages like “Today was my first Christmas (baby boy’s name)” or “What a fun first Christmas (baby girl’s name)”. This piece can be preserved beautifully, and will make the perfect memento for the little one’s first Christmas. You could do this for the years to come, and store everything in a box with other little mementoes.
14. Make a Christmas Baby Mobile
You could make your own DIY baby mobile with a Christmas-y twist. Decide on a festive colour scheme, and you could use anything from stuffed animals to green and red pom-poms to create the hanging bits!
15. Make a Special Christmas Dinner
Sitting together with the family during mealtime is always fun, but with a Christmas touch in it, dinner time with the family will be spectacular! With the new little member in your family, you will have to think a bit more about the Christmas menu. You could look for ways to include baby-friendly dishes to your traditional holiday menu, while making sure everybody in your family can enjoy the feast.
16. Contribute to the Charity
Never forget that Christmas is the festival of sharing. Whether you share love or money, it is your will that counts. Collect your baby’s belongings, like clothes and toys, that he does not need anymore and donate to the charity. This way you and your baby will be contributing something for charity and people in need. You can also teach your kid the value of gratitude.
17. Spend Precious Time With Your Baby
Festivities bring along tons of tasks and with a baby in the house, it gets impossible to take care of things proportionally. So this Christmas, give your child the best Christmas present – your time and love. Designate one day of yours to your little munchkin, click lots of photos, create videos, and preserve the moment for coming years.
18. Start a Baby’s First Christmas Book
Design a custom book or scrapbook documenting your baby’s first Christmas. Include photos, anecdotes, and memories from the holiday season, making it a cherished keepsake to revisit as they grow.
19. Take a Festive Family Walk or Drive
Enjoy the holiday lights and decorations around your neighborhood or visit places known for their extravagant holiday displays. Take your little one on a walk or drive, soaking in the festive atmosphere together.
20. Create a Baby’s Christmas Time Capsule
Put together a time capsule filled with items or memorabilia from your baby’s first Christmas, such as a tiny outfit, a favorite toy, a handwritten note, or photos. Store it away to open on a future Christmas, reminiscing about this special time.
Your little one’s first Christmas can be a very exciting time for the entire family, but it is best to not overbook yourself. While doing all the fun activities during the day, you should also try sticking to the usual routine for sleeping, eating, and playing. However, no matter how you plan on spending this holiday season, from special Christmas-themed activities to special family time, you will surely be able to create a lot of beautiful memories.
Also Read:
Baby Christmas Photoshoot Ideas
Tips on How to Baby Proof a Christmas Tree
Read more

Tips and Ideas to Design a Twin Nursery
Designing the perfect nursery for a little one can be intimidating, but the thought of creating a spacious room for two kids at the same time might make you stressed. Creating a room for two kids is a completely different game, and you would have to plan and make decisions that are twice as hard. Squeezing two little ones into the same room may seem a bit tough, but with a few simple and creative ideas, you will be able to transform your nursery into a functional yet beautiful space for two!
Things to Keep in Mind While Designing a Nursery for Two
Here are a few tips that will help you create the perfect nursery for your two little children.
1. Start early.
Compared to a single kid, twins tend to arrive a bit early, and once they have arrived, you will not have time to finish your nursery – you will not have time to even think about finishing your nursery! Moreover, when you are in the last few weeks of your pregnancy, and are nearing your date, you will not be able to do basic chores. Therefore, it is best to plan and finish your nursery as early as possible, and finish the nursery before the third trimester begins.
2. Don’t double up.
When you are expecting twins, you may feel tempted to purchase two of everything for them. However, doubling up on things is not necessary. Though you are going to have two babies, you only have one pair of hands, and you will not be able to change both the babies at the same time. Using two different dressers to keep all their clothes is also a waste of energy and time. Therefore, it is best to go for a single changing table combo and dresser, and use drawer separators to help keep your babies’ things organized.
3. Choose the perfect crib.
Though doubling up on other objects may not be the best idea, doubling up on cribs might be a bit more convenient. Twins can actually share a crib, but it is best to separate them once they start bumping and rolling into each other. Look for cribs that have simple, clean lines and low, even sides. It is best to skip the larger convertible cribs, since choosing the small ones will help give the nursery a natural look, and will provide more space.
4. Crib placement is important.
Finding enough space for two cribs in the room can be pretty tough, but you should also be pretty picky about the placement of your cribs. Never place the cribs directly beside or in front of the window, since the afternoon sun can heat the little ones and cause problems. Kids may also fall through the open window when they start walking. And, keep things like heavy window accessories or blind cords out of reach.
When your twins start growing older, sleep time would become playtime, and they may even try to climb into the other’s crib. Though you may not always be able to have enough space between the cribs, a certain degree of separation will ensure restful and safer nights.
5. Add a personal touch.
Though your twins may look alike, they can – and will – still have their own unique style. Therefore, there is no need for getting matching sets of everything. You can get matching items for big things like cribs, but when it comes to dresses and accessories, you can add a personalized touch to each of your infants. If you are having a boy and a girl, then you can give your nursery a neutral shade with different color themes for each baby.
6. Keep the room simple.
It is best to go for a minimalistic approach when you decorate your nursery. When you have two babies in the room at the same time, things will get really busy. Therefore, for a cleaner and uncluttered option, it is best to keep your twin nursery décor simple. Do not overdo accessories, and keep toys to a minimum in the room.
7. Include extra seating.
If there is extra space in your nursery, you should consider including an extra chair in the room. When both of your babies are demanding attention, you will be relieved to get extra help. Adding a little seat or an extra armchair will ensure seating for any relatives and friends who are willing to help you.
8. Safety first.
When it comes to twins, the danger is double since they have a little partner-in-crime to help them take more risks and come up with schemes. Therefore, childproofing is an absolute must to keep the daring duo safe. Be aware of simple nursery accidents, and take the time to baby-proof your nursery to avoid those accidents.
6 Best Twin Nursery Design Ideas
Check out these beautiful twin boy and girl nursery ideas!
1. Twin Girl Nursery
Source: Pinterest
With beautiful floral accessories and lacy flounces, a vintage-inspired space embellished with gold and pink accents would be perfect for your pair of little angels. The crown jewel of the room could be rose-gold cribs, which, despite their footprint, would make a beautiful statement.
2. Twin Boy Nursery
Source: Pinterest
A small and comfortable room with a monochrome color scheme would be perfect for your little twin boys. The black and white theme is a wonderful choice for parents who wish to try something new instead of going for the traditional blue twin boy room ideas.
3. Gender-Neutral Nursery
Source: Pinterest
For twin nurseries, a neutral color palette is the smartest choice, especially for parents who are expecting a girl and a boy. Getting the right theme from a neutral color palette can be tricky, but when it is done right, it can turn the room into a beautiful, complex, and rich space. This will allow the more subtle and elegant design elements to take center stage by edging out bright colors. With simple neutral colors and patterns, you will surely be able to create a classy space.
4. Pop of Color
Source: Pinterest
If you liked the idea of a gender-neutral baby room, but wish to add a bit more color to the room, you could try painting the ceiling, or go for statement patterns on the walls! Opulent rooms with ivory and gold cribs and large damask print wallpapers will surely bring in an Old Hollywood feel, especially if the room is accented with crystal in the accessories and lighting.
5. Geometric Design
Source: Pinterest
A perfectly balanced space is always deeply satisfying, and you can incorporate this balance into your twin babies’ bedroom. With soothing geometric shapes, soft neutrals, and perfect symmetry, the room will feel very dreamy, and be perfect for girls, boys, or both. This is a wonderful twin nursery idea for small rooms!
6. Bright and Colorful Design
Source: Pinterest
If neutral colors are just not your style, then you could for a color-centric nursery for your twin babies. A South African-inspired theme would be perfect to bring in the colors of life, and would help vibrant hues pop off your single-colored walls. You can infuse the nursery with warmth and energy, while the primary palette keeps everything gender-neutral.
With these creative tips and beautiful design ideas, you will surely be able to come up with the perfect nursery to welcome home your pair of angels!
Also Read:
Amazing Gender-Neutral Nursery Ideas
Pink Nursery Ideas for Baby’s Room
Cute Nursery Theme Ideas for Your Baby Girl’s Room
Read more
The Childhood Memories of a Cute, Little, Naughty Kid
This story is about me when I was just ten months! My mom took me to my grandpa’s house to stay there for some days as they wanted to spend time with me. I was the only infant to play with during that day, and I was rather very cute! They used to play with me a lot and enjoyed even the tiniest of my smile. When it was time to return after ten days, they wished mom, and I could stay longer, but it was not possible. Even I used to enjoy there as it was a cool and calm place with loving and caring people! And I was a naughty one!
On the day of returning back home, I didn’t want to come back, so I just went up the stairs crawling slowly without making any noise while mom was busy packing and grandma too was helping her. But when the car came to pick us up, everybody released that I was missing and they were tensed and busy searching for me all around!
Suddenly, my elder cousin found me, and he soon told mom about it. Mom ran towards me. She cried with joy and hugged me! This decreased the stressed atmosphere and led to a happy ending! Everyone finds it quite funny as I was just ten months.
I would like to share another incident from when I was two years old. One morning, I asked my mom to take me to the bathtub, and she denied as she was busy doing some stuff. So, I went to the bathroom and then locked it up as I saw elders doing it. Basically, I tried to copy them, but when I tried to open it, I was not able to do so! I got scared as I didn’t know how to switch on the light and cried a lot and shouted for help!
Mom came running with some keys and tried to open the door. Unfortunately, none of the keys was the correct one. She tried all the keys and at the end called dad, and he came with a key maker, who made a key and opened the door. While all this was going on, I got tired of crying and slept on the floor. Mom got worried as I was not speaking for some time. When they opened the door, I was found sleeping on the floor. Mom picked me up and cried hugging me, and when I opened my eyes, I laughed looking at my parents.
But again, it ended happily with an ice-cream party to make me feel better! Even today, whenever I lock the door, I remember this incident! Childhood is the best part of our lives. Live every moment of it and enjoy it!
Disclaimer: The views, opinions and positions (including content in any form) expressed within this post are those of the author alone. The accuracy, completeness and validity of any statements made within this article are not guaranteed. We accept no liability for any errors, omissions or representations. The responsibility for intellectual property rights of this content rests with the author and any liability with regards to infringement of intellectual property rights remains with him/her.
Read more
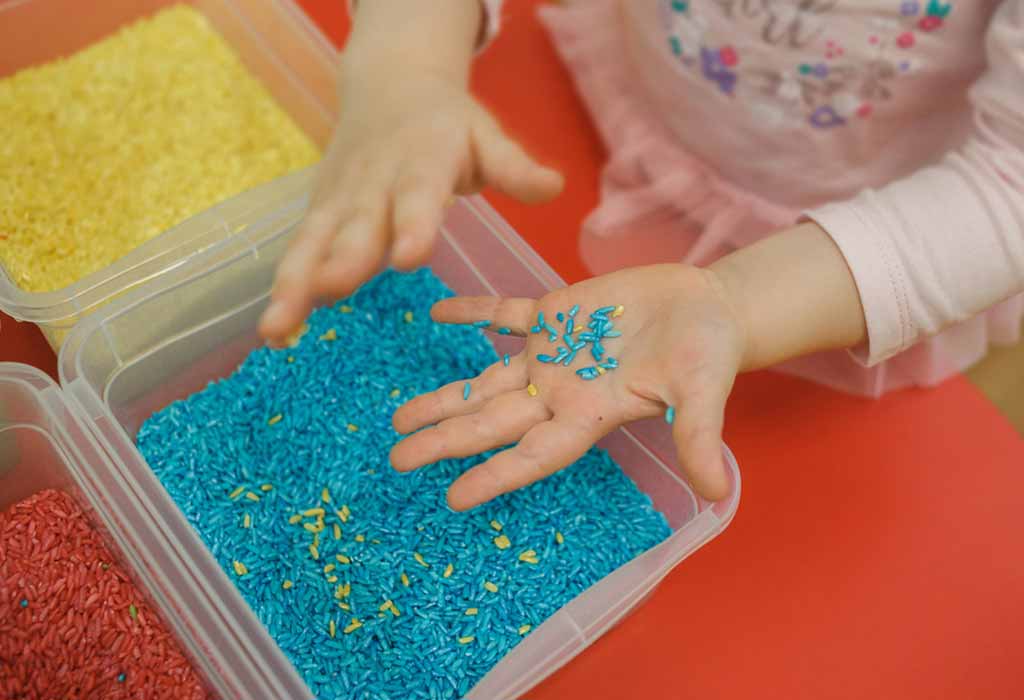
Importance of Sensory Bins for Infants and Toddlers
Babies are such wonderful beings, full of life, curiosity and optimism. The wonder with which they discover the world is such a joy to watch. However, some of these characteristics must be imbibed from a very young age so that they are familiar with their surroundings and don’t feel confused or scared when they come in contact with something new. In order to impart this knowledge, many parents opt for sensory bins for toddlers. Sensory bins help toddlers learn and discover by “doing”, and also provide the parents a few precious minutes where the child is occupied. Read on to find out more about sensory bins and how they can be useful in your life.
What Are Sensory Bins?
Sensory bins for toddlers are of various kinds but they are all essentially bins filled with a range of things that are different in shape, size, colour, texture, etc. with which toddlers can play, grow and discover. These are great in a way where there are bins available that allow children to play with their siblings, friends, and even their parents. The big advantage of these bins is that it is easy to change the composition of the bins. You can choose to put anything from your day to day life as well. These things can be all different in one aspect or the other or they can be the same texture but different things, just to get your toddler acquainted with new feelings and experiences.
What Are the Benefits of Sensory Bins?
You might be right in wondering whether there are any merits in taking this approach but there are definitive advantages in using sensory bins, and we have listed some of them below.
1. Cognitive Development
Sensory bins help kids empty and fill the bins, which imitate a hide and seek kind of play. This is important for their development.
2. Calming Activity
Turns out, giving kids a few bins with different things inside them helps to channelise all of that excess energy they have inside and helps them calm down. In case you feel like your toddler has a lot of pent up energy, have him sit in front of these boxes and just explore. This is also when you might come up with the best sensory bin ideas for toddlers.
3. Attention Span
Sometimes it might seem like your little one is all over the place and it can get a bit overwhelming. Sensory bins are a great way to get them to focus on one thing. They might just enjoy this more than structured activities since there is no goal as such.
4. Fine Motor Skills
Since the objects in the bins are of different shapes, sizes, and textures as well, it helps in developing your toddler’s fine motor skills. Holding, moving around, and handling small objects can be difficult for toddlers but the sensory bins give them a fun way to engage in it and understand it better.
5. Sensory Exploration
This is probably the most important benefit that comes out of sensory bins. The bins give the chance for toddlers to explore and understand different kinds of senses, namely, touch, seeing different colours, shapes, and textures, sounds that they produce, their taste and smell. It is a very important trait to develop and the earlier it is, the better it is for your little one!
Tips for Playing in a Sensory Bin
Before you get too excited and start making your own bins, we have a bunch of tips that you can use in order to make this experience more efficient and wholesome. Here they are!
Choose items that you can reuse instead of stuff that is perishable. Reusing materials saves you money and time and you can spend that on seasonal materials that are available only for a certain amount of time in a year.
Pick items that are age-appropriate.
Make sure to set up the bins in such a way that they are away from the main part of the house so that in case it gets messy, you can clean up and nothing gets damaged.
Make sure to reuse the bins for other activities as well including colour and letter sorting, activities with names and words, etc.
Include items that might help your toddler academically as well.
Sensory Bin Filler Ideas
The number of things that you can fill sensory bins with is endless. There are too many things with different textures, shapes, and sizes that exist on this planet. You might find it overwhelming and may not know what to put in them at all but do not worry, here is a list of items that you can fill up the bins with to make it fun for you and your little one.
Rice
Beans
Salt
Lentils
Coffee beans
Oats
Popcorn
Leaves
Coconut husk
Pebbles
Ice
Water
Bubbles
Cooked pasta
Jello
Whipped cream
Snow
Cooked beans
Cotton
Nuts
Hay
Cream
Boiled potato
Mustard seeds
Acorns
5 Sensory Bin Ideas for Babies and Toddlers
Our list is pretty comprehensive but in case you are still a bit confused about how to go about it, we have 5 ideas that you lock up and keep in your sensory bin storage. These ideas can be easily executed with things that might mostly be lying around your house.
1. Dyed Pasta Sensory Bin
Source: Pinterest
Pasta is a great ingredient with which a sensory bin can be made. It is easily available in most households and all you need is a couple of other things to put together this multi-coloured, dyed pasta sensory bin. Here’s what you will need to do.
Supplies Needed
Dry pasta noodles in different shapes and sizes
Rubbing alcohol
Sealed bags
Food colouring of choice
Paper towels
Baking pan
Instructions
Take the different kinds of pasta and seal them up in bags based on shape choice.
Splash each of the bags with some rubbing alcohol.
Pour the food colouring into each of the bags. The colours should be different in each bag.
Shake the sealed bags vigorously to a point where it seems like all the pasta has been covered by the food dye.
Let it sit for about 10 minutes and keep shaking the bag at regular intervals so that the dye seeps in.
Line the baking pan with a lot of paper towels and open up the bags.
Make sure they don’t intermingle or else the colours will get mixed.
Once they have dried, use a large sealed bag and transfer them so that they can be used in the future.
2. Rainbow Rice Sensory Bin
Source: Pinterest
Much like pasta, most households have rice, otherwise, it is pretty easy to find some at your closest supermarket. Rice makes for a great dry item to use in a sensory box. Toddlers love to fiddle around with tiny things. Here’s how you can make a rainbow rice sensory bin.
Supplies Needed
Ziplock bags
Non-toxic paint
Parchment paper or paper towels
Baking tray
A large container to store the final rice
Measuring cups for your kids
Instructions
Take half a cup of rice and put it in a ziplock bag.
Squeeze a little amount of paint in the bag. A lot of paint will make it all sticky. We use paint because it’s the only thing that helps coat the rice well and gives it a vibrant colour.
Press and shake and mix up the bag such that all the rice is coated in the paint.
Once coated, lay it all out on a sheet on a baking tray to dry out.
It might take an hour or two but once it is done, keep it aside and start with the next colour.
Make sure to include multiple colours since it’s known as rainbow rice.
3. Pond Inspired Sensory Bin
Source: Pinterest
A pond is a great way to introduce your little one to nature and what is around him. This ‘outdoor sensory bin is a great way to make them understand many textures and shapes and also different animals that live in ponds. Read more to find out about how you can set this up.
Supplies Needed
A tub
Water
Plastic aquarium animals like frogs, snakes, etc.
Pebbles
Water beads that swell on touching the water
Twigs and sticks
Books on pond animals
Instructions
Fill the tub with water and soak the water beads until they become big.
Add the frogs, fish, snakes, etc. You can allow your child to set this up as well.
Throw in some pebbles to add some colour.
Place the sticks so that they act as logs in the water, and your tub is ready.
It is useful to have a book on pond animals and nature so that this can act as an educational tool for your toddler as well.
4. Halloween Sensory Bin
Source: Pinterest
Halloween is one of the most fun holidays of the year and what better way to introduce your little toddler to it than through a sensory bin. It can be a scary holiday for many babies but if they have been introduced to it from a very early age, the transition and understanding can be a bit easier. These gooey bags with eyes are a real hit with the young ones. Read on to find out more about how you can set this up for your children.
Supplies Needed
Ziplock bags
Shaving cream
Googly eyes
Hair gel
Hand soap
Glue
Instructions
Use multiple Ziplock bags and fill them up with different textured liquids such as hand soap, shaving cream, and the hair gel.
Once the bags are full, get your little one to fill them up with the googly eyes. He can choose to sort them by size as well.
Next, make sure the bags are closed tight.
Take the glue, in this case, super glue, and close the bag shut so that your toddler does not end up opening the bag.
Once the superglue has dried up, your toddler can play away! Finding googly eyes in different textures is a very new experience for your young one so make sure you’re there by his side.
5. Christmas Sensory Bin
Source: Pinterest
Christmas is a joyous occasion for millions of people around the world and you must instil that joy and wonder in your toddler from a young age. Christmas is a time of wonder, family, and gifts and we have the perfect winter sensory bin just for you.
Supplies Needed
Snow
Small orange peg, buttons, and a hat
Green chart paper
Tiny decorations
Small gift boxes
Instructions
Take a bunch of snow and put it in the box to form a base.
On one end of the box, make a small snowman from all the snow that you gathered.
Decorate the snowman with a small piece of fabric, a piece of a carrot, lentils, etc.
On the other end of the bin, use the green chart paper and fold it into a conical shape to resemble a tree.
Use markers and other decorative items to set up the tree such that it looks festive.
Teach your toddler all about Christmas and you can also teach them how to make small snowballs. Snow is a great texture that not many people around the world get to experience.
Precautions
Although it might seem pretty straightforward to be able to play with sensory bins, there are definitely some important things that you should keep in mind before introducing your toddler to different bins that you have setup. Here are some of them.
Be wary of choking hazards. Since a lot of the items that are included in the bin will be small-sized, you must be careful, especially if your toddler is in the habit of putting everything in his mouth. Change up the contents of the bin based on your requirement so long as they are safe for children.
Be sure to replace some of the items that have a shelf life. This could include many things that have different textures.
Do not force your toddler to touch something that he/she does not want to touch. Make them comfortable with it and encourage them by slowly doing it yourself and showing them that it is safe.
Towels! Have lots of towels ready in case you have different textures because it can get messy and you do not want your toddler to wipe their hands on your precious furniture.
Sensory bins are definitely a great way to keep your kids occupied but also to get them to learn a lot. As adults, we often underestimate the power of learning that a toddler’s mind can accomplish. Since they are growing, they are much more impressionable than we’d like to believe. We hope that these ideas that we have provided will help you to make your own sensory corner in the house with a bunch of stuff that your toddler can play with and experience.
Also Read:
Sensory Processing Disorder in Toddlers
Sensory Activities for Infants
Read more
Sort By
 Latest
 Most Popular
 Trending
Please select atleast one Filter