How To Make a Clock for Kids
Creating a DIY clock for kids can be both educational and enjoyable, blending the learning of time-telling with creative crafting. As you sit with your children to craft their clocks, you have a perfect opportunity to teach them how to read time. Whether you’re looking for simple projects using household items or more intricate designs that teach about clock mechanics, there are numerous ideas to explore. From paper plate clocks to personalised photo clocks, these crafts enhance children’s understanding of telling time and encourage their creativity. Here’s your guide on how to make a clock for kids, where we explore 15 clock craft ideas that are perfect for engaging children in learning through hands-on activities.
15 Amazing Clock Making Ideas for Kids
Here are fifteen great ways on how to make wall clocks for kids. Each idea fosters a hands-on approach to learning and encourages imaginative exploration in crafting their unique timepieces.
1. Paper Plate Clock
This is a simple idea but can get great results.
What You Will Need
- White paper plate
- Sketch Pens
- Blue construction paper
- Scissors
- Tack Pin
- Crayons
How to Make
- Write down the 12 clock numbers on the paper plate’s face.
- Give your child sketch pens and ask them to write down the numbers on the marks.
- They can then use the crayons to colour the face of the plate.
- Draw one small arrow and one big arrow on the blue construction paper and help your child cut them out.
- Use a tack pin to stick the ends of the arrows in the centre of the plate.

2. Car Clock
Let your kid make his clock using cars for you.
What You Will Need
- 12 toy cars
- Cardboard sheet
- Sketch Pens
- Old clock
- Glue gun
How to Make
- Take an old clock and remove the battery-powered movement and the hands.
- On a large cardboard sheet draw a circle of 15-inch diameter.
- Cut out the circle and place the toy cars in the position of the numbers of a clock. You can choose your child’s favourite car to mark bedtime.
- Use the glue gun to paste the cars on the outer edge of the cardboard sheet.
- Attach the battery movement and hands to the centre of the sheet.
- Let your child decorate the face of the clock with sketch pens.
3. Colour Wheel Clock
A colourful clock perfect for kids.
What You Will Need
- Square canvas
- Acrylic paints – red, blue, and yellow
- Brushes
- Paint palette
- Clock mechanism
- Black marker
- Scale
How to Make
- Divide the canvas into 12 sectors using a black marker and scale. Explain the concept of the colour wheel to your child.
- There are three primary colours- blue, red, and yellow. When you mix these colours, you get secondary colours they are familiar with. For example, when blue and red are combined, you get purple. When blue and yellow are mixed, you get green; when you mix red and yellow, you get orange.
- Paint the first sector yellow, the fifth sector red, and the ninth sector blue with the acrylic paints.
- Use the paint palette and mix the colours to derive secondary colours.
- Paint these colours in the sectors between the primary colours. You can also refer to a colour wheel.
- Leave the canvas on a terrace or balcony to dry.
- Once dry, fix the clock mechanism to the centre of the canvas and use the marker to write the number on the edge of the clock.

4. Candy Stick Clock
This can be a favourite of the kids, as they may end up getting a few candies out of it too.
What You Will Need
- 12 ice cream candy sticks
- White construction paper
- Scissors
- Glue
- Clock mechanism
- Watercolour Paints
- Cardboard sheet
How to Make
- Draw a circle of 10-inch diameter on the cardboard sheet and cut it out.
- Paste the construction sheet on the cardboard and cut out the excess.
- Mix two mugs of water with watercolour paints in a large tub in a colour your child likes.
- Place the candy stick in the coloured water for a few hours.
- Cut twelve 2-inch diameter circles from the remaining construction paper and colour them like sticks.
- Write the clock numbers on these circles and leave them to dry with the candy sticks.
- Glue the dried sticks onto the surface of the cardboard sheet radially. Then, glue the numbered circles at the ends of the candy sticks.
- Attach the clock mechanism and the clock hands at the centre of the cardboard sheet.
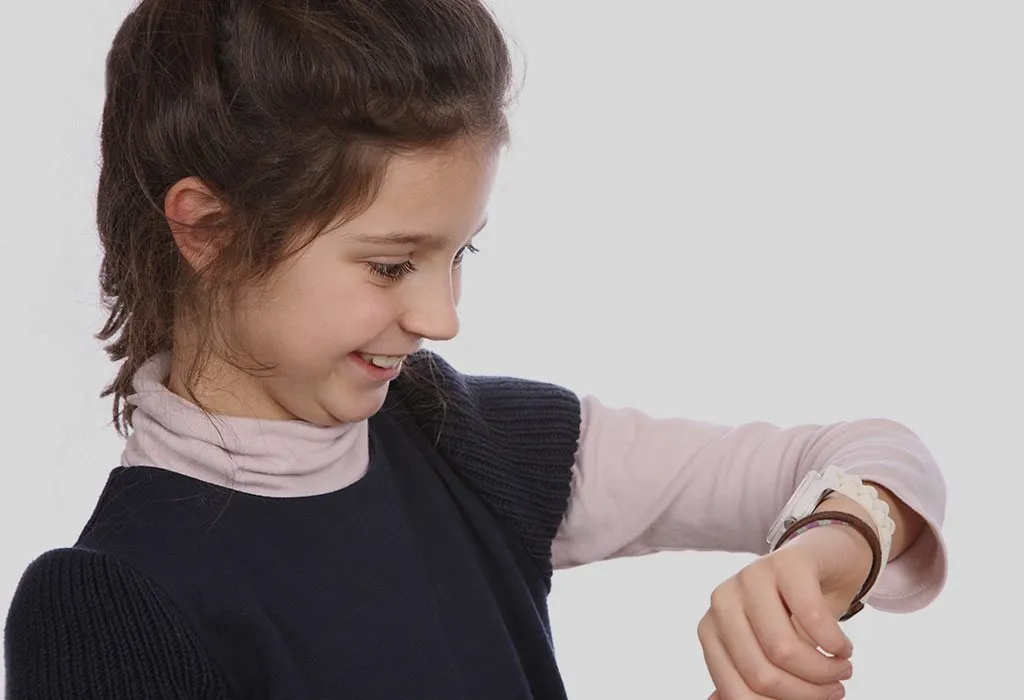
5. Wrist Watch
Help your kid make his own watch.
What You Will Need
- Brown construction paper
- Brightly coloured construction paper
- Embellishments
- Sketch Pens
- Glue
- Scissors
- Velcro strip
- Eyelet
How to Make
- Measure your child’s wrist and cut out a thick band from the brown construction paper to go around your child’s wrist.
- Paste the two sides of the Velcro on each end of the paper.
- Use the brightly coloured construction papers to make a wristwatch dial and hands. Make sure that the hands are a contrasting colour to the dial.
- Mark the numbers on the dial with the sketch pens.
- Place the dial and the hands together and secure with an eyelet.
- Paste the dial onto the brown wristband.
- Glue on the embellishments along the band.
- Use the Velcro to fasten the ‘watch’ onto your child’s wrist.
6. Activities Clock
Help them track activities in a fun way.
What You Will Need
- Construction paper
- Drawing Pens
- Glue
- Clock mechanism
- Colouring pencils
How to Make
- Cut out an 8-inch diameter circle from the construction paper and write down the clock numbers. This is the face of the clock.
- Mark your child’s daily activities, such as snacking, eating, playtime, brushing teeth, reading, quiet time, and sleeping.
- Cut out two-inch diameter circles from the remaining paper and make illustrations of the activities on these smaller circles.
- Paste these illustrations along the circumference of the face of the clock. Ensure that the illustrations correspond to the time your child does those activities. So, bedtime can be around eight, while playtime can be around 4.
- Attach the clock mechanism and hands to the centre of the dial.
7. Penguin Clock
A cartoon-clock can get any kid excited to learn time.
What You Will Need
- Construction paper – black, white, orange, and blue
- Sketch Pens
- Clock mechanism
- Glue
How to Make
- Cut out the shape of a penguin from the black construction paper.
- Use the white paper to make the penguin’s eyes and hands. Use the orange paper to make its beak and the blue paper to make a bow tie.
- Cut a 6-inch diameter circle from the white paper and stick it on the belly of the penguin.
- Mark the clock numbers on the white circle and attach the clock mechanism to the circle’s centre.

8. Face Clock
Another interesting clock idea that calls for creativity.
What You Will Need
- Cardboard sheet
- Construction paper
- Glue
- Sketch Pens
- Clock mechanism
How to Make
- Draw and cut a 10-inch diameter circle from the cardboard sheet.
- Mark the shapes of eyes, a nose, and a mouth on the construction paper and cut them out. You can use brightly coloured paper.
- Stick these onto the cardboard circle to form a face.
- Write down the clock’s numbers on the edge of the circle.
- Attach the clock mechanism and hands at the centre of the circle.
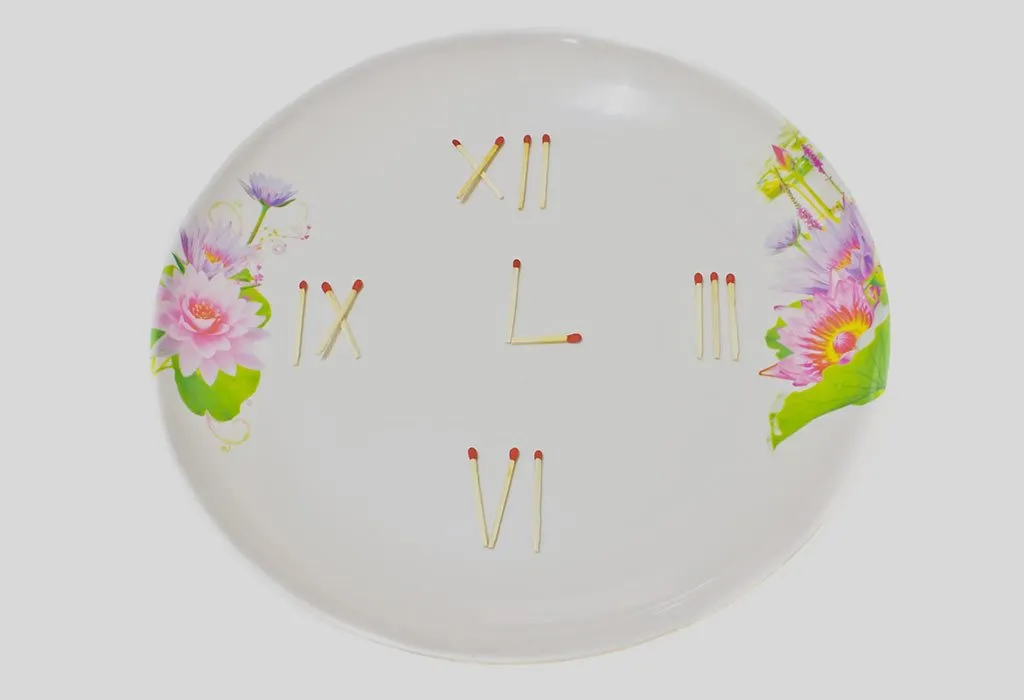
9. Matchstick Clock
A household item, matchstick can be used for crafts like these too.
What You Will Need
- Matchsticks
- Cardboard sheet
- Glue
- Clock mechanism
How to Make
- Draw and cut a 12-inch diameter circle from the cardboard sheet.
- Use the matchsticks to form Roman numerals for the clock face.
- You can omit a few numbers as long as 12, 3, 6, and nine are marked.
- Paste the numerals at the correct position on the sheet.
- Attach the clock mechanism and hands at the centre of the circle.
10. CD Clock
Put those old CDs to use.
What You Will Need
- Old CD
- Construction paper – two colours
- Sketch Pen
- Clock mechanism
- Glue
How to Make
- Draw a twelve-petal flower on the construction paper. Make sure it is larger than the CD.
- Stick the CD at the centre of this flower.
- Cut out 12 circles and write the clock numbers.
- Stick the circles at the correct place, one for each petal.
- Attach the clock mechanism and hands at the centre of the CD.
11. Puzzle Clock
Combine puzzle-solving with creating a unique timepiece.
What You Will Need
- Completed puzzle
- Clock mechanism kit
- Glue (Mod Podge recommended)
- Paintbrush
- Varnish or sealant
How to Make
- Glue the completed puzzle onto a flat base.
- Cut out a clock shape from the puzzle base.
- Attach the clock mechanism to the centre of the puzzle piece base.
- Seal with varnish or mod podge for durability, and display your puzzle clock proudly.
12. Recycled Bottle Cap Clock
Upcycle bottle caps into a colourful clock, teaching sustainability while creating a functional piece of art.
What You Will Need
- Bottle caps
- Clock kit
- Strong adhesive (hot glue recommended)
- Paint or markers (optional)
How to Make
- Arrange and glue bottle caps in a pattern on a flat surface.
- Attach the clock mechanism to the centre of the bottle cap base.
- Paint or decorate the bottle caps as desired.
13. Button Wall Clock
Design a colourful button wall clock perfect for teaching time with a playful array of buttons.
What You Will Need
- Assorted buttons
- Clock mechanism kit
- Glue
- Large round base (wooden plaque or cardboard)
- Paint or decorative paper (optional)
How to Make
- Arrange buttons in a pattern on the base.
- Use glue to secure buttons in place.
- Attach the clock mechanism to the centre of the base.
- Adjust the clock hands and hang your button wall clock for a vibrant timepiece.
14. Lego Block Clock
Construct a playful clock using Lego blocks.
What You Will Need
- Lego blocks
- Clock mechanism kit
- Clock hands
- Super glue or adhesive
How to Make
- Build a base using Lego blocks, ensuring it’s sturdy enough to support the clock mechanism.
- Attach the clock mechanism to the Lego base.
- Glue the clock hands securely in place.
- Personalise with additional Lego pieces for a unique design.
15. Emoji Face Clock
Craft a fun emoji face clock using basic craft supplies.
What You Will Need
- Yellow cardboard or foam board
- Clock mechanism kit
- Markers or paint
- Scissors
- Glue
How to Make
- Cut out a large circle from the yellow cardboard or foam board to create the emoji face.
- Use markers or paint to draw your favourite emoji expression on the circle.
- Attach the clock mechanism to the centre of the emoji face.
- Secure the clock hands in place and hang your emoji face clock for a cheerful addition to any room.
FAQs
1. What age is suitable for making these clocks?
With adult supervision, these clock craft ideas are suitable for kids around four years old. Older children can handle more intricate designs involving cutting and assembly.
2. How long does it take to make clock crafts?
The time required varies depending on the complexity of the design and materials used. Simple clocks like the paper plate clock can be completed in under an hour, while more detailed projects might take a few hours.
3. Are these crafts educational?
Yes, these clock crafts for kindergarten are educational in multiple ways. They teach children about time-telling, encourage creativity, improve fine motor skills, and can even involve learning about materials and tools used in crafting.
These clock craft ideas for kids offer a variety of creative ways to teach them about telling time while also fostering their artistic skills. Whether crafting at home or in a classroom, these activities not only engage children but reinforce the importance of time management from an early age.
Also Read:
Cloud Crafts for Kids
Teach Children to Read Clock
Easy Origami Craft Ideas for Children
Creative Button Crafts Ideas for Kids
Easy to Make Superhero Crafts for Children
Was This Article Helpful?
Parenting is a huge responsibility, for you as a caregiver, but also for us as a parenting content platform. We understand that and take our responsibility of creating credible content seriously. FirstCry Parenting articles are written and published only after extensive research using factually sound references to deliver quality content that is accurate, validated by experts, and completely reliable. To understand how we go about creating content that is credible, read our editorial policy here.


