15+ Easy Origami Crafts for Kids: Fun Paper Folding Ideas


Origami is the ancient art of paper folding without cutting, glueing, pasting, or marking. This creative practice is not only fun but also helps improve the aesthetic sensibilities of children. Engaging in easy origami craft for kids can enhance their fine motor skills, concentration, and patience. The beauty of paper folding craft lies in its simplicity—transforming a plain sheet into intricate shapes using just folds. From animals to flowers, origami offers endless possibilities for young minds to explore. It’s a fantastic way to introduce kids to geometry, symmetry, and problem-solving in a hands-on manner. Whether at home or in the classroom, this timeless art form fosters creativity and imagination in a structured yet enjoyable way.
Fun Origami Paper Craft for Kids
Origami for kids is a fun activity. Listed below are 16 origami ideas for kids with simple origami instructions for kids.
1. Rose
Awaken the botanist in your child with this rose origami.
How to Make It
- Take a square paper and fold in half horizontally.
- Unfold and fold vertically.
- Fold each corner into the middle crease blitz base.
- Fold each corner into the middle crease making a double blitz.
- Fold again, in the same way, making a triple blitz.
- Press down over the folds to make creases.
- Curl back the layers of the paper.

Image Credit: AI-Generated Image
2. Fox
The fox is very simple to fold and very easy for beginners.
How to Make It
- Fold the square paper in half diagonally.
- Fold in half again.
- Open up the last fold. With the long side of the triangle in the bottom, fold it so that the top and bottom points touch.
- Draw eyes and nose.

3. Simple Paper Plane
Paper planes are the first origami models most kids learn to make.
How to Make It
- Fold a rectangular paper lengthwise and make a crease in the middle.
- Unfold and fold the two corners towards the crease.
- Fold the corners again, but this time the folds should be lengthier than the earlier fold. It should resemble a roof of a hut with steep sides.
- Fold again in the middle but this time outwards.
- Fold the sides down so that they are aligned with the bottom of the object and make sharp creases.
- Lift the sides up to form wings.

Image Credit: AI-Generated Image
4. Boat
A boat is the most well-known origami art for kids.
How to Make It
- Fold a rectangular paper in the middle.
- Keeping the paper folded, make another fold vertically.
- Open the fold and then using the crease fold the bottom corners up to the middle.
- Fold one layer from the bottom up along the bottom of the front flaps.
- Repeat the step for the opposite sides.
- Unfold and then fold the bottom corners along the crease.
- Unfold and insert the overlapping flap on the left underneath the right section.
- Open the bottom and fold it making a crease.
- The fold one layer up to the top and repeat the same on the other side too.
- Pull open the right and the left flaps and flatten it in the shape of a boat.

5. Japanese Fan
Japanese fans are one of the simplest origami creations.
How to Make It
- Take a rectangular shape paper.
- Start folding in long skinny folds using your fingers.
- Fold till the end of the paper.
- Once the folding is completed, press it to make a crease on each fold.
- Keeping the folds all together and vertically, make a fold in the middle.
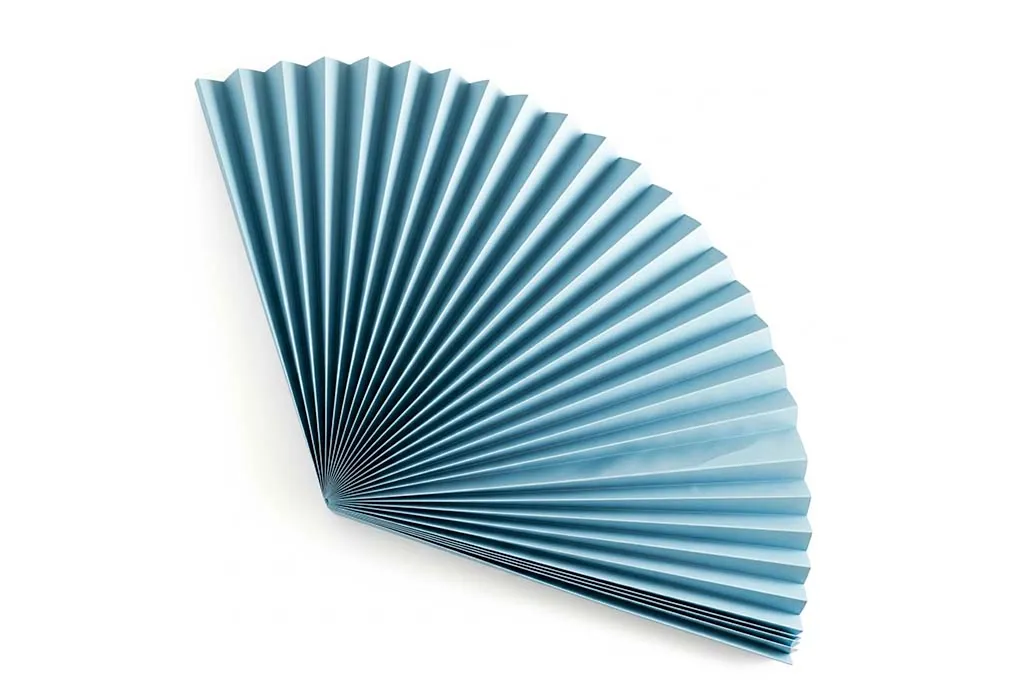
Image Credit: AI-Generated Image
6. Penguin
It has easy folds and can be made by small children.
How to Make It
- Take a square piece of paper (black on one side and white on the other side).
- Make a crease by folding (it will look like a triangle after folding) at the centre with the black portion inwards and white portion outwards.
- Unfold it again. Then fold the bottom corner just below the crease.
- Turn the paper over (white portion upwards).
- Fold in the left and right sides keeping enough space to create an invisible triangle.
- Fold the pointed top downwards (this will be the head).
- Tugging at the middle crease, fold the sides back.
- Pull out the beak and flatten the back of the head.

7. Fortune Teller
The Fortuneteller is easy to make, and children have a great time playing with it.
How to Make It
- Take a square white sheet of paper.
- Join the upper half of the paper with the lower half.
- Unfold. Then fold the left corner of the upper half and bringing the base till the crease line.
- Do the same in the right corner.
- Continue with the same process in the lower half as well bringing both the corner bases to the crease line.
- Turn the side and again fold the corners bringing all the corners to the centre.
- Colour all the triangles in different colours.
- Write a fortune underneath each flap.
- Fold the bottom half to the top

Image Credit: AI-Generated Image
8. Cup
An easy-to-do origami model.
How to Make It
- Take a square piece of paper, preferably origami paper.
- Fold the bottom corner to the top corner.
- Fold the left edge of the triangle to the bottom edge, and then unfold.
- Fold the left end corner of the triangle to the end of the crease line on the right.
- Fold the right corner to the left corner.
- Fold the top flap down and turn the paper over.
- Do the same on the other side too.
- Open up the pocket
9. Elephant
Help your kids get close to nature by teaching them to make an origami elephant in very simple steps.
How to Make It
- Take a square paper.
- Fold the paper in half by folding the top corner to the bottom corner.
- Press with your fingers and create a crease.
- Unfold. Then again fold from the left side to the right side. The again unfold.
- Fold the left and right edges of the triangle to the centre crease.
- Fold both top corners and bring them to the side.
- Fold the left and right corners in.
- Turn the figure over.
- Fold up the elephant’s trunk and fold in. Then bring the trunk down keeping a bit of the trunk folded in.
- Fold the trunk in an out like an accordion or just the way we do while making a fan.
- Pull the trunk down and add eyes with a marker.

10. Butterfly
The origami butterfly’s wings spread out nicely and look really realistic.
How to Make It
- Take a big square piece of paper.
- Fold along the diagonals and then unfold.
- Fold along the other diagonal and then again unfold.
- Fold the square horizontally and then unfold.
- Fold the square vertically and again unfold.
- Holding the two sides, push the centre together.
- Flatten the sides above and below until it becomes a flat triangle with layers.
- Take the bottom corners of the top layer triangle and fold them to meet at the top corner.
- Turn it over and fold the top of the triangle backwards over the bottom edge so that the tip sticks out a little bit.
- Insert the tip that sticks out over the side and turn the card over.
- Make a fold in the middle.

11. Tulip
This easy origami Tulip can easily be made by kids.
How to Make It
- Place a square paper with colour side downwards.
- Fold it in half making a triangle.
- Fold into another triangle and unfold it.
- From the right corner, make an angled fold diagonally upwards on each side.
- From the left corner, wrap the flap around the rest of the object.
- Fold the cornerback behind the figure.

12. Hat
A cool hat made out of paper is a great paper-folding craft for preschoolers.
How to Make It
- Take a rectangular paper.
- Fold the paper lengthwise into two equal halves and then unfold.
- Fold the paper in half – top to bottom and then unfold.
- Make a triangle by folding the right and left corners to the centre.
- Fold up the bottom flaps in the front as well as in the back.

13. Shirt
An origami shirt can be used to make a cute card.
How to Make It
- Take a rectangular paper and fold 1/3rd of the paper (from the edge upwards).
- Turn it over and fold it lengthwise. Make a crease and unfold.
- Fold in both sides to meet the centre line.
- Fold the two bottom corners outwards.
- Turn it over and turn the top edge (about 1/4th).
- Turn over again. Fold the top two corners diagonally making them meet the straight line at the centre.
- Fold up the bottom edge and tuck it under the collar.
14. House
An easy paper folding for kids. Make an origami house in simple and easy steps.
How to Make It
- Take a square sheet of paper with the colour side down.
- Fold the paper from the left to the right edge and unfold.
- Fold from top to bottom.
- Fold both the edges bringing each to the centre crease.
- Turn it over and fold the left and right edges to the centre.
- Open the top right and left flaps, spread out the corners to the side and flatten them down.
- Turn it over and draw the door and window.

15. Lady Bug
Make a pretty ladybird in a coloured paper or a polka dotted paper.
How to Make It
- Take a paper (square in shape) with the white side up and fold it diagonally.
- Fold the triangle in half and unfold.
- Fold the top two corners downwards, but the flaps should not be in line with the centre crease. Leave a gap in the middle.
- Turn it around and fold down the top corner to the centre point.
- Fold a little of the folded down top corner and flatten it.

Image Credit: AI-Generated Image
16. Jumping Frog
This playful frog can actually jump when you press its back! Kids will love making it hop.
How to Make It
- Start with a square sheet of green paper, colored side down.
- Fold it diagonally in half to form a triangle, then unfold.
- Fold both sides to meet the center crease, forming a kite shape.
- Fold the bottom corners up to align with the top corner.
- Fold the entire model in half backward.
- Create the legs by folding the bottom flaps outward.
- Press down on the back to make it jump!
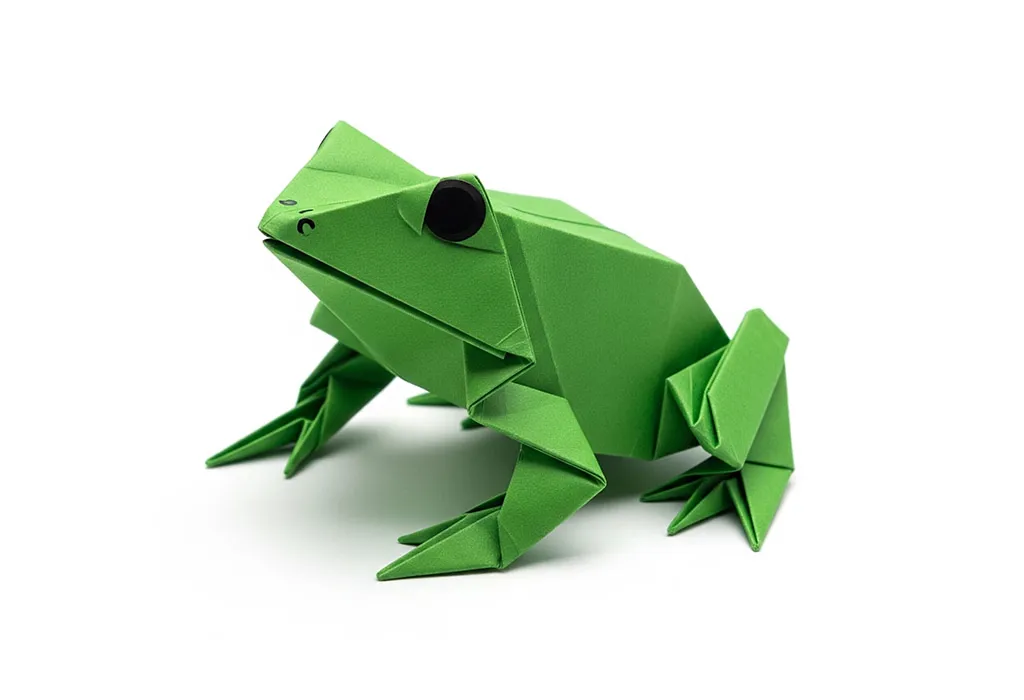
Image Credit: AI-Generated Image
FAQs
1. What type of paper is best for beginners to avoid frustration?
Beginners should avoid thin or flimsy paper, as it tears easily and can lead to frustration. Instead, opt for:
- Origami paper (kami): Pre-cut, lightweight, and brightly colored.
- Construction paper: Sturdy but may be harder to fold for complex designs.
- Copy paper (70–90 gsm): A budget-friendly option that holds folds well.
Avoid glossy or thick paper until kids gain more experience.
2. How does origami improve a child’s mathematical and spatial reasoning skills?
Origami naturally teaches geometry (shapes, symmetry, angles) and fractions (folding paper into halves, quarters). Following instructions boosts logical thinking, while visualising 3D shapes from 2D paper enhances spatial awareness. Studies show origami can even help kids grasp advanced math concepts like area, proportions, and problem-solving in a hands-on way.
Origami as an art can be enjoyed by children as well as adults. It is an excellent activity for developing the attention span, fine motor skills and the ability to follow instructions.
Also Read:
Greeting Card Making Ideas for Kids
Waste Material Craft Ideas for Kids
Plastic Bottles Craft Ideas for Children
Weather Crafts for Toddlers, Preschoolers, and Kids
Was This Article Helpful?
Parenting is a huge responsibility, for you as a caregiver, but also for us as a parenting content platform. We understand that and take our responsibility of creating credible content seriously. FirstCry Parenting articles are written and published only after extensive research using factually sound references to deliver quality content that is accurate, validated by experts, and completely reliable. To understand how we go about creating content that is credible, read our editorial policy here.
- Author


.svg)


