20 Easy Children’s Painting Ideas
A kid always leaves his mark in the house where he lives. You might find something scribbled on the wall, on the newspaper, or sometimes even on your important documents. As kids grow up, they like to explore and experiment with a variety of ways to draw and paint their imaginations. Employing various simple painting ideas for kids or even different forms of paintings can help kids find the right channel of expression and develop their artistic skills. Encouraging creativity in children can also boost their confidence and enhance their cognitive and motor skills, making art an essential part of their development. So, check out these fun children’s painting ideas.
Creative Painting Ideas for Children
You can try the following kids painting ideas to encourage your children to paint.
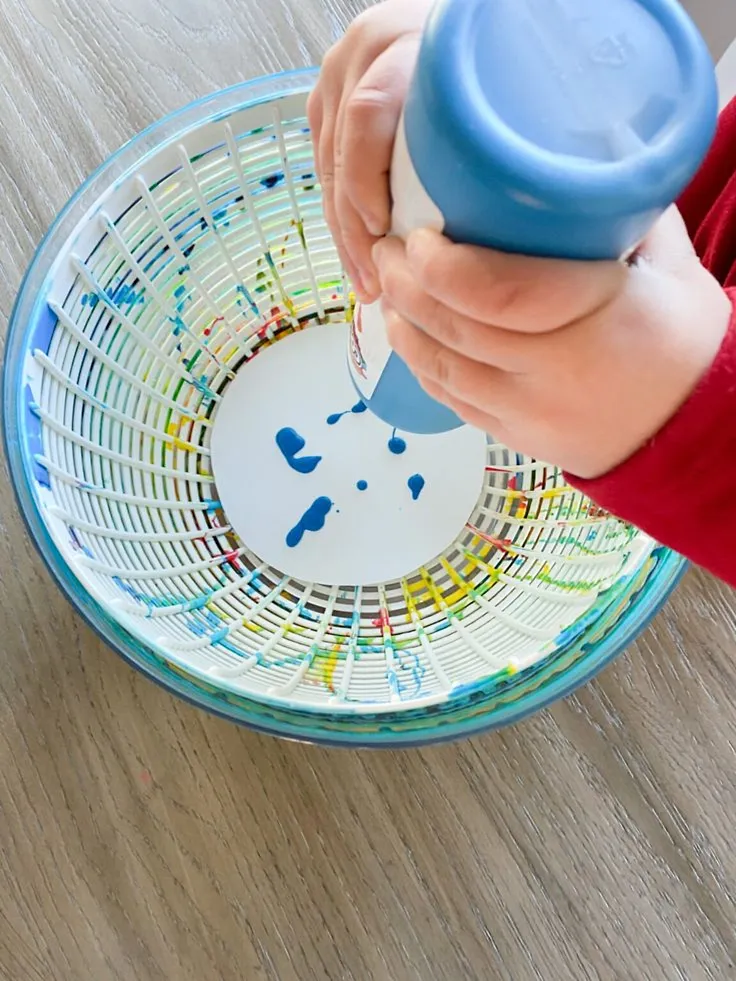
1. Spinning-styled Paintings
Move beyond brush strokes and create beautiful patterns with spin art.
Source: Pinterest
What You Will Need
- Salad spinner
- Colours
- Scissors
- Paper plates
How to Make
- Take a few colours together and mix them well. This will create a paint that has multiple shades to it. You can do this using two colours as well to create a dual-shade.
- Allow your kid to use that paint on the paper plate. Do not use a lot of it since it can make it soggy.
- With the paint in one position, keep the plate on a salad spinner and run the machine. The paint will spill around across the plate’s surface in beautiful patterns.
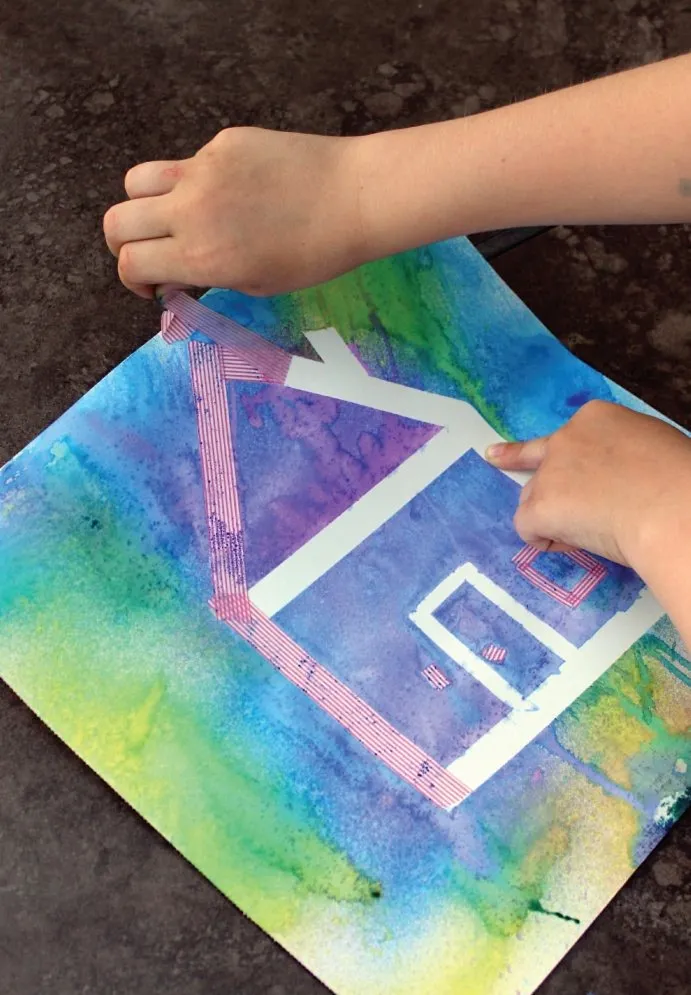
2. Restricted Painting Using Tapes
Understanding the basics of negative space by using tapes to prevent painting certain areas and making a design out of it.
Source: Pinterest
What You Will Need
- Paper meant for watercolours
- Watercolours
- Painting tape, preferably in a bright colour
- Crystals of salt
How to Make
- Lightly sketch the outline of a flower using a pencil and let your kid tape over it. These need to be taped correctly since it will form the shape once it is removed.
- Once all the tapes are in place, let your child start painting the rest of the area. Add colours within the flower and the surrounding sections, too.
- For added effect, let him sprinkle some salt crystals once he colours a section. This will add a nice texture to the flowers.
- Once the entire paper is covered in colours, let it dry on its own time and shake off the salt crystals once done.
- Then, gently peel out the tape in such a way that it doesn’t pull the paper with it. The taped area will be white and reveal the outline of the flower.
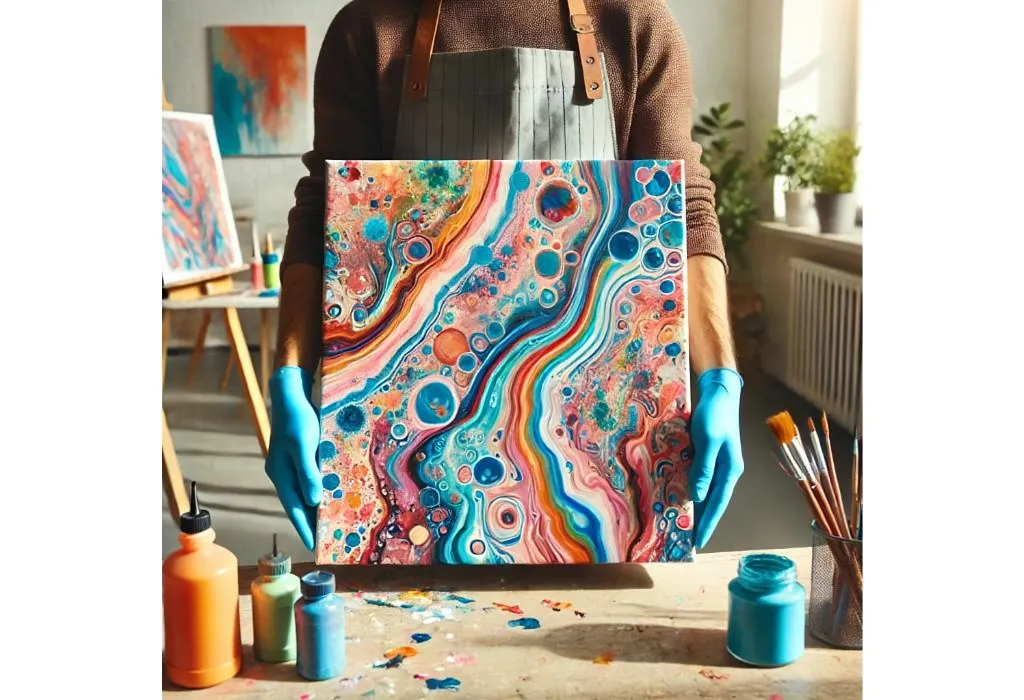
3. Painting an Art by Pouring Colours
A unique way of painting by putting the traditional technique aside and pouring colours directly onto the canvas.
What You Will Need
- Thick paper to be used with watercolours
- Watercolours
- Painting tape
- A large board to support the paper
- Paintbrushes
- Bottled spray
- A bowl
How to Make
- Mount the paper on the board first, securing it properly by pinning it on all sides.
- Dip a clean brush in clean water and paint the paper completely with it, leaving no section of the paper to be dry.
- Now, use the watercolours directly and pour them gently in one section of the paper. Move the board around, tilting it at times, to let the paint travel along the paper in different directions.
- Use multiple paints at the same time so that they can mix and create different colours.
- Make as many layers of colours as needed to make the patterns exciting and unique.
- Once the patterns are ready, tilt the board into the bowl to get rid of any excess paint and set the paper aside to dry.
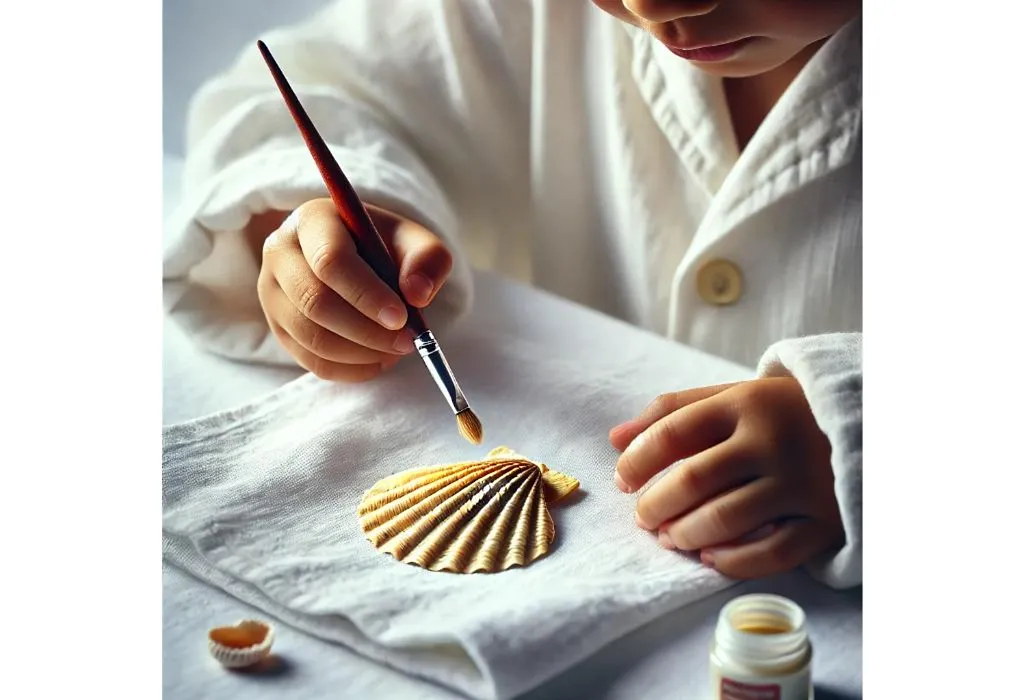
4. Painting by Turning Seashells into a Canvas
An unorthodox yet uniquely creative approach to create art on something other than paper.
What You Will Need
- Different types of seashells
- Watercolours
- Paintbrushes
- Paper plate
- Salt
- Water
How to Make
- Sprinkle table salt all over the paper plate, covering it up properly.
- Place all the shells on the plate with some spacing between them, so that they are rested properly in the salt.
- Use the watercolours and the brushes to paint the shells with colour. Feel free to use different colours or paint the shells in a specific pattern.
- Once all the shells have been painted, set them aside to dry and use them as showpieces or string together to create a wonderful necklace.
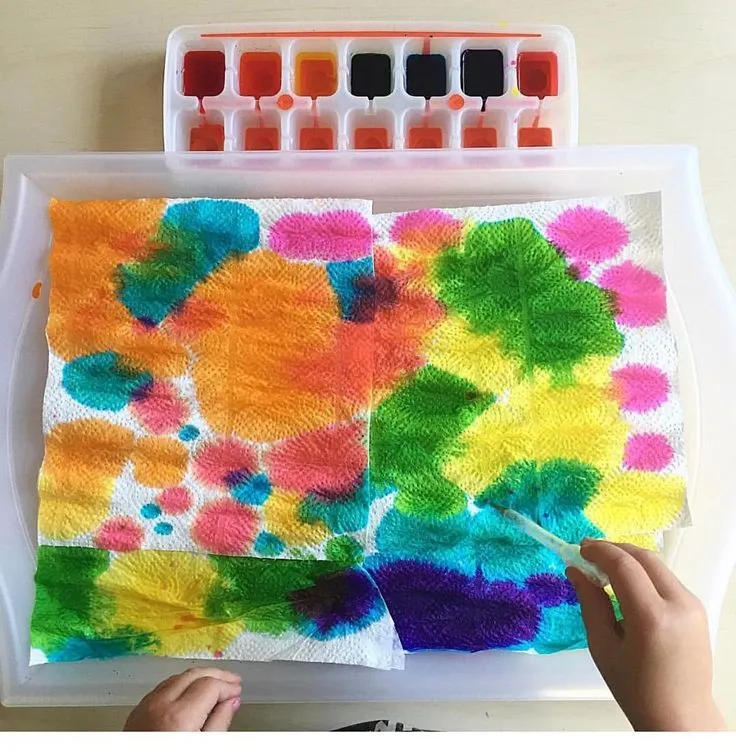
5. Making Art on Paper Towels
Making use of the qualities of paper towels to create classic art designs on it.
Source: Pinterest
What You Will Need
- Small pipettes
- Watercolours
- White paper towels
How to Make
- Keep all the pipettes separate for each colour so that they don’t mix it up.
- Either use tiny bowls or dip the pipettes directly in the watercolours and pull up the colour in it.
- Keep the pipette pressed to hold the paint, position it over the section of the paper towel where you’d want the colour, and drop the colour so that it covers the areas.
- Use different colours to complement the shades or mix them on the paper itself.
- Let the paper towels dry completely. These can then be placed together in your home to resemble a wall painting.
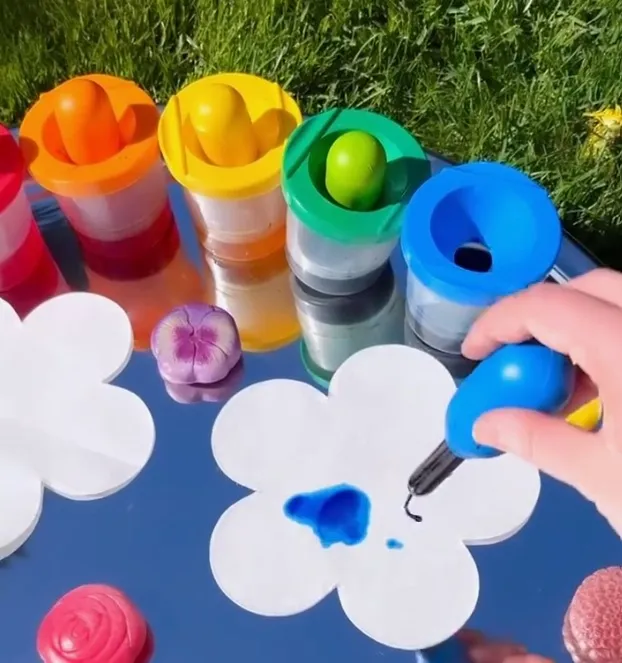
6. Coloured Flowers Using the Drip-Water Method
Quite similar to pour painting, this technique also creates spectacular designs but with a slight twist.
Source: Pinterest
What You Will Need
- Watercolours
- Empty spray bottles
- Paper meant to be used with watercolours
- Glue stick
- Scissors
- Droppers
- Water
How to Make
- Let your kid use the scissors to cut the paper into different types of flowers. These could be any shape or simply flower-shaped designs, too.
- Place these flowers on a flat surface, spreading them around.
- Now, pour watercolours directly over these flowers and use the droppers to move them around different areas of the flowers.
- Once enough colours have been added, add water to the spray bottles and spray them over the paper.
- The spray will spread the colours gently while the water will help soak them. These two actions create a collection of patterns on the paper, mixing colours in different shades.
- Keep these flowers aside to dry and then glue them together, if needed, to create a banner of sorts.
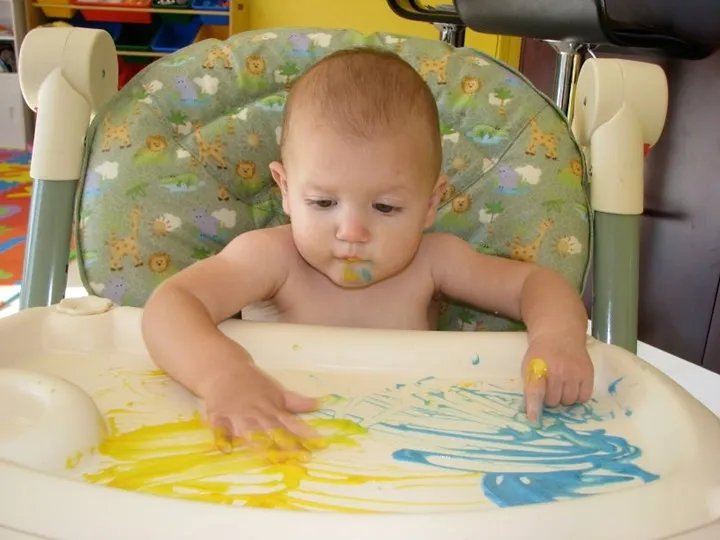
7. Yogurt-Based Painting
You read that right. It is time to mix paints with yoghurt for a style never seen before.
Source: Pinterest
What You Will Need
- Bowls to mix the yogurt
- Yoghurt
- Edible paint
- Paper
How to Make
- The first step before your child begins to paint is to create the edible paint mixture. This requires mixing the edible colours with the yoghurt in the right proportions to make unique shades and a palette of colours.
- Make sure there are no clumps of yoghurt.
- Spread out the paper on a surface and keep the bowls of paint around it.
- Let your kid use his own fingers to paint on the paper using the edible mixtures and create yoghurt based art. Notice how it smells different too.
8. Imprinting Hearts to Create Art
Using the age-old technique of printing by using household items to create modern or abstract art.
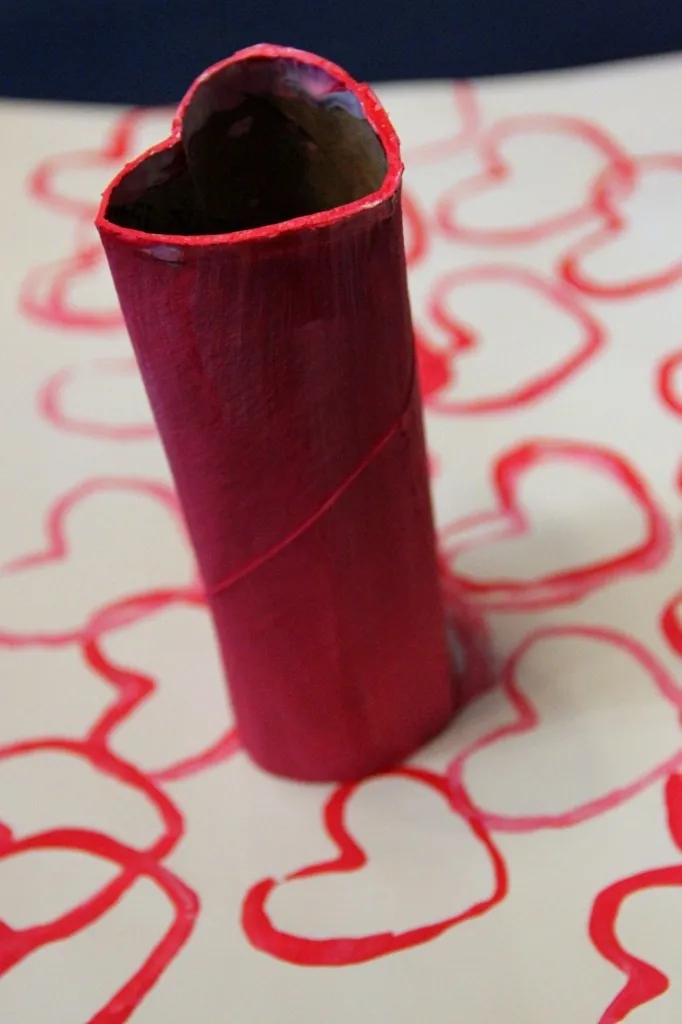
Source: Pinterest
What You Will Need
- Inner roll of toilet paper or flexible cardboard
- Paints
- Whitepaper
- Paper plates
How to Make
- A finished toilet paper roll works best in this regard, but flexible cardboard does the trick too. You just need to roll it up first.
- Then, press the roll on both sides so that edges fold inside, to create a shape resembling a heart.
- Pour out the paints in different areas of the paper plate and press the heart-shaped edge in the paint.
- Once properly covered in paint, press it on the paper to create an imprint. Repeat as many times as needed using different colours to create your very first abstract art.
9. Salt and Water-Based Colour Painting
Using the texture of salt to add a design-style to the usual paintings.
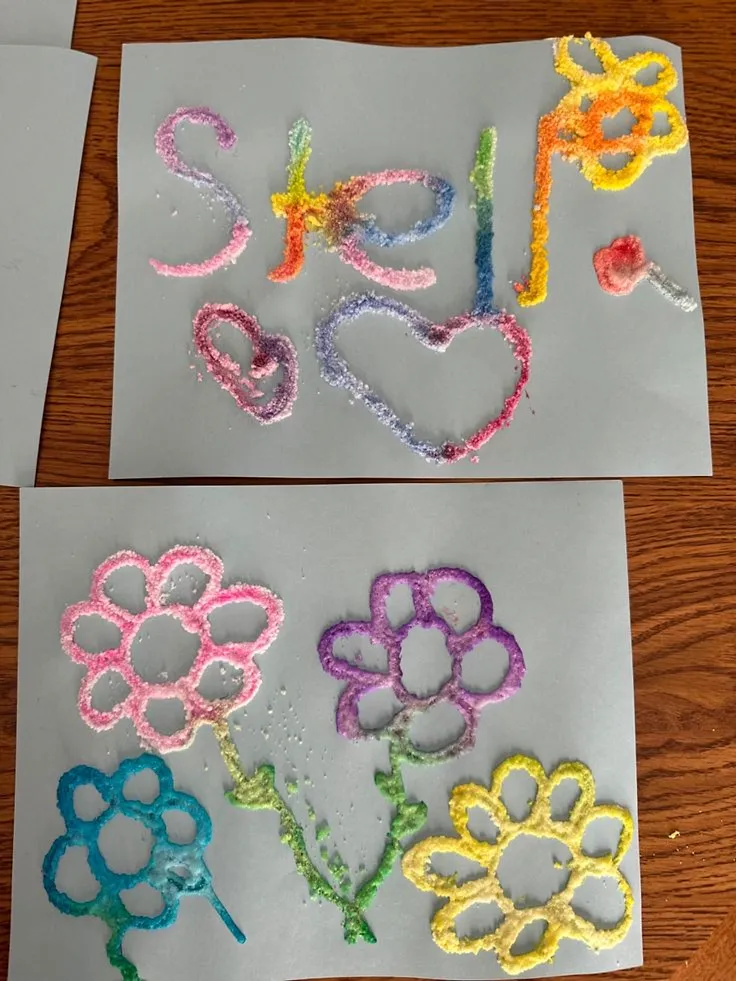
Source: Pinterest
What You Will Need
- Whitepaper
- Watercolours
- Salt
- Brushes
How to Make
- Start the usual way by allowing your kid to fill the entire paper with multiple colours.
- Let the salt be right next to you. A salt shaker works best.
- The moment he finishes painting, hand him the salt and let him sprinkle it on the paper to create different patterns.
- Once it dries, it will resemble a uniquely textured painting.
10. Using Crayons to Create a Painting
Dry crayons are used to make drawings. But melting them can yield a method to paint using those same crayons.
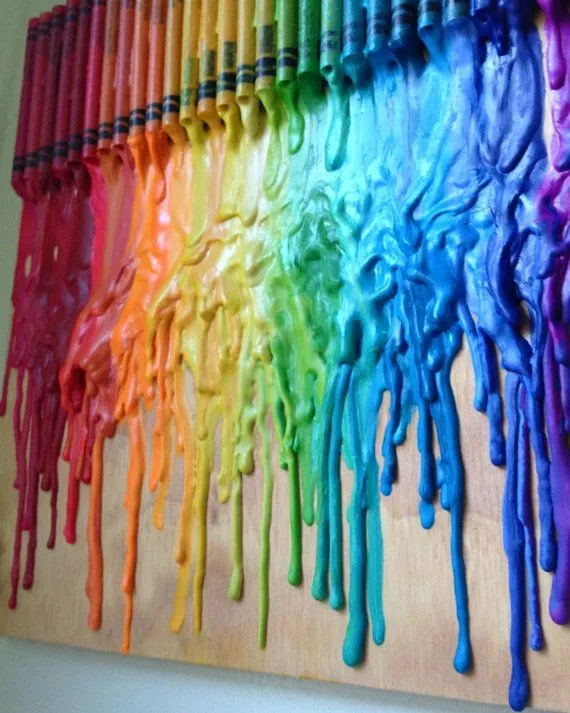
Source: Pinterest
What You Will Need
- A large collection of crayons
- Old brushes to scrape the paint
- Permanent marker
- Marble Tiles
How to Make
- Begin with the tiles and let your kid use the permanent marker to draw various patterns and designs on them.
- Keeping the tiles flat, let your child choose the colours he wants on the tiles and place those respective coloured crayons on those sections.
- Place this arrangement exactly as it is inside an oven. Let it heat to a point where you start seeing the crayons melt.
- When they have fully melted, remove the tiles carefully. It is best you do this for your kid so that he doesn’t hurt himself.
- By maintaining a safe distance from the hot tile, use the old brushes to spread any liquid paint around before it dries.
11. The Classic Caterpillar Made Using Hands and Fingers
We have all done this when we were kids. It is time for your own child to repeat your legacy.
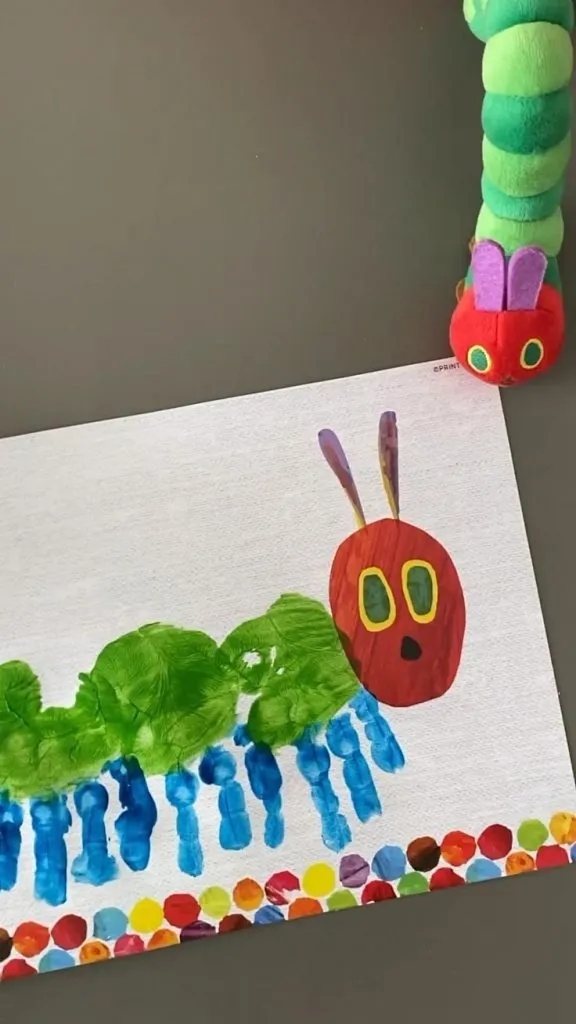
Source: Pinterest
What You Will Need
- Paper or cardboard
- Paper plates
- Water
- Towel
- Glue
- Orange coloured thick paper
- Paints
- Brushes
How to Make
- Keep the paints ready by pouring them out on paper plates separately. One plate for green paint which will be used for the body. Use black for the legs and red colour for the head.
- Begin by asking your kid to place his palm on the green paint and create a print on the paper. Mixing finger painting with this, let him use the fingers in the black paint and imprint the legs for the green caterpillar body.
- For a larger caterpillar, use multiple green handprints.
- Dip a thumb in the red paint to make a head for the caterpillar.
- Now, cut the orange paper to make the butterfly body, and stick it next to the caterpillar. Use handprints again to make the wings for the butterfly, completing the full cycle of the caterpillar.
- You can use this technique to create a bunch of other designs and patterns based on handprints.
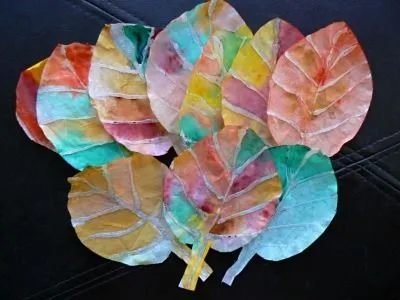
12. Dry Leaves Using Colours and Glue
Make your very own leaves of autumn by using these special art techniques.
Source: Pinterest
What You Will Need
How to Make
- Use the coffee filters as the paper on which your kid can draw the outlines of various leaves. Use the scissors to cut the coffee filters along those lines.
- Using the glue and a pencil or a dropper, draw out the lines on those leaves to make them look real. Let them be aside till they dry.
- Dilute the watercolours and then paint the leaves with it. The colours will be muted as the filters soak them in, while the glue lines will make the leaves seem real.
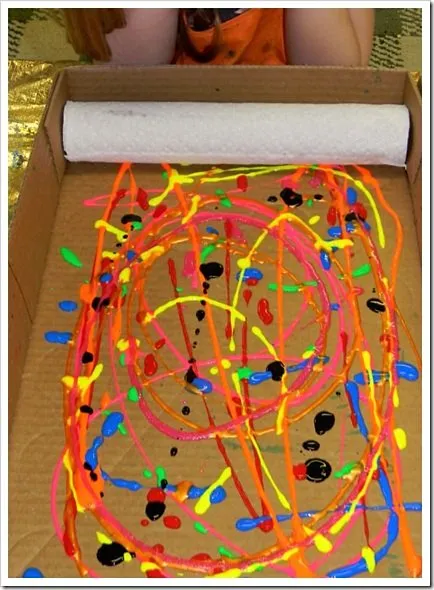
13. Paint With a Tube
Make abstract art even stranger by using a tube to roll the paint.
Source: Pinterest
What You Will Need
- Finished toilet paper roll
- Brush
- Glue
- Paints
- Paper towel
How to Make
- Spread the paper and squirt out paints from the colour tubes all over it.
- Cover the toilet roll with a paper towel and glue it properly. Now roll this tube over the squirted paints of the paper. They will mix and match in wonderful ways.
- Roll it in different directions for varying patterns. This will great art on the paper, as well as the paper tube can be used as decoration, too.
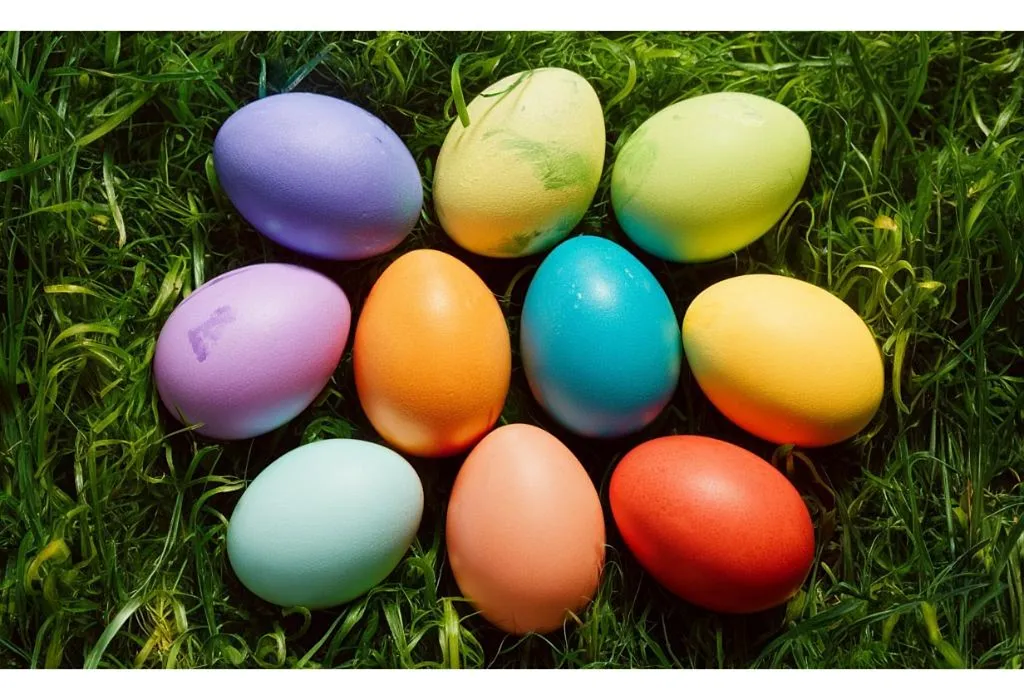
14. Why Should Eggs Be White
Add a dash of colour to the inside of your refrigerator by using eggs.
What You Will Need
- Eggs
- Watercolours
- Brush
How to Make
- Get a small box of eggs, especially for this. Spread newspaper on the working surface to prevent any broken eggs from dirtying the surface.
- Teach your child to hold the egg properly and let him colour it in the manner of choosing.
- Once paints are dried, use sketch pens to add some flourishes as well.
- Place the eggs in the fridge to make it look wonderful from the inside.
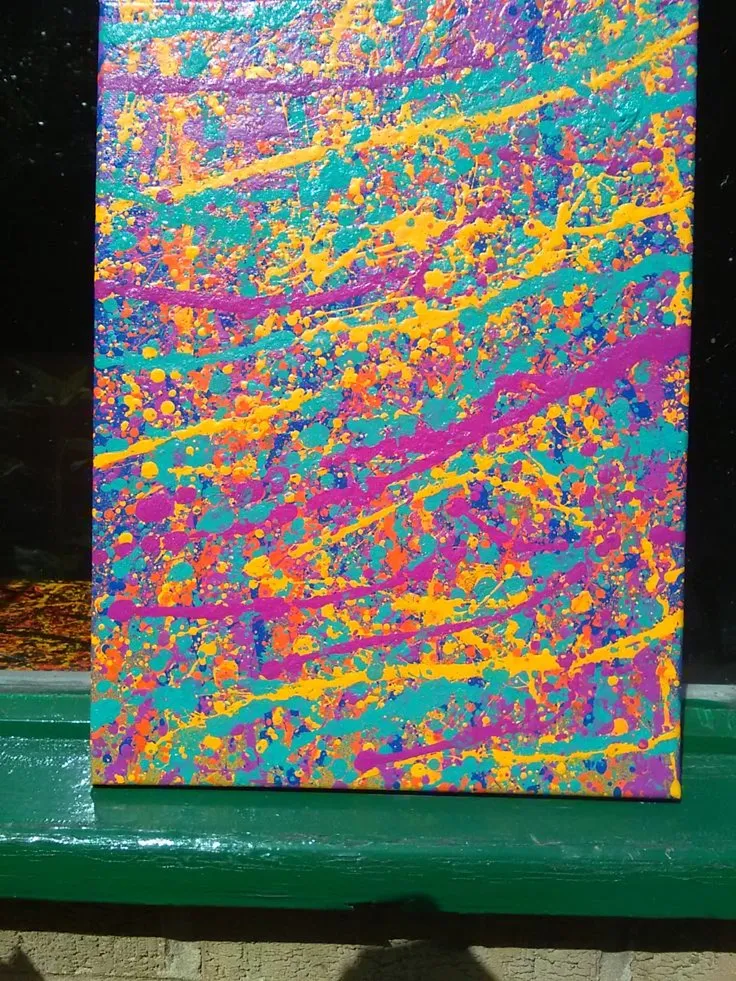
15. Throw and Spray Colour to Make Modern Paintings
This one is bound to be a lot of fun for the little one.
Source: Pinterest
What You Will Need
- A proper room
- A lot of newspaper
- Canvas
- Paints
- Brushes
How to Make
- Cover the room with newspaper so that no paint can land on the walls.
- Place the canvas on one side of the room with different paints and colours on the ground below.
- Let your child wear old clothes for this. Dip the brushes in paint and water and whip them in the direction of the canvas.
- The strokes that fly on it will leave beautiful patterns. You can add details later once the paint has dried.
16. Nature Imprints With Leaves
Create vibrant, nature-themed artwork by using leaves as paintbrushes.
What You Will Need
- Various types of leaves
- Watercolours
- Paper
- Paintbrushes
How to Make
- Collect different shapes and sizes of leaves from the garden.
- Paint one side of the leaves with watercolours using a paintbrush.
- Press the painted side of the leaf onto a piece of paper and gently press down.
- Carefully lift the leaf to reveal a colourful imprint on the paper.
- Repeat with different leaves and colours to create a vibrant nature-themed artwork.
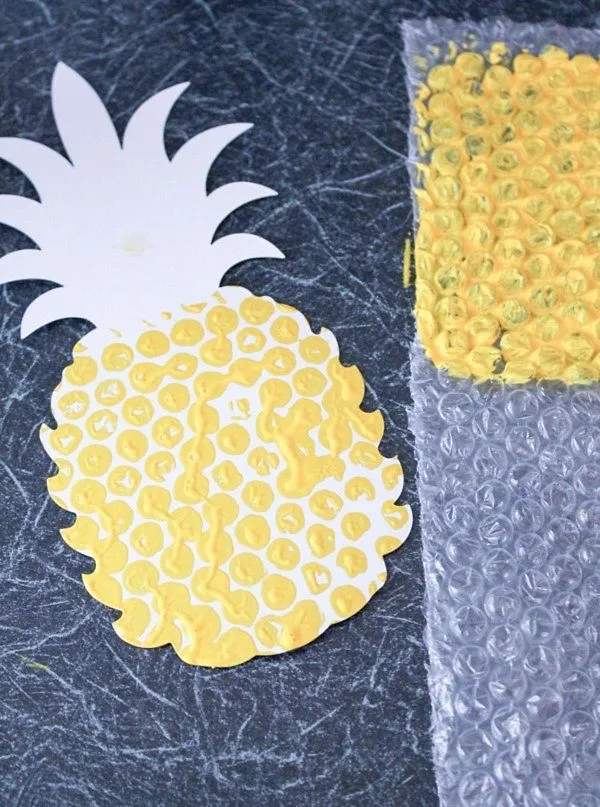
17. Bubble Wrap Painting
Make unique textured patterns by stamping with bubble wrap.
Source: Pinterest
What You Will Need
- Bubble wrap
- Paints
- Paper
- Paintbrushes
How to Make
- Cut the bubble wrap into manageable pieces.
- Paint the bubble side of the bubble wrap with various colours.
- Press the painted bubble wrap onto a piece of paper.
- Lift the bubble wrap to reveal a unique pattern of coloured circles.
- Repeat the process with different colours and shapes to create a textured painting.
18. Ice Cube Painting
Use colorful ice cubes to paint and watch as they melt into beautiful designs.
What You Will Need
- Ice cube tray
- Watercolours
- Water
- Paper
How to Make
- Fill the ice cube tray with water and add different watercolours to each section.
- Freeze the tray to make coloured ice cubes.
- Once frozen, remove the ice cubes and let your child use them to paint on paper.
- As the ice cubes melt, they will leave behind beautiful and vibrant trails of colour.
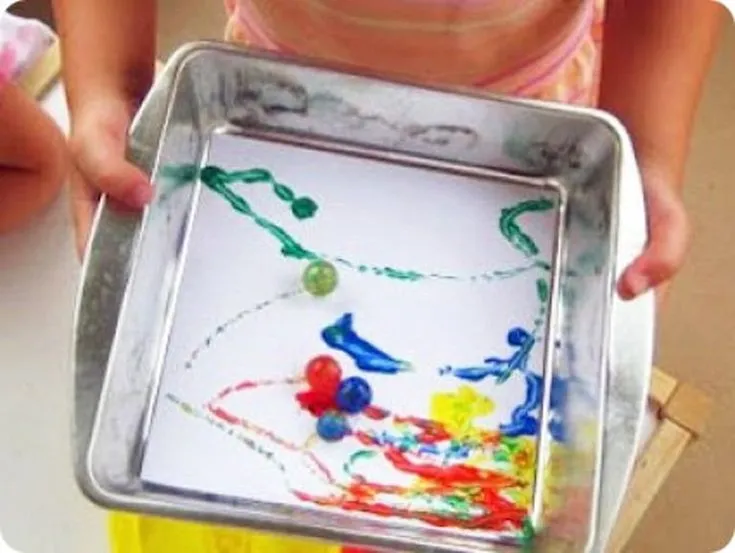
19. Marble Rolling Art
Roll marbles dipped in paint to create dynamic and abstract artwork.
Source: Pinterest
What You Will Need
- Marbles
- Paint
- Shoebox or tray
- Paper
How to Make
- Place a sheet of paper inside a shoebox or tray.
- Dip marbles in different colours of paint.
- Drop the paint-covered marbles into the box and gently shake or tilt the box to roll the marbles around.
- The marbles will create unique patterns and lines as they move, resulting in a dynamic piece of art.
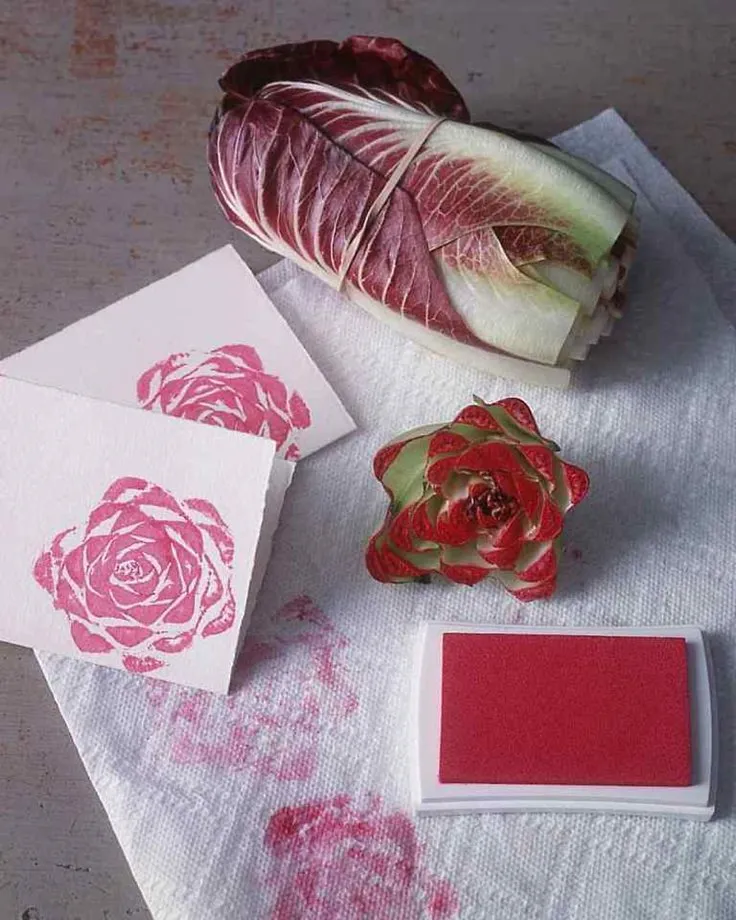
20. Fruit and Vegetable Stamping
Turn fruits and vegetables into fun stamps for creative prints.
Source: Pinterest
What You Will Need
- Various fruits and vegetables (e.g., apples, potatoes, okra)
- Paints
- Paper
- Knife (adult supervision required)
How to Make
- Cut the fruits and vegetables in half to reveal interesting shapes and patterns.
- Dip the cut sides into paint.
- Press the painted sides onto a piece of paper to create stamps.
- Experiment with different fruits and vegetables to create a variety of textures and designs.
What Are the Benefits of Painting for Kids?
Painting is not only a fun activity for kids, but it also plays a significant role in their overall development. Engaging in painting allows children to express their creativity while honing various skills that are crucial for their growth. Here are some of the key benefits of painting for kids:
- Enhances Creativity: Painting encourages kids to think outside the box and use their imagination to create unique artworks. This creative freedom helps them develop innovative thinking and problem-solving skills.
- Improves Motor Skills: Using brushes, sponges, and other painting tools helps children develop fine motor skills. The precise movements required for painting can improve hand-eye coordination and dexterity.
- Boosts Emotional Expression: Painting provides an outlet for kids to express their feelings and emotions in a non-verbal way. This can be particularly beneficial for children who find it difficult to articulate their thoughts and feelings.
- Enhances Cognitive Development: Engaging in painting activities helps children learn about colors, shapes, and patterns. It also encourages decision-making and planning, as they decide what to paint and which colors to use.
FAQs
1. How can painting help in developing a child’s focus and concentration?
Painting requires kids to pay attention to details, stay within lines, and complete a project from start to finish. This process helps in enhancing their focus and concentration skills over time.
2. Can painting be used as a therapeutic activity for children with special needs?
Yes, painting can be a therapeutic activity for children with special needs. It helps them express their emotions, improve motor skills, and provides a calming effect, reducing stress and anxiety.
3. How can parents encourage a reluctant child to try painting?
Parents can encourage reluctant children by starting with simple, fun projects, providing a variety of tools and materials, and painting alongside them to create a supportive and engaging environment.
So, these were some of the many painting activities for kids. Painting is one of the first forms of artistic expression we all learn as a child. Indulging in colours and patterns helps reveal our psyche as well as lets others know our thoughts and ideas visually. Nature painting ideas for kids are a great option, along with involving them in modern art patterns too. Learning this can make it a habit that stays with them for life.
Painting enhances children’s creativity along with shaping various skills in them. Another great way to ensure your child gets all-round development at home is by subscribing to a monthly activity box-like Intellikit that combines fun with learning. Based on the theory of multiple intelligence, each box is based on a unique monthly theme and involves various types of play to enhance a child’s smarts. Subscribe to Intellikit, today!
References/Resources:
1. Painting with young children: There’s more to the picture; Penn State Extension; https://extension.psu.edu/programs/betterkidcare/early-care/tip-pages/all/painting-with-young-children
2. Uzunboylu. H, Evram. G; Understanding Children’s Paintings in Psychological Counselling with Children (New Trends and Issues Proceedings on Humanities and Social Sciences); Researchgate; https://www.researchgate.net/publication/321478504_Understanding_Children’s_Paintings_in_Psychological_Counselling_with_Children; March 2017
3. Yu. L, Nagai. Y; An Analysis of Characteristics of Children’s Growth through Practical Art (Healthcare); National Library of Medicine; https://www.ncbi.nlm.nih.gov/pmc/articles/PMC7349711/; June 2020
4. Yu. L, Nagai. Y; Painting Practical Support: A Study about the Usage of Painting Materials in Children’s Painting Works (Social Sciences); ResearchGate; https://www.researchgate.net/publication/340328684_Painting_Practical_Support_A_Study_about_the_Usage_of_Painting_Materials_in_Children’s_Painting_Works; March 2020
Also Read:
Rangoli Designs for Kids
Paper Plate Craft Ideas for Kids
Thumb and Finger Painting Ideas for Kids
Superb Canvas Painting Ideas for Children
Was This Article Helpful?
Parenting is a huge responsibility, for you as a caregiver, but also for us as a parenting content platform. We understand that and take our responsibility of creating credible content seriously. FirstCry Parenting articles are written and published only after extensive research using factually sound references to deliver quality content that is accurate, validated by experts, and completely reliable. To understand how we go about creating content that is credible, read our editorial policy here.






.svg)


