Sensory Bags: Easy DIY Ideas and Benefits
If you have a little one at home, you’d know that one of the latest trends in the market is sensory bags. It’s a proven concept that children, as well as adults, learn better when their senses are engaged. Sensory learning can last long in the memory, like the taste of your mom’s food or the sight of a beautiful sunset.
Even something like the smell of a campfire taking you to a summer memory or belting out the lyrics to your favourite song come under sensory learning. This concept begins when we’re little babies and by exposing your kids to textures, sounds, colours and more, you’re exposing them to senses that help develop their overall cognitive skills. Once you get the hang of it, the whole process becomes fun and you can also involve the kids in the experience. Read on to learn about sensory bags for babies and toddlers.
What Are Sensory Bags?
Sensory bags for toddlers are one of the latest toys in the market and allow kids to enjoy mess-free play while also stimulating their core senses. These bags, which are also known as squish bags, allow the children to discover, explore, imagine, create and learn using their senses.
They contain different materials and even artwork which can stimulate their senses and get them excited about play-time.
What Age to Start Using a Sensory Bag
Sensory bags can be introduced to babies as early as 6 months old, once they can sit up with minimal support and start exploring objects with their hands. However, the appropriate age depends on the child’s development and the type of sensory bag used.
Benefits of Sensory Bags for Children
There are many benefits for sensory bags for babies, including –
- Language Skills – The language skills of many children are improved and grammar and vocabulary are boosted, as they describe the many senses they experience.
- Sensory Input – The bags provide a sort of sensory input that also meets the child’s requirements.
- Fine Motor Skills – As kids manipulate smaller objects, they also improve their overall fine motor skills.
- Social Skills – As children can communicate their experiences using sensory toys, they improve their social skills naturally.
What Fillers Can Be Used to Make a Sensory Bag?
There are plenty of options to work around with these bags for infants. They can be filled with a variety of things including:
- Dry pasta
- Pom poms
- Popcorn
- Shaving cream
- Dyed rice
- Salt
- Beads
- Drinking straws
- Clear hair gel or even shampoo
Creative DIY Sensory Bag Ideas
Wondering how to make a sensory bag? Here are some of the best and creative DIY sensory bags. You can even make these with sensory Ziplock bags by placing different materials inside these little bags. Here’s a list of sensory bag ideas –
1. Ocean Sensory Bag
It’s important that you give the baby a calming and wonderful sensory experience with the help of the water blob. This ocean sensory bag idea is one way to get them interested in the sea right from a young age. They can easily squish and splash their way to glory without making a mess at all.
It’s an excellent way to get them to play with “water” and pique their curiosity towards this wonderful liquid. The mini version is easy to pull off and here’s how you can make it. You can work with small bath toys and just a little bit of water
Method
- Place the bath toys (optional, but not anything pointy) in the freezer or Ziploc bags and fill them with water. Make sure you squeeze out as much air as possible and seal the bag tightly.
- Use duct tape and make the seal strong. You can use two overlapping strips that fold over the edge.
- Place the filled bag, with the side that’s taped down inside another bag, squeeze as much air out again and duct tape it for extra security.
- You can also place a towel down for extra safety.
- Let the baby enjoy their new squishy toy and play.
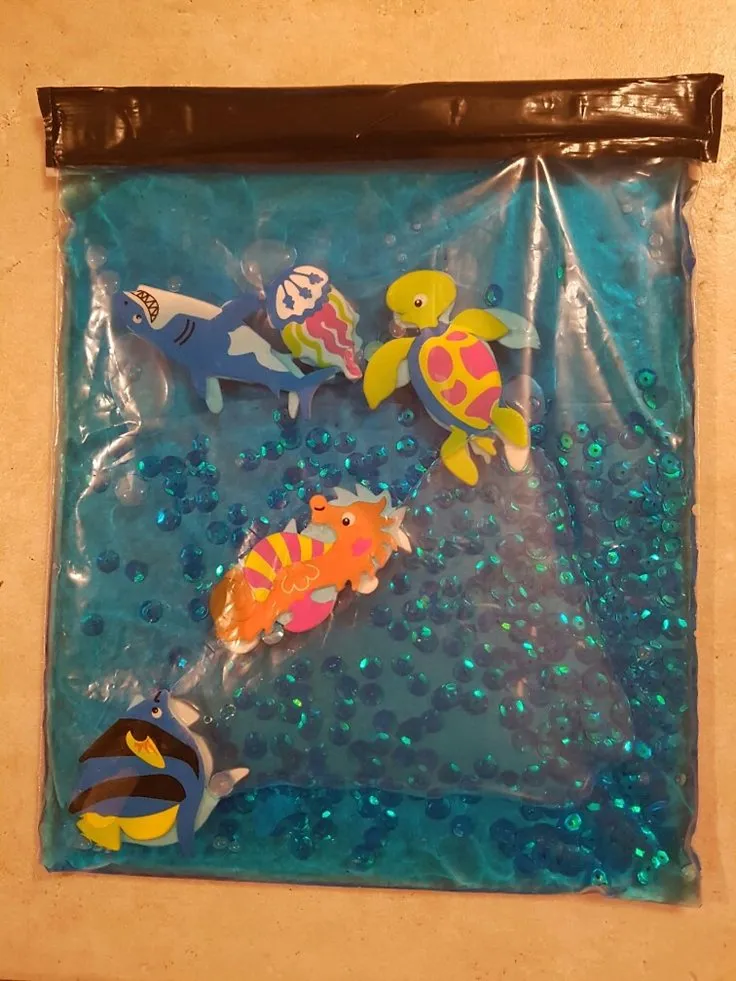
Image Credit: Pinterest
2. Shaving Cream Sensory Bag
Shaving cream is another soft material that you can place inside bags to convert them into a fun and enjoyable experience for the little one. Make sure the sensory bags are properly sealed before you give it to kids.
Babies can learn all about soft squishy toys with a shaving cream sensory bag and it can keep them entertained for hours.
Method
- It’s super easy and fun to work with sensory bags that are made from shaving cream. Start by adding the white foam into a resealable bag and put a few drops of food colouring into it.
- The more drops you add, the stronger the colour, so you can add as much as you’d like.
- You can start off by adding colour combos such as blue and yellow or red and yellow.
- Duct tape the bag strongly and make sure it doesn’t burst. Extra duct tape works wonders.
- Hand the bag to your little one and watch as they play and mix colours. Blue and yellow forms green while red and yellow forms orange. It’s a great way to teach kids about complementary colours and watch them play with the squishy sensory bag, in a mess-free environment.
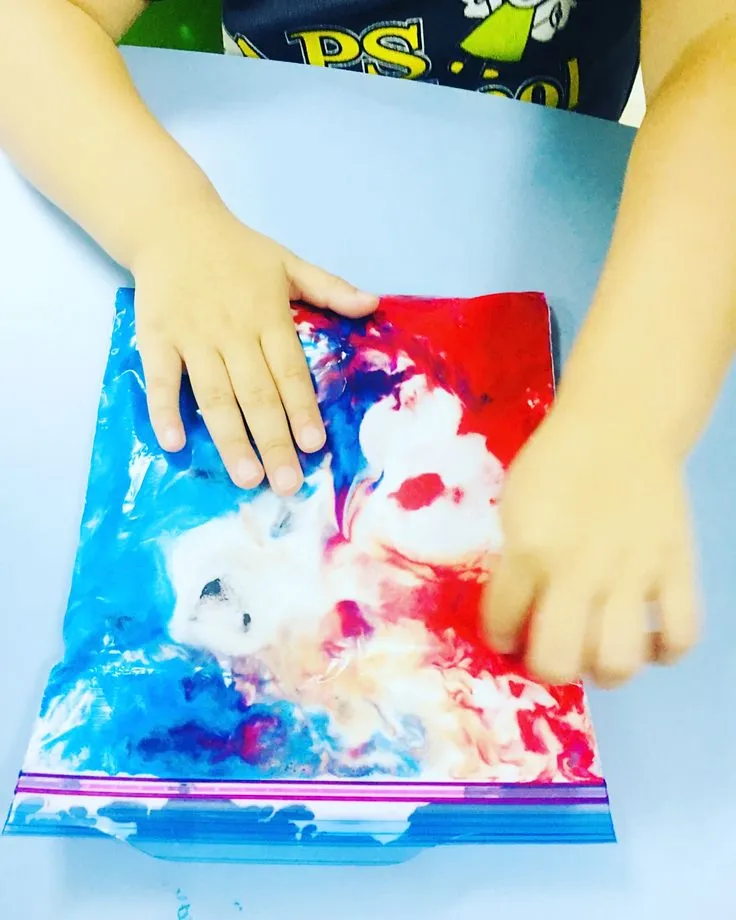
Image Credit: Pinterest
3. Play-Doh Sensory Bag
This is one of the easiest and super fun sensory bags you can make for your little ones. Play-doh is a popular material for children to play with and they can explore its magic with the help of these bags.
You can let the kids play around with the soft material and it straightens on its own over time.
Method
- To make this sensory bag, you’ll need play-doh, a ziplock bag, some duct tape, even beads or glitter.
- Add the playdough, glitter and add beads to the bag.
- Ensure that you’ve closed and sealed the bag properly with the help of rubber bands or duct tape.
- You can encourage kids to even try to mould the playdough in different shapes to create a cool sensory bag idea.
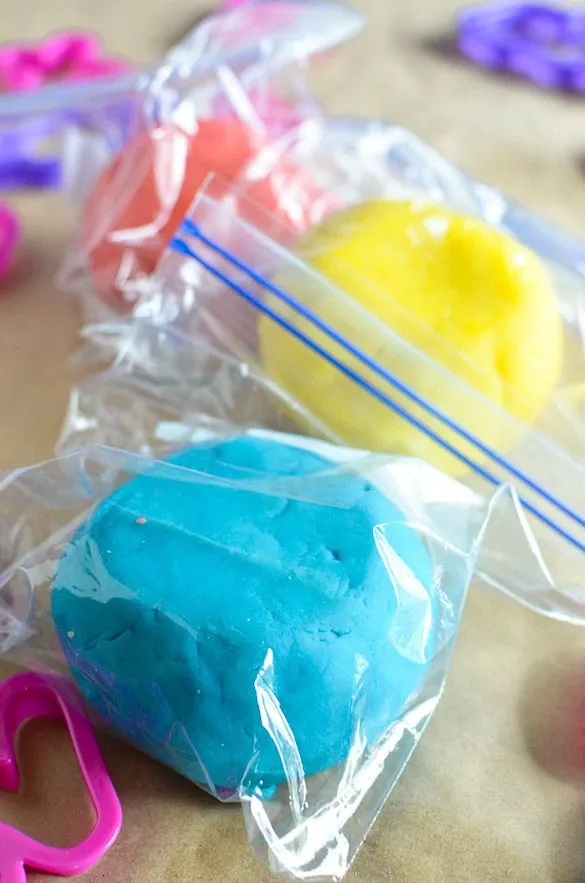
Image Credit: Pinterest
4. Lava Lamp Sensory Bag
One of the best ways to teach kids about colours is to create sensory bags that come in different colours that glow in the dark as well. It’s important that kids are able to enjoy the lovely effects of lava lamps, at home, so they understand these substances better.
All you need to create lava lamps in a sensory bag are some baby or cooking oil, Ziploc bags, neon watercolours and clear packaging tape.
Method
- You can begin by filling a large zip-lock bag around 1/3rd of the way with oil. Baby oil works best but so does cooking oil too.
- You can proceed to add a couple of tablespoons of neon watercolour to make them glow and look great in the dark.
- You can close the bag with the help of clear tape and this ensures that there is no leaking when your kids are playing with the bags.
- Repeat this process and add other colours into the lava lamp sensory bag to stand out from the rest.
- Then, switch off the lights and let the kids play around with the many colours that appear. It’s a great way to teach kids about the properties of oil and water as well as colours in the process.
- The lava lamp will bubble around, adding a touch of drama as their faces brighten up with the lights inside.
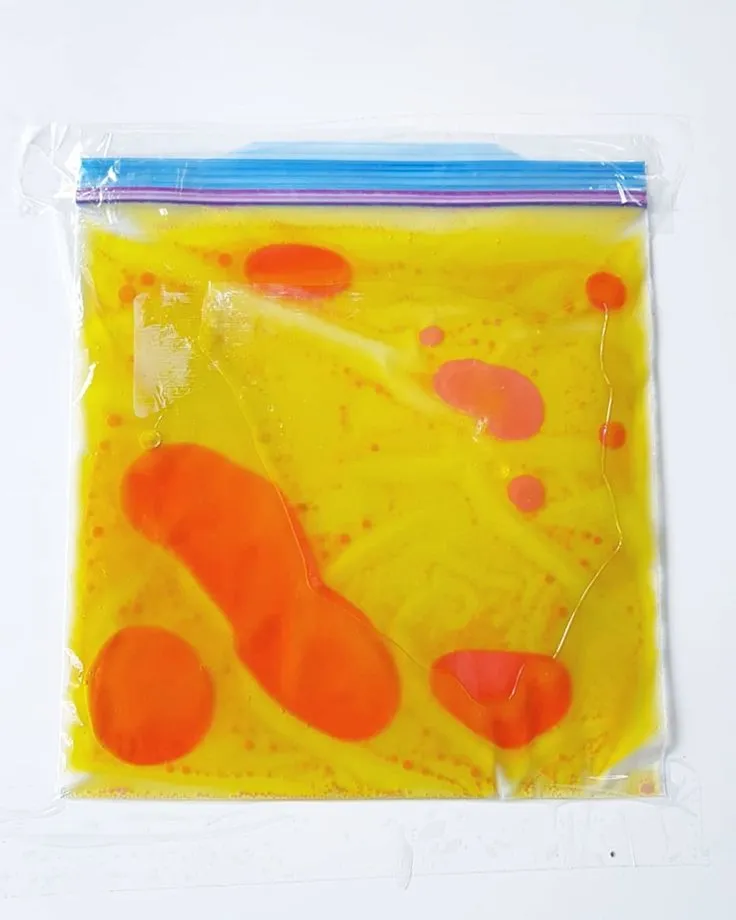
Image Credit: Pinterest
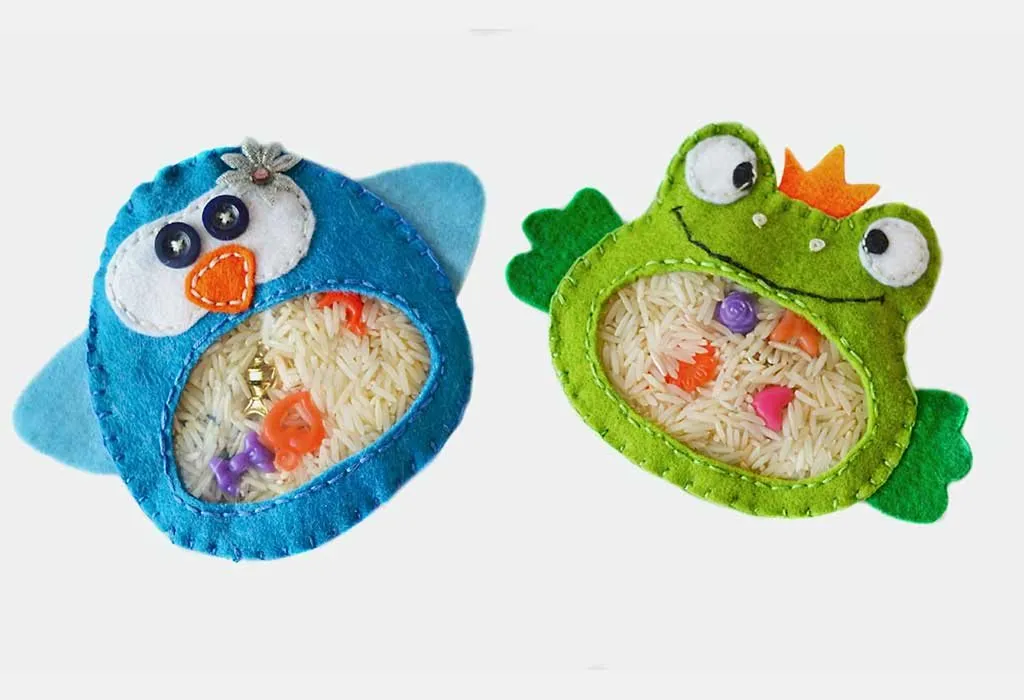
5. Rice Sensory Bag
Rice sensory bags are one of the most fun types to set up for your little one. This is because rice is one of the best and ideal sensory materials for children. It comes with a soothing texture as well, which makes it perfect for unwinding and playing right before bedtime.
Rice is an excellent sensory bin material, purely because it is extremely affordable too. It’s also super easily available. You can go purchase it from your local store and go forth and create sensory bags out of the same. Purchase a bag of rice from your local store, add it to the plastic bin or bag, seal it tightly, and your bag is good to go.
Method
- Buy a bag of rice and place it in a plastic bag that’s filled right up to the brim or even 3/4ths of the way ready.
- You can use a bag that goes halfway in and, to spice up the fun, even add a few toy items towards the bottom.
- The toys act as a nice little surprise for kids and you could also mix it up by adding coloured rice into the sensory bin wherever needed. You could look up tutorials that teach you how to make neon or harvest coloured rice. These techniques can be made to create any type of coloured rice.
- You can also keep the rice in the bin by covering it tightly. You could also clean up any spills with the help of a vacuum or just simply put a sheet under the bin to collect any spills. Pick up the sheets and pour any of the excess rice back to the bin.
- The project is perfect for preschoolers, toddlers, or even school-age kids but not ideal for those kids who still put objects into their mouths.
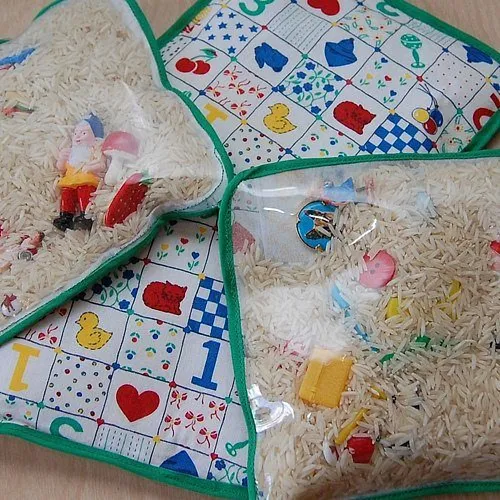
Image Credit: Pinterest
6. Magnetic Sensory Bag
A magnetic sensory bag combines science and play by letting kids manipulate objects through the bag. This interactive version teaches basic magnetism while keeping small parts safely contained—ideal for curious toddlers who love cause-and-effect play.
Method
- Place paper clips, small metal beads, or magnetic alphabet letters inside a heavy-duty freezer bag filled with hair gel or corn syrup (for slow movement).
- Seal and reinforce the edges with duct tape.
- Then, give children a strong magnet (like a fridge magnet) to move the metal pieces around from the outside.
- They’ll love “drawing” with the objects!
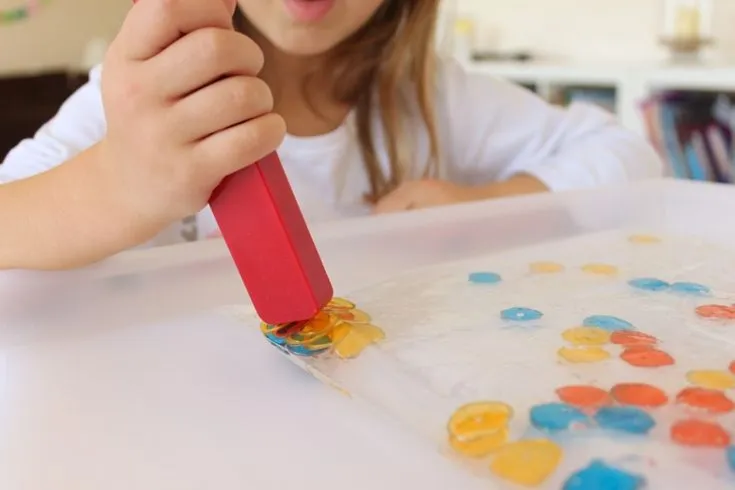
Image Credit: Pinterest
7. Nature Sensory Bag
A nature sensory bag is a wonderful way to let kids explore textures, colors, and natural elements in a mess-free, contained way. Perfect for toddlers and preschoolers, this bag can include leaves, flowers, sand, or even small pinecones—all safely sealed inside a durable plastic pouch.
Method
- First, gather small, flat nature items such as fallen leaves, flower petals, small twigs, feathers, or smooth pebbles.
- Next, place the collected items into a heavy-duty ziplock bag or a vacuum-seal bag for extra durability. For a floating effect, add a small amount of clear hair gel or glycerin.
- Seal the bag tightly, pressing out as much air as possible. Reinforce the edges with strong packing tape or duct tape to prevent leaks.
- Once sealed, let your child squish, press, and explore the textures. Pair the bag with a magnifying glass for closer observation.
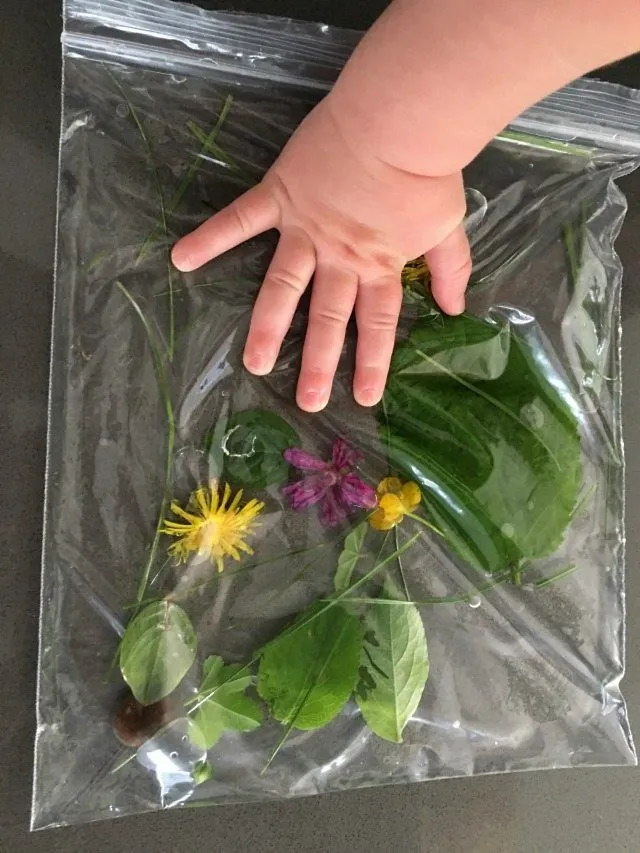
Image Credit: Pinterest
8. Galaxy Sensory Bag
For little space explorers, a galaxy-themed sensory bag creates an out-of-this-world experience. This mesmerizing bag mimics swirling galaxies with glitter, stars, and cosmic colors, perfect for sparking imagination. The slow-moving glitter and beads resemble floating stars, making it both calming and visually stimulating.
Method
- Fill a sturdy ziplock bag with clear hair gel or hand sanitizer as a base.
- Add silver and blue glitter, small star-shaped sequins, and a few drops of neon blue/purple food coloring.
- Seal the bag tightly with duct tape, then let kids press and swirl the contents to create their own mini galaxy.
- For extra magic, shine a flashlight underneath to make it glow!
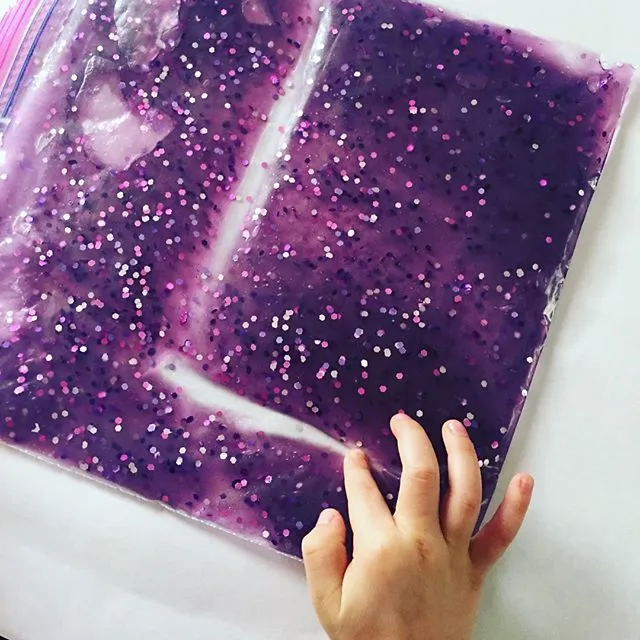
Image credit: Pinterest
9. “Frozen” Sensory Bag
Inspired by Disney’s Frozen, this icy-blue sensory bag idea mimics Elsa’s magic with shimmering snowflakes and a frosty texture. It’s a hit for themed playdates or calming anxious little ones.
Method
- Combine blue glitter, silver sequins, and clear hair gel in a bag.
- For a “melting ice” effect, add a teaspoon of rubbing alcohol (safe when sealed).
- Tape the bag to a window for sunlight to enhance the sparkle.
- Optional: Freeze for 10 minutes before play for a chilly tactile surprise!
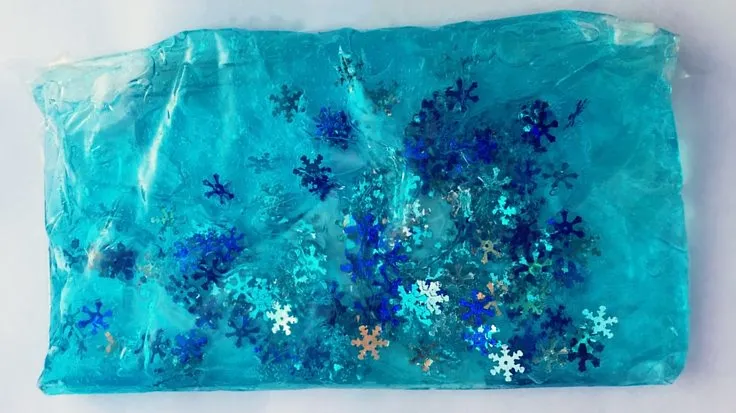
Image credit: Pinterest
How to Make a Sensory Bag Last
To ensure your sensory bag remains durable and long-lasting, start by selecting high-quality materials. Heavy-duty freezer bags or resealable silicone pouches are excellent choices because they resist punctures and leaks. If you’re using a standard plastic bag, consider double-bagging for extra strength. The sturdier the material, the longer the sensory bag will hold up under use.
1. Proper Sealing Techniques
A strong seal is crucial for preventing leaks, especially in liquid-based sensory bags. For ziplock bags, reinforce the closure with duct tape or packing tape along the edges. If you’re using a plastic pouch that needs to be fully sealed, try heat-sealing the opening with an iron. Place a sheet of parchment paper over the bag before ironing to avoid melting the plastic directly. This method works well for water, gel, or oil-filled sensory bags.
2. Choosing Safe and Durable Fillers
The type of fillers you use can impact the bag’s lifespan. Avoid sharp or rigid objects like hard beads or sequins, as they can puncture the bag over time. Instead, opt for soft, lightweight materials such as foam shapes, pom-poms, or fabric scraps. If you’re making a liquid sensory bag, thicker substances like hair gel, baby oil, or glycerin are better than water because they’re less likely to leak and provide a more interesting tactile experience.
3. Storage and Maintenance
How you store the sensory bag plays a big role in its longevity. Keep it away from direct sunlight, which can weaken the plastic and cause fading. Store it in a cool, dry place, and avoid placing heavy objects on top of it to prevent unnecessary pressure on the seams. If the bag has air inside, you can press out excess air before sealing to reduce stress on the material.
4. Supervision and Care During Use
Even with a well-made sensory bag, supervision is key to preventing damage. Teach children to handle it gently—no squeezing with sharp nails, biting, or throwing. If the bag does develop a small leak, act quickly by drying the area and applying a patch of strong tape or waterproof glue. With proper care and handling, a sensory bag can last for months or even years. Let me know if you’d like specific recommendations for different sensory bag types!
FAQs
1. Can sensory bags help with picky eating or food sensitivities?
While sensory bags are not a direct solution for picky eating, they can help desensitize children to certain textures in a low-pressure way. For example, filling a bag with squishy, slimy, or crunchy materials (like cooked pasta, gelatin, or rice) may make a child more open to touching similar textures in food. Over time, this tactile exposure could reduce mealtime resistance, though it should be paired with other feeding therapy techniques if needed.
2. How do I clean or sanitize a sensory bag for reuse or sharing?
For non-liquid bags, wipe the exterior with a disinfecting wipe or soapy cloth. If the filler is dry (rice, beans), you can occasionally replace it or freeze it for 24 hours to kill bacteria. Liquid-based bags (gel, oil) are harder to sanitize—consider making them single-use or assign one per child. Silicone bags are the easiest to clean thoroughly with warm, soapy water.
3. Are sensory bags safe for children with severe tactile defensiveness?
For kids who strongly resist touching certain textures, sensory bags can be a gentle introduction—but proceed carefully. Start with neutral or preferred textures (like smooth water beads or soft fabric) and avoid overwhelming fillers (e.g., sticky or gritty materials). Let the child explore at their own pace, even if that means just looking at the bag initially. Pairing the activity with positive reinforcement can also help build tolerance.
These were some lovely ideas for baby sensory play bags. These are just some of the more popular sensory bag ideas for kids. You could fill sensory bags with hair gel or any other materials to give kids an experience they’ll love. It’s important that they understand how different materials and products work and these sensory bags stimulate their core senses in a fun, non-toxic and, most importantly, safe and easy way.
Also Read:
Sensory Activities for Kids
Paper Craft Ideas for Children
Plastic Bottle Crafts for Children
Five Senses Activities for Children
Was This Article Helpful?
Parenting is a huge responsibility, for you as a caregiver, but also for us as a parenting content platform. We understand that and take our responsibility of creating credible content seriously. FirstCry Parenting articles are written and published only after extensive research using factually sound references to deliver quality content that is accurate, validated by experts, and completely reliable. To understand how we go about creating content that is credible, read our editorial policy here.






.svg)


