12 Creative DIY CD Craft Ideas for Kids
- What Kind of Crafts Can Be Made With Cds?
- Benefits of CD Crafts for Kids
- DIY CD Craft Ideas for Kids
- FAQs
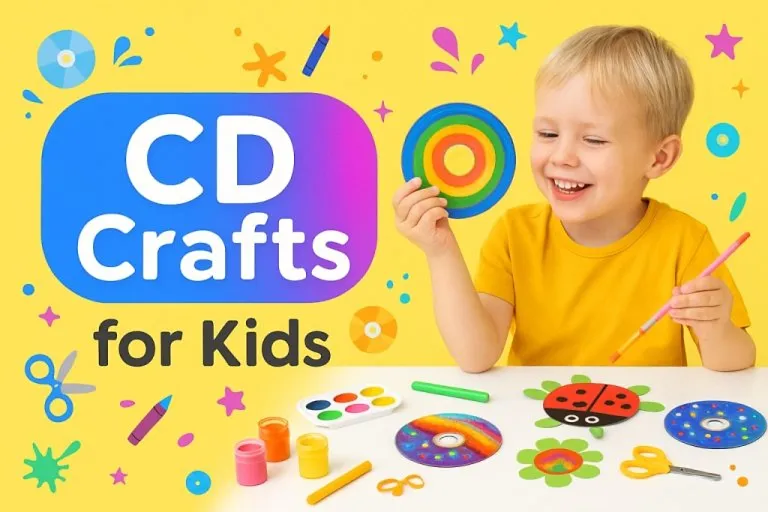
When kids start engaging in crafts, they spend their time in a fun and creative activity that is both stimulating and rewarding. It is also incredibly beneficial when you are trying to introduce your kid to new activities that are unrelated to being stuck in front of a screen for most of the day. Your kids are always on the lookout for something interesting, especially something right in front of their eyes, yet it manages to surprise them completely. So imagine the look on their faces when they realise what they can do; it’s the perfect opportunity to upcycle old CDs. Exploring CD craft ideas for kids is a fantastic way to transform forgotten items into dazzling new art, blending creativity with environmental consciousness.
What Kind of Crafts Can Be Made With Cds?
CDs can be used to form animal shapes, photo collages, party masks, dreamcatchers, and so much more. A very versatile material that your child can easily experiment with old CD crafts.
Benefits of CD Crafts for Kids
Transforming discarded discs into art is more than just a creative afternoon; it’s a surprisingly powerful activity for child development. The process of creating crafts with CD discs offers a unique blend of benefits that nurture a child’s growth in multiple ways.
- You’re in luck. You’ve landed on the jackpot of crafts categories. After all, CDs have always been a valuable currency of their own; CDs are easy to find, whether in music, movies, or video games.
- The best part is that your old CDs are being reused into something valuable for your child to unleash their creativity. Instead of throwing them away, you ensure they are made into something meaningful for your child.
- Making crafts is a skill-building exercise for your kids that they would never know about! Within weeks, they will become quite skilled in creating beautiful pieces from the old CD art projects.
- Teaching kids to reuse items such as old CDs for crafts exposes them to eco-friendly practices from a young age.
DIY CD Craft Ideas for Kids
Here are some CD decoration ideas for making crafts using CDs.
1. Mini Photo Album
Your kid can make their designer photo collages on this decorative mini CD album!
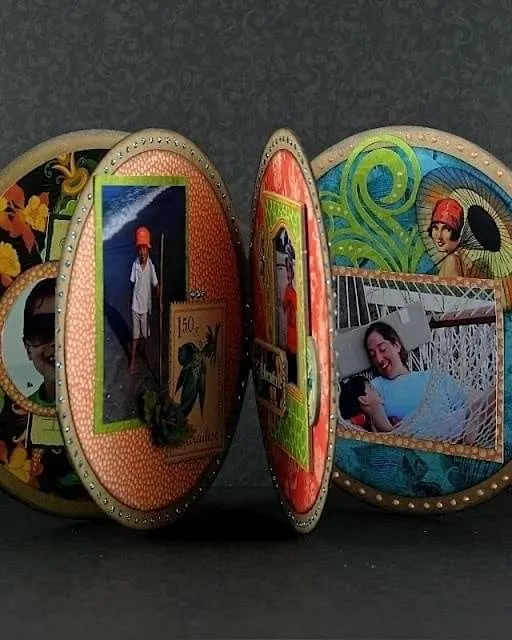
Image Credit: Pinterest
What You Will Need
- Four old CDs or DVDs
- Patterned paper/cardstock
- One bookbinding ring
- Glue
- A hole punching machine
- Ribbon
- Scrapbook paper
How to Make
- Start with tracing the CD onto the back of your patterned paper/cardstock.
- Cut them out with scissors to cover both sides of each CD.
- Next, apply your choice of glue onto one face of the CD, and please ensure that the glue is spread evenly across its surface.
- Stick the cardstock to your CD and let it dry for a few minutes.
- Then use the hole punching machine to make one hole approximately 1/2″ in from the edge.
- Follow the same process for the remaining CDs.
- Start sticking!
2. Sparkly CD-ROM Fish
What more does a child need than a sparkly fish ornament to show off to their friends? Here is how to do this very simple piece.
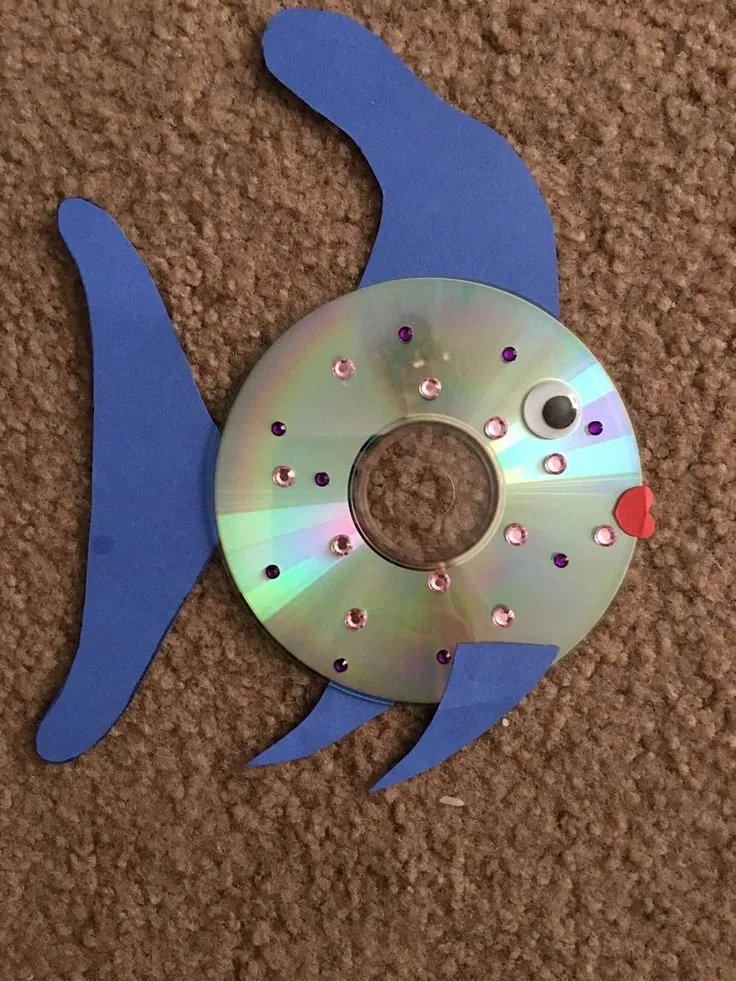
Image Credit: Pinterest
What You Will Need
- A CD
- Glitter
- Cardstock
- Scissor
- Pencil
- Glue
How to Make
- Take the CD and apply glue to one side of it.
- Sprinkle glitter on the glue for good measure, and then try to even it out.
- Make sure all parts of the CD are covered.
- Do the same for the other side.
- Next, draw the fins, tail fins, and mouth of the fish on the cardstock. Feel free to match them with any colour of your choice.
- Cut out a small circle for the eyes on both sides.
- Use your scissors to cut them out carefully.
- Make sure to glue the fins and the mouth to fit precisely under one side.
- Draw and cut out two small circles for the fish’s eyes. Don’t forget to stick one on each side!
- You have a sparkly CD fish for your kid’s fascination!
3. CD Clock
Wall clocks are an easy fix to any boring walls in your home, and they’re quite special since this one would be a custom-made toy clock by one of your own!
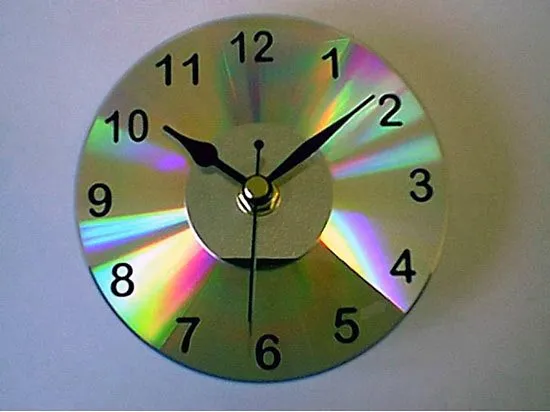
Image Credit: Pinterest
What You Will Need
- A CD
- Scissors
- Cardstock
- A thumb pin
- Sketch pen
- Glue
How to Make
- Take a sheet of cardstock. Keep the CD on it and draw a circle an inch wider than the CD.
- Use the sketch pen to design the clock’s dial, considering that the CD would be at the centre. You can decorate the dial however you want.
- Cut out the circle’s outline with the scissors and stick it on one side of the CD.
- On the cardstock again, draw the two hands for the clock, the hour and minute hands, and cut them out. Design the hands so that they fit with the theme of the clock.
- Take a thumb pin, centre the two hands, and pierce them through the circle stuck on the CD.
- That is all; feel free to stick the CD clock wherever you feel like it!
4. Clown Wall Hanging
Clowns are the most lovable characters we can come across! Here is how to make a clown wall hanging for all the clown lovers!
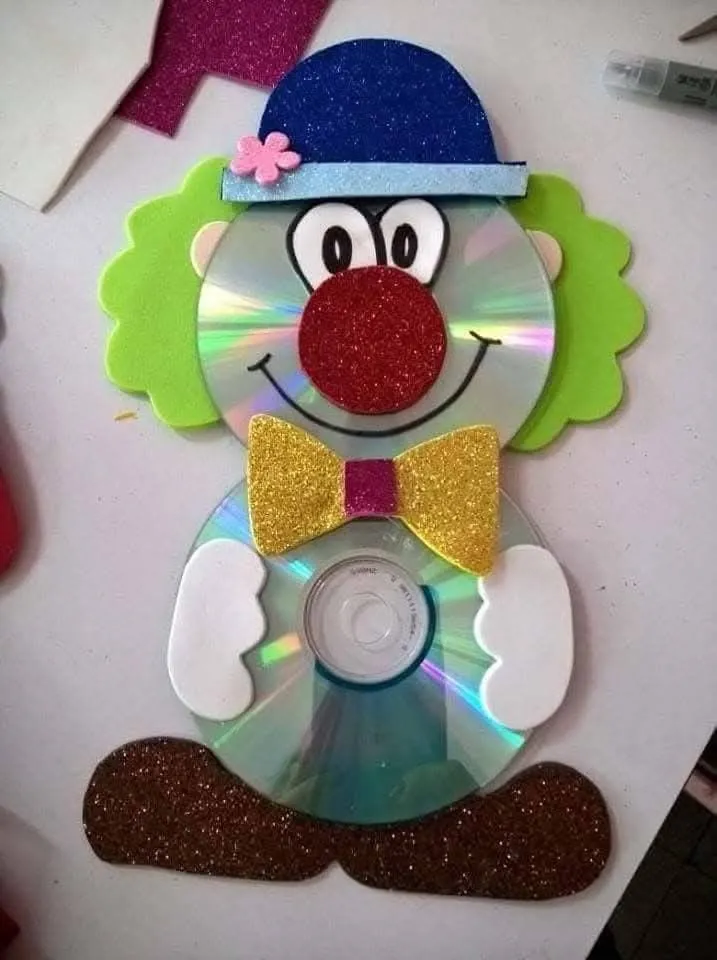
Image Credit: Pinterest
What You Will Need
- CDs
- Cardstock, multiple colours
- Scissors
- Glue
- Needle
- Ball of thread
- Sketch pen
- Ribbons
How to Make
- The first step is to make a rough sketch of the clown you would like to make.
- Remember that the CD forms the major part of the clown’s head. Only the jaw needs to be attached separately.
- Take extra care with the design for the mouth, preferably a wide grin or that of a laughing clown.
- Use different colours to draw the rest of the clown’s appearance, such as the hat, makeup, hair, and nose.
- And make sure to draw the clown’s eyes on the CD surface.
- Place the CD on a sheet of cardstock and draw out the jaw for the clown.
- Cut them out carefully and stick them on the CD.
- Stick the different parts according to the design you made.
- Pick out a ribbon that goes well with the clown’s look.
- Use a needle at the top of the clown’s hat and insert enough thread through the hole for easy wall hanging.
- Your clown is now ready to ‘hang’ out!
5. CD Suncatcher
There is a very dreamy look to a suncatcher. If only they were easy to make. Oh, wait, they are!
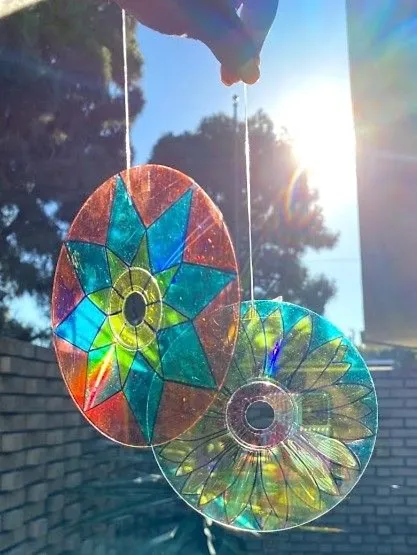
Image Credit: Pinterest
What You Will Need
- CDs
- Scissors
- Tape
- Paper
- Black textured paint
- Suncatcher paint
- Thread
How to Make
- Take one of your CDs and use tape to remove the top layer. You can do this by sticking the tape on it and peeling off the layer slowly.
- Repeat on the other side so that the CD is entirely transparent.
- Next, trace an outline of the CD and draw a design on it as you please. You can also download templates for suncatcher designs.
- Outline the design on the transparent CD. Use black textured paint for this.
- Once it has dried, use suncatcher paint to paint inside the design.
- Finally, tape a threaded cord to the back of the CD for hanging it.
- Your DIY CD Suncatcher is ready!
6. CD Peacock
Here is a spectacle for your eyes that your kids can make with their bare hands! Here you have a simple way of making a dazzling CD peacock.
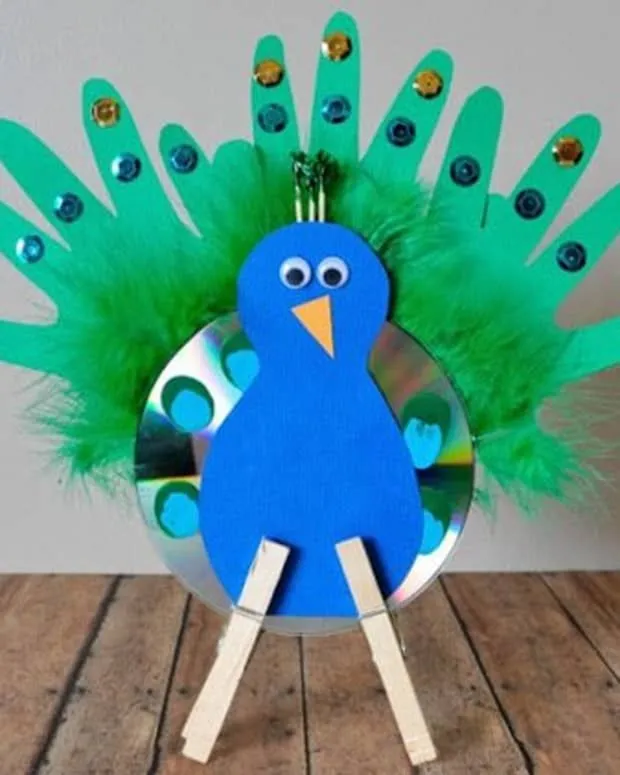
Image Credit: Pinterest
What You Will Need
- CDs
- Pencil
- Scissors
- Colored cardstock
- Disposable wooden spoons
- Glue
- Colored thumb pins
How to Make
- Make a rough sketch of the peacock design you want to create.
- Assign different colours for each peacock part, including its main body, beak, and feathery tail.
- Use scissors to cut them out and glue them to the CD accordingly.
- Pick two pairs of disposable wooden spoons for the legs and glue them into place, two in front and two in the back, forming two legs for the peacock.
- Use colored thumb pins to form the design of the peacock’s feathers. You can add that to the feathers if you have glitter for an extra dreamy effect!
- Do not forget to make the eyes for the peacock as well.
- And there you have it, a CD peacock that you can place anywhere!
7. CD Spinning Top
Making something that you can play with is an absolute joy. Especially with CDs, it can be quite tough. But the CD spinning top is the easiest one to make!
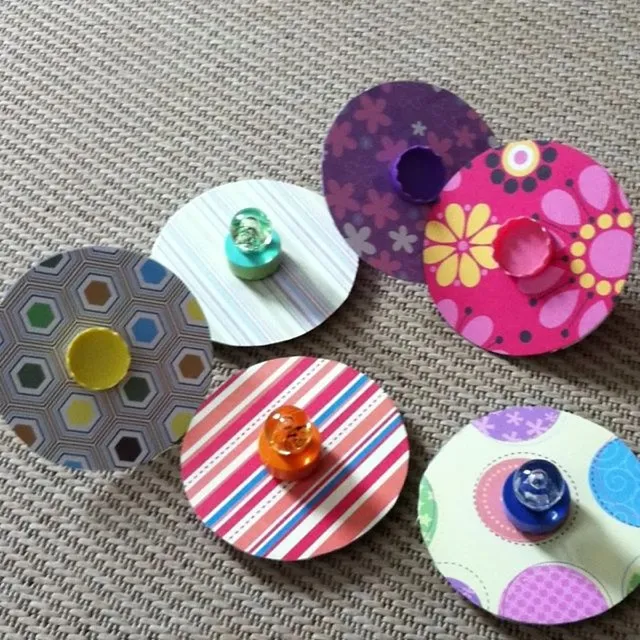
Image Credit: Pinterest
What You Will Need
- CD
- Thick marker
- Large thumb pin
- Scissors
- Sketch pen
How to Make
- Decorate the CD with the colored sketch pen of your choice.
- Take the thickest marker that you can find, which can also fit through the hole of your old CD.
- Take out the refill of the marker and replace the marker’s tip with a large thumb pin taped to the front.
- Fit the whole piece through so that the front of the marker and the pin rest comfortably under one side.
- The CD top is now ready to start spinning!
8. CD Guitar Craft
Music has always been an inspiration for so many kids to express themselves. Tap the music-lover in your child by teaching them to craft their CD guitar.
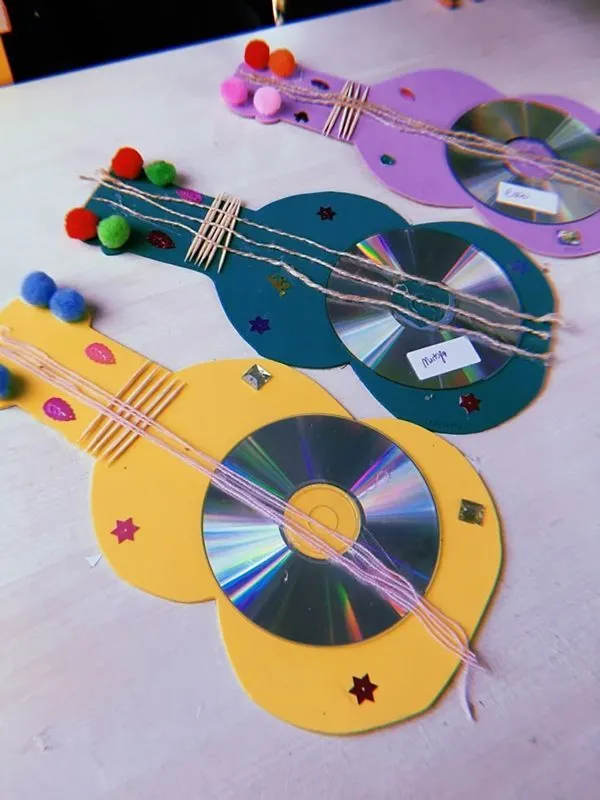
Image Credit: Pinterest
What You Will Need
- CD
- Cardstock
- Thumbpin
- Scissors
- Thread
- Stickers
How to Make
- Sketch the shape of a guitar on the cardstock of your choice with the CD as the centrepiece.
- Draw, cut out, and stick thin lines of cardstock on the arm of the guitar holding its strings.
- Take four strands of thread as the strings to stretch across the length of the guitar, cut and tape both ends tightly to the back.
- You can place stickers on the guitar and customise it as you please.
- Use thumb pins for the knobs at the end of the arm and for sticking the guitar onto any board for showcasing.
9. CD Sock Puppet
Remember a time when puppets were a big thing? Time to jump back to those times! Here’s the best way to make a CD sock puppet.
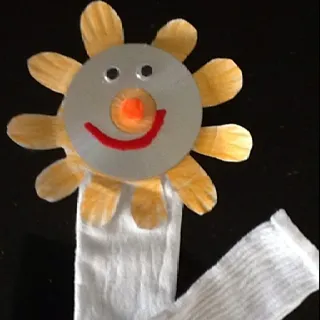
Image Credit: Pinterest
What You Will Need
- CD
- Socks
- Cardstock
- Scissors
- Glue
How to Make
- Place the CD on the cardstock and draw a design for the puppet’s head that goes along with the CD. For instance, a sunflower.
- Make different parts of the design with different colours.
- Cut the pieces out and stick them onto the CD with glue.
- Then use glue to attach the whole piece onto the sock with extra care.
- Make a bunch of these, and you can start hosting puppet shows right away!
10. CD Doggo
If your kids love playing with dogs, this would be a CD decoration they would absolutely adore!
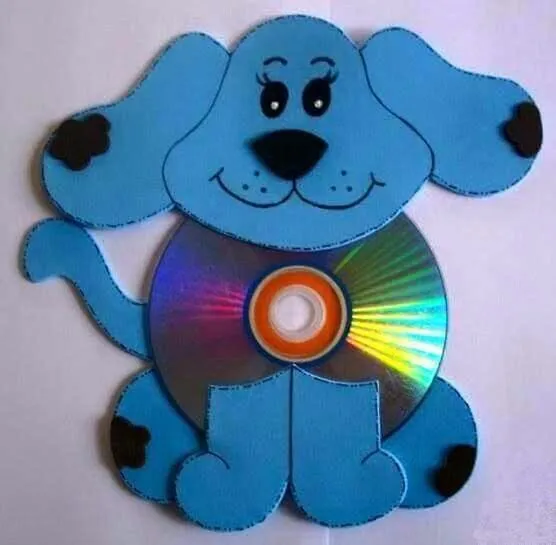
Image Credit: Pinterest
What You Will Need
- CD
- Cardstock
- Sketch pen
- Scissors
- Glue
- Buttons
- Tape
How to make
- Peel off the outer layer of the CD using tape.
- Using the CD as the main body of the dog, design the rest of it on colored cardstock.
- Cut out and stick the head, legs, and tail carefully.
- Sketch the face of the dog and stick buttons for its eyes.
- This CD doggo is here to stay!
11. CD Mosaic Flowerpot
Transform a plain terracotta pot into a dazzling garden feature by using broken CD shards as iridescent mosaic tiles.
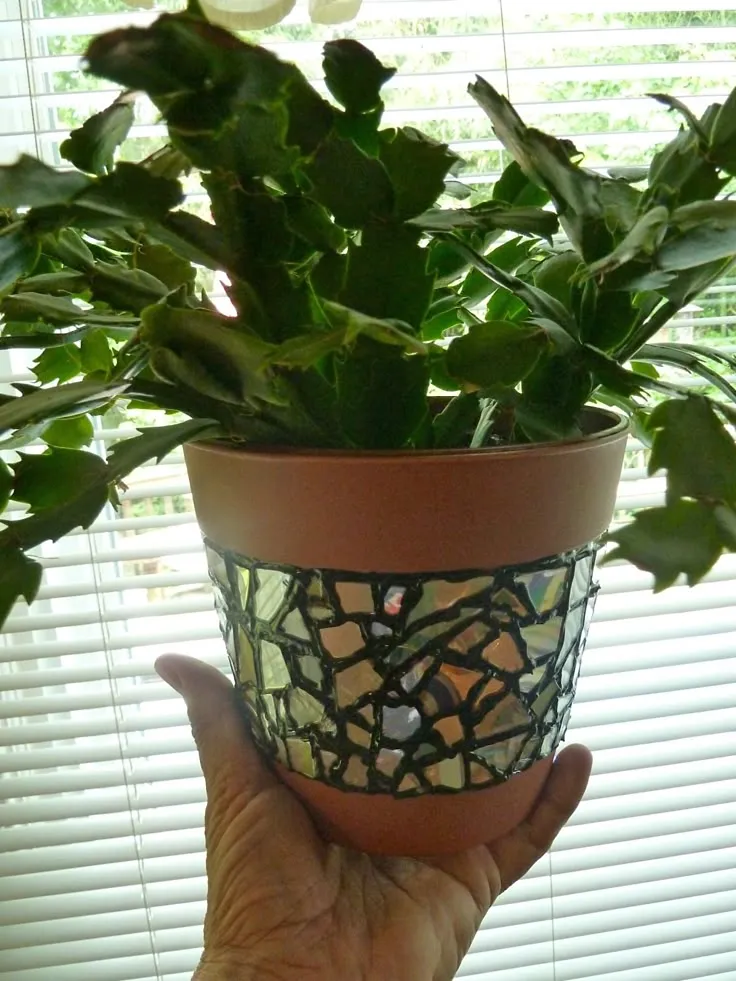
Image Credit: Pinterest
What You Will Need
- Several old CDs (scratched ones work perfectly)
- A terracotta flowerpot
- Tile nippers or strong scissors (for adult use)
- Outdoor-rated mosaic glue or strong adhesive
- Grout (optional)
- Safety glasses
How to Make
- Wearing safety glasses, carefully break the CDs into small, manageable shards using tile nippers. An adult must complete this step.
- Plan your design on the flowerpot, then glue each CD shard firmly onto the pot’s surface.
- Allow the glue to dry completely according to the manufacturer’s instructions.
- For a finished look, apply grout between the pieces, wiping away the excess with a damp cloth. This creates a sturdy, weather-resistant finish for your sparkling pot.
12. CD Hovercraft
Blend a science experiment with a fun craft by building a simple hovercraft that glides smoothly across flat surfaces.
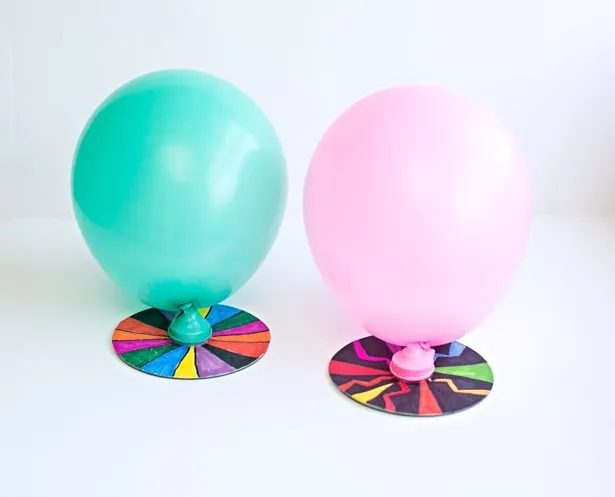
Image Credit: Pinterest
What You Will Need
- Old CD
- Pop-top cap from a disposable water bottle
- A balloon
- Strong craft glue or hot glue gun (for adult use)
How to Make
- Ensure the pop-top cap is closed. Glue the base of the cap securely over the centre hole of the CD, creating an airtight seal. Let the glue dry completely.
- Once the glue is dry, open the cap and inflate the balloon. Pinch the neck of the balloon to prevent air from escaping.
- Stretch the mouth of the balloon over the closed pop-top cap.
- Place your hovercraft on a smooth, flat surface like a table or floor. Open the cap and give it a gentle push to watch it glide on a cushion of air.
FAQs
1. Are there any safety concerns with the reflective surface of CDs?
Yes, the reflective surface can pose a safety concern if a CD is used in a craft intended for outdoor decoration. The highly reflective surface can concentrate and reflect sunlight, similar to a mirror, potentially creating a glare hazard or, in extremely rare cases, a fire risk if focused intensely on a single point. For this reason, it is advisable to avoid hanging finished CD crafts in direct, uninterrupted sunlight, especially near windows or in gardens.
2. Can the data side of a CD be used in crafts, or does it need to be covered?
The data side can absolutely be used and often creates the most visually striking effects. Its iridescent, rainbow-hued surface is perfect for projects like mosaics, mobiles, or sun catchers where light refraction is desired. There is no functional need to cover it; however, be aware that paint and glue will not adhere well to this slick, non-porous surface. If you plan to paint directly on the data side, lightly sanding it first will help the paint grip.
These were some great old & waste CD craft ideas for kids. Using CDs, this collection of ideas for DIY crafts would have your kid wanting more! Always be on the lookout for ways to turn your old CDs into the next CD art project your kid will take charge of.
Also Read:
Origami Crafts for Kids
Clothespin Crafts for Kids
Penguin Crafts for Children
Plaster of Paris Craft Ideas for Kids
Was This Article Helpful?
Parenting is a huge responsibility, for you as a caregiver, but also for us as a parenting content platform. We understand that and take our responsibility of creating credible content seriously. FirstCry Parenting articles are written and published only after extensive research using factually sound references to deliver quality content that is accurate, validated by experts, and completely reliable. To understand how we go about creating content that is credible, read our editorial policy here.





.svg)


