25+ March Crafts for Kids to Celebrate Spring Time
Bright and cheerful March crafts for kids to welcome spring with fun, creativity, and colorful seasonal activities at home or school


Image Source: AI-Generated Image
As winter slowly fades and the first signs of spring appear, March becomes the perfect time to bring creativity indoors and outdoors. Kids are naturally curious this time of year, flowers start blooming, birds return, and the weather feels lighter. It’s the ideal season to channel that energy into fun, hands-on activities that spark imagination. That’s where March crafts for kids come in, offering a wonderful mix of learning and play.
Parents and teachers often look for children’s crafts for March that are easy to set up yet engaging enough to hold attention, and the good news is, there are plenty of options that tick both boxes. Whether you’re planning a weekend activity or classroom fun, these craft ideas bring joy while helping kids develop fine motor skills and creativity.
March Crafts for Preschoolers & Toddlers
March is a lovely time to slow down and enjoy simple, creative moments with little ones as the season gently shifts into spring, when everything feels fresh and new. Children at this age learn best through touch, colour, and repetition, so crafts should feel playful and comforting rather than focused on perfect results or neat outcomes. These ideas are designed to be easy and enjoyable, whether you are exploring March preschool crafts at home or trying March crafts for kindergarten in a classroom setting with a group of curious learners. You will also find calming and engaging options that work beautifully as March arts and crafts for toddlers, helping them stay involved without feeling overwhelmed or rushed.
1. Rainbow Finger Painting

Source: Pinterest
What You Will Need
- Washable paints
- White paper
- Wet wipes or a cloth
Instructions
- Pour small amounts of paint in different colours on a plate.
- Let your child dip fingers into the paint slowly.
- Guide them to spread colours across the paper freely.
- Talk about colours as they create their artwork.
2. Paper Plate Sun
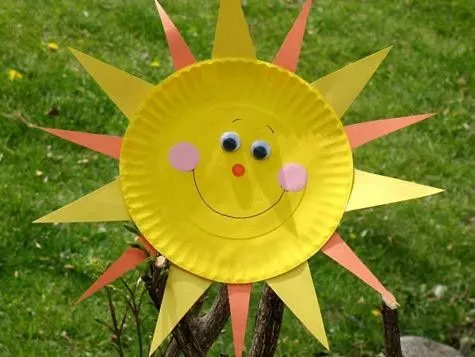
Image Credit: Pinterest
What You Will Need
- Paper plate
- Yellow and orange paint
- Paintbrush
- Glue
Instructions
- Paint the plate fully in yellow using a brush.
- Add orange strokes to give it a warm look.
- Let the plate dry completely before touching.
- Place it on a wall as a bright sun display.
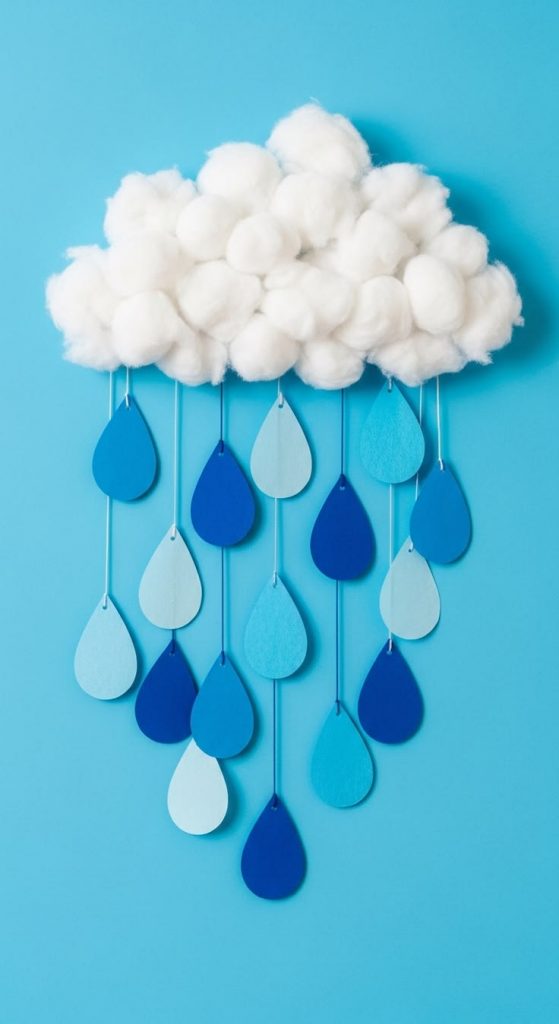
3. Cotton Ball Cloud
Source: Pinterest
What You Will Need
- Blue paper
- Cotton balls
- Glue
Instructions
- Draw a simple cloud shape lightly on the paper.
- Apply glue inside the shape carefully.
- Stick cotton balls one by one on the glue.
- Press gently and allow it to dry.
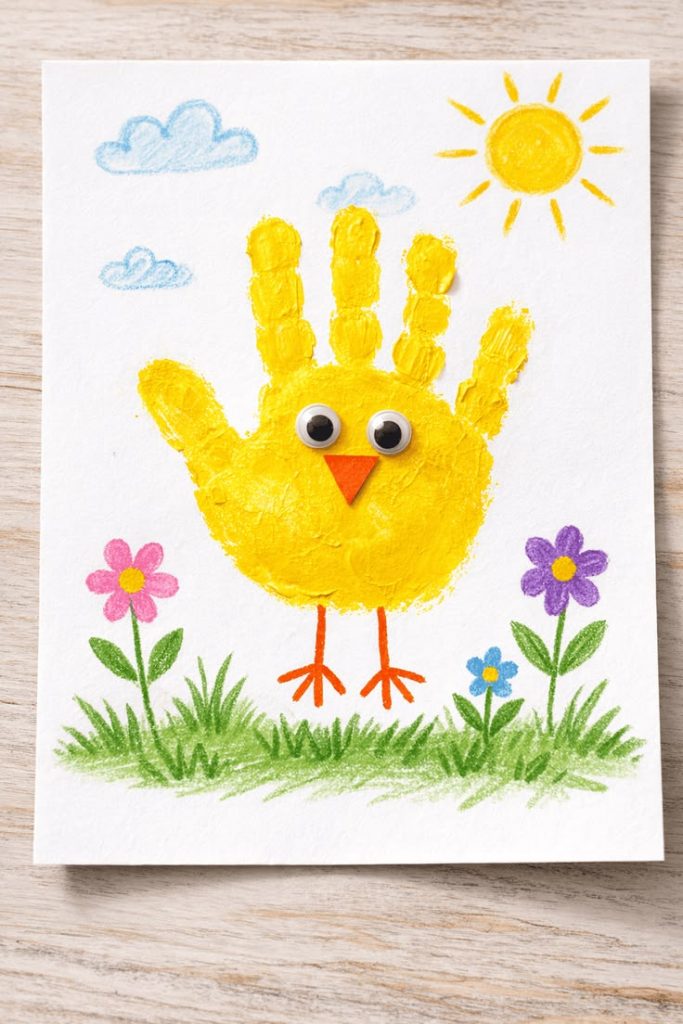
4. Handprint Chick
Source: Pinterest
What You Will Need
- Yellow paint
- White paper
- Black marker
Instructions
- Apply yellow paint evenly to your child’s palm.
- Press the hand gently onto the paper.
- Let the print dry before adding details.
- Draw eyes, beak and legs using a marker.
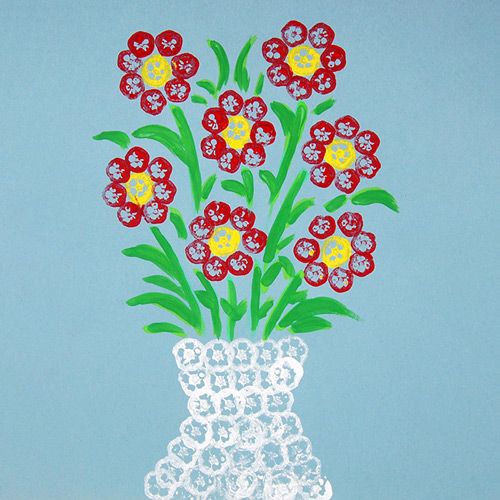
5. Simple Flower Stamping
Source: Pinterest
What You Will Need
- Cut vegetable pieces like okra or potatoes
- Paint
- Paper
Instructions
- Dip the vegetable piece into the paint slowly.
- Press it onto paper to form a flower shape.
- Repeat using different colours for variety.
- Add stems with a brush or finger.
6. Bunny Ear Headband

Source: Pinterest
What You Will Need
- White paper
- Pink paper
- Glue
- Scissors
Instructions
- Cut long strips of paper for the headband.
- Cut bunny ear shapes from white paper.
- Glue pink paper inside the ears.
- Attach the ears to the band and wear gently.
7. Raindrop Art
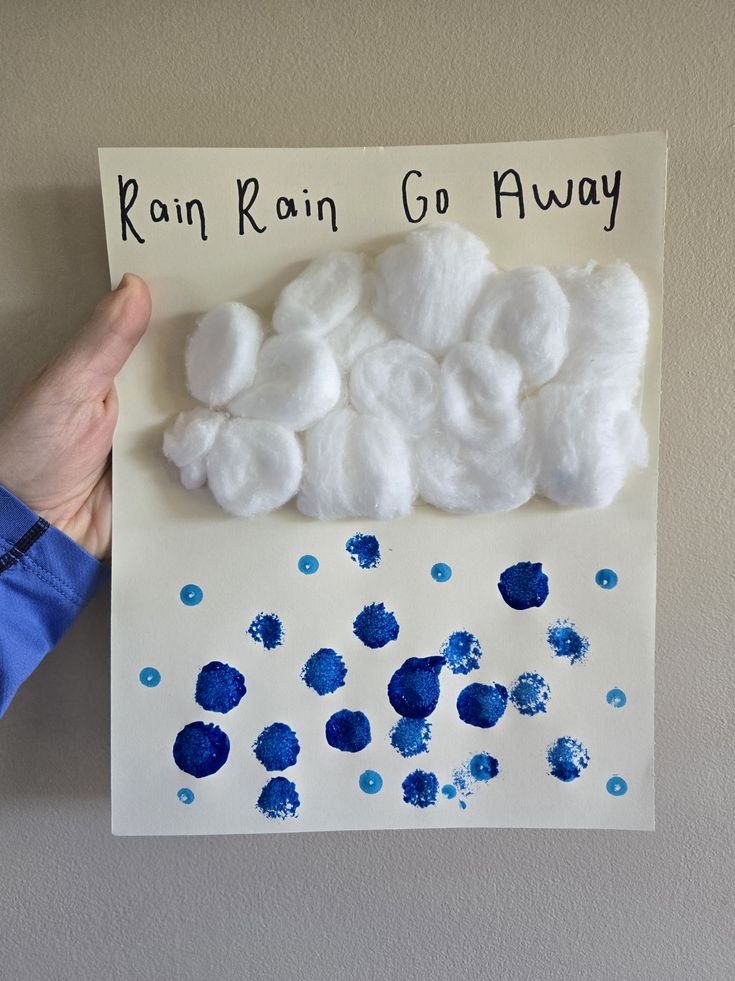
Source: Pinterest
What You Will Need
- Blue paper
- White paint
- Cotton swabs
Instructions
- Dip a cotton swab into white paint.
- Dab small dots on the paper gently.
- Shape them to look like falling rain.
- Let the artwork dry before displaying.
8. Paper Butterfly
Source: Pinterest
What You Will Need
- Coloured paper
- Crayons
- Glue
Instructions
- Fold the paper neatly in half.
- Draw a half-butterfly shape on one side.
- Cut along the outline and open it.
- Decorate using crayons or simple patterns.
9. Ladybug Paper Craft
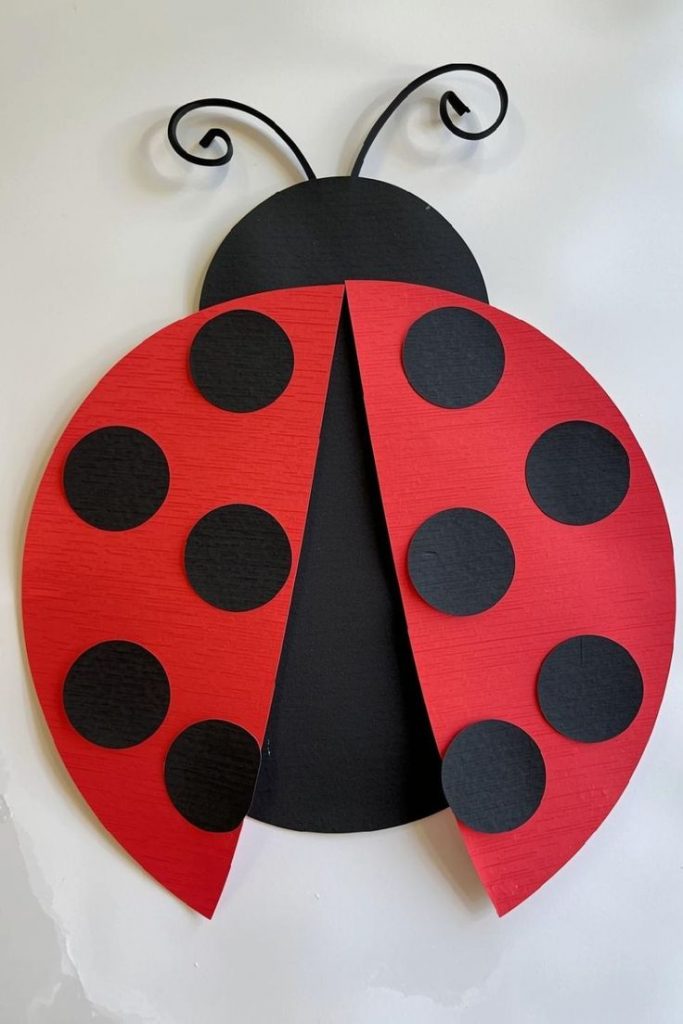
Source: Pinterest
What You Will Need
- Red and black paper
- Glue
- Scissors
Instructions
- Cut a circle from red paper for the body.
- Add black spots using paper or a marker.
- Cut a small black head shape.
- Glue all parts together carefully.
10. Popsicle Stick Flower
Source: Pinterest
What You Will Need
- Popsicle sticks
- Paint
- Glue
Instructions
- Paint the sticks in bright colours evenly.
- Arrange them in a flower shape.
- Glue the sticks together at the centre.
- Add a small circle in the middle.
11. Leaf Collage
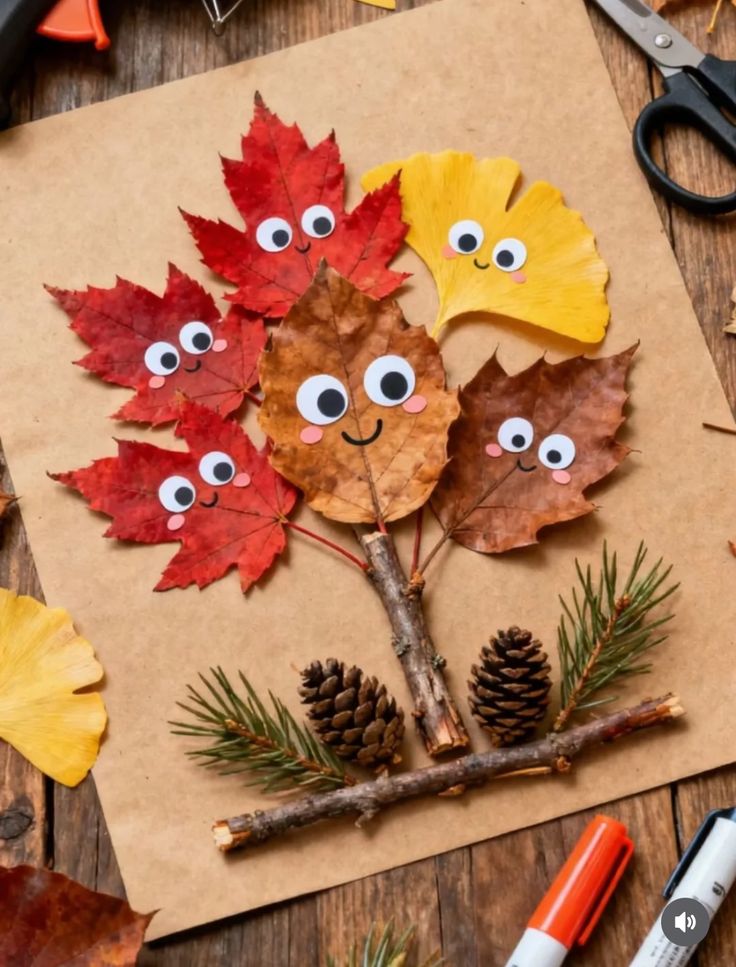
Source: Pinterest
What You Will Need
- Real leaves
- Paper
- Glue
Instructions
- Collect leaves during a short outdoor walk.
- Apply glue to the paper in small areas.
- Place leaves in patterns or shapes.
- Press gently and let it dry fully.
12. Sun and Cloud Scene
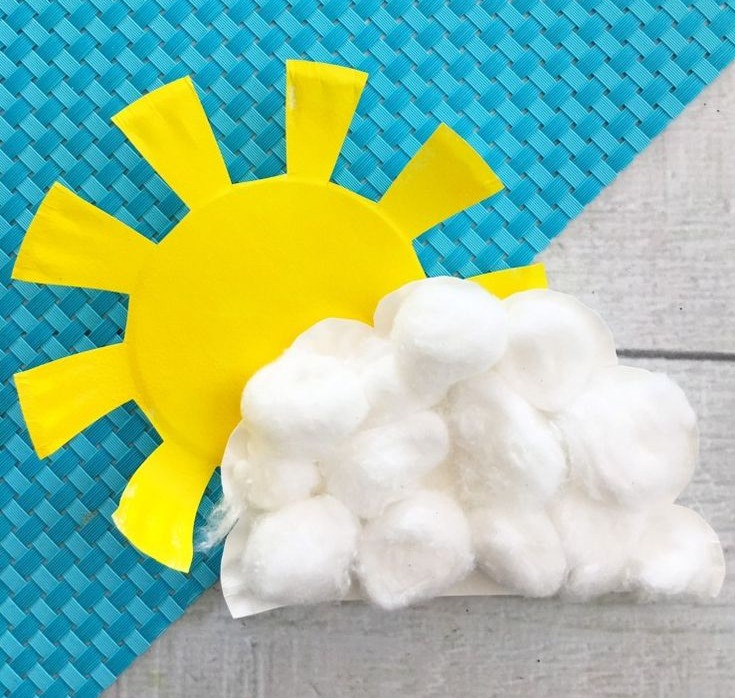
Source: Pinterest
What You Will Need
- Coloured paper
- Cotton balls
- Glue
Instructions
- Cut a sun shape from yellow paper.
- Glue it onto blue paper as the base.
- Add cotton balls to form soft clouds.
- Arrange everything neatly and let it dry.
13. Egg Carton Caterpillar

Source: Pinterest
What You Will Need
- Egg carton
- Paint
- Googly eyes
Instructions
- Cut the egg carton into small sections.
- Paint each section in bright colours.
- Attach googly eyes to the front part.
- Let it dry before playing with it.
Easy March Crafts for Kids
March brings a fresh kind of energy that kids between five and eight really respond to as they start noticing small changes in nature and enjoy expressing it through creative play. At this age, children like a bit more challenge but still need activities that feel fun and achievable without too many steps or strict rules. These simple projects are perfect if you are looking for arts and crafts ideas for March that balance creativity with ease, while also working well as crafts for the month of March at home or school. Each idea is designed to feel engaging and meaningful, making them great March kids’ crafts that kids can feel proud of when they finish.
1. Paper Rainbow Wall Hanging
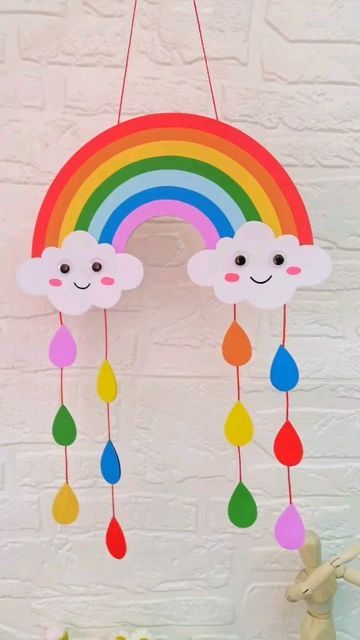
Source: Pinterest
What You Will Need
- Coloured paper strips
- String
- Glue
- Scissors
Instructions
- Cut coloured paper into equal strips and arrange them in rainbow order.
- Glue the strips in a curved rainbow shape on a base paper.
- Attach a string at the top carefully.
- Hang it near a window or wall to enjoy the colourful display.
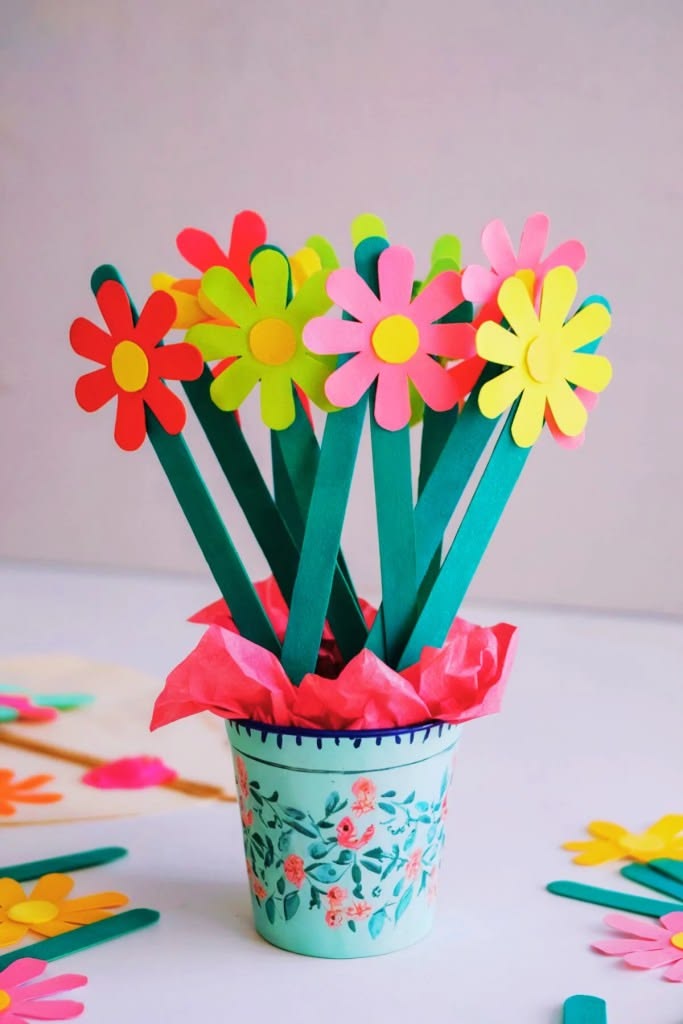
2. Spring Flower Bouquet

Source: Pinterest
What You Will Need
- Coloured paper
- Glue
- Green straws or sticks
- Scissors
Instructions
- Cut flower shapes from coloured paper using simple patterns.
- Glue each flower onto a straw or stick to form stems.
- Add small leaves using green paper pieces.
- Arrange all the flowers together to make a bouquet.
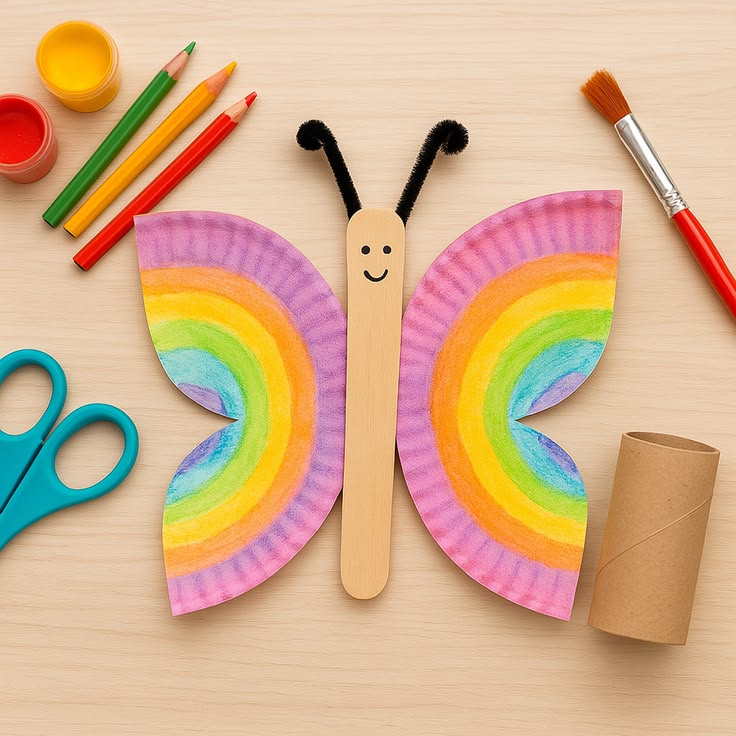
3. Butterfly Symmetry Art
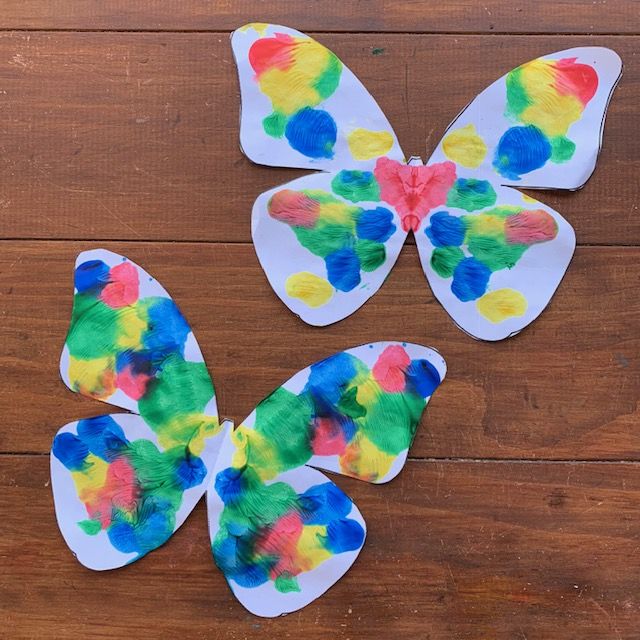
Source: Pinterest
What You Will Need
- Paper
- Paint
- Brush
Instructions
- Fold the paper neatly in half to prepare for symmetry.
- Apply paint on one side in random patterns.
- Press and fold the paper gently to transfer the paint.
- Open it slowly to reveal a colourful butterfly effect.
4. Kite Craft
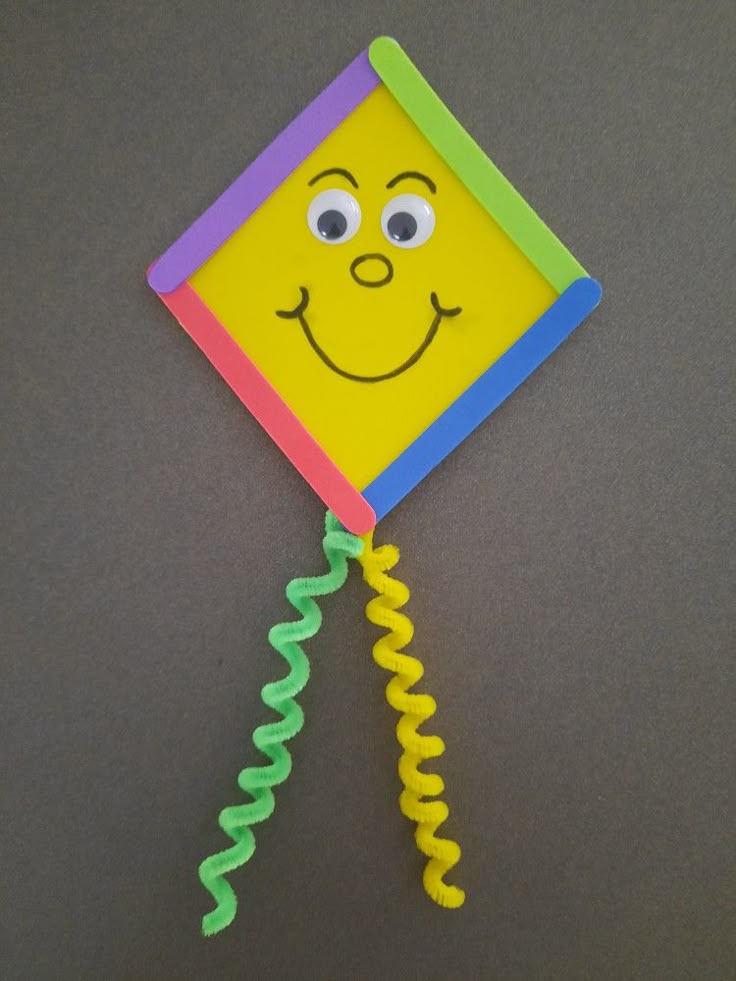
Source: Pinterest
What You Will Need
- Coloured paper
- Ribbon
- Glue
- Scissors
Instructions
- Cut the paper into a diamond shape to form the kite base.
- Decorate it using crayons or patterns for a personal touch.
- Attach a ribbon at the bottom to act as the tail.
- Display it or hold it while playing indoors.
5. Bird Nest Craft
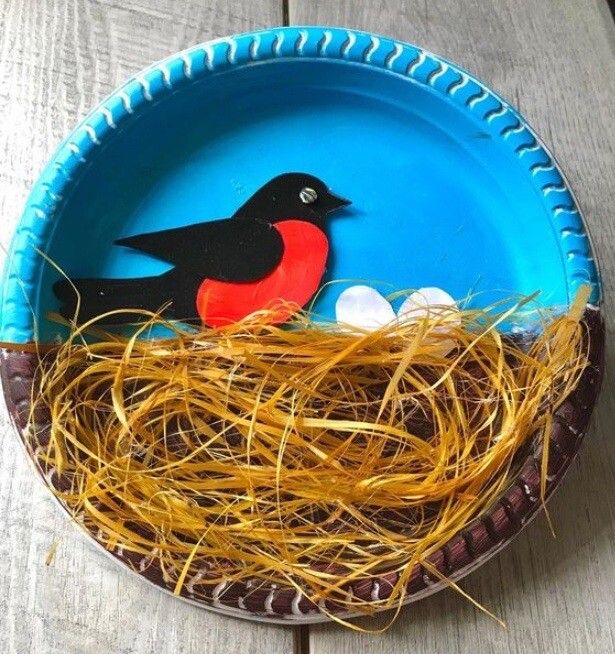
Source: Pinterest
What You Will Need
- Paper bowl or paper circle
- Dry grass or paper strips
- Glue
- Small paper eggs
Instructions
- Fill the paper bowl with dry grass or paper strips carefully.
- Shape it gently to look like a nest.
- Add small paper eggs in the centre.
- Let it dry and keep it as a spring display.
6. Ladybug Bookmark
What You Will Need
- Red and black paper
- Glue
- Scissors
Instructions
- Cut a long strip of paper to form the bookmark base.
- Add a red circle on top to create the ladybug body.
- Draw or paste black spots neatly.
- Let it dry before placing it inside a book.
7. Rainy Day Umbrella
What You Will Need
- Coloured paper
- Cotton
- Glue
- Marker
Instructions
- Cut an umbrella shape from coloured paper.
- Decorate it with patterns or lines using a marker.
- Add cotton above to represent clouds.
- Draw raindrops below to complete the scene.
8. Sunflower Craft
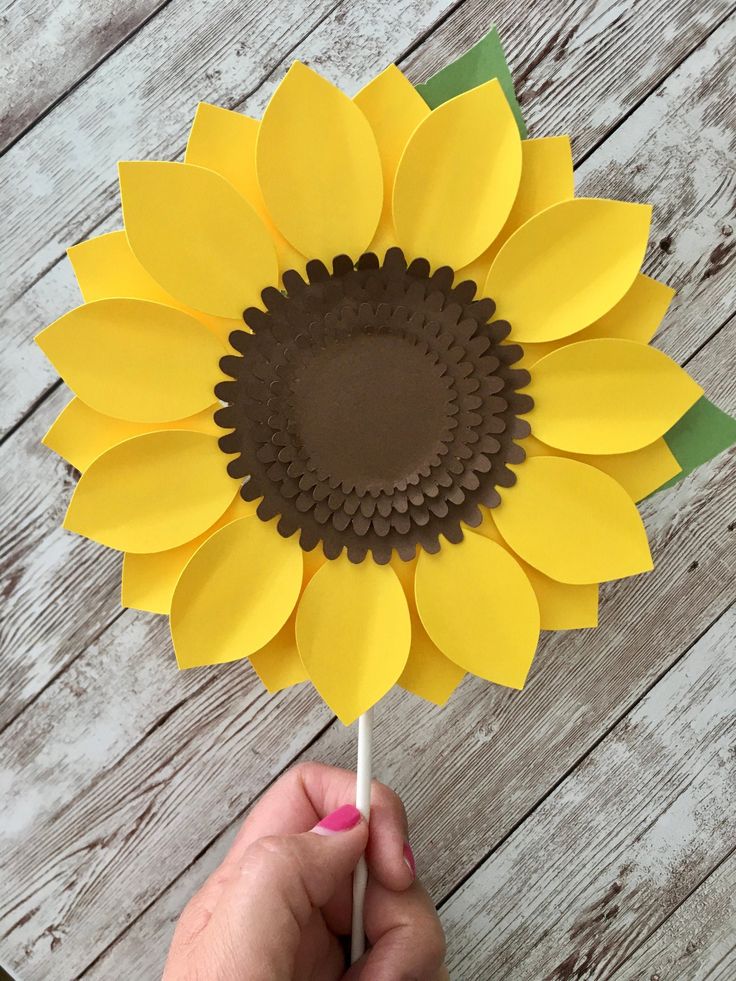
Source: Pinterest
What You Will Need
- Yellow paper
- Brown paper
- Glue
- Scissors
Instructions
- Cut multiple petal shapes from yellow paper.
- Cut a brown circle to form the centre.
- Glue petals around the centre evenly.
- Add a stem and leaves to finish.
9. Paper Windmill
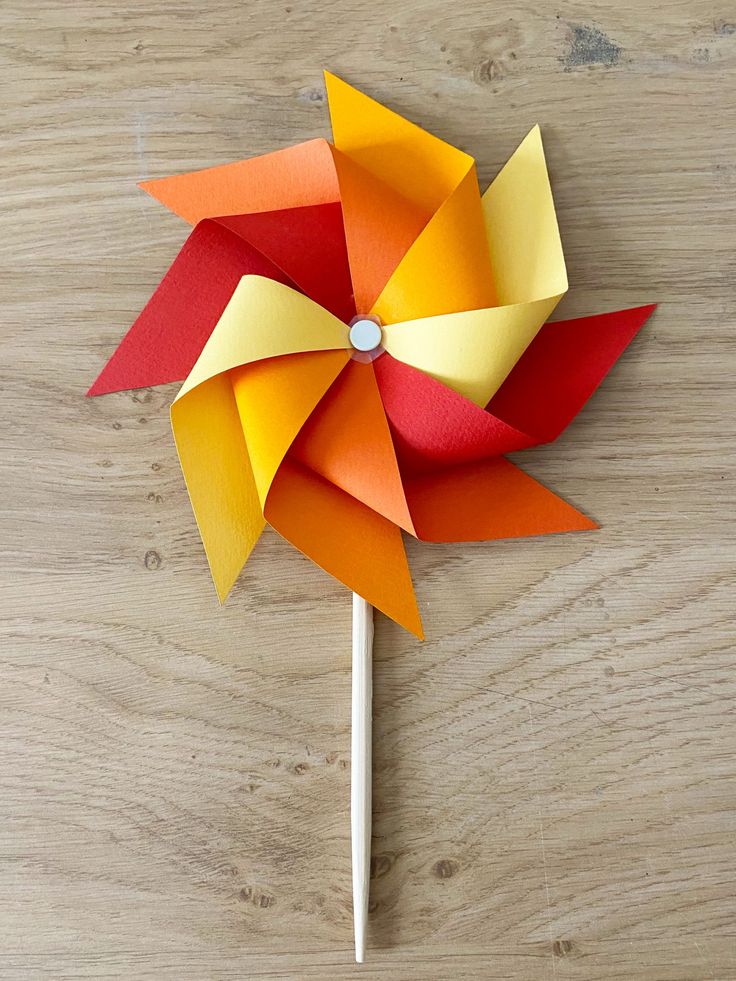
Source: Pinterest
What You Will Need
- Square paper
- Pin or stick
- Scissors
Instructions
- Cut from each corner towards the centre of the paper.
- Fold alternate corners inward carefully.
- Fix the folded parts with a pin.
- Attach it to a stick and spin gently.
10. Spring Tree Painting
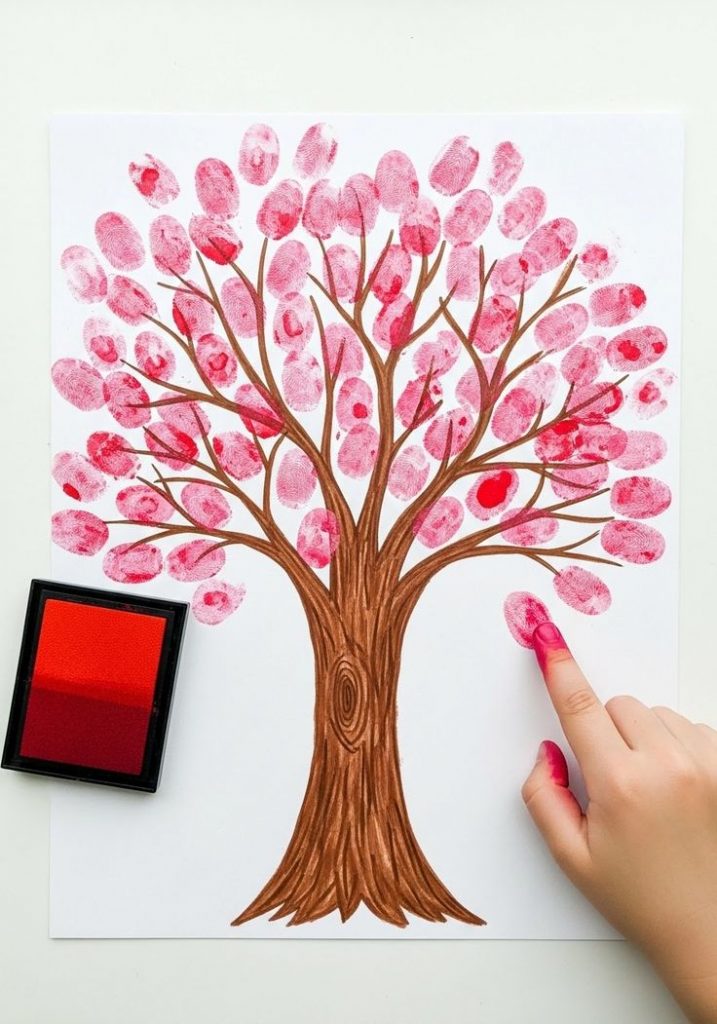
Source: Pinterest
What You Will Need
- Paper
- Paint
- Cotton buds
Instructions
- Draw a simple tree trunk using a brush or pencil.
- Dip cotton buds into paint colours.
- Dab gently to form flowers on branches.
- Use different colours to make it look lively.
11. Bee Craft
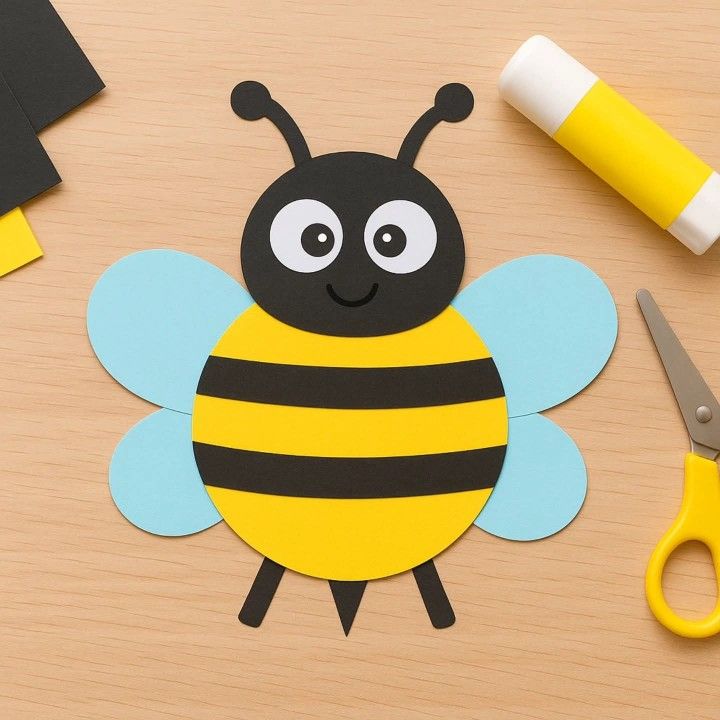
Source: Pinterest
What You Will Need
- Yellow and black paper
- Glue
- Scissors
Instructions
- Cut an oval shape from yellow paper for the body.
- Add black stripes across the body.
- Cut and attach small wings on the sides.
- Draw eyes and a smile to complete.
12. Paper Plate Frog
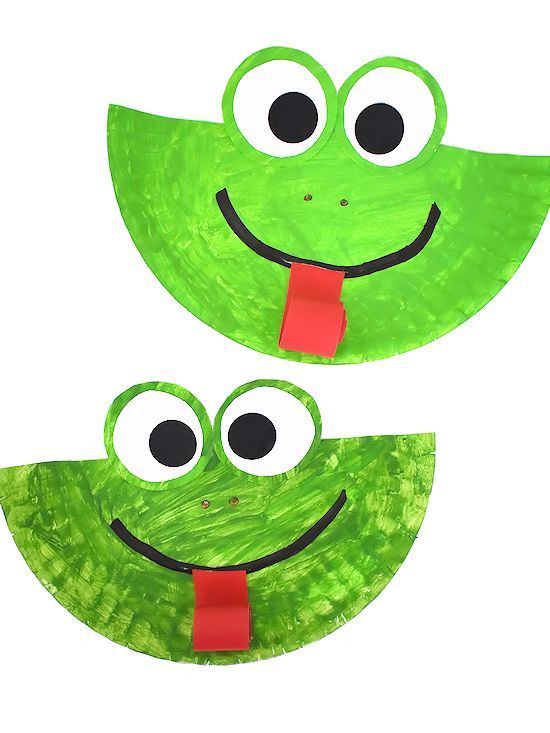
Source: Pinterest
What You Will Need
- Paper plate
- Green paint
- Glue
- Paper
Instructions
- Paint the paper plate green evenly.
- Cut out two circles for eyes using paper.
- Glue the eyes on top of the plate.
- Draw a wide smile to give it character.
13. Nature Collage
What You Will Need
- Leaves, flowers, and twigs
- Paper
- Glue
Instructions
- Collect leaves, flowers, and twigs during a short walk.
- Arrange them on paper in a creative way.
- Glue each piece carefully in place.
- Let it dry and observe the natural textures.
These simple crafts help children explore colours, shapes and textures in a way that feels natural and joyful. Over time, children begin to express their own ideas more freely through such activities. March becomes not just a season of change outside but also a time of growth and creativity for little minds.
Also Read:
Best Fun & Development Boosting Activities for 18 Months Old
Fun Cinco de Mayo Crafts for Kids to Make at Home
Best Brain Development Toys for Babies and Toddlers
Was This Article Helpful?
Parenting is a huge responsibility, for you as a caregiver, but also for us as a parenting content platform. We understand that and take our responsibility of creating credible content seriously. FirstCry Parenting articles are written and published only after extensive research using factually sound references to deliver quality content that is accurate, validated by experts, and completely reliable. To understand how we go about creating content that is credible, read our editorial policy here.
- Author


.svg)


