30 Creative Weather Crafts for Toddlers, Preschoolers, and Kids


‘Why does the sun disappear at night?’ ‘What happened to the moon in the morning?’ ‘How does God create the rain?’ This is what a daily episode of children looks like who are trying to find answers to their curiosity. Teaching little ones about the weather can be super enjoyable if you start with fun and educational crafts. Parents looking to keep their toddlers entertained on a rainy day or a day off can introduce weather concepts to preschoolers by incorporating weather crafts into their activities. Since kids are pretty much always curious about the sun, moon, and land, weather crafts for preschoolers and toddlers can be beneficial in teaching them something new and educational as well as keeping them engaged. Rest assured, we have compiled the best and age-appropriate weather crafts for kids that are entertaining and educational at the same time. Let’s start with weather crafts for toddlers that’ll introduce them to sunshine, rain, snow, and more crafty topics.
10 Weather Crafts for Toddlers
Toddlers love getting hands-on with things they like to explore, and weather-themed crafts are a fantastic way to dig deeper into their curiosity about the world. These weather arts and crafts for toddlers are fun, simple, and educational, and they help develop fine motor skills, creativity, and a beginner understanding of weather concepts in children.
1. Paper Plate Sunshine
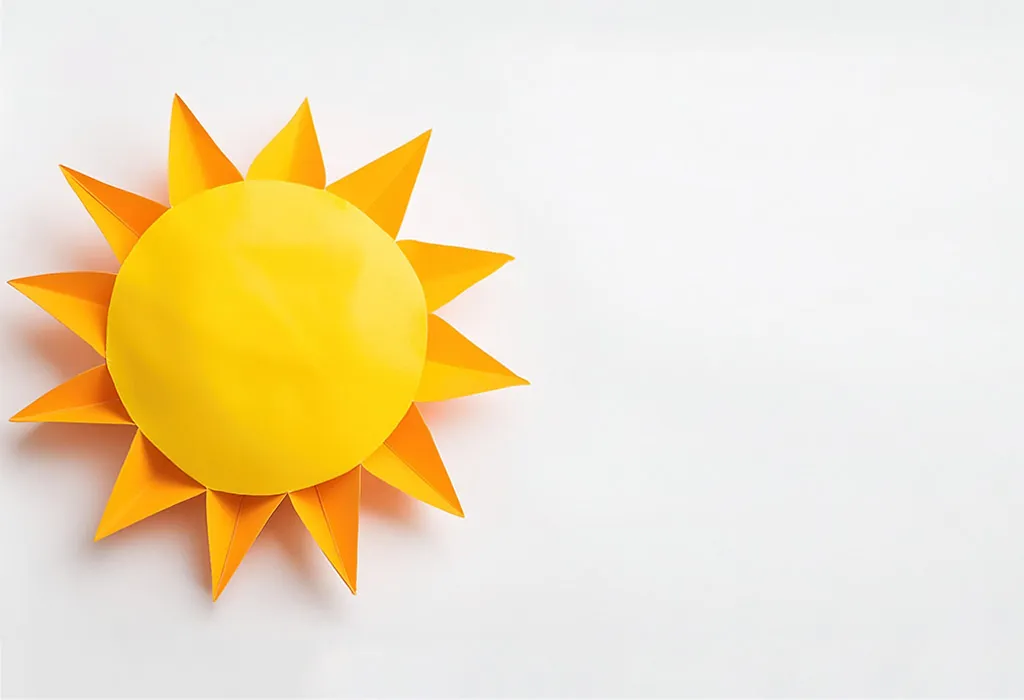
Things You’ll Need:
- Paper plate
- Yellow paint
- Yellow and orange construction paper
- Glue stick
- Scissors
- Black marker
Method:
- Paint the paper plate with a yellow colour and let it dry.
- Cut triangles from the construction paper to create sun rays.
- Glue the triangles around the edge of the paper plate.
- Use the black marker to draw a happy face in the centre of the sun.
2. Cotton Ball Cloud
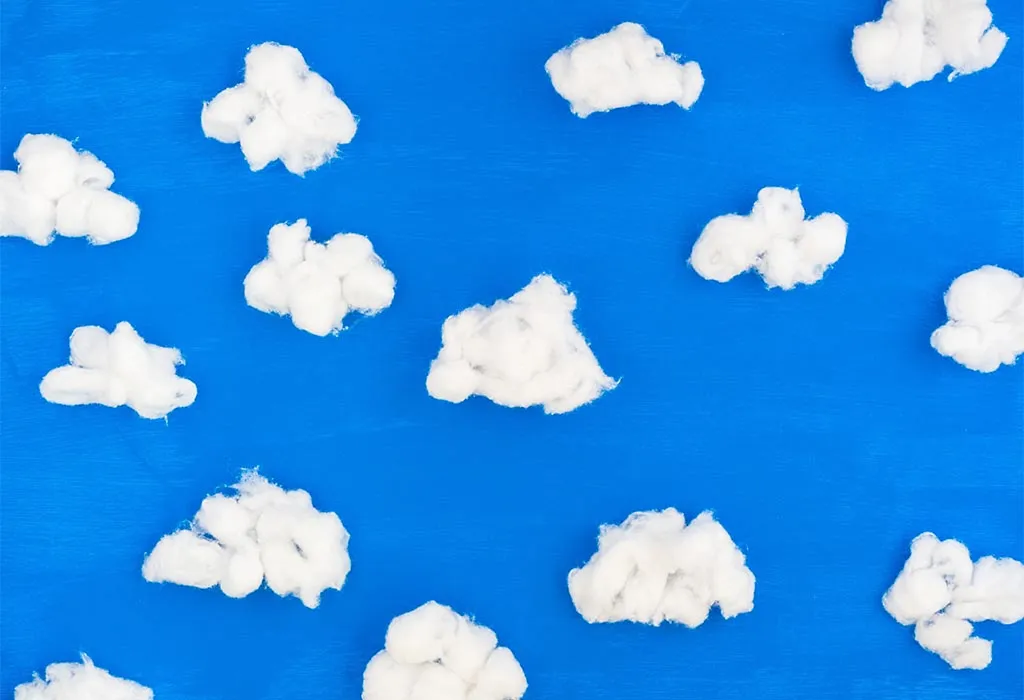
Things You’ll Need:
- Blue construction paper
- Cotton balls
- Glue stick
- Scissors
- White paper
Method:
- Cut out a cloud shape from the white paper.
- Glue the cloud shape onto the blue construction paper.
- Spread glue over the cloud shape and cover it with cotton balls.
3. Rainbow Handprints
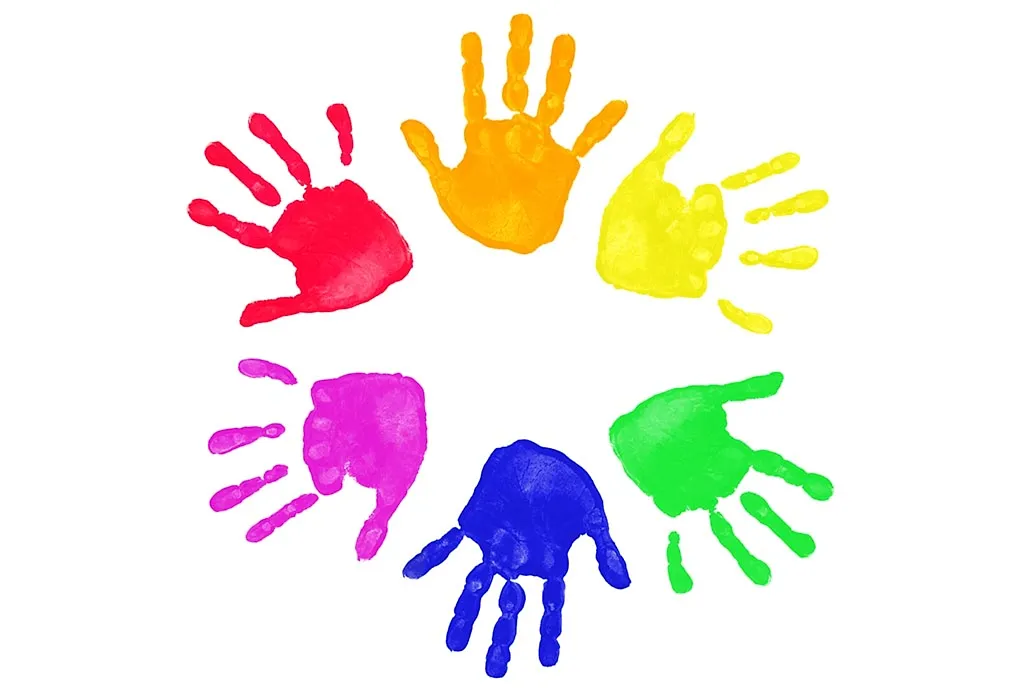
Things You’ll Need:
- Red, orange, yellow, green, blue, and purple paint
- White construction paper
- Paintbrush
- Wet wipes (for cleaning hands)
Method:
- Paint your toddler’s hand with red paint and press it onto the top of the paper.
- Repeat with orange, yellow, green, blue, and purple paint, making a rainbow of handprints.
- Let the paint dry before displaying.
4. Raindrop Mobile

Things You’ll Need:
- Blue construction paper
- White string or yarn
- Scissors
- Glue stick
- Paper plate
Method:
- Cut raindrop shapes from the blue construction paper.
- Attach the raindrops to lengths of string.
- Cut a paper plate in half and decorate it like a cloud.
- Attach the strings to the paper plate cloud and hang it up.
5. Tornado in a Bottle
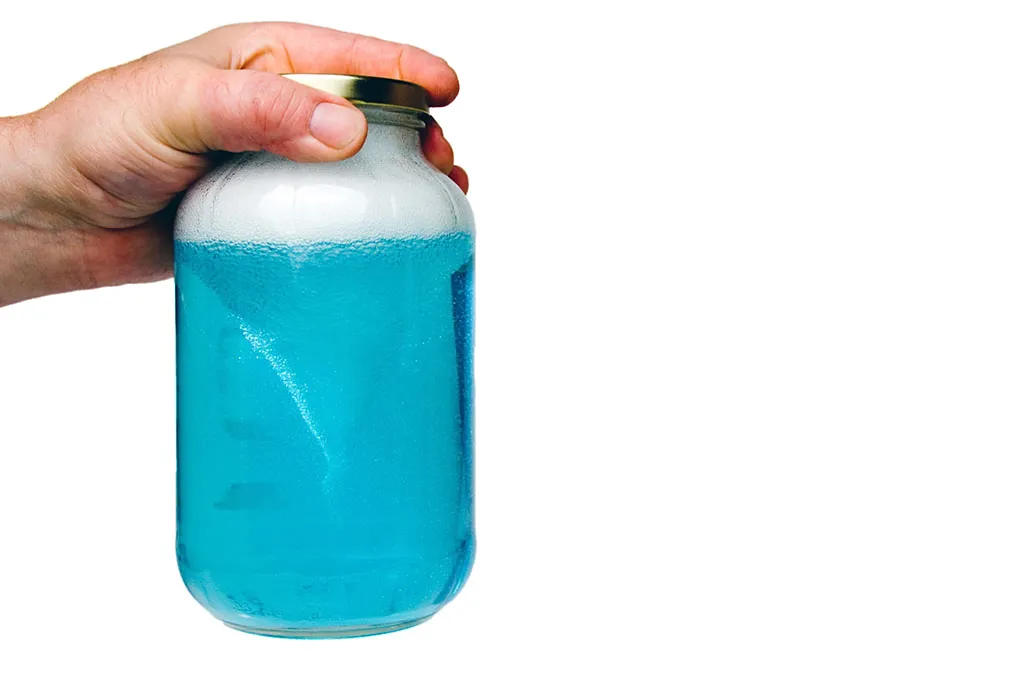
Things You’ll Need:
- Clear plastic bottle with a lid
- Water
- Glitter
- Dish soap
Method:
- Fill the bottle with water. Don’t fill it to the brim; leave some space at the top.
- Add a few drops of dish soap and a pinch of glitter.
- Close the lid tightly and swirl the bottle to create a tornado effect.
6. Snowflake Painting

Things You’ll Need:
- White paper
- Blue paint
- Paintbrush
- White crayon
Method:
- Use the white crayon to draw snowflakes on the white paper.
- Paint over the paper with blue paint.
- Watch as the crayon-resistant snowflakes appear through the paint.
7. Wind Sock

Things You’ll Need:
- Toilet paper roll
- Colourful streamers
- Paint or markers
- Glue stick
- String
Method:
- Paint or decorate the toilet paper roll.
- Glue streamers around one end of the roll.
- Attach a string to the other end for hanging.
8. Weather Wheel

Things You’ll Need:
- Paper plate
- Split pin
- Construction paper
- Markers
- Scissors
Method:
- Divide the paper plate into four sections and draw different weather symbols (sun, cloud, rain, snow) in each section.
- Cut an arrow from the construction paper and attach it to the centre of the plate with a split pin.
- Spin the arrow to indicate the weather.
9. Lightning Bolt Craft
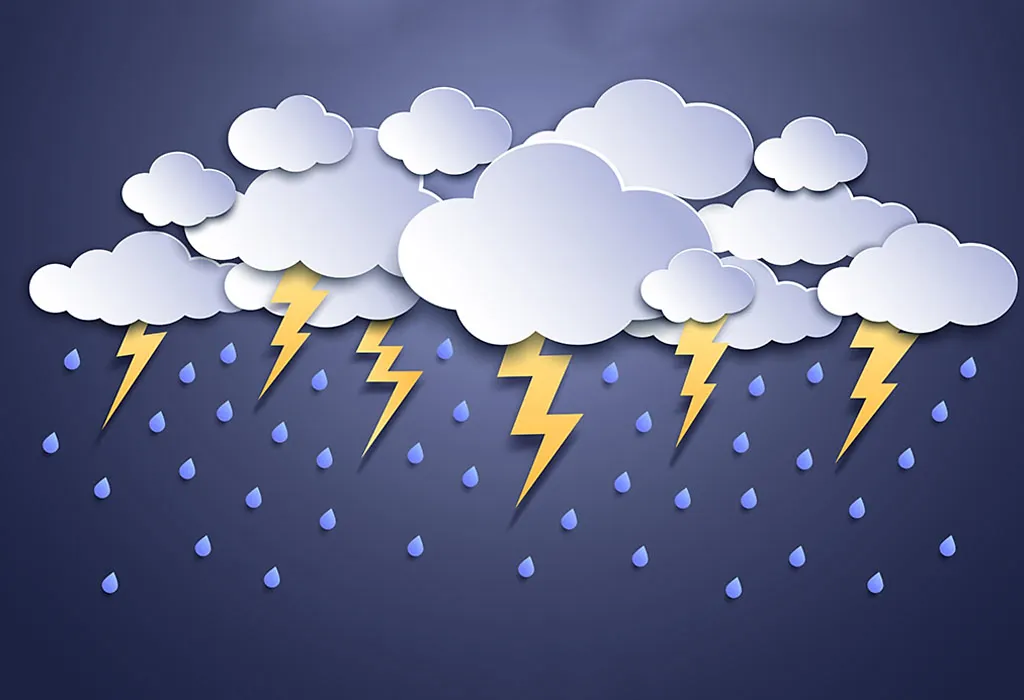
Things You’ll Need:
- Yellow construction paper
- Black construction paper
- Scissors
- Glue stick
Method:
- Cut a lightning bolt shape from the yellow construction paper.
- Glue the lightning bolt onto the black construction paper to create a striking contrast.
- Display the lightning bolt as a fun weather decoration.
10. Weather Sensory Bottle
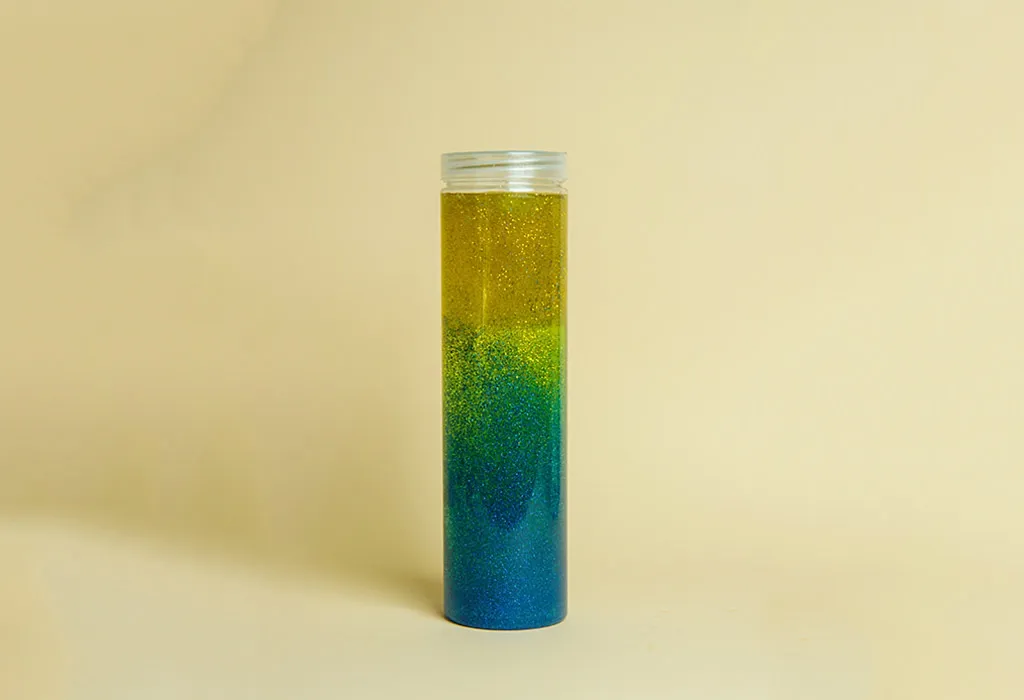
Things You’ll Need:
- Clear plastic bottle with a lid
- Baby oil
- Blue food colouring
- Glitter
- Water
Method:
- Fill the bottle halfway with water. Now, add a few drops of blue food colouring.
- Add glitter to the water.
- Now, fill the rest of the bottle with any baby oil of your choice and seal the lid tightly.
- Shake the bottle to see the weather’s sensory effects.
10 Weather Crafts for Preschoolers
Preschoolers are at a wonderful age where their curiosity about everything happening around them is boundless, including how the sun and the moon work. So, introducing them to weather art for preschoolers can be a fantastic way to combine fun and learning. Try out these weather-themed crafts that will inspire creativity and teach them about different weather conditions.
1. Rainy Day Collage

Things You’ll Need:
- Blue construction paper
- Grey and white cotton balls
- Glue stick
- Scissors
- Silver glitter
Method:
- Cut out cloud shapes from the grey construction paper.
- Glue the clouds onto the blue construction paper.
- Stretch out the cotton balls to make them flat and glue them onto the clouds.
- Add drops of glue below the clouds and sprinkle silver glitter to create the effect of rain.
2. Sun Catcher Rainbow
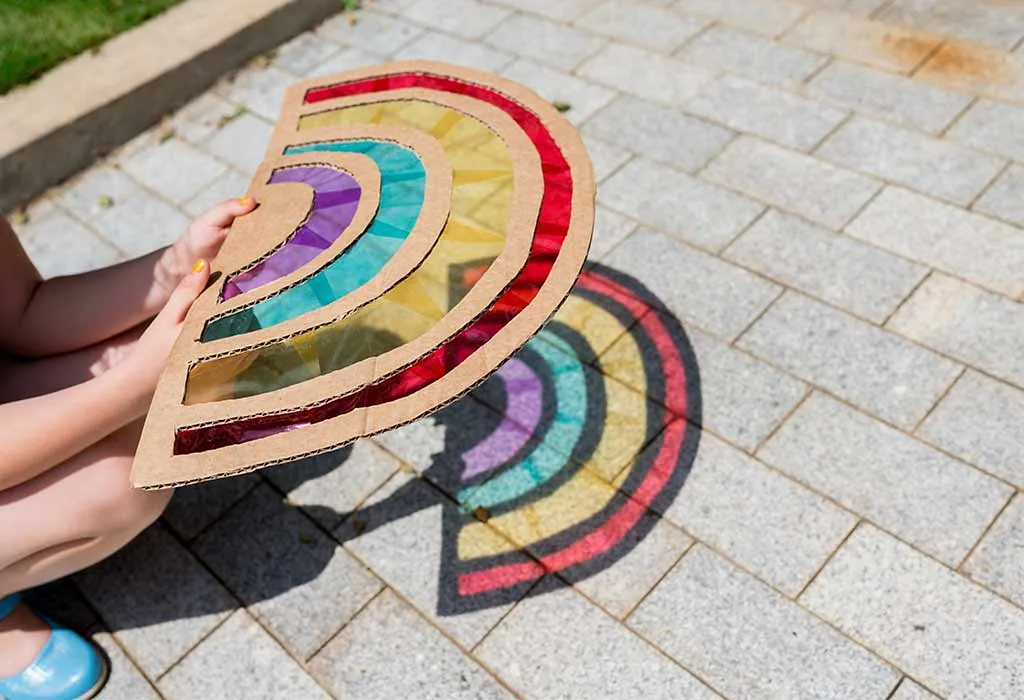
Things You’ll Need:
- Transparent contact paper
- Tissue paper in rainbow colours
- Scissors
- String
Method:
- Cut the contact paper into a large circle or any desired shape.
- Cut the tissue paper into small squares.
- Peel the backing off the contact paper and stick the tissue paper squares onto it to create a rainbow pattern.
- Hang the sun catcher with string in a sunny window.
3. Windmill Craft
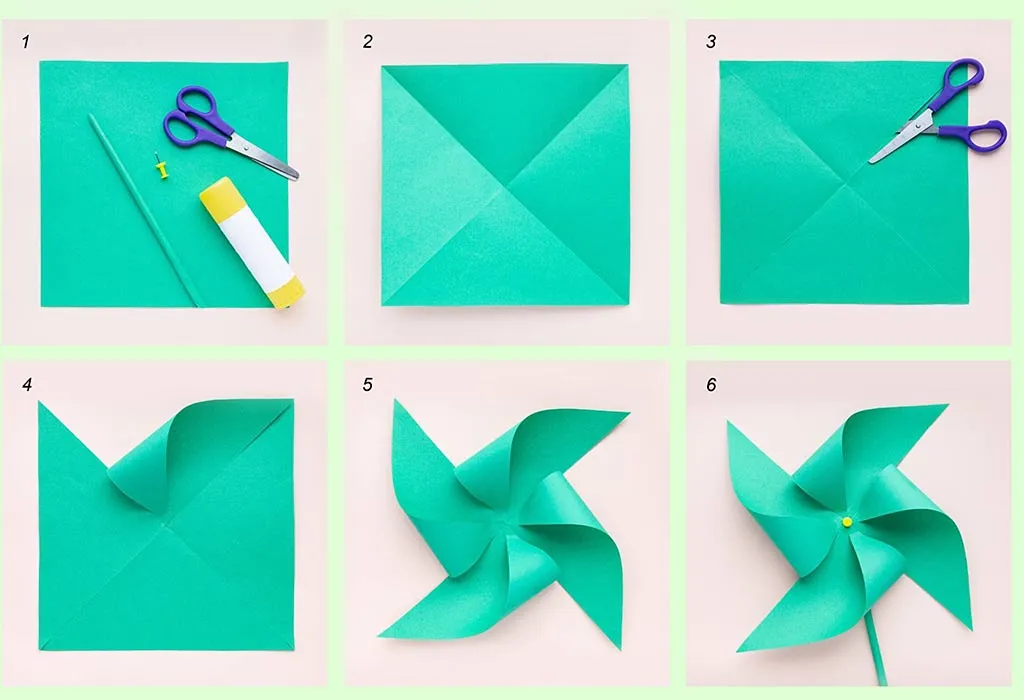
Things You’ll Need:
- Coloured paper
- Scissors
- Glue stick
- Straw or wooden stick
- Pin
Method:
- Cut the coloured paper into a square.
- Cut diagonally from each corner towards the centre. Don’t go all the way to the very centre; stop a few centimetres from the middle.
- Fold alternating corners into the centre and glue them down.
- Attach the windmill to the straw or stick with a pin.
4. Snow Globe
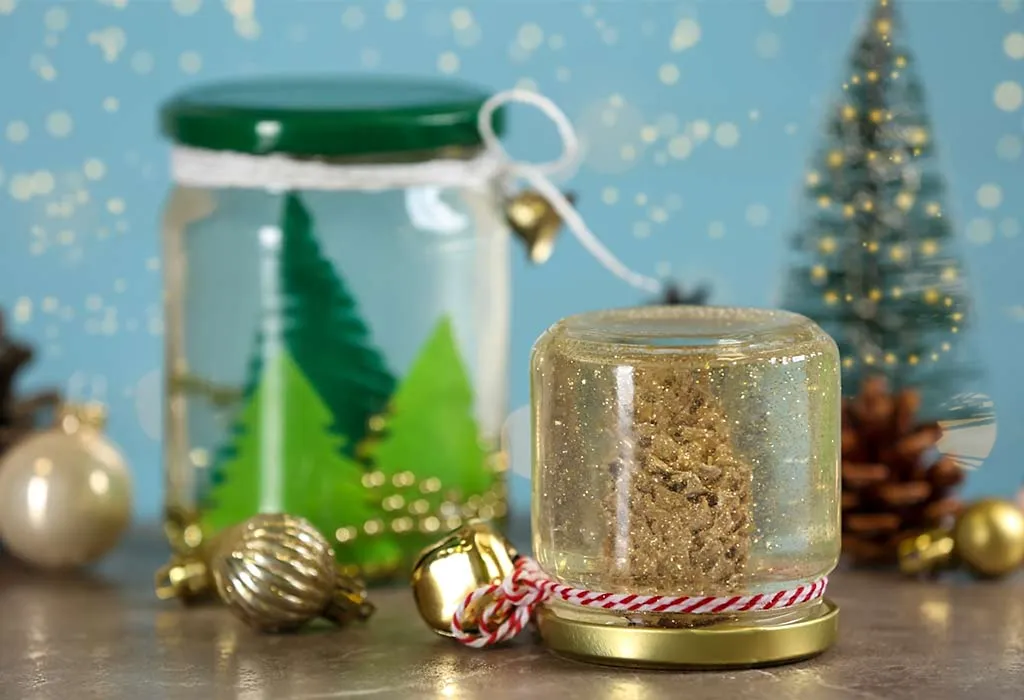
Things You’ll Need:
- Clear plastic cup
- White glitter
- Blue construction paper
- Glue stick
- Scissors
- Clear tape
Method:
- Cut a circle from the blue construction paper to fit the opening of the plastic cup.
- Glue white glitter to the paper to represent snow.
- Tape the paper to the opening of the cup, glitter side in.
- Shake the cup to see the “snow” fall.
5. Thunderstorm in a Jar
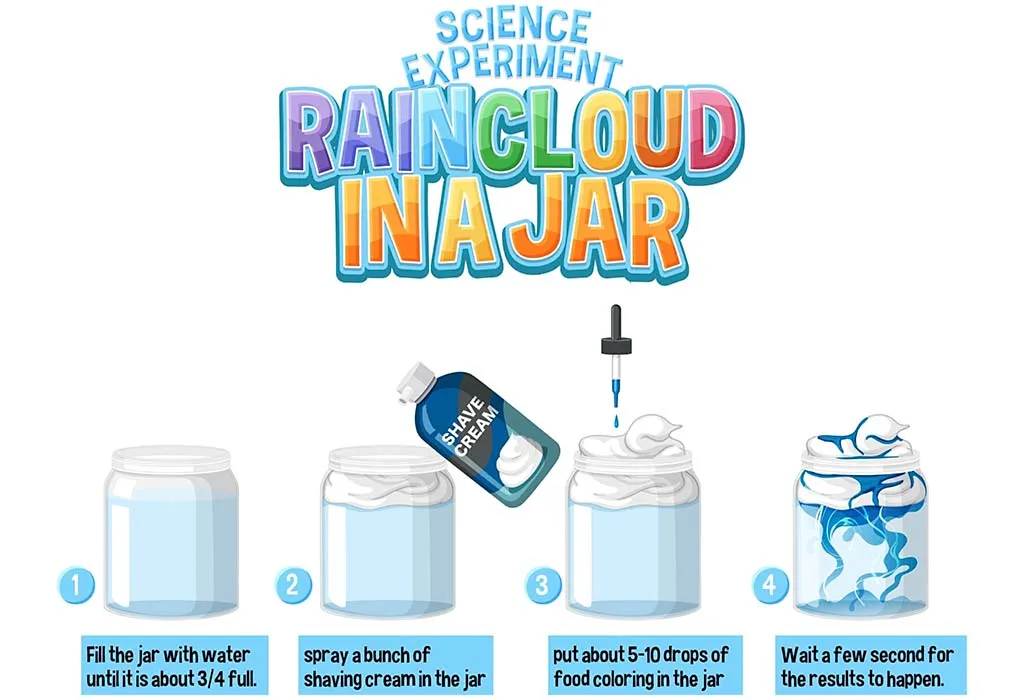
Things You’ll Need:
- Glass jar with lid
- Water
- Shaving cream
- Blue food colouring
- Dropper
Method:
- Fill the jar three-quarters full with water.
- Top it up with a layer of shaving cream.
- Use a dropper to add drops of blue food colouring onto the shaving cream.
- Watch as the “rain” falls through the shaving cream into the water.
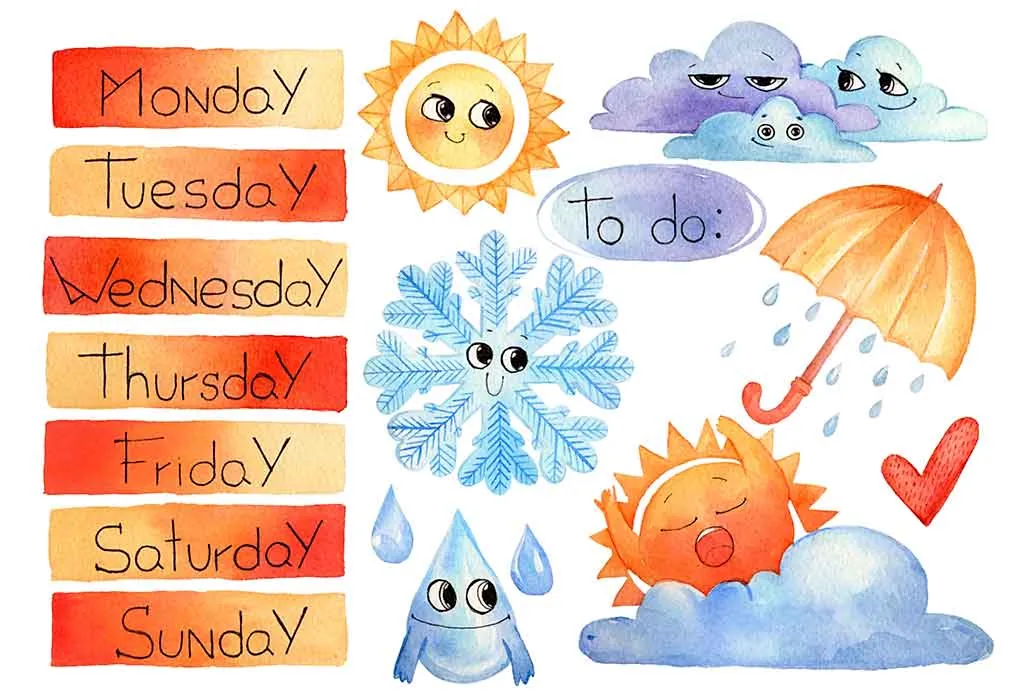
6. Weather Chart
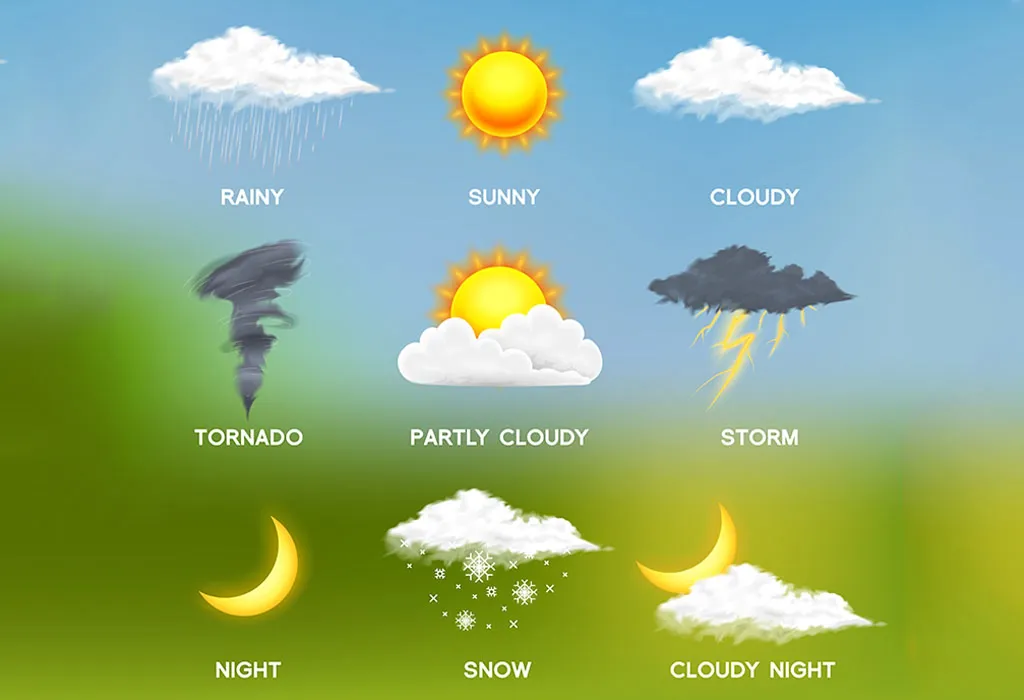
Things You’ll Need:
- Large poster board
- Markers
- Construction paper
- Glue stick
- Velcro dots
Method:
- Draw a grid on the poster board with the days of the week.
- Create weather symbols (sun, cloud, rain, snow) from construction paper.
- Attach Velcro dots to the back of the symbols and on the chart.
- Let children change the symbols daily according to the weather.
7. Puffy Paint Clouds
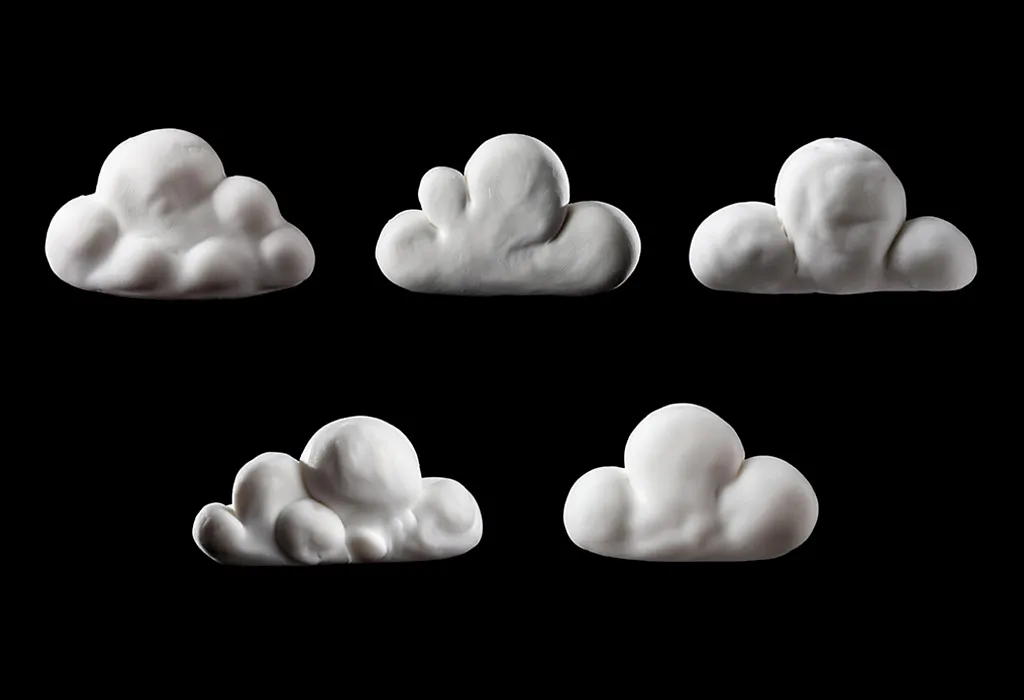
Things You’ll Need:
- Shaving cream
- White glue
- Blue construction paper
- Paintbrush
Method:
- Mix equal amounts of shaving cream and white glue to make puffy paint.
- Use the paintbrush to create cloud shapes on the blue construction paper.
- Let the clouds dry to become puffy and soft.
8. Tornado Twirlers
Things You’ll Need:
- Black construction paper
- White crayon
- Scissors
- String
Method:
- Draw a spiral on the black construction paper with the white crayon.
- Cut along the spiral line.
- Attach a piece of string to the centre of the spiral.
- Hang the tornado twirler and watch it spin.
9. Weather Wheel
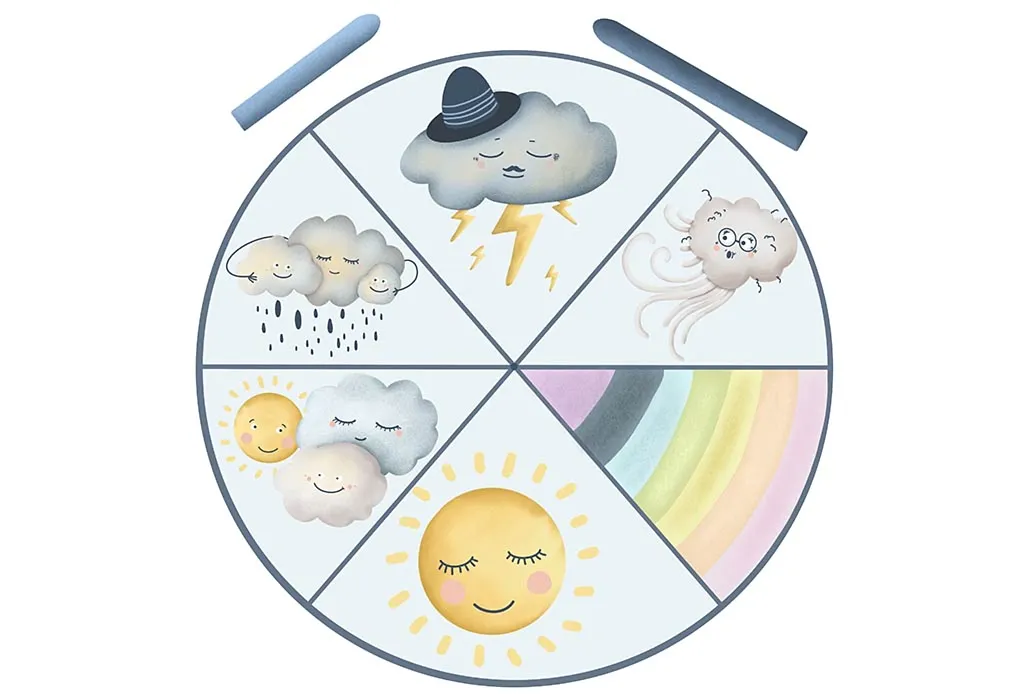
Things You’ll Need:
- Paper plate
- Markers
- Split pin
- Construction paper
Method:
- Divide the paper plate into four sections and draw different weather symbols (sun, cloud, rain, snow) in each section.
- Cut an arrow from the construction paper and attach it to the centre of the plate with a split pin.
- Spin the arrow to indicate the weather.
10. Cloud Viewer
Things You’ll Need:
- Paper towel roll
- Blue paint
- Cotton balls
- Glue stick
- Scissors
Method:
- Paint the paper towel roll blue and let it dry.
- Glue cotton balls around one end of the roll to represent clouds.
- Look through the other end to view the sky and imagine different weather scenarios.
10 Weather Crafts for Kids
Weather phenomena is such a vast topic that keep learning about it even in your adulthood. Temperature, precipitation, rain, electricity, thunder, storm,…oh my my… there’s so much to learn. Instead of asking them to rote, let’s engage them in projects that combine creativity with education, basically hands-on learning. These engaging weather crafts for kids are perfect for school projects and rainy day activities at home.
1. Weather Diorama
Things You’ll Need:
- Shoebox
- Construction paper
- Markers
- Scissors
- Glue stick
- Cotton balls
- Miniature plastic figures, like humans, trees, and animals
Method:
- Cover the inner side of the shoe box with blue construction paper to make it look like the sky.
- Create weather elements like clouds, sun, and raindrops from construction paper.
- Glue cotton balls for clouds and place them inside the box.
- Add plastic figures to represent people or animals experiencing the weather.
2. Weather Forecast Board
Things You’ll Need:
- Large poster board
- Markers
- Construction paper
- Velcro dots
- Scissors
Method:
- Divide the poster board into sections for different weather conditions (sunny, rainy, cloudy, snowy).
- Create weather symbols from construction paper.
- Attach Velcro dots to the back of the symbols and on the board.
- Allow kids to change the forecast daily based on the actual weather.
3. DIY Barometer
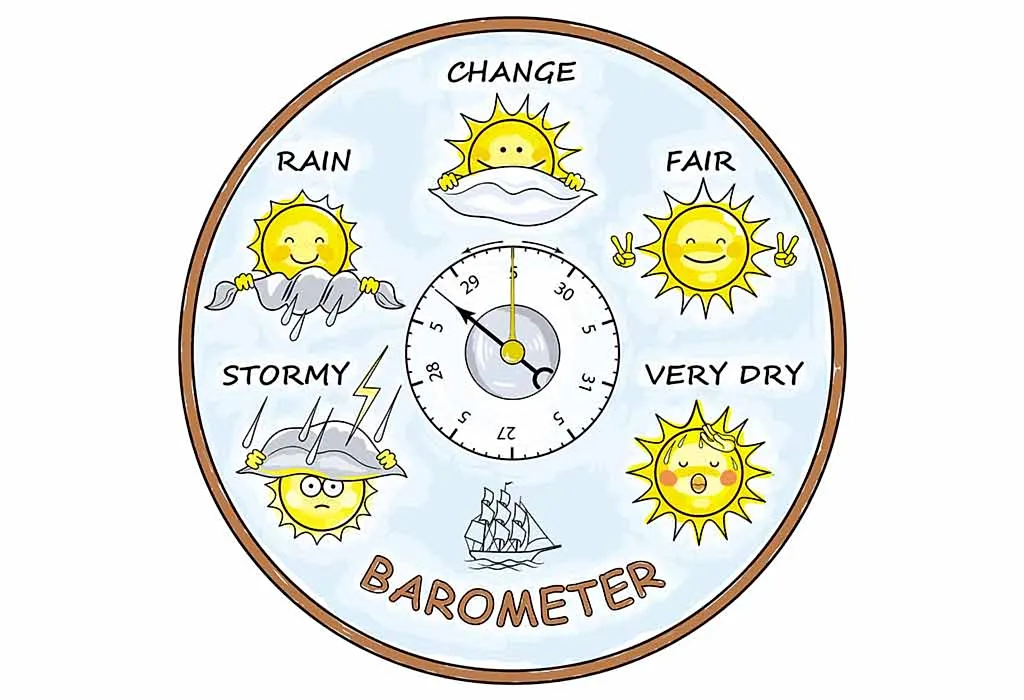
Things You’ll Need:
- Glass jar
- Balloon
- Rubber band
- Drinking straw
- Glue
- Index card
- Tape
Method:
- Cut the balloon and stretch it over the top of the jar, securing it with a rubber band.
- Glue a drinking straw to the centre of the balloon top.
- Place an index card vertically next to the jar and tape it in place.
- Mark the card to track the straw’s movements, indicating pressure changes.
4. Rain Stick
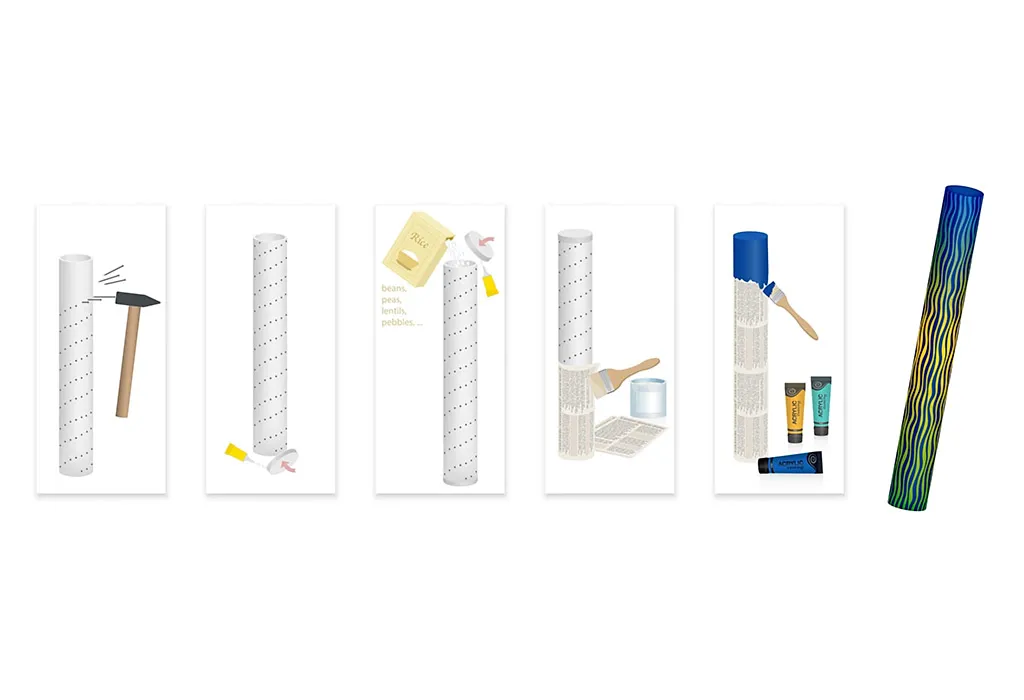
Things You’ll Need:
- Cardboard tube
- Aluminium foil
- Rice or beans
- Construction paper
- Glue stick
- Markers
Method:
- Cover one end of the cardboard tube with construction paper and secure it with glue.
- Twist aluminium foil into a spiral and place it inside the tube.
- Fill the tube with rice or beans.
- Cover the other end of the tube with construction paper and glue.
- Decorate the tube with markers and shake to hear the sound of rain.
5. Sun Clock
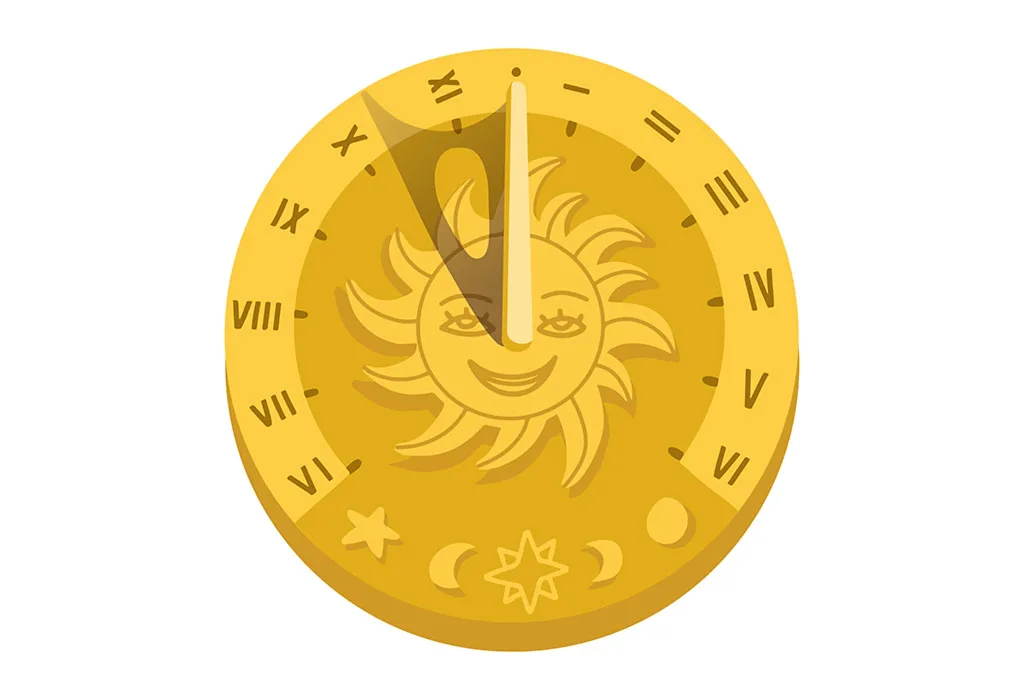
Things You’ll Need:
- Paper plate
- Markers
- Construction paper
- Glue stick
- Scissors
- Split pin
Method:
- Draw a clock face on the paper plate.
- Create clock hands from construction paper and attach them to the centre of the plate with a split pin.
- Decorate the plate with sun rays using markers.
- Use the sun clock to teach kids about time and daylight.
6. Weather Vane
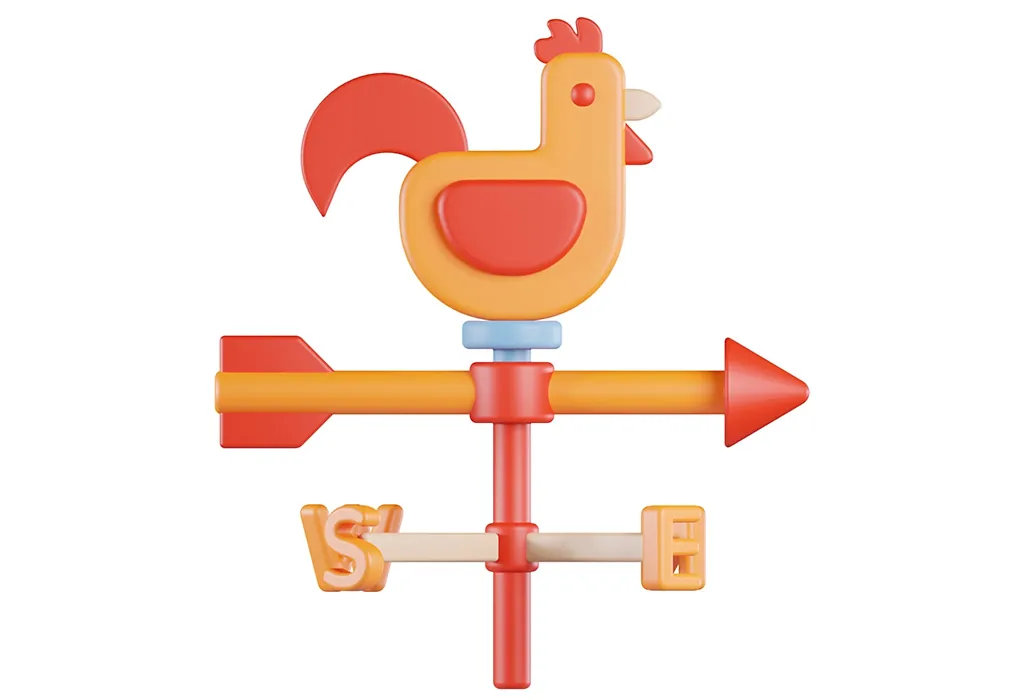
Things You’ll Need:
- Straw
- Paper
- Glue stick
- Scissors
- Pencil with eraser
- Pin
Method:
- Cut an arrow and tail from the paper and glue them to opposite ends of the straw.
- Push a pin through the centre of the straw and into the pencil eraser.
- Place the pencil in an upright position.
- Use the weather vane to determine wind direction.
7. Cloud in a Jar
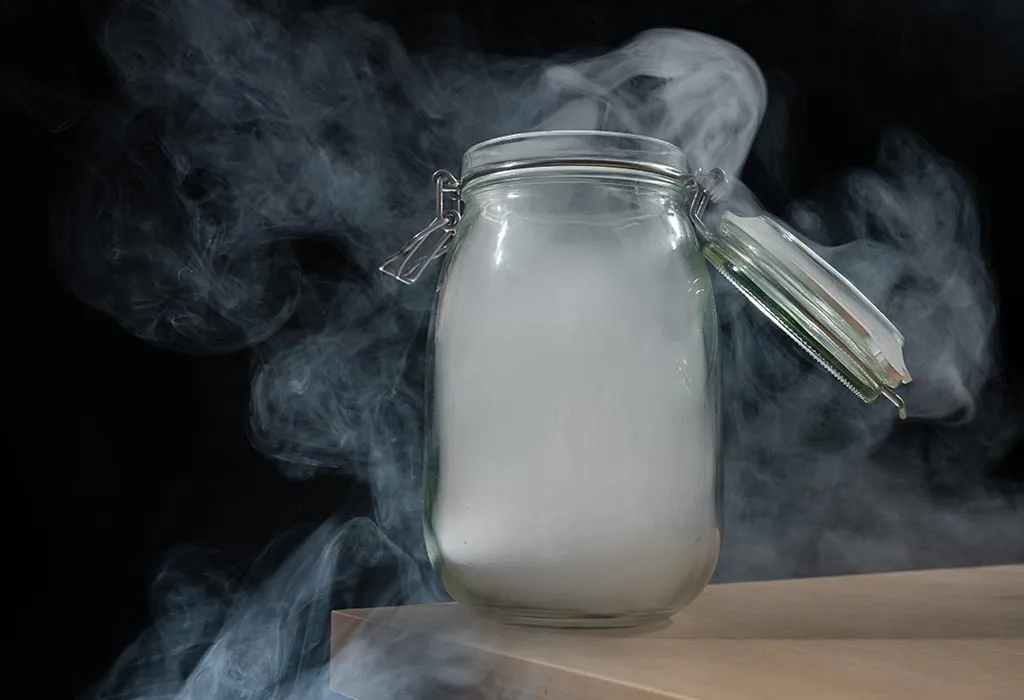
Things You’ll Need:
- Glass jar
- Warm water
- Ice
- Hairspray
Method:
- Fill the jar with warm water.
- Spray a small amount of hairspray into the jar.
- Quickly place the lid with ice on top of the jar.
- Watch as a cloud forms inside the jar.
8. Snowflake Window Clings
Things You’ll Need:
- White school glue
- Glitter
- Wax paper
Method:
- Draw snowflake designs on wax paper using white school glue.
- Sprinkle glitter over the wet glue.
- Let the snowflakes dry completely.
- Peel them off the wax paper and place them on the windows.
9. Temperature Chart
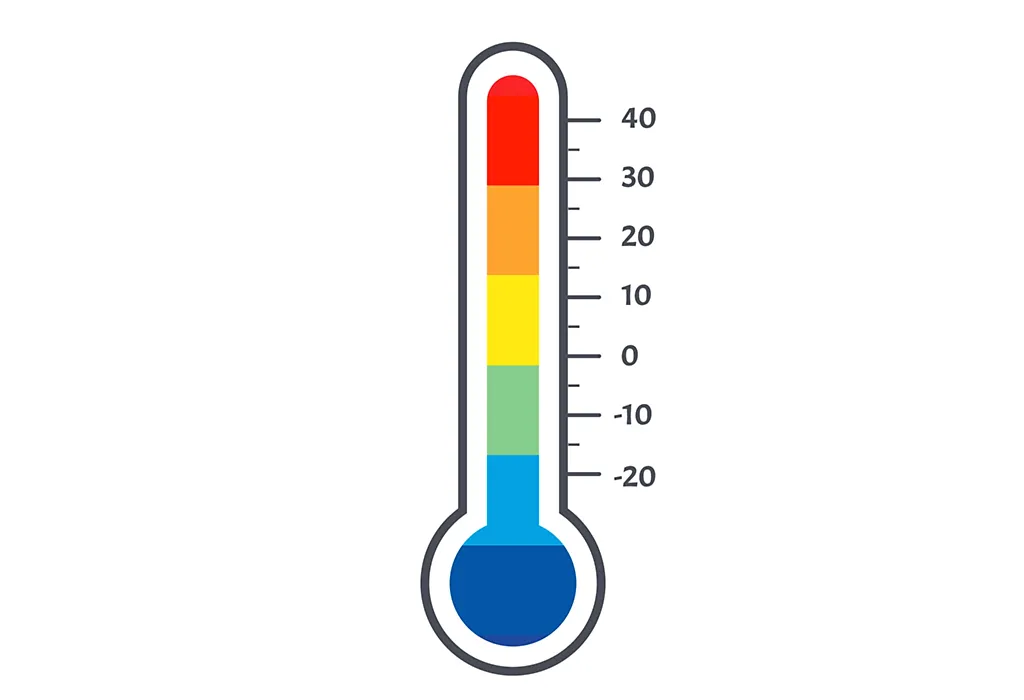
Things You’ll Need:
- Poster board
- Markers
- Construction paper
- Glue stick
Method:
- Create a large thermometer shape on the poster board.
- Use markers to indicate temperature ranges.
- Cut a strip of red construction paper to represent mercury and glue it to the chart.
- Adjust the “mercury” strip daily to reflect the temperature.
10. Weather Journal
Things You’ll Need:
- Notebook
- Markers
- Stickers
- Ruler
Method:
- Divide the notebook into sections for each day.
- Have kids draw and write about the weather they observe daily.
- Use markers and stickers to decorate the journal.
- Review the journal regularly to discuss weather patterns and changes.
FAQs
1. What are some easy weather craft ideas for preschoolers?
Some easy weather craft ideas for preschoolers include making paper plate suns, cotton ball clouds, and rainbow handprints. These projects are simple, engaging, and perfect for young children.
2. How can weather crafts benefit preschoolers?
Weather crafts for kindergarten and preschoolers help develop fine motor skills, enhance creativity, and teach basic weather concepts through hands-on activities.
3. What materials are commonly used in weather crafts for preschoolers?
Paper plates, construction paper, child-safe glue sticks or glue guns, cotton balls, markers, scissors, glitter, etc., are some commonly used materials in weather crafts for preschoolers. Apart from scissors, these items are safe and easy to handle for several weather projects for preschoolers.
4. How can I incorporate weather crafts into a preschool curriculum?
You can introduce several weather crafts into a preschooler’s curriculum by aligning them with weather lessons. For instance, at home, you can create a weather wheel to track daily weather, make DIY wind chimes, or make a rain stick to observe the sound of rain. These activities make learning about the weather interactive and super fun.
Weather crafts offer a wonderful opportunity for toddlers, preschoolers, and big kids to learn about different weather phenomena in a fun and engaging way. These hands-on projects build creativity, enhance fine motor and observational skills, and, most of all, do all this in a non-boring way. Plus, the crafts designed for children require only simple materials and easy-to-follow steps, so creating a sunny day collage or a rain stick is quite easy and fun. We hope these weather craft ideas for preschoolers and kindergarteners turn your little one’s day into a learning adventure and be an excuse for socialising with other kids and turning new pages, one at a time.
Also Read:
Amazing paper craft activities for kids
Waste Material Craft Ideas for Kids
Plastic Bottles Craft Ideas for Kids
Was This Article Helpful?
Parenting is a huge responsibility, for you as a caregiver, but also for us as a parenting content platform. We understand that and take our responsibility of creating credible content seriously. FirstCry Parenting articles are written and published only after extensive research using factually sound references to deliver quality content that is accurate, validated by experts, and completely reliable. To understand how we go about creating content that is credible, read our editorial policy here.
- Author


.svg)


