10 Creative Ladybug Crafts for Kids


There is something fascinating about ladybugs that captivates the imagination of young children. The magnificent pattern and adorable shape of these cute little insects is a perfect inspiration for some creative crafts. If you are hunting for some great ladybug crafts for preschoolers or toddlers, we have some interesting and easy ideas that your kids can try! Read on to learn some of these exciting craft ideas for kids!
Easy to Make Ladybug Crafts for Children
The vivid and colorful pattern on ladybug makes for some great craft ideas and here are some easy ways to try ladybug activities and crafts for your kids:
1. Handprint Ladybug
This ladybug handprint craft activity can be enjoyed by young kids as it is designed keeping in mind young creative minds.
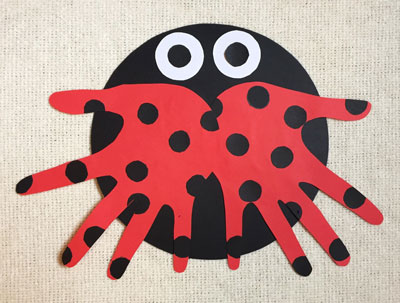
Source: Pinterest
Materials Needed
- Black, red and white card stock
- Yellow, green and white tissue paper (cut into small rectangular strips)
- Black acrylic paint
- Paintbrush
- Scissors
- Glue
- Pencil
Instructions
- Ask your kid to place both hands on the red card stock as you draw the outlines with a pencil.
- Cut the handprints with the scissor.
- Use black paint and brush to draw dots on the handprints.
- Use the black card stock to cut out a ladybug shape, with one large circle and one conjoined circle on top as the head.
- Take the white card stock and smear glue all over it.
- Place colored tissue paper strips in a random order as you cover the entire sheet. Let it dry.
- Stick the ladybug body in the centre of white card stock.
- Now, stick the inverted red handprints on the body by overlapping the thumbs of both the handprints slightly in the centre.
2. Ladybug Rocks
This super easy craft can be a thrilling craft experience for toddlers!
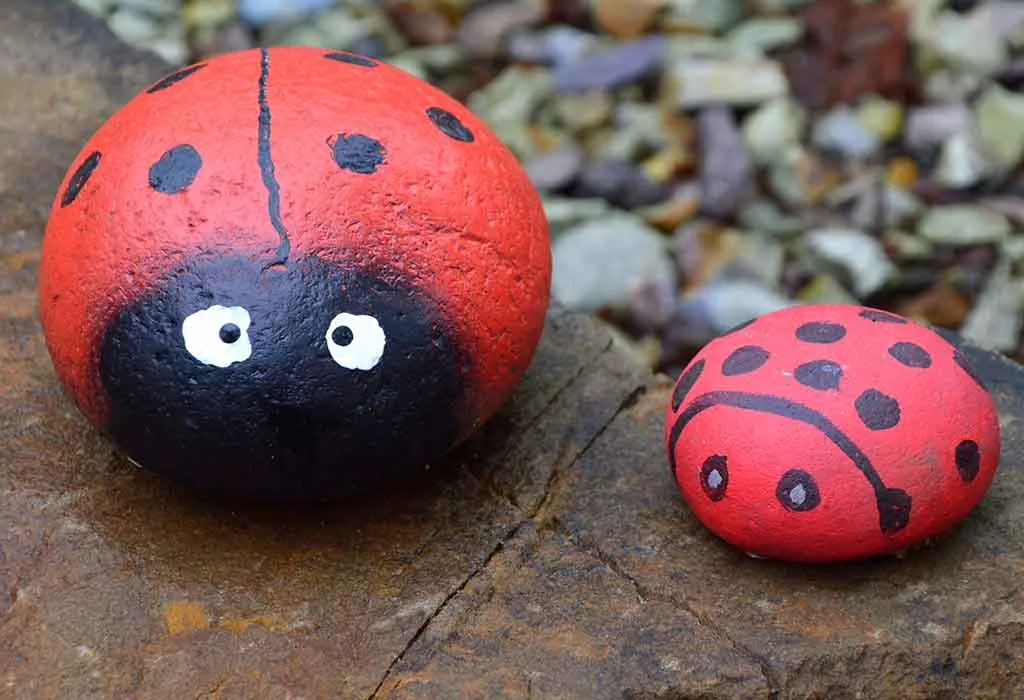
Materials Needed
- 3-4 Smooth, flat and oval rocks
- Acrylic paints in red, yellow, orange, and blue colors
- Black and white acrylic paint
- Paintbrush
Instructions
- Wash and dry the rocks before coloring.
- Color all the rocks in different colors and let them dry.
- Take black paint and color the head and let it dry.
- Make small dots on the body using the handle end of the paintbrush.
- Paint two white dots on the head and make two small black dots inside the white dots to make eyes.
- Place these rocks inside any planters or use them as a paperweight!
3. Toilet Paper Roll Ladybug
This best out of the waste idea is a great ladybug art and craft for toddlers!
Materials Needed
- 1 toilet paper roll (the empty tube)
- Black and red craft paper
- Glue
- Black marker pen
- 2 googly eyes
Instructions
- Use black craft paper to cover the toilet roll.
- Cut two small antennas using the black craft paper.
- Cut a circle using the red craft paper taking the height of the toilet roll as the diameter.
- Draw black spots randomly on the circle and cut it into two equal parts to make the wings.
- Stick antennas on the top inner rim of the roll.
- Stick googly eyes below the antennas and place wings right below it!
4. Paper Plate Ladybug
This is an interesting ladybug paper craft idea for young kids!

Source: Pinterest
Materials Needed
- Paper plate
- Red acrylic paint
- Black card stock
- Glue
- Paintbrush
- Scissors
Instructions
- Use red paint to color the paper plate. Let it dry.
- Use black card stock to cut ladybug spots, antennas, and a semi-circle shape for the head.
- Glue the semi-circle on the back of the plate so that the head sticks out slightly.
- Stick the antennas on either side of the head and glue the black spots randomly on the paper plate!
5. Potato Masher Ladybug
This is a fun ladybug craft activity with a potato masher!
Materials Needed
- Black and green construction paper
- Black and red acrylic paints
- Paintbrush
- Round potato masher
- Cork
- Googly eyes
- Glue
- Scissors
- A plate
- Black marker pen
Instructions
- Cut ladybug legs using black construction paper (six legs for each bug).
- Squeeze a dollop of red paint on a plate and cover the base of the potato masher in it.
- Make two to three round prints on the green construction paper.
- Stick googly eyes on top and three legs on each side, of the red circle.
- Dip the cork in black paint and use it to make ladybug spots.
- Use the marker pen to draw antennas!
6. Bottlecap Ladybug
Transform the bottlecaps into these cute little insects with this super easy craft!
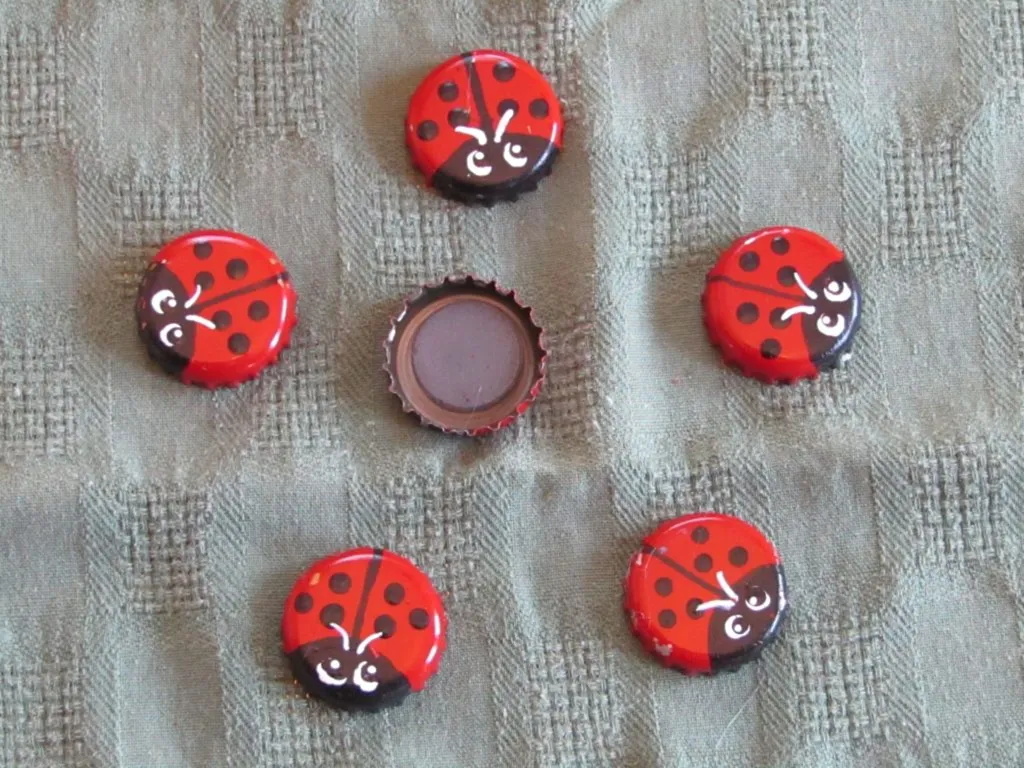
Source: Pinterest
Materials Needed
- Bottlecap
- Acrylic paints in black, red and white colors
- Paintbrush
- Toothpick
Instructions
- Paint the bottle cap in red color. Let it dry.
- Paint the head using black paint.
- Paint random black spots on the body.
- Dip the toothpick in white color and make two eyes on the head.
7. Coffee Filter Ladybug
This craft is super easy and the coffee filter gives a beautiful watercolor effect to the craft!
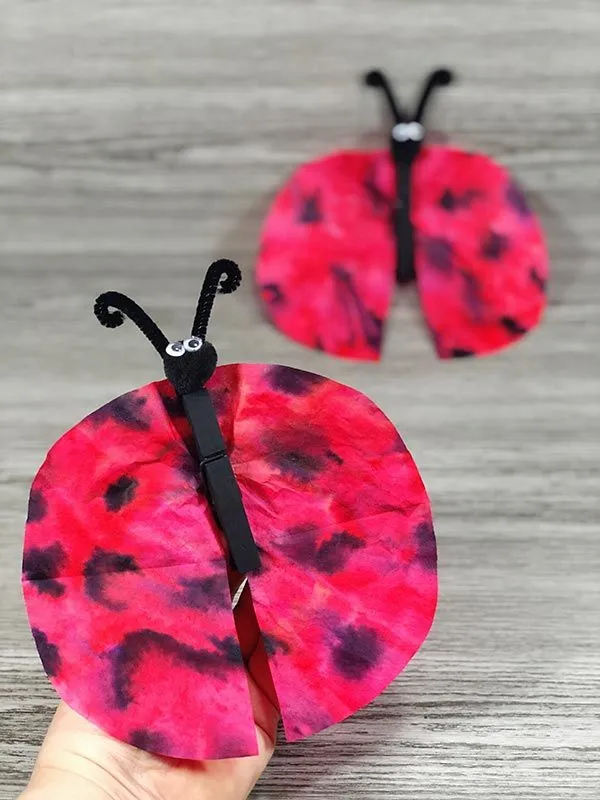
Source: Pinterest
Materials Needed
- A coffee filter
- Black permanent marker
- Red washable marker
- Googly eyes
- Glue
- Paintbrush
- A spray bottle filled with water
Instructions
- Using the red marker, color the coffee filter. Try to cover as much area as possible.
- Spray water on the colored filter and let it dry. This will give a nice watercolor effect to it.
- Using the black marker, draw the head, spots, and the middle line of the ladybug.
- Glue the googly eyes on the head!
8. Ladybug Bookmark
Help your kiddo make his own bookmark with this amazing craft activity!
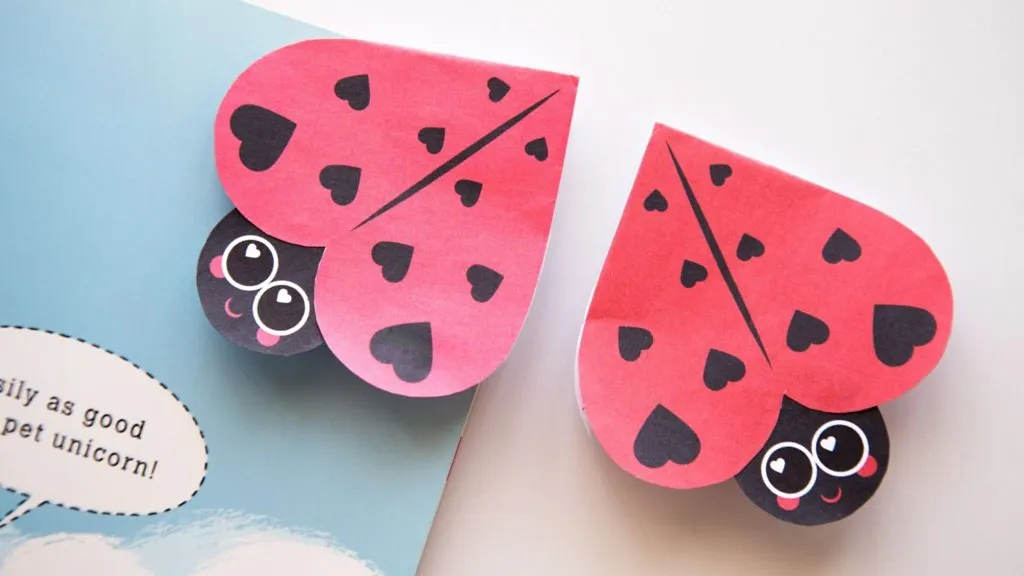
Source: Pinterest
Materials Needed
- White card stock
- Black, red and white acrylic paint
- Paintbrush
- Black craft paper
- Glue
Instructions
- Cut the white card stock into 6 inches by 2 inches rectangular size.
- Color any one side in red color.
- Use black paint to draw the head and black spots.
- Use white to draw two eyes on the head.
- Cut two small antennas using the black construction paper and glue them on the backside of the head region!
9. Ladybug Crown
This is a great craft option to make birthday party gears!
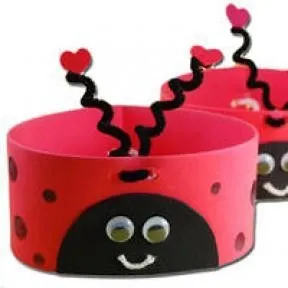
Source: Pinterest
Materials Needed
- Red and black construction paper
- 2 black pipe cleaners
- Glue
- Scissors
- Pencil
- Tape
Instructions
- Measure the circumference of your kiddo’s head and cut a strip in the same length and of approximately 4 inches height using the red construction paper. This will be the crown structure. Secure the ends of the glue.
- Cut ladybug spots using black construction paper.
- Glue the spots randomly on the crown.
- Take the pipe cleaners and swirls them around the pencil to make a long spring-like structure.
- Tape both the spiral structures on the inner rim of the crown to make ladybug antennas.
- Let the crown dry completely before adorning it!
10. Potato Stamp Ladybug
A perfect way to teach stamping activity, this potato stamp ladybug will be a fun activity for young kids!
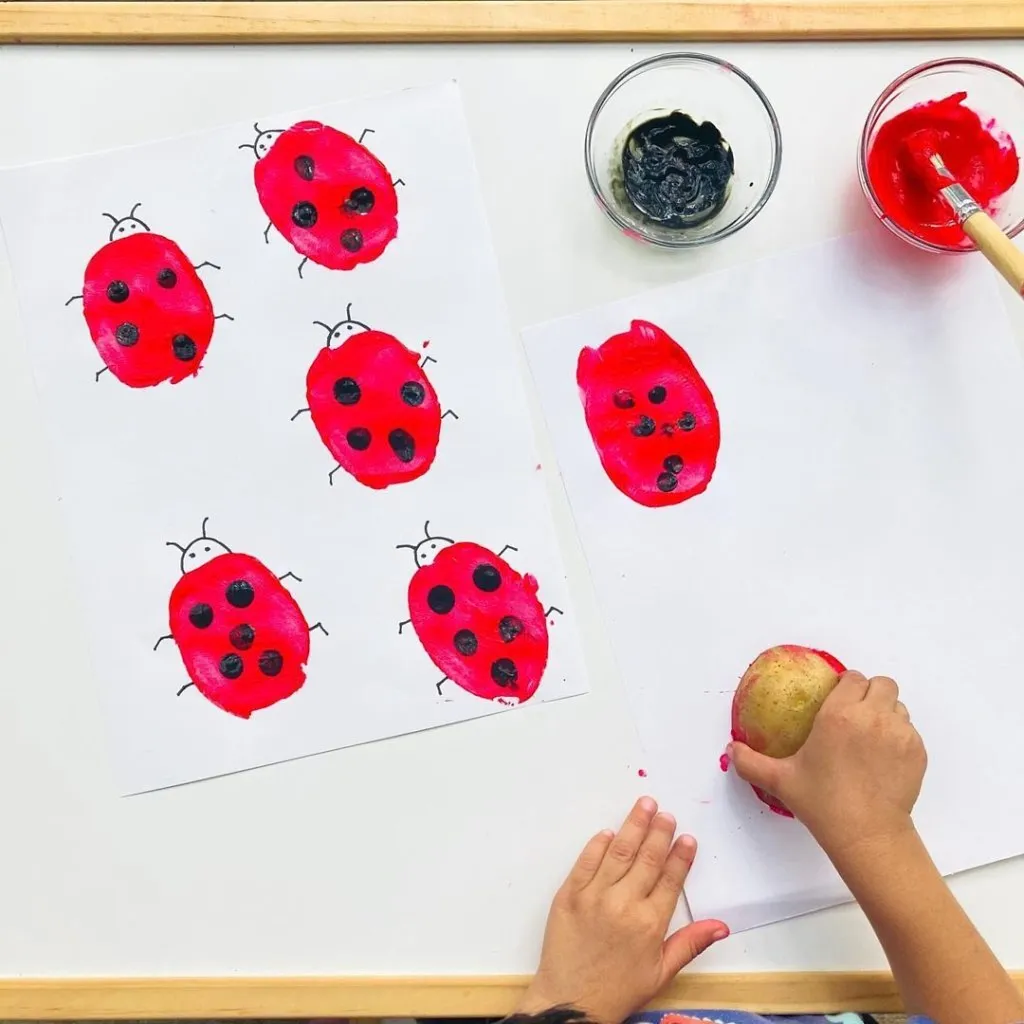
Source: Pinterest
Materials Needed
- Potato
- Red and black paint
- Black marker
- White card stock
- Black marker pen
- Plate
Instructions
- Take the potato and cut it into half. Leave it for drying or until the natural juices dry.
- Take some red paint on a plate and dip the potato in it.
- Make two to three stamps on the white card stock. Let the stamps dry before you work on them.
- Take the marker pen to make the middle line and spots.
- Take some black paint on the plate and dip your kiddo’s thumb in it.
- Make a small black stamp on each red stamp to make the head. Let it dry.
- Use a black marker pen to make the antennas on the head!
These are some easy and fun ladybug craft activities that will keep your kid fruitfully occupied and engaged in going something constructive!
Also Read:
Penguin Crafts for Children
Newspaper Craft Ideas for Children
Plaster of Paris Craft Ideas for Children
Was This Article Helpful?
Parenting is a huge responsibility, for you as a caregiver, but also for us as a parenting content platform. We understand that and take our responsibility of creating credible content seriously. FirstCry Parenting articles are written and published only after extensive research using factually sound references to deliver quality content that is accurate, validated by experts, and completely reliable. To understand how we go about creating content that is credible, read our editorial policy here.
- Author


.svg)


")
")


")