

















.svg)
.svg)
.png)


How To Draw
Suggested articles for you
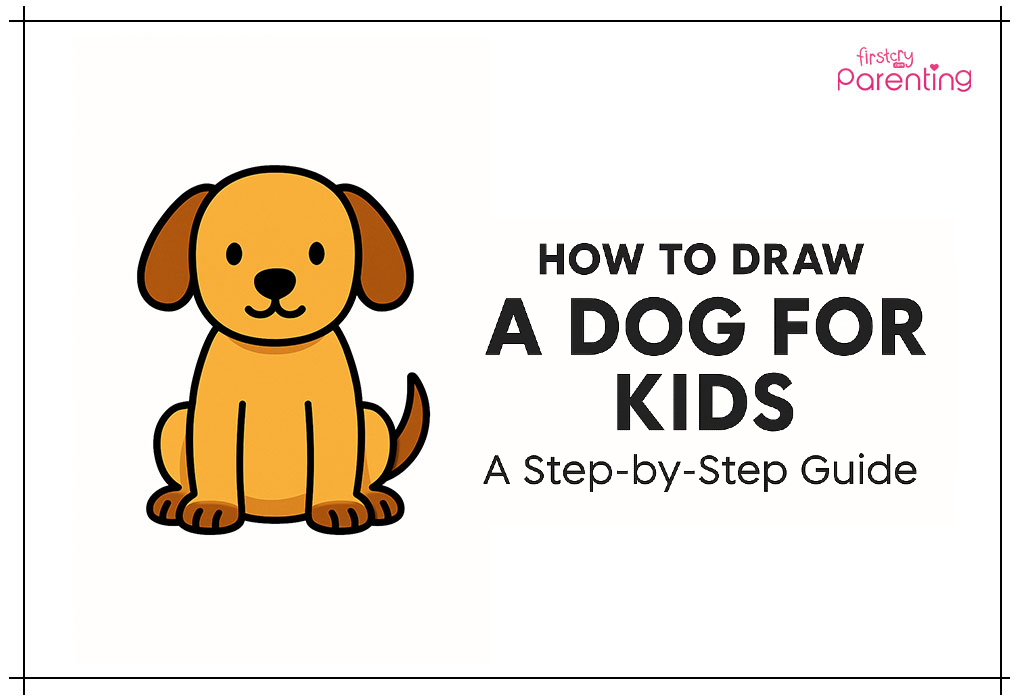
How To Draw a Dog – A Step By Step Guide
Drawing a dog can be a fun and rewarding activity for kids and preschoolers who love animals and enjoy being creative. Then get ready for a super fun activity! In this guide, we’ll show you the basic steps of how to draw a dog in the simplest way. It’s perfect for kids, preschoolers, and anyone who wants to draw a cute little dog without any tricky steps.
You don’t need to be an artist, just grab your pencil, paper, and maybe some crayons if you want to add color later. We’ll go through easy steps on how to draw a dog using shapes like circles, ovals, and lines. Step by step, you’ll see your dog come to life with floppy ears, a wagging tail, and a happy face!
Drawing helps young learners learn, focus, and have fun all at the same time. So if you’re ready to make your own cartoon dog, let’s start drawing together. Woof woof!
Easy Dog Drawing for Kids in 10 Simple Steps
Get ready to learn easy steps on how to draw a dog with this fun and simple guide made just for kids. Follow along and enjoy drawing a cute puppy in just 10 steps!
1. Draw the Head
Start by drawing a big oval or round shape in the middle of your paper. This will be the puppy’s head where the face goes. Make sure it’s big enough for eyes, ears, and a nose!
2. Add Two Floppy Ears
On each side of the head, draw long curved ears that hang down like a cute puppy’s ears. You can make them rounded or pointy on your choice!
3. Draw the Eyes
Inside the head, draw two medium-sized circles for the eyes. Then add tiny black dots inside for the pupils to make the puppy look alive and cheerful.
4. Make a Nose
Right between the eyes but a little lower, draw a small oval or triangle shape. This will be your puppy’s nose don’t forget to color it black!
5. Add a Smiley Mouth
Below the nose, draw a curved smile going from one side to the other. You can add a small U-shape inside for a tongue to make it even cuter.
6. Draw the Body
From the bottom of the head, draw a big round or oval shape. This is the puppy’s body, and it should be wider than the head.
7. Add Front Legs
Draw two straight lines going down from the front of the body and curve them at the bottom to form paws. These are the front legs.
8. Add Back Legs
Now draw two more curved legs on each side of the body near the back. These should look like the puppy is sitting down comfortably.
9. Draw the Tail
On one side of the body, add a small curved tail. You can make it waggy or curly whatever style you like best!
10. Add Final Details and Color
Go over your lines with a black marker to make them bold. Erase any sketch marks and color your puppy using brown, yellow, white, or your favorite shades!
FAQs
1. How can I make my dog drawing look cuter?
Add fun details like big eyes, a wagging tail, floppy ears, or a small tongue. You can also use soft colors and draw a bone or collar for extra cuteness!
2. Can I color the dog any way I want?
Absolutely! You can use brown, black, white, or even rainbow colors—there’s no rule. Let your creativity shine!
3. Can I draw different dog breeds using this method?
Yes! Once you learn the basic shape, you can change the ears, tail, or fur to look like different breeds like a pug, labrador, or dachshund.
Learning how to draw dog is a fun and simple activity that kids will love. With easy shapes and step-by-step guidance, anyone can create a cute puppy even if they’re just starting out. If you’re wondering about drawing a cute puppy, just remember to take it slow, enjoy each step, and let your creativity shine. Kids can make their drawings unique by adding colors, spots, collars, or even a wagging tail. You can also try puppy coloring pages to add more fun and practice your coloring skills. So grab your pencils and have fun turning your ideas into adorable dog drawings!
Also Read:
Drawing a Cat for Kids
How to Draw an Owl for Kids
Step by Step Guide for Drawing Bird
Read more




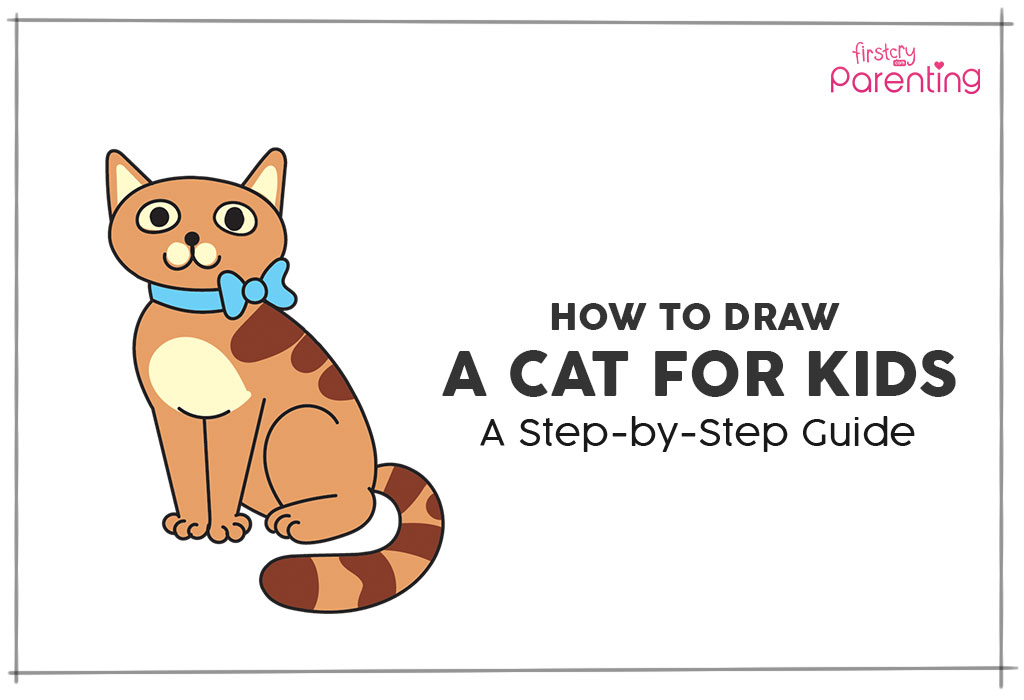
How to Draw a Cat for Kids
Drawing comes naturally to young children and is a wonderful way for them to express their creativity. Whether it’s with crayons, pencils, or markers, drawing offers numerous developmental benefits, such as improving fine motor skills, enhancing focus, and boosting imagination. For beginners, learning how to draw a cat for kids is a simple and enjoyable activity that helps them build confidence in their artistic abilities. Drawing a cat is one of the easiest and most fun activities to introduce them to the world of art. Here’s how you can teach your little one to draw a cat, making the process both engaging and educational!
What You Will Need for Drawing a Cat
Cats are a popular choice for pets. Teaching kids how to draw a cat can nurture their love for animals. Drawing animals can be quite tricky, but once you’ve got it right, it can be rewarding. To make your drawing look as convincing or life-like as possible, you need to observe, make a quick sketch, recognise the structure, and finally refine you’re drawing.
Here’s what you will need as a beginner:
Pencil
Non-dust eraser
Drawing paper
Black marker
Coloring supplies
Printable template (for little kids who are just starting off)
Cat Drawing for Kids in Six Easy & Simple Steps
Learning to draw a front view image of a cat is the most simple activity for kids. Here is an easy, step-by-step guide on how to draw a cat.
1. Draw the Head and the Belly of the Cat
To draw a cat, first draw an outline of the cat’s belly as shown in the figure below (a tilted, big oval circle). Then, on the top of this circle, draw a smaller oval shape or a small circle for the cat’s head.
2. Draw the Cat’s Hind Leg and Ears
On the face or the smaller circle that you have drawn, draw two triangles to make the cats ears. At the bottom half of the lower circle, draw a ‘C’ for the car’s thigh. Then, draw a long u-shape for the hind leg and the paw at the bottom. Then, draw the toes at the end of the paw.
3. Draw the Cat’s Forelegs and Bow
Now, imagine a line running through the centre of the cat’s belly. Draw a large w-shape to form the forelegs as shown in the figure. Once again, draw the paws and the toes. Then, draw a bow across the line that separates the cat’s face from the rest of its body.
4. Draw the Cat’s Eyes
Draw two small circles for the cat’s eyes on the cat’s face. Fill in two smaller circles for the pupils.
To polish whatever you’ve drawn so far, erase any extra lines or curves. And, draw a small curve on the top of the w-shape you drew for the forelegs. Refer to the image given below for a better understanding.
5. Draw the Cat’s Nose, Mouth, and Tail
Draw a small circle just below the centre of the cat’s eyes to form the nose. From this circle, draw two curves, each ending in the opposite direction. If you look closely, the curves look like a horizontal ‘3’. There! You’ve just drawn the cat’s mouth.
Then, draw two lines starting from the back of the bottom circle (from behind the hind leg and join them to make a nice, fluffy tail.
6. Draw Details and Color the Cat
Adding details, such as patches, sharpen the toe outlines, etc. and color the cat in the colors of your choice!
FAQs
1. What are the benefits of cat drawing for children?
Drawing a cat helps children develop fine motor skills, hand-eye coordination, and concentration. It also encourages creativity and imagination as they can add their own details or unique features to the drawing. Moreover, the structured steps of drawing a cat teach kids how to follow directions and improve problem-solving skills. Artistic activities like drawing foster emotional expression, which is important for a child’s overall mental development.
2. How can I help my child stay patient while drawing a detailed cat?
Children can often feel impatient when a drawing becomes complex. To help them stay focused, break down the process into smaller, manageable steps, such as first drawing the basic body structure and then moving on to details like the face or stripes. You can encourage them to take short breaks between steps or use coloring as a reward for finishing each stage. Keeping the atmosphere fun and lighthearted will help them stay engaged and patient.
3. Can drawing a cat help my child understand animal anatomy?
Yes, drawing a cat can give your child an early understanding of basic animal anatomy. As they draw the cat’s skeleton, muscles, and facial features, they begin to see how animals are structured. This awareness can lead to a deeper curiosity about animals and biology, making it a great introduction to understanding living creatures and how their bodies work.
This was all about easy cat drawing for kids. Apart from developing fine motor skills, drawing encourages visual analysis, helps establish concentration through practice, improves hand-eye coordination, and develops social skills and creative problem-solving in kids . Therefore, motivate your child to pick up the pencil and ensure you display his personalised artwork on the living room walls, the refrigerator, etc.
Also Read:
How to Draw a Car for Children
How to Draw a Lion for Kids
How to Draw a Frog for Kids
How to Draw an Owl for Children
How to Draw a Butterfly for Children
Read more

How To Draw A Fish for Kids
If your child is attracted to the enigmatic charm of a fish gliding gracefully in the serene blue water of an aquarium, it’s time to build their relationship with nature and capture the exciting features of a fish in art…
Simple Fish Drawing for Kids in Easy Steps
Originating in the Cambrian period, fishes are aquatic, craniate, gill-bearing animals that lack limbs with digits. Having evolved through the Palaeozoic and Silurian periods, fishes have diversified into a wide variety of forms. From just the prey of arthropods, they became formidable marine predators that can be found in nearly all aquatic environments. From high mountain streams, lakes, rivers, coral reefs, the abyssal, and even the oceans’ deepest depths. Most fish are cold-blooded, which allows their body temperatures to change as ambient temperatures vary. They have fear and pain responses as well! With over 34,300 described species, fish exhibit greater diversity in sizes, shapes, and colors than any other group of vertebrates. Whether your kid likes to admire fishes in the local aquarium or keep them as pets, fishes can be a good theme for an underwater world art project. They also teach kids about the importance of marine conservation and how they contribute towards maintaining the earth’s ecological balance. From developing fine motor skills to visual analysis, problem-solving, hand-eye-co-ordination to boosting self-confidence, art offers a host of developmental benefits for toddlers. One of the first things to keep in mind while sketching a fish is to pay attention to general body proportions, size of the head, mouth position, and placement of the fin. The mouth, location, and several paired and medial fins vary in morphology and number from one species to another; these features play a huge role in identifying species.
Learning how to draw a cartoon fish is important for kids as it is fairly easy, fun, and makes a perfect choice for beginners. Start with the basic structure and then upgrade to learning to draw different types of fish with details like scales, fins, and tails. From spending the summer vacation in a productive way to engaging kids indoors, these simple stepwise instructions can help one master the art of drawing a generic or any specific fish variety that they can display with pride. Artwork is only limited by imagination! Get started with some simple fish drawings, and move on to more complex fishes for further exploration and creative discovery. Each step in this guide contains illustrations and explanatory texts that you can follow to make any of the fish that catches your child’s fancy.
What You Will Need
Drawing Paper
Marker
Pencil
Eraser
Steps
1. Start by drawing an ellipse for the body.
2. Draw a curved line across the front part of the fish to represent its head that often has different patterns of scales.
3. Draw a triangular-shaped tail on one end of the fish’s body.
4. Draw the dorsal fin of the fish as a curve upward on the fish’s body.
5. Draw the bottom fin as the dorsal fin underneath. The side fin as a “D”-shaped curve can be made at the body’s center.
6. Draw the eye for the fish as a big circle with a marker while leaving it as a white dot (un-shaded) in the top right corner. Draw a curved line as the mouth on the front of the fish’s face.
7. Colour it as per your choice.
How to Draw a Koi Fish for Kids
Native to East Asia, Koi fishes are mainly kept in water gardens and koi ponds for decoration. Comprising of complex and beautiful features, it makes your artwork look truly amazing. Found all over the world, their interesting colors and lineage make them special and visually soothing. People in Japan believe the Koi fish symbolizes wealth, prosperity, love, a successful career, and good fortune.
What You Will Need
Pencil
Eraser
Drawing paper
Colored pencils/ crayons
Steps
1. The head of the Koi fish is curvy on three sides. It’s one side longer than the other, like a triangle. The smaller side is flatter and half the size of the neck or long side. Draw the eye of the fish.
2. Draw the long, slender body of the Koi. Making the fish curvy creates an image to show that the fish is in motion. The tail-end is narrower than the front end, which is wider.
3. Add the tail fin or caudal fin, which is slightly rough around the edges or a little sharp.
4. Add two fins on each side. The pectoral fin (one close to the head), the pelvic fin, and the anal fin. The dorsal fin (one on top) has two parts. Add the barbells that are sensory organs used by the Koi for detecting taste and smell.
5. Draw lines inside the fins for details and draw the scales on the body.
6. Color it.
How to Draw Nemo for Kids
If your child has been fascinated by little Nemo from the Disney-Pixar movie, they can learn to bring this cute orange clownfish to life with straightforward materials. Nemo is actually Ocellaris clownfish that belongs to the family Pomacanthidae. With a little practice and perseverance, even a beginner will produce amazing artwork.
What You Will Need
Pencil
Eraser
Drawing paper
Color pencils/Crayons
Steps
1. Draw the body of the fish. Make a circle and draw another curvy sphere intersecting it.
2. Now erase the intersecting line and join the circles to form a single oval shape like a mango.
3. Do a freehand drawing for adding the dorsal fin, caudal fin, pectoral fin, anal fin, and pelvic fin. Make the edges of the fins look rough with a few tiny bumps. Add the eyes and a curvy mouth to make it look happy and smiling.
4. Draw curvy lines across the fish’s body to brighten up the face and indicate the beautiful design of the clownfish.
5. Draw more lines inside the fins to give it a distinct look.
6. Color the fish orange and white.
How to Draw a Bass for Kids
This large-mouthed and spotted fish is usually caught for food or sport in North America and hunted in South Africa. The term comes from Middle English bars, meaning “perch” encompassing both freshwater and marine species belonging to the Perciforms or perch-like fishes. The black bass, temperate bass, and Asian bass are most popular.
What You Will Need
Pencil
Eraser
Drawing paper
Color pencils/Crayons
Steps
1. The black bass has a full mouth, which should look prominent. Begin by outlining the fish with gentle curves. The body of the bass has a wide oval shape while it has a fan-shaped tail. Draw a groove at one end of the body for the fish’s mouth, which is usually seen open, measuring almost one inch wide on paper.
2. Add detail to create a realistic impression of the fish’s head. Draw a slant from the groove you drew before for the mouth. Draw thin lines in and around the mouth to show the folds of the flesh and skin inside the mouth. The lines below the head indicate the gills and pectoral fin.
3. Draw a small circle with a smaller black dot in the center of the head for the eye.
4. Then add the pelvic fin, dorsal fins, and the spiny rays to the sides. Add little details by drawing lines near the neck. Draw a C-shaped line to outline the gills of the fish.
5. Draw small, closely spaced slanting lines on all fins. Draw fish scales with small, bumpy lines on the body to show the scales and body marks.
6. Color the fish.
How to Draw a Clown Fish
A clown fish belongs to the subfamily Amphiprioninae. Depending on the species, anemonefish are yellow, orange, reddish, or blackish in color with white bars or patches. The largest clownfish measure up to 17 cm, while the smallest can be 7–8 cm. Anemonefish live at the bottom of shallow seas in sheltered reefs or lagoons. A comically distorted drawing is mainly done to satirize or ridicule its subject. Characteristics like facial features of the subject are seized upon and exaggerated for amusement. A cartoon drawing is chosen for its simplicity and aimed at the beginner artist by adding an animated eye, plump lips; we distort the fish features to insert human expressions on them.
What You Will Need
Pencil
Eraser
Drawing paper
Color pencils/Crayons
Steps
1. Draw two small circles of the same size joined at the sides.
2. Draw a smaller circle inside each circle with thicker edges.
3. Draw an egg-shaped extension starting from each eye. Do not join the pointed end of the oval.
4. Draw the caudal fin sideways or the fish’s tail shaped like the ears of a bunny.
5. Make a curved line from the center upwards, and extend it a tiny bit to the right to complete the mouth.
6. Color it.
How to Draw a Shark for Kids
Sharks are a group of elasmobranch fish characterized by a cartilaginous skeleton, five to seven-gill slits on the sides of the head, and pectoral fins that are not fused to the head. The earliest species of sharks lived over 420 million years ago and were different from modern sharks. Tiger sharks, hammerhead sharks, thresher sharks, blue sharks, and great white sharks are well-known apex predators. With an average of 15 feet in length and weighing more than 2,000 pounds, sharks are the most efficient macro predators. As they have different features, your child should pay attention to the details to draw a shark more realistically.
What You Will Need
Pencil
Paper
Crayons/Color Pencils
Eraser
Steps
1. Draw a pointy snout for the head in front with the letter “V.”
2. Add a tiny eye in the middle of the snout and mouth inside the head to give it dimension and prevent it from looking flat.
3. Draw a long back attached to two lines on the bottom. Leave space for the front fin. The body of almost all sharks is like a spindle or a teardrop laid on its side.
4. Draw some lines next to the head for gills. Next, draw the gill lines that should go up and down. About five to seven pairs of gill slits are located on each side of the shark’s head. These vertical splits on the neck are an important characteristic that should not be omitted.
5. Add a tall fin on the top of their body, one in the space left on the bottom, and three smaller fins towards the direction of the tail. Draw the thin lower pointy fin below the top fin.
6. Finally, draw a tail with an upper and lower fin on the back, which allows the shark to change directions while swimming. The upper lobe of the tail fan is usually longer than the lower lobe.
7. Color it greyish blue to add more depth and richness to your drawing. Consider advanced techniques like stippling or hatching to add further texture and dimension to the shark.
While trying to make perfect artwork, it is important to know your pencils well. Position your child’s hand closer to the end of the pencil so that they have more control and precision. Subtle shifts in the width and darkness of your lines will create a dynamic, visually interesting drawing. Avoiding smudging makes a clean-looking drawing — the art of drawing a good picture involves practice. There’s no better way to connect with your kid and help them understand more about the world than working on an art project together. It helps to strengthen the bond of the family and create fond memories of childhood to be cherished forever. Instead of indulging in electronic gadgets like smartphones, video games, and monotonous television shows, it is better to cultivate hobbies like drawing or keeping a pet fish that not only lets you bring a piece of the natural world into your home, but reduces stress, anxiety, increases concentration levels, teaches important life skills like love, compassion, responsibility, tolerance, and patience that will shape them into caring adults.
Also Read:
How to Teach Children to Draw
How to Draw a Car for Children
How to Draw an Apple for Children
Read more
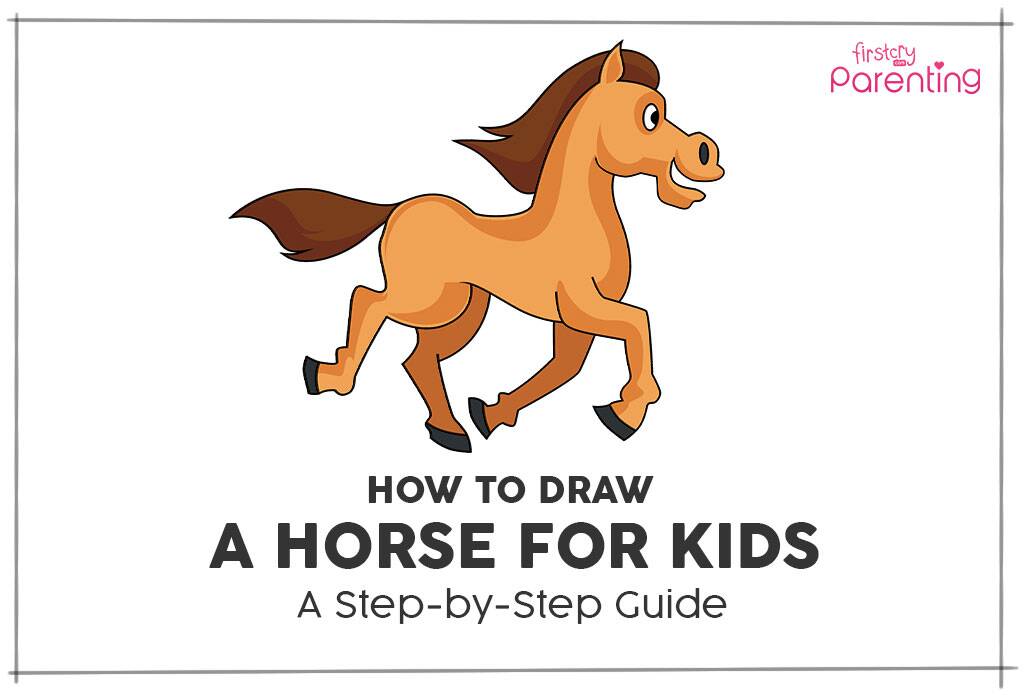
How to Draw a Horse for Kids
As parents or teachers, you could find yourself looking for easy drawings that your kids can enjoy coloring. Animals can be fun to color, but drawing them can be challenging. Horses, in particular, are tricky because they have so many curves, and you have to get the proportions of their body, head, and legs just right. Capturing their elegance, strength, and grace has been made easy, so if you are looking for a quick guide, keep reading to learn how to draw a horse step by step.
Video: How to Draw a Horse – A Step-by-Step Guide For Kids
What You Will Need to Draw a Horse
Drawing a horse is going to be easy and quick. The materials you will need to sketch a horse are easily available at your house:
Drawing paper
Black pen or marker
Crayons or color pens (optional)
Horse Drawing for Kids in 9 Simple Steps
If you are not the best artist or have difficulty drawing objects, here is a simplified tutorial to draw a cartoon horse. It is beginner-level and easy to follow. Here are 9 steps to draw a horse:
1. Start with the face.
First, you draw the horse’s face. Make a U shape if you want to make it quick and simple. You could also make it a bit more realistic by adding a curve on the lower side of the face.
2. Draw the face, neck and chest.
Draw the different facial components of the horse, i.e., the nostrils, mouth, and eyes. Draw the nostril a little bit above the mouth. From the ear, draw a slightly curved line that will form the neck. For the chest, draw a mild ‘S’ downwards from the chin.
3. Draw the mane and the back.
Draw the back at the tip of the horse’s neck. For the mane, you can make a zig-zag starting at the ear and going all the way down the neck, and ending at the back. You can even add a tiny bit of mane in between the ears.
4. Draw the first front leg.
Now you can start drawing the legs. First, draw the front leg, beginning from the end of the neck and chest line. Draw two almost parallel line downwards, then to the left. Draw a hoof at the end of the leg.
5. Draw the second front leg.
Similarly, draw the other front leg, such that it looks like it’s slightly behind the first front leg.
6. Draw the first hind leg.
For the hind leg, you can follow the same steps, or you can make it more realistic by making the calve more defined and angled.
7. Draw the second hind leg and the belly.
You can then add the last leg of the horse. Do it in the same manner as the other three but then draw behind the first ones. If you want to make the horse look like it’s galloping or walking, you can change the angle at which you draw the legs. Draw a connecting line from the first leg to the fourth leg. This will form the horse’s belly.
8. Draw the tail.
Now it’s time to make the tail of the horse at the end of the body. Start by making a backward S and connect it back, such that it looks like a leaf.
9. Colour the horse.
Grab some crayons and get to work or give them to your kids so they can color it.
If your little ones like horses, ponies, or unicorns, this easy tutorial is perfect for you to draw one for them so they can be creative and color or decorate it. You can try this easy step-by-step tutorial with materials already at home!
Also Read:
How to Draw a Lion for Children
How to Draw a Frog for Children
How to Draw a Butterfly for Children
Read more
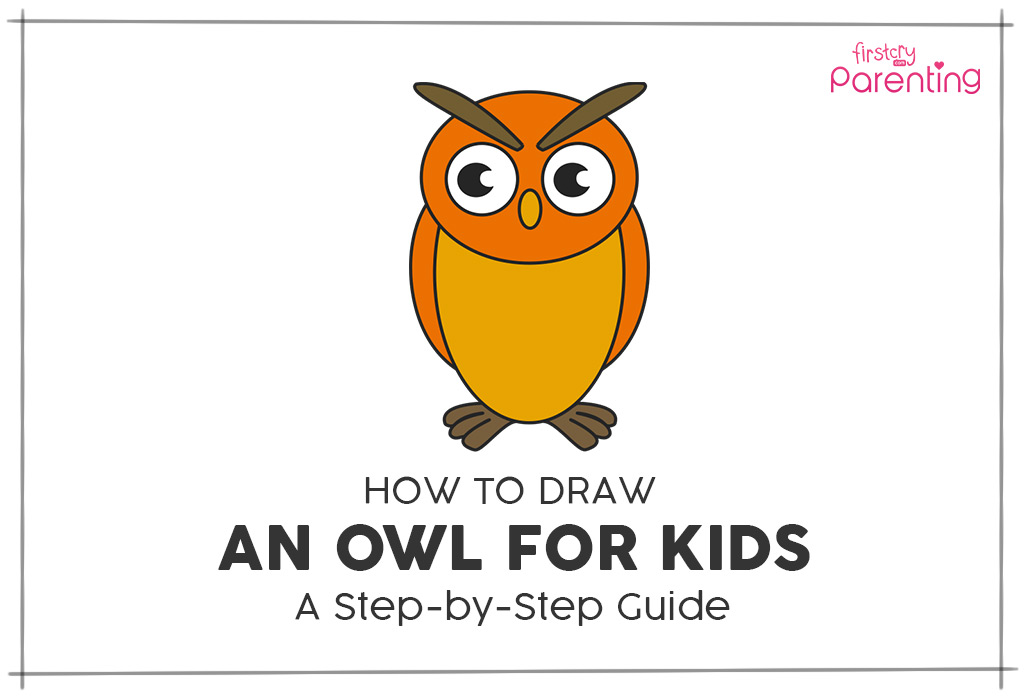
How to Draw an Owl – An Easy Step-by-Step Guide
Owls are not only cute and aesthetic but also a symbol of mystery and wisdom. In Greek mythology, the owl is known to be one of the symbols of the Goddess of Wisdom, Athena. However, it may be overwhelming to draw one in an accurate manner, getting all the proportions and shapes right. If your kids are fans of owls because of Harry Potter, Winnie the Pooh, Animal Crossing, or Pokemon, an owl drawing for them to colour can be the perfect afternoon activity. Want to learn how to draw an owl for kids? You can draw a simple owl by following this easy guide to learning step-by-step how to draw an owl.
Owl Drawing for Kids in 6 Simple Steps
You can first draw a cartoon owl lightly with a pencil and then line over it with a dark marker or pen once you are done. If you want to give your little one a cute drawing to colour or paint, here’s how to draw an owl for kindergarten kids:
1. Draw the base for the head and body.
First, start by drawing the head and body of the owl. Outline the horizontally oval head and the vertically oval body. Make sure they are both aligned.
2. Draw the outlines of the eyes and feet.
Draw two circles for the eyes of the owl. Also, lightly draw the feet of the owl at the base of the bodyby drawing two slightly rectangular shapes. This will form the outline for the actual feet.
3. Fill out the eyes and feet.
For the eyes, draw two crescent shapes to make them look life-like. Lightly draw two diagonal lines over the eyes. These will form the outline for the eyelashes. Also lightly draw a small vertical line between the eyes. This will form the outline for the beak. Elaborate on the details of the feet of the owl by drawing three tiny sausage-like shapes for each foot. Let the middle one be longer than the other two.
4. Draw the eyelashes, beak and wings.
Draw two eyelashes around the lines above the eyes, such that they look like thin leaves. Next, using the outline drawn in the previous step, make the beak of the owl in the center of the head. Next, draw the wings of the owl, starting from the bottom of its head, along its body, almost till the bottom. Make them a little wider near the top and narrower as they come down and pointy at the end. They should look like they curve around the body.
5. Erase the light outlines.
Erase the light outlines which served as the guide to draw the eyelashes, nose and feet.
6. Colour the owl.
Your owl is now ready. Grab some crayons and get to work! You can even color it or decorate it with sequins and glitter. If you want a more realistic owl, color the inside portion of the body and the beak in light brown color. Color the wings and the head with dark brown. Color the eyelashes and feet in a darker shade of brown. Color the pupils black.
Tips to Learn Owl Drawing Easily
Here are some tips to keep in mind when you teach your child a simple owl drawing:
To ensure children learn to draw a neat and clean owl, start by teaching them how to draw a oval shape. Once they skillfully master the oval shape drawing. You can see the drawing and look for different shapes required that make up an owl, including a straight line and a circle.
Tell what an owl is and how they look, so they have a reference.
Teach them about symmetry so they can practice it and draw a symmetrical and neat owl.
Most of all, the practice of shapes is important to ensure an easy drawing of the owls without getting bored. Add colours and make it vibrant.
FAQs
1. What is an owl?
An owl is a solitary creature that stays nocturnal. It means they stay up at night and sleep in the daytime. They have a large head, a stoic stance, and calm energy. Fun fact – when they fly, they make no noise because of their flexible feathers. Their prey are small animals, such as insects, mice, fish, and smaller birds.
2. What are some fun facts about owls?
Some amazing facts about owls are:
Owls have the ability to rotate their necks about 270 degrees. Isn’t that surprising?
Do you know what owls hunt? Well, they hunt other owls. For instance, Great Horned Owls are known for hunting smaller Barred Owls.
Bran Owls can swallow their hunt or prey whole; that includes bones, skin, and everything. They also eat up to 1000 mice in a year.
Owls don’t have eyeballs. They have completely immobile tube-shaped eyes that give them binocular vision and focus on their target.
3. Is owl drawing easy for children?
Drawing an owl is easy and not that difficult for kids. It is a great drawing activity for children who are learning to draw and practising their pencil skills. With oval, circle, and straight-line shapes, the drawing is not so difficult, so they can easily draw an owl.
Giving your kids drawings will keep them entertained, hone their creativity, and also help them learn the colors of objects. You can follow these easy six steps to draw a cute cartoon owl that your little one can color.
Also Read:
How to Draw Frog for Children
How to Draw Lion for Kids
How to Draw a Cat for Kids
How to Draw Butterfly for Children
Read more
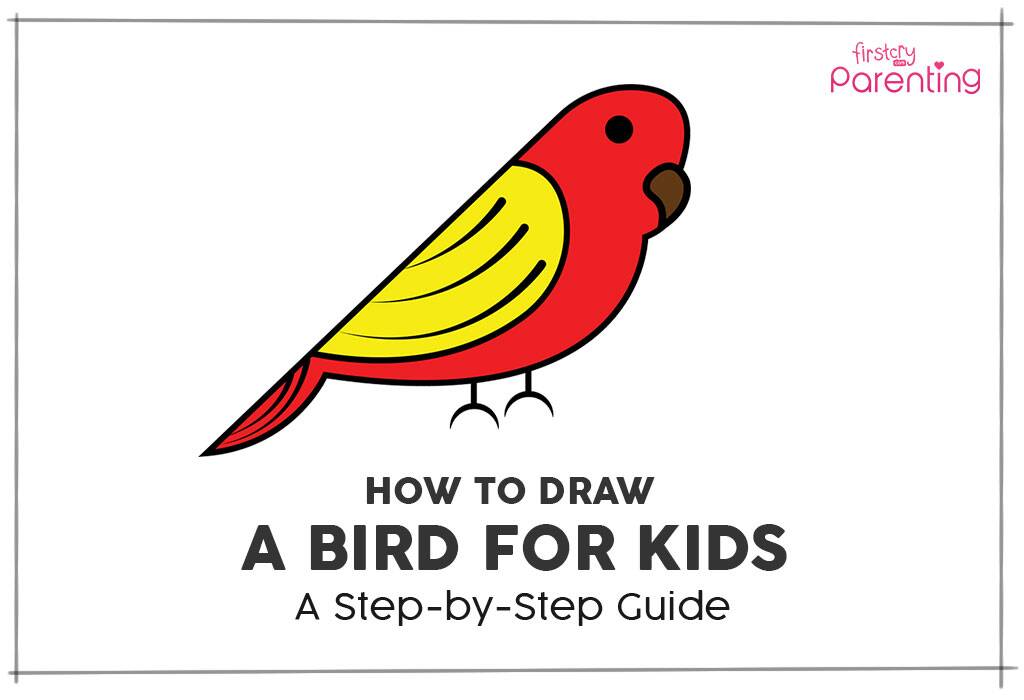
How to Draw a Bird for Kids: An Easy Step by Step Guide
Children are naturally curious and imaginative, and by engaging them in various art and craft activities, parents can enhance their creativity and imagination power. If your child develops or shows an interest in drawing, you could teach him simple designs such as easy bird drawing for kids to hone their skills and keep them interested. Encouraging children to express themselves through art fosters not only their artistic abilities but also their cognitive and emotional development. Read on to learn how to draw a bird for kids and ignite their creativity further.
This step-by-step guide is a great way to get your child to learn a new drawing. This one’s very simple, and your little one will enjoy himself while at it! Is your child ready to learn how to draw a bird?
What You Will Need to Draw a Bird?
You will need the following materials to make a bird drawing in a perfect way.
1 graphite pencil HB or B type
1 eraser
An A4 size plain paper/plain white sheet
Bird Drawing for Kids in 5 Simple Steps
Here is a simple guide on how to draw a bird in 5 simple steps! This simple bird drawing guide is perfect for beginners!
1. Draw the outline
To draw the outline of the bird’s head and body, all you need to do is draw a candy cane. You can draw a line as shown in the image below, and give it a slight curve from the top to make the head. Draw a small curve for the beak.
2. Draw the eyes
Make a small circle under the curved head and fill it to make the eyes. Then draw the beak as shown in the image.
3. Draw the wings and complete the body
To draw the wing of the bird, draw a semi-circle connecting the outline. Draw a bigger semi-circle and connect it at the bottom as shown in the image. The small arc at the bottom will form the tail of the bird.
4. Draw the feathers and the feet
Draw three arcs inside the semi-circle to make feathers of the bird, and two arcs, one below another inside the tail. To draw the feet, make two small lines, parallel to each other, from the outer semi-circle, and make small arcs under the lines.
5. Colour the bird
Colour the bird in orange and yellow. Colour the wings in yellow as shown in the picture, and the remaining body in dark orange. Its beak should be brown.
Benefits of Drawing Birds for Children
Drawing birds can be a delightful and educational activity for children, offering numerous benefits beyond just artistic expression. Moreover, it can enhance cognitive development and provide a sense of accomplishment for young artists. Here are the benefits of drawing pictures of birds for children:
Drawing birds requires careful observation of their shapes, sizes, colors, and patterns, which can enhance a child’s attention to detail.
Children can use their imagination to create unique bird drawings, experimenting with different colors and designs.
Holding a pencil and making precise strokes to depict feathers, beaks, and wings helps in refining fine motor skills.
Through drawing birds, children can learn about different species, their habitats, and behaviors, fostering a deeper connection with nature.
Engaging in art activities like drawing birds stimulates cognitive processes such as problem-solving, spatial awareness, and visual thinking.
Completing a bird drawing successfully can boost a child’s self-esteem and confidence in their artistic abilities, encouraging further exploration and experimentation.
FAQs
1. How can I make my bird drawing look realistic?
To make your bird drawing look more realistic, study reference images of the bird species you’re drawing. Pay attention to the placement of feathers, the shape of the beak, and any distinct markings. Use shading and highlighting to add depth and dimension to your drawing.
2. Do I need expensive art supplies to draw birds?
No, you can use basic pencils, paper, and coloring tools like crayons or colored pencils to draw birds. Expensive supplies are not required to create beautiful drawings.
3. How long does it take to learn to draw birds?
Learning to draw birds, like any skill, takes time and practice. It’s different for everyone, but with regular practice, you’ll see improvement over time.
This was about bird drawing for kids with colour. In 5 simple steps, your child will have learned how to draw a bird. Let him practice how to draw a bird, then you can teach him to draw other animals as well. Drawing is a great hobby that will improve your child’s focus, hand-eye coordination, and imagination. So let him draw and create a beautiful world of his own!
Also Read:
How to Draw a Butterfly for Children
How to Draw a Frog for Kids
How to Draw a Lion for Children
Step-by-Step Guide on How to Draw A Owl
Read more
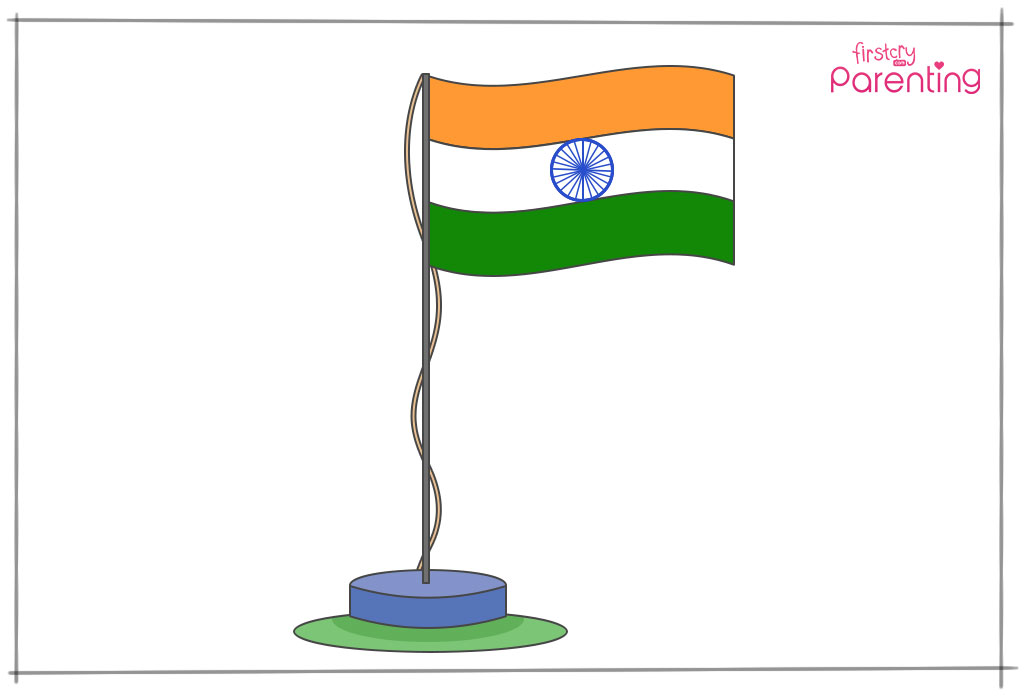
How to Draw Indian National Flag
India celebrates its Independence Day on August 15 every year. This day is celebrated to commemorate the day when India’s Constitution came into effect after our country gained independence after a very long fight for freedom. 15 August is celebrated with patriotic fervour and festivities all around the country. This is the perfect time to involve your child in activities that teach him about India’s history and its rich cultural heritage.
One of these interesting activities can be learning how to draw the Indian national flag. Doing so will serve a dual purpose – your child will hone his creative skills and, also, learn about the significance of our national flag. Flag drawing for children is one of the best and easiest activities. So, let’s get started! Take a look at how to draw the Indian flag step-by-step.
What You Will Need for Drawing the Indian Flag?
An A4 size plain paper
A pencil
An eraser
A ruler
Colours
Flag of India Drawing for Kids in 9 Simple Steps
Here’s a step-by-step guide on how to draw the Indian flag.
1. Draw the pole
Using a ruler, draw a pair of vertical lines that are parallel and close to each other. Join both the ends of these parallel lines. This is the pole that will support the flag.
2. Draw the flag
Draw a wavy line, extending outwards, from the top portion of the flag pole, and draw a similar line a few inches below, as shown in the illustration. Join the open ends of these wavy lines.
3. Divide the flag into 3 parts
Divide the flag into 3 proportionate sections by drawing 2 wavy and horizontal lines across the flag, as shown in the image.
4. Draw the circle for the Ashoka Chakra
Draw a small circle in the centre of the middle section of the flag.
5. Complete the Ashoka Chakra
From the centre of the circle, draw 24 equidistant lines towards the outline of the circle. These lines will form the 24 spokes of the Ashoka Chakra.
6. Draw the stand for the flag pole
Draw a flat and slightly elongated oval around the bottom of the flag pole, as shown in the image. Below the oval, draw an arc which is parallel to the oval. Join the arc to the oval with two small vertical lines.
7. Draw the cord/rope
From the topmost tip of the flag pole, draw a wavy line flowing downwards, towards the bottom tip of the pole. This wavy line will form the rope or cord used for hoisting the flag.
8. Draw the base for the stand
Draw a second oval below the stand of the flag pole. With this, your flag outline is ready. All that’s left is to colour the flag.
9. Colour the flag
Colour the topmost section of the flag saffron, and the third section dark green. Colour the lines of the Ashoka Chakra navy blue. For the stand and the base, you can use shades of blue and green. While you’re at it, don’t forget to explain to your child what each colour stands for. Saffron stands for courage and sacrifice, white represents truth and peace, and green stands for faith and chivalry. The Ashoka Chakra stands for continuous progress.
FAQs
1. What Is the Meaning Behind Each Colour of the Indian Flag?
The Indian national flag has saffron, white and green colours. The meaning of each colour is:
The Saffron colour – indicates the strength and courage of the country.
The White middle band – indicates peace and truth along with Dharma Chakra.
The Green colour – shows the fertility, growth and auspiciousness of the land.
2. What Does the Ashoka Chakra Signify?
The centre of the Indian flag contains the Ashok chakra, on the white bank. It has 24 spokes and is blue in colour. It represents the constant movement and progress of the country.
3. What Do the 24 Lines in the Ashoka Chakra Represent?
The 24 spokes in the Ashoka Chakra represent the twelve causal links taught by the Buddha and paṭiccasamuppāda (Dependent Origination, Conditional Arising) in forward and then reverse order. The first 12 spokes represent 12 stages of suffering.
Drawing the Indian flag has never been easier with this step-by-step guide for your child. Not only will it keep him engaged and guarantee a fun-filled time, but also instil a sense of patriotism in him, as he learns about the significance of each and every element of the flag.
Also Read:
How to Draw Lion for Kids
How to Draw Car for Children
How to Draw an Apple for Kids
How To Draw a Butterfly for Children
Read more
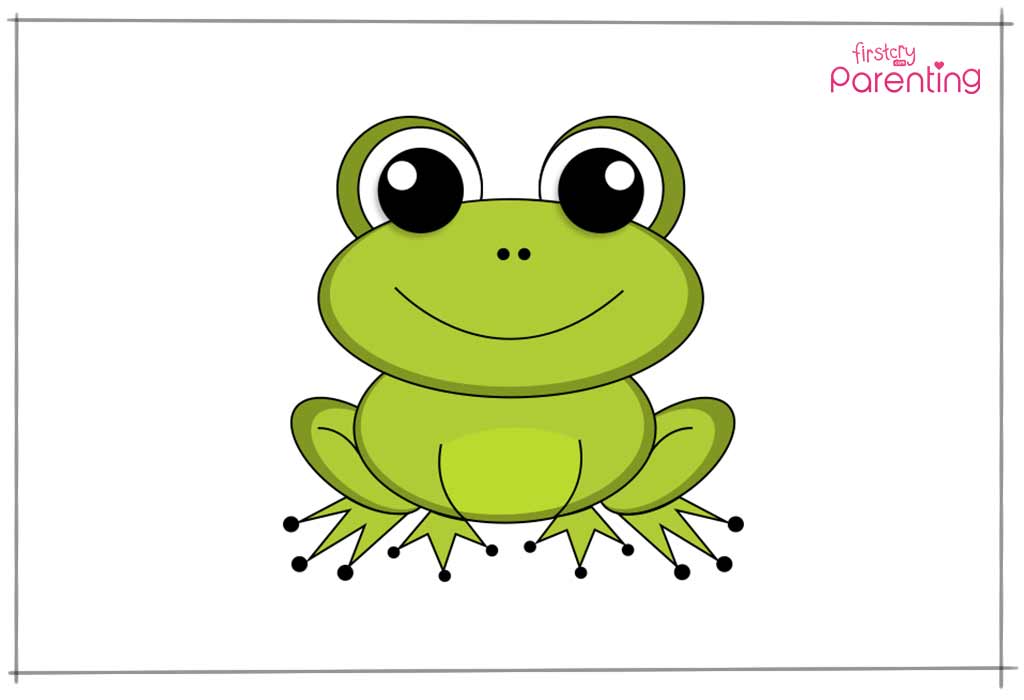
How to Draw a Frog for Kids
Animal drawings have a magical ability to captivate children and ignite their interest in art and craft activities. This summer, seize the opportunity to introduce your child to the world of drawing by starting with a simple animal drawing. If you want to teach your child how to draw, start with an easy frog doodle. And you’re in luck! We’ve got a step-by-step guide complete with pictures for a cute frog drawing to get your child started. Frog drawing is easy! This fun and educational activity will not only keep your child entertained during the holidays but also nurture their creativity and artistic skills. So, get ready to embark on an artistic journey with your little one and witness their imagination soar.
Benefits of Learning to Draw a Frog for Kids
Learning to draw a frog can be a highly rewarding and educational experience for kids. It not only encourages their creative expression but also offers numerous developmental benefits. Here are some advantages:
Enhances Fine Motor Skills: The precision required in drawing helps children refine their fine motor skills.
Boosts Creativity: Drawing encourages kids to use their imagination and create their own interpretations.
Improves Concentration: Focusing on details in a drawing can enhance a child’s concentration and attention span.
Develops Problem-Solving Skills: Kids learn to analyze shapes and proportions, fostering problem-solving abilities.
Builds Confidence: Successfully completing a drawing can boost a child’s self-esteem and confidence.
Teaches Patience: The process of drawing teaches patience as children work through each step.
What You Will Need to Draw a Frog?
A pencil
An eraser
An A4 size plain paper/plain white sheet
Colors
A reference image of a frog (optional, but it can be helpful)
Frog Drawing for Kids in 12 Simple Steps
Follow this step-by-step guide for a frog jumping drawing.
1. Begin with drawing a horizontal oval on the sheet
Using a pencil, draw a horizontal oval shape on the sheet. The oval shape should be slightly elongated.
2. Draw a smaller oval under the oval drawn in step 1
Draw a smaller horizontal oval shape under the bigger oval – this will form the body of the frog. The bigger oval should overlap the smaller one, as shown in the picture.
3. Draw the limbs of the frog
Draw one oval (the size of your thumb) on either side to make the limbs or hind legs of the frog.
4. Draw the webbed feet of the frog
Draw three ‘V’ shapes under the two small ovals drawn in step 3. The webbed feet should be drawn under the hind legs of the frog.
5. Draw curves and arcs to define the characteristics of the frog
Draw two arcs facing each other inside the oval which forms the body of the frog. Refine its hind legs with curves.
6. Complete the forelegs
Complete the forelegs of the frog by drawing the front webbed feet.
7. Draw the eyes of the frog
To make frog’s eyes, start with drawing two dome-like structures on top of the oval shape drawn in step 1; draw them just like you would draw Mickey Mouse ears. They shall form the base of the frog’s eyes. Inside each dome draw half-a-circle as shown in the illustration.
8. Draw two small circles to complete the eyes
Draw a circle inside each half-circle drawn in the above step. These circles will form the black part of the frog’s eyes. To make the white part of the eyes, draw two little circles on the top left and top right in the left and right eyes respectively. Check the image below for reference.
9. Draw the mouth of the frog
Drawing the mouth of the frog is very easy; all you have to do is draw a curve inside the oval shape drawn in step 1.
10. Draw the nostrils
Draw two small dots about 1 cm above the curve drawn in step 9 to make the nostrils of the frog.
11. Draw the toes
Just like the dots drawn in the above step, draw dots at the end of the pointed webbed feet of the frog.
12. Colour the frog
Colour the body of the frog green and its eyes and toes black.
How to Draw a Jumping Frog in 9 Steps
Learning to create a captivating frog jumping drawing is an exciting venture that allows you to capture the dynamic and lively nature of these amphibians. In nine straightforward steps, you can master the art of illustrating a frog mid-leap, creating a fun piece of artwork.
1. Draw the Frog’s Head and Body
Source: Pinterest
Begin by sketching the head and body of the frog, creating a basic outline of its form.
2. Begin Drawing the Arms
Source: Pinterest
Extend two curved lines from the body to create the frog’s arms, forming a V shape.
3. Start on the Legs
Source: Pinterest
Add the hind legs by drawing two elongated bent lines, giving the frog its characteristic posture.
4. Add the Frog’s Hands and Legs
Source: Pinterest
Draw the hands and feet by adding webbed fingers and toes to the ends of the arms and legs.
5. Draw Small Balls on the Frog’s Hands and Feet
Source: Pinterest
On the frog’s hands and feet, add small round shapes to represent the finger and toe pads.
6. Draw the Frog’s Face
Source: Pinterest
Create the frog’s face by adding eyes, a nose, and a wide smile, giving it a friendly expression.
7. Add Three or More Lily Pads
Source: Pinterest
Draw three or more lily pads in the background to place the frog in its natural habitat.
8. Draw Water Puddles and the Sun
Source: Pinterest
Add wavy lines below the frog and lily pads to represent water and a shining sun in the sky.
9. Fill in the Color
Image Credit: Pinterest
Color the frog, lily pads, and background as desired to complete the drawing.
For the finishing touches, trace the outline with a marker and proceed to add vibrant colors.
Frog Drawing Tips for Children
Drawing a frog can be an enjoyable and educational experience. To help kids make the most of their artistic journey, here are some valuable tips to keep in mind while crafting a frog sketch:
1. Start Simple
Begin with basic frog shapes and gradually move to more complex details as your child’s skills improve.
2. Use References
Encourage kids to look at pictures of real frogs or other easy frog drawings as references for their own creations.
3. Practice Regularly
Like any skill, drawing improves with practice, so make it a regular activity.
4. Experiment With Colors
Let children explore their creativity by using a variety of colors for their frogs.
5. Be Patient
Remind kids that it’s okay to make mistakes and that practice makes perfect.
6. Offer Encouragement
Praise their efforts and celebrate their progress to boost their confidence.
7. Make It Fun
Keep the process enjoyable and stress-free to nurture their love for art and creativity.
There you go – in a few simple steps, you can teach your child how to draw a frog. Let him practice this cute and simple frog drawing daily – he will surely get better at it. Once he gets the hang of it, you can teach him to draw other intricate frog drawings too!
(P.S. Once your child learns how to draw a frog, you can teach him about its body parts!)
Also Read:
How to Draw a Lion for Kids
How to Draw Butterfly for Children
How to Draw An Apple for Kids
How to Draw a Christmas Tree for Kids
Read more
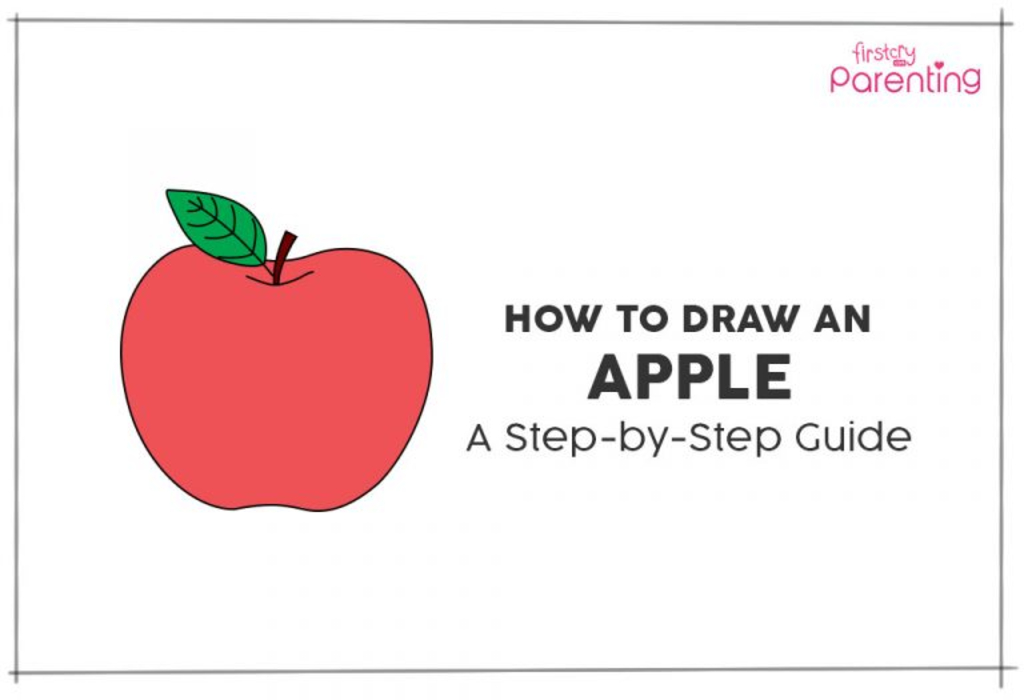
How to Draw An Apple for Kids
An apple a day keeps a doctor away. The fruit has been a part of your child’s diet since was a little baby. Remember all the apple puree you fed your little munchkin while weaning? Now that your baby is old enough to chomp on and relish slices of the fruit to her heart’s content, let’s use the fruit as a subject and teach your child how to draw an apple, step by step.
Encouraging your child’s creativity through drawing not only fosters artistic skills but also enhances cognitive development. Engaging in such activities not only sparks your child’s imagination but also provides an opportunity to discuss the importance of a balanced diet and the health benefits of consuming fruits like apples. Take this chance to bond with your little one through art and valuable conversations. Read on for easy instructions to draw an apple.
What You Will Need to Draw an Apple?
A drawing paper
Red, green and brown paint/ crayons/ sketch pens
A black-coloured sketch pen
A pencil
An eraser
A circular lid (3 to 5-inch diameter or of your preferred size)
Apple Drawing for Kids in 8 Simple Steps
Here’s an easy guide on how to draw an apple, step-by-step.
Step 1: Draw a Circle
Using a pencil, draw a circle with the help of the circular lid. We’ve given a size specification, but you can choose to draw your apple as big or small as you want. You can also go free-hand with the circle.
Step 2: Draw a Wave in the Top Half Part of the Circle
Leave some distance from the top of the circle, and draw a wave-like pattern that dips in the centre as shown in the figure below. This dip/ trough is where we will draw a stalk later. Let the ends of the wave overlap the circle on each side. It should look like a hairline on a face.
Step 3: Draw a Wave in the Bottom of the Circle
Draw another wave-like pattern at the bottom of the circle with its centre raised, as shown in the figure. Once again, let the ends of the wave overlap with the sides of the circle. The bottom curve is where the stamen of the apple is located. The drawing now probably looks like someone wearing an oversized pair of glasses, but it actually is the body of the fruit. Easy to draw, right?
Step 4: Draw a Small Curve Under the Top Wave-Like Pattern
Just under the top wave pattern, draw a curve underneath the gentle trough, as shown in the figure.
Step 5: Draw a Stalk and a Leaf
Draw two slightly curved lines projecting upward from the centre of the small curve you’ve just drawn. Join the ends of these lines. There, you have the stalk! It should look like a gently sloping elongated triangle.
Now, draw a leaf from the left base of the stalk, as shown in the figure. An easy way to draw a leaf is to draw a line projecting outwards from the base of the stalk and then draw an oval-shaped blade around it.
If you’re keen on learning how to draw different types of leaves, do leave a comment below.
Step 6: Draw the Veins of the Leaf
Now, on the leaf, draw slightly curved lines projecting out from the centre line. These are the veins of the leaf.
Step 7: Final Touches
Now, erase the unwanted lines and, with a black sketch pen, outline the apple.
Step 8: Paint It Red!
Colour the apple in a vibrant red colour. Use green for the leaf and brown for the stalk.
What Are the Benefits of Learning to Draw an Apple for Children?
Learning the drawing of an apple can offer numerous benefits for children, encompassing both artistic and educational aspects. As they engage in the creative process of drawing, children develop essential motor skills and cognitive abilities. Here are some specific benefits:
Fine Motor Skills Enhancement: Drawing involves precise hand movements, contributing to the refinement of fine motor skills in children.
Cognitive Development: The process of visualizing and replicating an object on paper enhances cognitive abilities and spatial awareness.
Creativity and Imagination Boost: Drawing encourages creative thinking and allows children to express their imagination freely through art.
Educational Engagement: Using a familiar object like an apple turns the drawing activity into an educational experience, providing an opportunity to discuss topics like nutrition and healthy eating habits.
FAQs
1. What Age Is Suitable for this Drawing Activity?
This drawing activity is suitable for children of various ages, but it is often recommended for kids around 4 years old and above. Younger children may need more assistance, while older kids can enjoy it independently.
2. How to Make My Apple Look More Realistic?
To make your apple look more realistic, focus on shading and texture. Add shadows to create depth, and consider using different shades of color. Pay attention to details like the stem and leaf, and observe real apples for inspiration.
3. What Other Fruits Can I Teach My Child to Draw?
Expand your child’s artistic skills by teaching them to draw various fruits. Start with simple shapes and gradually add details. Some other fruits to consider include bananas, oranges, strawberries, and grapes. Use a step-by-step approach to make it fun and easy for your child to learn.
There you have it! With this step-by-step, easy-to-draw apple guide, you can teach your tiny tot how to draw an apple! Let your munchkin draw as many apples as they want and show them off to your friends and family. Don’t forget to reward your kiddo with one of some delicious apple recipes. The apple of your eye deserves it!
Also Read:
How to Teach Kids to Draw?
How to Draw a Lion for Kids?
How to Draw a Butterfly for Children?
How to Draw a Christmas Tree for Kids
Read more
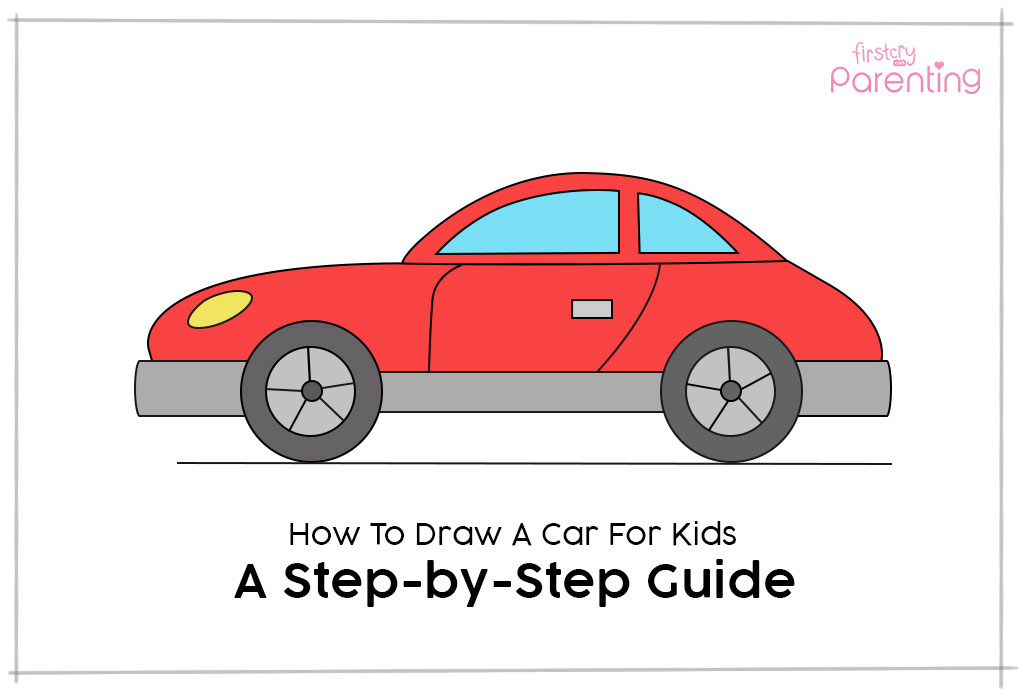
How To Draw A Car for Kids: Step by Step Guide
Cars are one of the most loved toys among kids. If you’ve seen them play with their cars, you’d know how fascinating their journeys are when they go around the house. And why just play with toy cars? Your kids could even draw and paint them in vibrant colours! Car drawing for kids enhances their motor and cognitive skills and allows them to imagine exciting adventures as they craft their unique vehicular masterpieces. Encouraging their artistic expression adds an extra layer of joy to their playtime.
Wondering how you could make drawing a car simple for your kid? Here’s how to draw a step by step car guide:
What You Will Need for Drawing a Car?
If you want to learn how to draw a car, here’s what you will need:
An A4 size plain drawing paper
A pencil
An eraser
A scale
Colours (crayons, watercolour, or sketch pens)
Car Drawing for Kids in 10 Easy Steps
Here are 10 steps that will teach you how to draw a car easily:
Step 1: Draw a Horizontal Line and Two Circles Over It
Using a scale, draw a horizontal line on the bottom half of the A4 sized drawing paper. Then draw two circles over the line, as shown in the figure. These circles are the wheels that will take you places!
Step 2 : Draw Smaller Circles Inside the Wheels
Now, draw another circle on the inside of the car wheels, as shown in the figure below. This is what we call the barrel of the wheel.
Step 3 : Draw the Third Set of Circles Inside the Wheels
Draw a small circle in the centre of each wheel. Your drawing might look like scary eyes right now, but trust me, it is your car. We’re just making it simple for you. These little circles, by the way, are the centre caps.
Step 4 : Draw Lines From the Innermost Circle Till the Second Circle
On each wheel, now draw five equidistant lines starting from the innermost circle and ending at the second circle. These lines are the spokes of the wheels. You may choose to use your scale to draw these lines or go freehand.
Step 5 : Connect the Wheels With Two Horizontal Lines
Now connect the wheels with two horizontal lines. You can use your scale here as well. These lines form the base of the car. Before we proceed, is it just us or does the drawing look like a pair of glasses on a pair of eyes?
Step 6 : Draw Two Rectangles on Either Side of the Wheels
Now, on either side of the wheels, draw two rectangles extending away from each other, as shown in the figure below.
Step 7 : Draw the Body of the Car
To make this part of the drawing simple, we’ll break it down in three steps –
First, from the left-hand side of the drawing paper, and from above the rectangle, draw a curved line that stops just above the end of the wheel on the right-hand side. The front portion of this curve will be the hood of your car.
Then, to connect the rear of the car, draw another curved line from the end of the rectangle on the right-hand side till the point where the first line stops. This part is the trunk of your car.
Now, draw a semi-circle on the top, starting from the point where the first two curved lines met till the end of the first wheel. Voila! You just drew the windshield and the roof of the car!
Step 8 : Draw the Car Door and the Headlight
Now, let’s add a car door and a headlight. For this step, you have to draw two slightly curved lines in the centre portion of the car, as shown in the figure below. Add a small rectangle near the second line for the handle. This completes your car door!
Drawing the headlight of the car is even more simple! Just draw an oval on the hood of the car (the curve on the extreme left of your drawing paper).
Step 9 : Draw the Windows With Two Quadrants
Now, draw two quadrants, one big and one small to make the windows of your car. You can use your scale to get the lines straight, but it’s not required. Just make them look like the car windows given in the image below.
Step 10 : Paint It On!
Wow! Your car has really come together well! Now all that’s remaining is to gather your favourite colours and paint that car!
FAQs
1. Can Drawing and Colouring Cars Help Children In Understanding The Colours?
Drawing and colouring cars can help children understand colours better. It allows them to explore different shades and learn about colour combinations, helping develop their colour recognition skills while having fun.
2. How Can You Make The Car Drawing Process Fun and Engaging for Children?
To make car drawing enjoyable for children, consider these tips:
Provide a variety of coloured pencils, crayons, or markers to encourage creativity.
Show them simple step-by-step tutorials or templates, making the process less intimidating.
Incorporate storytelling, asking them to draw a car for a specific adventure or character.
Offer praise and positive feedback to boost their confidence and motivation.
3. How to Help Your Kids to Avoid Mistakes While Drawing Cars?
Here are a few tips to help kids avoid mistakes while drawing cars:
Demonstrate patience and emphasising that mistakes are a part of learning.
Encourage them to start with basic shapes and lines, gradually adding details.
Offer gentle guidance without taking over, allowing them to problem-solve.
Use erasable materials to reduce the fear of making errors, fostering a stress-free creative environment.
With this easy guide on drawing a simple car step-by-step for kids, you can add another dimension to your kid’s life. Won’t you be the cool parent when you participate and use these simple steps to draw another car with your kid? Encourage your little one to go crazy with the colours, abstract with the spokes, or even redesign the complete car. Let them know that the sky is the limit when it comes to his/her abilities!
Also Read:
How to Draw a Frog for Children
How to Draw a Lion for Kids
How to Draw a Butterfly for Children
How to Draw a Christmas Tree for Kids
Read more
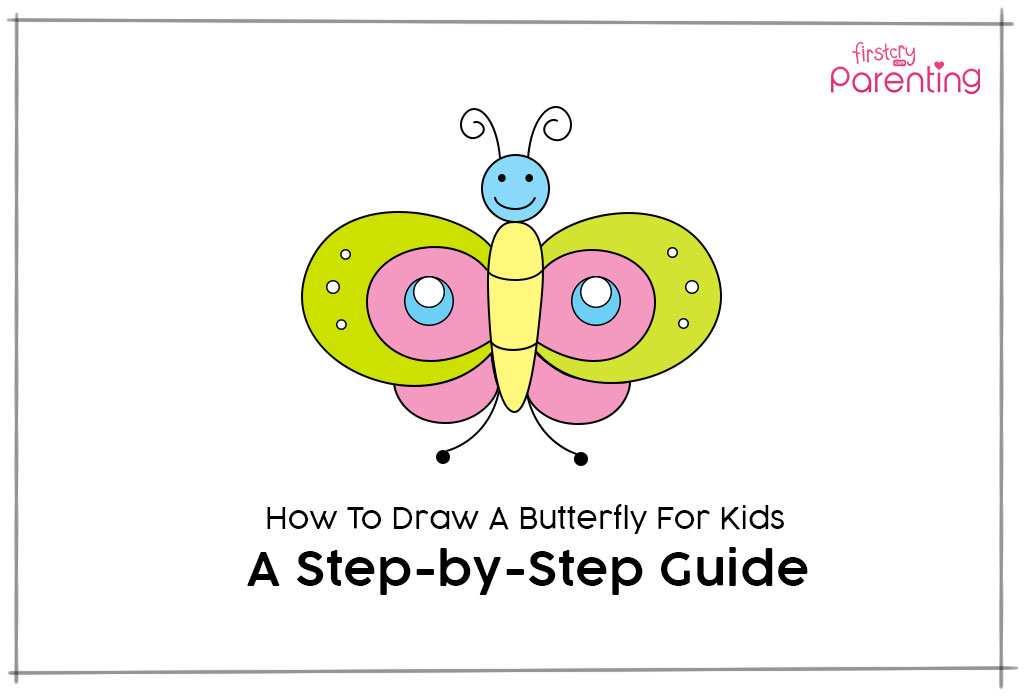
How to Draw a Butterfly – An Easy Step-by-Step Guide
Butterflies exist in various shapes, sizes and colours. And did you know they can see colours too? These delicate little creatures fluttering their many-hued wings can hold your kid’s attention for hours. Then, how about encouraging your little one to draw one? It can turn out to be a great indoor activity and also polish your child’s drawing skills. With their intricate wing patterns and symmetrical designs, butterflies may seem challenging to sketch, but don’t worry! In this step-by-step guide, we’ll break down how to draw a butterfly for kids with simple and easy-to-follow instructions so that they can confidently create a stunning butterfly drawing. Grab your pencil and paper, and let’s get started.
What You Will Need to Draw a Butterfly?
Before you start drawing your beautiful butterfly, make sure you have the right materials ready. You don’t need anything fancy, just some basic art supplies will do! Here’s a simple list to help you get started on your creative journey.
An A4 size plain drawing paper
Colours (crayons, sketch pens or watercolours)
A pencil
An eraser
Butterfly Drawing for Kids in 12 Easy Steps
Here’s a step-by-step guide on easy butterfly drawing for kids.
Step 1: Draw a circle.
First, draw a circle on the top half of your drawing paper. This will be your butterfly’s head/ face.
Step 2: Draw a stretched oval connecting the circle.
From the bottom of the circle, draw an oval shape that stretches downwards and tapers at the bottom. Ensure the oval shape touches the bottom of the circle. This forms the body of the butterfly.
Step 3: Draw two curved lines on the body.
Draw two curved lines, equidistant to each other on the body of the butterfly, as shown in the figure. This is the butterfly’s abdomen.
Step 4: Draw a smiley.
Now, on the face (the circle which was drawn in Step 1), draw a smiley with two small circles for the butterfly’s eyes and a curved line for its smile.
Step 5: Draw two lines at the end on the head.
On the head of the butterfly, draw the antennae with two curved lines spiralling out in opposite directions, as shown in the figure.
Step 6: Draw two circles on each side of the butterfly’s body.
Draw two circles overlapping the butterfly’s body at the centre. These circles are the butterfly’s fore wings. Use the curved lines of the abdomen for reference to get the shape as perfect as possible.
Step 7: Draw a curve at the bottom of each wing.
Draw a curve at the bottom of each wing and connect it to the bottom part of the butterfly’s body. These are the butterfly’s hind wings.
Step 8: Draw curves from the lines on the abdomen.
Now, connecting the two curved lines on the abdomen, draw a curve inside each fore wing, as shown in the figure.
Step 9: Draw two curved lines at the bottom of the body.
From the point where the butterfly’s body meets the hind wings, draw a curved line on each side, pointing away from each other. Draw a small circle at the end of each of these lines. These lines are the butterfly’s legs.
Step 10: Draw circles in the centre of each fore wing
In the centre of each fore wing, draw two concentric circles, touching each other as shown in the figure below.
Step 11: Draw tiny circles on the fore wings.
On the outermost part of the fore wings, draw three tiny circles on each side of the wings.
Step 12: Colour the butterfly.
Now, pull out all your colours and decorate the butterfly in as many shades as you want.
FAQs
1. How can kids add details to their butterfly drawing?
Children can add patterns like dots, swirls, and lines on the wings. They can also draw antennae on the head and decorate the butterfly with different colours.
2. What are some fun variations to make the butterfly unique?
Kids can add a background with flowers, a garden, or a rainbow. They can also experiment with different wing shapes to make their butterfly look more imaginative.
With this easy-to-understand guide, your kid can learn how to draw a simple butterfly. When your little one masters this drawing, encourage him/her to draw more butterflies in various sizes, prettier shapes and colour them as vibrant or subtle as they want. Don’t forget to put the drawings on the refrigerator. You will give them wings to explore the art form by doing that!
Also Read:
How to Draw Bird
Steps to Draw Owl
How to Draw Frog for Kids
How to Draw a Lion for Kids
How to Draw a Christmas Tree for Children
Read more
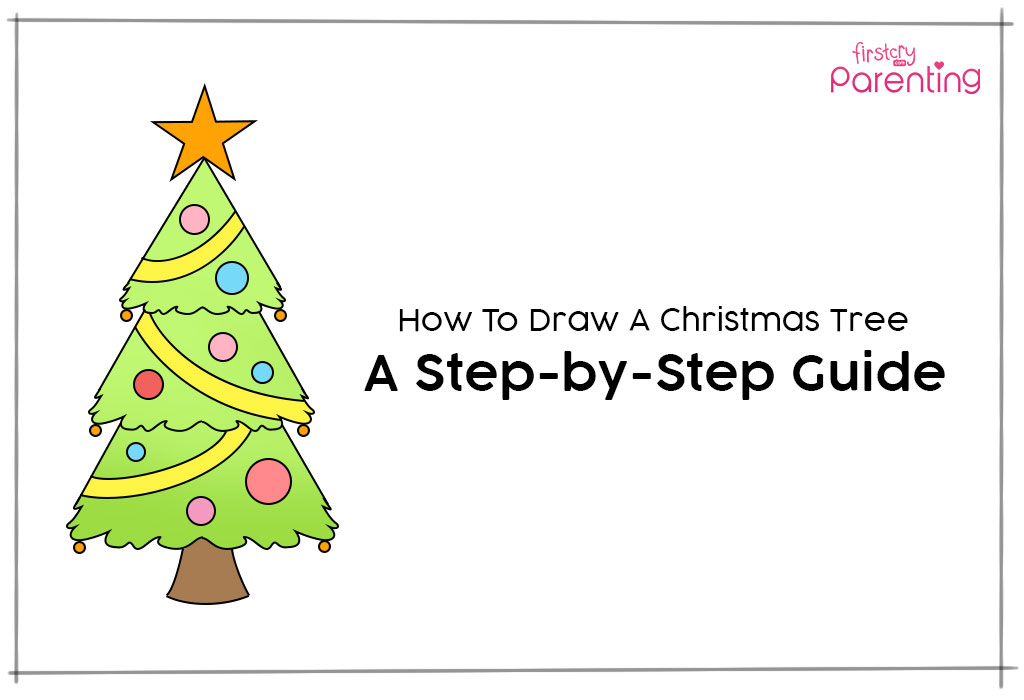
How to Draw a Christmas Tree for Kids
It’s the merriest time of the year, and what better way to get your little ones into the Christmas spirit than an easy Christmas tree drawing for children. Drawing helps bring out creativity and also keeps the kids occupied for hours. Who knows, you may even uncover a hidden talent in your child. So, bring out the colours and sit down with your kids, and we’ll tell you how to draw a Christmas tree, step by step.
Christmas Tree Drawing for Kids in 10 Simple Steps
Are you ready for the easiest Christmas tree drawing for kids? We’ll show you how in 10 simple steps.
1. Draw an inverted ‘V’
Start by drawing an unfinished ‘A’ or inverted ‘V’ shape. This will be the topmost section of the tree!
2. Begin connecting the ends from the left-hand side
It’s time to connect both the ends. Draw an uneven, frill-like design, as shown in the illustration, from the left end towards the centre.
3. Do the same from the right-hand side
Draw the same uneven, frill-like design from the right side towards the centre, connecting the open ends of the inverted ‘V’ shape.
4. Draw a similar, mid-section of the tree
Draw a similar, but larger shape, right under the first one. This forms the mid-section of the tree.
5. Draw another similar, yet larger shape
Draw the last similar, yet larger shape under the previous section, to finish the basic outline. You’re almost done! Can you see your tree coming together?
6. Draw the trunk of the tree
For the base of the tree, draw two lines curving away from each other and connect them, as seen in the image.
7. Draw some lights on the tree
Draw two lines across each section, as shown in the illustration. These will become the lights!
8. Decoration Time!
What tree is complete without a star? Draw a star at the top of the tree! Add circles at the ends of each section for the decorations.
9. Add some finishing touches
Draw circles in the empty spaces of each section, as seen in the illustration. Your tree is now drawn and ready to be coloured in!
10. Bring out the colours
Its time for the most fun step. Let your kids use their creativity and colour each part of the tree. They can use the illustration as a reference as well!
10 simple steps later, there you have it! A colourful Christmas tree, drawn from scratch by your kids! With some practice, they’ll learn how to draw their own variations and use their creativity. This is also a fun activity at any Christmas party for kids! The perfect way to get into the Christmas spirit, isn’t it?
Infographic : How To Draw a Christmas Tree for Kids
Also Read:
Christmas Tree Facts for Kids
Christmas Party Games for Kids
Stories about Christmas for Children
Christmas Art and Crafts Activities for Kids
Read more
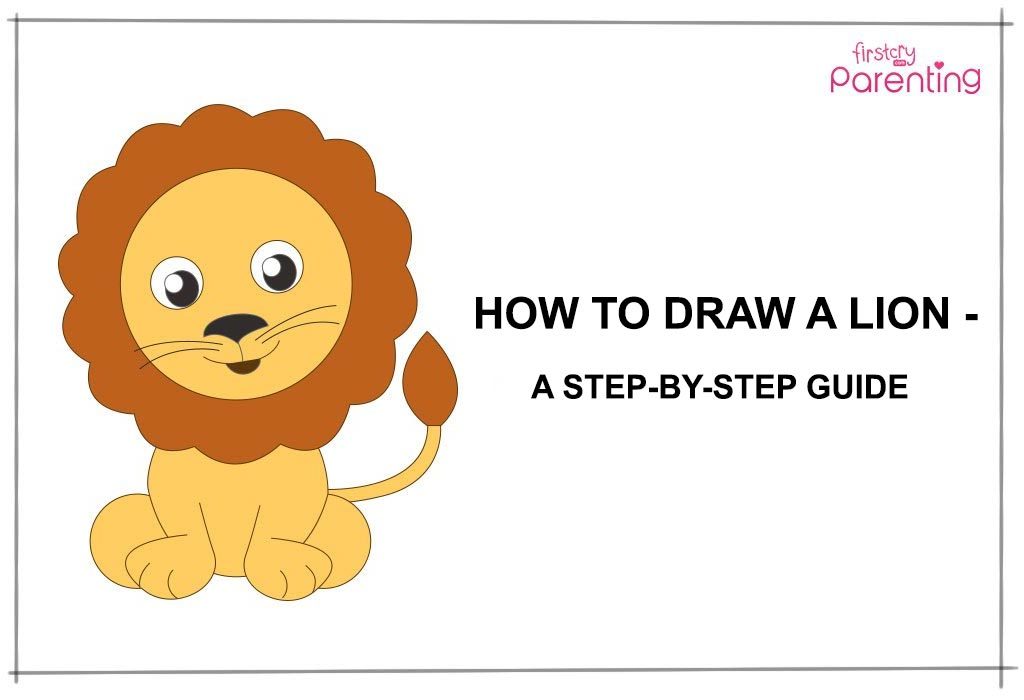
How to Draw a Lion – A Step-by-Step Guide for Kids
Does your little one enjoy arts and crafts? With a little nudge in the right direction, he could turn into the next little Picasso! Drawing and colouring reach a level of excellence when practised often, if not daily. If you’re looking to hone your little one’s artistic talent, drawing a day is a step in the right direction. Since kids are easily captivated by animals and birds and are often taught animals, colours, and birds early on, a drawing on such topics can be a great idea; for instance, a lion drawing for kids. You can start with an easy lion drawing for your kiddo and take their skills to the next level with other animals. This article is a simple guide on lion drawing for kids step by step.
This step-by-step guide is a great way to get your child to learn a new drawing. This one is simple and turns out great! Ready to see how simple it is to draw a lion?
What You Will Need
1 pencil
1 eraser
An A4 size plain paper/ plain white sheet
Colours
Lion Drawing for Kids – 13 Easy & Simple Steps
Let’s quickly learn how to make a cute lion drawing, shall we? All you need is a pencil, an eraser, an A4-size white sheet, and colours.
Step 1: Draw a lion face.
Draw a circle with a diameter of 5 cm or more on a plain sheet. To draw a lion face, make a small circle inside this circle. The space between the two circles should be about 1 cm. The outer circle should be sketched lightly so that it can be erased later.
Step 2: Draw the mane of the lion.
Draw frill-like semi-circles on the circumference of the bigger circle to draw the mane of the lion. Then erase the outer circle.
Step 3: Draw an egg shape.
Draw an oval or egg-like structure starting from 1 cm below the centre of the circle as shown in the illustration.
Step 4: Draw two small circles on the left and right sides of the oval shape.
Draw two small circles along the base of the oval shape. The two circles should be drawn on the left and right side of the oval shape respectively such that they intersect with the oval shape as shown in the image.
Step 5: Draw two arcs inside the oval shape.
Draw two arcs inside the oval shape on the left and right sides respectively, as shown in the image.
Step 6: Erase the top-half of the oval shape.
Erase the above half of the oval shape.
Step 7: You will get a U-shape.
You will get a U-shape, which will form the base or the body of the lion.
Step 8: Draw the lion’s feet.
To make the lion’s legs and feet, draw a ‘J’ on the left, as shown in the image and an ‘L’ on the right. Draw two arcs on both feet as illustrated.
Step 9: Draw the tail of the lion.
Now to make the tail of the lion, draw two parallel lines going upwards on the right. Draw a leaf-like shape on the end of the lines.
Step 10: Draw the facial features.
To make lion’s eyes, start with drawing two small circles inside the smaller circle drawn in step 1.
Draw an oval shape inside the above two circles respectively and colour them black.
To make the white part of the eyes, draw a little circle on the top left inside each oval shape.
To draw a nose, draw a wide ‘V’ under the eyes of the lion. Draw an arc to connect the ends of the ‘V’ shape.
Step 11: Draw the tongue of the lion.
Draw a small line from the centre of the lion’s nose and draw a half-circle curved upwards (towards the nose). Draw a small semi-circle underneath to make the tongue of the lion. Next, draw two whiskers on each side as shown in the image.
Step 12: Colour the nose and tongue of the lion.
Colour the tongue and the nose of the lion black.
Step 13: Colour the body of the lion.
Colour the body of the lion mustard yellow and his mane and tail brown.
In 13 simple steps, your kids will have learned how to draw a lion.
FAQs
1. What are the advantages of lion drawing for children?
Lion drawing, first of all, teaches children about what a lion looks like. This drawing is a great way to introduce children to animals one by one and teach them the trivia. Instead of rote learning, kids will enjoy learning about animals like lions in a fun and creative way.
2. What colours can children use to fill in a lion drawing?
Yellow, brown, and orange can be used to colour a lion. For children beginning their colouring journey, they can use pencil colours or oil pastels as they glide smoothly. Remember to use child-safe colours only.
3. What else can we draw on a lion drawing?
You can make trees, rocks, vines, sand dunes, mountains, and other animals to give the drawing a vibrant look.
With some practice (and patience), your kiddo will learn how to draw a lion and other animal figures. And once he gets the hang of it, he can teach his friends, too!
Also Read:
How to Draw a Frog for Kids
How to Draw an Owl for Children
How to Draw An Apple for Kids
How to Draw Butterfly for Children
Read more
Sort By
 Latest
 Most Popular
 Trending
Please select atleast one Filter