
Play & Activities
Suggested articles for you
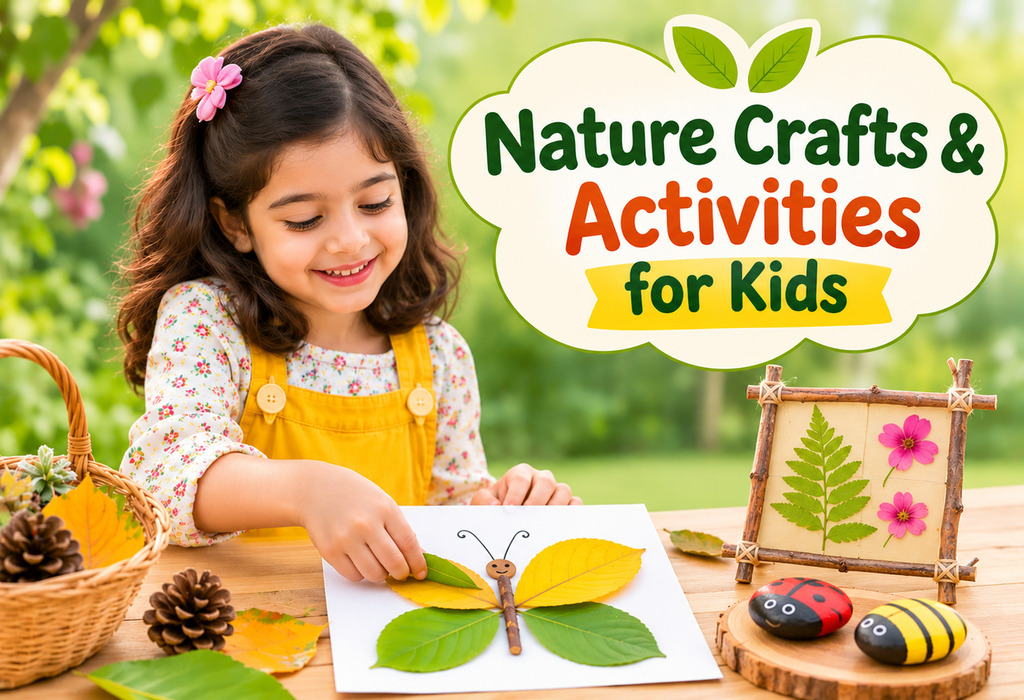
20+ Nature Crafts & Activities for Kids to Spark Creativity
Key Takeaways
Nature crafts and activities for kids use free, natural materials, so they are budget friendly and easy to set up.
Most projects suit preschoolers and kindergarteners with light adult supervision.
Always check that collected items are clean, dry, and free of insects, and avoid poisonous plants, berries, and mushrooms.
Crafting and exploring outdoors builds creativity, fine motor skills, and curiosity about the natural world.
Keep a basket handy on walks to collect leaves, twigs, and stones for later projects.
Who says you need an art box full of supplies to get creative? Sometimes, the best materials are waiting just outside your door! Leaves become little works of art, twigs turn into tiny creations, and rocks can be transformed with a splash of colour. Nature is full of possibilities for curious little minds. If you’re looking for fun ways to keep kids busy while encouraging their creativity, these easy crafts and outdoor activities are a lovely place to start. They’re simple, enjoyable, and give children plenty of opportunities to explore, experiment, and have fun along the way.
Easy Nature Crafts for Kids
Getting creative with nature doesn’t have to be complicated! These easy nature craft ideas for preschoolers use simple materials like leaves, flowers, twigs, and stones to help little ones explore their creativity while having fun with hands-on activities.
1. Leaf Rubbing Art
Source: Pinterest
What You Will Need
Fresh leaves with clear veins
Plain white paper
Crayons with the paper wrapper removed
A clipboard or flat board (optional)
Instructions
Place a leaf vein side up on a flat surface.
Cover it with a sheet of paper and hold it steady.
Rub the side of a crayon gently over the leaf until the pattern appears.
Try different leaves and colors to make a full page of designs.
Cut out the rubbings and glue them onto cardstock to make greeting cards.
2. Pinecone Bird Feeder
Source: Pinterest
What You Will Need
A large pinecone
Peanut butter or sunflower butter
Birdseed
String
A spoon or craft stick
Instructions
Tie a piece of string around the top of the pinecone.
Spread peanut butter over the scales with a spoon.
Roll the pinecone in birdseed until it is well coated.
Hang it from a tree branch near a window and watch the visitors.
Check for allergies before using nut butters, and use sunflower butter if needed.
3. Painted Rocks
Source: Pinterest
What You Will Need
Smooth, clean rocks
Washable acrylic or poster paints
Paintbrushes
Clear sealant spray (for adult use)
Instructions
Wash and dry the rocks well.
Paint animals, patterns, or kind messages on each rock.
Let the paint dry fully before adding details.
Ask an adult to apply the sealant, then place the rocks in a garden or leave them along a trail for others to find.
4. Stick Picture Frame
Source: Pinterest
What You Will Need
Four straight sticks of similar length
Twine or yarn
Cardboard
A small photo or drawing
Child safe glue
Instructions
Lay the sticks in a square and tie the corners with twine.
Cut cardboard slightly larger than the opening.
Glue the photo or drawing onto the cardboard.
Attach the frame on top and add a loop of twine to hang it.
5. Nature Collage
Source: Pinterest
What You Will Need
Sturdy cardboard or paper
Leaves, petals, grass, and seeds
Glue
A small paintbrush for spreading glue
Instructions
Take a walk and collect small items from the ground.
Brush glue across the cardboard.
Arrange the items into a scene, such as a garden, a face, or a landscape.
Press gently and let it dry flat for a few hours.
6. Leaf Animals
Source: Pinterest
What You Will Need
Colourful fall leaves in different sizes
Paper
Glue
Googly eyes or a marker
Instructions
Arrange leaves on paper to form a fish, owl, or butterfly.
Glue each leaf in place.
Add eyes and details with markers.
Display the finished animals on the fridge or a classroom board.
7. Pressed Flower Bookmarks
Source: Pinterest
What You Will Need –
Small flowers and leaves
Heavy books
Cardstock strips
Clear contact paper
Ribbon
Instructions
Place flowers between paper sheets inside a heavy book for one week.
Arrange the dried flowers on a cardstock strip.
Cover with clear contact paper and press out air bubbles.
Trim the edges and add a ribbon through a punched hole.
8. Twig Wind Chime
Source: Pinterest
What You Will Need
One sturdy stick
Several thin twigs or shells
String
Scissors
Instructions
Tie strings of different lengths along the sturdy stick.
Attach a twig, shell, or small stone to the end of each string.
Tie one more string in the center for hanging.
Hang it near a window or tree and listen to the gentle sounds.
9. Acorn Cap Fairy Houses
Source: Pinterest
What You Will Need
Bark, moss, and small sticks
Acorn caps
A small box or flat piece of wood
Glue
Instructions
Build walls by gluing sticks upright on the base.
Add a bark roof and moss for a garden.
Use acorn caps as tiny bowls or chimneys.
Place the house under a tree for imaginative play.
10. Pebble Mosaic
Source: Pinterest
What You Will Need
Small pebbles in different colours
A paper plate or thick cardboard
White glue
A pencil
Instructions –
Sketch a simple shape, such as a sun or heart, on the plate.
Spread glue over a small section.
Press pebbles into the glue to fill the shape.
Let it dry overnight before displaying.
11. Flower Petal Suncatcher
Source: Pinterest
What You Will Need
Clear contact paper
Flower petals and small leaves
Construction paper
Scissors
String
Instructions
Cut a frame from construction paper and tape it around a sheet of sticky contact paper.
Press petals and leaves onto the sticky side in a pattern.
Cover with a second piece of contact paper and seal the edges.
Add a string and hang the suncatcher in a sunny window.
Fun Nature Activities for Kids
Not every idea needs glue or paint. These nature art activities for kids and outdoor games get children moving while they observe the world around them, and they pair well with the crafts above.
1. Nature Scavenger Hunt
Source: Pinterest
Give children a list of items to find, such as a feather, a smooth stone, or a yellow leaf. Check items off together and talk about where each one was found.
2. Mud Kitchen Play
Source: Pinterest
Let kids mix soil, water, and leaves in old pots and pans. This messy fun builds imagination, sensory skills, and early science understanding.
3. Bug Hunt With a Magnifier
Source: Pinterest
Turn over logs and peek under leaves with a magnifying glass. Draw the insects you find in a notebook, then release them gently where you found them.
4. Cloud Watching
Source: Pinterest
Lie on a blanket and spot shapes in the clouds. Ask children to describe what they see and invent a short story about each shape.
5. Leaf Boat Race
Source: Pinterest
Make small boats from large leaves and sticks. Float them in a stream or a shallow tub and see which one travels the farthest.
6. Nature Bracelet
Source: Pinterest
Wrap a strip of tape sticky side out around a child’s wrist. Press flowers and leaves onto it as you walk, creating a wearable record of the day.
7. Sound Map
Source: Pinterest
Sit quietly for five minutes and draw a map of every sound you hear, from birds to rustling grass. Compare maps and see who noticed the most.
8. Stick Weaving
Source: Pinterest
Tie yarn between a forked stick and weave in grass, feathers, and flowers. The result is a natural tapestry that children can display or take home.
9. Rock Stacking
Source: Pinterest
Challenge children to build the tallest stable tower of stones. It teaches balance, patience, and problem solving.
10. Sidewalk Chalk Nature Art
Source: Pinterest
Trace the shadows of leaves and plants with chalk, then colour them in to make bold designs. Return later in the day to see how the shadows have moved.
11. Seed Planting Station
Source: Pinterest
Fill small pots with soil and plant easy seeds such as beans or sunflowers. Children can water them daily and track growth in a simple chart.
12. Texture Walk
Source: Pinterest
Bring a bag and collect items that feel rough, smooth, bumpy, or soft. Sort them by texture and describe each one using as many words as possible.
Benefits of Nature Crafts & Activities for Kids
Creative outdoor play does more than fill an afternoon. Here are some of the ways kids nature crafts and activities support healthy growth, learning, and happiness.
1. Boosts Creativity
Natural objects have no set purpose, so children invent their own designs and stories. A stick can become a wand, a frame, or a fence, which encourages flexible thinking.
2. Builds Fine Motor Skills
Tearing, gluing, tying, and arranging small items strengthen hand and finger control. These skills support handwriting and other school tasks later on.
3. Encourages Curiosity
Collecting and examining items sparks questions about plants, insects, seasons, and habitats. Children begin to notice details that they might otherwise miss.
4. Improves Focus and Calm
Time outdoors and quiet making can help children slow down and concentrate. Many parents find that a short nature session settles restless energy.
5. Supports Language Development
Describing textures, colours, and shapes expands vocabulary, especially during nature arts and crafts for preschoolers. Talking about what they made also builds confidence in speaking.
6. Promotes Physical Activity
Walking, bending, climbing, and gathering supplies keeps children active and healthy. Fresh air and sunlight add extra benefits for mood and sleep.
7. Teaches Care for the Environment
Children who handle leaves, rocks, and flowers learn to respect nature and collect responsibly. They begin to understand why leaving living plants and animals undisturbed matters.
8. Strengthens Family Bonds
Crafting side by side creates shared memories and easy conversation. Even a simple walk with a collecting basket can become a treasured routine.
FAQs
1. What are some easy nature themed crafts for preschoolers and kindergarteners?
Leaf rubbings, pinecone bird feeders, painted rocks, and nature collages are simple and quick. They need few supplies, make great nature themed crafts for preschoolers and kindergarteners, and are easy to complete with a little guidance.
2. How do I keep kids safe while collecting natural materials?
Stay with your child and teach them not to taste or eat anything they find. Avoid poison ivy, unknown berries, and mushrooms, and wash hands after every outing. Check items for insects and dampness before bringing them indoors.
3. What age is best for nature crafts?
Toddlers can enjoy simple sensory play with leaves and flowers under close supervision. Children from three to eight can handle most projects, and older kids can try detailed builds like fairy houses and mosaics.
4. Can I do nature crafts indoors?
Yes. Collect materials outside and craft at a table at home. Pressed flowers, collages, and stick frames work well on rainy days, and you can store a nature basket by the door so supplies are always ready.
Nature crafts and activities for kids turn simple walks into creative adventures. With a few leaves, stones, and sticks, children can make art, build skills, and learn about the world around them. These projects are affordable, flexible, and easy to adapt for different ages and abilities. Always supervise young children and choose safe, clean materials. Start with one idea today and see how much fun your little explorer has.
Also Read:
Fun & Easy Flower Crafts For Kids
Easy Animal Crafts For Kids
Amazing Paper Cup Craft Ideas for Kids
Read more




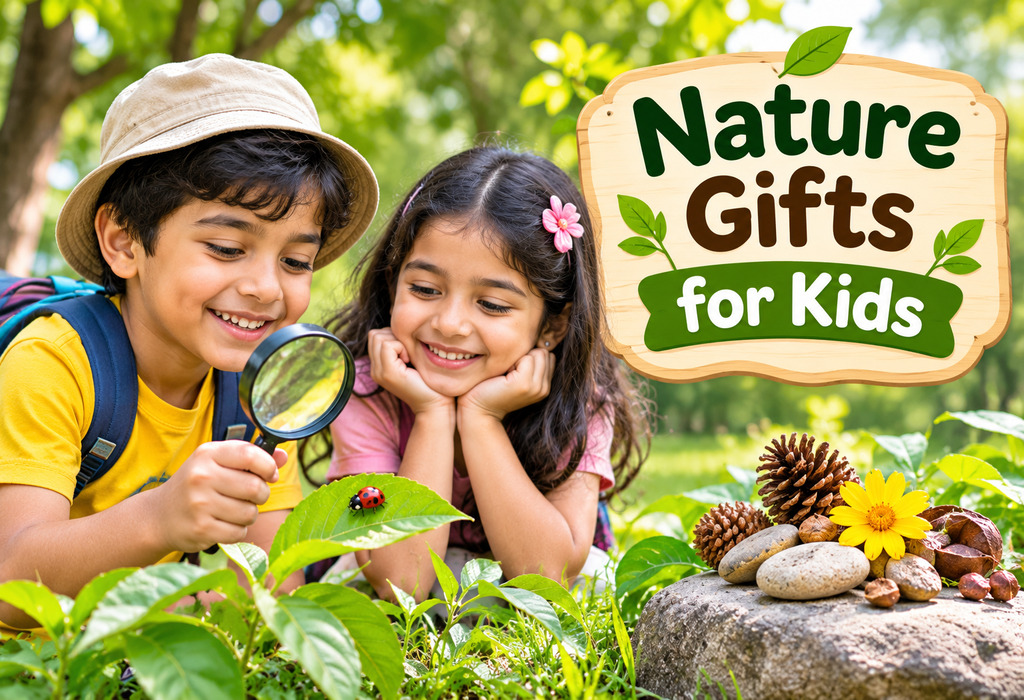
15 Nature Gifts for Kids That Spark Curiosity
Key Takeaways
Nature gifts for kids work best when they invite hands on play, such as digging, observing, collecting or growing.
Match the gift to your child’s age. Toddlers need chunky, safe items, while older kids enjoy tools that let them investigate.
Choose sturdy, child sized gear with non toxic materials and no small parts for children under 3.
Gifts that connect to a hobby, like bird-watching or gardening, tend to be used long after the birthday party ends.
Children are natural explorers, and the right present can turn a quiet afternoon into a backyard adventure. Nature gifts for kids encourage them to look closely, ask questions and spend more time outdoors. From bug catchers and binoculars to seed kits and star charts, these presents build observation skills, patience and a real love for the living world. This article shares 15 thoughtful ideas for different ages, plus simple tips to help you pick one your child will actually use and enjoy.
Best Nature Gifts for Kids
Whether your child chases butterflies or collects every stick on the trail, there is a gift here for them. These gifts for kids who love nature are grouped loosely from simple to more advanced, so you can find a fit for any age and interest.
1. Bug Catcher and Viewer
Source: Pinterest
A bug catcher with a built in magnifier lets kids observe insects up close and then release them safely. It is one of the most popular kids nature gifts because it turns any lawn into a science lab. Choose a model with air holes and a secure lid.
2. Kids Binoculars
Source: Pinterest
Compact binoculars with rubber grips and easy focus wheels are made for small hands. They help children spot birds, squirrels and distant trees. They make a great pick among nature gifts for 5 to 7 year olds who are ready to explore the neighbourhood.
3. Magnifying Glass
Source: Pinterest
A simple magnifying glass reveals the tiny details in leaves, bark, feathers and stones. It is lightweight, affordable and perfect for tucking into a pocket. Look for a shatterproof lens with a comfortable handle.
4. Nature Journal and Coloured Pencils
Source: Pinterest
A sturdy journal gives kids a place to sketch plants, record animal sightings and press leaves. Pair it with coloured pencils or watercolours for a complete set. Writing and drawing outdoors helps children notice more than they usually would.
5. Bird Feeder
Source: Pinterest
A window or garden bird feeder brings wildlife to your child’s doorstep. Kids can refill the seed, watch the visitors and learn bird names over time. It is a gentle gift that teaches responsibility.
6. Seed Growing Kit
Source: Pinterest
Starter kits with pots, soil and seeds let kids watch a plant grow from nothing. Herbs, sunflowers and wildflowers are easy choices. These nature inspired gifts for kids teach patience and show where food and flowers come from.
7. Child Sized Gardening Tools
Source: Pinterest
A mini trowel, rake and watering can make children feel like real gardeners. Pick lightweight, rounded tools with bright handles. Among nature gifts for 2 & 3 year olds, these are a favourite because toddlers love to dig and pour.
8. Field Guide for Kids
An illustrated field guide to birds, trees, insects or wildflowers helps children name what they find. Choose one with large photos and short, simple descriptions. Kids can check off each species they spot.
9. Butterfly Garden Kit
A butterfly kit lets children watch caterpillars grow, form a chrysalis and emerge as butterflies. The whole process takes a few weeks and is full of wonder. Release the butterflies outdoors when they are ready to fly.
10. Explorer Backpack Set
Source: Pinterest
A small backpack stocked with a compass, flashlight, collecting jars and a whistle prepares kids for any trail. It is a fantastic present for gifts for nature loving kids who always want to head outside. Look for adjustable straps and water resistant fabric.
11. Rock and Mineral Collection
Source: Pinterest
A box of polished stones, crystals and geodes introduces children to geology. Many sets include labels and a mini guide. Kids love sorting, trading and displaying their finds.
12. Wooden Animal Figurines
Source: Pinterest
Smooth wooden woodland animals invite imaginative play and gentle storytelling. They are safe, durable and have no batteries. They also suit toddlers, making them wonderful nature gifts for 2 & 3 year olds.
13. Birdhouse Building Kit
A kit with pre cut wooden pieces lets kids hammer, paint and assemble their own birdhouse. When it is done, hang it in a tree and wait for tenants. It combines crafting and wildlife watching in one project.
14. Nature Scavenger Hunt Cards
Illustrated cards challenge kids to find a pinecone, a feather, a smooth stone or a red leaf. They work well on walks, camping trips and in the backyard. They suit nature gifts for 5 to 7 year olds who enjoy a good challenge.
15. Star Chart or Beginner Telescope
For kids who look up more than down, a star chart or simple telescope opens the night sky. Start with the moon and bright planets, then move to constellations. It encourages family evenings under the stars.
How to Choose the Best Nature Gift for Kids?
A few simple checks will help you pick a present that gets used instead of forgotten. Keep these tips in mind while you shop.
Consider your child’s age and skill level, and avoid small parts for children under 3.
Think about their favourite activity, such as bugs, birds, plants, rocks or stargazing.
Pick durable items made of wood, metal or sturdy plastic that can handle rain and mud.
Look for gifts that can be used outdoors and indoors, so play continues in any season.
Check for non toxic materials and clear safety labels, especially for kits with paints or seeds.
Choose items that grow with your child, like a field guide or journal, for long term value.
FAQs
1. What are the best nature gifts for kids who do not like being outdoors?
Start small with indoor friendly options, such as a seed kit, butterfly habitat or nature journal. Window bird feeders also let shy kids enjoy wildlife from inside. These gentle gifts can slowly build curiosity about the outdoors.
2. What nature gifts are safe for toddlers?
Choose chunky wooden animals, soft garden tools and large, sturdy bug viewers. Avoid tiny rocks, seeds or beads that could be a choking hazard. Always supervise toddlers during outdoor play.
3. Are nature gifts good for kids who spend a lot of time on screens?
Yes. Hands on items like scavenger hunt cards, binoculars and gardening kits give children a fun reason to step away from devices. They also support focus, creativity and physical activity.
4. How much should I spend on a nature gift?
Many great options, like magnifying glasses, journals and seed kits, cost under 20 dollars. Binoculars and telescopes cost more, so set a budget first. A thoughtful gift matters far more than an expensive one.
Nature gifts for kids do more than fill a birthday or holiday wish list. They help children slow down, notice small wonders and build a lasting bond with the outdoors. Whether you choose a bug catcher, a bird feeder or a star chart, the best gift is one that matches your child’s interests and age. Keep safety and durability in mind, and you will give something that gets used again and again. Most of all, join in the adventure, because exploring together is the best gift of all.
Also Read:
Best Engaging Outdoor Toys For Kids
Best Gifts Ideas For 6 year Old Boys
Experience Gifts For Kids
Outdoor Gifts For Kids
Read more
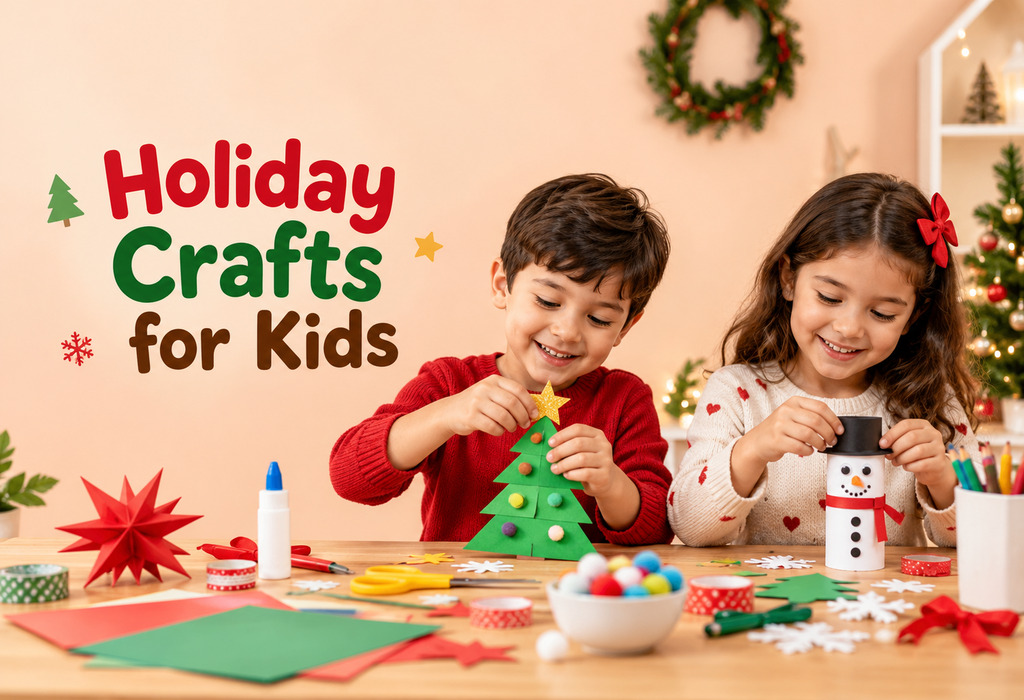
10 Easy Holiday Crafts for Kids to Spark Creativity
Key Takeaways
Holiday crafts for kids build fine motor skills, focus, and creative confidence while making festive memories.
Most projects use household supplies like paper plates, glue, and craft sticks, so you can start without a shopping trip.
Choose a project that matches your child’s age, and give younger kids safety scissors and washable, nontoxic glue and paint.
Adults should handle hot glue, baking, and sharp tools, and supervise small parts for children under three.
Simple holiday crafts take 20 to 40 minutes, which makes them perfect for a cosy afternoon or a classroom party.
The holidays are a wonderful time to slow down, gather around the table, and make something together. Crafting gives children a chance to express their ideas, practice patience, and create keepsakes they can proudly display or gift. You do not need fancy supplies or artistic skills to get started. This list of the best holiday crafts for kids includes ten easy projects that use everyday materials and welcome all ages, from curious preschoolers to confident older kids.
Fun Holiday Crafts for Kids to Try
Ready to fill your home with handmade cheer? These holiday craft ideas for kids are quick to set up, simple to follow, and fun to personalise, so pick a few favourites and enjoy the process as much as the result.
1. Paper Plate Wreath
Source: Pinterest
What You Will Need
One sturdy paper plate
Green paint or green tissue paper squares
Red pom poms or red buttons
Child safe scissors
Washable glue
A length of red or gold ribbon
Instructions
Cut out the centre of the paper plate to make a ring, with an adult starting the cut for younger children.
Paint the ring green, or glue tissue paper squares all over it for a textured, leafy look.
Let it dry completely before adding any decorations.
Glue red pom poms on the wreath to look like berries, spacing them out evenly.
Tie a ribbon bow at the bottom and add a loop of string at the top for hanging.
2. Handprint Reindeer
Source: Pinterest
What You Will Need
Washable brown paint
White paper or cardstock
Googly eyes
One red pom pom
Black marker
Glue
Damp paper towels for quick cleanup
Instructions
Paint your child’s palm and fingers brown using a soft brush, which tickles and keeps little ones giggling.
Press the hand onto the paper with the fingers pointing outward to form antlers, while the thumb and palm form the face.
Wipe hands clean right away and let the print dry.
Glue on googly eyes and the red pom pom nose.
Add small details with a black marker and write the year underneath as a keepsake you can look back on.
3. Salt Dough Ornaments
Source: Pinterest
What You Will Need
1 cup flour
1/2 cup salt
1/2 cup warm water
Cookie cutters in holiday shapes
A straw for making holes
Acrylic paint and brushes
Ribbon or twine
Instructions
Mix flour, salt, and water in a bowl until a smooth dough forms, adding a little flour if it feels sticky.
Roll the dough to about a quarter inch thick and cut out shapes with cookie cutters.
Poke a hole near the top of each shape with a straw so you can hang it later.
Have an adult bake at 250 degrees Fahrenheit for two to three hours, until hard.
Once cool, paint the ornaments, let them dry, and thread ribbon through the holes.
4. Paper Snowflakes
Source: Pinterest
What You Will Need
White printer paper
Child safe scissors
String or clear tape
Optional glitter glue for extra sparkle
Instructions
Cut the paper into a square, which is easy to do by folding one corner over to the opposite edge.
Fold the square in half, then in half again, then fold it into a triangle.
Snip small shapes along the folded edges, such as triangles, curves, and notches.
Unfold the paper carefully to reveal your one of a kind snowflake.
Tape the snowflakes to a window or hang them with string to create a winter wonderland.
5. Pom Pom Snowman
Source: Pinterest
What You Will Need
Three white pom poms in different sizes
Blue or black construction paper
Orange felt or paper for the nose
Black marker
Glue
Scrap fabric or yarn for a scarf
Instructions
Glue the three pom poms in a stack on the paper, with the largest at the bottom and the smallest on top.
Draw eyes, a mouth, and buttons with the marker.
Cut a tiny carrot nose from orange felt and glue it on.
Tie yarn or a fabric strip around the neck for a cosy scarf.
Add a paper hat and draw a snowy scene with falling snowflakes around your snowman.
6. Popsicle Stick Christmas Tree
Source: Pinterest
What You Will Need
Seven craft sticks
Green paint
Glue
Sequins, beads, or small stickers
A yellow paper star
Instructions
Paint all the craft sticks green and let them dry.
Glue five sticks side by side, then glue one stick across the top and one across the bottom to hold them together.
Trim or arrange the sticks in a triangle shape if you want a more tree like look.
Decorate with sequins, beads, or stickers as ornaments, pressing each one down firmly.
Glue the paper star on top and add a string loop for hanging.
7. Paper Plate Santa
Source: Pinterest
What You Will Need
One paper plate
Red construction paper
Cotton balls
Googly eyes
Pink or peach paint
Glue
Instructions
Paint the back of the plate pink or peach and let it dry.
Cut a red triangle from construction paper for the hat and glue it to the top of the plate.
Stick a cotton ball on the tip of the hat.
Glue cotton balls along the bottom half of the plate for a fluffy beard, pulling them apart for extra volume.
Add googly eyes and a pink pom pom nose to bring Santa to life.
8. Paper Chain Garland
Source: Pinterest
What You Will Need
Coloured construction paper
Child safe scissors
Glue stick or tape
A ruler
Instructions
Cut the paper into strips about one inch wide and eight inches long, using a ruler as a guide.
Make a loop with the first strip and glue the ends together.
Slide the next strip through the first loop and glue it closed.
Keep linking strips in a red and green pattern until your garland is the length you want.
Hang it across a mantel, doorway, or tree.
9. Pinecone Ornaments
Source: Pinterest
What You Will Need
Small pinecones, cleaned and dried
White paint or glue mixed with glitter
Paintbrushes
String
Small pom poms or beads
Instructions
Brush white paint on the tips of the pinecone scales to look like fresh snow.
Sprinkle glitter on the wet paint if you like some sparkle.
Let the pinecone dry fully, which may take about an hour.
Glue a small pom pom or bead on top.
Tie a string around the top to hang it on the tree.
10. Homemade Holiday Cards
Source: Pinterest
What You Will Need
Folded cardstock
Washable ink pads or paint
Cut potatoes or sponges in simple shapes
Markers
Stickers
Instructions
Fold the cardstock in half to make a card.
Dip a potato or sponge shape into paint or ink, dabbing off any extra.
Stamp patterns on the front, like trees, stars, or snowflakes.
Let the design dry, then add details with markers and stickers.
Write a warm message inside and give the card to a friend, grandparent, or neighbour.
FAQs
1. What age is best for DIY holiday crafts for kids?
Most children can join in from about age two with adult help. Toddlers enjoy painting, stamping, and gluing, while kids over five can cut, fold, and follow multiple steps on their own. Choose the project and the amount of help based on your child’s skills rather than a strict age.
2. How do I keep holiday crafting safe for young children?
Use nontoxic, washable supplies and child safe scissors. Keep small items like beads, buttons, and pom poms away from children under three, and handle hot glue and oven steps yourself. Always stay nearby, cover the table, and wash hands once the project is done.
3. What if my child gets frustrated or the craft does not look perfect?
Remind them that handmade projects are meant to be unique. Praise their effort, offer help with tricky steps, and let them make their own choices, because imperfect crafts often become the most treasured keepsakes. If they lose interest, take a break and come back to it later.
4. How long do simple holiday crafts usually take?
Most take 20 to 40 minutes, plus drying time. Projects with paint or salt dough may need several hours to dry or bake, so plan ahead. Starting a day early lets you finish decorating when everything is ready, so your child can enjoy the final touches without waiting around.
5. Can I make these crafts for a classroom or party?
Yes. Prepare materials in advance, pick projects with few steps like paper snowflakes or paper chains, and set up stations so each child has what they need. Having extra supplies on hand and a few adult helpers keeps the activity calm and fun, and sending the finished crafts home gives every child something to be proud of.
Holiday crafting turns ordinary supplies into joyful memories your family can enjoy year after year. These ten projects show that the best holiday crafts for kids do not need to be complicated or expensive. Each one encourages creativity, patience, and pride in making something by hand, while giving families a reason to sit together and talk. Choose a craft that fits your child’s age and interests, play some festive music, and let the fun begin. Your little ones will love hanging their creations around the house and sharing them with the grandparents, friends, and neighbours they care about most.
Also Read:
Easy & Fun Summer Crafts For Kids
Rainbow Crafts For Kids That Spark Creativity
Simple Christmas Tree Crafts For Kids
Read more
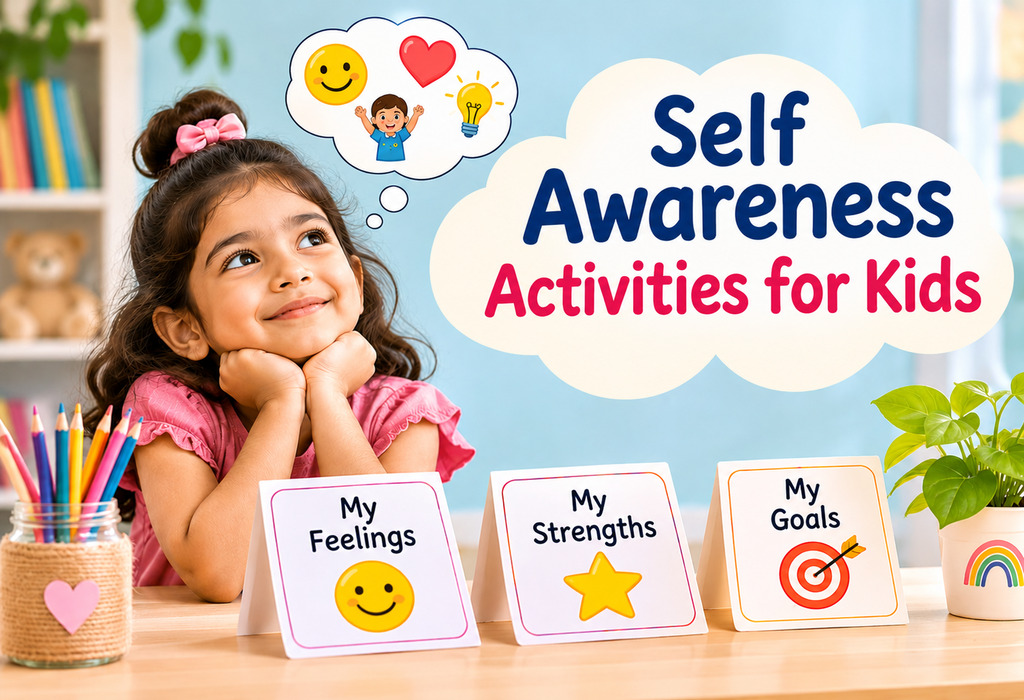
15 Self Awareness Activities for Kids to Boost Confidence
Key Takeaways
Self awareness helps children recognise their feelings, strengths, and needs, which builds confidence and emotional balance.
Simple, playful routines like mirror time, feelings charts, and journaling work well from the preschool years onward.
Short daily practice of 5 to 10 minutes is more effective than occasional long sessions.
Parents can support growth by naming emotions, listening without judging, and modeling reflection themselves.
Children who understand their own feelings, strengths, and limits tend to feel more secure and make better choices. Self awareness is not something kids simply pick up; it grows through gentle, repeated practice. The good news is that you do not need special tools or training. This article shares 15 easy self awareness activities for kids that fit into everyday life, from preschool play to school age reflection, so your child can build confidence one small step at a time.
What Are Self Awareness Activities?
Self awareness activities are simple games, conversations, and creative tasks that help children notice and understand their thoughts, emotions, behaviours, and personal qualities. They invite kids to pause and ask questions such as “How do I feel right now?” or “What am I good at?” These activities can involve drawing, storytelling, movement, or quiet reflection. When practiced regularly, they give children the words and habits they need to express themselves clearly, manage big emotions, and understand how their actions affect others.
Why Are Self Awareness Activities Important for Kids?
Building self awareness early gives children a strong base for emotional health and healthy relationships. Here are some key benefits:
Stronger confidence: Kids who know their strengths feel more capable of trying new things.
Better emotional control: Naming a feeling makes it easier to handle calmly.
Improved communication: Children learn to explain what they need and feel.
Healthier friendships: Understanding themselves helps kids understand and respect others.
Smarter decision making: Reflecting on past choices guides better future ones.
Resilience: Children who accept their mistakes and limits bounce back more easily.
Self Awareness Activities for Kids to Develop Emotional Skills
These activities are designed to be flexible, so you can adjust them for different ages and settings. Many work as preschool self awareness activities, while others suit older children who can write and reflect. Pick a few that match your child’s interests and repeat them often.
1. Feelings Faces Chart
Source: Pinterest
Draw or print a chart showing faces for happy, sad, angry, scared, surprised, and calm. Ask your child to point to the face that matches their mood each day. This is one of the easiest preschool self awareness activities because it needs no reading. Over time, add new emotion words like “frustrated” or “proud” to grow their vocabulary.
Tip: Keep the chart on the fridge so your child can point to it anytime, even before they can explain how they feel.
2. Mirror Time
Source: Pinterest
Stand with your child in front of a mirror and make different faces together. Say, “This is my happy face. Can you show me yours?” This works beautifully as one of the self awareness activities for 3 year olds, since toddlers love seeing themselves. Talk about what each expression feels like inside the body.
Tip: Add a simple question like “What makes you smile?” so the activity grows with your child’s language skills.
3. All About Me Poster
Source: Pinterest
Give your child a large sheet of paper and ask them to draw their family, favourite foods, hobbies, and things they love. Write short labels beside each drawing. This is a great option among self awareness activities for kindergarten, since it celebrates identity. Display the poster in their room as a daily reminder of who they are.
Tip: Let your child choose the colours and pictures themselves, since ownership makes the poster feel more meaningful.
4. Emotion Charades
Write emotions on small slips of paper. Take turns acting them out without speaking while others guess. Afterwards, discuss a time when you felt that emotion. This game teaches children to read body language and link feelings to real events, all while laughing together.
Tip: Start with easy emotions like happy and sad, then move on to harder ones like embarrassed or jealous.
5. Feelings Journal
Source: Pinterest
Provide a notebook where your child can draw or write about their day. Younger kids can sketch a picture and dictate a sentence to you. Older kids can write a few lines about what made them happy or upset. Journaling builds the habit of reflecting without any pressure to be perfect.
Tip: Offer stickers or coloured pencils to make journaling feel like a treat instead of homework.
6. Body Check In
Ask your child to close their eyes and notice their body. Questions like “Is your tummy tight or relaxed?” and “Are your shoulders tense?” help them connect physical sensations to emotions. Practice this for two minutes before bedtime or after a stressful moment. It teaches kids that feelings show up in the body.
Tip: Use a soft, slow voice and keep it short, so the exercise feels relaxing for younger children.
7. Strengths Tree
Draw a tree trunk on paper and cut out paper leaves. Each time your child shows a strength, such as kindness, patience, or creativity, write it on a leaf and stick it to the tree. Watching the tree fill up gives children visible proof of their good qualities, which boosts confidence naturally.
Tip: Add leaves for effort too, such as “tried again after falling,” so kids learn that persistence is a strength.
8. Calm Down Jar
Source: Pinterest
Fill a clear jar with water, glitter glue, and a little glitter. When your child feels upset, they shake it and watch the glitter settle while breathing slowly. Explain that their thoughts settle just like the glitter. This tool helps kids notice rising emotions and choose a calming response.
Tip: Let your child help make the jar so it feels like their own special tool, not a punishment.
9. Weather Check In
Ask your child, “What is your inner weather today?” They can answer sunny, cloudy, stormy, or rainy. This playful metaphor lets shy children share feelings without direct questions. Use it at breakfast or in the classroom as a quick and friendly morning routine.
Tip: Ask a gentle follow up like “What could help the storm pass?” to build simple coping ideas.
10. Story Time Discussions
After reading a picture book, pause and ask questions such as “How do you think the character felt?” and “What would you do?” Linking story emotions to personal experience helps children see themselves in others. Choose books about feelings, friendship, and challenges for the best conversations.
Tip: Let your child pick the book now and then, because their choices reveal what matters to them.
11. Proud Moments Jar
Source: Pinterest
Keep a jar and some paper strips nearby. Whenever your child does something they feel proud of, they write or draw it and drop it inside. On tough days, open the jar and read the notes together. This activity strengthens self worth and teaches kids to notice their own progress.
Tip: Read a few notes together at the end of each month to celebrate how much your child has grown.
12. Likes and Dislikes Sorting
Prepare cards with pictures of foods, games, animals, and activities. Ask your child to sort them into “I like” and “I do not like” piles. Discuss why they chose each. This simple game helps children understand their preferences and learn that it is fine for people to like different things.
Tip: Revisit the cards every few months, since interests change and kids enjoy noticing how they have grown.
13. Emotion Colour Wheel
Source: Pinterest
Assign a colour to each feeling, like yellow for happy and blue for sad. Let your child colour a wheel and then point to the colour that matches their mood. Many kids find colours easier than words, so this is a gentle way to open up conversations about tricky emotions.
Tip: Display the wheel at eye level so even young children can reach it and use it independently.
14. Gratitude Circle
Sit together as a family and take turns sharing one thing you are thankful for. Encourage children to include something about themselves, like “I am thankful I am a good helper.” Gratitude shifts attention toward positives and helps kids appreciate their own qualities and the people around them.
Tip: Keep the circle short and relaxed, and avoid correcting answers so every child feels safe to share.
15. Bedtime Reflection Questions
At the end of the day, ask three simple questions: “What made you smile today?”, “What was hard?”, and “What would you try differently?” Keep the tone warm and curious, never critical. This calm routine teaches children to review their day honestly and learn from it.
Tip: Share your own answers too, which shows children that adults also reflect, learn, and sometimes find days hard.
FAQs
1. At what age can I start self awareness activities with my child?
You can begin as early as age 2 or 3 with simple games like mirror play and naming feelings. Toddlers and preschoolers learn best through short, playful moments. As your child grows, you can add journaling, discussions, and reflection questions.
2. How often should kids practice these activities?
Aim for a few minutes every day. Short and regular practice builds lasting habits better than one long weekly session. Try linking an activity to an existing routine, such as breakfast or bedtime.
3. What if my child does not want to talk about feelings?
Never force a conversation. Offer indirect options like drawing, colour wheels, or weather check ins. Share your own feelings openly so your child sees that it is safe to express emotions at their own pace.
4. Can these activities help with shyness or low confidence?
Yes. Activities like the strengths tree and proud moments jar give children clear evidence of what they do well. Over time, this awareness helps shy kids feel more comfortable speaking up and trying new things.
Self awareness is one of the most valuable gifts you can give your child. These 15 activities show that growth can happen through play, art, stories, and quiet moments at home or in class. Choose a few that fit your child’s age and personality, and repeat them with patience and warmth. Celebrate effort rather than perfection, and be a model of honest reflection yourself. With steady practice, your child will gain the confidence to understand their feelings and express who they truly are.
Also Read:
Self Awareness in Child’s Development
Memory Games to Play with Your Toddler
Positive Self-talk & Its Benefits for Kids
Read more
60+ Farm Jokes for Kids That Will Make Them Laugh
Key Takeaways
Farm jokes for kids use familiar animals, tractors, and barns, so even young children can understand the humour quickly and join in the fun.
This list has over 60 jokes, puns, and knock knock jokes, sorted by theme so parents and teachers can find the right one fast.
Short jokes and puns work well for early readers, while longer setups and wordplay suit older kids.
Sharing jokes builds vocabulary, listening skills, timing, and confidence in speaking.
Jokes are great for car rides, classroom breaks, family dinners, birthday parties, and farm visits.
Farm jokes for kids are a simple way to bring giggles to any day. Cows, chickens, pigs, and tractors give children plenty of silly characters to laugh about. These jokes are clean, easy to understand, and perfect for reading aloud at home or in the classroom. Whether you are a parent, a teacher, or a young joke teller, this collection has something for everyone. Grab a seat in the hayloft and get ready to laugh out loud with the whole family.
Hilarious Farm Jokes for Kids
Get the laughter started with these funny farm jokes for kids. Each one is short, silly, and easy to remember, so your little comedian can share them with friends right away.
1. Why did the farmer name his pig Ink?
Because it kept running out of the pen.
2. What do you call a sleeping bull?
A bulldozer.
3. Why did the cow go to space?
To see the Milky Way.
4. What do you get from a pampered cow?
Spoiled milk.
5. Why was the chicken sent to the principal’s office?
For using fowl language.
6. What do you call a cow with no legs?
Ground beef.
7. Why did the scarecrow win an award?
Because he was outstanding in his field.
8. How does a farmer count his cows?
With a cowculator.
9. Why did the sheep go to the doctor?
It was feeling a little baaad.
10. What do you call a cow in an earthquake?
A milkshake.
Short Farm Jokes
Short jokes are perfect for little ones who love a quick laugh and have a short attention span. Try these one liners on the school bus, at the dinner table, or during a long car ride.
1. What do you call a pig that does karate?
A pork chop.
2. Why do hens lay eggs?
If they dropped them, they would break.
3. What do you call a sheep with no legs?
A cloud.
4. What do you call a chicken at the North Pole?
Lost.
5. What is a duck’s favourite snack?
Quackers.
6. Where do sheep get their haircuts?
At the baa baa shop.
7. What do you call a duck that gets all A’s?
A wise quacker.
8. What is a pig’s favourite ballet?
Swine Lake.
9. Why do cows wear bells?
Because their horns do not work.
10. What do you call a horse that lives next door?
A neigh bor.
Farm Animal Jokes
Every barnyard friend gets a turn in these farm animal jokes for kids. Moo, oink, and cluck your way through the list, and see which animal makes your family laugh the loudest.
1. Why did the rooster cross the road?
To prove he was not chicken.
2. Why was the goat so good at sports?
Because it was the GOAT.
3. What do you call a cow that plays an instrument?
A moosician.
4. What do chickens say on Halloween?
Trick or cheep.
5. Why did the turkey join the band?
Because it had the drumsticks.
6. What do you get when you cross a sheep and a kangaroo?
A woolly jumper.
7. What do you call a donkey with three legs?
A wonkey.
8. Why do ducks make great detectives?
They always quack the case.
9. What did the pig say at the beach on a hot day?
I am bacon!
10. Why did the horse go to the doctor?
Because he was feeling a little hoarse.
Farmer Jokes for Kids
Farmers work hard from sunrise to sunset, but they also know how to have fun. These farmer jokes for kids are full of silly crop and barn humour that will make everyone smile.
1. Why did the farmer bury money in his field?
He wanted rich soil.
2. Why is corn such a good listener?
It has so many ears.
3. How did the farmer fix his jeans?
With a cabbage patch.
4. What did the farmer call his cow that would not give milk?
An udder failure.
5. Why did the farmer plant lightbulbs?
He wanted a power plant.
6. What do farmers give their families on Valentine’s Day?
Hogs and kisses.
7. Why was the farmer so good at his job?
He always had a field day.
8. Why did the farmer feed his cow money?
He wanted rich milk.
9. Why do farmers wake up early?
Because the rooster does not take sick days.
10. What did the farmer say to the sleepy hen?
Time to get up, the sun is egg ceeding expectations.
Farm Equipment Jokes
Tractors, barns, and tools can be funny too. These kids farm jokes are all about the machines and buildings that keep the farm running smoothly every day.
1. Why did the tractor feel so confident?
It always had a lot of drive.
2. What did the tractor say to the plow?
You always turn up when I need you.
3. Why was the hay bale so calm?
Nothing could rattle it, because it was packed tight.
4. What did the barn say to the silo?
You always stand out.
5. Why did the wheelbarrow get a new job?
It was tired of being pushed around.
6. Why did the shovel get a promotion?
It always got to the bottom of things.
7. Why does the pitchfork always win an argument?
It has a point.
8. Why was the barn door so cheerful?
It was always open to new things.
9. Why did the combine harvester stay calm?
It knew good things come to those who wait for harvest time.
10. What did the old tractor say to the new tractor?
Do not worry, you will get used to the bumps.
Farm Puns for Kids
Puns play with words that sound alike, and kids love figuring out the double meaning. Here are 10 farm puns for kids to groan and giggle over, perfect for older children who enjoy a little wordplay.
I would tell you a farm pun, but it might be too corny.
Cows make great friends because they are udderly supportive.
That pig is so lazy, he is a real boar.
Our chicken is egg cellent at maths.
This farm is a real hoot, owl tell you why.
Sheep are great at making friends because they are ewe nique.
Farmers love gossip because it always travels on the grapevine.
The duck had a quacking good time at the pond.
Our farm dog is rolling in the hay because he is having a barking good time.
The horse said he was not just stable, he was a stable genius.
Farm Knock Knock Jokes
Ready for a classic? Try these farm knock knock jokes with a friend or family member.
1. Knock knock. Who’s there? Cow says. Cow says who? No, cow says moo!
2. Knock knock. Who’s there? Lettuce. Lettuce who? Lettuce in, it is cold out here.
3. Knock knock. Who’s there? Hen. Hen who? Hen are you coming out to play?
4. Knock knock. Who’s there? Wool. Wool who? Wool you be my friend?
5. Knock knock. Who’s there? Duck. Duck who? Duck, a ball is coming your way!
FAQs
1. Why are farm jokes good for kids?
Farm jokes use animals and objects children already know, so the humor is easy to follow. They also help kids practice listening, rhyming, and wordplay while having fun. Telling a joke out loud builds speaking confidence as well.
2. What age group enjoys farm jokes the most?
Children between 4 and 10 years old usually enjoy farm jokes the most. Younger kids like simple animal sounds and silly answers, while older kids enjoy puns and clever twists. You can pick jokes from each section to match your child’s age and reading level.
3. How can I help my child tell a joke well?
Let your child practice the joke a few times before sharing it with others. Encourage a short pause before the answer, since good timing makes the punchline funnier. You can also take turns, with one person asking the question and the other guessing before the answer is revealed.
4. Where can I share these jokes with kids?
You can share them during car rides, lunchtime, classroom breaks, or bedtime. They also work well at farm visits, birthday parties, and family game nights. Teachers can write a joke on the board each morning to start the day with a smile.
Farm jokes for kids are a joyful way to spark laughter and bring families and classrooms closer together. From cow puns to tractor humor, every joke in this list is easy to read, easy to remember, and easy to share. Kids also build language skills, listening skills, and confidence each time they tell a joke to someone new. Try picking a favourite from each section and turn joke time into a daily habit at home or at school. With a little practice and plenty of giggles, your child might just become the funniest farmhand around.
Also Read:
Horse Jokes For Kids
Best Jokes For Kids
Best Bee Jokes For Kids
Read more
30 Best Out of Waste Crafts for Kids
Key Takeaways
Out-of-waste crafts turn everyday household items into fun, creative projects for kids.
Simple materials like cardboard, newspapers, plastic bottles, and ice cream sticks are perfect for DIY crafts.
These activities help children improve creativity, imagination, and problem-solving skills.
Always choose safe materials and supervise young children during crafting.
Waste material craft for kids is a fun and easy way to turn everyday household items into creative, useful, and colourful DIY projects. From empty plastic bottles and cardboard boxes to old newspapers and ice cream sticks, children can reuse materials that might otherwise be thrown away while learning the importance of recycling and protecting the environment.
Whether you’re a parent planning a fun activity at home or a teacher looking for creative classroom projects, these 30 craft ideas with waste material for kids offer simple, budget-friendly ideas for different age groups. With a little imagination and a few reusable materials, kids can turn ordinary waste into extraordinary creations!
Safety Tip: For some activities listed here, you need a hot glue gun. We recommend that you do not allow children to use this on their own and supervise them because the gun can get very hot and may cause burns.
Creative Craft Ideas for Kids With Waste Material
Craft out of waste material is pocket-friendly and encourages children to reuse things while exercising their creativity! Here are some cool, and fun best out of waste easy ideas for kids!
1. Milk Carton Bird House
Use an old milk carton for this activity, which will not only be fun and engaging but will also enchant your children by attracting birds to your balcony.
Things You Need
Milk or juice carton
White spray paint
White adhesive, such as Fevicol
Hot glue gun
One plastic spoon
Coloured tissue papers
Cutter or knife
Sponge brushes
Soft book cover big enough to make a roof
Wool
Procedure
Spray paint the milk or juice carton and leave it to dry.
Dilute the white glue with water and put a thin layer of it on the cartons and the roof made of the book cover.
Before the glue dries up, use the coloured tissues or paper randomly on the cartons for a colourful effect. You can even overlap one tissue over another.
Make a hole in the top of the carton using a cutter and another on the side of the carton to make the door.
Just below the door, cut a small ‘X’ shape and insert a plastic spoon in it. This is where the bird seeds can be put.
Now fix the roof on top of the carton using the hot glue gun.
Make two tiny slits on the roof, about 2 inches apart from each other. Put the wool through this to hang the pretty birdhouse!
2. Popsicle Stick Bookmarks
Make holiday reading fun with these DIY bookmarks. They make great gifts for friends too!
Things You Need
Popsicle sticks
Fabric scraps
Glue
Ribbons
Felt pens
Googly eyes
Procedure
Start with washed and dried popsicle sticks.
Let the kids twirl and wrap the fabric scraps around the sticks with glue leaving enough space for a face, which should be about 1/4th on the top.
Ribbons can be glued as belts or hair accessories.
Finally, stick googly eyes and draw a mouth on each of the sticks.
Your cute little dressed-up bookmarks are ready!
3. Glittery CD Fish
Help your child make an aquarium of her very own with these attractive fishes
Things You Need
A CD
Glitter
White adhesive
Yellow card paper
Scotch tape
Scissors
Googly eyes
Procedure
Apply the adhesive to the CD all over, only leaving the middle portion empty.
Sprinkle the glitter all over the area on the CD. Leave it to dry.
3. With the yellow card paper, cut a mouth, fins and tail and stick these on the blank side of the CD using the tape after it’s dry.
Attach the googly eye to one side of the fish’s face.
Your fun fish is ready!
4. Ombre Spoon Vase
Make space for all those flowers your children are going to collect for you on their walks with this simple vase. It is a great way to keep stationary too!
Things You Need
One large can or jar
Paper plate
Plastic spoons, depending on the size of the jar
Scissors
Hot glue gun
White spray primer
Acrylic paint of your choice of colour, and white
Procedure
Use the white spray primer and coat the jar.
Cut off the handles of all the plastic spoons but one.
On the paper plate, pour out blobs of coloured paint in a row.
Leave one blob as it is to be the darkest and add white paint to other blobs so that the shades become lighter and lighter. There, you have Ombre shades.
Paint the spoon heads; some in light shades, some in medium, while some in dark shades of the chosen colour. Make sure you paint enough spoon heads required to cover the jar. Let them dry.
Stick the dried spoon heads to the jar in layers according to their shade. You can have it light to dark or the other way around!
Your Ombre spoon vase is ready!
5. Tin-can Chimes
Convert boring tin cans into musical chimes on a lazy afternoon in a few simple steps. Here’s how:
Things You Need
Tin cans with lids, 3 or more
Nail and hammer
Washers, one for each tin
Paintbrush
Tempera paints in different colours
Wool or string
Glitter
Procedure
Paint the tin cans in different colours.
Add some glitter to the cans while they’re wet.
After they dry up, make a hole at the bottom of each can using the hammer and the nail (this part is best handled by adults)
Take a long piece of wool or string through the holes. Tie the two washers at the other end of the string, inside the tin cans.
Hang the cans in a way that they overlap or hit each other when there’s a breeze.
Your tin-can chimes are ready!
6. Itsy Bitsy Spider
Help your child make creepy crawlies you won’t mind having in your house. These spiders are the perfect addition to your kid’s room
Things You Need
Bottlecap
String or wool
Paints and paintbrush
Glue
Scissors
Paper
Googly eyes
Procedure
Paint the bottle cap red.
Cut 8 strings of the same length.
Stick 4 strings on either side of the cap.
Now stick 2 googly eyes or make eyes from the paper and stick them on the cap.
Your spider is ready to scare people!
7. Pineapple Craft Pen Stand
Be reminded of everything summer with this bright pen stand which is guaranteed to bring some sunshine to your study table. It is just what you need to organise all that stationary you always need at hand
Things You Need
Green wool
Green paper
Tape
Plastic bottle
Paints and paintbrush
Glue
Red sketch pen
Procedure
Paint the plastic bottle yellow and leave it to dry
Make zig-zag lines on the green paper and cut the paper to form the shape of a pineapple top or the shoots.
Cut the green wool into small strips and stick them across the top and the bottom of the bottle so that the strings create a crisscross pattern.
Make thorn patterns on the yellow paper with a red pen.
Stick the top made of paper on the rim of the bottle.
Your pineapple craft pen stand is ready for use!
8. Ice Cream Stick Toy Fighter Plane
Why buy a toy when it is so much more fun to make one! Help your little pilot make a plane and watch him go
Things You Need
4 ice cream sticks
1 wooden clothespin
Paint
Eraser
Paintbrush
Glue
Cutter
Procedure
Paint the ice cream sticks in colours of your choice and let them dry.
Paint the clothespin in the same or a different colour, and leave it to dry
Cut an ice cream stick into 3 pieces and join two end pieces in a straight line with glue. This is to make the plane’s propeller
Cut a tiny little bit of the eraser, paint it and leave it aside to dry
Glue 2 ice cream sticks to the mouth of the clothespin, one on the top and the other at the bottom, parallel to each other.
Glue a smaller ice cream stick to the tail of the clothespin.
Glue the eraser to the ice cream stick to complete the propeller.
Finally, stick the propeller on the mouth of the clothespin. Your plane is ready!
9. Tin Can Lanterns
Engage the kids, use up your throw-away items and prepare for the next festival all in one go with these attractive lanterns. Here’s how:
Image Credit: AI-Generated Image
Things You Need
Tin can
Hammer
Wire
Nail
Pliers
Tea light candle
Spray paint
Procedure
Remove the label and glue from the tin can, and let it dry.
Fill the can with water and put it in the freezer for some time.
Take the can out of the freezer, remove the water, and then poke a hole in the top of the can and one at the bottom.
Take a 12-inch wire and make a handle attaching it to the two holes
Make various holes around the can with a hammer and nails. You can choose to create a shape with these holes or a random pattern.
Paint the cans in fun colours, inside and outside. This might require several coats.
Once it’s all dry, you can put fairy lights or tea light candles in them for effect!
10. Sock Puppets
Make storytime fun with these simple puppets. It is a good idea to make puppets of your child’s favourite characters. A cut-out cardboard box makes the perfect theatre for an engaging show.
Things You Need
Two socks – plain or printed
Googly eyes or buttons
Wool
Wool needle
Black thread for sewing
Scissors
Procedure
Make sure the socks are washed properly and dry.
Sew the googly eyes or the buttons on the heels of the socks. Put 2 eyes per sock.
Cut 12 six-inch strips of wool. This is for the puppet’s hair.
Sew the hair on top of the sock above the eyes. Stitch it in a way that makes it resemble hair parting.
Put your hands in and the puppets are ready!
11. Popsicle Photo Frame
Display your favourite pictures instead of letting them gather dust in albums with these easy photo frames.
Things You Need
8 popsicle sticks
Scissors
Glue gun
Paint
Crayons
White paper
Procedure
Colour the popsicle sticks on both sides in different colours.
Stick popsicle sticks in such a way that they form a square shape, with the ends jutting out on the four sides.
Cut a white paper to 9×12 inch size. Glue the popsicle sticks along the edges of the white paper to create a frame. Chop off the excess paper.
Your frame is ready!
12. CD Coasters
Make sure all those drinks your kids spill don’t ruin your furniture by helping them make these reversible coasters. Here’s what you need to do:
Things You Need
CDs
Thin Cardboard
Felt tip pen or pencil
Scissors
Glue
Fabric scraps
Procedure
Trace the outline of the CD with a pencil on the cardboard and cut the shape out. You need 2 such circles for each coaster you make as you need to cover up the hole of the CD.
Glue the cutout cardboard circles on each side of the disk so that the hole is covered.
Glue the top of the cardboard and stick the fabric scraps that are cut to the same shape.
Your reversible coasters are ready to use!
13. Recycled Bottle Vases
Teach your kids the importance of recycling with these pretty bottle vases.
Image Credit: AI-Generated Image
Things You Need
Glass or plastic bottle
Paint primer
Paintbrush
Thick tape
Spray paint
Procedure
Clean the bottle to remove the label.
Paint the bottle with primer.
Spray paint the bottle in a colour of your choice.
Once the paint dries, top it up with another coat of spray paint.
You can also make patterns on the bottles! For this, you need to wait till the paint primer has dried up. Then use the tape to make the design you want. When you remove the tape after spray painting the bottle, that part will still be transparent! You can even use washi- tape to make the design of your choice on the bottle.
Your bottle vases are ready to use!
14. Turtle Made With Walnut Shells
Give your child’s CD fish a turtle for company, and help your child decorate her aquarium with this cute walnut turtle.
Things You Need
Cardboard
Half a walnut
Yellow and green paint
Scissors
Tape
Black marker
Glue
Procedure
Paint half the walnut shell yellow. Now once that dries up, trace the details of the shell with green paint.
Draw the base of a turtle onto a thick green sheet. Make two of these and cut them out.
Stick both together along with a triangular shape for the face of the turtle.
Stick the walnut on top of the base, make eyes and a mouth on the triangular shape and voila! Your turtle is ready!
15. Bear Mask with Paper Plates
No kids’ party is complete without masks. Help your kids prepare for a bear-themed party with these easy-to-make masks.
Things You Need
A large paper plate
White, light and dark brown chart paper
Brown paint
Scissors
Paintbrush
Hot glue gun
String
Procedure
Start by measuring and marking the child’s eyes on the paper plate which should be bigger than your child’s face. Make holes with the scissors exactly where the eyes will be. You can try it on to see whether the position is correct after cutting the holes.
Next, paint the paper plate brown (tempera paint is preferable).
Cut out two circles of dark brown paper for the ears, and of light brown paper to make the inner circle for the ears. Stick them together.
Make the eyes with white paper and then make a black ring around the holes you had previously for the child’s eyes.
Cut one big circle of the light brown paper for the mouth and nose area. Draw the mouth and the nose on it.
After this, use the different elements to put the bear’s face together with glue on a paper plate.
Make two small holes in the bear’s cheeks with a sharp pencil. Pass the string through it and make a knot so that it stays. The size of the string should match the size of the child’s head.
That’s it! Your bear mask is ready!
16. Bottle Paper Bank
Saving is a habit which must be encouraged in every child, as it helps them realise the value of hard work and money. Get them started with these DIY banks.
Things You Need
Clean plastic bottle
Piece of paper
Felt tip pens or markers
Glue
Procedure
Clean and dry the bottle.
Cut a slot big enough to send a coin through and seal the edges with glued paper or tape.
Cover the rest of the bottle with the paper and hand it to your child to paint or make patterns on.
The money bank is ready for some sweet savings!
17. Ocean in a Bottle
Bring home the beach and refresh memories of your last vacation with this curio. Here’s how you can make it
Things You Need
Big plastic bottle
Water
Funnel
Blue food colouring
Mineral oil
Rocks
Seashells
Sand
Glue gun
Procedure
Clean the plastic bottle, and make sure the label and the glue are gone.
Using the funnel, fill the bottle with sand. There should be enough to cover one side when the bottle rests on its side.
Add some seashells, rocks and maybe an aquarium toy or two that fit in.
In a separate bottle, mix some water with blue colouring till you get a colour like the blue of the ocean.
Pour the blue water into the bottle with the sand till it’s about 2/3rds filled. Then pour mineral oil into the remaining part of the bottle that’s empty.
Glue the cap of the bottle so that it cannot be opened and leave it to dry.
Tilt your bottle to see the ocean and the waves when you want!
18. Button Bracelet
Dig into your sewing box for some wearable artwork. This button bracelet is quick and easy to make and makes an awesome gift too.
Image Credit: AI-Generated Image
Things You Need
Buttons
Elastic
Metal crimp tube
Shanks
Pliers
Procedure
Thread the elastic through the shanks and make sure the buttons are turned upside down to overlap.
When you have done this with enough buttons, and it is large enough to wrap around the wrist, thread the ends of the elastic through a metal crimp tube to seal it.
Trim off the excess elastic with the pliers and your bracelet is ready!
19. Mason Jar Snow Globe
The most attractive things are often the easiest to put together. Introduce your child to this mason-jar snow globe and give them a chance to display their creativity.
Image Credit: AI-Generated Image
Things You Need
Mason jar
Hot glue gun
Decorative ornaments
Glycerin
Glitter
Water
Silver paint
Procedure
Paint the lid of a mason jar with silver acrylic paint.
Stick the ornaments on the inside of the lid using a glue gun.
Fill the jar up with water to the brim. Add some glycerin and glitter to it.
Screw the lid on carefully and tightly.
Turn the mason jar and keep the lid as the base to see the snowfall!
20. Paper Wind Turbine
Science meets art in this quick craft. Make a paper turbine and attach it to your kids’ bicycles to teach them how the wind works.
Things You Need
5 paper cups
Cardboard box lid
Sand
White paper
Board pins
Glue
Scissors
Procedure
Colour 2 paper cups blue and leave 3 as they are.
Pile and glue all the cups, one on top of the other to form the tower.
After this, make a pinwheel with the paper and attach it to the topmost cup with a pin.
Fill the cardboard box lid with sand, and place the windmill on it or stick it with glue.
Your paper wind turbine is ready!
21. Match-Bot
Help your kids make a robot of their very own with these easy–to-collect materials.
Things You Need
4 matchboxes
2 matchsticks
Coloured sheets
Scissors
Glue
Procedure
Cover a matchbox with coloured paper.
Make a hole at the bottom of the box using a matchstick.
Make the robot’s antennae using 2 matchsticks.
Draw the robot’s eyes.
Make a body sticking together 3 more matchboxes as the body and the legs.
Using a matchstick, connect the head with the body in the shape of a table.
Your match-bot is ready!
22. Mini Suitcase for Dolls
Get ready to take your dolls on a vacation with these cute mini-suitcases. These suitcases also help your child organise her trinkets.
Things You Need
Matchbox
Coloured paper- light and dark brown
Scissors
Glue
Felt pens
Procedure
Cover the top of the matchbox with the dark-coloured paper.
Cut thin strips of light brown paper and stick them on the sides.
Make a small handle with the light brown paper and stick it on top.
Make 4 semi-circles with the light brown paper and stick them on the side.
Add two strips for the upper and lower ends and insert these back into the cover. You can use this to store tiny bits and baubles!
23. Abstract Alligator
Convert an ordinary clothespin into a snappy pet! This cute alligator is ready in a jiffy and can be a perfect addition to storytime.
Things You Need
Wooden cloth clip
Glue
Scissors
White paper
Sketch pens
Green paint
Procedure
Colour the clip with green paint.
Draw teeth on white paper and cut them.
Stick the teeth on both sides of the clip.
Draw eyes and nostrils with the black marker on the top of the clip, above the area where the teeth are stuck.
Your cute alligator is ready!
24. T-shirt Tote Bag
Convert your kid’s favourite frayed t-shirt into an attractive beach bag. Here’s how:
Things You Need
An old T-shirt, with any neck
Scissors
Procedure
Cut a circle along the neck of the shirt.
Cut off the left and the right sleeves so that they are completely removed. Make sure the cut on both sides is the same.
Turn the tee inside out.
Chop off the rim at the base of the shirt.
Make fringes of 5 cm each at the bottom of the tee and tie two of these together in knots. Tie all the fringes so that the base of the bag is sealed.
Flip the tee again, and your bag is ready!
25. Tennis Ball Key Holder
Make an organiser for your home as your kids learn a new craft with this convenient key-holder.
Things You Need
Tennis ball
Cutter
Googly eyes
Procedure
Cut a big slit in the tennis ball, right above one of the lines. This will be the mouth of the ball.
Attach two googly eyes spaced out right above the slits so that it looks like it has a face.
Hang it on the wall as a fun key holder. You can put anything into the mouth of the ball to hold it there!
26. Popsicle Stick Storage Box With Sliding Lid
Craft a mini storage box using popsicle sticks and a cool sliding lid your kids will love.
Things You Need
Popsicle Sticks
Glue
Paint
Decoratives
2 pieces of paper – 5×5 inch
Procedure
Using the piece of paper as a template, make a base of the popsicle box. Stick the popsicles all over the paper to form a flat base.
Then, keep sticking popsicles only on the edges to create a box with a hollow centre.
When you build it to a preferred height, Add two popsicles only on two opposite sides. After this add another layer of popsicle sticks along all the edges. This will create a gap for the lid to slide through.
Let the box dry.
For making the lid, use the second square-shaped paper as a template and stick the ice cream sticks parallel to each other. Let it dry.
After the box and the lid, both are dry, cut the lid to a size appropriate for it to slide through the gap in the box.
You may now paint the box with your favourite colours decorate it with beads, ribbons, etc. and store anything you want in it.
27. Little Monsters
Let kids create silly little monsters with googly eyes and wild colors for endless giggles.
Things You Need
Tissue roll tubes
Acrylic paint
Sketch pens
Pompom
Procedure
Cut the tissue roll cardboard tubes in varying sizes.
Using the acrylic paint, paint them in different colours. The darker the colour, the better.
Use the sketch pens to draw funny monster faces and emotions on the rolls.
Add pompoms to create more details.
28. Yogurt Cup Wreath
Turn used yogurt cups into a festive wreath with paint, ribbons, and a dash of creativity.
Things You Need
36 empty yoghurt/curd cups
Straw wreath
Green spray paint
Glue gun
Procedure
This one is to be strictly done under adult supervision. Apply hot glue to the top of one cup and place it against the straw wreath’s outer rim. In this way, even space out and fix 11 more cups to the wreath’s outer rim. This way, there will be 12 cups.
The next step is to form a second rim inside the first ring of cups. Place a new cup between two previous cups, and the top against the wreath. Repeat this till you have 12 yoghurt cups that are evenly spaced out.
Create the third and final ring by fixing the cups still remaining, in a circle with their bases pointing upwards.
Colour the wreath using the spray paint and let it dry.
29. Plastic Egg Snake
Connect colorful plastic eggs to build a slithery snake that wiggles with fun.
Things You Need
Plastic coloured eggs with holes at both ends.
Googly eyes
30 to 36-inch plastic lacing cord
Red felt
Procedure
Take the lacing cord and tie a knot at one end.
Take one half of the eggshell and thread it through the cord. Similarly, repeat this for the other shells.
Knot the other end of the cord to secure the eggshells.
Place the googly eyes on the first shell to depict the snake’s face.
Use the red felt to depict the snake’s tongue.
Bend the snake slightly to make it look more realistic.
30. Paper Garland
Cut, fold, and string paper shapes together to make a bright garland for any celebration.
Image Credit: AI-Generated Image
Things You Need
Scraps of paper
Yarn
Glue
Scissors
Procedure
Cut the paper into different shapes like triangles, circles, squares or anything your child desires.
Using glue, stick these shapes on the yarn at an equal distance from each other.
Your paper garland is now ready to adorn any room.
FAQs
1. What is the importance of best out of waste for kids?
Best out of waste activities teach children how to make creative and useful items from materials they already have at home. These best out of waste craft ideas for kindergarten are budget-friendly, encourage imagination, and help children understand the importance of reusing materials and reducing waste.
2. How to encourage kids to think out of the box when using waste materials?
You can create opportunities for your child to think out of the box and be resourceful. Give them projects like building structures, art projects, and designing everyday-use items.
3. What is an easy waste material craft for Class 1?
A paper roll butterfly, a cardboard fish, or a newspaper collage is an excellent waste material craft for Class 1 students. These activities require minimal materials and simple steps, making them suitable for young children with adult supervision.
With these waste material art and craft ideas, you can put waste materials at home to good use. By trying out these craft ideas for kids with waste material, not only will your child learn to make new things, but he will also learn the importance of recycling them. To promote creativity, you can also get DIY kits for your kid. These kits contain age-appropriate activities that will keep your child busy. Yes, he will draw, colour, and paint all by himself. As he tries out these activities on his own, his skills will develop and so will his confidence.
Also Read:
Newspaper Crafts for Children
Plastic Bottle Crafts for Kids
Paper Cup Craft Ideas for Children
Read more

10+ Best Brain Gym Exercises for Kids
Key Takeaways
Brain gym exercises use simple movements to encourage coordination, body awareness, and focus in children.
Activities such as cross crawls, double doodles, and belly breathing can be practised at home or school.
Puzzles, reading aloud, music, and nature walks offer additional ways to engage children.
Short activity breaks can fit easily into daily routines.
Choose age-appropriate exercises, supervise young children, and keep movements gentle and comfortable.
Brain gym exercises for kids are simple, fun movements that encourage children to practice coordination, body awareness, and focused attention. These activities can easily fit into a child’s daily routine at home or in the classroom, making movement breaks more engaging and enjoyable.
From cross-crawl movements to simple hand exercises, these activities give kids a playful way to move their bodies and take a break from learning tasks. In this article, we’ll cover 10+ best brain gym exercises for students, along with easy ways to practice them as part of their everyday routine.
What Are Brain Gym Exercises?
Brain gym exercises are simple physical movements designed to support coordination, focus, and learning. These exercises contain several movements which help with your child’s ears, eyes, head, limbs, and overall body coordination. They often involve activities such as cross-body movements, stretching, and balance exercises (1).
Benefits of Brain Gym Exercises for Students and Children
Regular practice of brain gym exercises can support children’s overall development in several ways, including the following (2) (3) (4):
Helps your child get sharper and smarter.
Boosts your child’s self-esteem and confidence level.
Improves health and boosts the immunity and healing in your child.
Improves eyesight
Improves their creativity
Boosts their communicative skills
Effective Brain Gym Exercises for Kids to Sharpen Memory
Here are some fun and easy brain gym exercises for toddlers that make playtime fun and engaging while encouraging early development.
1. Double Doodle
This is a bilateral drawing exercise where your child draws two images with both his/her hands. This helps improve several skills like learning spelling accuracy, writing and recognition of symbols, calculation, etc.
2. Cross Crawls
In this exercise, your child will move their left arm to their right leg slowly. The slow movement increases your child’s mental coordination and attention. It can help release their stress and concentrate better on their studies.
3. Lazy Eight’s
This exercise requires your child to draw the figure eight either on a sheet of paper or in the air using their hands. This loosens the muscles in his arms and wrists and activates the creative side of your child. It also improves eyesight with eye muscle coordination and peripheral vision.
4. The Elephant
Let your child stretch their hands and place it next to their ear on the same side. After this, let them draw the sign of infinity with their extended hand for at least 3 times and repeat with the other hand too. This improves your child’s mind and body balance and also helps listen to words correctly.
5. Active Arm
In this exercise, your child has to stretch one arm and hold the other arm at a right angle to hold the extended arm in position. This not only increases the strength of your child’s upper body but also improves the hand and eye coordination in your child.
6. The Owl
Let your child sit comfortably and bring one of his/her hands to the opposite shoulder. Let him/her hold the hand steady and slightly pinch the shoulder near the trapezius muscle and then turn the head slowly towards the shoulder and take a deep breath. This improves blood circulation and improves the memory and attention of your child.
7. Gravitational Glider
Make your little one sit straight on a chair and then ask him/her to stretch their legs. Let him/her cross the right leg over the left ankle. Then, ask him/her to take a deep breath and lean forward to reach the feet. This enhances the flow of blood and oxygen and also stretches your child’s hamstring.
8. The Thinking Cap
Your child is required to hold both their ears with the thumb and the index finger and then roll and unroll the outer portion of the ear. This improves your child’s short-term memory, hearing, and peripheral vision.
9. Earth Buttons
Let your child either stand or comfortably sit down and place their right hand on the lips and the palm of the left hand on the navel. After this, let your child rub both his hands in their respective regions in small circular motions. This improves your child’s mental alertness and enhances their whole-body orientation.
10. Hook Ups
For this exercise ask your baby to either stand up, sit down, or lie down . Let your child cross their left ankle above the right one and then place the hands with fingers intertwined on the chest and breathe deeply. This lets your child’s mind and body relax and reduce stress.
11. Brain Buttons
Make your child place their right hand on their left collarbone and their left hand on their right collarbone. Ask them to apply gentle pressure and massage these points while taking deep breaths. This exercise can be beneficial when your child needs to regain focus during studying or other tasks.
12. Energy Yawn
Ask your child to take a deep yawn, inhaling deeply and then exhaling with a relaxed sigh. Tell them to stretch their arms out wide and let them drop down as they exhale. Repeat this process a few times to release tension and boost alertness.
13. Belly Breathing
Ask your child to lie down on their back or sit comfortably. Place their one hand on their chest and the other on their belly. Ask them to breathe deeply, focusing on expanding their belly while keeping their chest relatively still. Belly breathing can reduce stress and enhance relaxation.
14. Gravitational Midline
Make your child sit or stand comfortably and ask them to hold each wrist with the opposite hand. Now help them gently sway from side to side for a minute to enhance balance.
Brain Gym Activities for Kids
Here are some simple brain gym exercises for preschoolers that make learning fun while encouraging movement and coordination.
1. Puzzles and Board Games
Puzzles and board games encourage children to think logically, recognise patterns, and solve problems. Games such as chess, matching cards, and jigsaw puzzles also help develop patience and strategic thinking while making learning enjoyable.
2. Music and Dance
Listening to music, learning an instrument, and following dance routines engage children in creative activities that involve memory and coordination. Remembering lyrics or dance steps also gives children opportunities to practise concentration and sequencing.
3. Reading Aloud
Reading stories aloud encourages children to focus on words, understand sentence structures, and build vocabulary. Parents can make this activity more engaging by asking questions about the story or encouraging children to narrate it in their own words.
4. Nature Walks
Outdoor walks give children opportunities to observe their surroundings and explore the natural world. Asking them to identify plants, notice different sounds, or spot birds encourages curiosity, observation, and attention to detail.
Incorporating Brain Gym in Your Child’s Daily Routine
Making brain gym a part of your child’s daily routine doesn’t have to be complicated. A few simple activities during playtime, study breaks, or morning routines can help keep kids engaged and active throughout the day.
FAQs
1. At what age can children start brain gym?
Children can start with brain gym activities at any age. These activities are typically introduced during the preschool and school years and even as early as eighteen months old.
2. What are brain exercises for kids called?
Brain exercises for kids are known as brain gym exercises or cognitive training.
3. Which brain gym exercises are used for calming children down?
Hook-Ups is one of the several brain gym exercises used to calm children’s nervous systems and relax their bodies because these exercises link the body’s electrical circuits and help circulate energy that has been blocked by tension.
4. How long should kids practise brain gym exercises?
Kids can start with 5-10 minutes of simple activities and adjust the duration according to their interest and energy levels. These exercises can be included in playtime or used as short breaks between learning activities.
5. Are brain gym exercises better before or after studying?
Children can try brain gym activities before studying or during breaks when they need a change of pace. The best time depends on the child’s routine and preferences, as these activities are intended to complement rather than replace regular study, sleep, and physical activity.
So, go ahead and let your child be one of the smartest one in their class with these simple brain gym activities for kids.
Also Read:
Best Mind Games for Kids
Park Games for Children
Memory Games for Kids
Read more
20 Fun and Easy Thanksgiving Craft Ideas for Kids
It’s time to be thankful! Thanksgiving is a holiday of celebrating and giving thanks for the blessings of the preceding year, and it is gaining a lot of popularity in different parts of the world. As more and more people celebrate this festival of gratitude and happiness worldwide, you must be wondering how can you educate your kids about this festival and involve them in the celebrations. Read on to find out how you can make this festival a lot of fun for your kids.
Thanksgiving Crafts for Toddlers (1-3 Years)
Keeping toddlers busy is a challenging task as they are still dependant on their parents to do a lot of things. The crafts given here will need adult supervision, but you can get them in the festive mood and teach them all about Thanksgiving.
1. Family Tree
Image Credit : Pinterest
This finger painted family tree will help you introduce your toddler to all the family members coming over for the Thanksgiving celebrations.
Materials required:
White paper
Black or brown sketch pen
Red, orange, brown watercolours
Procedure:
Take the white paper and draw the tree trunk, branches, and twigs using the black or brown sketch pen.
Get the watercolours ready and dip your toddler’s finger in the different colours and press it on the twigs and branches, making the impression look like leaves.
Let the paint dry. Once it has dried, write the names of different family members against each leaf.
2. Painted Corn Husk Headband
Image Credit : Pinterest
The best way to use corn husk is by making a Thanksgiving craft with it. This is a great Thanksgiving craft for toddlers of the age of 2 or above as it requires some artistic paint strokes.
Materials Required:
Dried corn husks
Paint
Glue
Headband
Procedure:
Stick the corn husks together in the shape of a semi-circle.
Once the glue has dried, let your toddler explore her artistic side by painting the corn husks in different colours.
When the paint dries, stick the corn husks on a hairband and let your toddler wear her beautiful creation.
3. Turkey Craft for Toddlers
Image Credit : Pinterest
Painted hand turkeys look super cute, and your toddler would love making them. So go ahead and indulge your little one using this Thanksgiving art for toddlers.
Materials required:
A few cardstock papers
Paint
1 googly eye
Crayons
Procedure:
Dip your toddler’s palm in brown paint and dip each of her fingers in different colours.
Let your toddler stamp her hand on the cardstock paper and repeat this step for as many paintings as you want to make.
When the paint dries, stick a googly eye on the thumb’s impression and draw small details like the turkey’s feet, beak, and tongue with the crayons. Your painted turkey hand is ready.
4. Corn Cob Craft Painting
Image Credit : Pinterest
Every Thanksgiving celebration is incomplete without corn on the cob. But what about some corn on the cob painting? Here’s how you can make your toddler enjoy some corn cob craft painting.
Materials required:
Corn on the cob
Paint
Paintbrush
White paper
Procedure:
Remove the husk from the corn and paint the corn with different colours, painting a part of the corn with one colour.
Once that’s done, let your toddler roll the white paper, making a vibrant painting.
Let the paint dry, and then you can hang it up by attaching a piece of thread to it.
5. Pumpkin Handprint Card
Image Credit : Pinterest
In the world of instant messaging and emails, letters and cards are only sent out during festivals. So use this opportunity to involve your munchkin in the celebrations.
Materials required:
Green, white, and orange papers
Orange and green paint
Scissors
Procedure:
Fold the green paper to make a card and keep it aside.
Cut out a circle from the orange and white papers, keeping the orange circle bigger than the white.
On the green card, first, stick the orange circle and then paste the white circle on the orange one.
Dip your toddler’s hand in the orange paint and stamp it on the white circle.
Dip one of your toddler’s fingers in green paint and press her finger on the leftover white paper.
Cut out the finger impression and stick it on top of the pumpkin, making it the pumpkin stem.
6. Paper Chain
This is a fun way for kids to write down what they are thankful for and make a colorful chain to decorate the home or table.
Materials required:
Colored construction paper
Scissors
Glue stick or tape
Markers/pens
Procedure:
Cut construction paper into strips.
Ask each child to write something they’re thankful for on each strip.
Link strips together to form a chain, gluing or taping the ends.
Hang the chain around the room or on the Thanksgiving table.
7. Handprint Turkey Placemat
Kids create a keepsake by turning their handprint into a cute turkey to use as a festive placemat.
Materials required:
Construction paper
Washable paint or markers
Googly eyes
Glue
Scissors
Procedure:
Trace a child’s hand on brown paper to form the turkey’s body.
Cut out the handprint and glue it onto a larger sheet for the placemat base.
Decorate “feathers” with colorful cut-out paper, markers, or paint.
Add a beak, wattle, and googly eyes to finish the turkey.
8. Pine Cone Turkey
This craft uses natural materials to make a turkey decoration perfect for the Thanksgiving table
Materials required:
Pine cones
Feathers (craft or real)
Glue
Googly eyes
Small orange and red felt (for beak and wattle)
Procedure:
Glue feathers to the back of the pine cone to create a tail.
Attach googly eyes to the front.
Cut a small triangle (beak) and a wattle from felt and glue both under the eyes.
Let dry and place on the table as a cute decoration.
Thanksgiving Crafts for Preschoolers (3-4 Years)
Do you have a restless preschooler who has too much energy and not enough to do? Here is the solution to your problem, the following list of Thanksgiving crafts for preschoolers will use up all of their energy, and you won’t even have to leave the house.
6. Thanksgiving Paper Pumpkins
Image Credit : Pinterest
Let your preschooler tell you all she is thankful for with this simple Thanksgiving papercraft.
Materials required:
Orange and green coloured paper
Scissors
Stapler
Procedure:
Cut out eight long strips of orange paper and two strips of green paper.
Make your child tell you all she is grateful for this year and write it down on the orange strips.
Staple the left ends of the orange strips together and then staple the other end together to make a pumpkin.
Roll up the green paper strips to make a pumpkin vine and staple them to the top of the pumpkin. Your gratitude pumpkin is ready!
7. Thanksgiving Pasta Necklace
Image Credit : Pinterest
Your kids will love making and wearing these festive necklaces, so get ready to find pasta all over your house.
Materials required:
Dyed pieces of macaroni or penne pasta
A long piece of thread or yarn
Procedure:
Give the piece of thread and the pasta to your little one.
Knot one end of the thread and show her how to pass the pasta pieces through the thread.
She can use different colours to create a unique pattern and once she is done, knot the other end of the thread and tie it around her neck.
8. Turkey Craft for Preschooler
Image Credit : Pinterest
This fun turkey craft for kids will keep your preschooler engaged and make her use the new skills she is learning at this age.
Materials required:
Brown foam
Googly eyes
Glue
Clothespins
Feathers
Procedure:
Cut out two circles (one bigger than the other) from the brown foam and stick the two circles together.
Stick the googly eyes and a small orange triangle (cut from coloured paper) to make the turkey face.
Stick the feathers on the clothespins and make your little one use those fine motor skills to press the clothespins and place them around the brown foam.
9. Thanksgiving Leaf Garland
Image Credit : Pinterest
You can finally use those brown paper bags you have in the house. This beautiful leaf garland will keep your baby occupied, and it will also make for a pretty Thanksgiving decoration, so make sure you try it out!
Materials required:
Brown paper bags
Ribbon
Glue
Scissors
Clothespins
Paint
Procedure:
Draw big autumn leaves on the paper bags and let your child paint these leaves in different colours.
When the paint dries, cut out the leaves. On a long piece of ribbon stick some clothespins, and let it dry.
Stick the paper leaves on the clothespins, and you’re done! Hang this garland to add some festive cheer to your house.
10. Letter Feather Turkey
Image Credit : Pinterest
If your little one is learning the alphabet at school or you’ve taught her how to spell her name, this simple Thanksgiving craft will help your preschooler brush up on his/her skills.
Materials required:
A white paper plate
Orange and brown paper
Scissors
Glue
Brown crayon
Googly eyes
Procedure:
Set your munchkin’s artistic side free and let her colour the paper plate using the brown crayon.
While she is busy colouring, cut the coloured sheets in the shape of turkey feathers and label each feather with one letter of your child’s name.
When you are done, hide the feathers in different parts of the room and make her look for them.
Once she finds all the letters ask her to arrange the feathers according to the spelling of her name and paste the feathers to the paper plate.
Add googly eyes and a beak to complete the turkey’s face.
11. Apple Stamping Greeting Card
Image Credit : Pinterest
When festivities come, we greet our loved ones with wishes, gifts, and greetings. This Thanksgiving, let’s make pumpkin greetings using apples and paint.
Materials Required:
Apple, cut into two pieces
Google eyes
Orange paint
Brown and green pipe cleaners
White cardstock
Procedure:
Cut the apple into two pieces. Apply some orange paint on the underside of the halved apple and press it on the white greeting card.
It will take a shape similar to a pumpkin.
Once the paint is dry, paste different-sized googly eyes. Cut some brown and green-coloured pipe cleaners. Paste the brown ones as stem and twist green ones to make leaves. Paste onto the paper using glue.
Thanksgiving Crafts for Children (4-8 years)
If your kids are old enough to do some art and craft on their own, have them make these amazing Thanksgiving crafts. They can even take them to school and show them to all their friends.
12. Winter Gloves Turkey
Image Credit : Pinterest
These bright turkey gloves will not only keep your hands warm but also amuse your little one immensely.
Materials required:
Brown or tan coloured glove
Green, yellow, red, and blue felt paper
Googly eyes
Glue
Scissors
Procedure:
Cut the felt papers (two of each) in the shape of turkey feathers and stick the two parts together.
Stick the felt feathers on all the fingers of the glove. Stick the googly eye and a small beak on the thumb making the turkey’s face.
Make your kids wear these cute turkey gloves and have fun with them.
13. Felt Pumpkin Pie Coasters
Image Credit : Pinterest
The upcoming Thanksgiving celebrations will definitely require some coasters, so why not make some with your kids?
Materials required:
White, orange, and tan felt paper
Glue
Scissors
Procedure:
Cut the orange and tan felt paper in a conical shape resembling the shape of a piece of pie. Make sure the orange piece is smaller than the tan piece.
Cut the white felt paper in the shape of a cloud to resemble whipped cream.
Make your kids stick the orange felt on the tan felt and add the white felt on top of the orange felt. Arrange the pieces to make it look like a piece of pumpkin pie.
Viola! Your pumpkin pie coasters are ready to add to the Thanksgiving vibe.
14. Toilet Paper Roll Turkey Showpiece
Image Credit : Pinterest
When occasions come, it becomes imperative to decorate the house with colourful showpieces and crafts. If you are looking to create crafts with your kids, then this easy to make craft is one such craft idea.
Material Required:
Toilet paper roll
Brown paint
Glue
Small google eyes
Black marker
Cardstock – yellow, orange and red
Procedure:
Take toilet paper and paint it brown with brown paint.
Take red, yellow, and orange coloured cardstock, draw feather shapes, and cut out the shapes.
Ask your kid to write things that they are grateful for on the feather cutouts using a black marker.
Paste googly eyes on the toilet roll using glue.
Cut out a tiny triangular beak and feet on orange cardstock. Paste the beak and feet on the roll.
Next, paste the feathers on the back of the toilet paper roll.
15. Thanksgiving Turkey Bookmark
Image Credit : Pinterest
If you’re raising some bookworms, then your kids will love this paper turkey craft.
Materials required:
Brown felt paper
Glue
Scissors
Popsicle stick
Procedure:
Cut the felt paper in the shape of an autumn leaf, use the first leaf as a stencil to draw and cut out another one.
Stick the two pieces of felt together.
When it’s dry, stick the popsicle stick on the bottom of the leaf.
16. Turkey Craft for Children
Image Credit : Pinterest
This funny turkey headband will look super cute in your Thanksgiving pictures. So make one for every member of your family!
Materials required:
Brown, yellow, orange, and green paper
Googly eyes
Brown headband
Scissors
Glue
Procedure:
Cut out two circles (one smaller than the other) from the brown paper and stick them together in the figure of eight to make the turkey.
Cut out the feathers from the yellow, orange, and green paper.
Stick the turkey’s body on a brown headband and add the feathers behind the body.
Stick the googly eyes and a yellow beak to make the turkey’s face.
Make your kids wear these hilarious headbands and click many pictures!
17. Thankful Wind Spinners
Image Credit : Pinterest
Let your child’s gratitude flow and what better way to express it than put it on a wind spinner!
Materials required:
White paper
Crayons
Sketch pens
Scissors
Procedure:
Make your child draw a spiral on the white paper.
Around the spiral make her write the things she is thankful for.
Let your child colour the other side of the paper. When she is done, cut the spiral carefully.
Attach a piece of thread on top of the spiral and hang this wind spiral to celebrate the feeling of gratitude and the spirit of Thanksgiving.
These fun art and craft activities are sure to keep you and your kids busy this Thanksgiving season. Let us know which ones you tried to make with your kids and have a happy Thanksgiving!
Also Read:
Thanskgiving Songs for Kids
Thanksgiving Stories for Kids
Thanksgiving Poems for Children
Thanksgiving Coloring Pages for Children
Read more

Veterans Day Crafts and Activities for Kids
Veterans Day is a special time to honor the brave men and women who have served in the armed forces to protect our country. It’s an important day for children to learn about gratitude, respect, and patriotism in a fun and meaningful way. Engaging kids in Veterans Day crafts and activities helps them understand the sacrifices veterans have made while encouraging creativity and kindness.
Through simple hands-on projects like making patriotic wreaths, thank-you cards, flag-themed crafts, or paper medals, children can express their appreciation and develop a sense of national pride. Classroom and home activities such as storytelling, role-playing, or singing patriotic songs can further enrich their learning experience.
Easy Veterans Day Craft and Activities Ideas for Children
Therefore there are some fun crafts and activities that kids can indulge in to understand the importance of this day.
1. Patriotic Pinwheel
One of the most loved Veterans Day crafts for preschoolers that produces a beautiful outcome:
Materials Used
A pushpin
A pencil with an eraser
A hole punch
Construction papers in red and blue
Scissors
Markers or crayons
Instructions
The first step is to take up the construction papers to make two squares. To begin with, making squares, two pieces of paper need to be arranged together, and then the corners of the piece of paper have to be folded.
The rectangle has to be cut off to make the two squares.
Now to make a half triangle, the paper needs to be folded and then unfolded again.
Then instruct your child on how to start decorating one side of each sheet of paper provided
Now the next steps involve putting all the undecorated sides of the paper together and then going for four cuts along the folded lines.
Four holes need to be punched in each corner, and then those four points need to be brought to the center.
Now use the pushpins to put them through the holes in the center of the wheel and then have the pinwheel attached to the side of a pencil’s eraser.
2. Star Crown
Another Veterans Day art that is loved by all kids and should be tried on this day.
Materials
A white band
Stickers in the shades of red, blue, white
Construction papers in the shade of red, blue and white
Glue
Instructions
The first step is easy and direct as your child needs to begin with cutting stars using construction papers.
Measure your child’s head and then cut a wide band of ½ to 2 inches from the construction paper.
Leave it to the child to stick as many stars he or she would want to stick on the white band
Stickers can be used to decorate the stars further and then left to dry
Once the crown has dried up, you can place it on your child’s head and glue or staple the ends
3. Cascade of Stars
This is quite a fun Veteran’s Day crafts for toddlers that they can indulge on Veterans Day.
Materials
An optional set of painters, glitters, and markers
Scissors
A printer and a drinking straw
Yarn that is 2 feet in length
Some sort of thick paper like construction paper or cardstock paper
Instructions
All these crafts that have stars in them begin with the same direct step where the child has first to cut out stars. In this activity, it has to be of different sizes.
This is the step where the markers, glitters, and painters come in, and your child can color the stars and then pierce a hole in the center of each star.
The drinking straw needs to be cut into 1 and a half inch long length. Five straws are needed for each of the projects.
4. Wind Sock
One of the many Veteran day activities that kids love, and they always end up doing one of these to commemorate the special day.
Materials
A string
Stapler, glue, or tape for sticking
Streamers in red, blue, and white
Construction papers in red, blue, and white
Instructions
All three shades of construction papers need to be rolled lengthwise, and then use the stapler or glue to stick them together.
Use the string and stick it to one end of the windsock and the other end with streamers, and you have your windsock craft ready!
5. Torn Paper Poppies
This craft is to honor all those to whom this day is dedicated; each poppy is as different as the ones serving the army.
Materials
Glue stick for sticking
Construction paper
Instructions
First, take the construction papers in the shades of red, green, and black.
Cut out an oval shape from the red construction paper, you can try to obtain a perfect circle, but it doesn’t go well with this technique.
The next step requires you to cut a small circle from the black colored construction paper and then stick it using your glue to the already cut out red art flower.
The final step requires you to cut out a stem from the green construction paper.
Then stick the finished flower on white paper.
Continue following the above steps till the time you have several poppies and build scenery.
6. Star Wreath
Most of the Veteran’s day crafts include making stars, and the kids thoroughly enjoy it on this special occasion.
Materials
Scissors
Glue
Optional glitter
A paper plate
Construction paper in the shades of red, white, blue
Instructions
Instruct your child to begin with making a huge hole in the center of the paper plate
Once again, a lot of stars need to be carved out of the red, blue, and white construction papers
The stars then need to be glued to the paper plate
You can get creative and then add the names of the brave soldiers onto the wreath. Maybe scatter some glitter on the wreath to decorate it
7. String of Stars
Stars are the kid’s favorite element in all the Veteran’s Day crafts that they indulge in.
Materials
Printer is optional
Stapler, glue, or tape to stick.
Construction papers in red, white, and blue
Yarn in red, white, and blue colors
Scissors
Instructions
You can either print out a star template with the use of the optional printer or cut out a large star from the construction paper.
Once the star is achieved, your child can decorate it however he or she likes
The star’s tip needs to be folded, and then use a stapler, glue, or tape to stick the star to the string.
Countless stars can be made this way, and all can be attached to the string or yarn. The extra strings at the edges can be left hanging.
8. Poppy Wreath
Either you opt for a sea of cut out poppy flowers as scenery, or you can go for this elegant poppy wreath.
Materials
Scissors
Printer
Paper
Crayons
Paper plate
Glue
Instructions
Your child will require two copies of the printed template.
Your child can pick any color to paint the wreaths as per his or her choice.
Help your child to cut out the poppies in the right shapes.
Now carve out the center of the paper plate so that it looks like a round donut; this will be used to make the base of the wreath.
It is up to your child if they want to add some more color; in that case, they can color the base of the wreath- green or brown.
Now the second last step requires your child to start pasting the poppies onto the paper plate.
Give a finishing touch by taking a bow and pasting it on the wreath; you can use a yarn also to stick behind the wreath if you plan to hang it.
Thus Veteran’s Day is an extremely important day of offering respect, gratitude, and happiness to those who honor the army and serve the army unconditionally. It is important that your child understand the importance of this day and indulges in some fun activities to learn about its minute details.
Also Read: Veterans Day for Children
Read more

25 Best Children's Day Gift Ideas for Kids
Children’s Day is celebrated on November 14 every year as it is the birth anniversary of Pt. Jawaharlal Nehru, the first prime minister of independent India. He was fondly called “Chacha Nehru” by kids. After his death in 1964, his birthday was decided to be celebrated as Children’s Day. Every school celebrates Children’s Day, but this time you can surprise your kids, too. Kids love receiving gifts and even a small gift can make them happy. But we know shopping for kids is always hard, and when you want to gift them something other than a toy, then double the thinking. So here are a few great ideas for gifts that you can buy.
Children’s Day Gifts That Parents Can Give to Their Kids
Children’s Day is the perfect time for parents to make their little ones feel extra special. A thoughtful gift, big or small, can fill their day with smiles and lasting memories.
1. Piggy Bank
Gifting a piggy bank to your kid is a great idea. It will not only serve as a traditional gift but will also teach your kids how to save and use the money. You can show your kid how to put money inside the bank, accumulate it, and use it for his own benefit in the future. This will be a valuable gift for your child for Children’s Day.
2. Books
Gifting a fun picture book or a light storybook can be an excellent Children’s Day gift for preschoolers. Choose books with attractive pictures, fun characters, and a simple story. These stories also come with moral values, which will helo in a child’s upbringing. You can read the story to your child before bedtime the same day in fact! Remember, books are true friends of humans.
3. Box of Chocolates
Are you planning to gift milk chocolates to your kids on Children’s Day? Go ahead and buy it for them. If you are worried about the sugar, make sure to buy a smaller box tied with a pretty, colourful ribbon. Let your child indulge in sweets on this day; you have the other days of the year to make sure he eats healthy!
4. A Digital Cartoon Wrist Watch
This is a great gift for your kid if you are teaching him how to read the clock. He will feel proud of this Children’s Day gift as it can make him feel like a true ‘adult’ who can read the time. Choose a watch that is made of a material not easily breakable and has your child’s favourite cartoon character on it. You can order it online, too.
5. Princess Dolls
Every girl wants to be a princess. Well, at least to a certain age. Why not get your daughter a pretty princess doll for Children’s Day? It can be Elsa from Frozen or Cinderella or Rapunzel from Tangled. Princess dolls are guaranteed to make little kids shriek with joy.
6. Video Games
Kids these days are quite tech-savvy than we were at their age. Video games can make a great Children’s Day gift if your child likes playing games. But make sure to set a limit to stop them from spending too much time on video games. You also need to protect your little one’s eyes so set rules at the same time while gifting them the video game.
7. Potted Plant
This is a unique gift choice for your child, but worthwhile all the same. Find a cute potted plant and tie a bright ribbon around it. Add a card with an interesting fact about the plant. When you gift it to your child, take a few moments to explain how he should take care of it himself and give it water and sunshine as needed. Tell him the plant will be like his baby to look after. The responsibility assigned will make your child feel important and proud. And they will be ready to take responsibility in the future as well.
8. Magazine Subscriptions
Get your child a magazine, book, fact magazine, or comic subscription this Children’s Day. You can opt for monthly or weekly subscriptions to test the magazines and then increase the subscription period. Your child will surely have something to look forward to every month. And receiving a mail addressed solely to him will also make him feel proud.
9. A Recipe
Children enjoy cooking once in a while. If your child likes to cook and try out new recipes, you can give him or her a unique gift, i.e., a recipe which he can try on his own easily. It would serve as a great DIY gift for Children’s Day. Gift him a recipe for a cake or cookies, buy all the ingredients, and keep it ready. Then ask him to bake and assist him if he needs help. There are many recipe books for kids available online as well.
10. Love Jars
This is an interesting gift among Children’s Day handmade gift ideas. Get a mason jar or a jam jar and tie a brightly coloured silk ribbon around it. You can also stick a nice photo of you and your child on the front. Fill the jar with notes of love and encouragement for your child, special memories you have shared with him, funny jokes, limericks, and so on. Tell your child that every morning, he can pick one of the notes to read for the day. The excitement will keep him happy all day!
11. Fancy Costumes
Children look up to comic characters. It can be Spiderman or Princess Moana or even Doremon. Why not gift them their favourite person’s costume on Children’s Day? You can easily order it online, and your child will be extremely excited to dress up in his dream costume.
12. Voucher Book
This is a simple gift, but you can prepare a decorated voucher book for your child this Children’s Day. Each voucher can be for a different activity your child can redeem from you, like for “a movie night”, “a bear hug” or “a piggyback ride” or even a “dance along with marathon”. Keep it quirky and fun by keeping your child’s interests in mind. He will be eager to try those vouchers soon.
13. Puzzles or Board Games
Children love to exercise their minds and think up strategies, so a puzzle or a board game will be a perfect Children’s Day gift. Try getting them Snakes and Ladders, Chess, Beginner’s Scrabble or a nice picture puzzle of their favourite character. You can even play these games with your child and have a great time together.
14. A Black or Whiteboard
Kids love to draw or play teacher-teacher. Getting them a blackboard or a whiteboard for Children’s Day can be perfect for those activities. They don’t need to waste paper anymore for drawing, and it can also be a great teaching tool for you to use in the future.
15. A Bicycle
Although this is a slightly bigger gift, it is perfect to make your child get out of the four walls of the house and participate in outdoor activities. You can teach him to ride a bicycle and you can have fun together while doing it! Initially use support wheels, once your child is able to balance on the cycle, you can remove the wheels.
16. Colouring Book and Colours
Source: Pinterest
Colours play a crucial role in a child’s brain development and every kid loves to draw and colour. What would be better than gifting your child a colouring book and set of colours this Children’s Day. Colouring and drawing will boost their brain development and keep them engaged. You can look for themed books like one with Marvel characters, Disney characters, or random cartoons.
17. DIY Project Activity Kids
Source: Pinterest
Activity kit sets are a perfect way to engage children in learning and enjoyment. These activity kit sets contain puzzles, clay moulds, DIY craft items based on themes, and more. The Do-It-Yourself activities are great for a child’s learning. On this special day, you can spend some one-to-one time and enjoy crafts with them.
18. Diary
This would be a lovely gift as your little one will love to pen down their thoughts. It reinforces the idea that writing isn’t meant to relate to studies alone, but they can also write to express their emotions. It will also help build their journalling skills.
19. Art Supplies Set
Encourage your child’s creativity with a thoughtfully curated art supplies set. Include a variety of colored pencils, markers, paints, brushes, sketchbooks, and other artistic tools. This gift will inspire them to explore their imagination and express themselves through art.
20. Educational Board Games
Enhance your child’s learning while having fun with educational board games. Choose games that focus on subjects like math, science, language, or geography. These interactive games not only provide entertainment but also promote critical thinking and problem-solving skills. It’s a gift that combines learning and play!
21. Personalized Water Bottle
Hydration with a personal touch! Brightly designed bottles with their name make school lunches and outdoor playtime extra special.
22. Cartoon Character Backpack
Let their favorite hero travel with them! A fun, lightweight backpack featuring beloved characters makes school or outings feel like an adventure.
23. Gardening Kit for Kids
A hands-on way to learn patience and care. These small pots, soil, and seeds let kids grow flowers or herbs and pride in their own little garden.
24. Kids’ Cooking Set
Tiny chefs in the making! A mini cooking set lets children safely whisk, mix, and bake simple treats — a perfect parent-child bonding gift.
25. Memory Scrapbook Kit
Capture moments that matter! With stickers, photo slots, and craft space, this scrapbook lets kids design their own keepsake of special memories.
Children’s Day is a special day for kids, but it is important to remember that you have to treat your child like every day with him or her is special. Treat them with simple gifts like this every once in a while. After all, you don’t need a particular day to celebrate your love for your children!
Also Read:
Craft Ideas for Children’s Day
Children’s Day Quotes,Wishes and Messages
Children’s Day Celebration Ideas and Activities
Read more

15+ Fun and Easy Children's Day Craft Ideas For Kids
Planning a little party for your child and his friends this Children’s Day? Or looking for ideas to keep him engaged and celebrate this special day by spending time with him? You’ve come to the right place! Craft activities are not just fun to do, they also boost your child’s creativity and imagination and give you some fun one-on-one time with them as well. So this Children’s Day, get your little one’s creative juices flowing with these fun and exciting Children’s Day crafts activities.
Simple Art and Craft Ideas for Children’s Day
Here are a few ideas that that can be easy enough for your tot to do on his own or under your supervision (especially where scissors are involved!). Whatever the case, oodles of fun are guaranteed!
1. Paper Pinwheel
You must have made and played with these as kids – now it’s time to teach your little one how to make a wonderful little pinwheel that moves with the wind!
What You Will Need
A sheet of paper (decorated or plain)
Unsharpened pencil with eraser
Crayons
Scissors
Ruler
Sharpened pencil
Ball pin
How to Make
Start off by cutting a square from the sheet of paper, with each side measuring 15 cm, and decorate the square with crayons.
Mark the centre of the page, measuring or eyeballing it. Using the ruler and pencil, draw two diagonal lines which extend from one corner to the other. The lines should cross at the centre of the page.
Once the lines have been drawn, mark a point on each line (about 7 cm away from each corner). Cut on the line from each corner up to the marked points.
Erase pencil marks (except for the centre point).
Now using the pin, punch a hole in the centre as well as at the tips of the corners.
Use the pin to poke through the point at one corner and curl it towards the centre without folding it (to look like a flower petal). Hold it in place and curl the remaining three towards the centre.
Push the pin through the centre hole. Hold a pencil with an eraser on a flat surface and align the centre of the pinwheel against the eraser, and push the pin into the eraser.
The pinwheel is now ready! Blow at it or hold it against a light breeze to see it move!
2. Paper Plate Mask
These fun and colourful masks are not just easy to make, but your child can always use them to indulge in pretend play later!
What You Will Need
Paper plates
Pencil
Sketch pens
Paint and paintbrushes
Decorative materials like glitter, stickers, etc.
Scissors
Ribbon or paper straw
Glue
How to Make
Use a pencil to draw the shape of the mask on the paper plate. The shape and size should be large enough to accommodate your child’s facial features. You can find various designs on the Internet and even print out a design for reference.
Cut out the mask and the eye-holes. To get symmetrical holes, fold the plate in half lightly, and cut along the outlines.
Paint or decorate the mask using sketch pens, paints, glitter and so on. Place it on a newspaper or another paper plate to avoid a mess.
Once done, punch holes on either side of the mask so that a ribbon can be strung through it. Alternately, you can also stick a paper straw (decorated with paint) on one side for your child to hold up the mask.
Your child can now pretend to be different characters using his mask!
3. Pistachio Shell Photo Frame
Remember this fun activity from your childhood? Time to create new memories with your little one and preserve it in a handmade pistachio shell photo frame.
What You Will Need
A sheet of cardboard
Pistachio shells
Paint and paintbrushes
Sketch pens
Glue
Scissors
Decorative materials like glitter, stickers, etc.
Sheet of plastic
How to Make
Start off by shaping the sheet of cardboard into an attractive shape – you can leave it as a plain square or rectangle or try different shapes like that of a heart, flower, or your child’s favourite cartoon character.
Decorate the sheet using sketch pens, paint, and other decorative materials. Do the same for the pistachio shells. You can paint it with different colours and patterns, and get really creative with it.
Glue the pista shells onto the sheet of cardboard in the pattern you prefer, but ensure that there is ample space in between for pasting a photograph.
Once dry, paste a photograph on the sheet, such that the shells are framing the image.
Cover the photograph with a piece of clear plastic to protect it from any scratches or damage. The piece of plastic needs to be bigger than the photograph so as to cover it from all sides.
Hang up this beautiful creation in your child’s favourite spot at home!
4. The Hungry Caterpillar
This cute little caterpillar takes only a few strips of paper to create – have a look!
Source: Pinterest
What You Will Need
Red, green and black construction paper
Googly eyes
Glue
Scissors
Stapler
How to Make
Cut strips of equal length from the construction paper. One strip of red and 4-5 strips of green paper should do. The red strip will be for the caterpillar’s head, while the green will be for its body.
Cut out features like antennae and a little mouth from the black construction paper.
Make a paper chain using the strips cut – start off by creating a circle with the red paper and staple the end together. Next, thread a strip of green paper through the red circle and staple the ends. Keep doing this till you’ve formed a chain.
Glue on the googly eyes, antennae, and mouth cutouts on the red circle to give the caterpillar a face.
The cute hungry caterpillar is ready! Put out some paper leaves in front of it, so it has something to eat!
5. Origami Bookmark
Is your preschooler turning out to be a voracious reader? Help him create these adorable origami bookmarks to help encourage his reading habits!
What You Will Need
A square sheet of coloured paper (15 cm)
Construction paper in different colours (to make decorative features)
Scissors
Glue
Decorative items like glitter, stickers, googly eyes, etc.
How to Make
Fold the sheet of paper in half from one corner to the other to form a triangle.
Fold the bottom-left corner up to the top corner and glue it in place. Do the same with the right corner.
Turn the paper over. Fold the bottom corner (only the top layer) up to the top corner. Once the fold is made, unfold it again and fold it back into the pocket just created.
Use construction paper to create different features like eyes, nose, mouth, teeth, etc., and glue them onto the bookmark.
As far as Children’s Day crafts for preschoolers go, this bookmark is a very cute and useful thing your child can make to help him along in his reading as well.
6. Paper Ice Cream Cone
Let your little one enjoy making a yummy-looking ice cream cone that won’t melt when left out!
Source: Pinterest
What You Will Need
Construction paper (brown and one colour of choice)
Tape
Buttons
Rough paper
Sketch pens
Decorative materials like glitter, stickers, etc.
How to Make
Decorate the sheets of construction paper with different colours, sketch pens, glitter and so on. Cut out even strips of the coloured paper (except the brown one).
Fold the brown paper to form a cone and tape it along the edges to secure it in place.
Crumble up a sheet of rough paper into a ball and tape it on top of the cone.
Cover the ball with strips of decorated construction paper to form a colourful ice cream scoop.
Glue a few buttons onto the scoop to resemble sprinkles, and the ice-cream cone is done!
7. Flying Rocket
Here’s a little rocket to excite your little scientist!
Source: Pinterest
What You Will Need
Paper towel tubes
Paint and paintbrushes
Construction paper
Aluminium foil
Tape and glue
Scissors
Clothes pegs
Mesh bags
How to Make
Paint and decorate a paper towel tube, and paint the clothes pegs as well. Let them dry.
Cut a semicircle out of a construction paper and fold it into a cone; secure it in place with tape.
Cover the cone with foil. Once done, tape it to the top of the cube.
Clip the clothes pegs at the bottom of the tube.
Cut up the mesh bags into little strips, and tape the strips at the bottom of the tube.
Your rocket is now ready to fly!
8. Bird’s Nest
This craft activity will surely make your little animal lover happy!
Source: Pinterest
What You Will Need
Brown construction paper
Paint and paintbrushes
Paper plate
Scissors
Tape and glue
Popsicle sticks
Pom poms or cotton balls
Googly eyes
Scraps of different coloured construction paper
How to Make
Cut a paper plate in half and tape the edges together such that it forms a hollow container or nest.
Paint the paper plate brown. Shred the brown construction paper into little strips and stick them onto the ‘nest’ to give it some texture.
Stick googly eyes and little beaks (made out of the scraps of construction paper) onto the pom-poms or cotton balls to make little birds.
Stick the ‘birds’ on popsicle sticks.
Once done, place the sticks in the ‘nest’, such that only the ‘birds’ are popping out from the nest, while the sticks can slide through the gap between the two halves of the plate.
Use the popsicle stick to slide the birds up and down whenever they’re hungry for a little nibble!
9. Paper Plate Bag
This one’s not just going to be fun to make but will also be handy for your child to carry around his little supplies, like his toys and crayons!
Source: Pinterest
What You Will Need
Paper plate
Ribbon
Paint and paintbrushes
Construction paper or foam paper
Decorative items like glitter, stickers, buttons, etc.
Scissors
Tape and glue
Stapler
How to Make
Cut a paper plate in half and tape the edges together such that it forms a hollow container or nest.
Paint the paper plates with any colour and decorate them with different things like stickers and glitter.
On the side facing out, add a little piece of construction or foam paper to resemble the latch. You can even stick a little button on it to make it look more like a bag.
Staple a ribbon to both sides of the purse to form a handle.
Place lightweight things like toys or art supplies in the bag, and it’s ready to go!
10. Sponge Sailboat
It’s off to the seas for your little one with these little sailboats!
Source: Pinterest
What You Will Need
Construction paper
Craft sticks or long toothpicks
Paint and paintbrushes
Sponges
Scissors
How to Make
Cut out small rectangular pieces from the construction paper and paint them.
Stick the long toothpicks or craft sticks into the sponges. You can even cut the sponge into different shapes if needed.
Insert the toothpicks through the pieces of paper, such that it goes through the bottom end and comes out through the top end, forming a mast.
You can place these little boats in the water and see how they float!
11. DIY Stamp Craft
We all have loved playing with stamps since we were kids. Let’s teach our kids to make the same and have endless fun with the stamps. They can use these DIY stamps anywhere, like printing on paper, greetings, etc.
Source: Pinterest
What You Will Need
Bottle caps
Blank paper
Foam
Paint or ink
Glue
Scissor
How to Make
Draw fun shapes, such as a flower, star, moon, heart, tree, etc., on the foam and cut out using a scissor.
Paste these cut-out foam shapes on the top of the bottle cap using glue.
Now dip the bottle cap from the foam side into the paint slightly and stick the cap on the blank paper.
The shape of the cut-outs will come out. You can use different colours for a vibrant painting.
12. Leaf Printing
Painting is always fun. What if we add nature’s blessings to it? More like using natural resources for our painting, like leaves? Different trees have different kinds of leaves. By doing this craft, kids will not only enjoy painting but also learn about trees and their kinds.
Source: Pinterest
What You Will Need
Different shapes of leaves from the outdoors
Acrylic paint or watercolours
White paper
How to Make
Take different types of leaves, wipe them with damp tissue so as to remove any dirt. Let the leaves dry.
Take the dry leaves, paint the back of the leaves with a generous amount of paint using a paintbrush.
Now press the leaf gently onto the white paper, making sure the edgy part of the leaf makes an impression on the paper.
13. Paper Fruit Basket
Fruits are colourful and refreshing. No wonder they are loved by all.
Source: Pinterest
What You Will Need
Drawing paper 4-5
Acrylic paint or watercolours
Paintbrushes
Pencil
Scissor
Glue
A small ribbon and decorative items(optional)
How to Make
Draw some of your favourite fruits on the white drawing paper and cut them appropriately.
Paint the fruit cut-outs with their respective fruit colours.
Draw a good-sized fruit basket on the drawing paper. Make two similar shapes, one for the front and one for the back.
Paste both sides of the basket leaving the storage compartment. After pasting, it should look like a paper fruit basket.
Paint the basket cut-out with your favourite colour. Decorate further the basket with whatever craft material you have, like glitter, ribbons, stickers, etc.
Place the painted fruits in the basket. Voila! Your fruit paper fruit basket is ready!
14. Creative Lollipop Card
This card is sure to impress your child’s friends, and here’s how you make it.
Source: Pinterest
What You Will Need
Sweet stamps
Card paper (any colour)
Card stock (different colours)
1 big button
1 taffeta ribbon (narrow)
Various buttons (neutral shades)
Glue dots (mini rolls)
Circle punch
Safety scissors
A pencil
A set of markers
A lollipop stick
How To Do
Tell your child to draw various circles on the different shades of card paper. Cut these using scissors and fold your card paper in half to create the base.
Layer the circles on the card’s front to resemble a lollipop. Use the circle punch to make a hole and loop a ribbon around it.
Paste the lollipop stick behind your circle to give it a 3D effect.
Tie a bow at the top using another ribbon.
Ask your kid to create their favourite designs using the glue dots on the front.
Let the glue dry up, and finish the card by writing a name or message on the front with colourful markers.
15. Children’s Day Button Flower Card
Button flower cards are not only easy to make but also look very cute. You just need a few different coloured buttons, some craft papers, and that’s it! Let’s have fun.
Source: Pinterest
What You Will Need
2 sheets of coloured craft paper
Different coloured buttons
Glue
Scissors
How To Do
Get a few coloured craft paper sheets, preferably two to three. Pick colours pleasing to the eyes, like sky blue, light pink, etc.
Take green-coloured craft paper, and fold it into a rectangle.
Now, cut strips from the edges by using scissors. This will be the stem of the flowers. Repeat these a few times to make stems for different flowers.
Place the stems on top of one sheet of coloured craft paper, and arrange the buttons in a way it resembles flower petals in a circular pattern.
Glue the stems and buttons in place on the first sheet.
Tie up the second sheet with the first one, get a marker, and write ‘Happy Children’s Day’ with a desired coloured marker.
Tell your kids to gift this to their friends and amaze their peers with their creativity.
16. Polka Dot Vases
These polka dot vases are not only cute, but they’re the perfect children’s day gift. Help your child make these if they’re planning to gift them to their friends.
Source: Pinterest
What You Will Need
Polka dot stickers
A ribbon
A pair of safety scissors
A few glass bottles (emptied out)
Double-sided tape
How To Do
Ask your child to make dot patterns all over the glass body using the polka dot stickers.
Once done, ask them to measure the width of the base and cut up the ribbon according to that measurement. Make sure to cut some extra ribbon on the same length to loop the ribbon around.
Loop the ribbon and stick it in place using the double-sided tape, and you’re done!
17. Kids’ Postage Stamp
Get your creative juices flowing because we’re about to have a fun ride with this one!
Source: Pinterest
What You Will Need
Glue
A sheet of paper
A ruler
Glitter (of different colours)
A marker
Coloured pens
How To Do
Draw a big rectangle with a marker and put some space around the edges. Use the ruler to measure the rectangle’s size.
Fold the sheet of paper in half and use a punching device to punch holes around the solid white border (the outside of the rectangle).
Now draw along the rectangle’s edges a black marker line to make a postage stamp silhouette.
Sketch out tree designs or any natural elements using sketch pens. Colour the rectangle’s insides and write some children’s day text.
Add the date below, make your child sign and voila – your children’s day postage stamp is ready!
18. 3D Nature Cube
Want to celebrate this Children’s Day the cool way? Then make this 3D Nature cube with your kids and prepare to watch faces light up in admiration.
P.S.: Get an adult to help you out with this activity.
Source: Pinterest
What You Will Need
Cardboard box
X-acto knife
Flowers, petals, and any nature items from your backyard/garden
Sticky contact paper (transparent)
A pair of safety scissors
A set of markers
A thread of string
How to Do
Get the cardboard box and make rectangular cutouts on each face using the X-acto knife.
Fit the contact paper into the rectangular cutouts with the sticky side out.
Get the flowers, petals, or any other items you’ve collected. Glue them to the sticky side.
Repeat and decorate until you’ve got lovely natural designs sprawling over each side.
You can also make some origami or paper lanterns inside the cube to add more life or vibrancy to your 3D nature cube.
19. Paper Bag Ninjas
The perfect way to kickstart fun and frolic on children’s day is to make a bunch of cool-looking paper bag ninjas. Show their friends who their new allies are and what makes them awesome.
Source: Pinterest
What You Will Need
Paper Bag
Cardstock paper (any colour)
Googly eyes
Metal paper fasteners
Punchole machine
Scissors
Glue
Pencil
Ruler
How To Do
Cut 3 inches from the bottom of your paper bag to make the ninja body height.
Now, cut out a rectangle piece of 5 X 6 inches from the cardstock paper and two strips of 5 X 1 inches for the face.
Additionally, cut two long strips of cardstock paper, at least 1 inch in width, for legs and arms.
Attach the body and face pieces to the paper bag to make the ninja puppet. Leave a little space between the thin strips to make a face and leave an opening for the eyes.
Punch a few holes into the paper bag for arms and add the arms to your puppet. Use the metal fasteners to fasten the arms and repeat the same for the other side.
Place the long strips for the legs at the bottom of the paper bag. Punch holes into the legs and fasten them to the front using metal paper fasteners.
Paste a pair of googly eyes on the opening made between the two long paper strips for the face.
Move the legs and arms a bit to see if they’re held in place well.
You can get creative by drawing cool design patterns on your ninja arms and legs to make them look unique and stylish.
There you go. Your paper bag ninja is ready! Let your kids take over, and watch them have fun with their stealthy friends.
20. Paper Plate Puppets
Kids love storytelling, and what better way to bring their stories to life than with their own handmade puppets? This craft encourages creativity, imagination, and fine motor skills.
What You Will Need
Paper plates
Markers, crayons, or colored pencils
Glue
Scissors
Craft sticks or straws
Fabric scraps, yarn, buttons, and other embellishments
How to Make
Allow the kids to draw and color characters or animals on the paper plates. They can create as many characters as they like.
Cut out the characters using scissors. Be sure to leave a small portion at the bottom to attach to the craft stick or straw.
Decorate the characters with fabric, yarn, buttons, and other craft materials. This is where their imagination can run wild!
Attach a craft stick or straw to the bottom of each puppet using glue. Allow it to dry.
Once dry, the kids can use their new puppets to act out their own stories or put on a puppet show for family and friends.
We hope you’ll enjoy making these fun crafts for Children’s Day with your little one and will have a blast. No doubt, these are also going to form precious memories for you and your child to cherish in the years to come!
Also Read:
Children’s Day Celebration Ideas
Unique Children’s Day Gift Ideas to Buy
Fun Children’s Day Activities, Games and Celebration Ideas
Read more
30+ Children's Day Celebration Ideas and Activities
One of the most memorable days of the year for a child is Children’s Day, which is dedicated entirely to kids. This special day gives children the opportunity to make lifelong memories. As a parent, you probably want to plan something special and unique each year, which can be hard when you’re busy throughout the day. Don’t worry; we’re here to help! Looking for Children’s Day celebration ideas? Here is a comprehensive list of fun ways and activities to host on Children’s Day, ensuring that each celebration becomes a cherished chapter in your child’s growing years. It will be difficult to pick a favourite!
Why Is Children’s Day Celebrated?
Children’s Day is celebrated on November 14th all over India. This signifies the birthday anniversary of Jawaharlal Nehru, as he was fond of children and was lovingly called Chacha Nehru by kids across the country. He always believed that children should be given the utmost love and affection, as nurturing them and raising them in the right way would determine the future of India. After all, they are the leaders of tomorrow!
Jawaharlal Nehru believed that education is essential for every child. He also helped set up some of the most reputed schools in India today. Every Children’s Day, schools and colleges set up cultural programs to celebrate both Nehru Ji’s birthday and organise fun-filled activities. Since children are the centre of attention on this day, Children’s Day is looked forward to every year by kids across the country.
17 Fun Ways to Celebrate Children’s Day
Wondering how to celebrate Children’s Day? Remember that the most important thing is for your child to be surrounded by loved ones. Here is a list of 17 creative ideas for Children’s Day.
1. Attend Special Events
Children’s Day is a special day for kids. It’s like a combination of their birthdays, Christmas, and other celebrations. To celebrate this fun day, most malls, parks, and stores also have great events planned for children of all ages.
2. Picnics
Celebrate this special day out with your kids with a good old-fashioned picnic, including kids’ beloved juices, sandwiches, a blanket, etc., at the park. Everybody loves picnics, but Children’s Day picnics are all about family and spending time with your kids. You can make your children’s favourite food and centre the picnic around them.
3. Disney Party
Disney characters are an iconic part of most people’s childhood, so planning a Disney themed party on Children’s Day will make your kids’ party special and fun. You can get themed Disney character costumes, decorations relating to Disney’s fairy tales, and even screen some popular Disney movies.
4. Dance Party
Dancing is fun; there is absolutely no doubt about that. A great and cheap way to celebrate Children’s Day is to clear up the furniture in your living room, put on some of your kid’s favourite songs, and dance it out with them all evening. Once they’re tired, finish the day with ice cream and their favourite foods to experience a truly magical bonding experience with your kids on one of their favourite days of the year.
5. Camping
Children’s Day is all about having fun with your kids. Build some classic memories with them on a camping trip to one of your favourite family spots for a night under the stars. Take some snacks and marshmallows to roast by the bonfire while you bond with your children over famous camping stories.
6. Movie Marathons
There are few things that kids enjoy more than a good movie. Organise a movie marathon for your kids, this Children’s Day, with a screening of their favourite movies, popcorn, and a blanket to cuddle under with them. These are the Children’s Day memories that last, and they are the ones that are the most special.
7. Bake with Them
Sometimes, being a part of the preparations is as special as the main event. Have your kids kneed the dough with you, add some flavour, make some icing, and of course, have them taste the cookie/cake dough while you bake together. You can give them cookie cutters in different shapes, sprinkles, and other decoration items, and this will enhance their creativity. Once you’re done, sit with them and have a small party where you eat those special cookies.
8. Visit a Water Park
Few things are as memorable as a family visit to the water park. Kids adore rides, ice cream, food, and shows at water parks. So, take them to an amusement park or a water park on this special day.
9. Pizza Party
Your kids and their friends, as well as their family, can have a fun time bonding over pizza. Organise a pizza party by baking or ordering your children’s favourite pizzas. You can make the night a little extra special with a chocolate dessert pizza. Make sure the pizza is accompanied by games to make the night a bit extra special.
10. Paint Party
Few things are as fun for kids as painting. This Children’s Day, get a lot of empty canvases and finger paints that are kid-friendly and let your children unleash their creativity. Make sure that you wash their hands clean after the night is done and put up their masterpieces on the fridge to appreciate for years to come.
11. Visit Old-age/Retirement Homes
Apart from parents, children are most loved and pampered either by grandparents or old-age people. If your kids do not have grandparents, then you can visit retirement homes every Children’s Day. Old-age people love kids; they will feel loved and welcomed, and on the other hand, your kids will become more compassionate towards senior citizens. If your kids have grandparents, then you can simply visit them and spend a cheerful day with them.
12. Visit an Amusement Park
Amusement parks are loved by children of all ages! After all, it offers many ride and activity choices, which are so much fun. From going on fun rides to simply strolling around the park, this will surely be on the kids’ list of awesome things to do on Children’s Day!
13. Storytelling Session
This involves inviting a skilled storyteller to entertain children by narrating captivating stories.The storyteller engages the children by making the tales interesting and may even involve them in the storytelling process. It’s a way to ignite their imagination and love for stories.
14. DIY Science Experiments
This involves organizing simple and safe science experiments that children can do at home. These experiments are designed to be hands-on, allowing kids to actively participate in the learning process. The aim is to make science engaging and enjoyable, fostering a love for learning.
15. Art and Craft Marathon
Set up an art and craft station at home with a variety of materials like colored paper, glue, scissors, markers, and more. Let your children unleash their creativity by making handmade cards, drawings, or other crafts. You can turn it into a marathon by setting challenges or themes for different crafting sessions.
16. Sports Day
Organize a mini sports day at a local park or in your backyard. Plan simple games like sack race, three-legged race, and tug-of-war. Create certificates or medals for the participants to make it a memorable and competitive Children’s Day celebration.
17. Virtual Talent Show
Host a virtual talent show where your kids can showcase their talents, whether it’s singing, dancing, magic tricks, or any other skill they possess. Invite friends and family to join the virtual event and cheer for the young performers. This not only celebrates their abilities but also provides a platform for them to express themselves creatively.
14 Interesting Activities for Children’s Day
Children’s Day isn’t all about parties and outings. The activities you plan for your children on this day can be just as special. Here are a few Children’s Day games and activity ideas to try this year.
1. Treasure Hunt
One of the most popular games for Children’s Day, a treasure hunt is a perfect activity to enable your children’s fun-loving and adventurous nature while keeping them occupied and entertained all through this day. Make the prize a Children’s Day themed one to emphasise the special nature of the game for the day.
2. Enact a Play
Children evolve by engaging in different creative activities. On this day, you ask your kids and their friends to enact a play by copying a story or creating an original play by themselves. For a helping hand, you can direct the play and they can act. Activities like these are harmless and will only boost their creativity and confidence.
3. Pool Games
A day at the pool on this Children’s Day can be the perfect recipe for lifelong memories. Add to that fun children’s pool games, and it is a recipe for an unforgettable day. Make sure you take a beach ball with you, so they can play games like water polo. You can also teach them Marco Polo and other fun pool games on this day to make it special.
4. Piñata
This Mexican traditional party game is loved by everyone, be it kids or grown-ups. This Children’s Day, make a cardboard piñata stuffed with healthy and yummy treats and enjoy this game with your kids. Don’t fret if they can’t find or break the piñata. Give them the rewards at the end of the day, anyway, and watch their eyes light up with this fun Children’s Day game.
5. Twister
Twister is an energetic and fun game to be enjoyed with family and friends. On this special day, you can together as a family can play twister and have lots of fun. Whoever conquers maximum colours will win the game. It is important to make sure you don’t make the game too competitive as twister can be harmful to your kids if they overextend or twist their bodies too far to win.
6. Hiking
Some of the best memories that can be made are those sunrises or sunsets over a mountaintop. This is especially true with your kids. Take them out for an easy hike this Children’s Day and have a picnic at the top of the mountain or hill. Watch a sunrise or sunset at the peak before making your way back. Maybe, stop at a local restaurant and order some of your children’s favourite desserts.
7. Take Them to the Planetarium
Kids are full of curiosity. Fill their sense of wonder with a family trip to the planetarium, this Children’s Day, so they can learn all about the stars and planets in the universe. This will entertainas well as educating them. Remember, every astronaut today once began with a small visit to one of these planetariums.
8. Take Them Bowling
Bowling is a great way to bond with your children, so take them out this day and bowl a few frames. Make the day a little extra special by taking them for ice cream and sodas after you’re done playing at the bowling alley.
9. Go to the Arcade With Your Kids
An arcade is a special place for kids. There are prizes, fun games, tickets, and the environment is full of fun and bliss. On this occasion, take your kids for a day at the arcade. Treat them with delicious snacks, ice cream, and sodas, and your kids will have an unforgettable Children’s Day.
10. Have a Costume Party
There aren’t many activities that are as fun or creative for kids as costume parties. The same can be said for adults, too. In this costume party, kids can dress up as their favourite characters, dance, sing, eat cake, play in a bouncy house, and enjoy fun party games like pin the tail on the donkey or duck, goose don’t have much of a downside. Remember, your costume party should also have Children’s Day themed party favours.
11. Go-Karting
Go-karting is an enjoyable and safe family fun activity that all children love to do. This Children’s Day, make sure you go to your local tracks because they have unbelievable discounts on special days. Race with your kids, savour themed foods and snacks, and enjoy a memorable Children’s Day.
12. Balloon Pop Relay
Create a balloon pop relay race for the kids. Fill balloons with small treats or notes and tie them to a string. Divide the kids into teams and have them race to pop the balloons by sitting on them or using other creative methods. The team that pops all their balloons first and retrieves the treats or notes wins.
13. Bubble Wrap Stomp Painting
Spread out a large piece of bubble wrap, add some paint, and secure it to the ground. Let the kids wear old shoes and stomp on the bubble wrap to create a unique and colorful painting. This messy and creative activity is sure to bring lots of laughter and artistic expression.
14. Musical Chairs With a Twist
Put a twist on the classic musical chairs game by adding fun elements like dancing or incorporating small challenges for the kids to complete when the music stops. This variation adds an extra layer of excitement and keeps the children engaged in the game.
So these were some of the many ideas to celebrate Children’s Day. Children’s Day is one of the best days of the year for kids. It should be filled with fun, excitement and joy. Make sure that the Children’s Day activities for kindergarteners you plan are safe and unique. It is also worth remembering that making this day special doesn’t always have to be expensive. It just has to be special for your kids, so instead of buying them expensive gifts, a great way to spend the day would be doing activities like arts and crafts with them. Have a great, unique and special Children’s Day with your children.
Also Read:
Gift Ideas for Children’s Day
Children’s Day Celebration Ideas
Children’s Day Craft Ideas for Kids
Children’s Day Quotes, Wishes and Messages
Read more
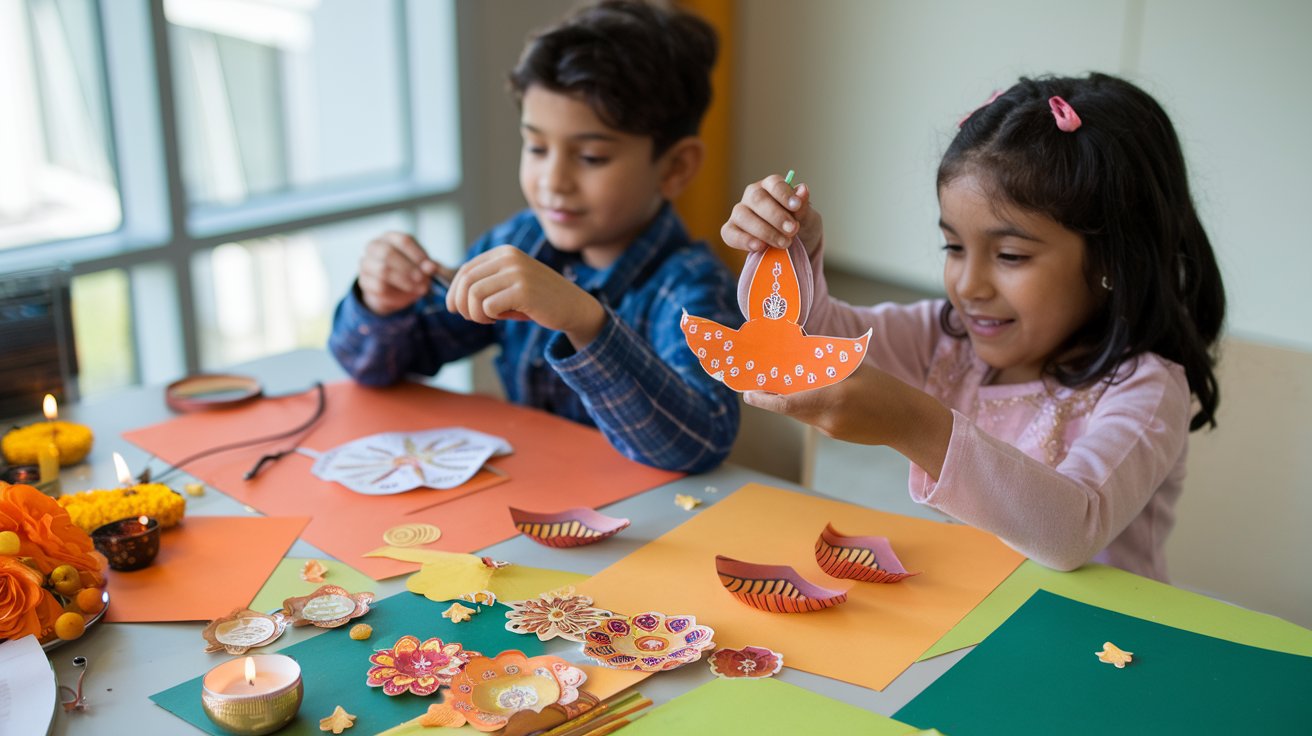
10 Easy and Creative Diwali Card Ideas for Kids
There is not much time for Diwali, and you must be very busy with the preparations already! However, have you started to think about the Diwali cards for kids yet? If you haven’t, to make things are easier for you, we are presenting to you 10 easy and creative Diwali card ideas for kids. Handmade cards are after all everyone’s favourite and carry with it a personalised touch of closeness that no ready-made card can convey.
Amazing Diwali Greeting Card Making Ideas for Kids
Keeping in mind your busy schedule, the ideas for Diwali cards for kids are simple and require just the basic materials. You would have to follow some super easy steps, and your handmade Diwali greeting cards for kids would be good to go! So, the following are 10 creative and easy handmade Diwali greeting cards for kids:
1. Bright As A Diya
The best representation of Diwali is surely a Diya!
Things You Need
Blank greeting card
Marble papers (Red and Yellow)
Pencil
Gum
Sketch Pens
How To Make
Take the blank card and draw the outline of a Diya as in the picture.
Tear the red marble paper into small pieces.
Carefully apply gum on the drawn picture and paste the marble paper inside the Diya to make a collage.
Use the yellow one in the same manner to fill the flame.
Write Diwali greetings inside the card using the sketch pens and your card is ready!
2. Do the Design
You certainly can’t have a Diwali without a beautiful and gorgeous rangoli.
Things You Need
Blank greeting card
Pencil
Sketch Pens
Colours
How To Make
Paint a Rangoli on the blank greeting card with season’s greetings written on it.
The Rangoli design can be something related to the festival like a Diya as shown in the picture.
You can make your child add some personalised greetings inside the card that her friends would surely love!
You can also add some glitters on the Rangoli at the end to make it look more attractive.
3. Burst Of Cracker
Your kids must be very fond of bursting crackers during Diwali. So, her friends too would love a cracker on their Diwali cards!
Things You Need
Blank greeting card
Pencil
Sketch Pens
Colours
How To Make
On the top of the blank greeting card, paint a burning or bursting cracker and colour it using bright colours.
Write season greetings inside the card along with Diwali messages.
4. Crack It Up
How about shaping the card in the form of a cracker? Kids would certainly be excited just by the look of it!
Things You Need
White mount board
Pencil
Sketch Pens
Colours
Scissors
How To Make
Paint a conically shaped cracker on the top of the mount board and colour it using bright colours.
Once done, cut through the outlines so that the shape of the card is that of the cracker itself. On the opposite side, write personalised greetings.
Kids can later use this as a bookmark as well!
5. Doodle It Out
Doodles are in these days and probably the best expression of a festival!
Things You Need
Blank greeting card
Pencil
Sketch Pens
Colours
How To Make
On the blank greeting card, guide your child to draw all the things that come to her mind when Diwali is being talked about.
She can doodle a variety of things like crackers, bombs, lights, candles, Diyas and so on.
Colour them using sketch pens and write Diwali greetings inside the card.
She can also add glitters, at last, to add create a festive effect.
6. Contrast Diya
Diwali is all about brightness and colours!
Things You Need
Blank Card
Watercolours (Three colours including Red and Yellow)
Pencil
Sketch Pens
How To Make
Take the blank card and draw a Diya on it as shown in the picture.
Since Diwali is all about bright lights, using bright watercolours would certainly give the card a feel of the festivity.
Colour the Diya using red colour as shown and the background using a contrast colour and let it dry for some time.
When it dries up, add greetings inside the card, and it is ready!
7. Lovely Lanterns
Colourful lanterns are not only an integral part of Diwali but a treat for the eyes as well.
Things You Need
Blank greeting card
Pencil
Sketch Pens
Watercolours
Coloured tapes
How To Make
Draw hanging lanterns on the greeting card like a shade over the Diwali messages written under them.
Colour them using bright shades of watercolours and write personalised messages inside.
You can also use colourful tapes as borders to make it brighter and more attractive.
8. Light it Up
The best description of Diwali would certainly be the “Festival of lights”. So, do not forget fairy lights while sending your greetings.
Things You Need
Blank greeting card
Pencil
Sketch Pens
Gum
Thread
Coloured papers (Preferably Yellow)
How To Make
Cut out pieces of the coloured paper in the shape of little fairy lights. While cutting them out, make sure that the papers are double layered so that the thread can be passed through.
Keeping the thread in between, stick the paper lights into the blank greeting card so that it seems that the lights have been hung.
Write Diwali messages inside, and the card is ready!
9. Welcome Home Doraemon
When it comes to kids, cartoons especially Doraemon is their favourite. So how about Doraemon wishing them a happy Diwali too?
Things You Need
Blank greeting card
Pencil
Sketch Pens
Colours
How To Make
Guide your kid to sketch Doraemon and colour it on the front side of the blank greeting card.
Then create a dialogue box on top of the sketch writing “Happy Diwali” on it such that it seems as if Doraemon is conveying wishes too.
Your kid can write her personalised wishes inside the card for her friends.
10. Diwali for animals
Crackers cause a lot of harm to street animals and children should be the first ones to be aware and spread awareness. A card explaining this would do this job right.
Things You Need
Blank greeting card
Pencil
Sketch Pens
Colours
How To Make
Guide your child to sketch some animals being hurt due to the careless use of crackers during Diwali.
She can explain her views about this in the form of a message inside the card which states how it Diwali for them too.
This would make the cutest idea of Diwali card making for kids!
FAQs
1. How can kids add a festive touch to their Diwali cards?
Kids can decorate their cards with traditional motifs like diyas, rangoli, peacocks, and fireworks. Adding glitter, glow-in-the-dark paint, and 3D elements makes cards more festive and exciting.
2. Are handmade Diwali cards suitable for gifting?
Handmade cards created by kids are a wonderful gift option for family, friends, and teachers, as they add a personal touch and express creativity. They’re suitable for both classroom activities and at-home celebrations.
Celebrating Diwali with handmade cards is a wonderful activity for kids that combines fun and learning. These Diwali card ideas give children a chance to showcase their creativity while bonding with family and friends. Whether it’s simple DIY decorations or colorful drawings, handmade cards are a thoughtful way for kids to send festive greetings. Inspire your child to make unique Diwali cards that brighten hearts and strengthen traditions.
Also Read:
Diwali Craft Ideas for Kids
Diwali Gift Ideas for Children
Lantern Making Ideas for Kids
Diwali Games and Activities for Kids
Read more
10 Easy Lantern Making Ideas for Kids
Lantern-making is a fun activity to get your kids’ creative juices flowing and to build excitement for Diwali. It’s also a great way to get children involved in decorating the house for Diwali, as they proudly see their hand-made lanterns hanging high and bright. Here is an article on 10 easy lantern-making ideas for kids.
What Is the Significance of Lanterns During Diwali?
Lanterns or akash kandils are a significant part of Diwali across India. The windows and doors of each house are lit by bright lights and decorations, at the centre of which you’ll see a beautiful lantern. But, why do people hang an akash kandil during Diwali? These are essentially a symbol of light, with the main idea being to eliminate any darkness and bring forth happiness in everyone’s life. The lantern also symbolises Krishna’s victory over the demon Narakasura, and is a form of celebration and happiness. While you can easily buy a beautiful akash kandil from the store, making one with your kid is an even better experience, as you can bond and prepare for the festival of lights together.
Hand-Made Lantern Ideas for Children
Listed below are easy lanterns that children of all ages can make. You can make these together with your child as a fun bonding activity. If you’re wondering how to make a lantern, here are 10 different types of lanterns and easy-to-follow instructions on making them.
1. Foam Lantern
Making Chinese/ foam lanterns is extremely easy, and can even be made by preschoolers. Here’s how to make a foam lantern at home.
What You Will Need
Foam sheets (of two different colours)
A stapler
Scissors
A ruler and pencil
2 clothespins
How to Do
Cut a rectangular piece of one foam sheet.
Then, roll it into a cylindrical shape and secure the edges with two clothespins to make the inner foam piece.
Cut a rectangular piece of the second coloured foam sheet (this piece should be 2 inches longer, vertically).
Fold it horizontally and cut slits along the folded side. Stop at least 1 centimeter away from both edges.
Draw lines using a ruler and a pencil to mark where the cuts should be, if your child is doing the cutting work. This will be the outer foam piece.
Now, it’s time to place the outer and inner foam pieces together.
First, join the top of the foam pieces by stapling them together (you will see that the outer foam piece is longer than the inner foam piece).
Then, join the bottom of the foam pieces by stapling them together (you will notice that the outer foam piece will balloon a bit at the centre, where the slits have been made).
Lastly, cut out a thin, long strip to make the handle of the lantern and staple it onto the lantern.
2. Pyramid Lanterns
These lanterns look beautiful and will light up your home during Diwali or a fun get-together.
What You Will Need
Paper
A pencil
A ruler
Colour pencils
Sketch pens
A paper puncher
Tape
A battery-operated candle
How to Do
Draw a triangle on a piece of paper and cut it out. This is your template.
Ask your child to colour a sheet of paper.
Using the template, draw four triangles attached to each other on the back-side of the coloured sheet.
Cut out the these four triangles together (do not separate them).
Tape the ends together.
Punch some holes in the pyramid or cut out any small shapes of your choice.
Place the paper pyramid on top of the battery operated candle.
3. Table Jar Lantern
This is probably one of the easiest lantern crafts for children to make all by themselves.
What You Will Need
A glass Jar
Glue
A brush for the glue
Colourful paper (origami paper, streamers, tissue papers work best)
Candles
A scissor
A battery-operated candle
How to Do
Cut the paper into different sized strips.
Using a brush, cover the outside of the jar with glue.
Then, start sticking the paper strips on the jar, one after the other.
Use more glue wherever required to stick strips in a way that they overlap each other.
Continue sticking until the entire jar is covered with the paper strips.
Once you finish, dab a layer of glue on the entire jar, on top of the glued on paper strips, and leave it to dry overnight.
In the evenings, place the candle inside the jar and light it up.
4. Paper Lanterns
This basic paper lantern for kids will brighten up your Diwali night. Here’s how to make a paper lamp at home.
What You Will Need
Card stock (any dark colour)
Tissue paper/ streamers (2-3 different colours)
A pencil or pen
A stationary knife
Scissors
Glue
A battery operated candle
How to Do
Decide on the size of your lantern and cut a rectangle shape from the card stock sheet.
Now, fold the rectangle equally in three folds, so that when we fold it, it becomes a triangle.
Now, draw a design on the middle portion of the card stock (any design that is easy for the child).
Using a stationery knife, cut out the design. Help your child do this if he is too young.
Then, using glue, stick the different coloured tissue papers on the inner side of the lamp.
Put glue along the extra bit of the card stock and paste the other side of the card stock to it.
5. Sphere Lantern
The sphere lantern is super easy and can make for nice decor in your child’s room or your balcony during Diwali. Here’s how to make an akash kandil in a sphere shape.
What You Will Need
2 – 3, thin, coloured chart paper sheets.
Glue
A thumb pin
A ribbon
Scissors
How to Do
Decide on the size of your lantern and cut different coloured strips of paper.
Arrange the strips, one on top of the other, alternating between each colour.
Attach them with a thumb pin at one end of the strips by putting glue on the prickly side of the pin.
Follow the same on the other side too and spread the strips to form a sphere shape.
Tie a ribbon on top so that it can be hung.
6. Kiddy Lantern
This is a great opportunity for your child to be as creative as possible while making a kandil for Diwali.
What You Will Need
Coloured paper of A4 size
A thin cardboard
Paints
A scissor
A pencil
Glue
Double-sided tape
Regular tape
Old artwork (optional)
How to Do
Starting from one corner of the paper, make diagonal folds till the end.
Unfold the paper and repeat the same from the opposite corner (there will diamond shape formations in the paper).
Roll the paper and paste the sides with double-sided tape.
Using the circle of the base of the lantern, cut out a circle from the cardboard.
Fix this circular cardboard at the bottom, with double sided tape.
Put a regular tape on two opposite sides of the opening and punch a hole, so that the paper does not tear.
Insert a string through the holes and tie the ends.
Decorate the outer side of the lamp by sticking artwork or painting it.
7. Plastic Bottle Lantern
This beautiful lantern can be made from throwaway plastic bottles. It’s a great way to re-use plastic that would otherwise be thrown away as waste.
What You Will Need
A big plastic bottle with a round bottom
Glue
A brush
Origami paper/tissue paper
Scissors
A pencil
A stationery knife
Strings
Coloured tapes (3-4 types)
A battery-operated candle
How to Do
Cut off the bottle top with a stationery knife.
Fold the sheet of paper into a small square and draw a circle.
Then cut out the circle in such a way that you get many circle cut outs in one go.
Cut the other coloured paper in different shapes.
Then, apply glue on the bottle and start pasting the paper cut outs on it.
Once you are finished, apply a final coating of glue on top of it and let it dry overnight.
Cut 5-6 strings, about 20” long, and stick strips of washi tapes around the strings, leaving some space in between. Also, cut the tape at the ends for a flag shape.
Make small holes on the opening of the lantern and tie the strings to it.
Now bring all the strings together and tie them up.
Place a battery-operated candle inside it and hang the lamp.
8. Plastic Cup Lantern
Try this easy and fun way of turning a plastic glass into a lantern. This is another great way to use things you find at home to make a sky lantern.
What You Will Need
A transparent plastic glass
Acrylic paint or permanent markers
A paper puncher
String
A battery-operated candle
How to Do
Make designs on the glass with markers or paint.
Make two holes on opposite sides at the top of the glass.
Insert a string through the holes and tie it up.
Place a battery-operated candle inside it and hang it.
9. Owl Lantern
This is a cute, easy-to-make lantern that will make any child happy.
What You Will Need
Round, ready made, plain paper lamp
Chart paper and printed paper
Glue
Scissors
Sketch Pen
A pencil
How to Do
Cut out big, round eyes, legs, ears, nose, and wings of an owl from the chart paper.
Then, trace the wings on the printed sheet and cut it out.
Paste the printed paper wings onto the chart paper wings.
Draw two small circles inside the eyes and colour the nose and legs.
Now, paste all of them on the lantern.
10. Painted Round Paper Lanterns
This is a cheap and easy do-it-yourself lantern which can be made at home. Your child is sure to have a lot of fun with this.
What You Will Need
Round, ready-made, plain paper lamp
A toothbrush
Paint
A palette
How to Do
Take some paint and add some water.
Paint the entire lantern with different colours.
Your child can mix different colours and be as creative as possible.
The above lantern ideas are easy and can be made by kids without any hassle. However, parental guidance is required while using scissors or a knife. Once your child has finished making the lantern, you can display it in your house for visitors to see!
Also Read:
Easy Piggy Bank Craft Ideas for Kids
Homemade Hat Craft Ideas for Children
Amazing Newspaper Craft Ideas for Kids
Read more
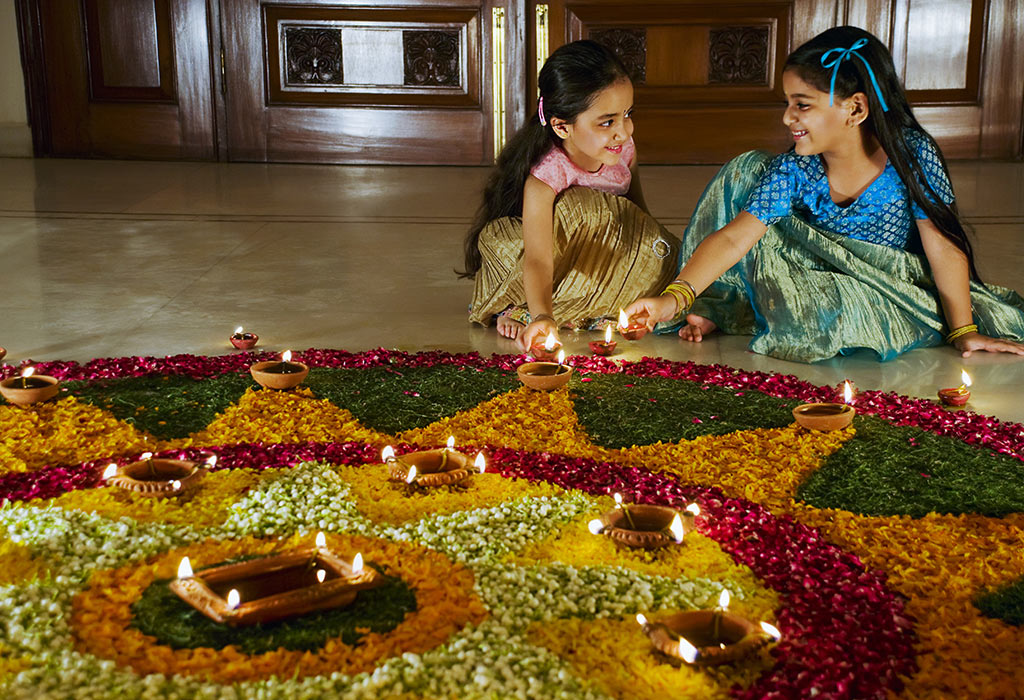
10+ Fun-Filled Diwali Activities & Games for Kids
Diwali, the festival of lights, is widely celebrated in our country. With the entire nation glowing brightly with lights and people celebrating the festivities together, it is a wonderful time for everyone. Parents interact with each other, kids burst crackers, and there is happiness all around. However, kids may get bored after a point, hence you will need something to keep them engaged. So, we have some amazing Diwali activities for preschool kids and children of all ages. Also, there are some awesome games for kids to play this Diwali and make it a memorable one.
Best Diwali Activities for Children
Here are some interesting activities that your little ones can try this Diwali and have a wonderful time together.
1. Quiz
If your house is buzzing with relatives and their kids, it is a good time to get all the kids busy by making them participate in a quiz. Pick certain topics that are relevant to their lives and they will enjoy it. You can divide the kids into two teams and let each team quiz each other. Make sure you keep prizes for everyone so that nobody is sad on Diwali.
2. Write it Down
Some kids prefer engaging in activities solitarily, such as writing down a story or a poem. If your kid seems to have the knack for it, encourage him to write a poem on the ‘festival of lights’ or a short story on Diwali. Publish it later on social media and let him know how everyone liked it and let him tell his friends about it as well.
3. Jewellery Making
Instead of giving your kids actual gems and precious items, let them pick some household items such as pasta covers, beads, and other essential things. Ask them to paint these items using and then sprinkle glitter. Allow them to turn those raw items into great jewellery pieces. These jewellery items can go with their festive wear and on other special occasions as well.
4. Paper Firecrackers
Although crackers are something that kids look forward to on Diwali, it is important to make them realize the negative effects of the crackers on the environment. You can engage them instead in craft activities where you help them create rockets and firecrackers out of colourful paper, decorate them, and hang them or stick them on a wall for a festive look.
5. Origami
This Japanese art form has numerous designs that can be used to decorate your house on Diwali. Let your kids peruse through numerous designs and use coloured papers to form garlands, banners, and many other decorative shapes. Ask them to make some lanterns as well.
6. Diwali Wishes
Every person wishes to celebrate Diwali in their own home but also wants to visit relatives or have them over. But if you are unable to visit them, you can always send Diwali wishes, can’t you? Ask your kids to write some personalized wishes and messages for your relatives this Diwali. Let them go overboard and make amazing Diwali cards and write down personalised wishes on them. Make sure these are decorated in a way that makes them stand out from any other cards.
7. Rangoli Art
Although rangoli is traditionally done by girls and women, let’s evolve in modern times and include all kids to try out their hand at it. Give them some specific designs that they have to make in different areas of the house, which would be supervised by older children. Later on, let them unleash their creative best and come up with some beautiful ways to make your home look the prettiest it ever has in all these years.
8. The Hidden Chef
Some kids enjoy cooking, if your kid is one of them, teach them simple recipes that you make on Diwali. Diwali presents a great time to indulge your kids in cooking since you can use all the help you get, and there are some simple recipes that kids can easily make and this encourages them even more. Give them the task of rolling laddoos or stirring the kheer while it is getting warm. Older kids can help you out with even more complicated tasks such as grating coconut or peeling almonds and so on.
9. Diya Painting
Diwali is a festival of lights and is incomplete if your house is not illuminated with the diyas all around. This Diwali, let those diyas not be bland and allow your kids to paint those diyas with colours of their choice. Make use of watercolours, paints, and everything at your disposal to provide the little ones with the tools to deck up those simple diyas.
10. Diwali Stories
After all, we are celebrating a festival that is deeply rooted in our traditional upbringing and stems from wonderful mythological stories. Introduce your kids to the origins of the celebration and watch them listen to you astounded. If your kids are already aware of the reason (story) why we celebrate Diwali, ask them to narrate the story to you. You can also tell the kids of your society to get together and enact a scene.
Wonderful Diwali Games for Children
Kids are not really interested in the rituals, all they want is to have fun during Diwali. This is where you can make use of some interesting Diwali party games for kids and let them enjoy their Diwali holidays.
1. The Best Dress
The festive occasion makes for a great opportunity to deck yourself up in the most glamorous way possible. Turn this into a competition of sorts if you can. Ask kids to wear dresses that are primarily in the colours of Diwali. If you are looking for something more, combine the enactment of plays with a fancy dress contest, allowing kids to dress in a variety of characters that hail from the mythological stories.
2. Musical Chairs
The simplicity of the game might make you feel like a weird addition for a festive occasion such as Diwali, but when you have siblings, relatives, and friends at one place, any game is fun. Let kids play separately or mix them up with adults as well. Choose the popular songs of the time and let your kids have fun running around and rushing to grab that empty chair.
3. Tambola
This, in fact, should be a Diwali tradition, if it is not already. Diwali is a time of celebrating happiness and togetherness as a family. Gifting is a great form of conveying gratitude but doing so in the form of tambola is even better. Kids will have an awesome time as they compete with each other to try their luck and win the gift of their choosing.
4. Diya Lighting Competition
Older kids can do this themselves but it is best if this is conducted under adult supervision. Young kids won’t be comfortable with flames and candles, so this is the perfect occasion to let them have a chance at it. Arrange multiple diyas and set a time limit within which each kid has to light all the diyas properly. Make sure this is done in an open space in order to avoid any problems.
5. Playing Cards
Gambling is a popular activity during Diwali. While kids might be too young for any kind of gambling, you can indulge them in some simple card games, and use sweets as a prize when they win each game.
6. Passing the Parcel
Children pass around a wrapped parcel while music plays, and when it stops, the child holding it performs a Diwali-themed task like singing, sharing a memory, or reciting a prayer. This game incorporates laughter, learning, and celebration in a playful format.
7. Bursting Balloons with Trivia
Balloons filled with Diwali quiz questions are popped by children taking turns, requiring them to answer the question inside to earn tokens or prizes. This interactive game combines excitement with knowledge about Diwali traditions and stories.
8. Antakshari with Festival Songs
A singing game where children take turns singing festival-related songs or bhajans. It promotes cultural learning and group bonding while spreading festive joy through music.
9. Diwali Bingo
Customized bingo cards featuring Diwali items, rituals, and sweets make learning about the festival interactive and entertaining.
10. Diwali Memory Game
In this game, about 10-15 Diwali-related items like diyas, sweets, and crackers are displayed on a tray for a brief time. Players then try to remember and list as many items as possible. It is a fun and educational way to sharpen memory and introduce children to festival symbols.
Coming up with various Diwali activities for 2-year-olds or even preschool kids shouldn’t be quite difficult. Diwali brings all the family together and this is why kids love it the most. To make it more fun for them, let them indulge in the above-mentioned activities and games. They will always remember it.
Also Read:
Diwali Card Ideas for Kids
Facts about Diwali for Kids
Diwali Safety Tips for Children
Read more
How To Draw a Dog – A Step By Step Guide
Drawing a dog can be a fun and rewarding activity for kids and preschoolers who love animals and enjoy being creative. Then get ready for a super fun activity! In this guide, we’ll show you the basic steps of how to draw a dog in the simplest way. It’s perfect for kids, preschoolers, and anyone who wants to draw a cute little dog without any tricky steps.
You don’t need to be an artist, just grab your pencil, paper, and maybe some crayons if you want to add color later. We’ll go through easy steps on how to draw a dog using shapes like circles, ovals, and lines. Step by step, you’ll see your dog come to life with floppy ears, a wagging tail, and a happy face!
Drawing helps young learners learn, focus, and have fun all at the same time. So if you’re ready to make your own cartoon dog, let’s start drawing together. Woof woof!
Easy Dog Drawing for Kids in 10 Simple Steps
Get ready to learn easy steps on how to draw a dog with this fun and simple guide made just for kids. Follow along and enjoy drawing a cute puppy in just 10 steps!
1. Draw the Head
Start by drawing a big oval or round shape in the middle of your paper. This will be the puppy’s head where the face goes. Make sure it’s big enough for eyes, ears, and a nose!
2. Add Two Floppy Ears
On each side of the head, draw long curved ears that hang down like a cute puppy’s ears. You can make them rounded or pointy on your choice!
3. Draw the Eyes
Inside the head, draw two medium-sized circles for the eyes. Then add tiny black dots inside for the pupils to make the puppy look alive and cheerful.
4. Make a Nose
Right between the eyes but a little lower, draw a small oval or triangle shape. This will be your puppy’s nose don’t forget to color it black!
5. Add a Smiley Mouth
Below the nose, draw a curved smile going from one side to the other. You can add a small U-shape inside for a tongue to make it even cuter.
6. Draw the Body
From the bottom of the head, draw a big round or oval shape. This is the puppy’s body, and it should be wider than the head.
7. Add Front Legs
Draw two straight lines going down from the front of the body and curve them at the bottom to form paws. These are the front legs.
8. Add Back Legs
Now draw two more curved legs on each side of the body near the back. These should look like the puppy is sitting down comfortably.
9. Draw the Tail
On one side of the body, add a small curved tail. You can make it waggy or curly whatever style you like best!
10. Add Final Details and Color
Go over your lines with a black marker to make them bold. Erase any sketch marks and color your puppy using brown, yellow, white, or your favorite shades!
FAQs
1. How can I make my dog drawing look cuter?
Add fun details like big eyes, a wagging tail, floppy ears, or a small tongue. You can also use soft colors and draw a bone or collar for extra cuteness!
2. Can I color the dog any way I want?
Absolutely! You can use brown, black, white, or even rainbow colors—there’s no rule. Let your creativity shine!
3. Can I draw different dog breeds using this method?
Yes! Once you learn the basic shape, you can change the ears, tail, or fur to look like different breeds like a pug, labrador, or dachshund.
Learning how to draw dog is a fun and simple activity that kids will love. With easy shapes and step-by-step guidance, anyone can create a cute puppy even if they’re just starting out. If you’re wondering about drawing a cute puppy, just remember to take it slow, enjoy each step, and let your creativity shine. Kids can make their drawings unique by adding colors, spots, collars, or even a wagging tail. You can also try puppy coloring pages to add more fun and practice your coloring skills. So grab your pencils and have fun turning your ideas into adorable dog drawings!
Also Read:
Drawing a Cat for Kids
How to Draw an Owl for Kids
Step by Step Guide for Drawing Bird
Read more
How to Draw a Cat for Kids
Drawing comes naturally to young children and is a wonderful way for them to express their creativity. Whether it’s with crayons, pencils, or markers, drawing offers numerous developmental benefits, such as improving fine motor skills, enhancing focus, and boosting imagination. For beginners, learning how to draw a cat for kids is a simple and enjoyable activity that helps them build confidence in their artistic abilities. Drawing a cat is one of the easiest and most fun activities to introduce them to the world of art. Here’s how you can teach your little one to draw a cat, making the process both engaging and educational!
What You Will Need for Drawing a Cat
Cats are a popular choice for pets. Teaching kids how to draw a cat can nurture their love for animals. Drawing animals can be quite tricky, but once you’ve got it right, it can be rewarding. To make your drawing look as convincing or life-like as possible, you need to observe, make a quick sketch, recognise the structure, and finally refine you’re drawing.
Here’s what you will need as a beginner:
Pencil
Non-dust eraser
Drawing paper
Black marker
Coloring supplies
Printable template (for little kids who are just starting off)
Cat Drawing for Kids in Six Easy & Simple Steps
Learning to draw a front view image of a cat is the most simple activity for kids. Here is an easy, step-by-step guide on how to draw a cat.
1. Draw the Head and the Belly of the Cat
To draw a cat, first draw an outline of the cat’s belly as shown in the figure below (a tilted, big oval circle). Then, on the top of this circle, draw a smaller oval shape or a small circle for the cat’s head.
2. Draw the Cat’s Hind Leg and Ears
On the face or the smaller circle that you have drawn, draw two triangles to make the cats ears. At the bottom half of the lower circle, draw a ‘C’ for the car’s thigh. Then, draw a long u-shape for the hind leg and the paw at the bottom. Then, draw the toes at the end of the paw.
3. Draw the Cat’s Forelegs and Bow
Now, imagine a line running through the centre of the cat’s belly. Draw a large w-shape to form the forelegs as shown in the figure. Once again, draw the paws and the toes. Then, draw a bow across the line that separates the cat’s face from the rest of its body.
4. Draw the Cat’s Eyes
Draw two small circles for the cat’s eyes on the cat’s face. Fill in two smaller circles for the pupils.
To polish whatever you’ve drawn so far, erase any extra lines or curves. And, draw a small curve on the top of the w-shape you drew for the forelegs. Refer to the image given below for a better understanding.
5. Draw the Cat’s Nose, Mouth, and Tail
Draw a small circle just below the centre of the cat’s eyes to form the nose. From this circle, draw two curves, each ending in the opposite direction. If you look closely, the curves look like a horizontal ‘3’. There! You’ve just drawn the cat’s mouth.
Then, draw two lines starting from the back of the bottom circle (from behind the hind leg and join them to make a nice, fluffy tail.
6. Draw Details and Color the Cat
Adding details, such as patches, sharpen the toe outlines, etc. and color the cat in the colors of your choice!
FAQs
1. What are the benefits of cat drawing for children?
Drawing a cat helps children develop fine motor skills, hand-eye coordination, and concentration. It also encourages creativity and imagination as they can add their own details or unique features to the drawing. Moreover, the structured steps of drawing a cat teach kids how to follow directions and improve problem-solving skills. Artistic activities like drawing foster emotional expression, which is important for a child’s overall mental development.
2. How can I help my child stay patient while drawing a detailed cat?
Children can often feel impatient when a drawing becomes complex. To help them stay focused, break down the process into smaller, manageable steps, such as first drawing the basic body structure and then moving on to details like the face or stripes. You can encourage them to take short breaks between steps or use coloring as a reward for finishing each stage. Keeping the atmosphere fun and lighthearted will help them stay engaged and patient.
3. Can drawing a cat help my child understand animal anatomy?
Yes, drawing a cat can give your child an early understanding of basic animal anatomy. As they draw the cat’s skeleton, muscles, and facial features, they begin to see how animals are structured. This awareness can lead to a deeper curiosity about animals and biology, making it a great introduction to understanding living creatures and how their bodies work.
This was all about easy cat drawing for kids. Apart from developing fine motor skills, drawing encourages visual analysis, helps establish concentration through practice, improves hand-eye coordination, and develops social skills and creative problem-solving in kids . Therefore, motivate your child to pick up the pencil and ensure you display his personalised artwork on the living room walls, the refrigerator, etc.
Also Read:
How to Draw a Car for Children
How to Draw a Lion for Kids
How to Draw a Frog for Kids
How to Draw an Owl for Children
How to Draw a Butterfly for Children
Read more
How To Draw A Fish for Kids
If your child is attracted to the enigmatic charm of a fish gliding gracefully in the serene blue water of an aquarium, it’s time to build their relationship with nature and capture the exciting features of a fish in art…
Simple Fish Drawing for Kids in Easy Steps
Originating in the Cambrian period, fishes are aquatic, craniate, gill-bearing animals that lack limbs with digits. Having evolved through the Palaeozoic and Silurian periods, fishes have diversified into a wide variety of forms. From just the prey of arthropods, they became formidable marine predators that can be found in nearly all aquatic environments. From high mountain streams, lakes, rivers, coral reefs, the abyssal, and even the oceans’ deepest depths. Most fish are cold-blooded, which allows their body temperatures to change as ambient temperatures vary. They have fear and pain responses as well! With over 34,300 described species, fish exhibit greater diversity in sizes, shapes, and colors than any other group of vertebrates. Whether your kid likes to admire fishes in the local aquarium or keep them as pets, fishes can be a good theme for an underwater world art project. They also teach kids about the importance of marine conservation and how they contribute towards maintaining the earth’s ecological balance. From developing fine motor skills to visual analysis, problem-solving, hand-eye-co-ordination to boosting self-confidence, art offers a host of developmental benefits for toddlers. One of the first things to keep in mind while sketching a fish is to pay attention to general body proportions, size of the head, mouth position, and placement of the fin. The mouth, location, and several paired and medial fins vary in morphology and number from one species to another; these features play a huge role in identifying species.
Learning how to draw a cartoon fish is important for kids as it is fairly easy, fun, and makes a perfect choice for beginners. Start with the basic structure and then upgrade to learning to draw different types of fish with details like scales, fins, and tails. From spending the summer vacation in a productive way to engaging kids indoors, these simple stepwise instructions can help one master the art of drawing a generic or any specific fish variety that they can display with pride. Artwork is only limited by imagination! Get started with some simple fish drawings, and move on to more complex fishes for further exploration and creative discovery. Each step in this guide contains illustrations and explanatory texts that you can follow to make any of the fish that catches your child’s fancy.
What You Will Need
Drawing Paper
Marker
Pencil
Eraser
Steps
1. Start by drawing an ellipse for the body.
2. Draw a curved line across the front part of the fish to represent its head that often has different patterns of scales.
3. Draw a triangular-shaped tail on one end of the fish’s body.
4. Draw the dorsal fin of the fish as a curve upward on the fish’s body.
5. Draw the bottom fin as the dorsal fin underneath. The side fin as a “D”-shaped curve can be made at the body’s center.
6. Draw the eye for the fish as a big circle with a marker while leaving it as a white dot (un-shaded) in the top right corner. Draw a curved line as the mouth on the front of the fish’s face.
7. Colour it as per your choice.
How to Draw a Koi Fish for Kids
Native to East Asia, Koi fishes are mainly kept in water gardens and koi ponds for decoration. Comprising of complex and beautiful features, it makes your artwork look truly amazing. Found all over the world, their interesting colors and lineage make them special and visually soothing. People in Japan believe the Koi fish symbolizes wealth, prosperity, love, a successful career, and good fortune.
What You Will Need
Pencil
Eraser
Drawing paper
Colored pencils/ crayons
Steps
1. The head of the Koi fish is curvy on three sides. It’s one side longer than the other, like a triangle. The smaller side is flatter and half the size of the neck or long side. Draw the eye of the fish.
2. Draw the long, slender body of the Koi. Making the fish curvy creates an image to show that the fish is in motion. The tail-end is narrower than the front end, which is wider.
3. Add the tail fin or caudal fin, which is slightly rough around the edges or a little sharp.
4. Add two fins on each side. The pectoral fin (one close to the head), the pelvic fin, and the anal fin. The dorsal fin (one on top) has two parts. Add the barbells that are sensory organs used by the Koi for detecting taste and smell.
5. Draw lines inside the fins for details and draw the scales on the body.
6. Color it.
How to Draw Nemo for Kids
If your child has been fascinated by little Nemo from the Disney-Pixar movie, they can learn to bring this cute orange clownfish to life with straightforward materials. Nemo is actually Ocellaris clownfish that belongs to the family Pomacanthidae. With a little practice and perseverance, even a beginner will produce amazing artwork.
What You Will Need
Pencil
Eraser
Drawing paper
Color pencils/Crayons
Steps
1. Draw the body of the fish. Make a circle and draw another curvy sphere intersecting it.
2. Now erase the intersecting line and join the circles to form a single oval shape like a mango.
3. Do a freehand drawing for adding the dorsal fin, caudal fin, pectoral fin, anal fin, and pelvic fin. Make the edges of the fins look rough with a few tiny bumps. Add the eyes and a curvy mouth to make it look happy and smiling.
4. Draw curvy lines across the fish’s body to brighten up the face and indicate the beautiful design of the clownfish.
5. Draw more lines inside the fins to give it a distinct look.
6. Color the fish orange and white.
How to Draw a Bass for Kids
This large-mouthed and spotted fish is usually caught for food or sport in North America and hunted in South Africa. The term comes from Middle English bars, meaning “perch” encompassing both freshwater and marine species belonging to the Perciforms or perch-like fishes. The black bass, temperate bass, and Asian bass are most popular.
What You Will Need
Pencil
Eraser
Drawing paper
Color pencils/Crayons
Steps
1. The black bass has a full mouth, which should look prominent. Begin by outlining the fish with gentle curves. The body of the bass has a wide oval shape while it has a fan-shaped tail. Draw a groove at one end of the body for the fish’s mouth, which is usually seen open, measuring almost one inch wide on paper.
2. Add detail to create a realistic impression of the fish’s head. Draw a slant from the groove you drew before for the mouth. Draw thin lines in and around the mouth to show the folds of the flesh and skin inside the mouth. The lines below the head indicate the gills and pectoral fin.
3. Draw a small circle with a smaller black dot in the center of the head for the eye.
4. Then add the pelvic fin, dorsal fins, and the spiny rays to the sides. Add little details by drawing lines near the neck. Draw a C-shaped line to outline the gills of the fish.
5. Draw small, closely spaced slanting lines on all fins. Draw fish scales with small, bumpy lines on the body to show the scales and body marks.
6. Color the fish.
How to Draw a Clown Fish
A clown fish belongs to the subfamily Amphiprioninae. Depending on the species, anemonefish are yellow, orange, reddish, or blackish in color with white bars or patches. The largest clownfish measure up to 17 cm, while the smallest can be 7–8 cm. Anemonefish live at the bottom of shallow seas in sheltered reefs or lagoons. A comically distorted drawing is mainly done to satirize or ridicule its subject. Characteristics like facial features of the subject are seized upon and exaggerated for amusement. A cartoon drawing is chosen for its simplicity and aimed at the beginner artist by adding an animated eye, plump lips; we distort the fish features to insert human expressions on them.
What You Will Need
Pencil
Eraser
Drawing paper
Color pencils/Crayons
Steps
1. Draw two small circles of the same size joined at the sides.
2. Draw a smaller circle inside each circle with thicker edges.
3. Draw an egg-shaped extension starting from each eye. Do not join the pointed end of the oval.
4. Draw the caudal fin sideways or the fish’s tail shaped like the ears of a bunny.
5. Make a curved line from the center upwards, and extend it a tiny bit to the right to complete the mouth.
6. Color it.
How to Draw a Shark for Kids
Sharks are a group of elasmobranch fish characterized by a cartilaginous skeleton, five to seven-gill slits on the sides of the head, and pectoral fins that are not fused to the head. The earliest species of sharks lived over 420 million years ago and were different from modern sharks. Tiger sharks, hammerhead sharks, thresher sharks, blue sharks, and great white sharks are well-known apex predators. With an average of 15 feet in length and weighing more than 2,000 pounds, sharks are the most efficient macro predators. As they have different features, your child should pay attention to the details to draw a shark more realistically.
What You Will Need
Pencil
Paper
Crayons/Color Pencils
Eraser
Steps
1. Draw a pointy snout for the head in front with the letter “V.”
2. Add a tiny eye in the middle of the snout and mouth inside the head to give it dimension and prevent it from looking flat.
3. Draw a long back attached to two lines on the bottom. Leave space for the front fin. The body of almost all sharks is like a spindle or a teardrop laid on its side.
4. Draw some lines next to the head for gills. Next, draw the gill lines that should go up and down. About five to seven pairs of gill slits are located on each side of the shark’s head. These vertical splits on the neck are an important characteristic that should not be omitted.
5. Add a tall fin on the top of their body, one in the space left on the bottom, and three smaller fins towards the direction of the tail. Draw the thin lower pointy fin below the top fin.
6. Finally, draw a tail with an upper and lower fin on the back, which allows the shark to change directions while swimming. The upper lobe of the tail fan is usually longer than the lower lobe.
7. Color it greyish blue to add more depth and richness to your drawing. Consider advanced techniques like stippling or hatching to add further texture and dimension to the shark.
While trying to make perfect artwork, it is important to know your pencils well. Position your child’s hand closer to the end of the pencil so that they have more control and precision. Subtle shifts in the width and darkness of your lines will create a dynamic, visually interesting drawing. Avoiding smudging makes a clean-looking drawing — the art of drawing a good picture involves practice. There’s no better way to connect with your kid and help them understand more about the world than working on an art project together. It helps to strengthen the bond of the family and create fond memories of childhood to be cherished forever. Instead of indulging in electronic gadgets like smartphones, video games, and monotonous television shows, it is better to cultivate hobbies like drawing or keeping a pet fish that not only lets you bring a piece of the natural world into your home, but reduces stress, anxiety, increases concentration levels, teaches important life skills like love, compassion, responsibility, tolerance, and patience that will shape them into caring adults.
Also Read:
How to Teach Children to Draw
How to Draw a Car for Children
How to Draw an Apple for Children
Read more
How to Draw a Horse for Kids
As parents or teachers, you could find yourself looking for easy drawings that your kids can enjoy coloring. Animals can be fun to color, but drawing them can be challenging. Horses, in particular, are tricky because they have so many curves, and you have to get the proportions of their body, head, and legs just right. Capturing their elegance, strength, and grace has been made easy, so if you are looking for a quick guide, keep reading to learn how to draw a horse step by step.
Video: How to Draw a Horse – A Step-by-Step Guide For Kids
What You Will Need to Draw a Horse
Drawing a horse is going to be easy and quick. The materials you will need to sketch a horse are easily available at your house:
Drawing paper
Black pen or marker
Crayons or color pens (optional)
Horse Drawing for Kids in 9 Simple Steps
If you are not the best artist or have difficulty drawing objects, here is a simplified tutorial to draw a cartoon horse. It is beginner-level and easy to follow. Here are 9 steps to draw a horse:
1. Start with the face.
First, you draw the horse’s face. Make a U shape if you want to make it quick and simple. You could also make it a bit more realistic by adding a curve on the lower side of the face.
2. Draw the face, neck and chest.
Draw the different facial components of the horse, i.e., the nostrils, mouth, and eyes. Draw the nostril a little bit above the mouth. From the ear, draw a slightly curved line that will form the neck. For the chest, draw a mild ‘S’ downwards from the chin.
3. Draw the mane and the back.
Draw the back at the tip of the horse’s neck. For the mane, you can make a zig-zag starting at the ear and going all the way down the neck, and ending at the back. You can even add a tiny bit of mane in between the ears.
4. Draw the first front leg.
Now you can start drawing the legs. First, draw the front leg, beginning from the end of the neck and chest line. Draw two almost parallel line downwards, then to the left. Draw a hoof at the end of the leg.
5. Draw the second front leg.
Similarly, draw the other front leg, such that it looks like it’s slightly behind the first front leg.
6. Draw the first hind leg.
For the hind leg, you can follow the same steps, or you can make it more realistic by making the calve more defined and angled.
7. Draw the second hind leg and the belly.
You can then add the last leg of the horse. Do it in the same manner as the other three but then draw behind the first ones. If you want to make the horse look like it’s galloping or walking, you can change the angle at which you draw the legs. Draw a connecting line from the first leg to the fourth leg. This will form the horse’s belly.
8. Draw the tail.
Now it’s time to make the tail of the horse at the end of the body. Start by making a backward S and connect it back, such that it looks like a leaf.
9. Colour the horse.
Grab some crayons and get to work or give them to your kids so they can color it.
If your little ones like horses, ponies, or unicorns, this easy tutorial is perfect for you to draw one for them so they can be creative and color or decorate it. You can try this easy step-by-step tutorial with materials already at home!
Also Read:
How to Draw a Lion for Children
How to Draw a Frog for Children
How to Draw a Butterfly for Children
Read more
How to Draw an Owl – An Easy Step-by-Step Guide
Owls are not only cute and aesthetic but also a symbol of mystery and wisdom. In Greek mythology, the owl is known to be one of the symbols of the Goddess of Wisdom, Athena. However, it may be overwhelming to draw one in an accurate manner, getting all the proportions and shapes right. If your kids are fans of owls because of Harry Potter, Winnie the Pooh, Animal Crossing, or Pokemon, an owl drawing for them to colour can be the perfect afternoon activity. Want to learn how to draw an owl for kids? You can draw a simple owl by following this easy guide to learning step-by-step how to draw an owl.
Owl Drawing for Kids in 6 Simple Steps
You can first draw a cartoon owl lightly with a pencil and then line over it with a dark marker or pen once you are done. If you want to give your little one a cute drawing to colour or paint, here’s how to draw an owl for kindergarten kids:
1. Draw the base for the head and body.
First, start by drawing the head and body of the owl. Outline the horizontally oval head and the vertically oval body. Make sure they are both aligned.
2. Draw the outlines of the eyes and feet.
Draw two circles for the eyes of the owl. Also, lightly draw the feet of the owl at the base of the bodyby drawing two slightly rectangular shapes. This will form the outline for the actual feet.
3. Fill out the eyes and feet.
For the eyes, draw two crescent shapes to make them look life-like. Lightly draw two diagonal lines over the eyes. These will form the outline for the eyelashes. Also lightly draw a small vertical line between the eyes. This will form the outline for the beak. Elaborate on the details of the feet of the owl by drawing three tiny sausage-like shapes for each foot. Let the middle one be longer than the other two.
4. Draw the eyelashes, beak and wings.
Draw two eyelashes around the lines above the eyes, such that they look like thin leaves. Next, using the outline drawn in the previous step, make the beak of the owl in the center of the head. Next, draw the wings of the owl, starting from the bottom of its head, along its body, almost till the bottom. Make them a little wider near the top and narrower as they come down and pointy at the end. They should look like they curve around the body.
5. Erase the light outlines.
Erase the light outlines which served as the guide to draw the eyelashes, nose and feet.
6. Colour the owl.
Your owl is now ready. Grab some crayons and get to work! You can even color it or decorate it with sequins and glitter. If you want a more realistic owl, color the inside portion of the body and the beak in light brown color. Color the wings and the head with dark brown. Color the eyelashes and feet in a darker shade of brown. Color the pupils black.
Tips to Learn Owl Drawing Easily
Here are some tips to keep in mind when you teach your child a simple owl drawing:
To ensure children learn to draw a neat and clean owl, start by teaching them how to draw a oval shape. Once they skillfully master the oval shape drawing. You can see the drawing and look for different shapes required that make up an owl, including a straight line and a circle.
Tell what an owl is and how they look, so they have a reference.
Teach them about symmetry so they can practice it and draw a symmetrical and neat owl.
Most of all, the practice of shapes is important to ensure an easy drawing of the owls without getting bored. Add colours and make it vibrant.
FAQs
1. What is an owl?
An owl is a solitary creature that stays nocturnal. It means they stay up at night and sleep in the daytime. They have a large head, a stoic stance, and calm energy. Fun fact – when they fly, they make no noise because of their flexible feathers. Their prey are small animals, such as insects, mice, fish, and smaller birds.
2. What are some fun facts about owls?
Some amazing facts about owls are:
Owls have the ability to rotate their necks about 270 degrees. Isn’t that surprising?
Do you know what owls hunt? Well, they hunt other owls. For instance, Great Horned Owls are known for hunting smaller Barred Owls.
Bran Owls can swallow their hunt or prey whole; that includes bones, skin, and everything. They also eat up to 1000 mice in a year.
Owls don’t have eyeballs. They have completely immobile tube-shaped eyes that give them binocular vision and focus on their target.
3. Is owl drawing easy for children?
Drawing an owl is easy and not that difficult for kids. It is a great drawing activity for children who are learning to draw and practising their pencil skills. With oval, circle, and straight-line shapes, the drawing is not so difficult, so they can easily draw an owl.
Giving your kids drawings will keep them entertained, hone their creativity, and also help them learn the colors of objects. You can follow these easy six steps to draw a cute cartoon owl that your little one can color.
Also Read:
How to Draw Frog for Children
How to Draw Lion for Kids
How to Draw a Cat for Kids
How to Draw Butterfly for Children
Read more
Sort By
 Latest
 Most Popular
 Trending
Please select atleast one Filter