
Care
Suggested articles for you
Red Flags & Must-Haves to Look Out for When Choosing Baby Skincare Products
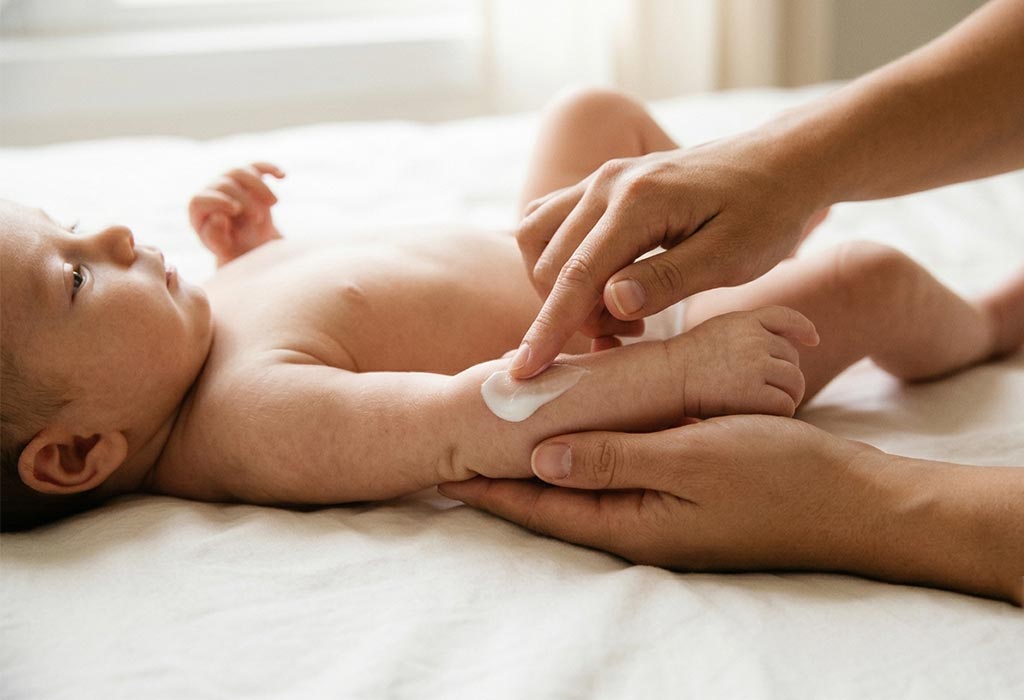
It’s a common thought that a newborn baby’s skin is just a softer version of adult skin. Let us prove otherwise. A baby’s skin is structurally and functionally different when compared to an adult’s; it is thinner and more permeable, highlighting the reason why a lotion or a soap that works well on you might not be for your baby. Buying a skincare product for skin that’s only weeks or months old requires careful selection and awareness of what you’re buying. Before you purchase baby skincare items for your little one, a little knowledge of the ingredients worth avoiding and the safe ones can help maintain your baby’s skin soft, healthy, and plump.
How Does Babies’ Skin Differ From Adult Skin?
There are two things that we would like to highlight. For one, the outermost layer of the skin — the stratum corneum — is still sensitive and developing. According to research published in the Journal of Investigative Dermatology, baby skin loses water faster than adults’, has less ability to regulate moisture levels, and does not have the same defences as ours (1).
A thinner layer of skin isn’t just prone to dryness; it’s also more permeable. In simpler terms, what sits on your baby’s skin can be easily absorbed. Developing skin barriers also mean that the chances of infection, dehydration, irritation, and topical absorption are higher (2).
Thus, faster water loss and easier absorption through thinner skin make your baby’s skin vulnerable to a host of issues like dryness, eczema, and infections. All these factors emphasise the need for a careful and gentle formulation for baby skincare that can keep the barrier intact without causing irritation.
The Red Flags: What Ingredients You Should Avoid in Your Baby’s Skincare Products
Knowing what should not be there in baby products is just as important as knowing the good ingredients in a product. Here’s what to avoid.
1. Dyes or synthetic colours
Synthetic dyes or colours are best avoided in your baby’s products, be it lotion, shampoo, or toothpaste as they can cause irritation, allergic reactions or more serious health risks in the future.
2. Phthalates
Phthalates usually come listed inside synthetic fragrance blends, usually for making the scent linger on the skin for a longer time. The ingredient has been linked to developmental and hormonal issues (1). Choosing baby products that are “phthalate-free” can be a great way of protecting your child from unnecessary infections in the future.
3. Parabens
It is a popular ingredient used as a preservative to prevent the growth of bacteria and mould (3). The American Academy of Pediatrics states that compounds like parabens are known to interfere with the endocrine system (4). Many health experts suggest avoiding baby products that have parabens in them. You may want to look for names like methylparaben, propylparaben, butylparaben, and ethylparaben.
4. Formaldehyde-releasing preservatives
Not all preservatives are bad. However, the following preservatives gradually release formaldehyde into the product and may lead to skin sensitivity and contact dermatitis.
● DMDM Hydantoin
Diazolidinyl Urea
Imidazolidinyl Urea
Quaternium-15
5. Excessive mineral oil or petrolatum used as filler
Petrolatum, paraffin, and mineral oil are commonly used as barrier ingredients in skincare products, but when used as the primary bulk ingredient in baby creams or lotions, they could do more harm than good. Lotion products containing high amounts of these fillers will act as an occlusive rather than a nourishing ingredient.
6. Sodium lauryl sulphate (SLS)
A common ingredient in rinse-off products like soaps, cleansing bars, body washes, and shampoos, sodium lauryl sulphate is a known emulsifying and foaming agent that can strip the skin of its natural oils, leading to redness, dryness, irritation, stinging, and even contact dermatitis in those with highly delicate skin or conditions like eczema. Babies’ skin, being the gentlest of all, should not come into contact with SLS.
The Must-Haves: Ingredients Worth Having in Your Baby’s Skincare Items
1. Glycerin
Glycerin is a known humectant that seals the moisture inside the skin. Baby lotions and creams containing Glycerin support the skin’s hydro balance and protect against dryness. Since it is a water-loving humectant, it does not leave any greasy residue. Products like Baby Sebamed Body Lotion offer an effective moisturising complex for delicate skin. Specially formulated with glycerin, chamomile extract, and allantoin, the rich baby lotion soothes sensitive skin, prevents it from drying out, and makes it soft and supple.
The best part is its pH 5.5 composition, which supports the development of the skin barrier.
2. Chamomile Extract
Chamomile extract helps soothe skin sensitivity and relieve any redness or inflammation (5). It is a great ingredient for baby shampoos and creams for children who have sensitivity or reactiveness.
3. Squalane
Squalane is a lightweight and non-comedogenic emollient that hydrates skin and locks in moisture. It is also non-greasy and generally safe for eczema-prone or sensitive newborn skin. A baby lotion or cream containing squalane can be considered a good choice.
4. Baby-safe carrier oils in modest concentrations
Carrier oils like jojoba oil are fatty, non-fragrant plant oils. These are effective in supporting skin barrier function in newborn babies without increasing the risk of sensitivity. These oils balance the moisture level of the skin without blocking pores.
5. Allantoin
Allantoin gently calms redness and inflammation, softens the skin, and protects the skin barrier by working hand-in-hand with ideal pH 5.5 formulation to prevent dryness and flaking. It does not leave any greasy residue, ensuring supple skin. Baby Sebamed Gentle Wash makes bath time enjoyable and tear-free with the soothing properties of Allantoin.
Babies have fine, delicate skin vulnerable to dryness, rashes, inflammation, and infections. A good baby skincare product not only creates a barrier, but it also hydrates from within. You don’t need to be a label wizard, but knowing what can harm your little one’s skin can go a long way toward preventing skin damage. Choose a product based on your baby’s needs — one that’s scientifically formulated and certified by experts.
Sources and References
1. Journal of Investigative Dermatology – Development of Skin Barrier Function in Premature Infants
2. National Library of Medicine – Skin Barrier Function in Neonates and Infants
3. U.S. FDA – Parabens in Cosmetics
4. American Academy of Pediatrics – Key Points about Personal Care Products
5. Cleveland Clinic – Colloidal Oatmeal: What Is It and What Are Its Benefits?
Read more




Back Pain While Breastfeeding – Causes and Tips to Relieve
Key Takeaways
Back pain while breastfeeding often results from poor posture, prolonged feeding sessions, and muscle strain after childbirth.
Sit upright, support your lower back, and use pillows to bring your baby closer to your breast.
Gentle stretches, short walks, warm compresses, and adequate rest may help relieve discomfort.
Stay hydrated and consult your doctor before starting postpartum exercises.
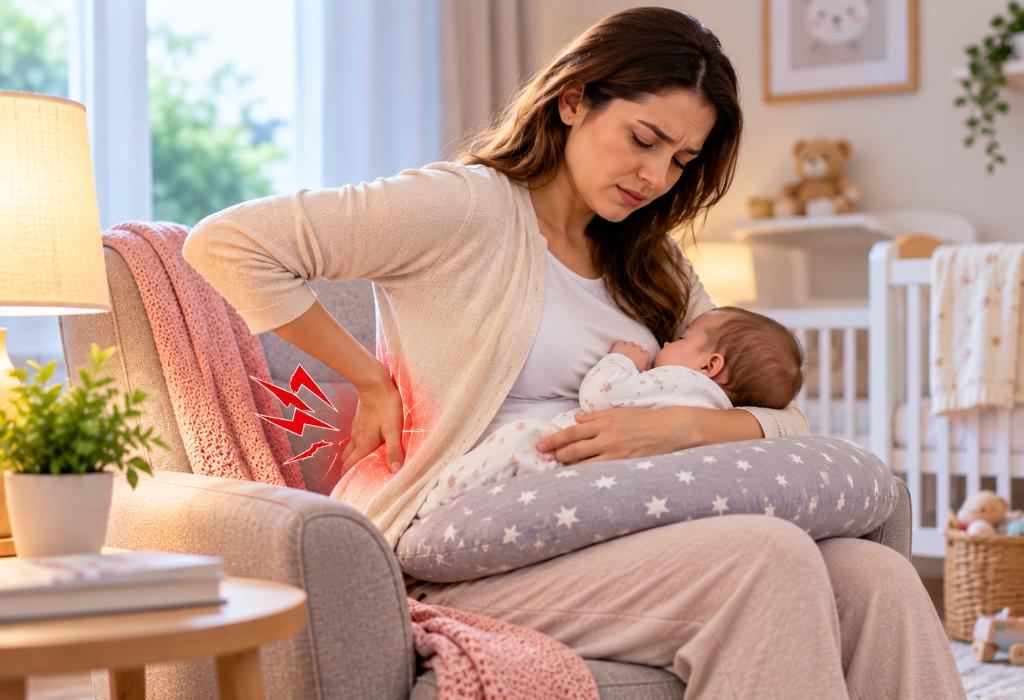
Experiencing back pain while nursing your little one? Long feeding sessions, awkward positions, and constantly bending over your baby can leave your back aching when you least expect it. While breastfeeding itself doesn’t usually cause back pain, the way you sit, hold your baby, and support your body during feeds can contribute to the discomfort.
The good news is that small changes can make a big difference. Let’s look at what causes back pain and breastfeeding discomfort, along with simple, practical tips to help you feel better during your breastfeeding journey.
What Causes Back Pain While Breastfeeding?
There are various reasons that may cause back pain during breastfeeding and some of them are listed below (1):
You may experience back pain because of the extra pregnancy weight that you might be carrying.
During pregnancy and labour, your body goes through a lot and many women experience body pain, particularly, back pain. If you experienced back pain during pregnancy, this pain may last for a while even after delivery, and your back may continue to feel sore and ache while you breastfeed your little one.
One of the common reasons for back pain is an improper feeding position. It is important that you position your baby correctly but also pay heed to your position and support yourself well while breastfeeding your baby.
Sometimes lifting heavy objects may cause back pain that may further aggravate while you breastfeed.
Also, pain in the back may be due to some previous accidents that may have harmed your back and breastfeeding may cause more pain and discomfort.
Tips to Relieve Back Pain While Nursing
Here are some tips that may help relieve back pain while you nurse your baby –
1. Pay Heed to Your Breastfeeding Position
Breastfeeding the baby while sitting in a wrong position is the most common cause of back pain and many mothers unknowingly may do so. It is very important that you check your feeding position and do not lean forward or slouch. It is also seen that some breastfeeding moms may find a certain position uncomfortable or painful whereas other feeding positions may cause no discomfort. Therefore, it will be a good idea to try different feeding positions. To avoid back pain, breastfeeding while lying down may be a good option (2).
2. Use Pillows for Support
You may often find yourself leaning forward to feed your baby, which may put a lot of stress on your back. You may prop your baby position up by using some pillows to get him closer to your breasts. Alternatively, you may use pillows to provide extra support for your back.
3. Use the Right Chair
If you sit on a chair to breastfeed your baby, it is very important that you choose the right kind of chair. Abstain from sitting in a deeply cushioned chair which makes you sink into it because this may cause back pain. Instead, it is recommended that you choose a firm chair and sit in an upright position. A better posture and sitting position may provide you relief from back pain.
4. Get a Massage
While tending to your baby’s requirements, you may neglect your health and well-being, which may result in back pain. Getting a relaxing massage is a great way of getting rid of obnoxious back pain. Do not hesitate to ask for help from family and friends to take care of your baby when you pamper yourself (3).
5. Take a Walk
Walking daily for some time can help strengthen your back muscles (4). Take a break in between the feeding sessions and invest some time in walking. If you cannot find time to go out and walk, you can walk in your home too. However, it will be a good idea to have a walk-in open for half an hour to strengthen your back muscles.
6. Take Rest When Your Baby Sleeps
Getting adequate rest and sleep is of prime importance for any mother, especially if you have delivered your baby recently. Taking out some quiet time for yourself may seem difficult but sneak out time and sleep or rest when your baby sleeps. It is often seen that a well relaxed and rested body is less likely to have problems such as back pain (5).
7. Start Exercising Once Your Body Recovers Completely
Your body will take approximately six weeks to heal itself after the birth of your baby. Once the six weeks are over and if you feel healthy and fine, you can start with some light exercises and yoga to get your body back in shape and to strengthen it. However, do consult your doctor before starting with anything. Start gradually by investing 10 to 15 minutes daily and slowly increase the time and intensity of your workouts. Doing so will help provide relief from lower back pain while breastfeeding (6).
8. Stay Hydrated
While taking care of your baby, you may often forget to drink water, and this may dehydrate your body. Dehydration can not only make you feel tired and exhausted but it may also lead to various kinds of pain (7). Therefore, it is suggested that you drink at least 8 to 10 glasses of water in a day to keep dehydration at bay.
9. Try Hot Compress
Use a hot compress for approximately 20 minutes at a time. You can do this for a few times to get relief from your backache. It is a great way of reducing pain in the lower back and upper back pain while breastfeeding (8).
10. Don’t Stress
It is very important that you avoid stressing over little things. If you feel stressed or anxious, make sure you do things that may reduce your stress levels such as, taking a warm bath, listening to some good music, getting some sleep or getting a good massage. You can also do whatever relaxes you and makes you feel happy.
11. Take Help From Your Family and Friends
Motherhood may exhaust you and it is very normal to feel that you cannot manage everything on your own. Ask for help, whenever you feel you cannot handle things all by yourself. It will be an excellent idea to join some new mommy group in your locality, where you all can get together and share your motherhood experiences and also may get some tips on better parenting.
Exercises That Can Help Relieve Back Pain While Breastfeeding
Stretches are very good for relieving back pain and here are some easy stretches that you may try to battle breastfeeding back pain:
1. Cat-Cow Pose
Get on all fours and place your hands under your shoulders. Your knees should be hip-distance apart. Inhale and gradually arch your back by looking up, then look down while exhaling slowly and rolling your back. Your tailbone should be tucked under. You can repeat this a few more times to get relief from nerve pain in the back while breastfeeding (9).
2. Child Pose
Come on to your hands and knees on the mat. Slowly stretch your arms in front of you by placing your palms flat on the ground. Inhale by taking a deep breath and slowly exhale while resting your chest towards the ground. Move your hands towards left and breathe into your right ribcage and then do the same on the other side (10).
3. Restorative Chest Stretch
Take a towel and roll in horizontally. Place it on the ground and lay on the towel by placing it around your bra strap area. Spread your arms outwards with your elbows touching the ground and your palm facing the ceiling. Inhale deeply and as you exhale let your body push your body towards to the rolled towel (11).
4. Bend Forward
Stand straight and keep your hands behind your back. Try to hold your left arm’s elbow with the right hand and your right arm’s elbow with your left hand. Slowly inhale then bend forward while exhaling. Be in this position for a while and then exhale from your mouth while returning to normal position.
5. Stretch Forward
Stand with your legs hip-width apart. Hold a towel and stretch your arms in front of you, a little more than shoulder-distance apart. Now, while inhaling, raise your arms up and while exhaling, bring them down. Similarly, while inhaling, get your hands in front and exhaling, get them down. Repeat this a few times.
FAQs
1. Can breastfeeding positions cause upper back pain?
Yes, poor feeding posture can contribute to upper back pain while nursing. Hunching your shoulders or bending your neck to look at your baby may strain the muscles around your upper back and shoulders.
2. Is it better to breastfeed while sitting or lying down if I have back pain?
Both positions can be comfortable when done correctly. Sitting with your back supported may help reduce strain, while side-lying breastfeeding can provide relief for some mothers. Choose a position that feels comfortable and keeps your body relaxed. If feeding while lying down, ensure your baby’s sleep space is safe after the feed.
3. How long does back pain after childbirth last?
The duration varies depending on the cause, recovery, and daily activities. Mild muscle soreness may improve over days or weeks, while pain related to posture or other conditions may last longer. If your pain is persistent, worsening, or affecting your ability to care for your baby, speak with your healthcare provider.
All these stretches are great for helping you in getting rid of back pain from breastfeeding. However, it is suggested that you seek medical advice before opting for any of the above-mentioned suggestions for relieving back pain.
Also Read:
Pain during Breastfeeding
Joint Pain after Delivery
Causes of Back Pain after Delivery
Read more

Setting Up Your Home For Twins
Most expecting parents are aware of what they have to buy for their baby’s needs. But, what if they’re expecting twins? It’s important to have a list of the best gear for twins to make looking after them easier. You’ll certainly save yourselves from frustration!
Did your doctor just tell you that you’re going to give birth to twins? You and your partner will be very excited and thrilled. But, taking care of twins can be a little challenging and requires preparation. You can make the task easier by purchasing all necessary baby gear before your due date.
Making a List of Things to Buy for Newborn Twins
Before you set out shopping, create a list of what to get. Arrange them based on priority, starting from the ones that are most essential to the ones that are the least. You can arrange the list according to clothing, sleeping, feeding and travelling.
Essential Baby Gear for Twins
1. Layette
It’s important that you put together a layette for your twins. Remember that you’ll need more clothes when dealing with twins. Here’s a checklist of things that you should include:
Onesies
Pajamas
Shirts and tops. Go for sleeveless for summers and full sleeves for winters
Socks and mittens
Caps
Swaddling blanket
Winter wear
Burp clothes
Hooded bath towels
Cloth diapers
2. Diapers
One of the most important items needed for newborn twins is diapers. Lots of them! Since babies soil their diapers very often, you need to have a ready supply. Invest in disposable as well as reusable diapers. Don’t forget to get a separate pail for each twin to place their soiled items. You’ll also need baby wipes and diapering essentials like a diaper rash cream.
3. Cot
Your babies will spend a lot of time sleeping, so a cot should make it to your list of things needed for newborn twins. Instead of buying two cots, look for integrated cots that are designed for twins. You can find them in different designs like L-shaped cots and side-by-side cots. If none are available, buy a large cot and divide it using a cot divider.
4. Strollers
Another important twin baby item is a stroller. It’s not easy carrying two infants when you’re all by yourself, and a stroller can make things easier. You can get a tandem model where you place your babies one behind the other, or you can go for a side-by-side stroller where they’re placed next to each other.
5. Baby Monitors
This is another essential item as it allows you to get household chores done and catch up on some sleep with a free mind while your babies are sleeping. Monitors alert you when babies wake up or move in their cots. You can choose from noise monitors that are triggered when babies cry or make a sound, or movement monitors that detect motion.
Aside from these must-haves, invest in a twin breastfeeding pillow that makes it easy to nurse your babies simultaneously. Caring for an infant is not simple and when it comes to twins, you need to be prepared. Planning in advance will make things a lot smoother to manage.
Read more

How to Choose the Best Child Insurance Plan
Every parent hopes that the future of their child should be free of worries, primarily those pertaining to money. This is why many wish to choose the best child insurance plan that can take care of everything. However, every plan comes with certain benefits and risks. Understanding your own needs can help you make the right choice in this regard.
Why Should You Have A Child Insurance Plan?
Getting a good insurance plan, for your child has a good payoff in the long run. This is not simply as a protection mechanism in case of an untoward incident, but can also be looked at as an investment opportunity for the child’s benefit.
1. Spaced Out Investments for Child’s Future
The premium for a child’s insurance plan is minimal and can be spaced out over a large period to reduce the amount even further. An annual payment of a small amount can help create a corpus of sorts, which helps in investing an amount that grows and can be utilised by the child later in life.
2. Advanced Planning for A Child’s Wedding And Married Life
Even when your child grows up, gets educated and married, he would still require some support and an impetus to set up his new life. By taking an insurance plan that has the right period of maturity, you can find yourself with funds that can take care of the wedding as well as provide a good foundation for the couple’s life.
3. Protection for The Child after The Death of Parents
The major factor that comes into play is to ensure that the life of their child continues to be unhindered and proceed unabated without any dependencies on you. A proper insurance plan can help your child continue living and taking care of expenses even in your absence so that he can continue to live and move ahead in life.
4. Support for Higher Education With Financial Ease
While an education loan might help take care of higher studies abroad, having an insurance policy in place that matures at the right time, can help fill the remaining gap. This allows your child to study without any worries about family finances and create wonders.
5. A Total Package to A Secured Future
Rather than be caught unaware and helpless by unexpected hurdles in life, a bunch of insurance policies can help you stay secure no matter what the troubles might be. Even if they don’t, the maturity amounts can be put to better use, or a repeat investment for better protection as well.
Types of Child Insurance Plans
Many insurance companies offer child insurance plans, with various additions and tweaks to it to suit your needs. There are a few of them that are quite common based on the general needs of the people.
1. Child Endowment Plans
Your investments are put into multiple debt products based on the decisions made by the company. While the returns on such an investment are not big, there is guaranteed security for your money due to low risk.
2. Unit-Linked Investment Plans
It allows your investment to be divided among debt as well as equity products. The percentage of the amount is higher for the high-risk equity products, but that is precisely what gives you a higher return for your money, making it great for your child’s future.
3. Single Premium Insurance Plans
At times, some parents may not want to be stuck with an annual premium payment because they may not want to be under the pressure of remembering the dates or keeping aside money for the premiums. In such cases, a one-time major payment can be opted for as well, which might even get you discounts for the same benefits.
4. Regular Premium Insurance Plans
Parents often like to choose what benefits they would like for their child and might forego on others. This also provides them with a facility of not paying premiums annually, but monthly or even quarterly. These payment cycles are suitable for many as well as come with different benefits customised to the schedules.
Best Child Insurance Plan Riders
Riders act as additional benefits on the base insurance plan that you take, and these are highly recommended. There are a few great riders that should be opted for, but it is necessary to know that your choice of insurance plan may govern the riders that are available to you.
1. Income Benefit Rider
This is one of the highly recommended riders for your child’s insurance plan, especially if you have a fast-paced life. By opting for an additional premium amount, your child can get a specific percentage of the policy amount every month as income. This usually triggers if the parent passes away, meets with an accident, or is diagnosed with a critical illness.
2. Critical Illness Rider
Similar to the one mentioned above, if a parent is diagnosed with a high-risk illness or undergoes a specific medical procedure, the child can receive a specified amount from the rider. The premium for this depends on the age of the parent, amongst other factors.
3. Disability Benefit Rider
This rider usually comes in variants of partial to total disability of the parent. If the parent gets disabled either by an accident or a disease, the child receives a benefit of a large amount from the rider.
4. Accidental Death Rider
Death caused by accident may not always be covered by the insurance policy terms. Therefore, this rider helps your child remain safe and secure, as well as provide him with financial support in the event such a tragedy does occur.
5. Premium Waiver Rider
Even if your child receives a monetary benefit after your death, he still needs to pay the remaining premiums of his policy to prevent it from lapsing. This rider takes care of that, where any future premiums are waived if the parent were to pass away.
Tips to Select A Child Insurance Plan
Choosing a proper insurance plan for your child is not as easy as it seems once you go through all the possible scenarios. Therefore, when making a decision, it is best to keep a few tips in mind that can help you bring closer to choosing the right one.
1. Plan the Stages
Make sure the insurance plan you pick up has the premiums and period panned out to a specific milestone of your child’s growth. This helps you receive the financial benefit for major decisions of his life.
2. Paying Capabilities and Frequencies
Once a plan is in motion, the premiums need to be paid on time. These amounts also depend on the final maturity amount of the insurance cover. Know your financial standing and choose the amounts accordingly.
3. Waiver of Premium
The repetitive nature of premiums is what gets most parents worried if they can pay them on time and if their child would still be protected after their death. A waiver rider is an option to choose for. Also, going for a single premium plan could also be beneficial.
4. Estimate the Inflation
You might require a specific amount for a good life now, but that number is going to increase in future for a similar lifestyle. Make sure you take that into account when specifying a maturity amount for the insurance plan.
5. Start Early
Most companies create insurance plans for children in such a way that their benefits start paying out after a child becomes an adult legally. The later you begin, the higher the premium amount starts to get. Therefore, start young and start soon.
What Documents are Required for Child Insurance Plan?
The documents required for starting an insurance plan depending on the requirements as per the company policies as well as the coverage of the plan itself. Nevertheless, there are a few standard documents that are invariably required, no matter what.
Policy form- This is where all your proposal details and information is entered.
Proof of address- Anything from your passport, driving license, aadhar card, electricity bill can be used.
Proof of income- The person buying the policy for the child needs to show that he has a source of income to pay the premiums.
Proof of identity- PAN card, aadhar card, driving license, voter ID, are common identity proofs you can use.
Proof of age- A copy of the passport, birth certificate, or 10th and 12th mark sheets can be used for this.
Figuring out the best child health insurance plan is a subjective decision since requirements vary from family to family. Understand where you currently are and the future you are planning for your child, can help you pick the right plan for him.
Also Read: Important Tips for Financial Planning
Read more

Daycare Centre for Children – Pros and Cons
So, you have been enjoying motherhood to the hilt by spending time with your little one, taking care of him and tending to his various needs too. But if you are a working mom then this rosy period may have to end soon and you may have to go back to work.
The sheer thought of leaving your baby behind can be daunting for a mother. However, the daycare centre is a good option for parents who, due to work constraints or other reasons, cannot be with their babies. But have you weighed in the pros and cons of daycare yet? In this article, we shall discuss various advantages and disadvantages of a daycare centre and various tips that may help you choose a daycare centre for your child.
What Are the Advantages of Daycare Centres?
Various studies have shown that children benefit greatly from going to a daycare centre, and this holds true for babies and toddlers from 6 months to 4 years of age. Here are some advantages or pros of a daycare centre for children (1) (2) (3) (4):
1. Kids Learn to Socialise
Socialising is one of the great benefits of daycare. Daycare centres are great places for kids to meet other kids; some of the kids may be of the same age, and others may be younger or older. Your child will interact with them on a day-to-day basis, which may help him to master his socialising skills. Your kid may understand and learn the art of making friends, too.
2. Kids Learn to Follow Schedule
Though daycare centres may not impart any formal education, the various activities planned for the children are executed in a structured manner. Your kid may learn how to do things according to the schedule, and this is amongst one of the many benefits of daycare for toddlers.
3. Kids Begin Learning at an Early Age
Daycare centres not only take care of your child but also plan various activities for your kids. These activities help your kid to learn various educational concepts at a young age. There are many daycare centres that may adopt play and learn the concept. Therefore, the importance of daycare in child development cannot be undermined.
4. Smoother Transition to Formal Schooling
Kids who start going to daycare centres may find it easier to adjust to the formal schooling atmosphere. This is because, by the time they are ready to go to kindergarten, they may already be aware of being with same-age group children, following a schedule and other things that may make the transition easier for them.
5. Kids Develop Better Immunity
This is one of the many benefits of daycare for infants. Home is a protected environment and a safe place for your child, but not exposing him to rowdy environmental conditions may not be good for your child’s immunity. A daycare centre is a place where your kid would be interacting with many children. The more the child gets exposed to various strains of flu and cold, the better it is for his immunity.
6. Contentment for the Parents
Every parent wants to be with his/her child, but due to various constraints, this may not always be possible. Therefore, when parents leave their children in a trusted environment where they are assured that their baby will be taken care of and thus they may feel contented and happy.
7. There Is Consistency in Care
When a daycare worker is sick, instead of closing, the facility hires a substitute for the day. This ensures parents have reliable care without disruptions. Seeing the same caregivers every day is beneficial for children. As a parent, you won’t need to worry about finding last-minute care arrangements if someone gets sick. This makes managing your schedule and responsibilities easier.
8. Children Perfect Langauge and Speech
Daycare centers have skilled teachers who know just how to help kids talk better and learn words. They teach kids things like letters, numbers, shapes, and colors. Children are able to practice their language and speech under the orderly guidance. Parents might be busy, but daycare teachers are really good at this stuff.
Now that we have gone through the benefits of daycare for toddlers, here comes the disadvantages.
What Are the Disadvantages of Daycare Centres?
A daycare centre is a great option for your child. However, everything may have some pros and cons. So, is daycare bad for kids? No, daycare is not bad for children, but there are some cons or disadvantages of a daycare centre that are worth looking into:
Daycares are not cheap. As you go up with the facilities provided, the cost of daycar service increases, too.
You may have to spend extra money for an extended stay at a daycare centre.
Some daycare centres may not be functional on holidays; you may have to look for alternate arrangements.
Sometimes, daycare centres may not permit a sick child.
Along with other things, your child may be sharing germs, too. This means your kid is more susceptible to catching various kinds of infections and diseases at a daycare centre.
Daycare is a place where kids from various families and backgrounds may come. Your kid may be learning good things but he is also exposed to various bad habits of other children . Your kid may pick up bad words or habits from other children.
Daycare centres follow a routine, and sometimes your kid may not adjust well to it, and it may create problems for you, too.
Your child may be in a noisy atmosphere, and he may not like it.
Spending time in a daycare centre provides for a less personalised experience in comparison to the services of a nanny.
Reputed daycares providing the best of care and services often accept limited applications, soaring the competition and waitlisting.
The above-mentioned are some of the drawbacks that you may like to consider before you plan to put your kid in a daycare centre.
Things to Consider While Choosing Daycare for Your Child
How you choose a daycare for kids is important, too. Once you make up your mind about sending your kid to a daycare centre, it is important that you pay heed to the following aspects before choosing a daycare centre for your child (5):
A daycare centre is not only for taking care of your child; therefore, choose one that may involve your kid in various interactive and educational activities, too.
Choose a daycare centre that may allow flexibility in terms of time and days.
It will be a great idea to opt for a centre that may be close to your house so that picking and dropping may become convenient for you.
Make sure you check the child-caretaker ratio before putting your kid in any daycare centre, the lower the ratio, better it is.
Make sure the centre is registered or licensed and follows the rules and regulations of a daycare centre.
There are many options for daycare facilities to choose from, you should choose the one best suited to your family requirements.
FAQs
1. Can I homeschool my child instead of sending them to a daycare?
Yes, you can homeschool your child, but this might not be the one-size-fits-all solution for all parents, as every family has different schedule and needs. If you can provide personalisation to your child, then homeschooling can work out. However, if you are unable to provide highly personalised education all the time, then daycare facility is ideal.
2. What is the major benefit of daycare for children?
One of the major benefits for children is independence. Children learn to be independent and learn to stay away from their primary caregivers, which is usually not in the case of children with no daycare. The need for constant care from parents reduce and children learnt to open up their circle to bring in more people in their trustworthy circle (2).
Sending your kid to a daycare centre can be a tough call for the parents to take. However, there are many good options available too. Make deliberate efforts to choose the daycare centre for your little one.
References/Resources:
1. Daycare Pros and Cons: What Parents Should Know; WonderBaby.org; https://www.wonderbaby.org/articles/daycare-pros-and-cons
2. 5 Benefits of Daycare For Your Child; YMCA; https://lafayettefamilyymca.org/5-benefits-daycare-your-child/
3. Benefits of childcare for your toddler; Professional Association for Childcare and Early Years (PACEY); https://www.pacey.org.uk/parents/the-best-care-for-your-child/benefits-of-childcare-for-your-toddler/
4. Daycare Benefits for Parents and Childeen; Mandio Montessori of Geneva; https://genevamontessori.org/daycare-benefits-for-parents-and-children/
5. Five steps to choosing childcare; Coram Family and Childcare; https://www.familyandchildcaretrust.org/five-steps-choosing-childcare
Also Read:
Importance of Preschool Education
Preschool Vs Daycare: Which Is Good for Your Child?
Should You Choose a Family Daycare for Your Child
At What Age Can Your Child Go to a Daycare/Childcare Centre?
Read more
10+ Best Baby Diapers Brands in India (2026)
Choosing the right diaper can make everyday baby care easier. A good diaper should offer a comfortable fit, reliable absorbency, leak protection and materials that feel gentle against your baby’s skin. With so many options available, parents often wonder which are the best baby diapers in India and which brands are worth considering.
To make the choice simpler, we have shortlisted 10+ popular baby diaper brands, including Pampers, Huggies, MamyPoko, Babyhug, Little’s, LuvLap and others. The list considers factors such as comfort, absorbency, fit, diaper styles, sizing and features that matter during everyday use.
Quick Picks: Best Baby Diaper Brands in India
Brand
Best For
Popular Diaper Types
Pampers
Everyday and premium options
Pants, taped diapers
Huggies
Comfortable everyday use
Pants, taped diapers
MamyPoko
Pant-style diapers
Pants
Babyhug
Variety and value
Pants, taped diapers
Little’s
Everyday essentials
Pants, taped diapers
Teddyy
Absorbency-focused options
Pants, taped diapers
LuvLap
Soft, skin-conscious options
Pants
Himalaya Babycare
Skin-focused baby care
Pants
Babyoye
Softness and comfort
Pants
Mylo
Modern diaper features
Pants
R for Rabbit
Lightweight diaper options
Pants
Bonfino
Absorbency-focused options
Pants, taped diapers
Chicco
Premium baby care
Pants, taped diapers
What Makes a Good Baby Diaper?
Before choosing a brand, it helps to understand the features that can make a difference in everyday use.
Good Absorbency
A diaper should absorb urine efficiently and help keep moisture away from the baby’s skin. For overnight use, parents may prefer diapers designed for longer wear, while daytime diapers can be changed more frequently.
Soft and Comfortable Materials
Since diapers remain in close contact with a baby’s skin, a soft inner surface and comfortable leg and waist areas are important. Babies with sensitive skin may benefit from simpler, skin-conscious options.
Secure Leak Protection
Leak guards around the legs, a flexible waistband and a good overall fit can help reduce leakage. However, even a highly absorbent diaper can leak when the size or fit is not right.
Comfortable Fit
A diaper should sit securely without digging into the baby’s waist or thighs. Frequent leaks, gaps around the legs or noticeable red marks can indicate that it is time to reassess the size or style.
Wetness Indicator
Some diapers include a wetness indicator that changes colour when the diaper becomes wet. This can be particularly convenient for newborn parents who are still getting familiar with diaper changes.
Top 10+ Best Baby Diaper Brands in India
The following brands offer different combinations of absorbency, softness, fit, styles and price points. Consider the features that matter most for your baby rather than choosing a brand based only on popularity.
1. Pampers
Pampers is one of the most recognised diaper brands in India and offers options for different stages, from newborns to active toddlers. Its range includes both taped and pant-style diapers, with options focused on everyday comfort, softness and absorbency.
Best for: Parents looking for a wide selection across different baby stages.
Popular options include: Premium Care, Active Baby and All Round Protection.
Why consider it: Pampers offers multiple ranges, making it easier to switch between different features as your baby’s needs change.
2. Huggies
Huggies is another widely recognised baby diaper brand with a strong presence in the Indian market. Its diaper range includes pant-style options as well as products designed for younger babies.
Best for: Everyday use and parents looking for a familiar, widely available brand.
Popular options include: Wonder Pants and premium diaper ranges.
Why consider it: Huggies focuses on comfortable fit, absorbency and movement-friendly designs for growing babies.
3. MamyPoko
MamyPoko is particularly well known for its pant-style diapers. Its range includes options designed for everyday use as well as variants focused on longer-lasting absorbency.
Best for: Parents who prefer pant-style diapers for active babies and toddlers.
Popular options include: Pants Extra Absorb, Skin Breathe Care and premium pant ranges.
Why consider it: The pant-style format makes changing easier once babies become more active and start crawling or walking.
4. Babyhug
Babyhug offers a variety of baby diapers in both pant and taped styles to suit different needs. Parents can choose from everyday and premium options based on their baby’s size, comfort, fit, and level of absorbency needed.
Best for: Parents looking for variety across different diaper styles and stages.
Popular options include: Babyhug Advanced and Pro Bubble Care ranges.
Why consider it: The brand offers several options across sizes and styles, making it convenient to compare different features within one brand.
5. Little’s
Little’s is an Indian baby-care brand offering diapers designed around everyday comfort, absorbency and leak protection. Its range includes different sizes and styles for babies at various stages.
Best for: Parents looking for practical everyday diapering options.
Popular options include: Premium FluffySoft, Comfy Night and pant-style diapers.
Why consider it: Little’s combines everyday diapering features with soft materials and convenient designs.
6. Teddyy
Teddyy from Nobel Hygiene is an Indian diaper brand offering both taped and pant-style options. Its products focus on absorption, dryness and a secure fit for babies at different stages.
Best for: Parents looking for an Indian brand with multiple diaper formats.
Popular options include: Easy Diaper Pants, Easy Tape Diapers and premium taped diapers.
Why consider it: The availability of both tape and pant styles makes the range useful as your baby moves through different developmental stages.
7. LuvLap
LuvLap offers a range of baby-care products, including diapers designed with softness, absorbency and comfortable movement in mind. Its diaper options are available in several sizes and are suitable for everyday use.
Best for: Parents looking for a comfortable diaper from an established Indian baby-care brand.
Popular options include: LuvLap diaper pants and premium diaper ranges.
Why consider it: Features such as soft materials and lightweight construction can make the diapers comfortable for everyday wear.
8. Himalaya Babycare
Himalaya Babycare brings its established baby-care focus to its diaper range. Its diapers are designed with features aimed at keeping babies comfortable while helping parents manage everyday wetness and leakage.
Best for: Parents who prefer a baby-care brand with a skin-focused approach.
Popular option: Total Care Super Absorb Baby Pants.
Why consider it: The brand’s baby-care positioning and focus on gentle care make it an option parents may consider when skin comfort is a priority.
9. Babyoye
Babyoye offers baby diapers with an emphasis on softness, comfort and everyday protection. Its Air Soft range is designed for babies who need a comfortable pant-style diaper during the day and night.
Best for: Parents who prioritise softness and a comfortable feel.
Popular option: Air Soft Premium Pant Style Diapers.
Why consider it: The soft, lightweight feel can be useful for babies who spend long periods wearing diapers.
10. Mylo
Mylo offers modern baby-care products developed around the everyday needs of parents. Its diapers feature an Acquisition Distribution Layer (ADL), which is designed to help distribute liquid through the absorbent core.
Best for: Parents interested in diapers with absorption-focused design features.
Popular option: Baby Diaper Pants with ADL Technology.
Why consider it: The ADL is designed to support more even liquid distribution, helping the diaper manage wetness efficiently.
11. R for Rabbit
R for Rabbit is an Indian baby-care brand known for its range of thoughtfully designed baby products. Its Feather Diapers focus on a lightweight construction while providing the absorbency needed for everyday diapering.
Best for: Parents looking for lightweight diaper options.
Popular option: Premium Feather Diapers.
Why consider it: A thinner diaper profile can provide babies with greater freedom of movement, particularly when they become more active.
12. Bonfino
Bonfino offers baby diapers in both taped and pant-style formats. Its products focus on absorbency, dryness and comfortable fit across different baby stages.
Best for: Parents looking for absorbency-focused diaper options.
Popular options include: Premium Tape Style and Premium Pants.
Why consider it: The brand offers multiple formats, allowing parents to choose between taped and pant-style designs depending on their baby’s stage.
13. Chicco
Chicco is an established Italian baby-care brand with a broad range of products for babies and young children. Its diaper range focuses on softness, comfort, absorbency and ergonomic fit.
Best for: Parents looking for premium baby-care options.
Popular options include: Comfypro and Ultra Soft & Light diaper ranges.
Why consider it: Chicco’s focus on soft materials and comfortable construction makes it an option for parents who prioritise a premium feel.
Types of Baby Diapers
Understanding the different diaper types can make choosing the right product much easier.
Taped Diapers
Taped diapers have adjustable fastening tabs that allow parents to customise the fit around the baby’s waist. They are particularly convenient for newborns and younger babies who spend much of their time lying down.
Pant-Style Diapers
Baby diaper pants can be pulled on like underwear and are convenient for active babies. They are especially useful when babies start crawling, standing and walking because they make changes quicker and easier.
Disposable Diapers
Disposable diapers are designed for single use and are widely preferred for their convenience, absorbency and ease of disposal.
Cloth Diapers
Cloth diapers are reusable and can be washed and used repeatedly. They are an alternative to disposable diapers for parents who prefer reusable baby-care products.
How to Choose the Best Baby Diapers for Your Baby
1. Choose the Right Size
Always check the weight range printed on the diaper pack rather than choosing based only on age. Babies of the same age can have very different body shapes and weights.
A diaper that is too small may leave marks or cause leaks, while an oversized diaper may create gaps around the legs.
2. Consider Your Baby’s Activity Level
Taped diapers can be convenient for newborns and younger babies. Once your baby becomes more active, diaper pants can make changing easier.
3. Look at Absorbency
If your baby tends to stay dry for longer periods, consider a diaper designed for extended wear. For newborns, frequent changes are still important regardless of the diaper’s advertised absorbency.
4. Check the Fit Around the Legs
The diaper should sit comfortably around the thighs without leaving excessive gaps. If leaks repeatedly occur around the legs, check the size and fit before changing brands.
5. Consider Skin Sensitivity
If your baby has sensitive skin, pay attention to how their skin responds to a particular diaper. Look for comfortable, breathable materials and avoid continuing with a product that appears to cause irritation.
6. Decide Between Pants and Tapes
There is no universal winner between pant-style and taped diapers. Taped diapers provide adjustable fastening, while pants are convenient for active babies.
7. Think About Day and Night Use
Some parents use the same diaper throughout the day and night, while others prefer a diaper designed for longer wear at bedtime. The choice should depend on your baby’s wetting pattern, comfort and how frequently you change diapers.
8. Try a Smaller Pack First
Before buying a large pack, trying a smaller pack can help you check whether the diaper fits your baby comfortably and works well with their skin and movement.
Baby Diaper Size Guide
Diaper sizing varies between brands, so always follow the weight range provided on the specific pack.
Newborn (NB)
Up to 5 kg
Small (S)
4–8 kg
Medium (M)
6–11 kg
Large (L)
9–14 kg
Extra Large (XL)
12–17 kg
XXL and above
15 kg+
Tip: If your baby’s weight falls between two sizes, consider the fit, thigh area, waistband and frequency of leaks rather than choosing purely by the size label.
Pant Diapers vs Taped Diapers: Which Is Better?
Neither option is automatically better. The right choice depends on your baby’s developmental stage and your preferred changing routine.
Taped diapers may work well for:
Newborns
Babies who are mostly lying down
Parents who want adjustable fastening
Babies who need frequent diaper changes
Pant-style diapers may work well for:
Crawling babies
Standing babies
Toddlers
Quick changes
Parents who find fastening tabs difficult with an active baby
How Often Should You Change a Baby’s Diaper?
Diapers should be changed regularly and whenever they are wet or soiled. Newborns may need more frequent changes because they feed and urinate frequently.
For older babies, the exact number of changes can vary depending on feeding, fluid intake, activity and individual wetting patterns.
A diaper’s advertised long-hour protection should not be taken to mean that a baby should remain in a wet or soiled diaper for that entire period.
Can Diapers Cause Diaper Rash?
Diaper rash can have several causes, including prolonged contact with urine or stool, friction, moisture, sensitive skin and reactions to certain products.
Changing diapers regularly, cleaning the diaper area gently and allowing the skin to stay dry can help support healthy skin. If a rash is persistent, severe or worsening, parents should speak with a healthcare professional.
Best Baby Diapers in India: Which Brand Should You Choose?
There is no single best baby diaper brand in India for every baby. A diaper that fits one baby perfectly may not work as well for another because babies differ in body shape, skin sensitivity, activity and wetting patterns.
For example, parents who want a broad range of options may consider Pampers or Huggies. Those looking for pant-style options can consider MamyPoko, Babyhug or Babyoye. Parents interested in Indian baby-care brands can also compare Little’s, Teddyy, LuvLap and R for Rabbit.
The most useful approach is to start with the correct size, try a suitable variant and observe your baby’s comfort, skin and leakage pattern.
FAQs About Baby Diapers
1. Which is the best baby diaper brand in India?
There is no single best brand for every baby. Pampers, Huggies, MamyPoko, Babyhug, Little’s and other brands offer different combinations of fit, absorbency, softness and diaper styles. The best choice is the one that fits your baby well and keeps them comfortable and dry.
2. Which diaper is best for newborn babies?
Newborns generally need a properly sized diaper with a comfortable fit around the waist and legs. Taped diapers can be convenient at this stage because they allow parents to adjust the fit while the baby is lying down.
3. Are pant diapers better than taped diapers?
Not necessarily. Taped diapers offer adjustable fastening and can be convenient for newborns, while pant diapers are easier to pull on and can be useful for active babies. The better option depends on your baby’s age, movement and fit.
4. How do I know if my baby’s diaper is the right size?
A well-fitting diaper should sit securely without being excessively tight. Frequent leaks, gaps around the legs or persistent red marks can indicate that the size or fit needs to be reassessed.
5. Which diaper is best for overnight use?
Parents may prefer diapers designed for longer wear at night. However, the right choice depends on your baby’s wetting pattern and the fit of the diaper. A good fit is just as important as absorbency when reducing overnight leaks.
6. How many diapers does a newborn need in a day?
Newborns generally need frequent diaper changes, so parents may go through several diapers each day. The exact number varies depending on feeding, bowel movements and individual wetting patterns.
7. Can I use pant diapers for a newborn?
Some brands offer pant-style diapers in smaller sizes, but taped diapers are often convenient for newborns because they can be adjusted while the baby is lying down. Always follow the manufacturer’s size and weight recommendations.
8. Should I size up if my baby’s diaper is leaking?
Not always. Leakage can result from an incorrect fit, gaps around the legs, an overfull diaper or incorrect positioning. If the diaper feels tight or leaves marks, moving up a size may help. If it fits loosely, another size or style may be more suitable.
9. Are expensive baby diapers better?
Not necessarily. Higher-priced diapers may offer additional features, but an affordable diaper can work very well if it fits your baby properly and provides adequate absorbency and comfort.
10. How often should I change a baby’s diaper?
Change the diaper regularly and whenever it is wet or soiled. Newborns usually require more frequent changes than older babies.
11. Can I use the same diaper during the day and night?
Yes, provided the diaper is suitable for your baby’s needs and is changed regularly. Some parents prefer a higher-absorbency option at night for convenience.
12. Do diapers prevent diaper rash?
No diaper can guarantee that a baby will not develop diaper rash. Regular changes, gentle cleaning, keeping the area dry and choosing a comfortable-fitting diaper can help reduce factors associated with irritation.
13. What should I look for in diapers for sensitive skin?
Look for a soft inner surface, comfortable fit and materials that your baby’s skin tolerates well. If a particular diaper repeatedly causes irritation, consider trying another variant or brand.
14. Are wetness indicators useful?
Yes. A wetness indicator can give parents a quick visual cue that a diaper is wet, which can be particularly helpful with newborns and during nighttime checks.
15. How do I choose diapers for an active baby?
Pant-style diapers can be convenient for crawling, standing and walking babies because they are easy to pull on and take off. A flexible waistband and secure leg fit are also important for active babies.
16. Should I buy a large pack of diapers?
It can be convenient to buy larger packs once you know which size and variant suit your baby. For a new brand or size, trying a smaller pack first can help you check the fit and comfort.
17. Why does my baby’s diaper keep leaking?
Common reasons include an incorrect size, poor positioning, gaps around the legs, an overfull diaper or a diaper that does not suit the baby’s body shape. Check the fit before assuming that the brand itself is the problem.
18. Can I use different diaper brands for my baby?
Yes. Parents can try different brands and variants to find the combination of fit, comfort and absorbency that works best for their baby.
19. What is the most important factor when buying baby diapers?
Fit is one of the most important factors. A well-fitting diaper should be comfortable around the waist and thighs, provide adequate absorbency and allow the baby to move freely.
Final Word
Choosing among the best baby diapers does not have to be complicated. Start with your baby’s weight and size, then consider fit, absorbency, softness, diaper style and skin comfort.
Pampers, Huggies, MamyPoko, Babyhug, Little’s, Teddyy, LuvLap, Himalaya Babycare, Babyoye, Mylo, R for Rabbit, Bonfino and Chicco all offer different options worth comparing.
Rather than choosing a diaper simply because it is popular, pay attention to how it works for your baby. The right diaper should fit comfortably, help manage wetness and allow your little one to move, play and sleep comfortably.
Ready to choose? Browse the baby diapers collection on and compare sizes, styles and brands to find the right option for your little one.
Read more
How to Keep Baby Cool in Summer: 12 Tips for Parents
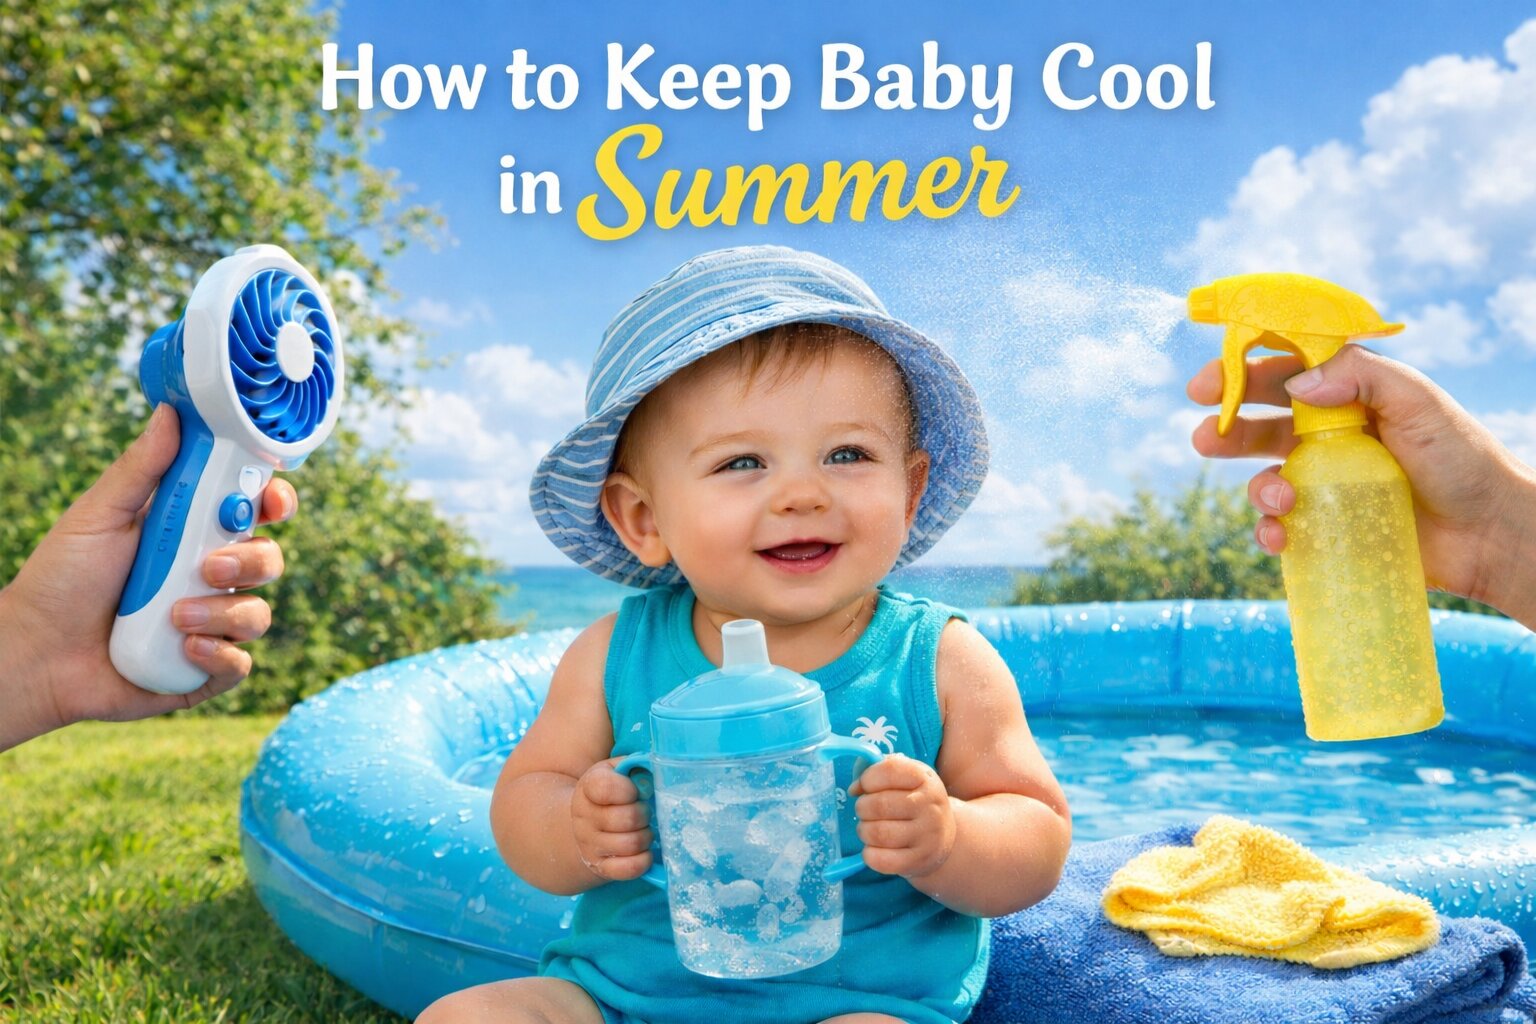
Summer is here, and so is your desire to get outside and enjoy it! But as a new mom, you must be concerned about your baby’s safety in the heat, and for good reason. Even small amounts of water loss can affect infants, and dehydration can become serious quickly. That’s why knowing how to keep your baby cool during hot weather is essential. A simple but important step is to keep your little one out of direct sunlight. Learning these strategies will help ensure your newborn stays comfortable, safe, and happy as the temperatures rise.
To enjoy the season without worry, check out these expert tips for keeping baby cool in summer.
How to Keep a Newborn Cool in Summer?
Here are some smart ways to help your baby beat the heat. And the best part? You can try all of these ways to keep baby cool in summer without breaking a sweat!
1. Stay Out of Direct Sunlight
You should always follow one mantra: “Keep your baby out of direct sunlight.” Babies are extremely sensitive to heat, and since their immune system is in the development stage, they are not capable of regulating their core body temperature (1). So, keep your baby covered whenever you go out. One of the best ways to keep your baby out of direct sunlight when you head out of home is a baby stroller. Invest in a stroller that comes with an adjustable sun canopy or shade to give the best protection to your little one. Also, make sure of some important features, like safety standards, age suitability, seat compatibility, etc.
2. Dress Your Baby Smartly
When it’s hot outside, loose-fitting, lightweight cotton garments are your best bet as they absorb perspiration better than synthetic fabrics and are gentler to the skin (2). You can even opt for a light onesie during the summer months. Ditch the layered (however cute they may be) outfits as your baby’s comfort is your topmost priority. Remember this good rule of thumb: “Dress your little one the way you’re dressed.” Now, you wouldn’t be wearing extra layers of clothing during the summers, would you?
3. Provide Good Ventilation
One major issue with the summer is the stuffy feeling and humidity. This combination is a sure-shot way to make your baby very cranky! To avoid this, ensure your home is well-ventilated. Fans help circulate air, so they might be more effective than an air conditioner in getting rid of the stuffiness (3).
4. Ensure Your Little One Is Hydrated at All Times
Even if you don’t see beads of sweat rolling off your infant’s forehead, she can be losing precious fluids in the hot weather. Staying hydrated is the key to keeping cool, particularly during the year’s warmest months. And this applies to you, too, if you’re breastfeeding your little one. If bottle-feeding or weaning, make sure your baby drinks plenty of cooled boiled water even at night (4). If your baby has transitioned to using a sipper cup, you can have more than one spout cup or sippy cup and place them at different locations in the house accessible to your baby to encourage her to drink more fluids and stay hydrated.
Pro tip: Do not give your baby anything other than water, like juice, in a sipper as it can lead to tooth decay.
5. Apply Baby-Safe Sunscreen
Before heading out with your baby, you check if all things are in place. Stroller-check, full-sleeve cotton dress-check, summer cap-check! Sunscreen-check? After your little one turns six months old, make sure to apply a suitable amount of sunscreen to your baby’s skin. A good-quality sunscreen will give your baby the sun protection she needs. Why? Because babies have delicate skin that burns easily! Reapply the sunscreen every few hours, as it may be effective only for a couple of hours (5).
When buying sunscreen for your baby, look for active features, like a mineral base, either with zinc oxide or titanium oxide, as these don’t require many chemicals to protect the skin. Also, consider sun protection factor (SPF) with a minimum from 15 to 30.
6. Use a Summer-Friendly Baby Carrier
Your body heat and the baby carrier’s enclosed space can make your little one hot and bothered within minutes. Choose a carrier made from lightweight fabric rather than a heavy fabric like denim. If your baby’s face starts to look flushed, get her out of the carrier at once.
7. Get a Wide-Brimmed Hat
For the short amounts of time that your baby will be playing outside in your garden or even balcony, keep her head protected with a sun hat. Get one with a broad brim to keep the sun off her face. A hat with strings will ensure it stays put and that your baby doesn’t fidget and toss it away. Also, make sure that the hat is made of breathable and non-irritable material so that your baby’s head doesn’t get overheated.
8. Time Outdoor Activities Wisely
The worst time for your baby (and anyone, for that matter) to be outside is between 10 a.m. and 4 p.m. (6). That’s when the sun does the most damage to the skin. To be on the safer side, plan outdoor activities prior to or after this timeframe. This has got to be the simplest way to protect your baby from getting heatstroke or severely dehydrated.
9. Apply Talcum Powder
This is an essential part of your baby’s skincare routine during summer. The mild fragrance of talcum powder can add oodles of freshness to your little one. Talcum powder refreshes and protects your little one’s skin, leaving it soft, supple, and cool without clogging the pores. While applying the powder, keep the powder away from your little one so that she doesn’t accidentally inhale any of it.
10. Get an Inflatable Pool
This is one of the best ways of keeping baby cool in summer. Most babies love splashing around in the water, especially during the summer! Get your baby an inflatable tub and let her enjoy playing in the water. You can get her some bath toys, too, so that she has a gala time in the tub! A tub works better than a sponge bath on a very hot day.
11. Choose Breathable Car Seat Covers
Car seats can get very hot, especially when left in the sun. Thick or padded covers can trap heat, making your baby uncomfortable or even causing overheating. Instead, use breathable covers made of mesh or lightweight cotton, which allow air to flow and help keep your baby cool. Always check that the seat and cover feel cool before putting your baby in.
12. Use Cooling Accessories
During hot weather, small accessories can help your baby stay comfortable. Lightweight muslin wraps, stroller fans, or breathable pads allow air to circulate and prevent your baby from getting too warm. Always supervise your baby when using these items, and make sure nothing blocks airflow or creates a safety risk.
FAQs
1. Can I use a cooling gel pad or mattress for my baby during summer?
While cooling gel pads or mattresses might seem like a good idea, they are not recommended for babies. These products can become too cold and may cause discomfort or even hypothermia in infants. Instead, opt for breathable, lightweight bedding and ensure the room is well-ventilated or air-conditioned.
2. Should I avoid using a stroller fan for my baby?
Stroller fans can be helpful to keep your baby cool, but they should be used with caution. Ensure the fan is securely attached and positioned at a safe distance to prevent little fingers from reaching it. Also, avoid pointing the fan directly at your baby’s face to prevent dryness or discomfort. Opt for a gentle breeze instead.
3. How can I tell if my baby is too hot?
Signs of overheating include flushed or red skin, sweating, rapid breathing, restlessness, or unusual fussiness. If you notice these, move your baby to a cooler area, remove layers, and offer fluids if age-appropriate.
During summer, it’s not very easy to beat the heat, especially when you’re outside. And with a baby on board, you’ll want to take added precautions while spending time under the sun. But that doesn’t mean you can’t enjoy the warm weather while it’s here. Follow these tips for summer safety for baby, and it will all be smooth sailing, even on the hottest day!
Also Read:
Summer Baby Photoshoot Ideas
Summer Skincare Tips for Babies
Newborn Baby Care Tips in Summer
Read more

Second Night Syndrome in Newborns: How Long It Lasts
Second night syndrome can make a newborn unusually fussy, wake frequently, feed repeatedly, and struggle to settle during the second night after birth. This behaviour can leave new parents exhausted and wondering whether something is wrong. In most cases, these changes are part of a newborn’s normal adjustment to life outside the womb, along with a growing need for feeding, warmth, comfort, and reassurance.
While the second night can feel difficult, knowing why these changes happen can help parents understand their baby’s behaviour and respond to their needs. This article explains what causes second night syndrome, the common signs to watch for, practical tips to soothe your baby, and how long this challenging phase usually lasts.
What Is Second Night Syndrome in Newborns?
Second night syndrome is a term used to describe a period of increased fussiness and frequent waking that some newborns experience during their second night after birth. After being calm and sleepy on night one, largely due to the exhaustion of birth, babies often wake up on night two feeling everything at once. They become far more alert, irritable, and eager to nurse or bottle-feed.
This change can be surprising, but it is usually a normal part of adjusting to life outside the womb. It is not a medical diagnosis or a sign that something is wrong.
Why Does Second Night Syndrome Happen?
There are several reasons why a newborn may become more restless during the second night after birth. The most common factors include:
Hormones wearing off: The hormones and tiredness that kept baby calm and sleepy during the first 24 hours begin to fade, leaving them more alert and awake.
A tiny stomach: Since colostrum comes in small amounts and a newborn’s stomach can hold only a little at a time, frequent feeding is completely normal at this stage (1).
A new environment: After months of constant warmth, movement, and sound, a quiet, still bassinet can feel very different from everything baby has known (2).
Changing sleep patterns: Newborns do not yet have an established sleep-wake pattern, so they may wake frequently, sleep for short stretches, and have difficulty settling (3).
What Are the Signs of Second Night Syndrome?
You may notice several changes in your newborn’s behaviour during the second night after birth, such as:
Waking frequently
Feeding repeatedly
Crying more often
Seeking constant physical contact
Having difficulty settling or staying asleep
When Does Second Night Syndrome Usually Occur?
Second night syndrome usually appears within the first 24 to 48 hours after birth, with the most noticeable changes often occurring on the second night.
Time
Typical Baby Behaviour
What Parents May Notice
Day 1
Drowsy and recovering from birth
Sleepy, brief periods of alertness, and fewer feeding cues
Night 1
Mostly sleepy with short alert periods
Short feeds and relatively easy settling
Day 2
Increasing alertness and activity
More frequent feeding cues and possible fussiness
Night 2
Increased alertness and fussiness
Frequent waking, repeated feeding, shorter sleep stretches, and wanting to be held
Day 3 and beyond
Gradually becoming more familiar with surroundings
Fussiness may begin to ease, although sleep and feeding can remain unpredictable
How Can You Manage Second Night Syndrome?
Although the second night can be tiring, these simple steps can help comfort your baby and make frequent waking and feeding easier to manage:
Feed on cue, not the clock: Offer feeds whenever your baby shows hunger cues, such as rooting, sucking, or bringing hands to the mouth as frequent feeding is common during this period (4).
Offer skin-to-skin contact: Keep your baby against your bare chest to provide warmth, comfort, and reassurance (5).
Keep your baby warm and comfortable: Dress your baby appropriately and maintain a comfortable room temperature (6).
Swaddle baby snugly: A secure swaddle can recreate the snug, contained feeling of the womb and help baby feel safer (7).
Hold and cuddle your baby: Close physical contact can help calm a fussy newborn and make settling easier.
Create a calm, quiet environment: Keep lights low and reduce unnecessary noise and stimulation around bedtime.
Rest whenever your baby is sleeping: Use your baby’s sleep periods to rest, especially during this demanding stage.
How Long Does Second Night Syndrome Last?
For most families, baby second night syndrome is short-lived. It’s typically most intense on the second night and starts to ease as feeding becomes more established and mature milk comes in, usually somewhere around day three to five. Some babies show a milder version of this pattern into the following day or two, but for the vast majority, things settle into a more predictable rhythm within the first few days.
When Should You Consult a Doctor?
Second night fussiness is usually normal. However, contact your doctor if your baby shows any of these symptoms:
Difficulty waking or unusual sleepiness
Difficulty feeding or refusal to feed
Fewer wet diapers than expected
A temperature of 100.4°F (38°C) or higher
Difficulty breathing or unusual weakness
FAQs
1. Does every baby go through second night syndrome?
Not every newborn experiences it strongly, and formula-fed babies tend to show it less intensely than exclusively breastfed babies, since parents can see exactly how much milk baby is taking in.
2. Is cluster feeding normal on the second night?
Yes. Cluster feeding is very common during the second night. Your newborn may want to nurse repeatedly, sometimes seeming hungry again soon after a feed.
3. Does second night syndrome mean my milk supply is low?
Not necessarily. Colostrum is exactly what baby needs in these first days, and frequent feeding is part of what signals your body to bring in mature milk.
4. Can bottle-fed babies experience second night syndrome too?
Yes. While it’s discussed most often in the context of breastfeeding, the underlying adjustment to life outside the womb affects bottle-fed babies as well, even if the feeding pattern looks a little different.
The second night can feel challenging, especially for new parents adjusting to their baby’s needs. Staying patient and responding to your baby with comfort and reassurance can make this stage easier for both of you. Remember that every newborn is different, and your baby may need time to settle into a new routine.
Also Read:
Bedtime Routine for Babies
Newborn Baby’s Sleeping Needs
Newborn Baby Sleeping Too Much
How to make a Baby Sleep at Night
Read more
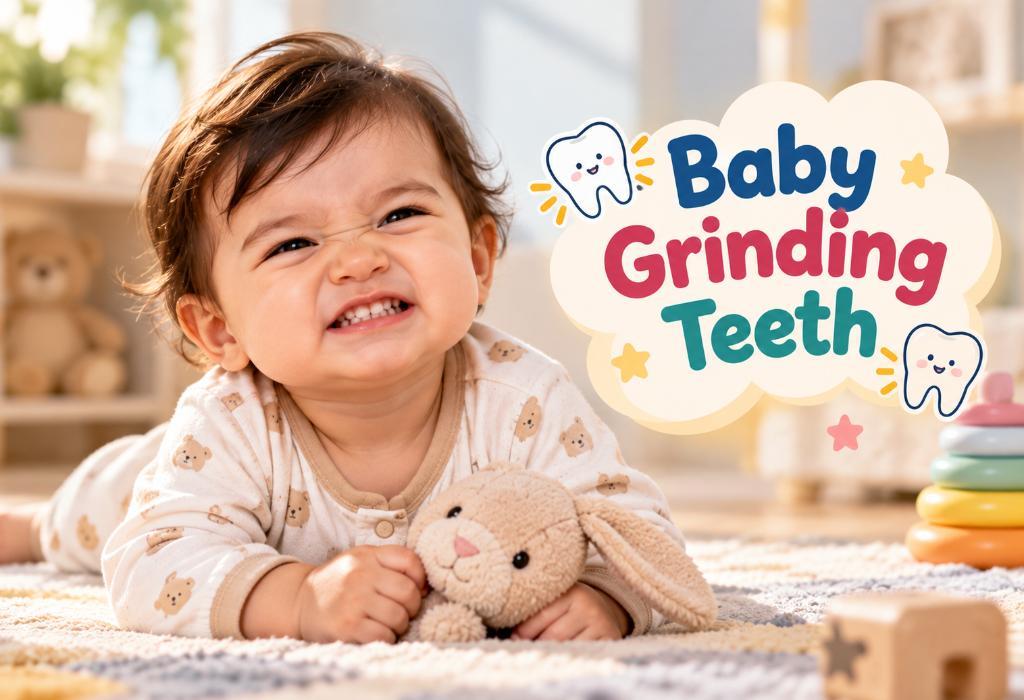
Baby Grinding Teeth: Causes, Signs, and How to Help
Baby grinding teeth is usually temporary and can occur as babies adjust to teething or sensations in their mouths. This behaviour, known as bruxism in infants, may happen while they are awake or asleep and can sound much louder than you might expect. The American Academy of Pediatrics explains that teeth grinding can begin before a child’s first birthday and is common in young children (1).
While occasional grinding is generally not a cause for concern, frequent or forceful grinding may lead to tooth wear or discomfort. This article covers the common causes of babies grinding teeth, signs to watch for, when to consult a dentist or paediatrician, and practical ways to help.
What Does Baby Teeth Grinding Mean?
Baby teeth grinding, medically known as bruxism, means a baby repeatedly clenches, rubs, or moves their upper and lower teeth against each other. It is particularly common when babies are asleep (2).
Is It Normal for Babies to Grind Their Teeth?
Yes, occasional teeth grinding without other symptoms is usually not a cause for concern. However, frequent grinding, especially when accompanied by sore gums, tooth damage, poor sleep, or jaw discomfort, may need attention (3).
Causes of Teeth Grinding in Babies
If you are wondering why do babies grind their teeth, the reason may vary depending on what your baby is experiencing. Some of the common causes include (4) (5):
Teething discomfort: Sore, swollen gums can make babies rub their teeth together as they try to relieve discomfort.
Exploring new teeth: Babies may grind simply because they are discovering the feel and sound of their new teeth.
Ear or mouth discomfort: Pain or irritation around the ears, gums, or mouth may sometimes lead to grinding.
Sleep changes: Changes in sleep patterns or disrupted sleep can be associated with teeth grinding.
Stress or excitement: Changes in routine, overstimulation, or strong emotions may sometimes trigger grinding.
Jaw or bite development: As the teeth and jaw develop, some babies may temporarily grind their teeth while adjusting to these changes.
Signs of Teeth Grinding in Babies
Besides the grinding sound, a few noticeable changes can help parents recognise whether their baby is grinding their teeth regularly. Look for (6) (7):
Grinding or clicking sounds
Visible tooth wear
Sore or swollen gums
Jaw discomfort
Disturbed sleep
Risks of Infant Grinding Teeth
Most babies who grind their teeth do not develop problems, but frequent or forceful grinding can sometimes lead to the following (6):
1. Tooth Wear
Repeated grinding can gradually wear down the outer protective layer of the teeth (enamel). Over time, the teeth may appear flatter, smoother, or shorter than normal. Excessive wear can be more concerning if grinding continues for a long period.
2. Chipped or Cracked Teeth
Strong or persistent grinding puts additional pressure on the teeth. In some cases, this may contribute to small chips, cracks, or damage to the edges of the teeth, particularly if the teeth are already weakened.
3. Tooth Sensitivity
When grinding causes significant enamel wear, the more sensitive inner layers of the tooth may become exposed. This can make a child more sensitive to hot, cold, sweet, or acidic foods and drinks.
4. Jaw Discomfort
Repeated clenching and grinding can place extra strain on the jaw muscles and the temporomandibular joints (TMJs), which connect the jaw to the skull. This may result in discomfort when opening or closing the mouth or chewing.
5. Facial Soreness
Overworked jaw and facial muscles can sometimes become tired or sore. Parents may notice that the child appears uncomfortable around the cheeks, temples, or jaw, particularly after periods of intense grinding.
6. Headaches
In older children, persistent teeth grinding and associated muscle tension may contribute to headaches, especially around the temples or forehead.
7. Sleep Disturbances
Grinding may occur during sleep and can sometimes be associated with restless or disrupted sleep.
How to Stop Baby From Grinding Teeth?
If you’re looking for how to get baby to stop grinding teeth, here are some simple steps that may help (4) (5) (7):
Offer a safe teething toy: A firm, baby-safe teether can give your baby something appropriate to chew on and may soothe sore gums.
Gently massage the gums: Clean your hands and gently rub your baby’s gums with a clean finger to help relieve teething discomfort.
Keep a consistent bedtime routine: A predictable routine can help your baby settle comfortably before sleep.
Help your baby relax before sleep: Quiet activities, cuddling, or gentle rocking may help your baby wind down.
Avoid overstimulation before bedtime: Keep lights, noise, and active play low before sleep to create a calmer environment.
Schedule regular dental check-ups: A dentist can check for tooth wear and identify any concerns if grinding continues.
When to Consult a Dentist?
Seek professional advice if you notice (5):
Visible tooth wear, chips, or cracks
Persistent jaw or facial discomfort
Sore or bleeding gums
Difficulty eating or chewing
Frequent sleep disturbances
Grinding that continues despite your efforts to ease it
FAQs
1. Should I wake my baby if they grind their teeth during sleep?
If you notice baby grinding teeth in sleep, there is usually no need to wake them up. However, if it happens frequently or you notice signs of pain, tooth damage, or disturbed sleep, consult a dentist or paediatrician for guidance.
2. Does baby teeth grinding go away on its own?
In many cases, yes. As babies adjust to their teeth and mature, grinding may become less frequent. Persistent grinding should be checked by a dental professional.
3. Can a pacifier help with baby teeth grinding?
A pacifier may soothe some baby grinding new teeth, but it should not be used specifically as a treatment for teeth grinding. Follow your paediatrician or dentist’s advice about pacifier use.
A little teeth grinding can be part of your baby’s growing years, so there is no need to panic when you hear it. Keep an eye on it, and if you feel something is not quite right, check in with your baby’s dentist for advice.
Also Read:
Appearance of Baby Teeth Order
Symptoms of Teething in Babies
When do Babies Start Teething?
Read more

High Chair Vs Booster Seat: Which Is Right for Your Child?
When you compare booster chair vs high chair options, the short answer is this: a high chair is a freestanding, harnessed feeding seat built for babies from about six months, while a booster seat is a compact seat that straps onto an existing dining chair for toddlers who can already sit unaided. The right pick depends mainly on your child’s age, how much floor space you have, and whether you need a full harness system or just a boost to table height. Both have a role at different stages of feeding.
To help you decide between the two, let’s take a closer look at how high chairs and booster chairs differ, when each one is most useful, and what to keep in mind before making your choice.
What Is a High Chair?
A high chair is a standalone feeding seat with its own base and legs, so it does not depend on any other piece of furniture. Most models include a removable tray and a built-in harness, and many recline or adjust in height to suit a baby who cannot yet sit fully upright (1). Under EN 14988, high chairs are designed for children roughly 6 to 36 months who can sit unaided (2), and the American Academy of Pediatrics generally marks around six months as the point when a baby is ready for one.
Benefits of a High Chair
Here are some of the benefits that make a high chair a practical choice for early feeding:
Stands on its own, so it is not dependent on another chair.
Comes with a full restraint system, usually a 3-point harness and often 5-point on newer models.
Has a built-in tray, making it well suited to the messy start of solids.
Many models adjust in height or recline, so they can be used before a baby sits fully independently.
Doubles as a stable base for early self-feeding practice.
Limitations of a High Chair
While a high chair can be useful during early feeding, it also comes with a few limitations worth considering:
Bulkier and takes up permanent floor space, which can be hard in small kitchens.
A bigger one-time cost for a shorter developmental window, roughly up to age 3 under EN 14988, unless it is a convertible model.
CPSC data links high chairs to a meaningful share of nursery-product injuries, mostly falls from climbing or rocking, so correct strap use matters (1) (3).
More parts to clean, including the tray, straps and upholstery.
What Is a Booster Seat?
A booster seat is a compact seat that straps onto an existing dining chair rather than standing on its own. The US standard ASTM F2640 defines it as a seat placed on an adult chair to bring a child up to table height, for children up to around 5 years old (4) (5).
Note: ASTM F2640 is a US standard and is used here as a general benchmark, as India does not currently have an equivalent standard specifically covering booster seats.
Benefits of a Booster Seat
Some of the key benefits of choosing a booster seat include:
Compact and foldable, so it is easy to store and travel with, and suits smaller homes well.
Usually a lower-cost entry point than a full high chair.
Brings a toddler up to the family table for shared meals once they can sit independently.
Fewer parts overall, so it is simple to wipe down and clean.
Limitations of a Booster Seat
The convenience of a booster seat comes with a few trade-offs, particularly when it comes to safety, fit, and everyday use:
Not suitable until a child already has real head and trunk control and sits unaided, so it is not a from-birth option.
Safety depends heavily on the host dining chair, since ASTM F2640 requires the backrest to contact the chair and caps forward tilt at 10 degrees, meaning a swivel, folding or armless chair is not a safe match.
Usually a simpler restraint than a high chair’s harness, often just a 3-point or lap belt.
Most models have no built-in tray, so it still needs a table at the right height.
High Chair vs Booster Seat: Key Differences at a Glance
Not sure which one would work better for your child and your mealtime routine? Here’s how the two compare across the features parents are most likely to consider.
Structure
Freestanding, with its own base and legs
Straps onto an existing dining chair
Typical age range
From about 6 months, per AAP guidance
From about 2 to 5 years, once sitting unaided
Restraint system
3-point minimum, often 5-point harness
Usually 3-point or a simple lap belt
Stability
Independent, tested to its own stability standard
Dependent on the host chair’s design
Tray
Built-in, removable tray included
Rarely included, needs a table
Portability
Low, stays in one spot
High, folds flat for storage or travel
Relative cost
Higher upfront cost
Lower upfront cost
Governing safety standard
ASTM F404-21, EN 14988, IS 6188:1988
ASTM F2640-18
Age and Safety Standards
Answering the high chair vs booster seat age question starts with the standards themselves, since each one sets a specific age range alongside its restraint and stability requirements.
ASTM F404-21
High chairs
ASTM International / CPSC (16 CFR 1231)
Passive crotch restraint plus 3-point minimum restraint, rearward stability test
EN 14988:2017+A1:2020
High chairs, 6 to 36 months
CEN / BSI (EU/UK)
Restraint, entrapment and stability testing
IS 6188:1988
High chairs
Bureau of Indian Standards
Stability tilt test, waist-belt and crotch-strap restraint, non-toxic finish
ASTM F2640-18
Booster seats, up to 5 years
ASTM International / CPSC (16 CFR 1237)
Tray drop and pull performance, static load, structural integrity
These standards exist because the risk is real: the CPSC received 1,842 high-chair incident reports, including 271 injuries, between January 2011 and September 2017, and NEISS estimated around 18,500 emergency-department-treated high-chair injuries in 2015 to 2016 alone (6).
High Chair vs Booster Seat: Which Is Safer?
Neither seat type is inherently safer than the other; outcomes depend far more on correct use than on the category itself. Research published in Clinical Pediatrics found that roughly one child an hour was treated in a US emergency room for a high-chair or booster-seat-related injury between 2003 and 2010, and 93% of those injuries were fall-related (7). The CPSC’s 2019 nursery products surveillance data confirms this pattern, listing falls as the leading cause of nursery-product injury that year (3).
In practice, this is one of the clearer answers to the difference between high chair and booster seat safety records: both are safe when the harness is used every time and the product carries a genuine certification, such as ASTM F404-21, EN 14988, IS 6188:1988 for high chairs, or ASTM F2640 for booster seats.
Safety Checklist for Buying a High Chair or Booster Seat
Use this checklist to compare specific models before buying, rather than relying on price or appearance alone (8).
Confirm the harness is at least 3-point, ideally 5-point on a high chair.
Check the base is wide and the frame does not tip easily when nudged.
Look for a genuine certification mark rather than a generic safety claim.
For a booster seat, confirm the backrest sits flush against the host chair.
Avoid using a booster seat on a swivel, folding or armless chair.
Check the tray or table height suits your child’s arm length.
Favour wipe-clean fabric and a tray with a lip to catch spills.
Where possible, choose a model with a documented standard, such as a high chair with a 5-point harness, anti-slip base and EN 14988 or EN 71 certification, as seen on the Babyhug range on FirstCry.
What to Consider When Choosing a High Chair or Booster Seat
The right choice usually comes down to a handful of practical factors rather than one single feature.
Child’s age and readiness: A high chair suits a baby who cannot yet sit fully unaided, while a booster seat needs real head and trunk control first.
Home space: A high chair needs permanent floor space, while a booster seat suits smaller kitchens or shared dining areas.
Budget: A booster seat is usually the lower-cost option, while a high chair is a bigger one-time spend.
Lifestyle and travel: Families who eat out often or visit relatives may prefer a foldable booster seat, especially for a toddler high chair vs booster seat decision made while travelling.
Ease of cleaning: A booster seat has fewer parts, while a high chair’s tray and straps need more regular attention.
Growth plan: Some parents choose a convertible high chair that later works as a booster, avoiding a second purchase.
High Chair vs Booster Seat: Which Should You Choose?
If your child is under two and still building sitting control, a high chair with a proper harness is the safer starting point. Once a toddler sits confidently unaided, has decent trunk strength, and is ready to join the family table, a booster seat becomes the more practical option, provided the host chair is a solid, non-folding, non-swivel match. Space, budget and how often you eat as a family at the table should guide the final decision.
As a general rule of thumb from a child product safety standpoint: choose based on your child’s current sitting ability first, and treat price or convenience as the tiebreaker only after safety is settled.
When Should You Switch from a High Chair to a Booster Seat?
There is no fixed age for switching, but a few clear signs suggest a toddler is ready to move on from a high chair.
Your child is approaching or has outgrown the high chair’s weight or height limit.
They can sit upright unsupported for the length of a meal.
They have learned to unbuckle themselves and try to climb out.
They actively want to sit at the table with the rest of the family.
FAQs
1. At what age can a baby start using a high chair?
Most babies are ready for a high chair from around six months, once they can hold their head steady and sit with support. This lines up with general guidance from the American Academy of Pediatrics on starting solid foods around the same age (9).
2. Are booster seats safe for toddlers?
Yes, provided the child already sits unaided and the seat is strapped to a stable, non-folding, non-swivel dining chair. Safety depends on correct fit against the host chair and consistent use of the harness or lap belt provided.
3. Can a booster seat be used instead of a high chair?
Only once a toddler has strong head and trunk control and can sit independently without support. Before that stage, a booster seat cannot provide the same restraint or stability as a proper high chair harness system.
4. What is the weight limit for a booster seat?
Weight limits vary by model, but most booster seats are built for children up to around five years old under ASTM F2640-18 guidance. Always check the specific manufacturer’s limit printed on the product itself.
5. Can a high chair convert into a booster seat?
Some convertible models are designed to detach from their base and strap onto a dining chair as the child grows. This can be a cost-effective option if you want one product to cover both feeding stages.
6. What certification should a high chair have?
Look for ASTM F404-21 in the US, EN 14988 in the EU and UK, or IS 6188:1988 in India. Each standard tests restraint strength, stability under tilt, and general structural safety before a product can carry the mark.
7. What is the maximum height a booster seat can be used at?
Most booster seats are designed to bring a child up to standard dining table height, generally suited to children roughly up to five years old. The exact seat height varies by model, so check the manufacturer’s specifications directly.
8. Does a booster seat need a five-point harness?
No, most booster seats use a simpler 3-point harness or a basic lap belt rather than a full five-point system. A five-point harness is more commonly found on high chairs, where full-body restraint matters more for younger children.
9. Is a high chair or booster seat better for a small kitchen?
A booster seat is generally the better fit for a small kitchen, since it folds away and does not need dedicated floor space. A high chair, while more secure for younger babies, stays in place permanently once assembled.
10. Are portable booster seats as safe as fixed high chairs?
They can be, provided the booster is certified and strapped to a suitably stable chair, but they rely more on the surrounding furniture for safety. A high chair’s safety does not depend on any other piece of furniture in the room.
11. Which high chairs on FirstCry meet international safety standards?
Ranges such as Babyhug include models built with 5-point harnesses, anti-slip bases and EN 14988 or EN 71 certification. Checking the product listing for the specific standard printed is the most reliable way to confirm compliance.
12. Where can you buy high chairs or booster seats in India?
Both product types are widely available through baby-focused retailers such as FirstCry, along with general marketplaces and larger department stores. Comparing certification details on the listing is more useful than comparing price alone.
Choosing between a high chair and a booster seat comes down to your child’s age, sitting ability and your home’s practical constraints, not which product is objectively “better.” A high chair remains the safer, more supportive option for babies who are still building head and trunk control, while a booster seat suits toddlers who already sit unaided and are ready to join the table. Whichever you choose, safety depends far more on using the harness correctly and buying a certified product than on the category itself. Many families end up using both in sequence, starting with a high chair and moving to a booster seat as their toddler grows.
Also Read:
Best Baby High Chairs in India
When Can a Baby Sit in a High Chair
When Can a Child Use a Booster Seat
Read more
World Polio Day 2026: Date, Significance, Themes, and More
Polio is a highly contagious and dangerous disease caused by a virus that attacks the nervous system. Such is the danger level of this disease that 1 in 200 infected people face the risk of permanent paralysis, according to the World Health Organization (WHO). Therefore, the eradication of polio was considered important on a global scale. This is why World Polio Day is an important occasion, observed to raise awareness for the polio vaccination and the eradication of polio.
When Is World Polio Day Observed?
World Polio Day is observed on the 24th of October every year.
History of World Polio Day
Established by Rotary International to commemorate the birth of Jonas Salk, the medical researcher who led the first team to develop a vaccine against polio, World Polio Day has been observed for over a decade now. He developed the inactivated poliovirus vaccine, which came into use in 1955, after which Albert Sabin developed the oral polio vaccine, which came into use in 1961.
The establishment of the Global Polio Eradication Initiative (GPEI) happened in 1988, launched by Rotary International and the WHO, when there were nearly 3,50,000 cases of polio across the world. As of date, several regions like the Americas, Europe, Southeast Asia, and Western Pacific have been declared polio-free. However, countries like Pakistan and Afghanistan still witness rare occurrences of this disease. World Polio Day, therefore, is the perfect occasion to spread awareness about the dangers of this disease and the immense need to vaccinate babies as per schedule so as to completely eradicate the virus completely.
Why Is World Polio Day Celebrated?
On this day, organisations around the world, such as Rotary International, WHO, and so on, celebrate the individuals and organisations involved in the global fight against polio and their efforts to eradicate the virus completely. Along with this celebratory note, it also seeks to spread awareness to people about the importance of curbing the virus and any potential outbreaks, as well as taking efforts to raise funds to achieve this objective.
How Is World Polio Day Celebrated Across the World?
On this day, worldwide, global organisations such as Rotary International and other similar clubs and organisations host several events and fund-raisers to raise awareness about polio. Events can be of various types, from rallies and walks to organising competitions in schools and clubs. It also goes to show that in the global fight to end polio, no member is too small to contribute!
World Polio Day – Themes of the Past Years
In the past few years, the themes of this occasion have been some of the following:
2022 – Stronger together to end polio globally
2023 – A healthier future for mothers and children
2024 – A Global Mission to Reach Every Child
2025 – End Polio: Every Child, Every Vaccine, Everywhere
This year, the overarching theme is “Ending polio for good” The theme urges to acknowledge the progress made so far in the struggle to eradicate polio in children and how they will continue to work together to give a healthier future for mothers and children. This way, mothers will be able to have a positive pregnancy experience, and children will reach their full developmental potential for a brighter and better future.
Some Important Facts About Polio
That polio is a deadly disease is well-understood. But these facts should help you understand the disease further and make you aware of the importance of polio eradication day.
Polio spreads mainly through infected faeces and contaminated water (due to infected human waste) and can even spread from person to person through a cough or sneeze.
While a person of any age can fall prey to the disease, it mainly affects people with compromised immune systems, pregnant women, and children under the age of 5.
There are two basic patterns of the disease – the first type is a minor illness called abortive poliomyelitis, which doesn’t affect the central nervous system (CNS). The second type is more critical, as it directly affects the CNS and may be paralytic or non-paralytic. In about 95% of the cases, the disease doesn’t show any symptoms.
Post-polio syndrome is also a part of the disease, whereby in some cases, polio survivors relapse after years of recovery.
In the case of those afflicted by paralysis, 5 to 10% of patients die if their breathing muscles also become immobilised.
Polio doesn’t have any cure, so prevention through vaccines is absolutely important, and babies need to be provided with the same per schedule. A single child being infected can put kids in all countries of the world at risk.
As of 2020, the Global Commission for the Certification of Poliomyelitis Eradication has declared that the wild poliovirus type 3 is globally eradicated.
Since polio has no cure, there is no other way to stop its spread than to immunise your baby at the earliest possible. So ensure that you protect your baby’s life by providing him with the vaccination on time, and in turn, do your part in reducing the transmission of this deadly virus as well!
Also Read:
Importance of Polio Vaccination
Read more
How Many Newborn Diapers Do I Need (Age Wise Chart)
You’ll typically need 8-12 diapers a day for a newborn, which works out to around 56–84 diapers a week (1). Newborns may need frequent changes because they often pee several times a day and may have multiple bowel movements. As your baby grows, the number of diapers used each day usually decreases, while diaper size changes with weight and fit. If you’re wondering how many diapers will I need for a newborn, this guide gives you a simple age-wise breakdown to help you estimate your monthly needs. We’ll also cover how many newborn diapers to buy, when to move up a size, and how to avoid overstocking diapers your baby may quickly outgrow.
How Many Diapers Should Your Infant Normally Use in a Day?
We shall acquaint you with the average diaper usage as per the age of your baby in the following paragraphs:
1. Newborn to a Month Old
Newborn babies use more diapers in comparison to older babies. Therefore, if your baby is under one month of age, you can expect to change 6 to 10 diapers per day. Around this age, your baby may have 3 to 4 bowel movements a day and pee after every feed.
2. Over 1-Month-Old Baby
As your baby turns one month old, you may notice fewer soiled diapers, and you’ll see that your baby may require up to 4 to 6 diapers in a day. If your baby is exclusively on breast milk, then he may have more soiled diapers in comparison to a baby who is on formula milk. Breast milk is easy to digest, which means more poops and more soiled diapers.
How Many Diapers Baby Needs Per Day? – Age, Weight & Usage
Here in the following diapers per day by age chart, we have discussed how many diapers your baby may require on daily and monthly bases.
Age of the Baby
Diaper Size
Diaper Usage Per Day
Diaper Usage in One Month
Weight
0 to 1-month-old baby
Newborn/Size 1
10 to 12 diapers
320 diapers
Up to 10 lb (4.5 kg)
1 to 5 months old baby
Size 1-2
8 to 10 diapers
240 diapers
8-16 lb (3.6-7.3 kg)
5 to 9 months old baby
Size 2-3
8 diapers
240 diapers
12-28 lb (5.4-12.7 kg)
9 to 12 months old baby
Size 3-4
8 diapers
240 diapers
16-37 lb (7.3-16.8 kg)
Above-mentioned diaper usage is an average usage of a baby of a particular age. However, it may vary slightly in all the babies.
When Should You Change Your Baby’s Diaper?
As soon as you find your baby’s diaper soiled and wet, it is recommended that you change it. The infection caused by urine and faeces is very painful for your baby, and it is very difficult to treat as well (1).
It is recommended that you check for your baby’s soiled diaper when your baby is awake. Avoid waking your baby to change his diaper. You may check and change your baby’s diaper before feeding him, as babies tend to sleep after their feeding session. You can also change your baby’s diaper just before retiring for the night.
You may notice a soiled diaper every 1 to 3 hours with your newborn baby and also after you finish feeding him. This happens because his bowels get stimulated, making the baby poop. You should change the cloth diaper when it gets wet, but you can wait for a disposable diaper to become wet and heavy before changing it (2).
How Often Should You Change Your Baby’s Diaper Overnight?
When it comes to diaper usage, babies are champs! It’s impressive how many times they can “go” in a day, and it’s even more impressive how many diapers you end up changing as a result. But what about those late-night diaper changes? How often should you be getting up to tackle your baby’s diaper situation during the wee hours of the night?
Well, there’s no one-size-fits-all answer to this question. It all depends on your baby’s age and how much they tend to “go” during the night. According to experts, newborns may need a diaper change as many as 12 times a day (or night!), while babies between 2 to 4 months may need about 8-10 diaper changes per day (3).
If your little one is a heavy wetter, it may be a good idea to change their diaper more frequently at night. But if your baby can handle the night with just one or two diaper changes, lucky you!
Remember, a well-fitting diaper can also help your baby stay comfortable and dry throughout the night, so be sure to choose the right size and style for your little one. And with a little practice, you’ll be a nighttime diaper-changing pro in no time!
What if Your Baby’s Wet Diaper Count Is Too Low?
On average, your baby may be wetting 6 to 8 diapers in a day. If you notice that your baby has fewer wet diapers, then this may be a cause for concern. Fewer wet diapers mean that your baby is not getting enough milk and this can make your baby dehydrated. Dehydration is a cause of great concern in babies, and this can lead to various health complications (4). As soon as you notice this change of your baby using lesser average diapers per day; get in touch with your baby’s doctor. However, if you are worried about your breast milk supply, you can discuss it with your doctor and learn about various ways of increasing your milk supply.
What if Your Baby’s Wet Diaper Count Is Too High?
Your baby’s high diaper usage may scare you, but it is very normal for newborn babies to the soil every 1 to 3 hours. This will get better as your baby grows. Your baby will develop better control of his bladder and bowel movements by the time he is one year old
Should You Stock Up on Diapers?
Babies are cute, cuddly, and oh-so-messy. And if you’re a parent, you know that diapers are an absolute necessity. But with so many options and sizes available, it can be overwhelming to decide whether or not to stock up on diapers. So, should you buy in bulk, or just grab what you need as you go? Here are four points to consider:
1. Convenience is key
If you’re a busy parent with a newborn, the last thing you want is to run out of diapers in the middle of the night. Stocking up can save you from late-night diaper runs and frantic trips to the store.
2. Save some cash
Buying diapers in bulk can save you money in the long run. You’ll usually get a better price per diaper when you buy in larger quantities, and you’ll save on gas by making fewer trips to the store.
3. Size matters
While it’s tempting to stock up on diapers in all sizes, babies grow quickly, and you don’t want to be stuck with a mountain of diapers that your little one has already outgrown. It’s best to buy in smaller quantities and adjust your stockpile as your baby grows.
4. Consider your storage space
Diapers take up a lot of room, so make sure you have enough storage space before you go on a bulk-buying spree. You don’t want to be tripping over piles of diapers every time you walk into the nursery.
Stocking up on diapers can be a smart move for busy parents who want to save time and money. Just be sure to consider your baby’s growth, your storage space, and your budget before you hit the buy button. And remember, no matter how many diapers you have, you’ll never be completely prepared for a blowout!
How You Can Save on Diapers?
Diaper expenses can add up quickly, especially during your baby’s first year. A few simple changes in how you buy, store, and use diapers can help you reduce waste and keep your monthly budget under control.
1. Buy Diapers in Bulk
Buying larger packs can lower the cost per diaper, especially when your baby is consistently using the same size. However, avoid stocking up too much on smaller sizes, as babies can outgrow them quickly.
2. Compare Price Per Diaper
Don’t choose a pack based only on its total price. Compare the cost per diaper across different brands, pack sizes, and offers to find the better deal.
3. Use Coupons and Offers
Look for store discounts, subscription savings, cashback deals, and manufacturer coupons when buying diapers. Combining an available offer with a larger pack can help you save more.
FAQs
1. Can babies wear diapers all the time?
As a busy parent, it’s tempting to leave that diaper on your little one for as long as possible. After all, who has time for constant diaper changes? But is it safe to make babies wear diapers all the time? The answer is a little more complicated than a simple yes or no. While it’s true that diapers are a convenient way to keep your baby clean and dry, they can also lead to some skin irritation and diaper rash if left on for too long. So, the key is to find a balance between keeping your baby comfortable and preventing diaper-related problems. This might mean changing your baby’s diaper more frequently or opting for a more breathable type of diaper (5). Ultimately, the goal is to keep your baby happy and healthy, whether that means changing a few extra diapers or embracing the diaper-free lifestyle (good luck with that!).
2. How many baby wipes should a infant use in a day?
If you’re a new parent, you might be wondering how many baby wipes your little one needs in a day. While there’s no magic number, it’s safe to say that you’ll be using a lot of wipes during the first few months of your baby’s life. According to the experts, newborns can go through 8 to 12 diapers a day, and you’ll likely be using a wipe for every diaper change. As your baby grows and becomes more mobile, you might find that you need to use even more wipes to clean up those messy hands and faces. So, it’s always a good idea to stock up on wipes and keep them handy wherever you go. After all, you never know when your little one will decide to paint themselves with pureed carrots!
3. How many diapers per day for infant is sufficient?
An infant typically needs 8-12 diapers per day, especially during the first few weeks. As your baby grows, diaper use may gradually decrease to around 6-10 diapers a day, depending on feeding, age, and bowel movements.
Now that you know how to go about it all, including diapers usage, taking on diaper responsibilities will be a whole lot easier!
Also Read:
Cloth Diapers vs Disposable Diapers
Diaper Rash Reasons and Treatment
Read more
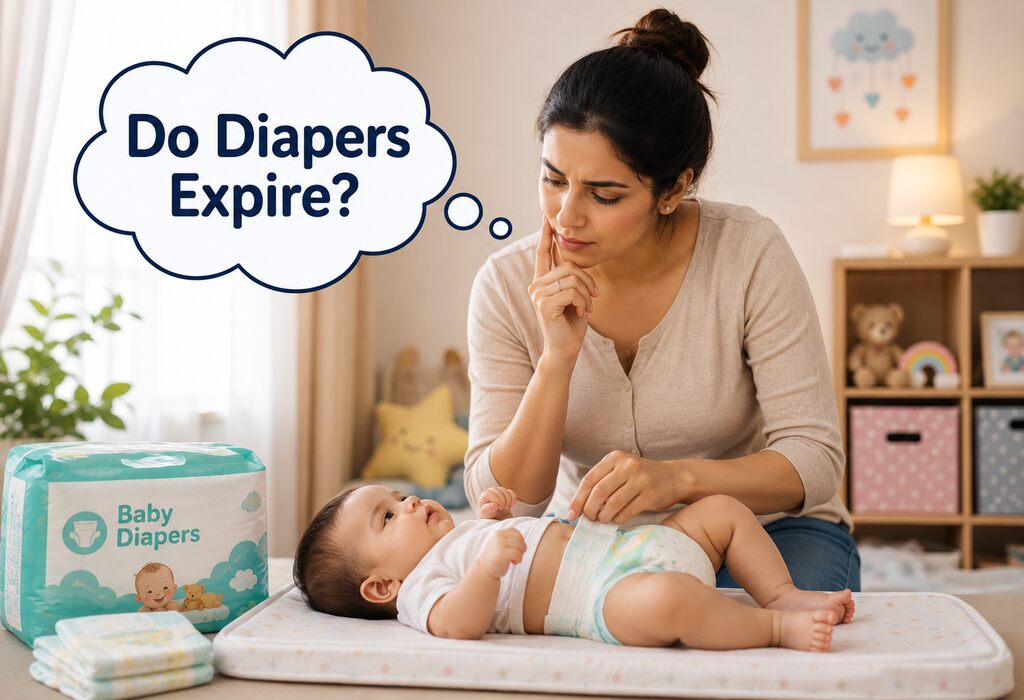
Do Diapers Expire? Shelf Life, Storage, & When to Discard Them
Babies seem to outgrow everything overnight, including diapers. That is why so many parents end up with unopened packs sitting in a nursery, closet, or storage box, waiting for a “just in case” moment that never comes. Then, months or even years later, you come across them again and wonder, do diapers expire? It is a fair question. Although diapers do not come with an obvious expiration date like milk or medicine, they are not designed to last forever. Before you open that forgotten pack, read on to learn when do diapers expire, how long diapers typically last, the best way to store them, and the signs that indicate whether they’re still safe to use or it’s time to toss them.
Do Diapers Have Expiration Dates?
No, disposable diapers do not have an official expiration date printed on the packaging like food or baby formula. So, can diapers expire? Yes, but not in the traditional sense. While diapers are non-perishable products and most manufacturers don’t assign a fixed shelf life, they can still deteriorate over time (1).
When stored properly in a cool, dry place, most disposable diapers remain in good condition for about 2 to 3 years.
Factors That Impact the Shelf Life of Diapers
Although there is no fixed expiration of diapers, several factors can affect how long they stay in good condition. Here are the most important ones:
Storage Conditions: Heat, humidity, and direct sunlight can weaken the diaper’s materials and reduce its performance over time.
Packaging: Diapers stored in their original, sealed packaging are better protected from dust, moisture, and contaminants.
Age: Even when stored properly, elastic bands, adhesive tabs, and absorbent materials can gradually deteriorate after several years.
Moisture Exposure: Damp conditions can damage the absorbent core and, in some cases, lead to mold or mildew.
Physical Damage: Torn packaging, crushed boxes, or improper handling can affect the diaper’s quality before it is ever used.
How Does Time Affect Diapers?
Even when diapers are stored in their original packaging, time can gradually affect their quality and performance. While these changes may not always be visible at first, they can impact how well a diaper works. Below are the few ways time can affect diapers.
1. Elastic Bands Lose Their Stretch
The elastic around the waist and leg openings can weaken as diapers age. When this happens, the diaper may not fit snugly, increasing the chances of leaks and blowouts.
2. Adhesive Tabs Become Less Sticky
Over time, the fastening tabs may lose some of their adhesive strength. As a result, they may not stay securely fastened, making diaper changes more difficult.
3. Absorbency Can Decline
The absorbent core can become less effective after years of storage, particularly if the diapers have been exposed to heat or moisture. This may reduce their ability to lock in liquid and keep your baby dry.
4. Materials Can Deteriorate
Prolonged storage may cause the diaper’s materials to become brittle, discoloured, or develop an unusual odour. If you notice any of these signs, it is best to discard the diapers rather than use them.
When Diapers Might Not Be Good to Use?
Before putting an older diaper on your baby, take a moment to inspect its condition. The following signs indicate that it is better to replace the diapers than risk discomfort or leaks (1).
The elastic feels loose or brittle: If the waistband or leg cuffs have lost their stretch, the diaper may not fit properly and could leak.
The adhesive tabs no longer stick: Fastening tabs that won’t stay in place can make it difficult to keep the diaper securely fitted.
There is discolouration or yellowing: While slight colour changes are not always harmful, significant discolouration may indicate that the materials have deteriorated over time.
The diaper has a musty smell or signs of mold: Any unusual odour, moisture, mold, or mildew is a clear sign that the diaper should be discarded immediately.
The packaging is damaged or the diaper is torn: Open, ripped, or moisture-damaged packaging can expose diapers to dirt and contaminants, making them unsuitable for use.
Risks of Using Old Diapers
Using an old diaper is not always a problem, especially if it has been stored properly. However, diapers that have deteriorated with age or poor storage may not perform as intended. Here are some potential risks to keep in mind:
1. More Frequent Leaks
Over time, a diaper’s absorbent core may become less effective, and the elastic around the legs can weaken. This can make it harder for the diaper to lock in moisture, leading to more frequent leaks.
2. Poor Fit and Discomfort
The waistband, leg cuffs, and adhesive tabs may lose their strength as diapers age. A loose or poorly fitting diaper can shift during movement, making it less comfortable and less effective.
3. Diaper Rash
Old diapers with reduced absorbency may leave your baby’s skin damp for longer periods. Prolonged exposure to moisture can increase the risk of diaper rash and skin irritation (2).
4. Skin Irritation
As diaper materials age, they may become rough or begin to break down. This can create friction against your baby’s sensitive skin, causing redness or discomfort (3).
5. Higher Chance of Blowouts
Weakened elastic and loose fasteners may not create a secure seal around the legs and waist. As a result, the diaper is more likely to leak or experience blowouts, especially during active movement.
How to Properly Store Diapers?
Proper storage can help preserve diaper quality for years. Follow these simple storage tips to extend the diaper expiry date and keep diapers in their best condition for longer.
Keep them in a cool, dry place: Store diapers in a room with a stable temperature and low humidity to prevent material deterioration.
Leave them in their original packaging: The manufacturer’s packaging protects diapers from dust, moisture, and other contaminants.
Avoid direct sunlight: Prolonged exposure to sunlight can weaken the diaper’s elastic and affect the quality of its materials.
Store them off the floor: Place diaper boxes on shelves or pallets to reduce the risk of moisture damage, especially in basements or garages.
Protect them from humidity: Avoid storing diapers in damp areas such as bathrooms, laundry rooms, or other places prone to moisture.
Do Eco-Friendly Diapers Expire?
Eco-friendly diapers do not have a strict expiration date, but they often have a shorter practical shelf life than conventional disposable diapers. Because they are made with more plant-based and biodegradable materials, some components may break down more quickly, especially if the diapers are stored in warm or humid conditions.
What Should I Do With Old, Unused Diapers?
If you have old, unused diapers that are still in good condition, you do not necessarily have to throw them away. The best option depends on their condition and whether they are still safe to use.
1. Donate Unopened Packs
If the diapers are unopened, clean, and undamaged, consider donating them to local diaper banks, baby shelters, charities, or community organisations.
2. Give Them to Friends or Family
If you have friends, relatives, or neighbours with a baby who wears the right size, passing along unused diapers is a simple way to reduce waste. Before giving them away, make sure the diapers are free from damage, odours, or signs of deterioration.
3. Discard Damaged Diapers
If the diapers have a musty smell, mold, discoloration, torn packaging, brittle elastic, weak adhesive tabs, or any other signs of damage, it’s best to dispose of them. Using deteriorated diapers may lead to leaks, poor performance, or skin irritation, so replacing them with a fresh pack is the safest choice.
FAQs
1. Do cloth diapers expire?
Cloth diapers don’t expire in the traditional sense, but repeated washing and long-term use can wear out the fabric, elastic, and waterproof layers. Regular inspection and proper care can significantly extend their lifespan (4).
2. Are yellow stains on old diapers normal?
Slight yellowing can occur naturally as diaper materials age and doesn’t always mean they’re unsafe. However, if yellowing is accompanied by odours, mold, or material damage, it’s best to discard the diapers.
3. Can you vacuum-seal diapers for long-term storage?
Vacuum-sealing is generally unnecessary and may compress the diapers, affecting their shape. It’s usually best to keep them in their original packaging and store them in a cool, dry location.
Fortunately, age alone does not determine whether diapers are still usable. A quick look at their condition is often enough to tell you if they are ready for use or better off replaced, helping you avoid both unnecessary waste and unwanted surprises.
Also Read:
Diaper Blowouts
Does Baby Powder Expire
How to use Diaper Safely for Newborn
Read more
Does Baby Oil Expire? Shelf Life, Signs, & Storage Tips
Baby oil is a must-have for many parents, whether it is used for a gentle baby massage, keeping skin soft, or part of your little one’s daily routine. But if you find an old bottle sitting on the shelf, you may start to wonder, when does baby oil expire? While it can last for a long time, baby oil does not stay the same forever. Its quality can change over time, especially if it has been opened or stored the wrong way. In this article, we’ll explain how long baby oil lasts, how to spot signs that it is no longer good to use, and how to store it properly to keep it safe for your baby’s delicate skin.
Can Baby Oil Expire?
Yes, baby oil can expire, although it usually has a long shelf life when stored properly. Most baby oils are made with mineral oil, which is known for being stable and lasting for a long time (1). However, over time, the ingredients can start to change, especially after the bottle has been opened or if it has been exposed to heat, sunlight, or moisture.
How Long Does Baby Oil Last?
Baby oil can usually last for about 3 to 5 years when it is stored properly and kept sealed. The exact shelf life can vary depending on the brand, ingredients, and how the oil is stored. If the bottle is unopened and kept in a cool, dry place away from direct sunlight, it can often stay in good condition until the date mentioned on the label.
What Affects the Shelf Life of Baby Oil?
Baby oil does not expire overnight, but a few everyday factors can affect how long it stays safe and effective. These include (2):
1. Storage Conditions
Keeping baby oil in a cool, dry place helps maintain its quality. Heat and direct sunlight can break down the ingredients and may change the oil’s texture or smell over time.
2. Exposure to Air
Once you open a bottle of baby oil, it comes in contact with air, which can slowly affect its freshness. Always close the cap tightly after each use to reduce exposure.
3. Bottle Hygiene
Dirt, water, or other products getting into the bottle can affect the oil’s quality. Avoid touching the opening with your hands and keep the bottle clean.
4. Ingredients and Formula
Different baby oils may contain different ingredients, such as added fragrances or plant-based oils. These ingredients can have different shelf lives and may affect how long the product stays fresh.
5. Frequency of Use
A bottle that is opened and used often may lose its freshness faster than one that stays sealed. Checking the oil before each use can help you notice any changes early.
Signs That Baby Oil Has Expired
Not sure if your baby oil is still good to use? These common signs can help you tell if it has expired.
1. Unpleasant or Rancid Smell
Fresh baby oil has a mild scent or no scent at all. If it smells sour, stale, or unusual, it has likely gone bad and should not be used.
2. Change in Colour
Baby oil should remain clear and consistent in colour. If it looks cloudy, yellowish, or darker than usual, its quality may have deteriorated.
3. Thicker or Unusual Texture
If the oil feels sticky, thicker than normal, or has developed lumps, it is a sign that the product is no longer in good condition.
4. Separation of Ingredients
Some baby oils may contain added ingredients that can separate over time. If the oil does not return to its normal consistency after gently shaking the bottle, it is best to replace it.
5. Skin Irritation After Use
If your baby develops redness, itching, or irritation after using the oil, stop using it immediately. While the reaction may have another cause, expired baby oil could be a contributing factor.
How to Store Baby Oil the Right Way?
You do not have to do anything complicated to keep baby oil fresh. These simple tips can help keep it in good condition until you’re ready to use it.
1. Store It in a Cool, Dry Place
Keep the bottle away from direct sunlight, heaters, and humid areas. A cupboard or drawer at room temperature is an ideal place to store baby oil.
2. Close the Cap Tightly After Every Use
Always secure the cap immediately after using the oil. This helps prevent air, dust, and moisture from getting inside the bottle.
3. Keep It Away From Water
Avoid storing baby oil near sinks, bathtubs, or other damp areas. Moisture can affect the product over time and may increase the risk of contamination.
4. Use Clean Hands During Application
If you pour the oil directly into your hands, make sure they are clean and dry. This helps prevent dirt or bacteria from entering the bottle.
What Should You Do With Old Baby Oil?
So, you’ve checked the bottle and realised it’s no longer safe to use on your baby. Now what? Before you throw it away, there are a few things you can do with it.
Use it to remove sticky residue: Old baby oil can help loosen adhesive left behind by stickers or labels on glass, plastic, or other hard surfaces.
Polish metal items: Apply a small amount to a soft cloth to add shine to stainless steel fixtures, faucets, or other metal surfaces.
Lubricate squeaky hinges: A few drops can temporarily reduce squeaks on door hinges, locks, or other household items.
Dispose of it properly: If the oil smells bad, has changed in colour or texture, or is well past its expiration date, seal the bottle and throw it away with your household waste. Avoid pouring baby oil down the sink or toilet, as it can contribute to clogged pipes.
FAQs
1. Can baby oil go bad before its expiration date?
Yes. Improper storage, exposure to high temperatures, frequent contamination, or leaving the bottle open can cause baby oil to deteriorate faster than its labelled shelf life.
2. Does baby oil need to be refrigerated?
No, refrigeration is not necessary. Baby oil is best stored at normal room temperature in a cool, dry place away from direct sunlight.
3. Where can I find the expiration date on baby oil?
The expiration date or manufacturing date is usually printed on the bottom, back, or neck of the bottle. If you can’t find it, check the packaging or contact the manufacturer for guidance.
A quick look at the expiration date and a quick sniff or visual inspection can save you from using a product that’s no longer at its best. And if you’re ever unsure whether it’s still good, it’s always better to replace it than risk using an expired product on your baby’s delicate skin.
Also Read:
Baby Oil for Massage
Does Baby Powder Expire
Is Mineral Oil Safe for Babies?
Do Infants Need Baby Powder?
Read more
Teeth Whitening in Pregnancy – Is It Safe?
We all want our pearly whites to stay white and shiny, but if you’re pregnant and are thinking of undergoing teeth whitening procedures, then you will have to check whether or not it’s safe. The primary concern for many expectant mothers is the safety of elective cosmetic treatments, including teeth whitening in pregnancy. Some women experience dental problems during pregnancy, such as gum issues or stained and discoloured teeth. In either case, a pregnant woman must check with her doctor regarding the need for any dental treatment. This article will inform you about bleaching teeth, and it will detail the safety considerations and potential risks of the same during pregnancy.
What Is Teeth Bleaching?
Teeth bleaching is a technique used for whitening teeth enamel, which makes the teeth shine and look bright. There are two ways to brighten the teeth. The first option is using a whitening toothpaste, and the other is consulting a professional for the same (1). Whether you use a toothpaste or consult a professional, peroxides will be used in various concentrations to bleach the teeth.
Can You Whiten Teeth While Pregnant?
Is teeth bleaching safe during pregnancy? There’s not enough evidence to confirm that bleaching or whitening teeth during pregnancy poses any risks for the mom-to-be or the baby, but to avoid taking any chances while pregnant, it’s best to avoid it. There is not enough evidence that confirms the dangerous effects of bleaching teeth during pregnancy. But peroxides above a certain concentration in the body have been shown to cause tissue injuries. It’s important to keep this in mind when using peroxide toothpaste, where the chances of swallowing it are higher. The best thing to do is to delay the bleaching treatment until after delivery (2).
Pregnancy Gingivitis and Teeth Whitening
You may want to whiten your teeth post-pregnancy if you have pregnancy gingivitis. This condition causes inflamed gums due to the hormonal flux during pregnancy (3). These hormones increase blood circulation in the gums, making them prone to inflammation and bleeding. You can avoid this by maintaining teeth hygiene. In case you want to whiten your teeth, check with your doctor because the peroxide in the teeth whitening bleach can worsen your already sensitive gums.
Risks of Teeth Whitening or Bleaching While Pregnant
Understanding the potential risks of bleaching teeth while pregnant is crucial for making an informed decision. The following points outline the primary concerns associated with this elective procedure for expectant mothers.
1. Increased Tooth Sensitivity
Pregnancy hormones can make your gums and teeth more sensitive and vulnerable to irritation. The bleaching agents used in whitening treatments can significantly exacerbate this sensitivity, causing considerable discomfort and pain.
2. Potential Harm to the Developing Baby
While direct studies are limited, the chemical components in whitening gels, such as hydrogen peroxide, could potentially be swallowed. There is no conclusive evidence proving these chemicals are safe for a developing fetus, so avoidance is the recommended precautionary approach (4).
3. Heightened Gum Irritation and Inflammation
Many pregnant women already experience pregnancy gingivitis, which causes swollen, tender gums that bleed easily. Applying a strong whitening gel can further irritate these sensitive gum tissues, leading to increased inflammation and discomfort.
4. Unpredictable and Uneven Results
Hormonal changes can affect the porosity of your teeth and the health of your gums, which may interfere with the whitening process. This can lead to uneven results, streaking, or a less effective outcome overall, making the procedure a poor investment during this time.
5. Exacerbation of Underlying Dental Issues
Pregnancy can sometimes uncover or worsen pre-existing dental problems. Whitening treatments can aggravate these unknown or underlying conditions, such as minor cavities or cracks, turning a simple cosmetic procedure into a more serious dental emergency.
6. Lack of Safety Data and Medical Approval
Major dental associations universally advise against elective procedures like teeth whitening during pregnancy due to the lack of comprehensive research. Since the safety cannot be definitively confirmed, most healthcare providers will recommend postponing treatment until after delivery and breastfeeding.
Tips for Teeth Whitening During Pregnancy
When considering a brighter smile, prioritising safety is paramount. For those seeking pregnancy-safe teeth whitening, the best approach focuses on gentle, non-chemical methods and professional consultation.
1. Prioritise a Thorough Oral Hygiene Routine
The most effective way to maintain a bright smile is through excellent daily care. Brush at least twice a day with a fluoride toothpaste and floss daily to remove surface stains and plaque, which can make teeth appear yellower.
2. Choose Your Diet to Minimise Staining
Be mindful of foods and drinks that stain teeth, such as coffee, tea, and berries. When you do consume them, rinse your mouth with water immediately afterwards to help reduce their staining potential.
3. Consult Your Dentist for Safe Advice
Always speak with your dentist and obstetrician before trying any whitening method. They can provide personalised guidance and confirm whether a specific product or procedure is safe for your individual situation (5).
4. Use Whitening Toothpaste Approved by Your Dentist
Some mild, non-bleaching whitening toothpastes that rely on gentle abrasives may be considered safe. However, it is essential to get your dentist’s approval on a specific brand before use to ensure it does not contain harsh chemicals.
Natural Teeth Whiteners That Are Safe to Use During Pregnancy
If you have discoloured or stained teeth and you’re looking for at-home teeth whitening during pregnancy, you can use natural teeth whiteners. Below is a list of pregnancy-safe teeth whiteners you can use after checking with your doctor (6).
1. Strawberries
Take a fresh strawberry and mash it in a bowl along with some toothpaste. Using your finger or your toothbrush, apply this mixture to your teeth. After five to ten minutes, wash out the mixture, then brush and floss properly to remove any strawberry pieces that might have gotten lodged between your teeth. Strawberries contain malic acid, which can help dissolve dental stains. But you should not leave it for long, as the malic acid can damage teeth enamel.
2. Orange Peel
You can take an orange peel and brush your teeth with it. Make sure you cover both the front and back surfaces of your teeth. After repeating this a few times, rinse your mouth. The mild fruit acids and vitamin C present in oranges are great for teeth and can help with teeth discolouration considerably.
3. Lemon Juice and Salt
Take some lemon juice in a bowl; add half a teaspoon of salt to the juice and some water, and mix well. Rub this mixture across your teeth. Don’t use this technique if your gums are sensitive or if you are on a reduced salt diet.
4. Turmeric
Put some turmeric powder on your wet toothbrush and then brush your teeth gently in circular motions. Then rinse.
5. Apple Cider Vinegar
Apple cider vinegar (ACV) has malic acid too, just like strawberries and can be used to remove teeth stains in diluted form. To use apple cider vinegar, add half a teaspoon of apple cider vinegar to a cup of water. Mix well and gargle with this solution before brushing your teeth. You can try this remedy twice or thrice a week.
FAQs
1. Can you bleach your teeth when breastfeeding?
While the risks are lower than during pregnancy, the consensus on breastfeeding and teeth whitening remains cautious. It is generally recommended to postpone elective bleaching until after you have finished nursing, as there is insufficient data on whether whitening chemicals can pass into breast milk.
2. Can you use whitening strips while pregnant?
No, it is not advised. Whitening strips contain bleaching gels that can be absorbed by your gums or swallowed in small amounts. Due to the unknown effects on fetal development, dentists recommend avoiding them entirely during pregnancy.
3. Are teeth whitening pens safe during pregnancy?
No, they are not considered safe. These pens contain the same concentrated bleaching gels as other products. The risk of swallowing the gel and the potential for gum irritation make them unsuitable for use during this time.
4. Can pregnancy hormones themselves cause teeth to yellow?
Yes, indirectly. Hormonal changes can lead to gum inflammation, which may cause more plaque buildup. This plaque can make teeth appear more yellow, even without changes in diet or hygiene.
This was all about teeth whitening and pregnancy. Before you try to whiten your teeth with using any of the above natural remedies, do check with your doctor first. Further, you can discuss with your dentist about your options regarding teeth bleaching during pregnancy. Either way, remember to make your dental appointments regular, so your teeth can be cleaned of tartar or the yellowish hardened plaque which stains your teeth. Make sure that your dentist keeps an eye out for periodontal disease, which can lead to premature labour and low birth weight in newborns.
Also Read:
Is it Safe to Get Braces in Pregnancy
Ways to Prevent Root Canal in Pregnancy
Home Remedies for Tooth Pain while Pregnant
Dental Problems and Treatment during Pregnancy
Read more
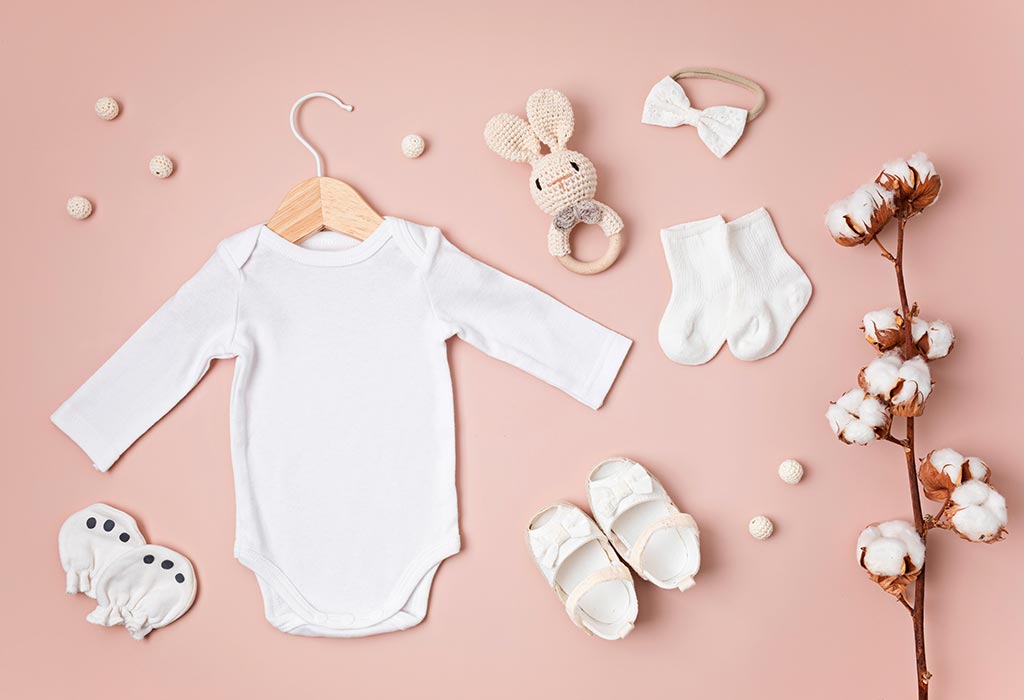
How Many Newborn Clothes Do I Need – Baby Clothes Checklist
Welcoming a new baby into your life is a journey filled with joy, anticipation, and a fair share of planning. One key question that often puzzles new parents is, ‘How many newborn clothes do I need?’ This guide aims to offer a warm, personal touch to help you navigate this exciting yet sometimes overwhelming phase. We’ll explore a practical and thoughtful baby clothes checklist, ensuring your little one is comfortably and adorably clothed from day one.
How Many Clothes Do I Need for My Baby?
As you prepare for your baby’s arrival, it’s natural to wonder about the right amount of clothing to have on hand. Striking a balance between having enough to cater to your newborn’s needs and not overstocking can be a delicate dance. In this section, we’ll explore the essentials, helping you create a perfect wardrobe for your little bundle of joy.
Essential Newborn Baby Clothes
Embarking on the adventure of dressing your newborn is both exciting and a bit daunting. Knowing what essential clothes to have in your baby’s wardrobe can make this journey smoother and more enjoyable. In this section, we’ll dive into the must-have items, ensuring your baby is cosy, comfortable, and stylish (1).
1. Bodysuits
These are versatile, easy to wear, and perfect for layering. Look for ones with envelope necks and snap closures at the crotch for easy diaper changes.
2. Sleepsuits and Pajamas
Essential for comfortable sleeping, these should be soft and preferably footed to keep little toes warm.
3. Hats and Beanies
A must to keep a newborn’s head warm, as they can lose heat quickly. Soft, stretchy materials are best.
4. Socks and Booties
Even if your baby isn’t walking, socks or booties are important to keep their feet warm.
5. Swaddle Blankets
These help soothe and comfort your baby, replicating the snugness of the womb.
6. Seasonal Wear
Depending on the climate, include appropriate seasonal attire, such as lightweight jackets for cooler days or sun hats and cover-ups for warmer weather.
Baby Clothing Essentials for Summer
Dressing your little one for the summer brings a unique set of considerations, focusing on comfort, breathability, and protection from the sun. This segment delves into the essential summer clothing items for your baby, ensuring they stay cool, comfortable, and safe during the warmer months (2).
1. Lightweight Bodysuits
Ideal for hot weather, these bodysuits are thin and allow air to circulate, keeping your baby cool.
2. Breathable Sleepsuits
Made of light material like cotton, these sleepsuits ensure your baby stays comfortable and doesn’t overheat during naps or nighttime.
3. Sun Hats
A wide-brimmed sun hat protects your baby’s delicate skin from harsh sunlight, especially during outdoor activities.
4. Light Socks or Barefoot Sandals
Keep your baby’s feet protected without causing overheating; light socks or barefoot sandals are perfect for this.
5. Muslin Swaddle Blankets
These lightweight blankets are multi-functional, ideal for swaddling or providing a light cover during naps.
6. UV Protective Wear
If you plan on spending a lot of time outdoors, UV-protective clothing can provide an extra layer of protection against the sun’s harmful rays.
Newborn Baby Clothing Essentials for Winter
Winter brings a whole new set of challenges when it comes to keeping your newborn warm and snug. It’s important to choose clothing that not only keeps your baby cosy but also allows for easy layering and comfort. This section is dedicated to guiding you through the essentials of winter wear for your little one, ensuring they’re well-protected against the cold.
1. Thermal Bodysuits
These provide a warm base layer, keeping your baby’s core temperature regulated.
2. Fleece Sleepsuits
Offering extra warmth, these suits are ideal for chilly nights and can be layered over bodysuits.
3. Warm Hats or Beanies
Essential for retaining body heat, choose soft materials that are comfortable for extended wear.
4. Thick Socks and Booties
Keep your baby’s feet warm, an important aspect as babies can lose heat through their extremities.
5. Mittens and Gloves
Protect baby’s hands from the cold and prevent scratching with soft, warm mittens.
6. Bunting Suits or Snowsuits
Great for outdoor use, these provide all-over warmth and are typically water-resistant.
7. Layered Outfits (Shirts and Pants)
Layering is key in winter; these additional layers can be added or removed as needed.
8. Soft Scarves
For extra protection around the neck, soft scarves can be used, but always under supervision.
9. Warm Blankets
Essential for stroller walks or car rides, keeping baby cosy when out and about.
10. Car Seat Covers for Winter
These covers provide an extra layer of warmth and protection from the elements during car travels.
Baby Clothes for Different Occasions
As you navigate through your baby’s first year, you’ll encounter various occasions that call for special attire. From family gatherings to photo sessions, having the right outfit for different events can add a touch of charm and make memories even more special. In this section, we’ll cover a few key clothing items that are perfect for different occasions in your baby’s life.
1. Formal Outfit for Special Events
Ideal for gatherings like weddings or family celebrations, these outfits are usually more elaborate and are great for photo opportunities.
2. Comfortable Outfit for Playdates and Day Trips
Look for soft, durable clothing that allows for easy movement, perfect for interactive play and exploration.
3. Themed Costumes for Holidays and Photo Shoots
Whether it’s a first Halloween or a themed photo shoot, costumes can add a fun and memorable element to special occasions and holidays.
Baby Clothes Needs By Month and Their Size
Navigating through the first year of your baby’s life involves constant adjustments, especially in clothing, due to their rapid growth. Understanding how many baby clothes do I need for each size is crucial to ensure you’re well-prepared for each stage. This part of our guide breaks down the clothing needs and sizes appropriate for different months of your baby’s development.
1. 0-3 Months
During the first three months, newborns primarily need clothes that are easy to put on and take off, considering their delicate size and frequent diaper changes. At this stage, opt for soft, stretchable fabrics in sizes that accommodate their rapid growth.
2. 3-6 Months
As your baby becomes more active, the need for comfortable and durable clothes becomes important. Look for sizes that allow for movement and are easy to wash, as this is the stage where babies start to explore more.
3. 6-9 Months
By this time, your baby might be starting to crawl, so clothes that are sturdy yet comfortable are essential. The sizes should accommodate their increased mobility and growing curiosity about the world around them.
4. 9-12 Months
Approaching their first year, babies are often on the move, possibly taking their first steps. Clothes should be flexible, safe for exploration, and in sizes that support their growing independence and physical activities.
What Type of Clothes Are Best for Babies?
Choosing the right type of clothes for your baby is not just about style but also about comfort, safety, and practicality. This becomes even more crucial when considering newborn clothes for twins, as the needs double. In this section, we’ll look at the key factors to consider when selecting baby clothes, ensuring your little ones are dressed in the best possible way.
Soft and Breathable Fabrics: Opt for natural fibres like cotton, which are gentle on the baby’s sensitive skin and provide good airflow.
Easy to Dress Designs: Clothes with wide necks, snap buttons, or zippers make dressing and undressing easier, which is especially important for managing twins.
Safety: Avoid clothes with small buttons, bows, or strings that can be choking hazards.
Appropriate for the Season: Choose clothing suitable for the current weather conditions, keeping your babies comfortable year-round.
Flexible Sizing: Look for slightly larger sizes that allow room for growth, especially important when buying clothes for twins, to ensure longer usability.
Things to Keep in Mind Before Buying Too Many Baby Clothes
Shopping for your little one can be incredibly exciting, but it’s easy to get carried away. Before filling your cart with adorable outfits, it’s important to consider a few key factors. This section will focus on what to keep in mind to avoid overbuying, ensuring your baby clothes checklist is practical, cost-effective, and tailored to your baby’s actual needs.
Rapid Growth of Babies: Remember that babies grow quickly, especially in their first year. Buying too many clothes in a single size can lead to unused items as your baby outgrows them faster than expected.
Ease of Maintenance: Opt for clothes that are easy to wash and dry, considering that babies often require multiple outfit changes in a day. This approach helps in managing laundry efficiently.
Lifestyle and Baby’s Comfort: Consider your lifestyle and choose clothes that suit your daily routine while ensuring your baby’s comfort. The key is to have enough clothes to accommodate your schedule without overstocking.
Preparing your baby’s wardrobe is a delightful yet thoughtful task. By considering the practical aspects of baby clothing, such as size, seasonality, and occasion, along with a focus on comfort and safety, you can create an ideal baby clothes checklist. Remember, the goal is to have a well-equipped but not overstocked wardrobe that grows with your baby, ensuring they are comfortable, happy, and stylish every step of the way.
References/References:
1. What to buy for your newborn baby; NHS; https://www.nhs.uk/start-for-life/pregnancy/preparing-for-labour-and-birth/what-to-buy-for-your-newborn-baby/
2. What you’ll need for your baby; NHS; https://www.nhs.uk/conditions/baby/caring-for-a-newborn/what-you-will-need-for-your-baby/
Also Read:
Choose and Buy Clothes for Your Baby
Must-have Baby Products Every New Mom Needs
Baby Travel Essentials Checklist
How to Interact with your Newborn Child?
Read more
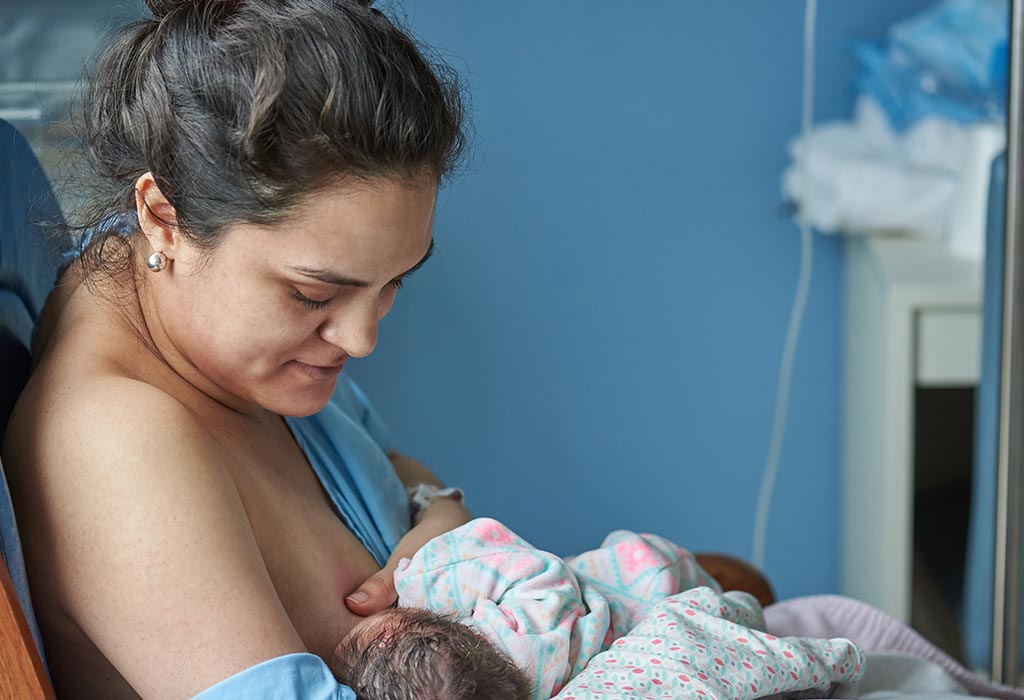
Breastfeeding in the First 24 Hours – Benefits and Tips
Congratulations! You are a proud mommy to a beautiful baby now. You may be thinking that probably motherhood may be a cakewalk for you. Well, ladies, we hate to burst the bubble but this beautiful phase comes along with oodles of responsibilities and challenges, and the very first in the line may be breastfeeding after birth. You may have heard that how important it is to breastfeed your baby within 24 hours after birth. And here in the following article, we shall be discussing breastfeeding in the first 24 hours, its various benefits and we shall throw some light on various tips on how to go about it.
What Happens During the First 24 Hours After Child Birth?
So, what exactly happens as soon as you deliver your baby? Well, if you are intrigued to know, then we shall share with you what a mom and her baby may experience on the first day after birth. Following are some of the things a mommy and her baby may experience:
1. To Mom
As a mommy, you may experience some of the following on your first day after birth:
Whether you had a normal (vaginal) delivery or a c-section, you may experience pain. However, you may be given medicines to overcome this pain.
You may experience stomach cramping and bleeding, which is very normal and will subside soon.
You may find it difficult to sit and feeding may seem like a humongous task.
In spite of all this, you may still want to begin breastfeeding your baby.
2. To Baby
Your little bundle of joy may go through some of the following experiences:
Your baby experiences a massive transition from a dark and cosy environment to bright and shiny surroundings.
He was in a quiet and slow-moving world and here everything may seem to be noisy and chaotic.
The most important thing that your little munchkin may experience is hunger.
It is important that you make efforts to feed your baby before he starts crying as it may get difficult to feed a cranky and crying baby.
What Are the Benefits of Breastfeeding Immediately After Birth
Breastfeeding your baby soon after birth is not only good for the baby but is also beneficial for the mother. Following are some benefits of breastfeeding immediately after birth:
Breastfeeding is very important for building your newborn baby’s immunity, which will help your baby fight against many ailments and infections.
As soon as you begin breastfeeding your baby your body releases a hormone called oxytocin, which helps in contracting your uterine muscles.
As your baby begins to suckle, it helps in more production of milk for your baby and also gets your milk supply going.
It helps in building a better breastfeeding bond between the mother and her baby as the baby is more alert during this time.
Skin-to-skin contact aids your baby to latch correctly.
It may calm and soothe your baby as sucking helps in providing comfort to babies.
Coming in close contact with the mother helps the baby to stay warm by using the mother’s body heat and warmth.
It is also seen that mothers who start breastfeeding within a few hours after birth tend to breastfeed their babies successfully for a longer period of time.
How Much Breast Milk Does a Newborn Need on the First Day?
Your newborn baby has a very tiny tummy, it is as small as the size of a cherry. This small tummy may only be able to hold about 5 to 7 ml of colostrum (thick yellow milk); because of this very reason, you may have to feed your baby approximately 10 to 15 times on the first day after birth. Your baby may breastfeed every 1.5 to 3 hours. If your baby sleeps most of the time and does not get up to feed for 2.5 to 3 hours, we recommend that you wake up your baby and breastfeed.
Essential Tips for Breastfeeding in First 24 Hours
Here are some tips that may help you to for breastfeeding your baby within 24 hours after birth:
Sit in a comfortable position, you may still be hurting from the birthing process and thus you may make use of pillows to give you support. Avoid stooping or bending forward, sit upright and comfortably.
Make sure your baby latches correctly by taking most part of your areola (the dark part around the nipple) inside his mouth. Improper latching may not only lead to pain for the mother but it may also result in lesser milk intake by the baby.
Refrain from force-feeding your baby. You should feed only when you feel your baby is hungry.
Prepare yourself mentally to feed your baby 10 to 15 times a day. This is because your baby has a small tummy with a small appetite and may require regular feeding.
Make sure you keep your baby close to your skin as you feed. Skin-to-skin contact is beneficial for you and your baby.
Newborn babies usually sleep a lot after birth but you should try to feed your baby every three hours to get your breast milk supply going.
You may take 45 minutes or more to breastfeed your baby for the first few times and it may tire and exhaust you. But the first milk or colostrum is very important to build immunity for your baby.
In case you face any difficulties in first-night breastfeeding or generally, you are facing troubles in breastfeeding your baby, you should get in touch with the lactation consultant for assistance.
Things That May Interfere With Nursing After Child Birth
Breastfeeding is a process that usually comes naturally to a mother. However, sometimes certain complications may arise that may interfere with this process. Following are some complications that may interfere with nursing after childbirth:
If you have had an epidural delivery, this may make your baby extremely sleepy and drowsy and thus he may not be able to suckle.
If you had a C-section, this may make you tired and exhausted.
If you have a premature or preterm baby, this may hamper your breastfeeding. You should get in touch with a lactation expert to know more about how to feed a preterm baby.
Narcotics may create problems in breastfeeding your baby.
If your baby has to be kept in a neonatal or intensive care unit then it may cause troubles with breastfeeding. However, you may be told to express the milk and feed it to your baby.
It is very normal for a newbie-mommy to experience various breastfeeding challenges and there is no need to worry and panic. With proper guidance and medical help, you may be able to share a great breastfeeding experience with your little bundle of joy.
Also Read:
Newborn’s Breastfeeding Habits
Breastfeeding Production after Delivery
Tips to Consider while Breastfeeding a Newborn
Read more
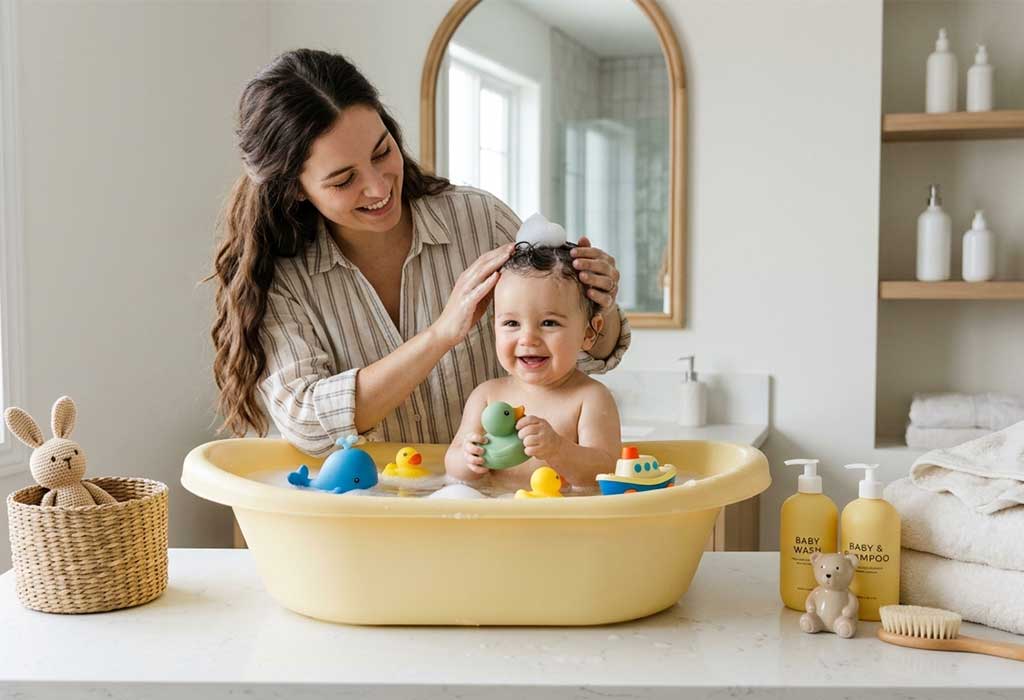
Did You Know Your Baby’s Skin Is Still Developing for 2 Years?
This health content has been medically reviewed by qualified experts and follows the FirstCry Parenting editorial policy to ensure accuracy and reliability.
A baby’s skin often feels irresistibly soft, something people notice right away. But what many do not realise is that this softness comes with a certain fragility. At birth, a baby’s skin is still developing and continues to do so for the next two years. During this time, the skin is learning how to protect itself. It is building its barrier, adjusting to the outside world, and finding its natural balance.
Read on to learn how to care for your baby’s skin during this important stage.
Understanding the Skin Barrier Better
The skin barrier is the outermost layer of the skin. It acts as a protective shield, keeping moisture in while blocking out irritants, germs, and pollutants (1).
For this barrier to function properly, the skin relies on a specific balance of essential lipids. These include ceramides, free fatty acids, and cholesterol, which work together in a ratio of 3:1:1 (2). Along with a slightly acidic environment (around pH 5.5), this balance helps maintain the skin’s structure and supports its role as an effective protective layer.
In adults, this barrier is typically strong and stable. In babies, however, it is still developing. As a result, moisture escapes more easily, the skin becomes dry or irritated more quickly, and harmful microbes can enter more easily (3).
How Long Does the Skin Barrier Take to Fully Develop?
A baby’s skin continues adapting after birth. Inside the womb, it is protected by a controlled and stable environment (4). After birth, it is suddenly exposed to air, clothing, weather, and cleansing products.
Over time, the skin gradually becomes stronger. It builds a more stable structure, improves its ability to retain moisture, and develops a balanced ecosystem of beneficial bacteria on the surface. This process does not happen overnight. It takes time, which is why the first two years are so important for long-term skin health (5).
The Role of pH in Skin Development
As the skin barrier develops, maintaining the right environment becomes essential. This is where pH comes in.
So, let’s talk pH! It’s short for “potential of hydrogen” and refers to how acidic or alkaline a surface is. Healthy skin naturally stays slightly acidic, around pH 5.5 (6). This balance, often called the acid mantle, supports the skin’s ability to function properly.
For baby skin, maintaining this balance is especially important because the barrier is still forming.
Why pH 5.5 Is Important for Babies
Maintaining pH 5.5 supports three essential functions (7):
1. Strengthening the Skin Barrier
A slightly acidic environment helps the skin barrier form properly. It improves the skin’s ability to hold moisture and resist damage.
2. Supporting the Microbiome
The skin is home to beneficial bacteria. Together, they form the microbiome, which protects against harmful microbes. A pH of 5.5 encourages good bacteria to thrive while keeping unwanted ones in check (8).
3. Reducing Irritation
When the skin’s pH shifts too high, it becomes more prone to dryness, redness, and rashes. Maintaining the right pH helps keep the skin calm and balanced.
That is why choosing the right skincare products matters from the very beginning.
How to Maintain a Newborn’s Skin pH at 5.5?
Since baby skin is delicate and still maturing, everyday skincare should focus on supporting the natural barrier rather than disrupting it. Here are a few simple principles that help protect a baby’s skin:
1. Choose Products With Ideal pH
Products formulated at pH 5.5 support the skin’s natural protective layer and help maintain microbiome balance.
2. Avoid Harsh Soaps
Traditional soaps often have a higher, more alkaline pH. This can strip away natural oils and disturb the skin barrier (6). Instead, look for a gentle kind like Sebamed Baby Gentle Wash, a great no soap & no-tear formula, perfect for your little angel.
3. Moisturise, Moisturise, Moisturise!
Moisturising helps reinforce the developing barrier and reduces dryness or irritation. Sebamed’s Baby Body Lotion is a paraben-free emollient that contains chamomile to soothe sensitive baby skin and allantoin for that extra soft kissable skin.
4. Choose a Gentle Shampoo
A baby’s scalp is just as delicate as the rest of their skin. Use a mild, tear-free shampoo with a pH of 5.5 to cleanse without drying. Sebamed Baby Shampoo with ‘no tears’ formula is one such product that has botanical extracts from chamomile that help with extra mild cleansing of hair and scalp.
5. Prevent Diaper Rash
The diaper area is prone to irritation due to constant moisture and friction. Choosing a rash cream with a pH of 5.5 is especially important here, as it helps prevent infections that can worsen rashes.
The Sebamed Baby Rash Cream is one of the best in the game, a simple, fuss-free formula with pH 5.5 and titanium dioxide (TiO₂) that delivers a stable, long-lasting protective barrier, so your baby’s skin stays protected, always.
Baby’s skin does not need complicated routines. It needs the right care to help it thrive. Maintaining a pH of 5.5 may seem like a small detail, but it plays an important role in how the skin barrier forms, how moisture is retained, and how well the skin protects itself. These early choices help build a strong foundation for healthier skin in the years ahead.
Read more
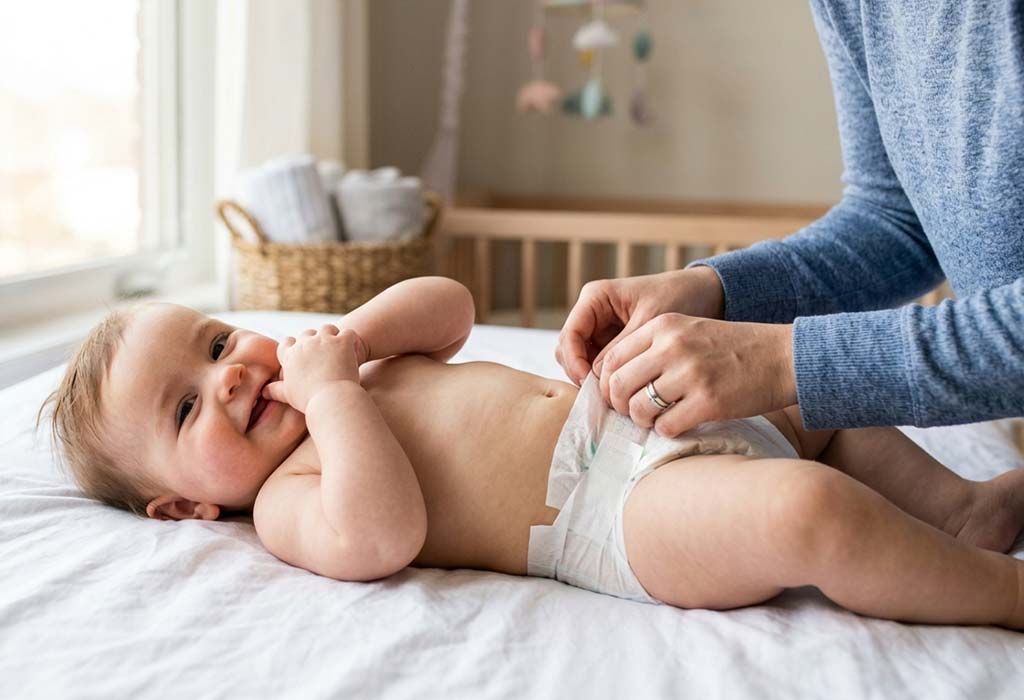
Are All Diapers Safe for Baby Skin? Here’s What Parents Should Know
For parents, choosing a diaper is not only about pricing and convenience. It is also about comfort, material and how soft it is against baby skin considering it is on them all day.
While many diapers are designed for babies, not every diaper offers the same level of softness, breathability, or skin protection. Some may feel fine at first but can lead to discomfort if they trap moisture, fit poorly, or contain harsh materials.
So, what should parents actually look for? Let us understand.
Why Baby Skin Needs Extra Care
Baby skin is much thinner and more delicate than adult skin. It loses moisture faster and reacts more easily to heat, friction, and dampness (1) (2). Even a small amount of wetness trapped against the skin for too long can cause irritation.
This is why diaper quality matters so much. A diaper is not just about preventing leaks. It should also help keep the baby’s skin dry, fresh, and comfortable throughout the day.
Signs a Diaper May Not Be Skin-Friendly
Sometimes babies cannot tell us what feels uncomfortable, but their skin often does. Parents should watch for signs like (3):
Redness around the waist or thighs.
Frequent diaper rashes.
Marks from tight elastic.
Baby becoming fussy during diaper changes.
Skin feeling damp even after short use.
These signs may indicate that the diaper is not absorbing well or is irritating the skin.
What Makes a Diaper Safe for Baby Skin?
Not every diaper works the same way. A skin-friendly diaper usually focuses on comfort, dryness, and breathability. Here are a few important things parents should check.
1. Soft and Gentle Material
A diaper should feel soft against the baby’s skin. Rough layers can cause friction, especially when babies move around or sleep for long hours. Soft-touch materials help reduce rubbing and keep babies comfortable throughout the day.
2. Good Absorption
One of the biggest causes of diaper rash is prolonged wetness. A diaper that absorbs quickly and locks moisture away helps keep the skin dry (4). Dry skin is happier skin.
3. Breathability
Airflow matters more than most parents think. Breathable diapers allow heat and humidity to escape, reducing stuffiness and discomfort. This becomes especially important during hot weather or overnight use.
5. Comfortable Fit
A diaper should fit snugly without being too tight. Tight elastic can leave marks and irritate sensitive areas, while loose diapers may leak. A good fit supports both comfort and movement.
Now, after reading all this, you may be wondering where to actually find a diaper that checks all these boxes.
To make things easier, we did a little digging and found that MamyPoko offers features designed specifically for baby comfort and skin care.
Their MamyPoko Pants Extra Absorb range comes with a Deep Absorbent CrissCross sheet and an added third absorption layer that helps keep wetness away for up to 12 hours without sogginess. The diapers are also designed with a soft stretchy waistband that fits gently around the tummy to help prevent red marks. Another feature parents often appreciate is the topsheet enriched with coconut extracts that helps soothe delicate skin and reduce the chances of rashes.
But remember, even the best diaper choice works better when supported with the right baby care routine.
Simple Tips to Keep Baby Skin Healthy
Even with a good diaper, a few habits can help protect baby skin even more (3) (4) (5).
Change Diapers Regularly: Do not wait too long between diaper changes, especially after bowel movements.
Keep the Area Clean and Dry: Use gentle wipes or warm water during changes and allow the skin to dry before putting on a fresh diaper.
Choose the Right Size: A properly fitted diaper helps avoid both leaks and friction.
Give Some Diaper-Free Time: A little airtime each day can help the skin stay fresh.
Every parent simply wants their baby to stay comfortable through playtime, long naps, and those nighttime cuddles. And sometimes, something as simple as the right diaper can make everyday moments feel a whole lot easier.
References/Resources
1. PubMed Central – Change in skin properties over the first 10 years of life: a cross-sectional study
2. PubMed Central – Skin Care Practices in Indian Newborns and Infants: Current Scenario
3. NemoursKidsHealth – Diaper Rash
4. American Academy ofPediatrics – Common Diaper Rashes & Treatments
5. Nationwide Children’s Hospital – Diapers and Diaper Rash
Read more

Why Children’s Skin Loses Moisture Faster in Summer
This health content has been medically reviewed by qualified experts and follows the FirstCry Parenting editorial policy to ensure accuracy and reliability.
Have you ever noticed how your child’s skin suddenly starts looking dry, patchy, or a little rough during summer? We usually blame winter for dry skin, not hot sunny days. But here’s the interesting part. Your little one’s skin is not as thick as yours, so it loses moisture more quickly. So, if your child’s skin feels less soft during the hotter months, there are ways to protect it better.
Let us look at why this happens and what parents can do to keep their child’s skin well moisturised and hydrated during hotter months.
Why Is Children’s Skin More Prone to Moisture Loss?
A younger child’s skin is not the same as an adult. It is thinner and still developing. That means the protective layer that holds moisture inside the skin is not as strong yet (1). So, when the weather becomes hot, or the skin faces constant exposure to sun, sweat, and dust, moisture escapes more quickly (2).
Think of it like a sponge that dries faster when it is placed under the sun. Children’s skin reacts in a somewhat similar way during summer.
How Summer Weather Affects Children’s Skin
Let us look at some of the main reasons.
1. Heat Causes Faster Moisture Evaporation
When the weather becomes hot, the body naturally tries to cool itself through sweating. As sweat evaporates, it cools the body (3). At the same time, heat and constant evaporation can increase water loss from the skin, especially when the skin barrier is delicate.
2. Sweating Can Disrupt the Skin’s Balance
Active children often run, play, and participate in outdoor sports, which increases sweating. Sweat contains salts that can irritate the skin if they remain on the surface. Mixed with dust or dirt, it may cause itching or redness, particularly on sensitive areas such as the neck, elbows, or behind the knees (4).
3. Frequent Bathing Strips Natural Oils
Because children sweat more during summer, they often bathe more frequently. While this helps maintain hygiene, frequent washing can strip the skin of its natural oils. These oils form a thin layer that prevents moisture from escaping too quickly. Without this layer, the skin becomes more vulnerable to dryness (5).
4. Sun Exposure Weakens the Skin Barrier
Children spend more time outdoors during the summer holidays. Direct sun exposure can gradually weaken the skin’s outer layer (6). When the barrier becomes weaker, the skin struggles to retain water. This leads to increased moisture loss and sometimes mild irritation or redness.
5. Air Conditioning Can Dry the Skin
Air conditioners reduce humidity, which can gradually draw moisture from the skin. Children who spend long hours in air-conditioned rooms may wake up with skin that feels tight or slightly dry.
What Signs Might Indicate Your Child’s Skin Is Losing Moisture?
When children’s skin begins to lose moisture, the changes are usually subtle at first. Some common signs may include (7):
Skin that feels dry or slightly rough to the touch.
Mild redness or irritation.
Occasional itching, especially after outdoor activity.
Small white or flaky patches on certain areas of the skin.
Simple Ways to Help Protect Children’s Skin
Caring for children’s skin in summer does not have to be complicated. A few simple habits can help maintain its natural balance (8).
1. Choose Gentle Cleansers
Children often bathe more frequently in summer because of sweat and outdoor play. Using mild, soap-free cleansers helps remove sweat and dirt without disturbing the skin’s natural protective layer (9).
Options like Sebamed Baby Gentle Wash or Sebamed Baby Cleansing Bar cleanse delicate skin while helping maintain the skin’s natural pH of 5.5. This pH supports the skin’s microbiome balance, which plays an important role in protecting children’s skin from irritation, dryness, and common summer concerns such as heat rashes and minor skin infections.
2. Moisturise After Bathing
After bathing, applying a light moisturiser helps restore hydration and support the skin barrier (10).
Sebamed’s Baby Body Lotion locks in hydration while maintaining the skin’s pH at 5.5, which helps keep children’s skin soft and comfortable throughout the day.
3. Sun-protection
Sunblock is one of the most important things you need to carry while heading outdoors. Sunscreen blocks the Sun’s harmful rays from penetrating the skin and causing harm. For babies, Sebamed’s Baby Sunscreen Lotion SPF 50 Plus is perfect as it protects the skin from the sun’s rays and provides optimal hydration.
4. Dress Children in Breathable Fabrics
Light cotton clothing allows air to circulate and reduces irritation caused by sweat.
5. Encourage Good Hydration
Drinking enough water supports overall body hydration and helps maintain healthy skin.
With a few simple habits, children can enjoy summer activities while their skin stays soft and comfortable.
Read more
Sort By
 Latest
 Most Popular
 Trending
Please select atleast one Filter